email Youtube

Home
Galleries
Blog
Workshops & Calendar
Store
Resources
About
Contact

Quilt Storage, continued…

January 24th, 2009

Before life ran away from me (again), I said I’d add more pics of my new quilt storage.   Previously, the quilts had been flat on the bed, which was great for the quilts but not so good if you wanted to use the bed (which meant moving about 30+ quilts I think…I really ought to count how many I’ve made, shouldn’t I?).  Anyway, remember the tubes which I covered with batting and muslin?  Next, you roll your quilt on the tube; For most of my rolls, I have two or three quilts per tube:
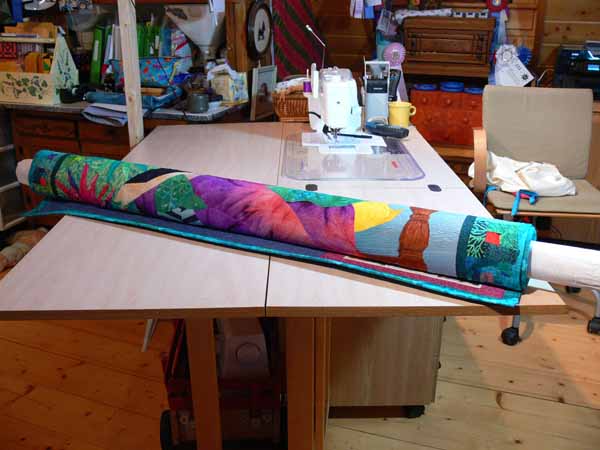
Quilt rolled on tube

Quilt rolled on tube

Next I made a muslin tube/sleeve  (I just used the serger, left the seams on the outside).  I cut 1 1/2″ wide strips of pretty fabrics (or rather, the “why did I buy these 14 years ago? fabrics”), folded them wrong sides together and serged to make ties.  I placed a tie about 4 inches down from either end of the tube/sleeve, and spaced about 14-16 inches apart down the center.
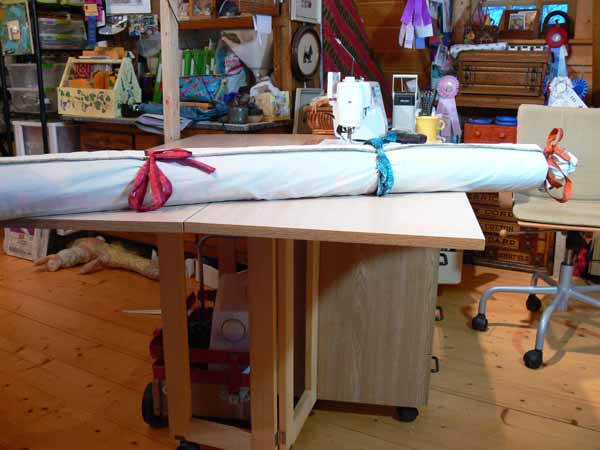
Quilt in musling sleeve, tied

Quilt in musling sleeve, tied

Slide your rolled quilt inside the sleeve; it is easier if you place a plastic bag over the end of the tube that goes in first.  Since both ends of the tube are open, you can just slip the plastic bag off the end once the quilt is inside.   I cut the muslin the length of my tubes (54″) plus about 2-4 extra inches (for gathering at the ends) by about 22 inches wide.  If you have 40-44 inch muslin, just cut down the center to whatever length.  The completed tube is large enough to accomodate several quilts rolled on one tube.  Once inside, make a tuck at the long seamline to fold excess muslin neatly and tie.  For the moment, I have safety-pinned a post-it-note with the contents of each roll to the end of the muslin tube so I can identify what is where…I’ll do something nicer eventually.

Under the bed, I have two tall-lamp-moving boxes (only one in this picture, added the second one later), plus some under-bed storage boxes from Target.  The quilts that are rolled on the tubes are in the lamp-boxes (in this picture, just to the right of center) and over on the far left.  The second lamp-box went on the far left.
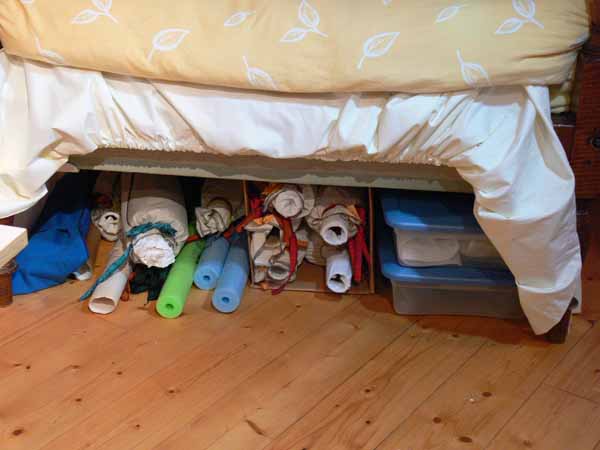
Rolled quilts and boxes under the bed

Rolled quilts and boxes under the bed

You can see swimming pool noodles, which are great for shipping quilts rolled–lightweight, soft, cheap if they are lost.  The blue thing on the far left is a long-skinny bag I made from canvas to carry my make-shift PVC-pipe quilt display stand (too heavy for air travel, but was cheap and works great for anywhere I drive to teach or lecture).

On the right you can see two storage boxes; there are two even larger ones in back.  I bought these for about $15-18 each (ouch!) at Target.  The largest boxes (in the back, not visible) are 42 inches long on the inside, meaning that some of my quilts that need to be carefully folded and not rolled (the Bijagos Warrior quilt, for example, is padded and thick, so doesn’t roll well, and the Autumn on the Village Green has cut copper leaves on it!) can fit inside with only horizontal folds.

My teaching samples are on the small side–26 wide or narrower.  I made several carrying gizzies (I’ll do a post on them some day….) and roll my class samples on them.  They are all in one box for easy access when packing to teach.  Finally, small quilts like my journal quilts (both the smaller 8 1/2 x 11 inch ones and the larger 17 x 22 inch ones) also fit inside these boxes.  I asked the conservators and textile specialists on the quiltart list, and the consensus was that as long as the actual quilt doesn’t touch the plastic…line with acid-free tissue or cloth…and you open the boxes periodically to refresh the air… that it is fine to store in boxes (which will also protect them from smoke damage should there be a smoke incident).  And when the bedskirt is down (not tucked up under the duvet), I don’t see the stuff!

Some day I’ll have my dream studio with a massive wall-long closet.  The doors will be design walls, I’ll have storage rods on the back for the quilts, and all sorts of cool things. And I’m going to make laminated tags using business card software with a picture of each quilt to replace the safety-pinned post-it note with the roll contents.  In the meantime this works quite well for me.  I’ve been under the weather (number one son brought home evil germs and shared…), and yesterday I luxuriated in lolling on the bed in my sunny studio with a book…for about 20 minutes. Sigh.  It was nice while it lasted.  Then I got to play mom-taxi.  Several times.
Come to my lecture on the journal quilts, Jan 31

January 20th, 2009

When:    January 31, 2009 (snow date:  February 7), 12:30

Where:  Jewett Hall, University of Maine at Augusta (just down from the Convention Center where we have Maine Quilts)

What:  Lecture on Journal Quilts and journals for quilters

When Mary Coombs asked me to give the January lecture I said I’d love to, but at the time had only one lecture “on the shelf.”  Since I have already given it several times around the state, I felt I needed to prepare something new for the PTQG.  She suggested the journal quilts, and idea I immediately loved, since I feel the journal quilts have been integral and essential to the success I’ve had in the past few years as a quilter.

I’ll have all of the journal quilts that I made (that aren’t sold…have most of them), plus will do a “slide” (digital) presentation and talk on the journal quilt project, how it began, with quilts by Maria Elkins, whom I think did the best job of anyone throughout the years of the formal journal project in using the process to learn, a variety of journal quilts by various artists from 2007 and 2008, a bit about how to use paper journals to help your own quilting, and ideas about how you can use the journal quilts to learn and grow.

The PTQG meets regularly on a statewide basis (in addition to the many, MANY local guild chapter meetings).  This is one of those meetings, which begins at 9:30.  The business portion of the meeting will take place in the morning, they’ll break about 11:30 for lunch.   People can come as guests as far as I know.  Show and tell follows the lecture.

Hope to see you there… if you are come up and say hi and say you saw this on my blog!

It’s DONE! and It’s COLD!

January 16th, 2009

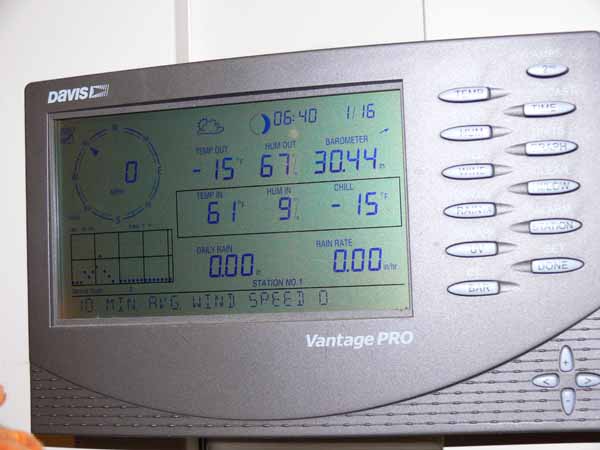
I cordially invite you to join me in a totally uninhibited MAJOR snoopy dance, but first, a break for a local weather report….

This is what our weather station said this morning when we got up (and when the boys had to go out to the bus stop):

2009-01-janblog320

Yes, folks, that is FIFTEEN BELOW ZERO, here in usually-balmy Camden, Maine.  It hasn’t been this cold here in five years, and although it isn’t unheard of, it is rare.  Fortunately, the wind wasn’t blowing.   And you should (or perhaps not) see/feel the static electricity with 9 percent indoor humidity.  I made the mistake of leaving my earbuds in from my iPod while pulling a polar fleece neck gaitor off the other day…static, right into the cords into my ears.  UNfun!

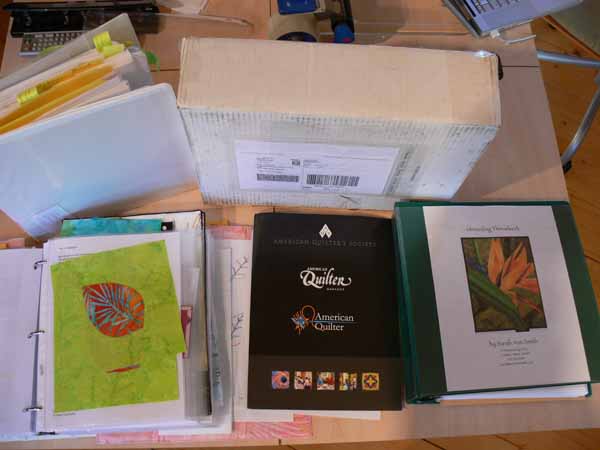
But now, for the cause for CELEBRATION! what you see below is TWO YEARS of work!

2009-01-janblog322

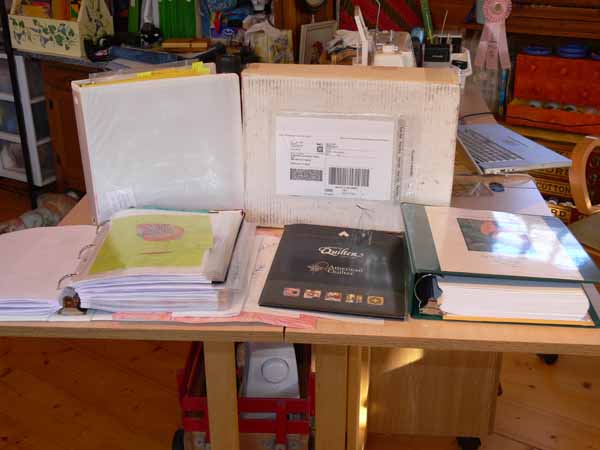
The binder on the right is the completed manuscript and CD ready to be mailed in the box (behind it) to AQS (folder in the center holds the contract).  The binder in the back left is my earlier working copies, and the overflowing binder on the left is my final working draft plus ALL the illustrations/samples that aren’t real quilts.

Just in case this isn’t enough for you (it wasn’t for me), here’s another view…. and for the record, thanks to an error in Word (which has a *(^&*%^&*@ mind of its own) which caused me to re-print 40 pages, I used nearly 400 sheets of paper and  one and a half extra-capacity black ink cartridges (those things cost $23!!!!! EACH) just to print the stuff in the binder on the right.  My last ink bill for two black and three color (cyan, magenta and yellow) cartridges was $86!  Anyway….lookit all that paper!

2009-01-janblog321

As I wrote to my editor upon returning from FedEx, I am ABSURDLY ELATED!  Then I cleaned off my worktable, where a large stack of batiks, used for book samples, has lived for the past two years.  I am grateful to AQS for being so understanding about the delays in submitting the manuscript (first Joshua’s accident, then Paul’s shoulder surgery, then mom’s move and decline).  And now it is IN!   Here’s to hoping they don’t cut too much.  I can live with cutting projects easily, but I want so much for the “meat” to stay in the book…. stay tuned!

Storing Quilts

January 9th, 2009

Once again, I have not fallen off the face of the earth…instead, I’m FINISHING UP the manuscript.  There is a ton of tedious paperwork and such, so I’m liable to be scarce for a few more weeks, but I’m here.   So, I thought I would share what I did to store my quilts.  They used to be stored in a fabulous place:  on top of the guest bed in my studio, under the duvet.  This meant they were flat, accessible, safe (sorta) from cat hair (it migrates EVERYwhere).  But, it also meant that no one could so much as sit on the bed, let alone come hang out in my studio and rest on the bed.  And Joyce came to visit in December and needed to SLEEP in the bed.  That meant the quilts needed to move.

Umpteen years ago I took a class with Heather Waldron Tewell, co-author of one of my favorite books on quilting line and design, A Fine Line (written with Melody Crust).  She described her storage:  upstairs, under the eaves / in the kneewall…. you know on second floors how you get a sloping roof that comes down to the floor, so builders will drop a short wall that is maybe 3-5 feet tall, then there is a space behind it?  Well, she put in doors instead of drywall and made a device similar to those used to display home dec fabric, which is sold on tubes (not bolts like quilting fabrics).  She stored her quilts rolled on tubes, covered in a sleeve, then the tube slides on a rod (like a closet rod) that sets into “U” shapes cut into some 1×3’s at either end of the closet. I’ve wanted something like that ever since.

Of course, I don’t HAVE a closet to make such a lovely storage space.  So I improvised, but first I made the rolls.  I’ll share the second part of this info in the next post….  Anyway, the rolls.  About five to six years ago, I worked for an interior designer doing high-end home dec sewing.  I was able to snag about a half dozen sturdy cardboard tubes.  So I FINALLY got around to making them suitable for rolling quilts for storage.  The cardboard in the tubes is very acidic, which of course isn’t great for quilts, so you need to cover them.

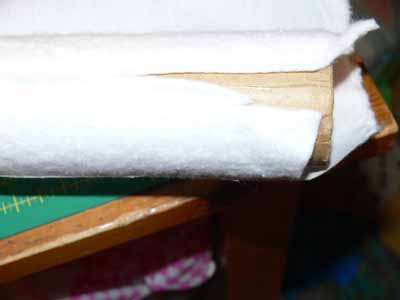
To cover the tubes, I wrapped them first in a round of batting, then used an inexpensive cream cloth (some was muslin, some was an inexpensive but nice cream cotton).  For the first few, I used hot-glue to glue the batting to the tubes, but had forgotten that hot glue leaves a hard line.  For later ones, I simply used a basic glue stick!

Addendum:  Carol Ann Sinnreich told me that she learned from others to wrap the tubes first in aluminum foil, then do the batting and muslin.  This prevents outgassing from the yucky stuff in the cardboard tubes.  I’ll do that on any future ones, and may think about peeling these apart and adding the foil at some point…just not too soon! Too much to do….

Batting on tube

I cut the cloth about 5-6 inches longer than the tube, and the circumference of the tube plus about two inches.

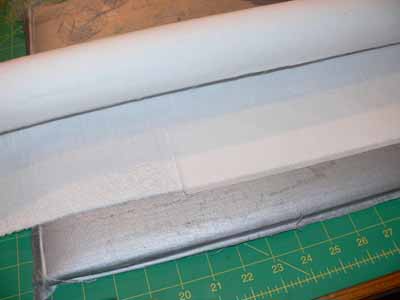
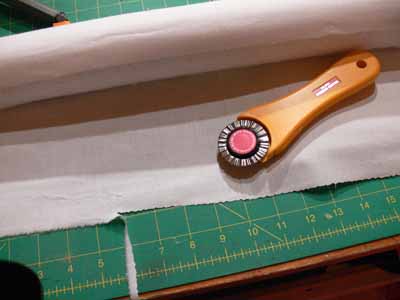
Fusing Misty Fuse to the edge of the tube-wrap-cloth

Fusing Misty Fuse to the edge of the tube-wrap-cloth

On one long edge, I applied Misty Fuse, a heat-activated fusible web (and my favorite fusing product by FAR), then trimmed the edge with a zigzag cut.

Trim the edge

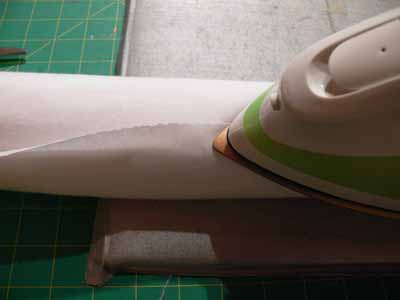
I wrapped the cloth over the batting, then fused it closed with the iron.

Iron fabric around tube

In a couple days I’ll show you the finished tube, the muslin dust-sleeve, and where I’ve got them stashed until I win the lottery and build that dream studio!

PS—please excuse any weird formatting.  My webhost has changed the WordPress software, and it isn’t cooperating very well.  The photo loading stuff is different, I can’t find instructions anywhere, and formatting is all goofed up…sorry!

Turn, Turn, Turn

January 1st, 2009

January is named after the Roman God Janus, the god of doorways and gates who looked both forwards (into the new year) and backwards (into the last year).  I for one am glad the tumult of the past 20 months is over, both the personal “stuff” and the major worldwide economic and political nightmares.  I’m hoping that things will take a turn for the better, and am really hoping our local schools will have the kids watch Barack Obama’s swearing in ceremony.  No matter what your political persuasion, this is a historic moment for us in the U.S. and, because of our role in the world, for the world too.   It IS  a time for hope, and a time for change.
Luminaries on Christmas Eve 2008

In Camden, Maine, where I live they have an annual fundraiser called Light a Luminary.  Kids and service organizations around the town bag up sand, candles, and waxed white paper bags with a sheet of instructions that are sold for $5.  Proceeds benefit LOCAL charities.   On the instructions, they have the day to light your luminaries…Christmas Eve, with rain/snow dates in case the weather isn’t cooperative.  This year, we lit ours on Christmas eve and I managed—thanks to propping my camera next to a tree trunk—get this shot of our driveway and home.

And in closing, Pete Seeger’s lyrics based on Ecclesiastes:

To everything (turn, turn, turn)
There is a season (turn, turn, turn)
And a time for every purpose, under heaven

A time to be born, a time to die
A time to plant, a time to reap
A time to kill, a time to heal
A time to laugh, a time to weep

To everything (turn, turn, turn)
There is a season (turn, turn, turn)
And a time for every purpose, under heaven

A time to build up,a time to break down
A time to dance, a time to mourn
A time to cast away stones, a time to gather stones together

To everything (turn, turn, turn)
There is a season (turn, turn, turn)
And a time for every purpose, under heaven

A time of love, a time of hate
A time of war, a time of peace
A time you may embrace, a time to refrain from embracing

To everything (turn, turn, turn)
There is a season (turn, turn, turn)
And a time for every purpose, under heaven

A time to gain, a time to lose
A time to rend, a time to sew
A time to love, a time to hate
A time for peace, I swear its not too late

HAPPY NEW YEAR !