email Youtube

Home
Galleries
Blog
Workshops & Calendar
Store
Resources
About
Contact

Dust Happens–a new article!

March 4th, 2014

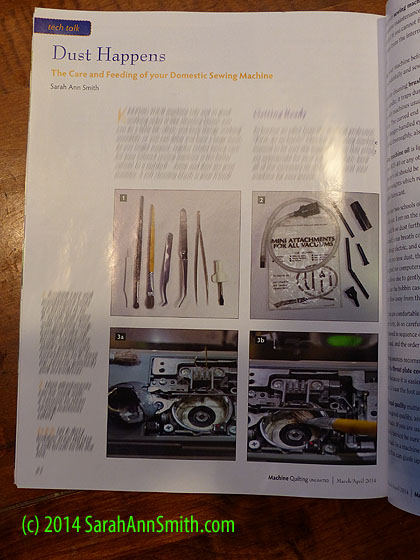
Especially in my house!  Think rural.  Think cats.  Think Sarah.  But you don’t want dust inside your sewing machine!  I was so happy when editor Kit Robinson asked me to do an article on the care and feeding of your domestic sewing machine.  That article has just come out in the March/April issue of Machine Quilting Unlimited:


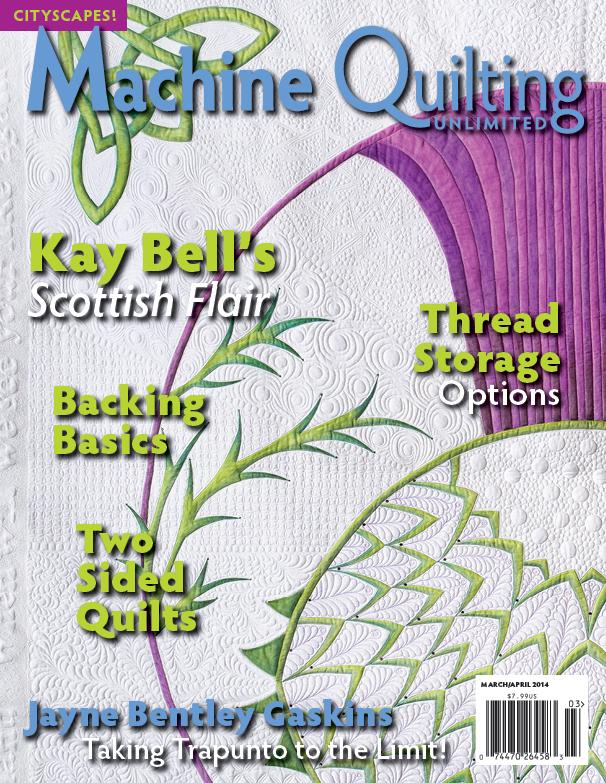
Machine Quilting Unlimited March/April Issue with my article on dust along with other great articles.  LOVED the one by fellow-Mainer Margaret Solomon Gunn on scalloped bindings and one on Jenny Bowker's quilts.

Machine Quilting Unlimited March/April Issue with my article on dust along with other great articles. LOVED the one by fellow-Mainer Margaret Solomon Gunn on scalloped bindings and one on Jenny Bowker’s quilts.

I was even more elated when just a few days after copies arrived in mailboxes across the US, Publisher Vicki Anderson forwarded this email to me:

My wife just received her March/April 2014 issue and I want to compliment you on the Sarah Ann Smith article titled Dust Happens.
 
I am a Bernina Certified tech that repairs anything that walks in the door and all brands of Long Arms. I also give presentations to the local guilds on Care and Feeding of your Domestic Machines. Her article is the most comprehensive that I have read to date. I feel as if she had a copy of my Power Point in front of her (right down to the needle photos!).
 
Outstanding! I agree with 100% of what she said and applaud her for the article.
 
Please use this and pass this along in any way that you see fit.
 
Duane Sellers
Bernina Tech
Lafayette, In

WOW! Talk about a HAPPY RUSH!  You all know I’m a Janome girl, but we also all know how GOOD Bernina is in terms of service and support, how good it’s repair folks are.  To have a Bernina Tech say that about my article just gives me goosebumps!  Thank you Mr. Sellers!

Here’s a peek at my article–to read it you’ll need to get a copy, which you can do online at mqumag.com or in places like Barnes and Noble or Books-a-Million.

The first page of "Dust Happens," my article about caring for your machine.  Just a few moments every time you use your machine will keep it much happier!

The first page of “Dust Happens,” my article about caring for your machine. Just a few moments every time you use your machine will keep it much happier!

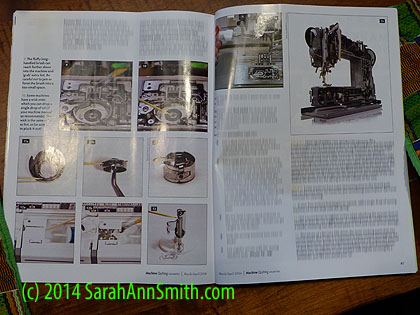
And HUGE thanks to Marie Z. Johansen (BFF!) and Silvia Dell’Aere (a.k.a. Orkaloca) for photographs used in the article.  I needed a specific view of a Bernina bobbin case and, astonishingly, despite having hundreds of photos available for press use, Bernina didn’t have the view I needed, so I called Marie–who is a fabulous photographer–and asked if she could save my bacon and photograph her Bernina’s bobbin case (right before deadline no less), and she did!  THANK YOU!  And Silvia has allowed me to use a photo of hers of the tips of new vs. slightly used needles in my class presentations for years.  I asked for a print-resolution photo, but she had to take a new one–Thank you!  So please, visit their blogs and say thanks! Here’s the page with their photos:

Two more pages from the article. In the "nine patch of photos," Marie's photo is middle row, right.  Silvia's is top left.

Two more pages from the article. In the “nine patch of photos,” Marie’s photo is middle row, right. Silvia’s is on a different page.  Thank you both!

Have another article in the next issue of MQU..it’s been a good year for writing (which I love as much as quilting).  Thanks, Vicki and Kit, for the opportunity to write for MQU.  I’m so happy to have been able to bring good articles to you.  Thanks also again to Mr. Sellers for taking the time to write such a nice comment!

Photographing your artwork

February 28th, 2014
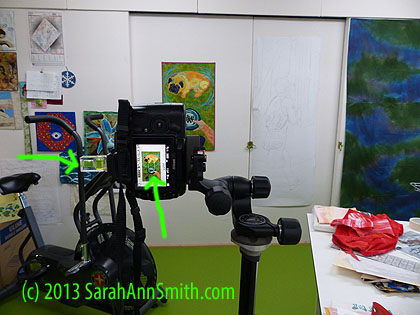
Center focus on center of quilt.  Note hotshoe bubble level.

Center focus on center of quilt. Note hotshoe bubble level.

I just read a fabulous article on photographing your artwork here, at textileart.org.  I highly recommend it!   I was thrilled that they link to Holly Knott’s instruction page for textile artists and art quilters, and they also had embedded a very useful YouTube video put up by the folks at Saatchi Online (see the video at the bottom of this post).  Those posts inspired me to share with you how I do my own photography.

I’ve become adept at photography through self-education and practice, and you can too.  My photographs have been used in my book (AQS even gave me a photography credit!), in Quilting Arts magazine (which has some of the best photography out there), Machine Quilting Unlimited magazine, and a number of Lark Books including 500 Art Quilts, so I think I’ve reached proficiency–at least with the best of my shots.  Here’s a little of what I do in hopes that it will help you!

Set-up and level:  In the photo above, I’ve shown how I set things up in my studio.  I am very fortunate to have a LARGE (vast!) design wall, which I had built and installed when we moved into this house three (!!!) years ago.  I can pin my quilts to the wall and photograph them easily.  If you don’t have a design wall, you can create a temporary set-up easily and inexpensively:  purchase either foam core or rigid foam insulation.  Place the foam core or insulation flat (or as flat as you can get) against the wall (poster tacking putty may be helpful).   If you have to tilt the board, make sure the camera lens is parallel to the surface (see the Saatchi video, at the bottom of this post).
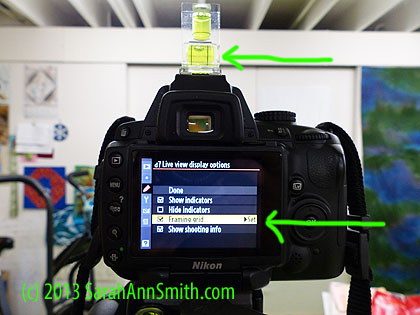
Hotshoe bubble level and first screen on my camera.  The hotshoe (if your camera has one) is where one attaches a separate flash mechanism.  On my camera, it is on top of the built-in flash.  These small bubble levels are inexpensive, about $15.  Mine will show you level whether the camera is positioned in landscape or portrait orientation.

Hotshoe bubble level and first screen on my camera. The hotshoe (if your camera has one) is where one attaches a separate flash mechanism. On my camera, it is on top of the built-in flash. These small bubble levels are inexpensive, about $15. Mine will show you level whether the camera is positioned in landscape or portrait orientation.

I purchased a small “gizzie,”  a bubble level that fits into the camera hotshoe (the place where one attaches a separate flash) of my camera so that I can be sure that the camera is perfectly parallel to the vertical wall and also level, because my basement floors definitely are not perfectly level.  I purchased my camera level from B&H Photo Video, a vast emporium (a real store and online) for all things photo and video; they have really expert sales people who can help you with expensive decisions (like a DSLR!) and great prices.  They are a Jewish business, so they close for the Sabbath (Friday to Saturday evenings) and holy days, so check on the website for special closings.  Otherwise, they are there.  Type “Camera level” into the search box on the site to find their current offerings.  If my eyes are telling me one thing and the hotshoe level is saying another, I often use a small “torpedo” level to double check.  When I turn the camera to vertical on the tripod, because the barrel of the lens has ridges, I make certain the front of the lens is level (see photos below).
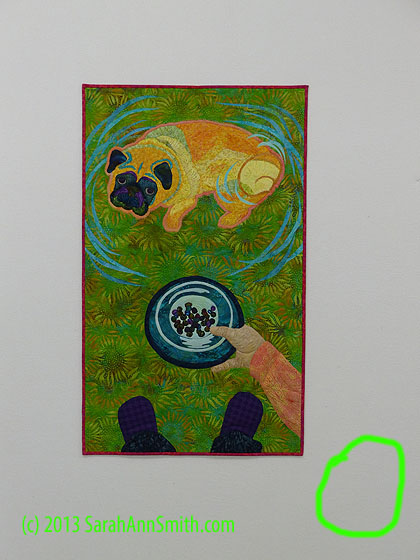
With this particular lens, I notice that the lower right corner isn't sharp no matter what the focal length, so when I want ALL the quilt to be super-sharp, I allow extra room around the edges.

With this particular lens, I notice that the lower right corner isn’t sharp no matter what the focal length, so when I want ALL the quilt to be super-sharp, I allow extra room around the edges.

If you want to get REALLY obsessive (guilty!) you can make sure your quilt is exactly vertical using a small bubble level from the hardware store:
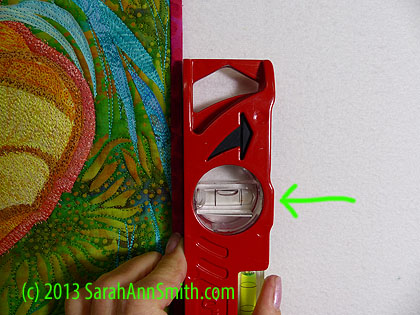
Making sure the sides of the quilt are vertical (or that the top is horizontal).
Making sure the sides of the quilt are vertical (or that the top is horizontal).

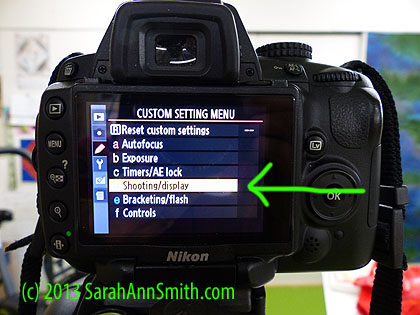
If you have the option, turn on a grid in the viewfinder.  This will help you see if the now-truly-vertical sides of your quilt are parallel to the grid on the screen or at an angle.  If they are at an angle, you can adjust the camera so everything is squared up correctly.

If you have the option, turn on a grid in the viewfinder. This will help you see if the now-truly-vertical sides of your quilt are parallel to the grid on the screen or at an angle. If they are at an angle, you can adjust the camera so everything is squared up correctly.

To obsess a bit more, you want to make sure that once the QUILT is vertical/level, that your camera LENS is also vertical/level.  The floors in my basement studio (painted that grass green!) are anything but flat and level.  So I triple check with not only the hotshoe bubble level, but I use the small red torpedo level (seen in the photo at the side of my quilt and below) to check if the camera LENS is vertical.  If the lens tips up or down, you will get distortion called keystoning, where a true rectangle appears wider at the top or at the bottom.
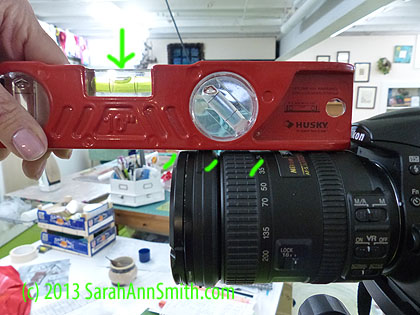
Using the bubble level on the top of the lens is a challenge because of the grip and changes in the surface.
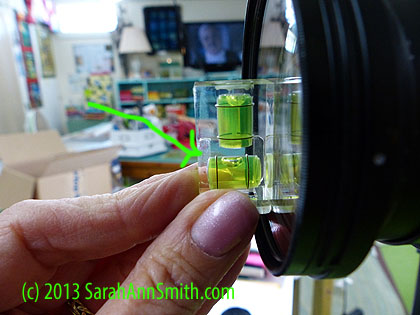
Using the bubble level on the top of the lens is a challenge because of the grip and changes in the surface.

Instead you can use the hotshoe bubble level to make sure the front of the lens is in fact truly vertical  (assuming of course that your wall is truly vertical!)

Instead you can use the hotshoe bubble level to make sure the front of the lens is in fact truly vertical (assuming of course that your wall is truly vertical!)

OR
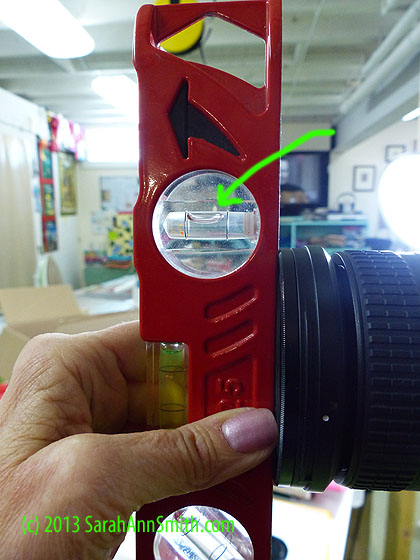
use  your Torpedo or other level to make sure the front of the lens is vertical.  A larger level such as this one is likely to have a bit better accuracy than a small one like the hotshoe level.  It also means I don't have to jar the camera taking the hotshoe level in and out of the hotshoe!

Distortion:  Through trial, error, and observation, I have learned that when I use my Nikon DSLR with the extra long zoom lens, the lower right of the lens has some distortion:  it just isn’t sharp in that lower right corner.  So when I set up and take photographs, I know that I need to have my tripod far enough away that I can avoid having a corner of the quilt in the not-so-sharp zone.  Next on my agenda:  take out the shorter zoom lens that came with the camera and see how that does.
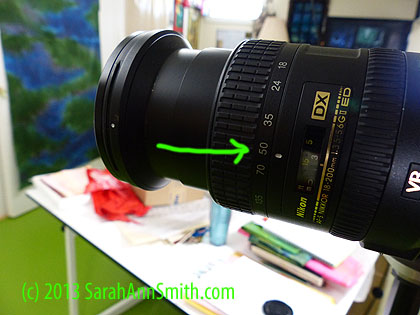
A focal length on your zoom of about 50 is optimal.  If your camera doesn't tell you the focal length, just don't do way zoomed in or really wide-angle.

A focal length on your zoom of about 50 is optimal. If your camera doesn’t tell you the focal length, just don’t do way zoomed in or really wide-angle.

Focal length:  I’ve also read that the optimal focal length for still photography like this is 50 mm (well, the digital equivalent of what 50mm was on old film cameras).  You definitely don’t want to go wide-angle because you will get distortion:  a square quilt will bulge out like a fish eye, the sides will appear to push out in the middle.  When I set up the tripod, I set the camera to 50mm, then I move the tripod so that the quilt fills the viewfinder (while avoiding that odd spot with my particular lens) but still allows me room to crop the photo in Photoshop Elements.

Center focus on center of quilt.  Note hotshoe bubble level.

Center focus on center of quilt. Note hotshoe bubble level. Notice that the tripod is about ten feet back from the design wall and the quilt of Pigwidgeon dancing for supper nearly fills the screen, but avoids that lower-right area.

Tripod:  I cannot overstate how important it is to have a perfectly still camera.  As you push the button, your hand introduces shake to the camera.  My first tripod was purchased used for $27.  Yep, that inexpensive.   And photos from that set-up made it into books!  I eventually replaced with an “enthusiast” level tripod, but which still didn’t cost more than $150.  Since this is my business, it was a business deduction (and honestly, the only time I’ve ever used it for anything other than work is to film Eli at a few wrestling meets–I can videotape from the tripod and take still pics sitting on the floor!) and well worth it.  My tripod head has a built in bubble level on it, too, but I rely on the level on the camera to make sure the camera isn’t tilted on a level tripod.  If you don’t have a tripod, find a ladder, chair or other stable surface and put your camera on that.  Use the self-timer, press the button, then let the camera trigger the shot; this avoids wiggling from your hands pushing the button.

At the enthusiast level, tripods and heads are sold separately.   Some photography books urge you to buy a tilt-pan head, which swivels on a ball head.  I have found for photographing a quilt, I prefer the heads that allow you to level horizontally, then vertically, using two separate knobs.  I know that once I get horizontal level if I have to adjust for vertical, I would knock it out of level.  By having the head have two separate knobs, I can adjust in one direction, get it right and lock it in, then adjust for the other direction of level.
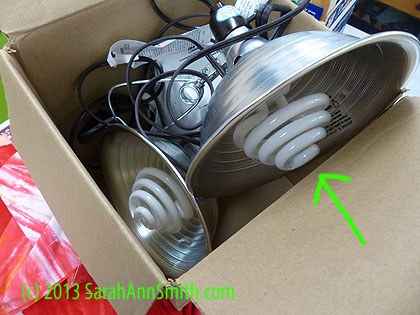
Tulip bulbs in inexpensive shop light reflectors.  The bulbs cost about $35 each, so I store them carefully!  But they are the most expensive part of your lighting set up and are still far less expensive than hiring someone to shoot your quilts!  Unless you drop them, they last a long time.

Tulip bulbs in inexpensive shop light reflectors. The bulbs cost about $35 each, so I store them carefully! But they are the most expensive part of your lighting set up and are still far less expensive than hiring someone to shoot your quilts! Unless you drop them, they last a long time.

Lighting is CRITICAL!   I followed the information on Holly Knott’s website (paragraph and links below) to purchase the tulip bulbs that give even light when correctly positioned.  I screw them into inexpensive shop fixtures from the big-box hardware stores (about $9 each).
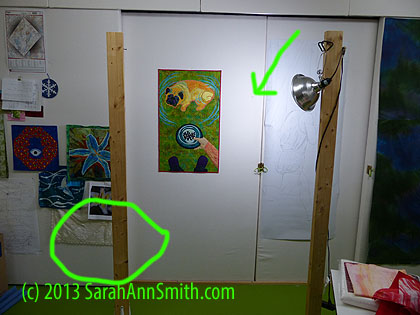
If you use only one light, or have it too close to the quilt as in this photo, you will get a "hot spot" or uneven lighting.  Notice how bright the right side of the quilt is compared to the other three sides.  This inconsistent lighting does not show your quilt at its best!

If you use only one light, or have it too close to the quilt as in this photo, you will get a “hot spot” or uneven lighting. Notice how bright the right side of the quilt is compared to the other three sides. This inconsistent lighting does not show your quilt at its best!

Instead, follow the info on Holly’s site and move the quilt stands (made from a 2×4 and four basic shelf brackets each, construction details on Holly’s site) back from the quilt to get good, even lighting.  Play with the White Balance on your camera to adjust for the type and color of light in your studio combined with the tulip bulbs.  If I recall, they recommend NOT having the overheads on, but I find that my studio is so dark that I really need my daylight-bulb overhead lights on to get a good shot.  Experiment to see what settings and lighting give you the sharpest, most color-correct photo.
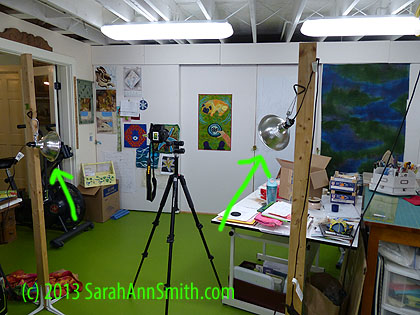
Light stands and tripod set up at a good distance from the quilt.

Light stands and tripod set up at a good distance from the quilt.

Holly Knott’s Shoot That Quilt:  For fabulous instruction on how to “Shoot That Quilt,”  visit Holly Knott’s very helpful site, here.  She collaborated with a professional photographer, and I can say unequivocally that her information–especially on lighting–has made a key difference in improving the quality of my photos.  In particular, take a good long look at the “Gallery of Wrongs” which shows common errors and how to avoid them.

And watch this video prepared by Saatchi Online, a mongo huge online art gallery.  It is very well done, with a lot of good information.  I hope you’ve enjoyed this post!  Now go make art, then photograph it well!
International Quilt Festival 2013, Houston, #7: Caryl Bryer Fallert-Gentry

February 26th, 2014
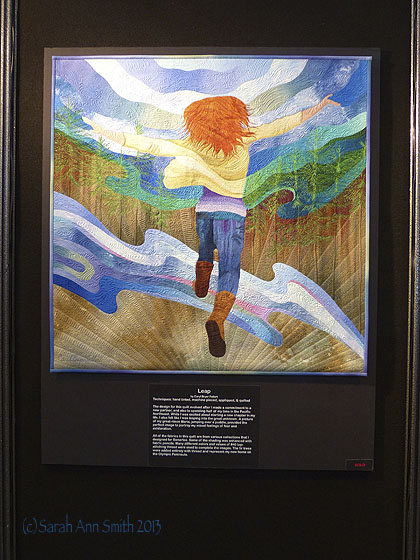
Caryl Bryer Fallert Gentry makes the leap into a new life

Caryl Bryer Fallert Gentry makes the leap into a new life

One of the stand-out exhibits of last Fall’s Houston International Quilt Festival 2013 was Caryl Bryer Fallert-Gentry’s exhibit of 30 for 30:  to celebrate 30 years of art quilts, she made 30 quilts 30×30 inches.  They celebrate her journey, invoking her style and techniques that have made her one of the pre-eminent art quilters of our day.  You can visit her website, here.

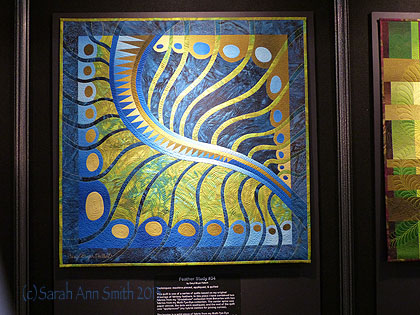
Many of you will know her for her vibrant rainbow-hued hand-dyes and appli-pieced quilts.  Some of you will remember the various styles she has tried over the years–remember the wonderful dandelion quilts?  the photo transfers?  the tucks and pleats?  All are represented in this exhibit.

Some of you may know that she realized a dream, building a  home and studio in Paducah with her husband after she retired from her “day job” with United (I think it was) airlines.  Her Paducah studio is amazing (here’s a link to an online tour of her studio), a perfect place to live and to offer workshops and sell her works and fabrics.  Then her husband died suddenly what seems like just a few years ago, but was actually  a few more than that.   After several years alone, she met Ron Gentry, love happened, and they married at the Quilt Museum in Paducah, with homes in Paducah and his home base of Port Townsend.  The quilt above is Caryl making the leap to this new life!  And I’ll put in a plug for her…the studio is now for sale!  Check here.

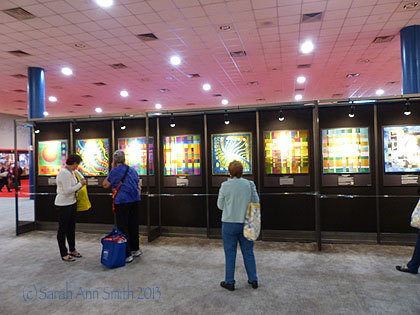
The exhibit was just inside the main doors as you enter the convention center on the quilt show side (as opposed to the vendor side) of Festival...what a wonderful way to begin!

The exhibit was just inside the main doors as you enter the convention center on the quilt show side (as opposed to the vendor side) of Festival…what a wonderful way to begin! Every time I passed by there were people taking photos and enjoying her work.

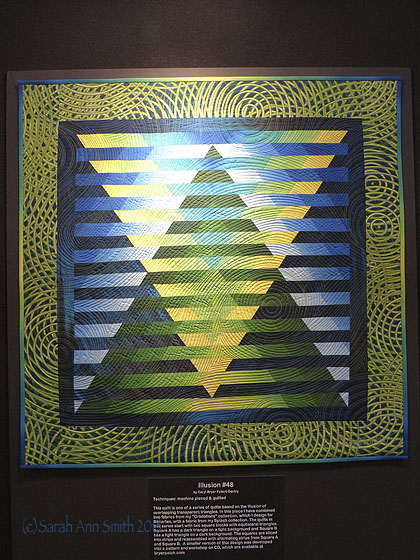
Remember the gradations of value, light, the piecing?

Remember the gradations of value, light, the piecing? Notice how perfectly centered the binding is, the yellow precisely in the middle, the mono-rpinted border, the quilting.  Sigh.

The nearly cellular-level "macro" shots?

The nearly cellular-level “macro” shots?

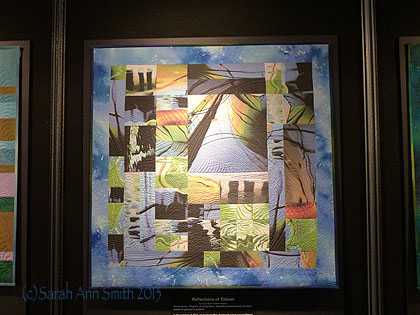
The photo transfer/prints years?  What is wonderful is that this is a new quilt, using photos from the Pacific Northwest and her new life, but in the style of these particular years.

The photo transfer/prints years? What is wonderful is that this is a new quilt, using photos from the Pacific Northwest and her new life, but in the style of these particular years.

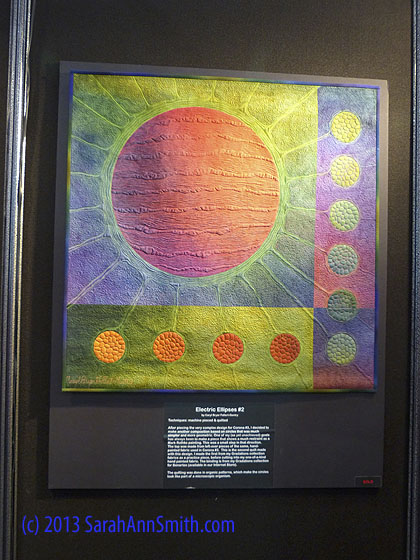
A symphony of color

A symphony of color.  SWOON!

Be still my beating heart!  The lighting was great when you were standing there looking at the quilt, but my photos are a bit washed out--the color was more vibrant.

Be still my beating heart! The lighting was great when you were standing there looking at the quilt, but my photos are a bit washed out–the color was more vibrant.

And a detail:

Look at that quilting.  And of course the quilts are perfectly flat, perfectly square, perfectly perfect.

Look at that quilting. And of course the quilts are perfectly flat, perfectly square, perfectly perfect.

The best news is that you can see all the quilts here (and see how many are sold/reserved and which are still available).

And yet more color and movement and "Macro".  Sigh.  Swoon.

And yet more color and movement and “Macro”. Sigh. Swoon.

Though I didn’t buy the CD, a CD with proffesional photographs of this series and exhibit in its entirety is available.  Hope you’ve enjoyed this snapshot as much as I enjoyed seeing the quilts. Thank you, Caryl, for sharing your art and life with us.

Published again! Quilt Essential

February 23rd, 2014

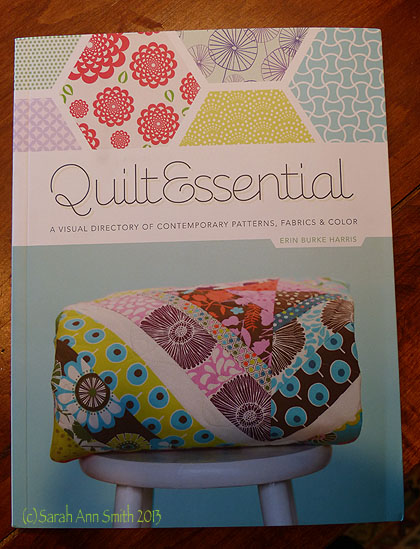
Hi all!  I can’t believe I haven’t had time to blog about this yet, but I have been published again!   This time in the new book Quilt Essential:  a Visual Directory of Contemporary Patterns, Fabrics and Color by Erin Burke Harris, part of C&T’s “Stash Books” series.  If you are new to quilting and want an overview book, this one is a good one.  It has a very “Quilt Modern” feel to it:  fresh, airy, not fussy, and covers a lot of basics.


The cover of Quilt Essential

The cover of Quilt Essential

I was thrilled when I was invited to submit some quilts for consideration, and even more thrilled when I received a copy and learned I was in the book three times!

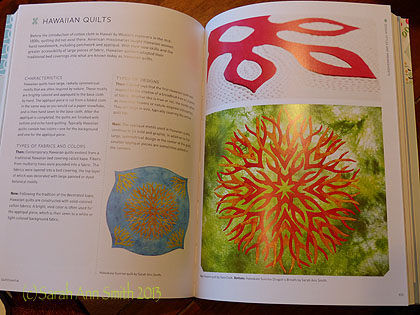
My Haleakala Sunrise pattern (available here in my shop and also at Pacific Rim Quilt Company, a great resource for Hawaiian and applique patterns)

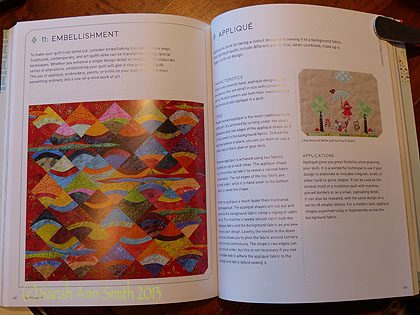
My Haleakala Sunrise quilts ( pattern available here in my shop and also at Pacific Rim Quilt Company, a great resource for Hawaiian and applique patterns) are both featured on the opening pages for the Hawaiian Quilts Section (mine are the blue-yellow and red-green).

The book is divided into four major sections:

  • 1.  Fabrics:  covers types of fabrics, yardage and measuring, and caring for fabrics.
  • 2.  Colors:  color theory, and matching fabrics and colors.
  • 3.  Designs:  Shapes, quilt blocks, block layouts and settings, styles and arrangements, sashing and borders, embellishment.
  • 4.  Assembling:  piecing, quilt sandwiching, quilting methods, bindings.

The book includes profiles of well-known quilters as well as works by other quilters (including me!).  Here’s a couple more photos:

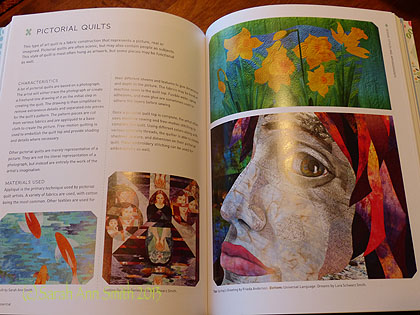
My Koi quilt is in the art Quilt section (detail, bottom left, where I'm thrilled to share a page with Lura Schwartz Smith-no relation).

My Koi quilt is in the Pictorial Quilt section (detail, bottom left, where I’m thrilled to share a page with Lura Schwartz Smith-no relation).

A big detail shot of The Tide is Hire, my pieced, appliqued and beaded quilt which is in the International Quilt Festival Collection (!!!!).

A big detail shot of The Tide is Hire, my pieced, appliqued and beaded quilt which is in the International Quilt Festival Collection (!!!!).

If you know of anyone who is beginning their quilt journey or just wants a good single overview book with a fresh feel to it, this book would be just the thing!  Thank you Erin for including me!

Misc: Fabric and fusing, snow, wrestling, food, RAM!

February 21st, 2014
Let's start with some beauty:  sunrise yesterday en route to the All-State (Maine) New England Qualifier tournament at Nokomis High School in Newport, Maine.

Let’s start with some beauty: sunrise yesterday en route to the All-State (Maine) New England Qualifier tournament at Nokomis High School in Newport, Maine. LOOK at those colors on the snow, the farm on the crest at the right, the maples silhouetted (and likely soon to sprout sap buckets)…. sigh..swoon…

It’s been an action packed few days:  it is now 9:34 a.m. Friday.  Since this time Wednesday morning…..

I received two memory cards (RAM, not hard drive) for my 2010 MacBook Pro and successfully installed them!   WOW what an improvement now that I’m at the max. for this machine, 8 GB!   Why did I wait so long?

In the upper left you see one of the two old RAM memory cards.  The two new ones are installed, in the center of my laptop.  The Apple Store no longer does upgrades on machines as "old" as my 2014, so I had no choice but to do it myself.  Luckily, there were handy videos online and it was easy peasy!

In the upper left you see one of the two old RAM memory cards. The two new ones are installed, in the center of my laptop. The Apple Store no longer does upgrades on machines as “old” as my 2010 model, so I had no choice but to do it myself. Luckily, there were handy videos online and it was easy peasy! And boy does my laptop switch from one thing to the next faster!

Then I got to go downstairs.  As promised, I’m sharing some of the fabric–since I can’t share the in progress pics until the quilt is done and juried (either in or out).

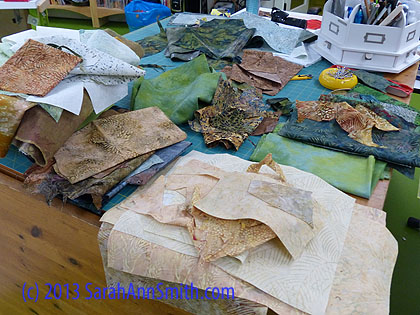
Here are the pre-fused fabrics for my current quilt.  There will be plenty leftover, but that is the joy of Mistyfuse--it never goes bad.  I can keep and use all the scraps and leftovers.  In fact, many of the fabrics on the table that aren't big rectangles are leftovers from previous projects.  Yep--I'm a Mistyfuser!  I'm gonna have to blog how I use it, maybe even try doing a video....

Here are the pre-fused fabrics for my current quilt. There will be plenty leftover, but that is the joy of Mistyfuse–it never goes bad. I can keep and use all the scraps and leftovers. In fact, many of the fabrics on the table that aren’t big rectangles are leftovers from previous projects. Yep–I’m a Mistyfuser! I’m gonna have to blog how I use it, maybe even try doing a video….

Yesterday was Eli’s final meet/tournament of the wrestling season:  a new one, but a worthy addition to Maine’s line-up.  In the past, the three state champions for each of the 14 weight classes (from 106 to 285), one each from Class A, B and C schools went to New England Regional Championships.   This year, in an effort to have the best of the best, they instituted a New Englands Qualifier tournament the week after States.  The top four finishers in each weight class got to compete.

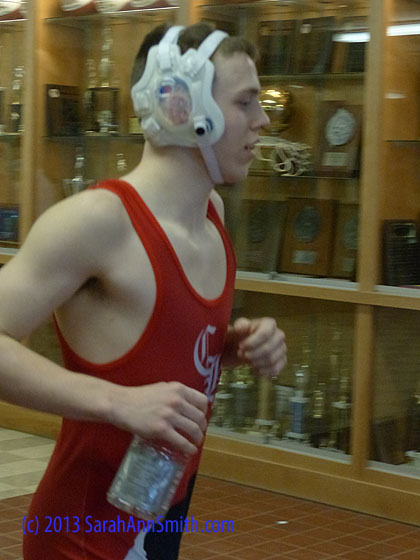
As usual, I had to take "good luck"  photos of Eli warming up.  Here he has doffed his sweats, put on his headgear and is running into the gym for what became his final match.

As usual, I had to take “good luck” photos of Eli warming up. Here he has doffed his sweats, put on his headgear and is running into the gym for what became his final match.

As my loyal readers (thank you! I am still astonished at that concept!), you know Eli is a GOOD wrestler, hubby/dad Paul is an Asst. Coach, and I’m a loud fan of Eli and the Camden team.  Last weekend, Eli placed third in States, having lost by just two points to the eventual winner of the 145-lb weight class in an early round, thereby ended up in the Consolation bracket where the top spot was number 3 (which he got!).

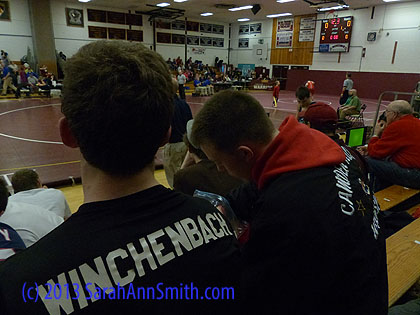
Earlier in the day, he and buddy Connor Winchenbach (who placed first at 152-lbs at Class B States) take a break between rounds to have some lunch.

Earlier in the day, he and buddy Connor Winchenbach (who placed first at 152-lbs at Class B States) take a break between rounds to have some lunch. In the far mat another of the Camden boys is wrestling (tiny figure in red with white lettering down the spine).

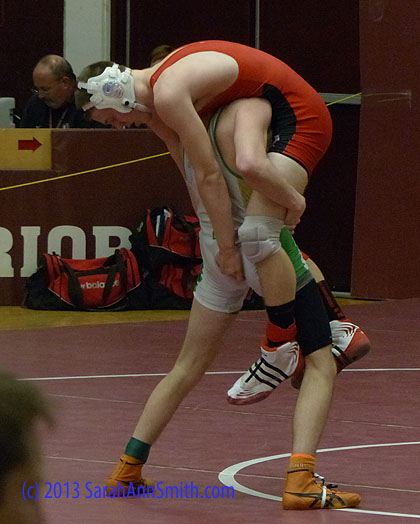
Earlier in the season, the kid from Massabesic tooled all over Eli at a duals (regular season) meet.  Eli was in a better frame of mind this day, but Eli told me the Massabesic kid is **really good** on his feet.  You don't often see Eli in this position, about to get dumped! (Eli is in red, Massabesic -- a Class A school from the southern part of the state -- is in white-green-yellow.

Earlier in the season, the kid from Massabesic tooled all over Eli at a duals (regular season) meet. Eli was in a better frame of mind this day, but Eli told me the Massabesic kid is **really good** on his feet. You don’t often see Eli in this position, about to get dumped! (Eli is in red, Massabesic — a Class A school from the southern part of the state — is in white-green-yellow.

But it wasn’t one-sided:  it was back and forth and tied at 5-5 until halfway through the third period:

After getting brought down, Eli came back and here is in control, trying (but not succeeding) to get the boy onto his shoulders.

After getting brought down, Eli came back and here is in control, trying (but not succeeding) to get the boy onto his shoulders.

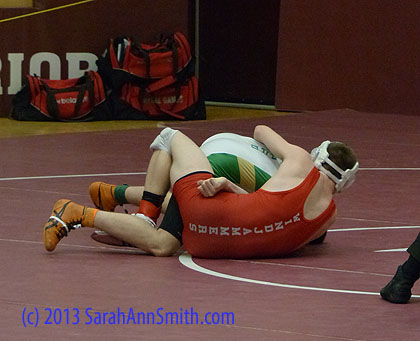
PK and Coach G are on the right, watching Connor who is wrestling on the next mat.  Eli and Massabesic wrestler are in the back, with Eli on top and in control.

PK and Coach G are on the right, watching Connor who is wrestling on the next mat. Eli and Massabesic wrestler are in the back, with Eli on top and in control.  Eli is doing a cross-face, which makes it hard for the kid to maneuver.

But in the end, Eli couldn’t hang on to the very strong senior from Massabesic, who got back on to his feet and managed to score two points at the end of the third period to eke out the win.

That makes Eli one of the top SIX 145-lb. wrestlers in the State—all classes! (there is no wrestle-off for 5/6, but the other one tied at 5/6 is the boy won won Class A States!).  As a SOPHOMORE!   Of the other six, one is a sophomore (he placed third), and four are seniors.  WAY TO GO, ELI! (Yup, bustin’ my buttons proud!)  AND, Eli placed higher than ANY other Class B or C 145-lb wrestler (meaning he did better than the boys who won first and second last Saturday)!  The top three in each weight class from the Qualifier meet will compete in two weeks at New Englands.  And (drum roll) Connor Winchenbach, a senior, qualified to compete, too!  Way to go, Connor!

Then came food!  Connor’s parents and three teammates who traveled with them (the school did not provide a bus!) and the three of us went to Pizza Hut, and boy could you tell only Connor has to make weight.  Those boys ATE!  <beam>

Eating continued with the first waffles in 3 1/2 months.  My recipe, from Joy of Cooking, uses 3 eggs, and I generally think of it as feeding 3 people.  I had 3 waffles (small).  Eli had ALL the rest.    I've missed feeding Eli!

Eating continued this morning with the first waffles in 3 1/2 months. My recipe, from Joy of Cooking, uses 3 eggs, and I generally think of it as feeding 3 people. I had 3 waffles (small). Eli had ALL the rest. <Beam!> I’ve missed feeding Eli!

Hmmm…just noticed my watermark needs the date changed! ….Anyway….

During breakfast guess what it was doing:  yep, snowing.  This is the FIFTH snowstorm/snowfall we’ve had in the past seven DAYS.  I ran out during breakfast to get this photo.  Good thing as the temperatures have just pushed above freezing and it has changed to (yuck) rain.  That means slush and, when the temperature drops tonight, ice.  Yuck.

HUGE snowflakes coming down during breakfast.

HUGE snowflakes coming down during breakfast.

So that’s the past 52 hours.   Today:  work more on that quilt, hopefully work on a drawing lesson/class, and hang out with Eli on the last weekday of Winter Break.  Tomorrow:  to Portland with Eli to buy new running shoes for the upcoming Track and Field season, then to a SAQA (Studio Art Quilt Associates) meeting in Portsmouth, NH on Sunday.  WOOT!  And fabric dyeing with Kathy, hopefully on Tuesday!!!  Double WOOT!