Plaid Top Tutorial: Lesson 8–Lined Patch Pocket
Tuesday, March 14th, 2023Today we move on to another fun technique: a lined patch pocket. I kinda made this up along the way (my first photos are not included because I figured out a better way…this is the revised and improved method!). The flannel is SO soft and comfy–in part because the weave is dense but not terribly tight. That means I might be able to wear holes in the bottom of the pockets, so I decided to give them some strength and structure by adding a lining. The hand-dyed blue was in my stash and worked well enough I also really liked the frayed selvage edge of the fabric so decided to use that as a decorative element. I cut the pockets with the the upper edge of the pocket on the selvage (lengthwise edge of the fabric) instead of the usual orientation.
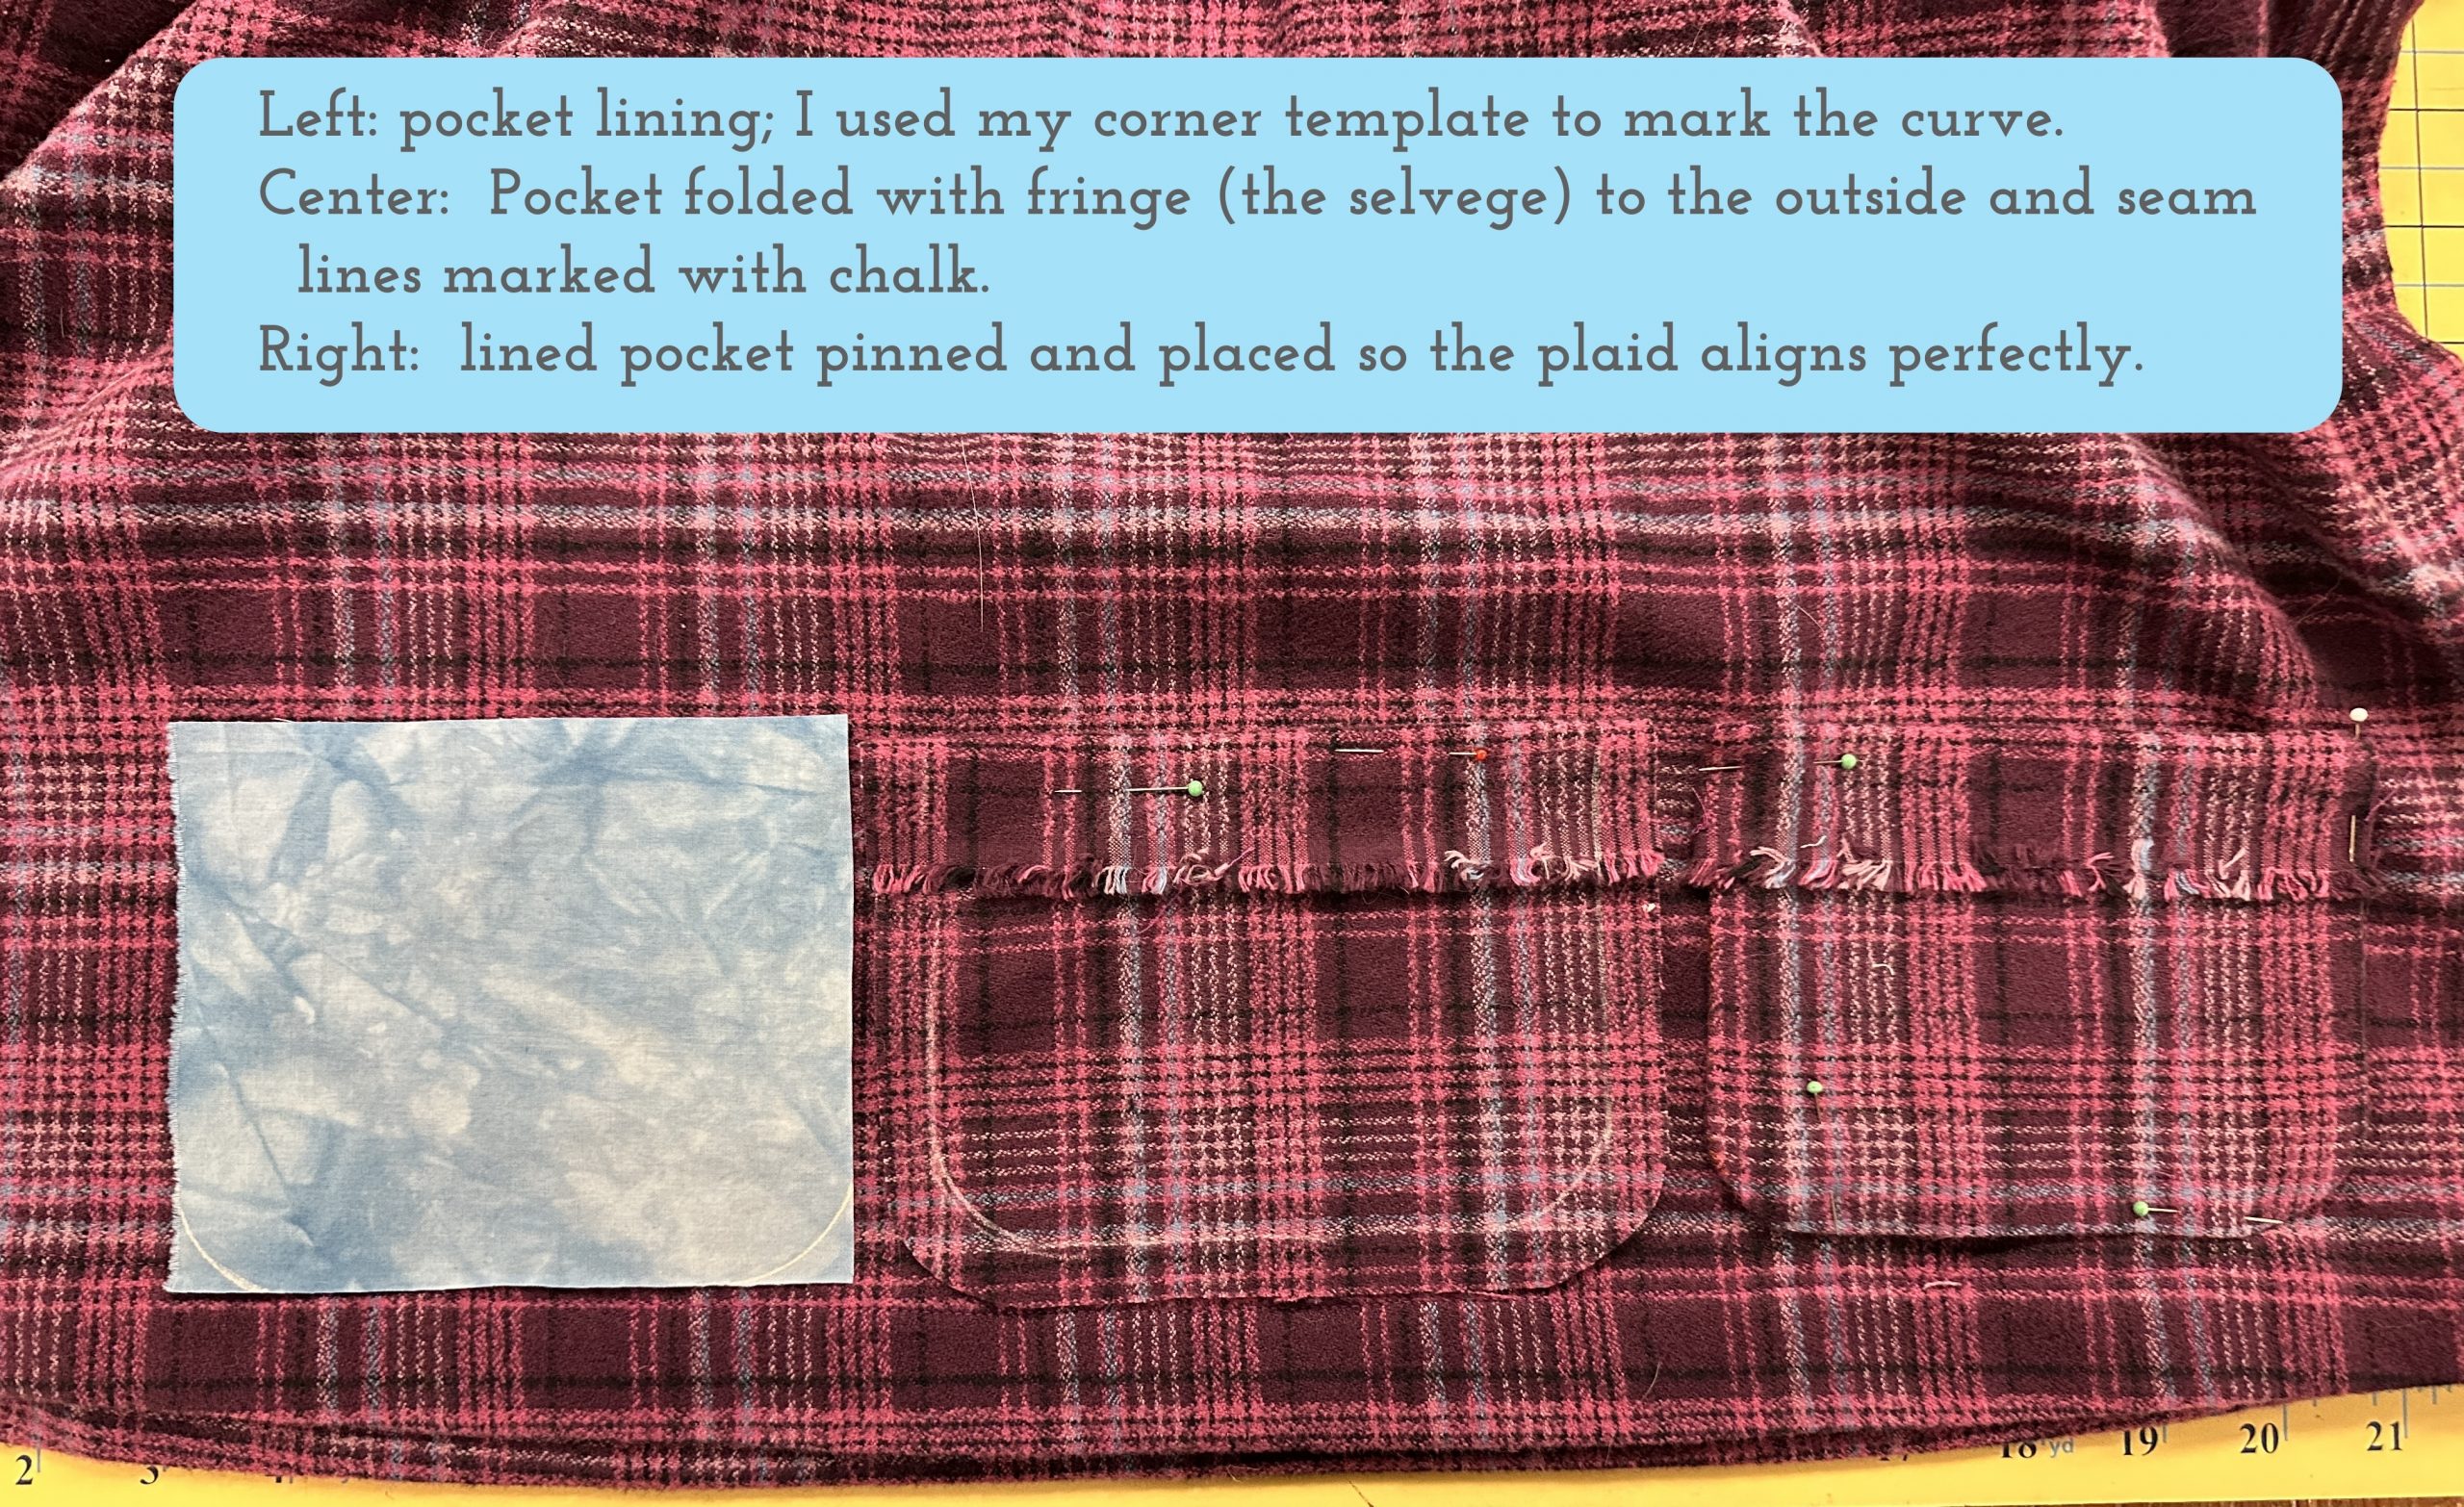
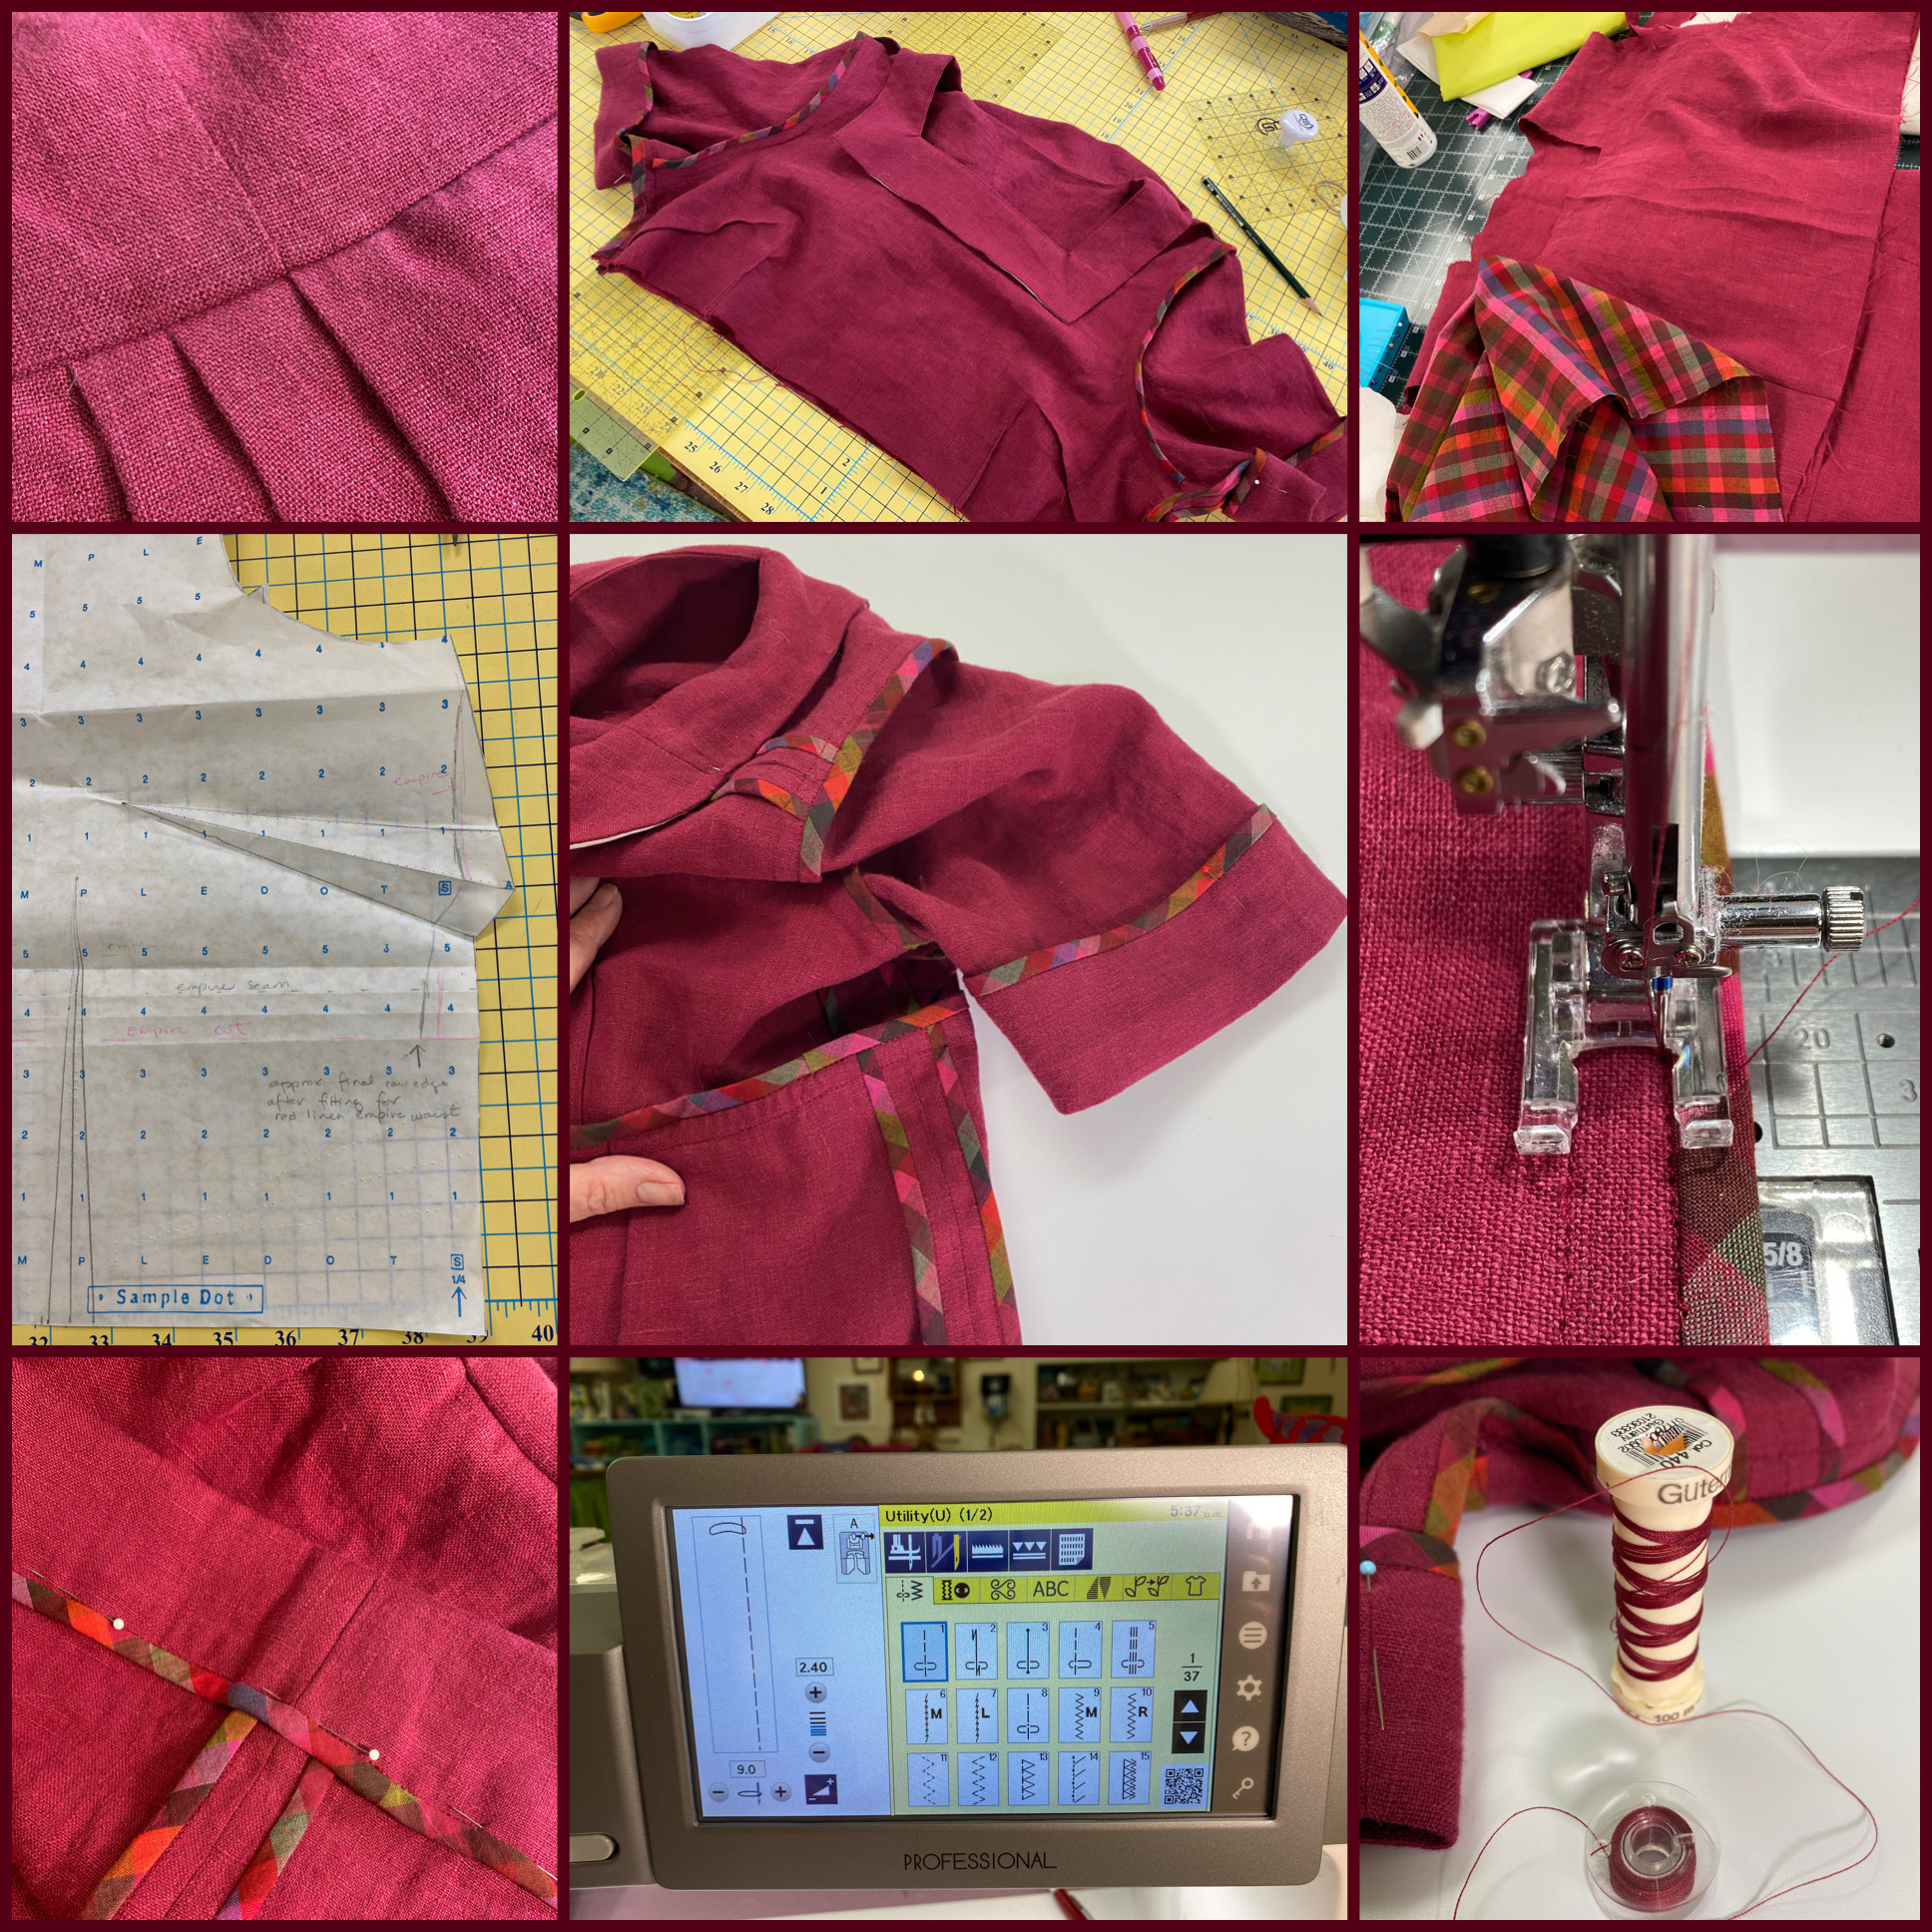
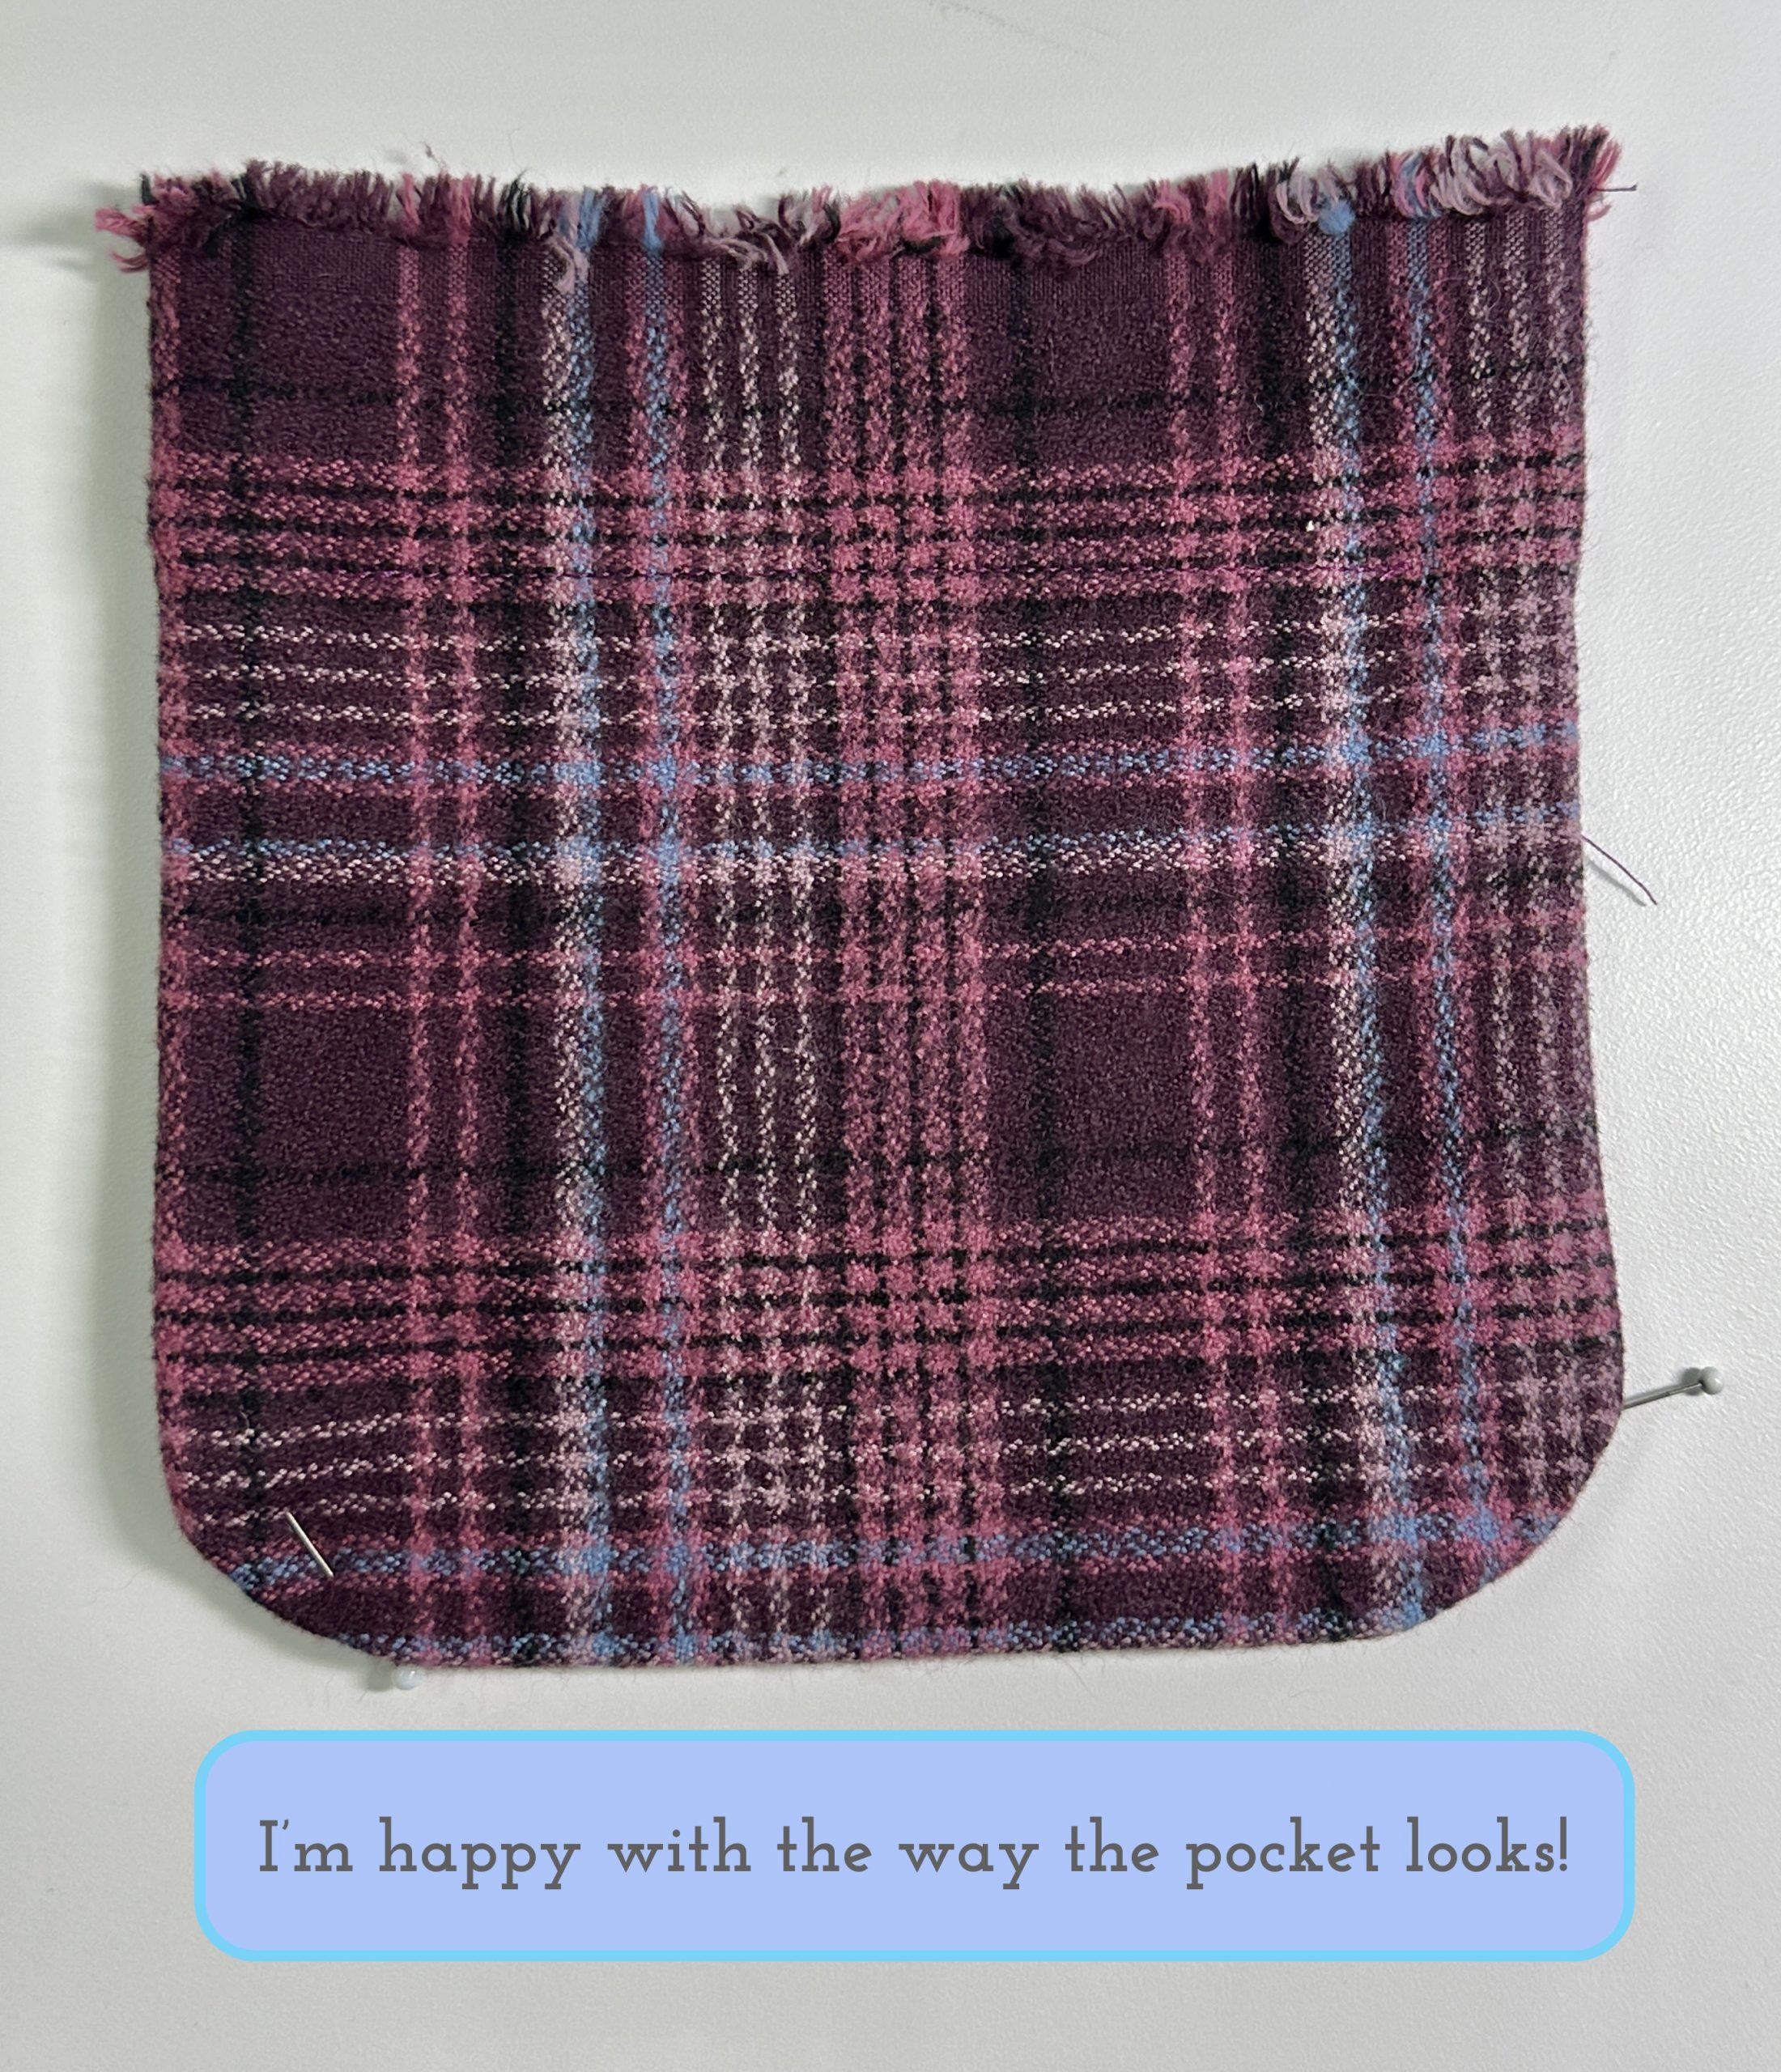
Here’s what we are doing today–pockets!
Please note: I am affiliated with Janome as a Janome Artisan and am compensated. However, my reviews are honest and I would say what I say whether affiliated or not. I’ve also chosen to be affiliated with Janome since 2003 (!!!) because their machines are so good and they are so responsive to the interests and needs of their customers.
Let’s dive into the details! First cut out your pocket including either a turn back (flap that will turn toward the garment or, as I did, a flap that will fold down over the front of the pocket. In the next photo, I’m preparing the cut pocket piece by sewing a basting stitch to make it easier to get a consistent turned-under seam allowance.
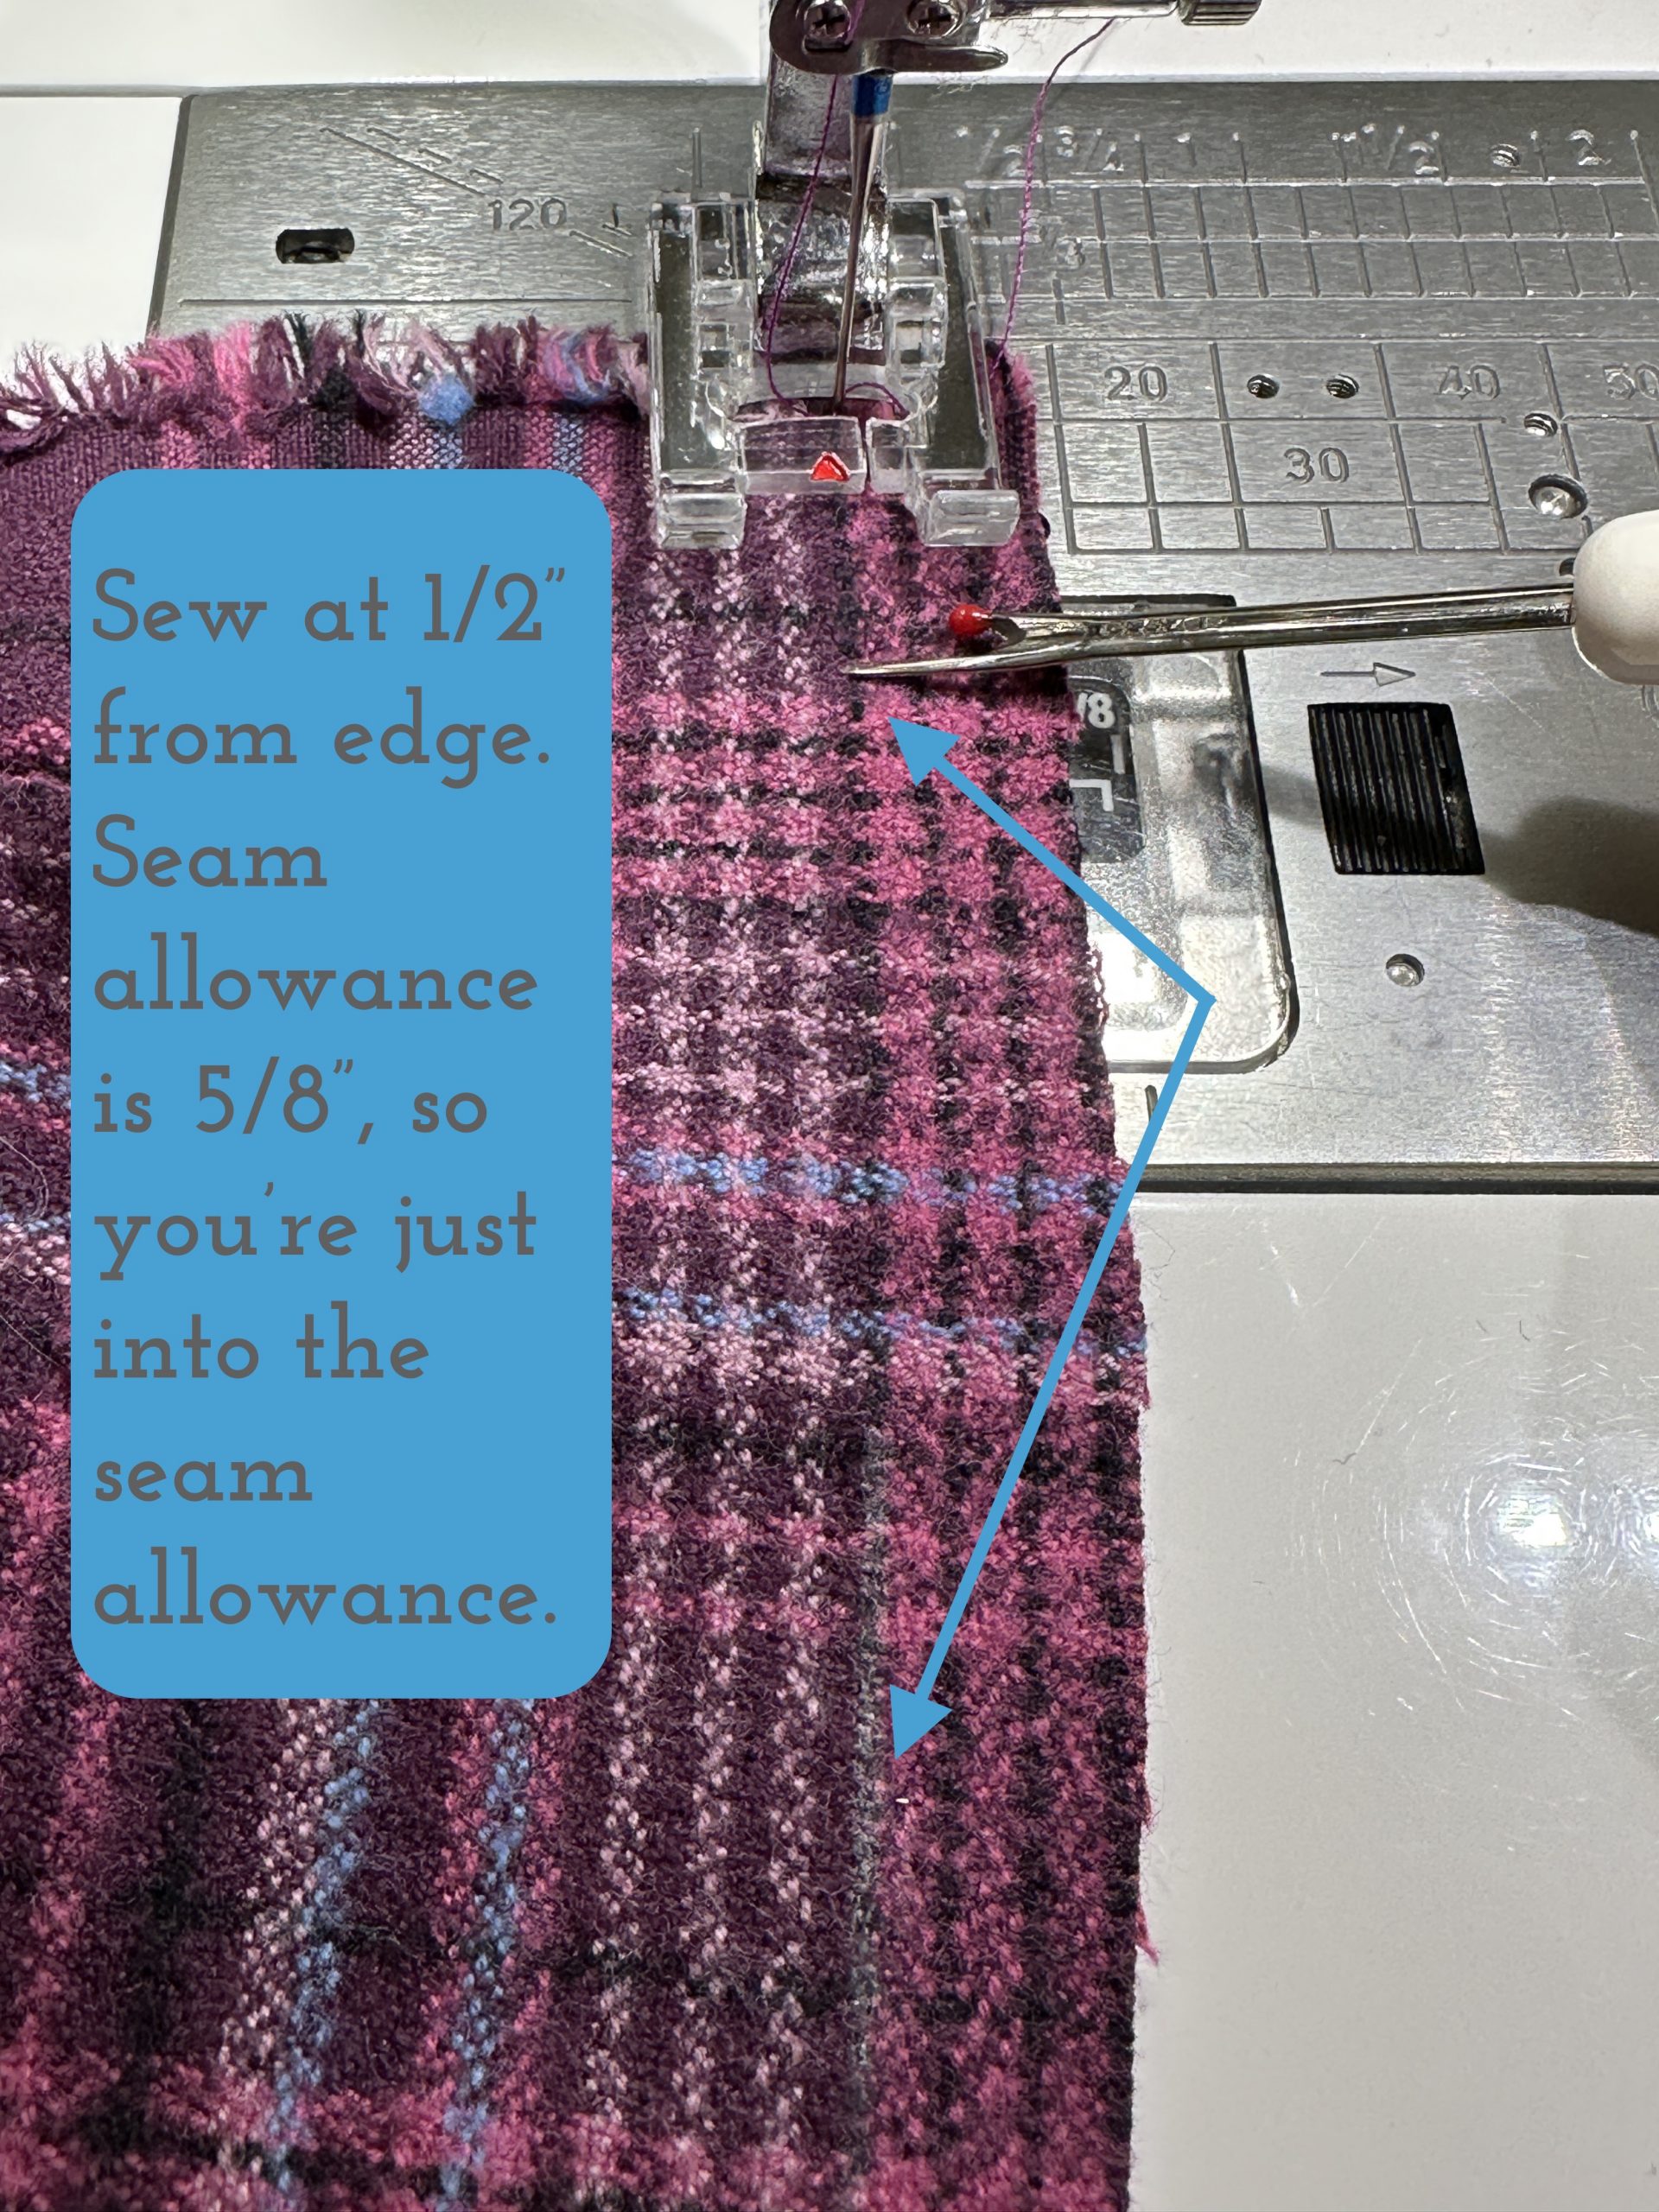
Sometimes taking an extra step makes things easier, not harder. This is one of those times. Sew with a basting stitch–I used about a 3.5 stitch length–1/2″ from the raw edge. This leaves 1/8″ between the basting and the turned edge line. The basting won’t show when the pocket is turned right side out, but the stitched line makes is SO much easier to turn accurately!
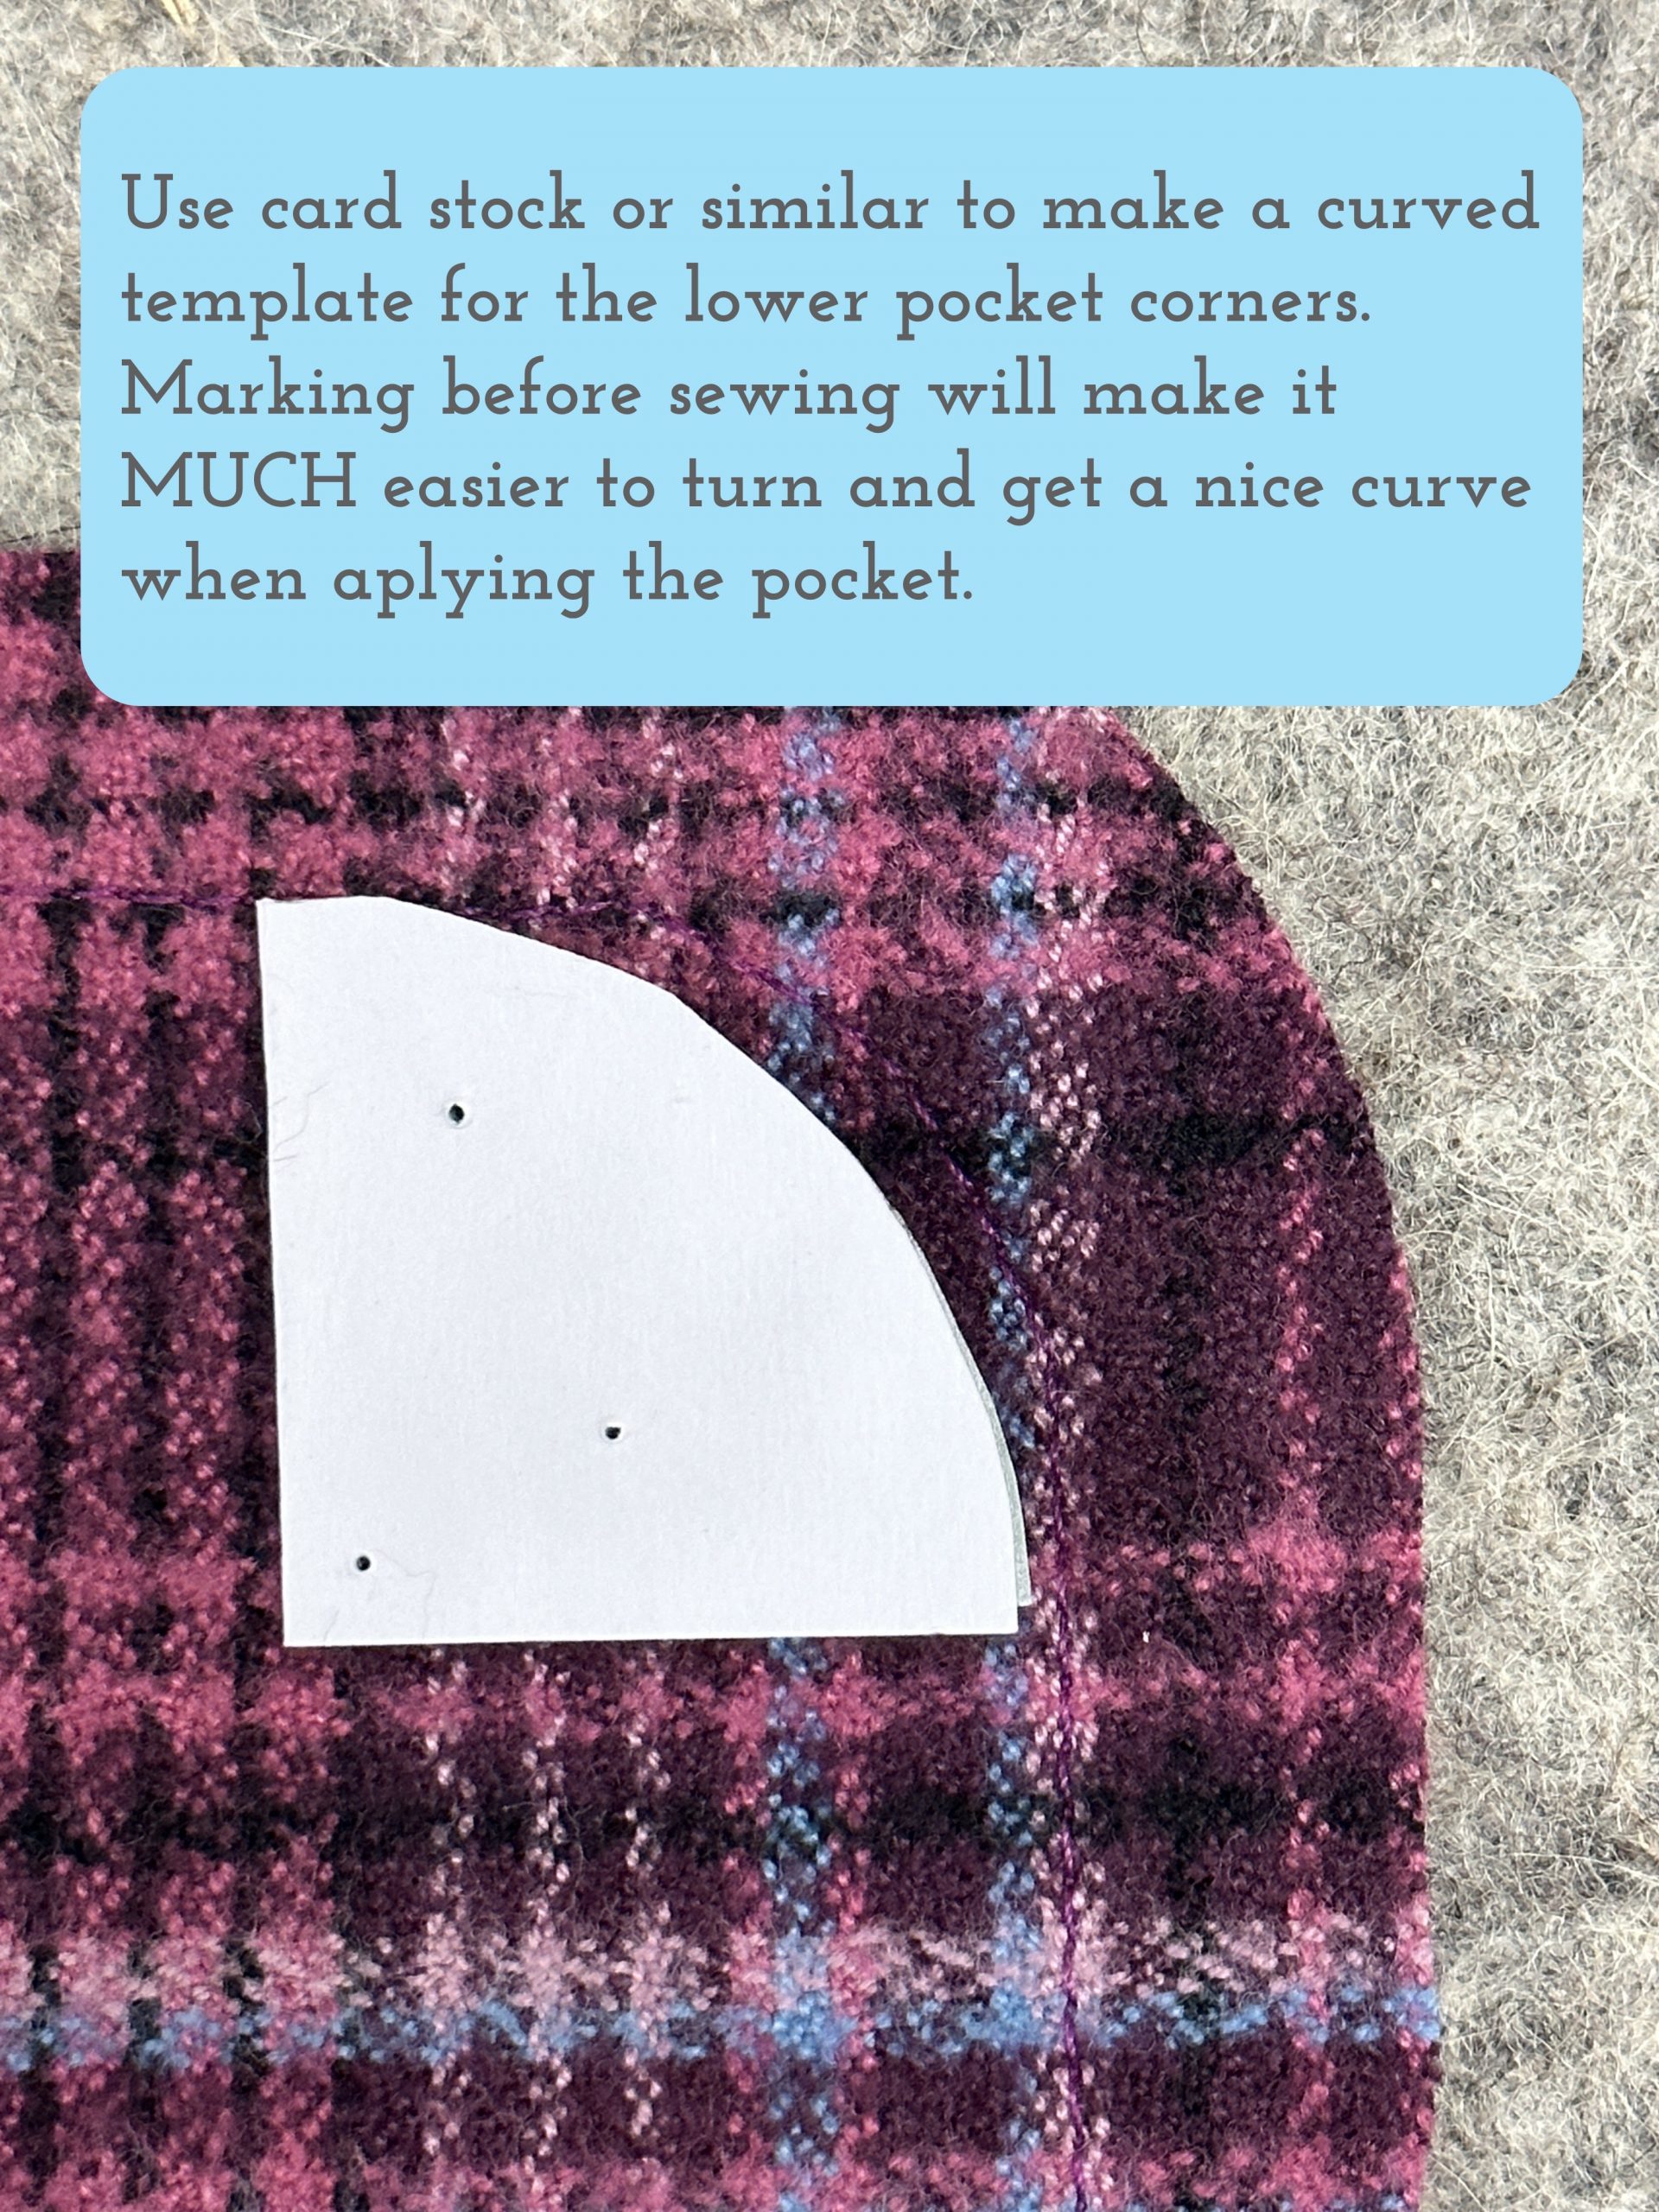
Using something firm like card stock, index card, or a cereal box, cut a quarter circle. I folded a sorta-square piece of cardstock into quarters, marked a set distance (an inch), then used a round item (think jar, pepper mill base, even (!!) a quilting template) that has a curve shape that you like. Be sure the curve intersects the distance marks so it curves symmetrically round the corner.

Notice that the top edge, with the fringed selvage, is pin marked where it will fold over to the outside of the pocket.
If your finished pocket is 6×6″ (honestly I’m not sure what size I cut mine, just using this to make the math simple!), you’ll have cut it 5/8″ seam allowance + 6″ + 5/8″ seam allowance = 7 1/4″. Now, you’ll want to cut your lining smaller so that it is nicely hidden. That means the lining would be cut at 6×6″ or a perhaps 6″ wide by 6 1/4″ long (to allow you an extra bit to tuck under at the top. You will sew it to the pocket exterior with 1/4″ seams allowance, NOT 5/8″!
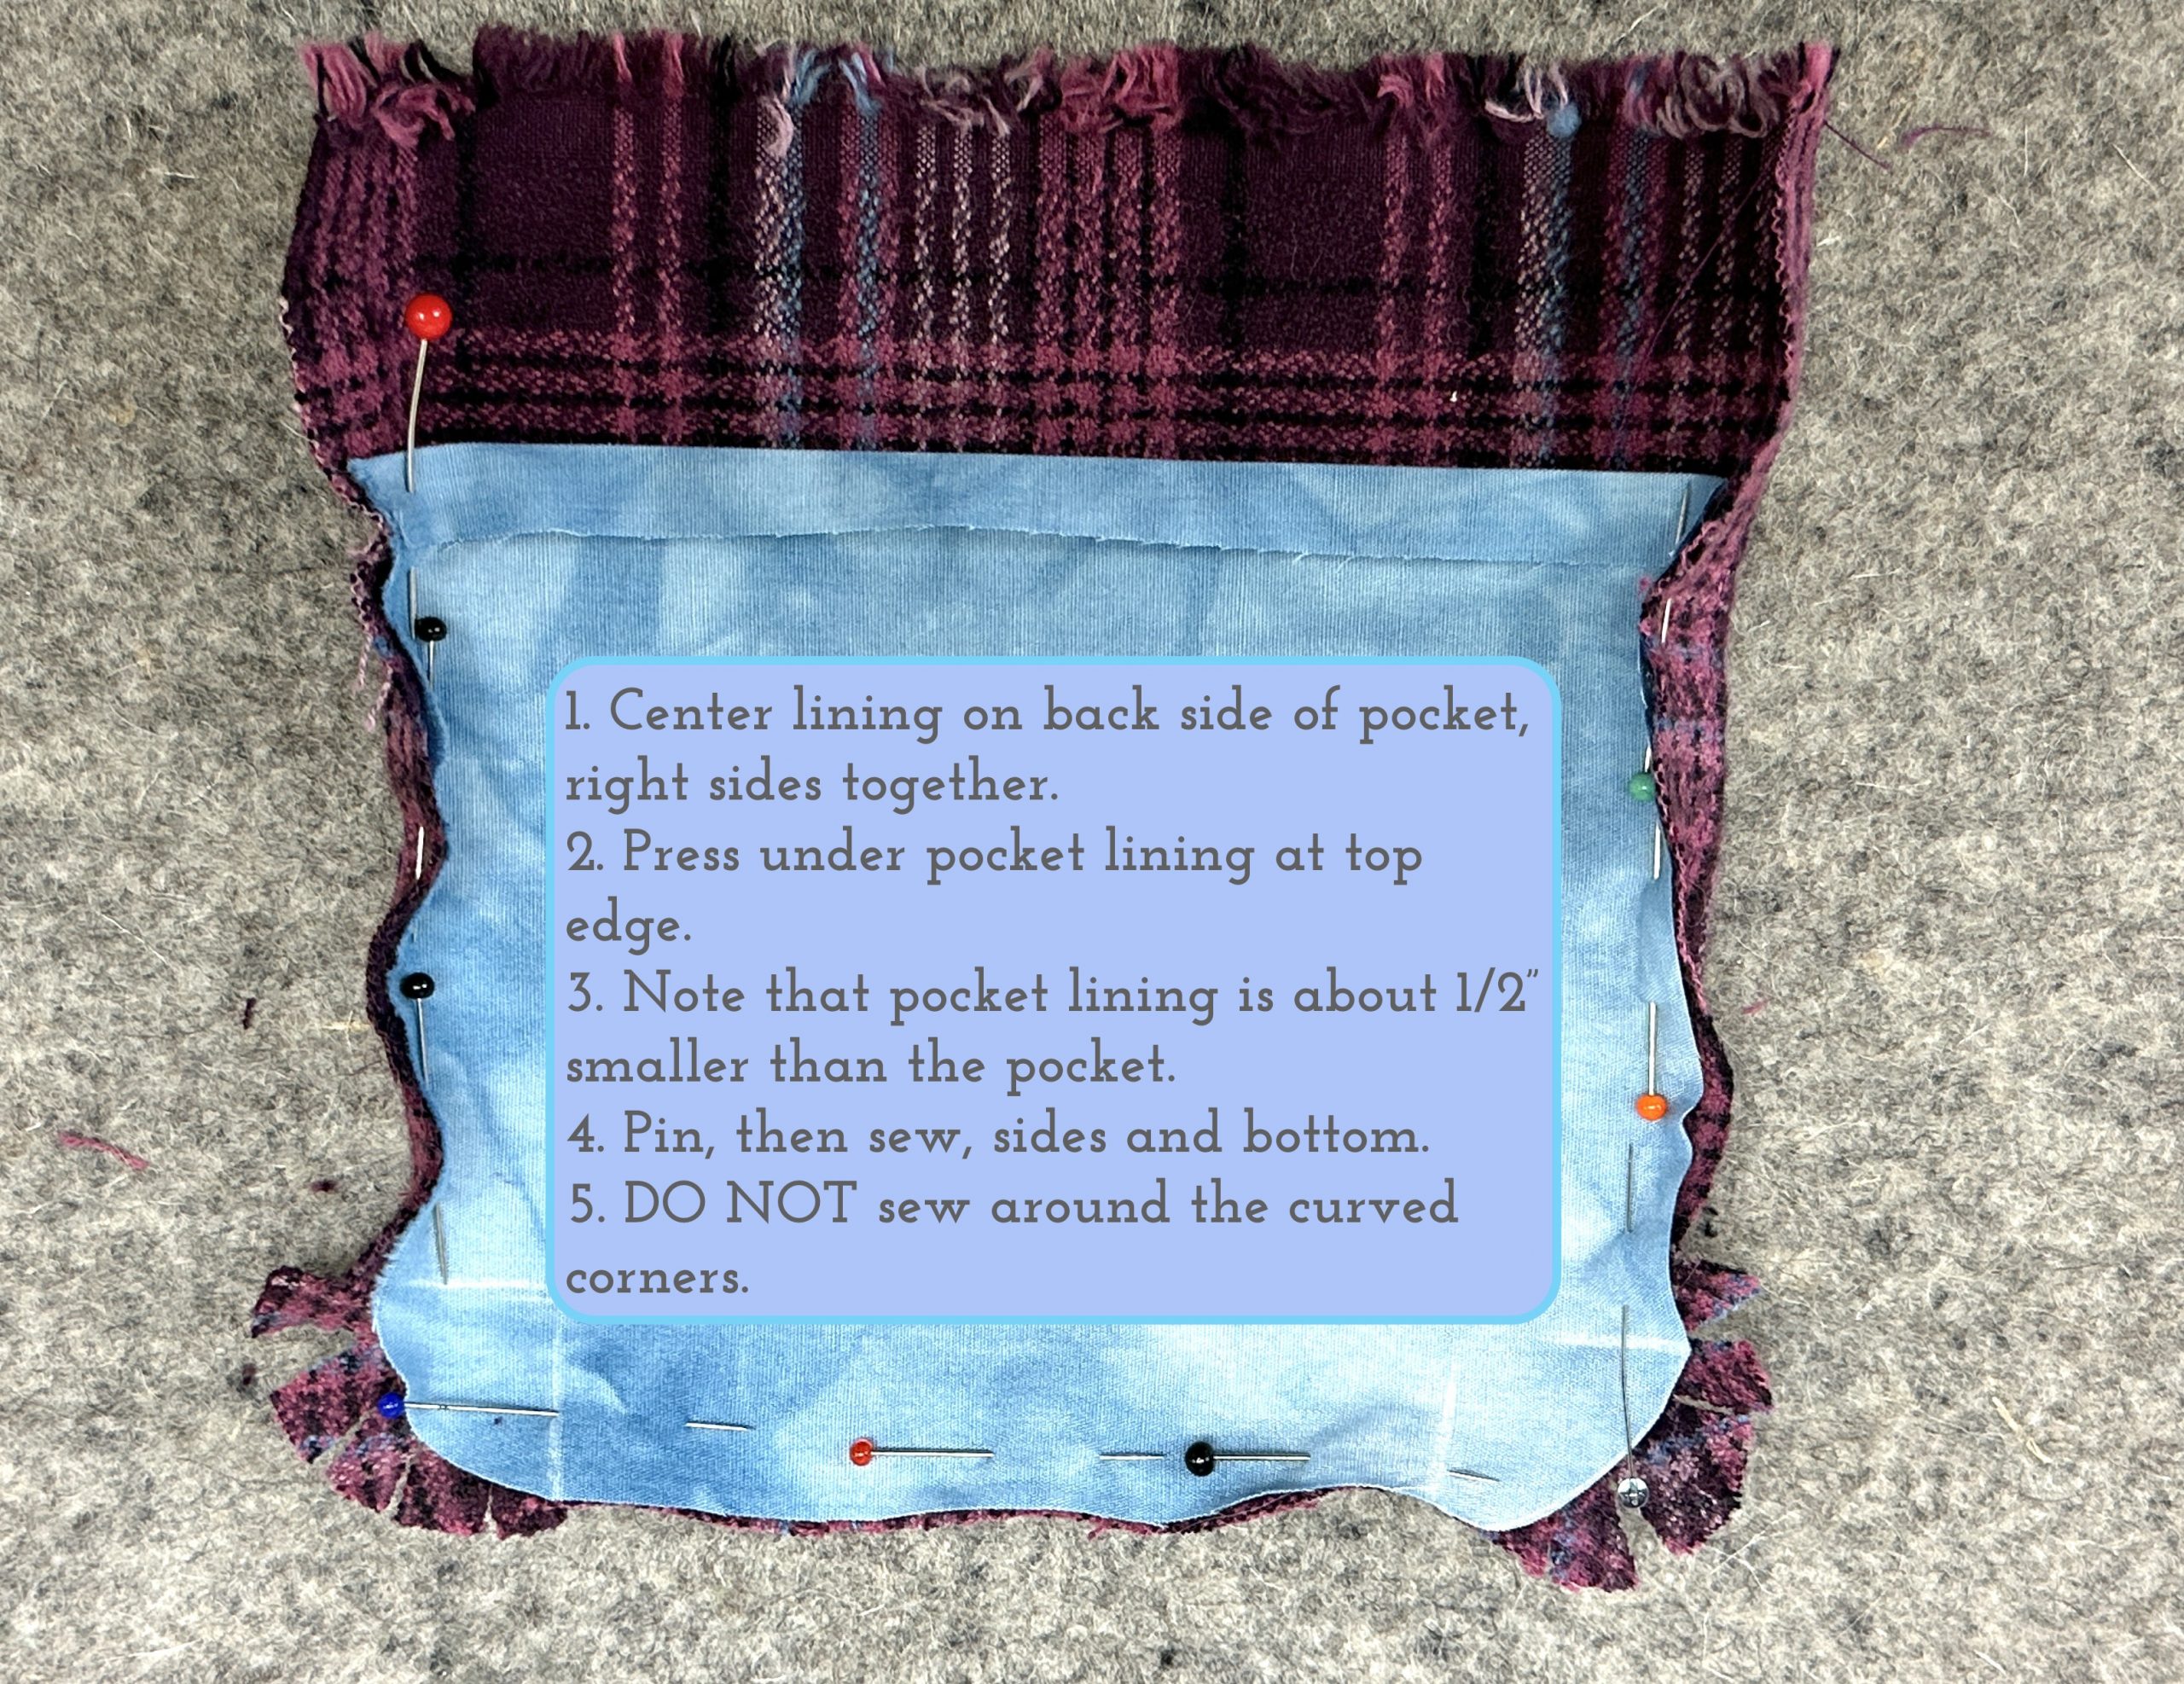
Press under 1/4-1/2″ at the top (see photo). Sew the lining to the exterior of the pocket with 1/4″ seams, right sides together, on the sides and bottom ONLY, but SKIP sewing those fiddly curves at the bottom.
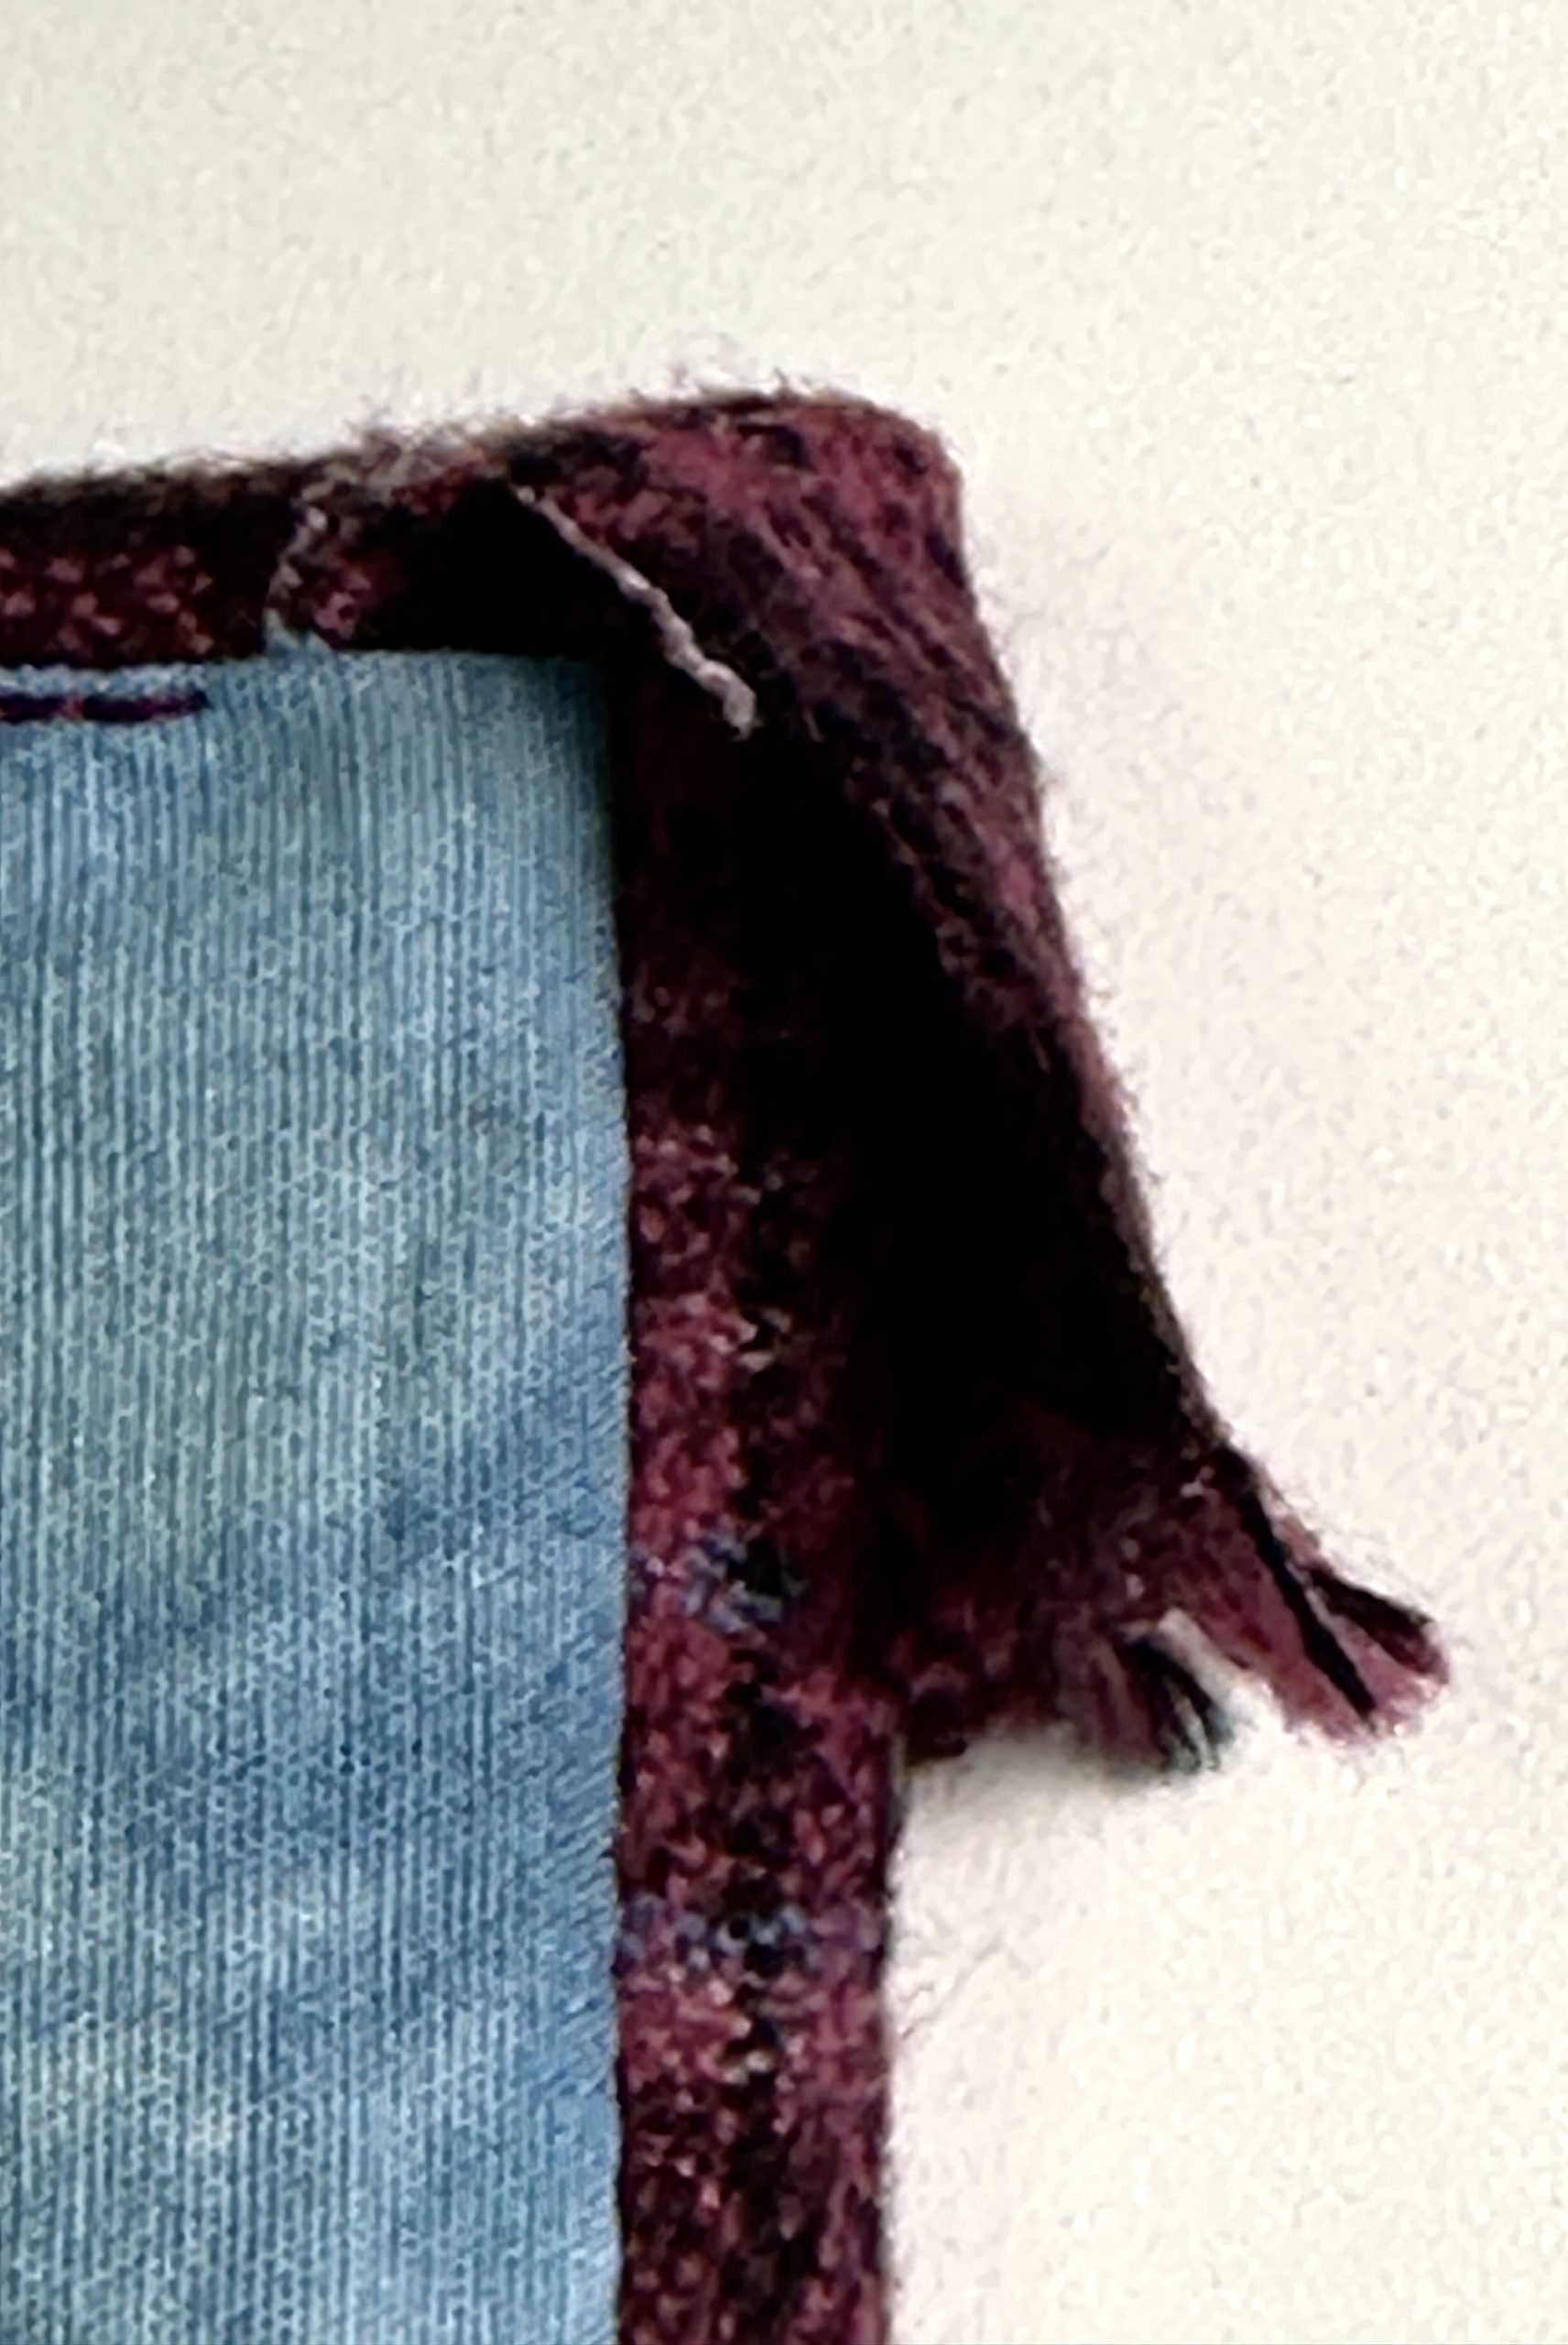
Turn the pocket right sides out and press so that the lining is centered and you see about 3/8″ of the fashion fabric on the edges.
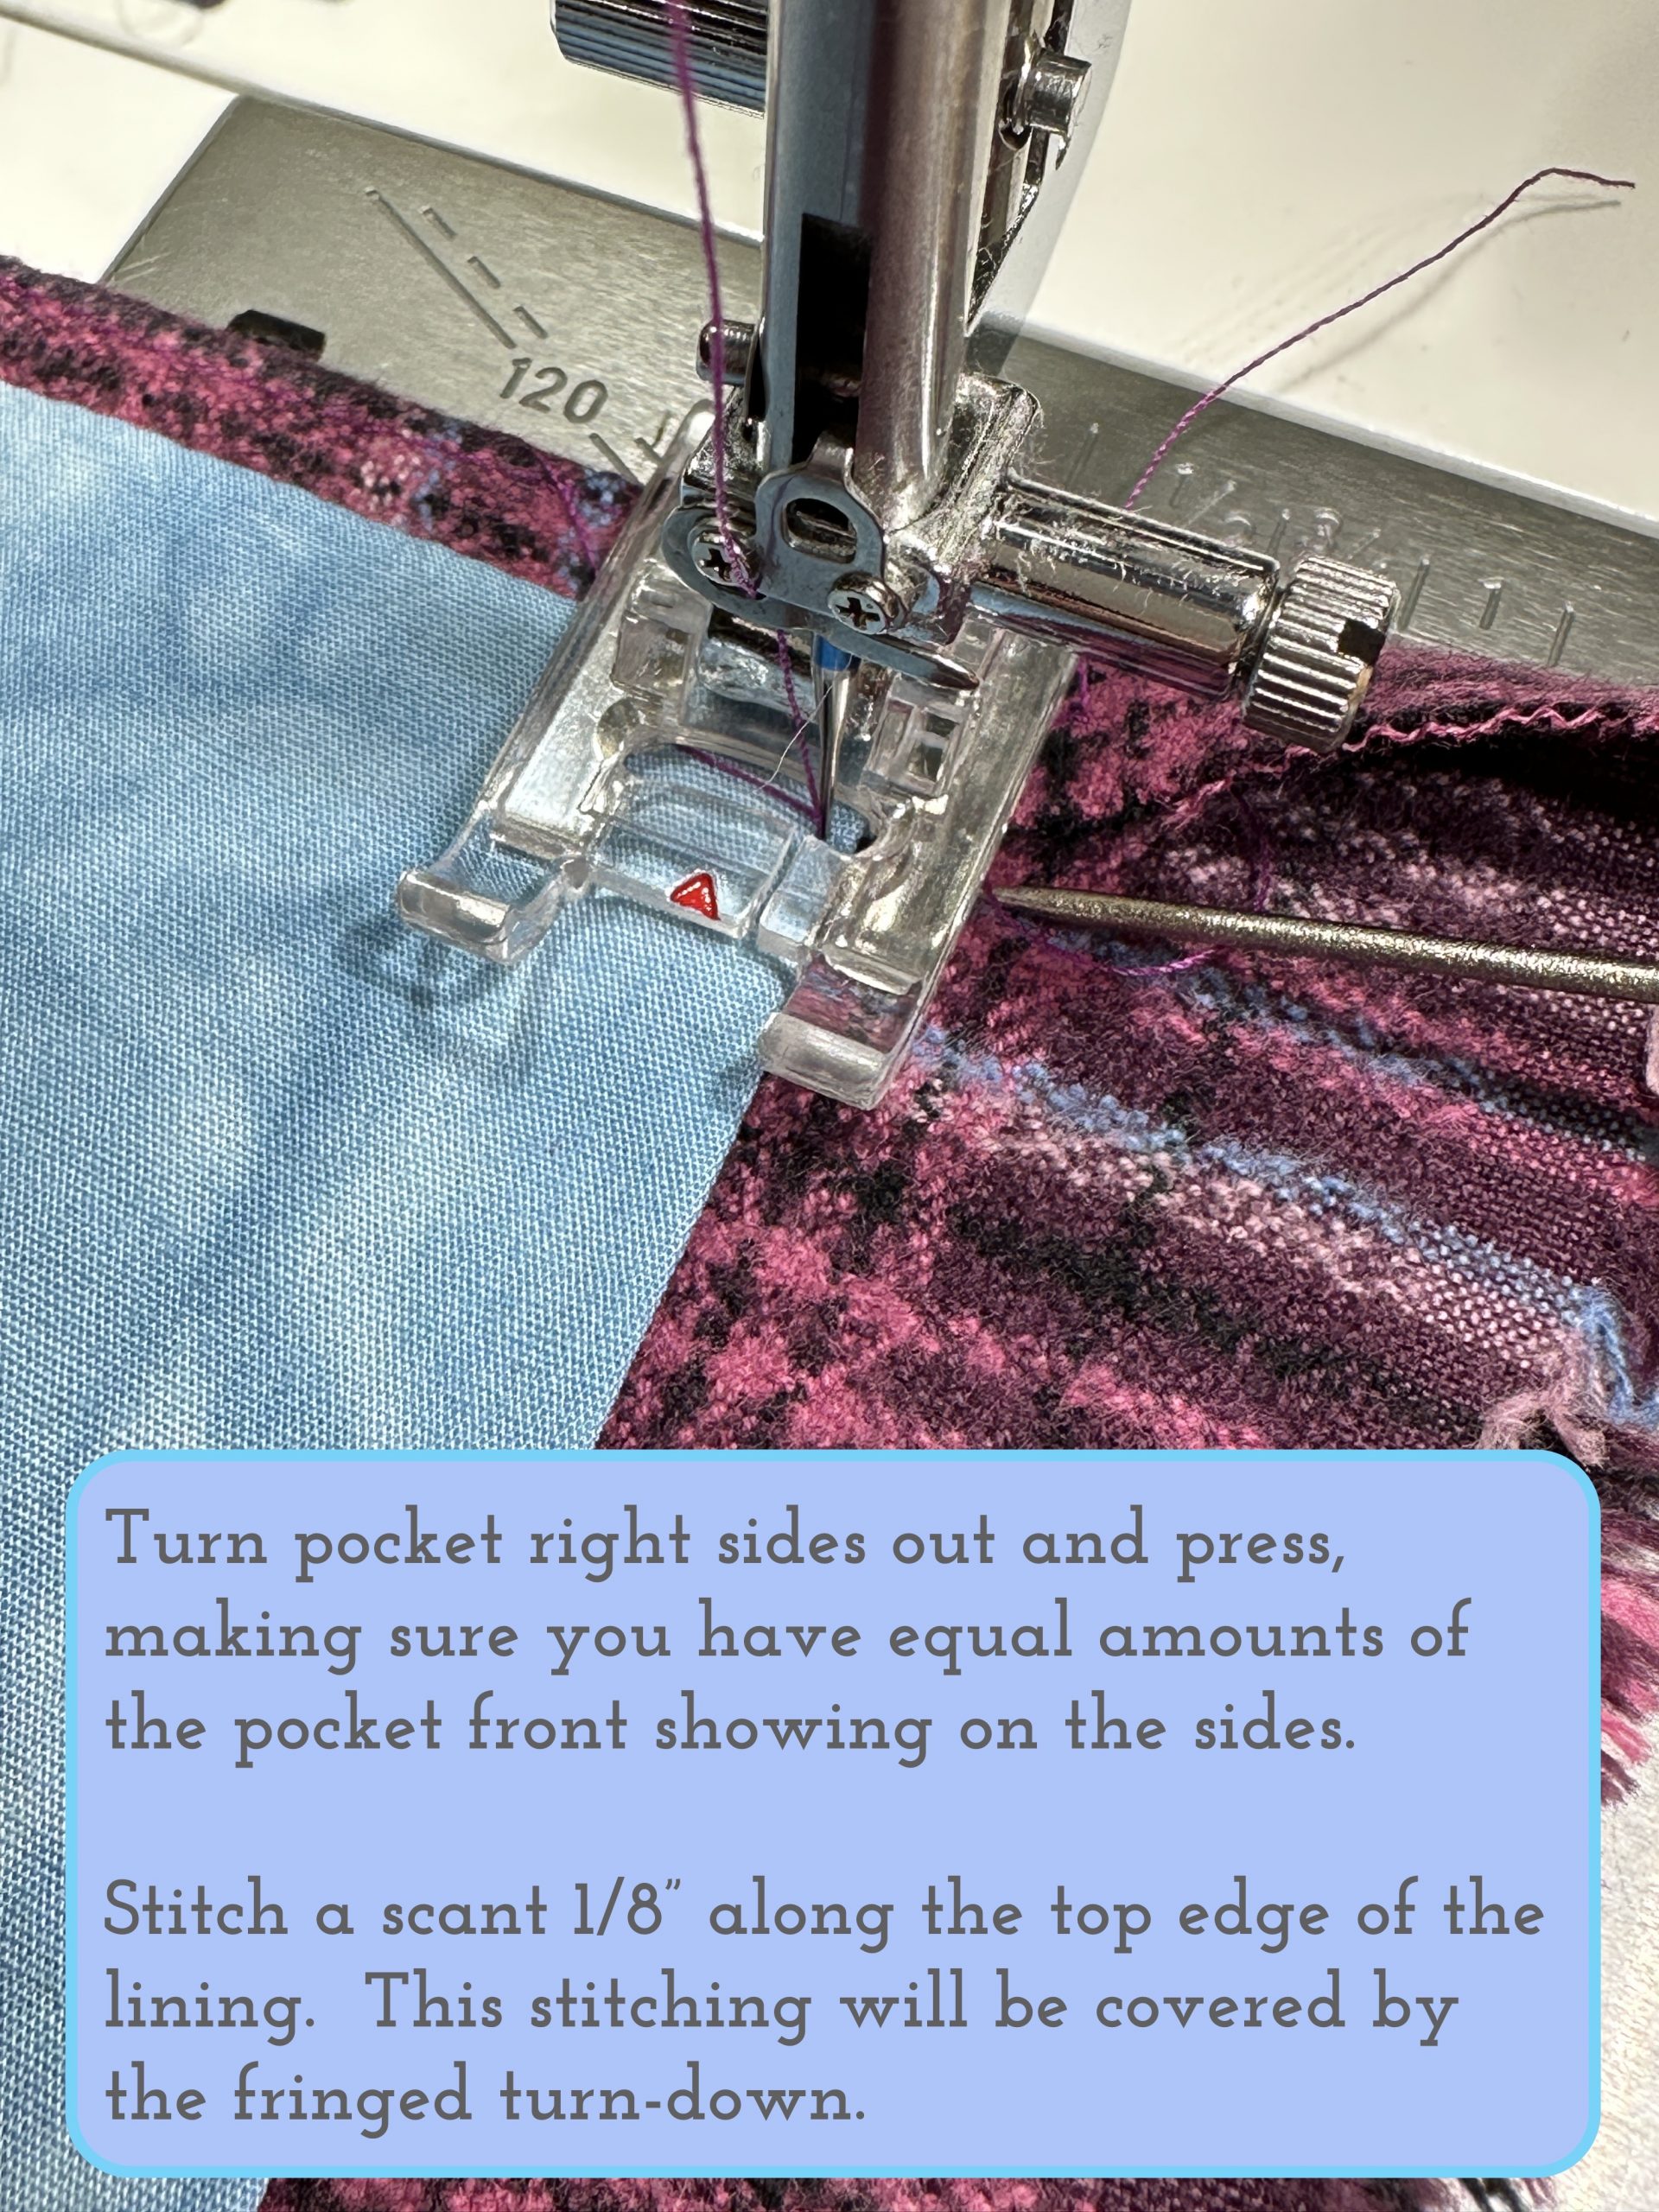
For my fringe-flap, I just tugged it out of the way. Then I edge-stitched the top (turned under) edge of the lining started about 1/2″ away from the outer edges of the pocket — this allows you some leeway when you deal with hiding that flap. Clarification to caption above: the turn-down is on the outside and doesn’t cover the lining, but the lining stitching is hidden by / covered by the turned down flap.
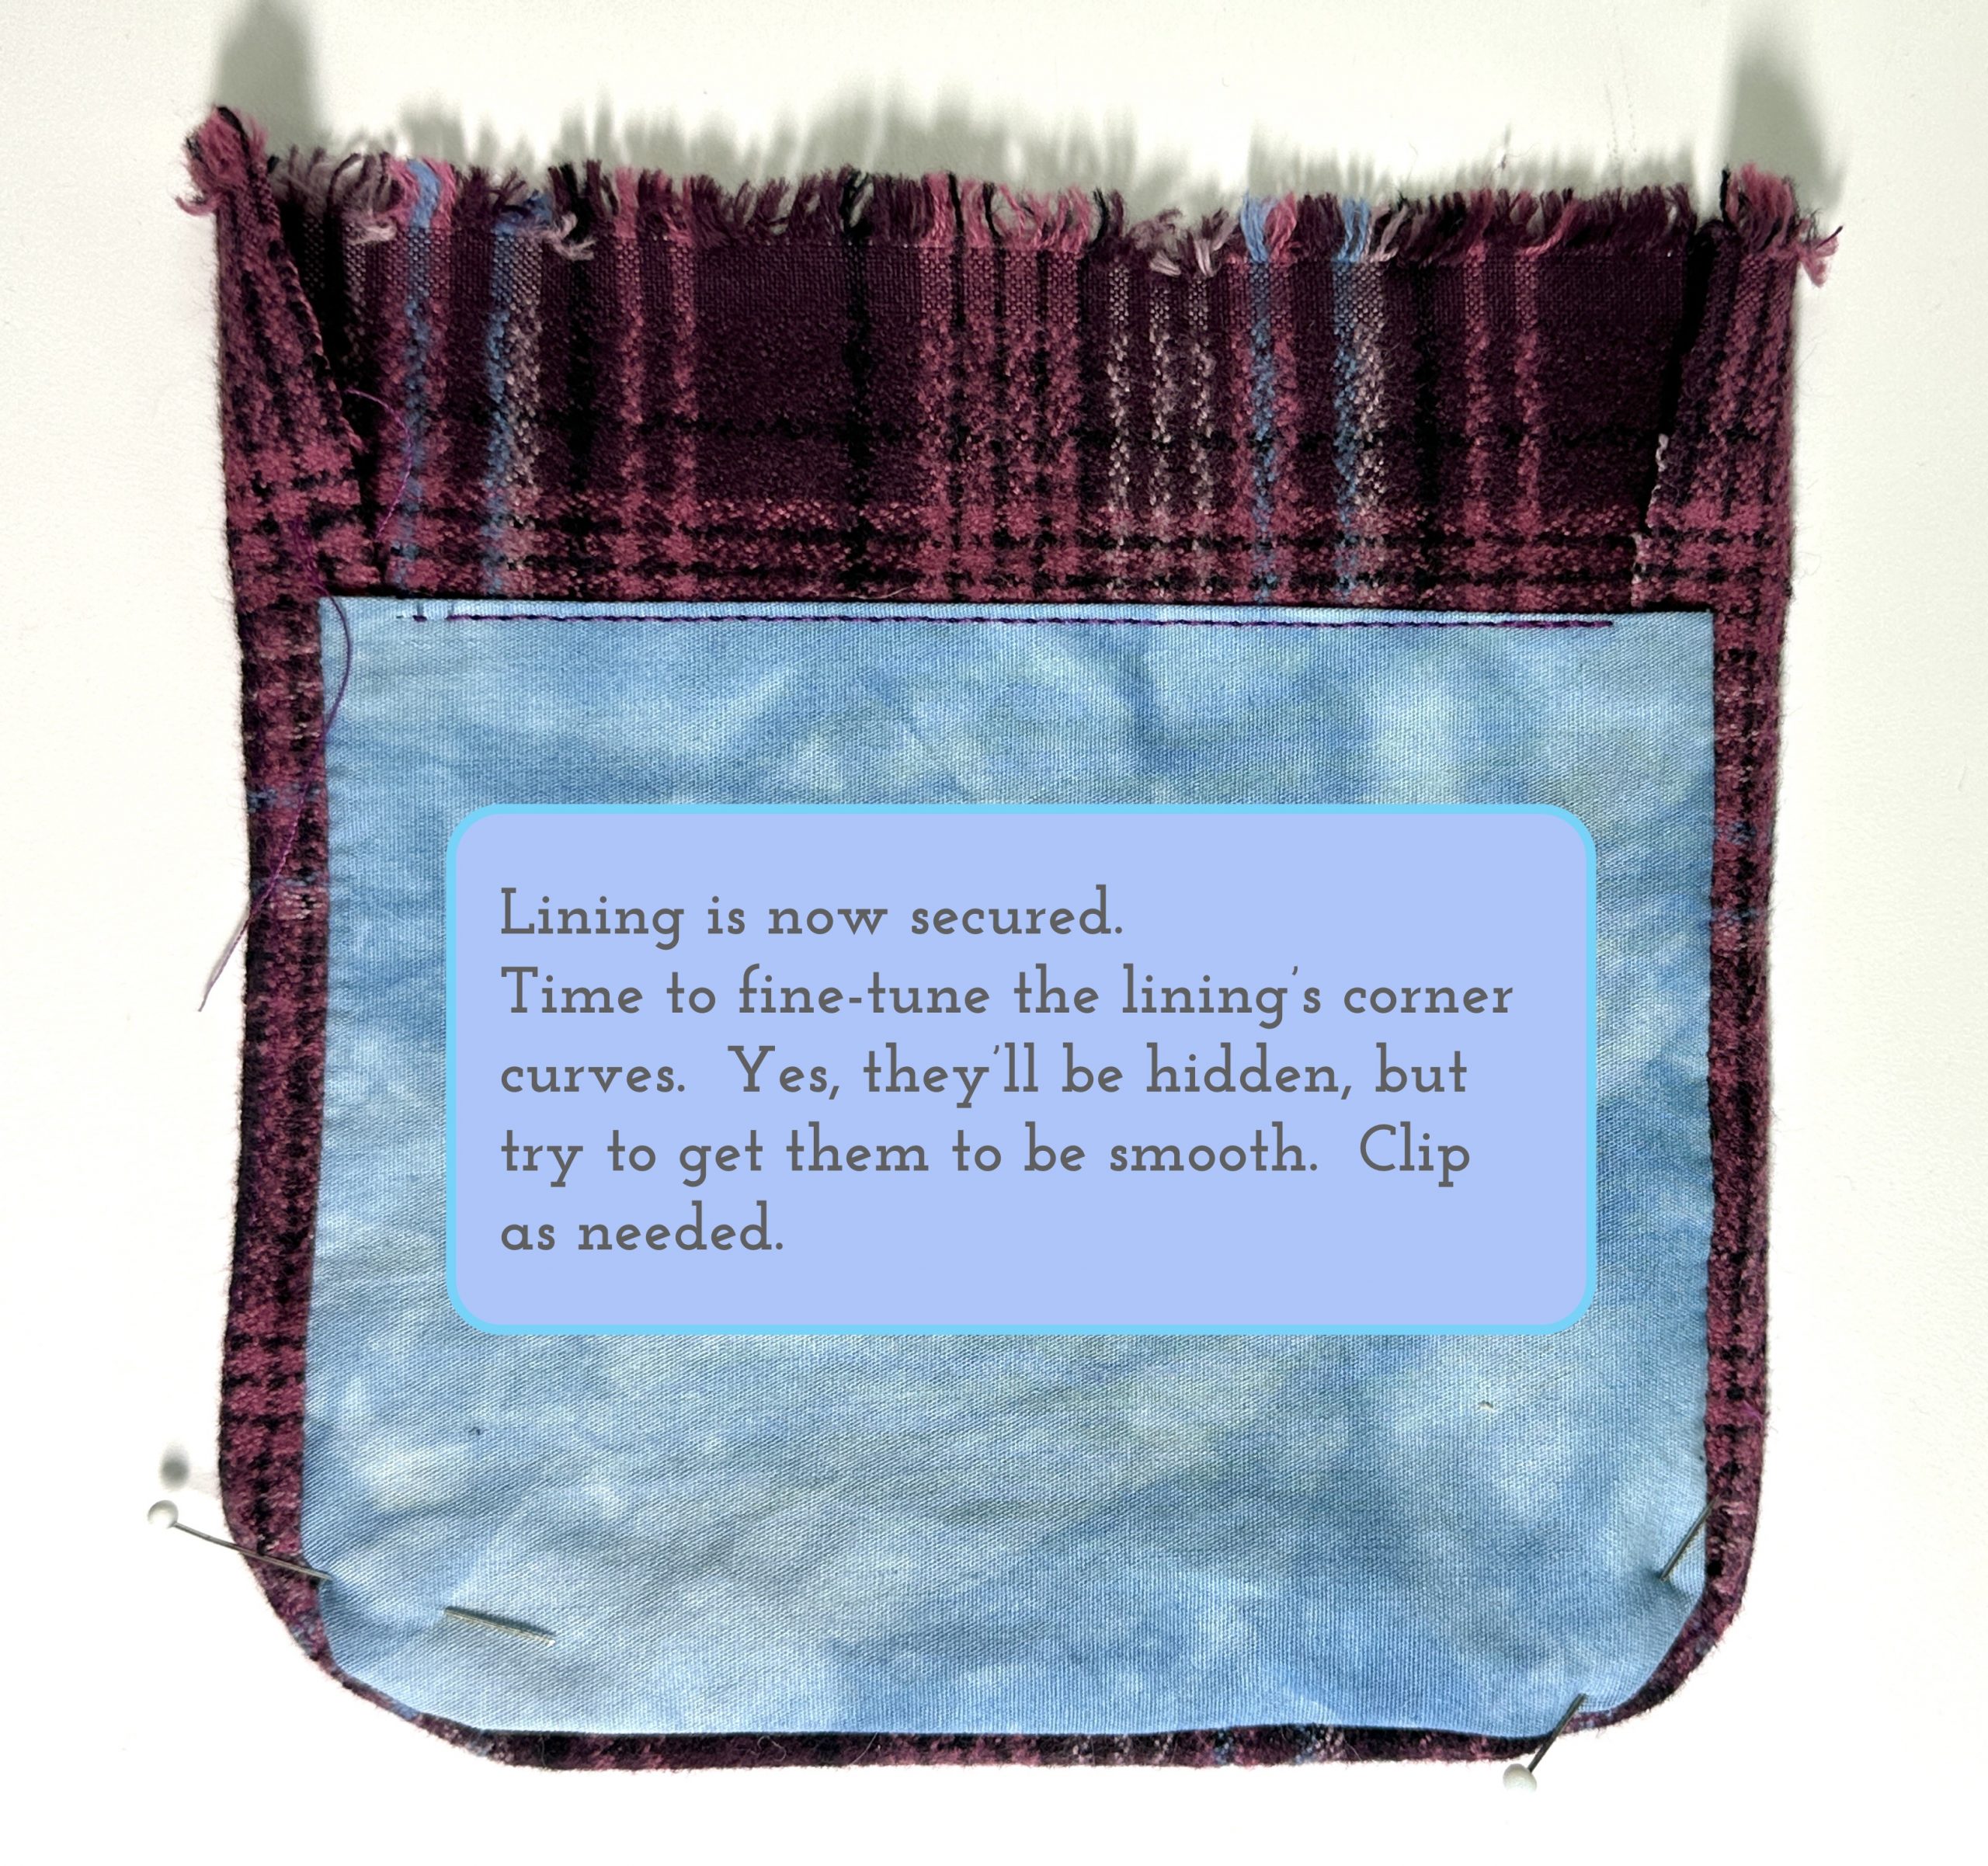
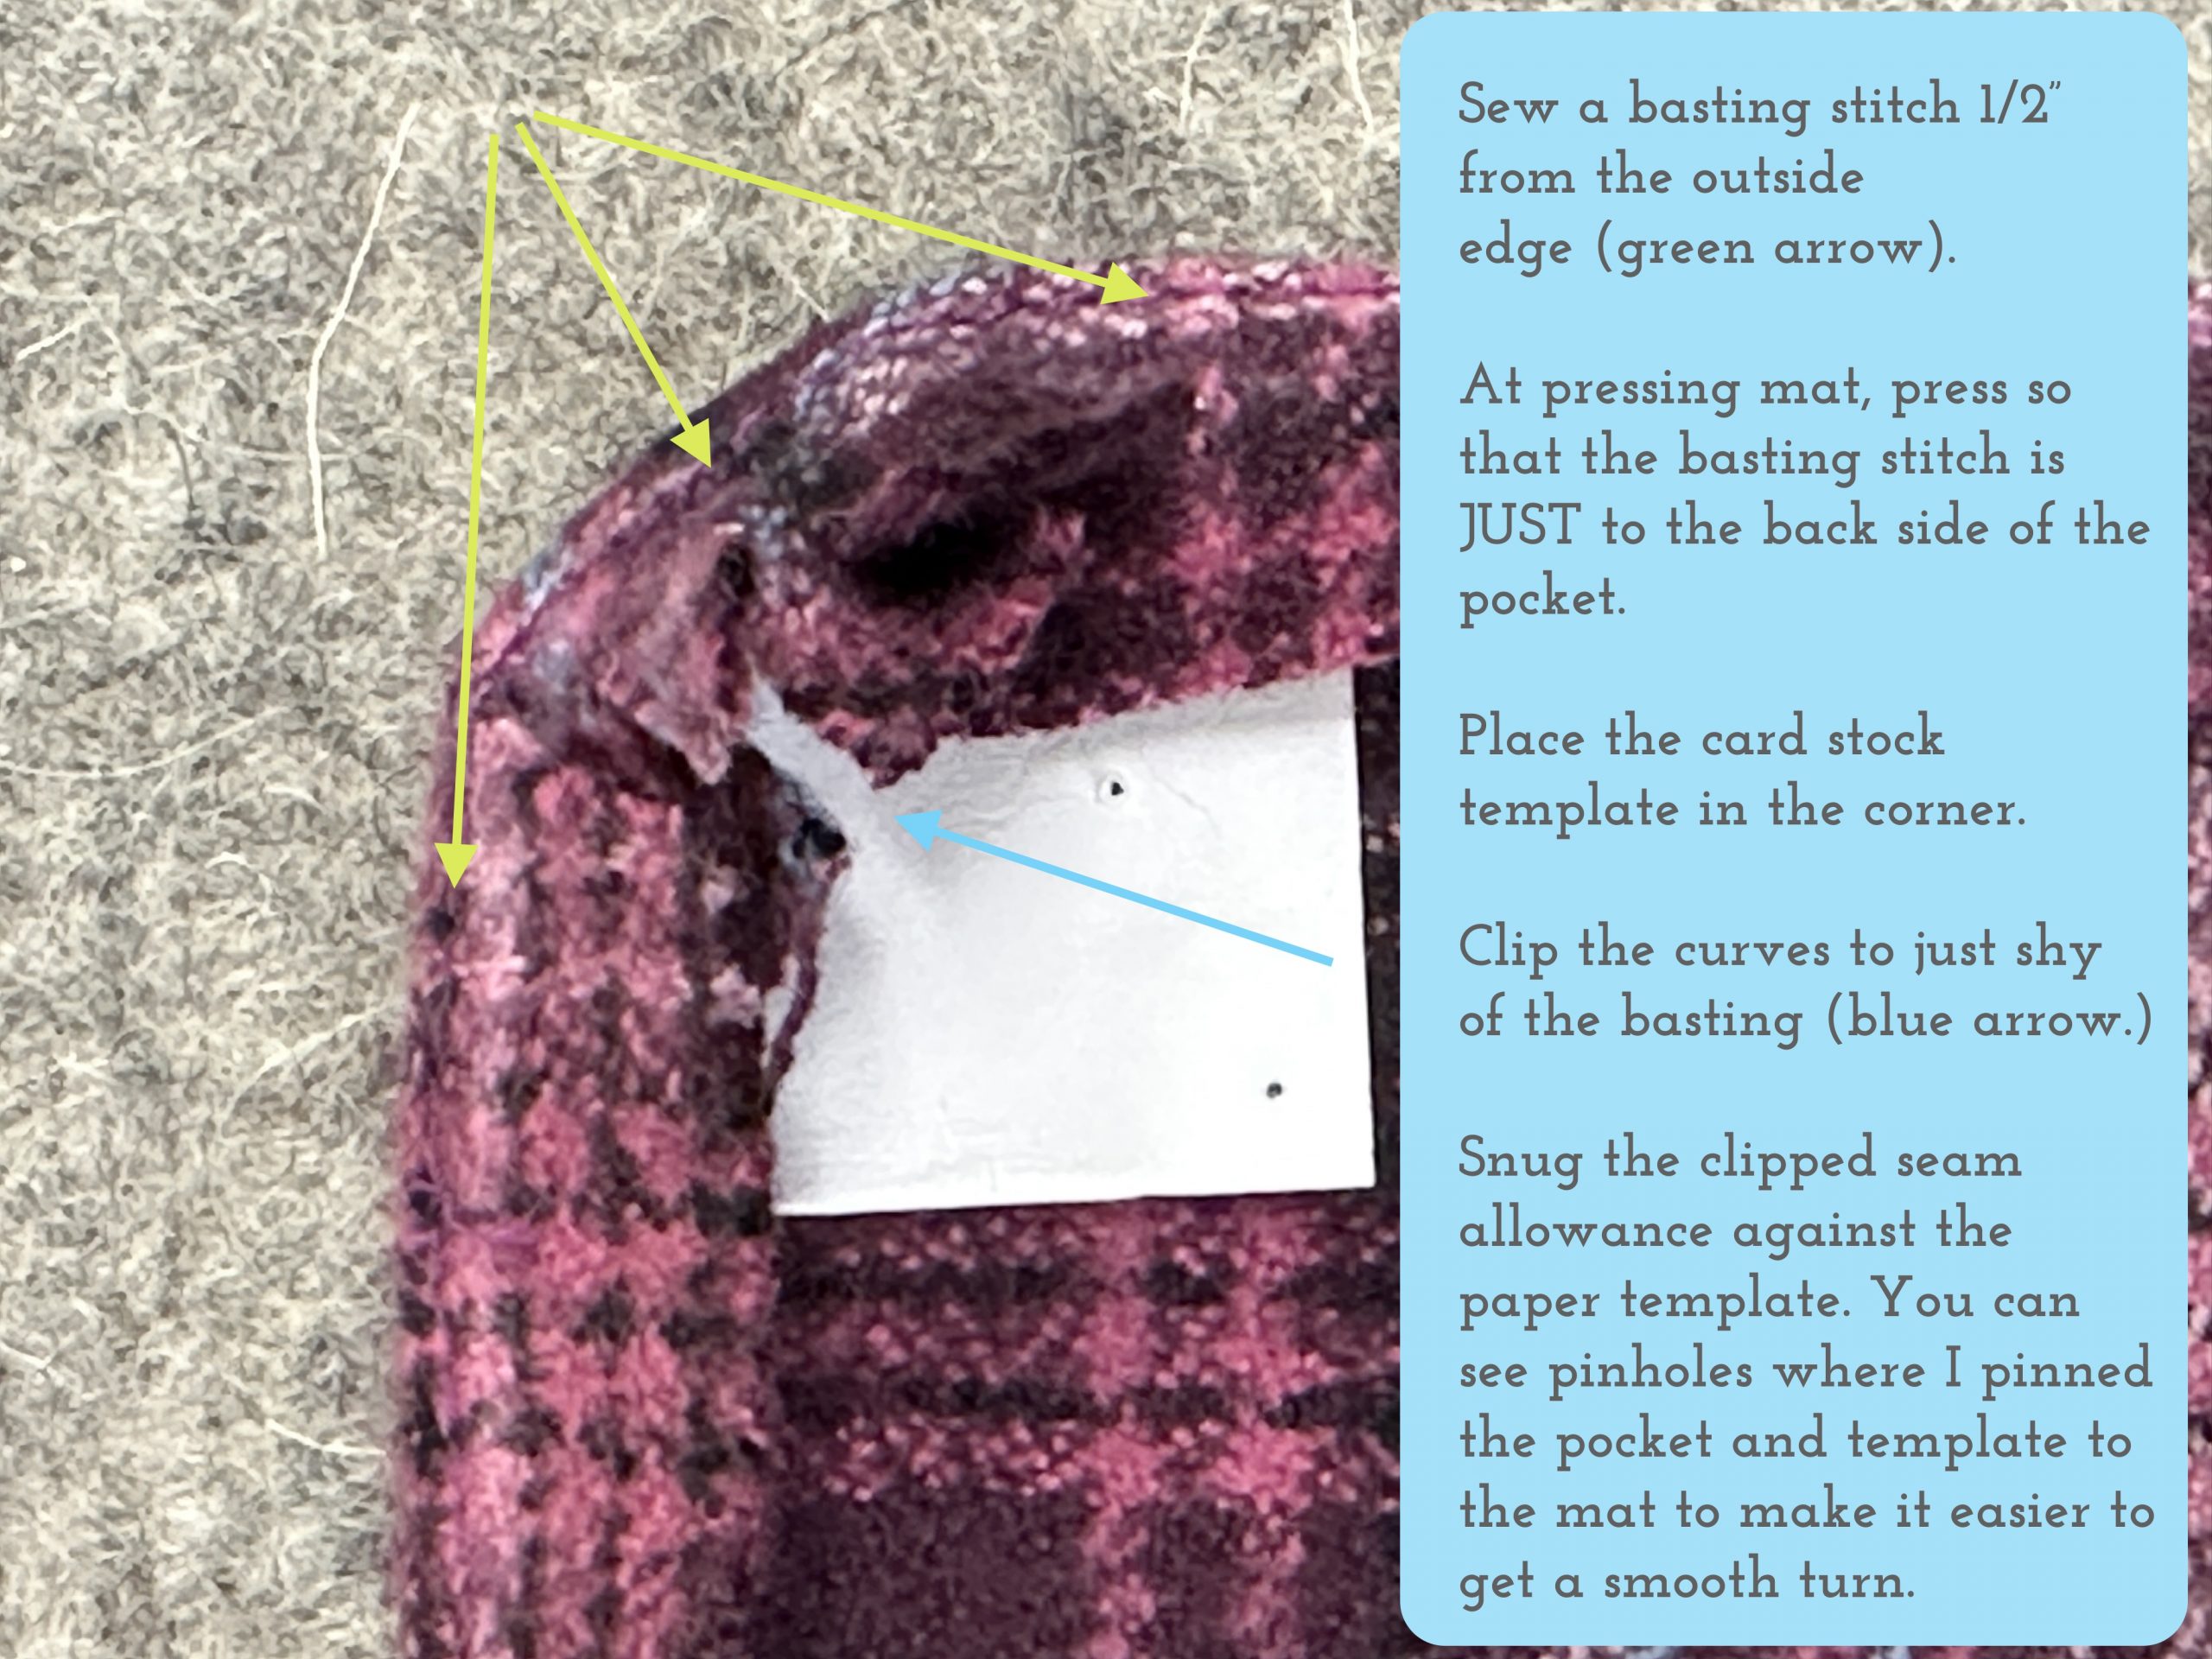
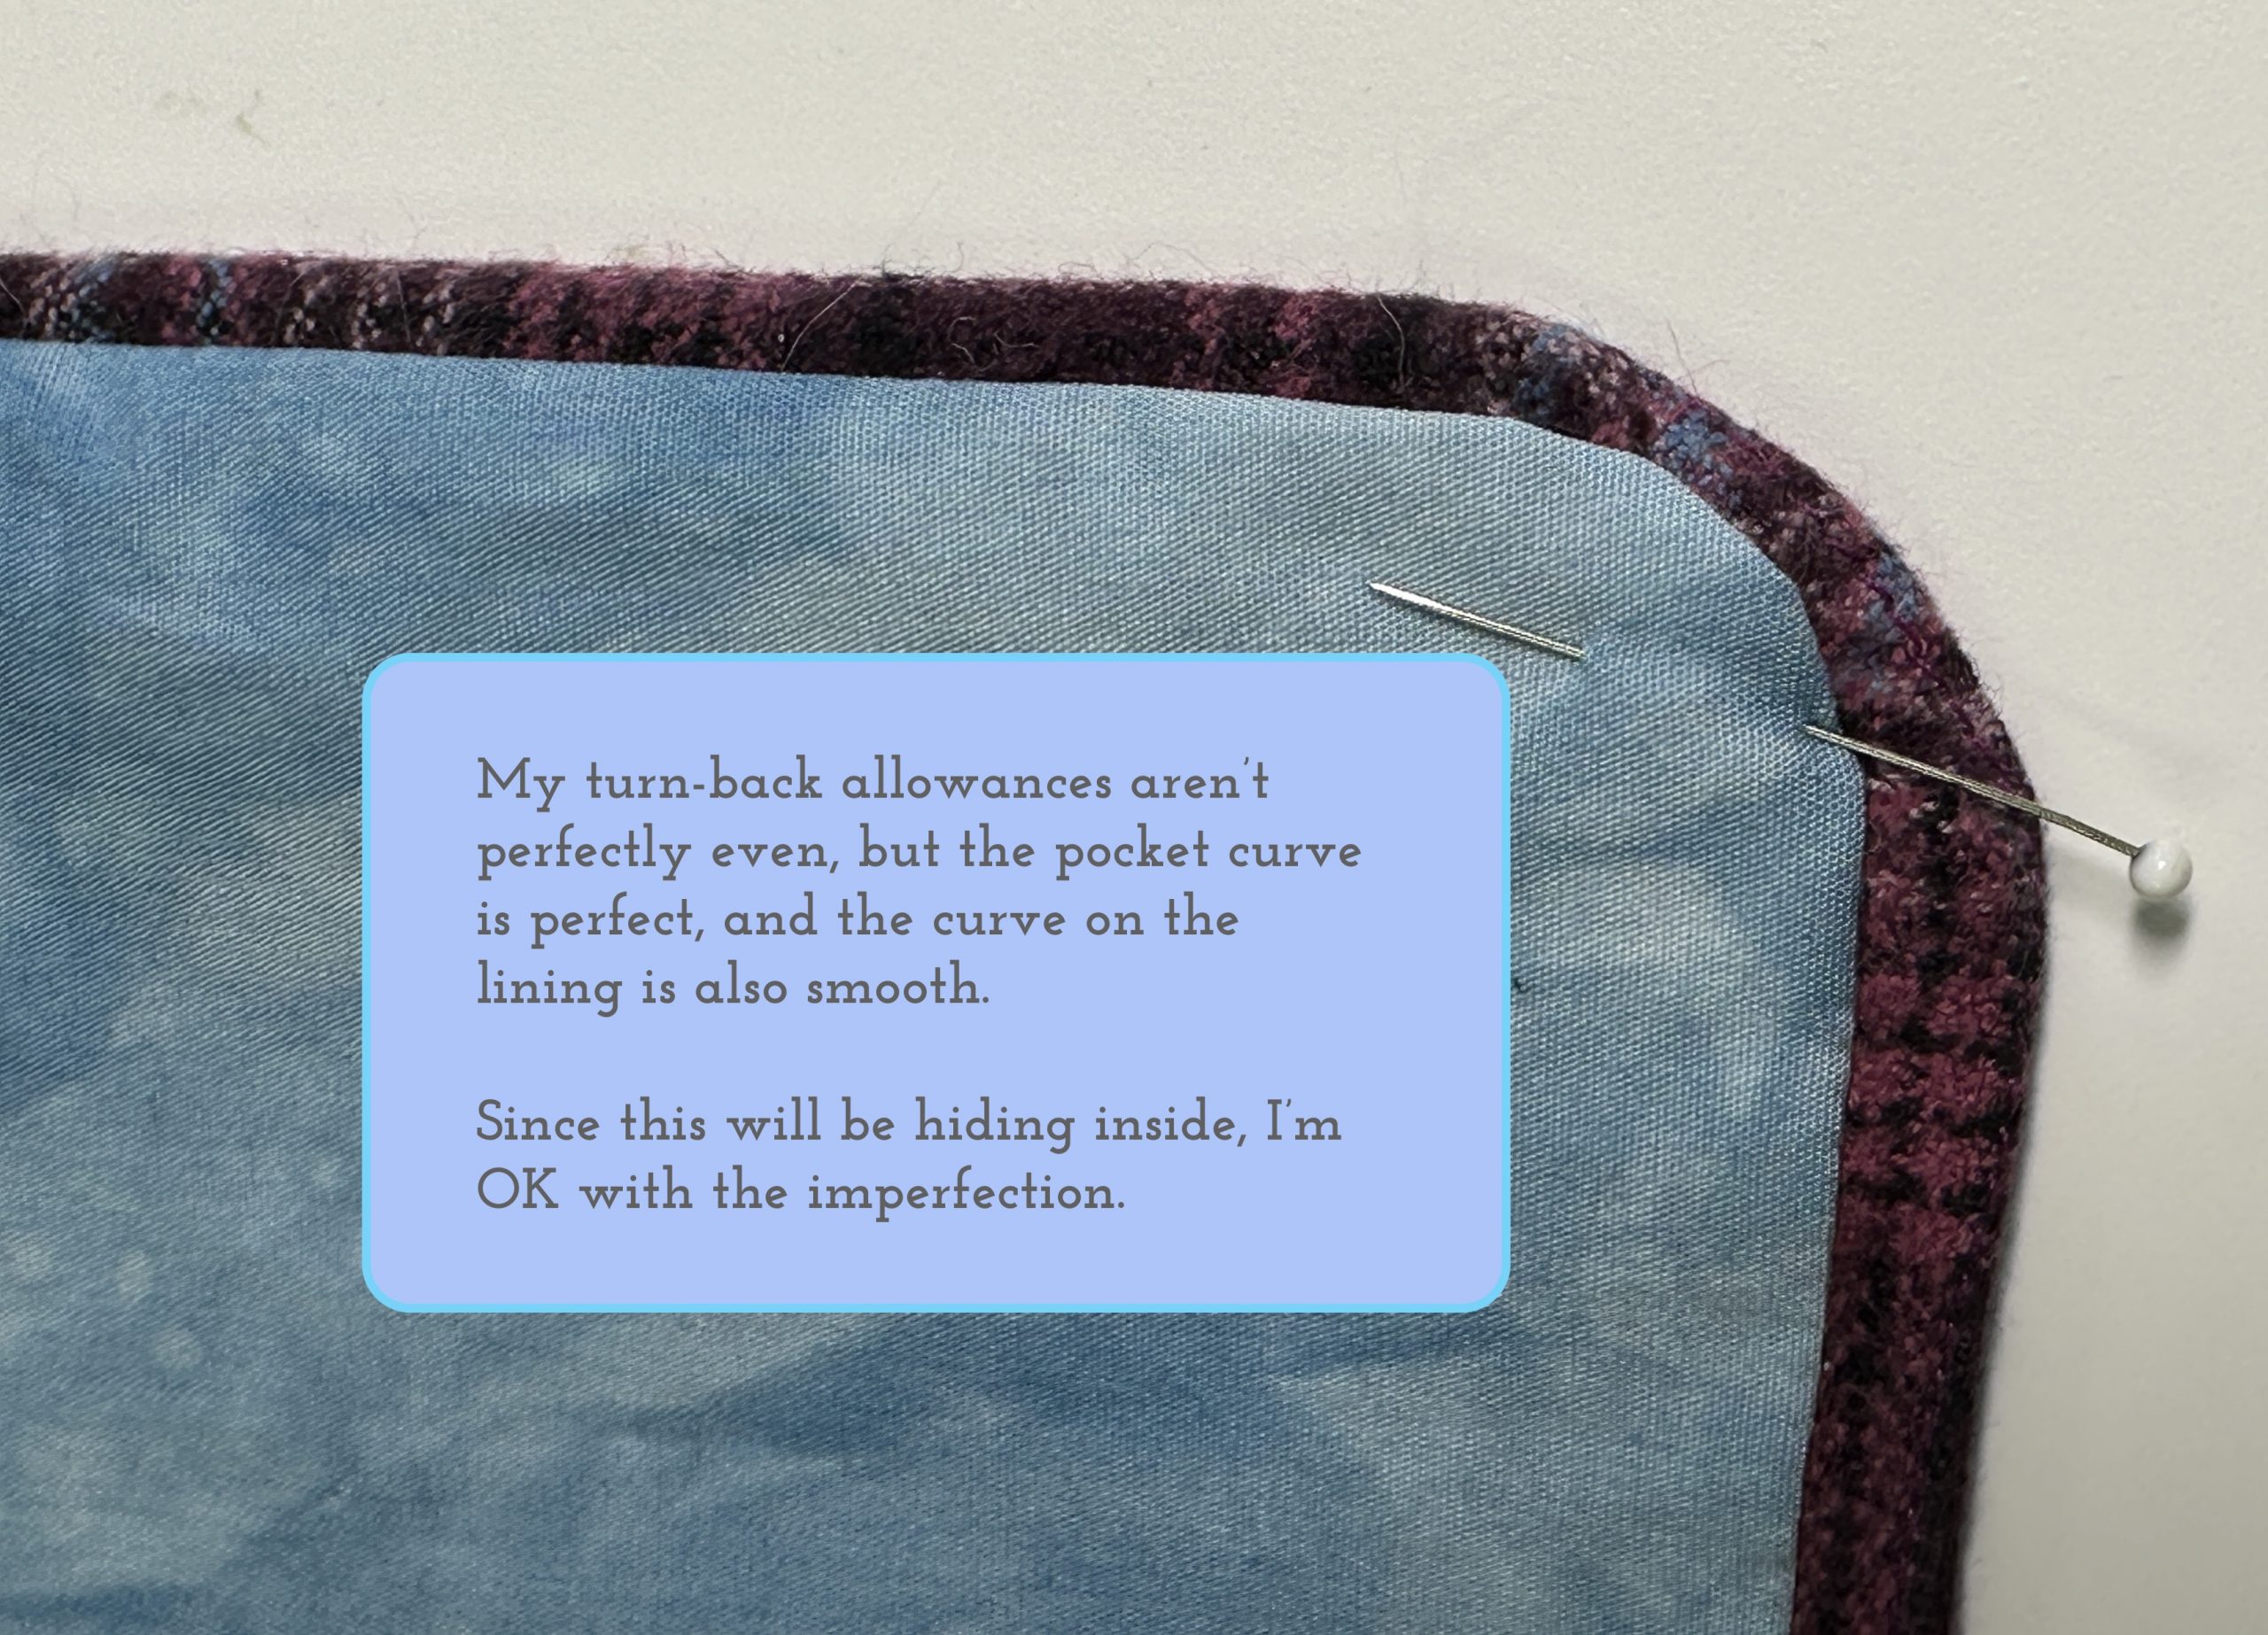
The corners are, honestly, a bit of a nuisance, but you can do it! Just tuck them inside, clip into the seam allowance as needed to facilitate turning and press the daylights out of them. I have become a fan of–don’t faint–washable glue stick. It works and is easier than pins, clips and whatnot. Just use a toothpick or the tip of your seam ripper to dab some between the seam allowances of the lining and fashion fabric to hold them together. The glue will wash out in the first laundering! I prefer glue stick to dots of white glue because it is already sorta dry and doesn’t soak through the fabric or require extra drying time.
Here’s the lined and pressed pocket from the front side.
Next I needed to deal with that flap detail.
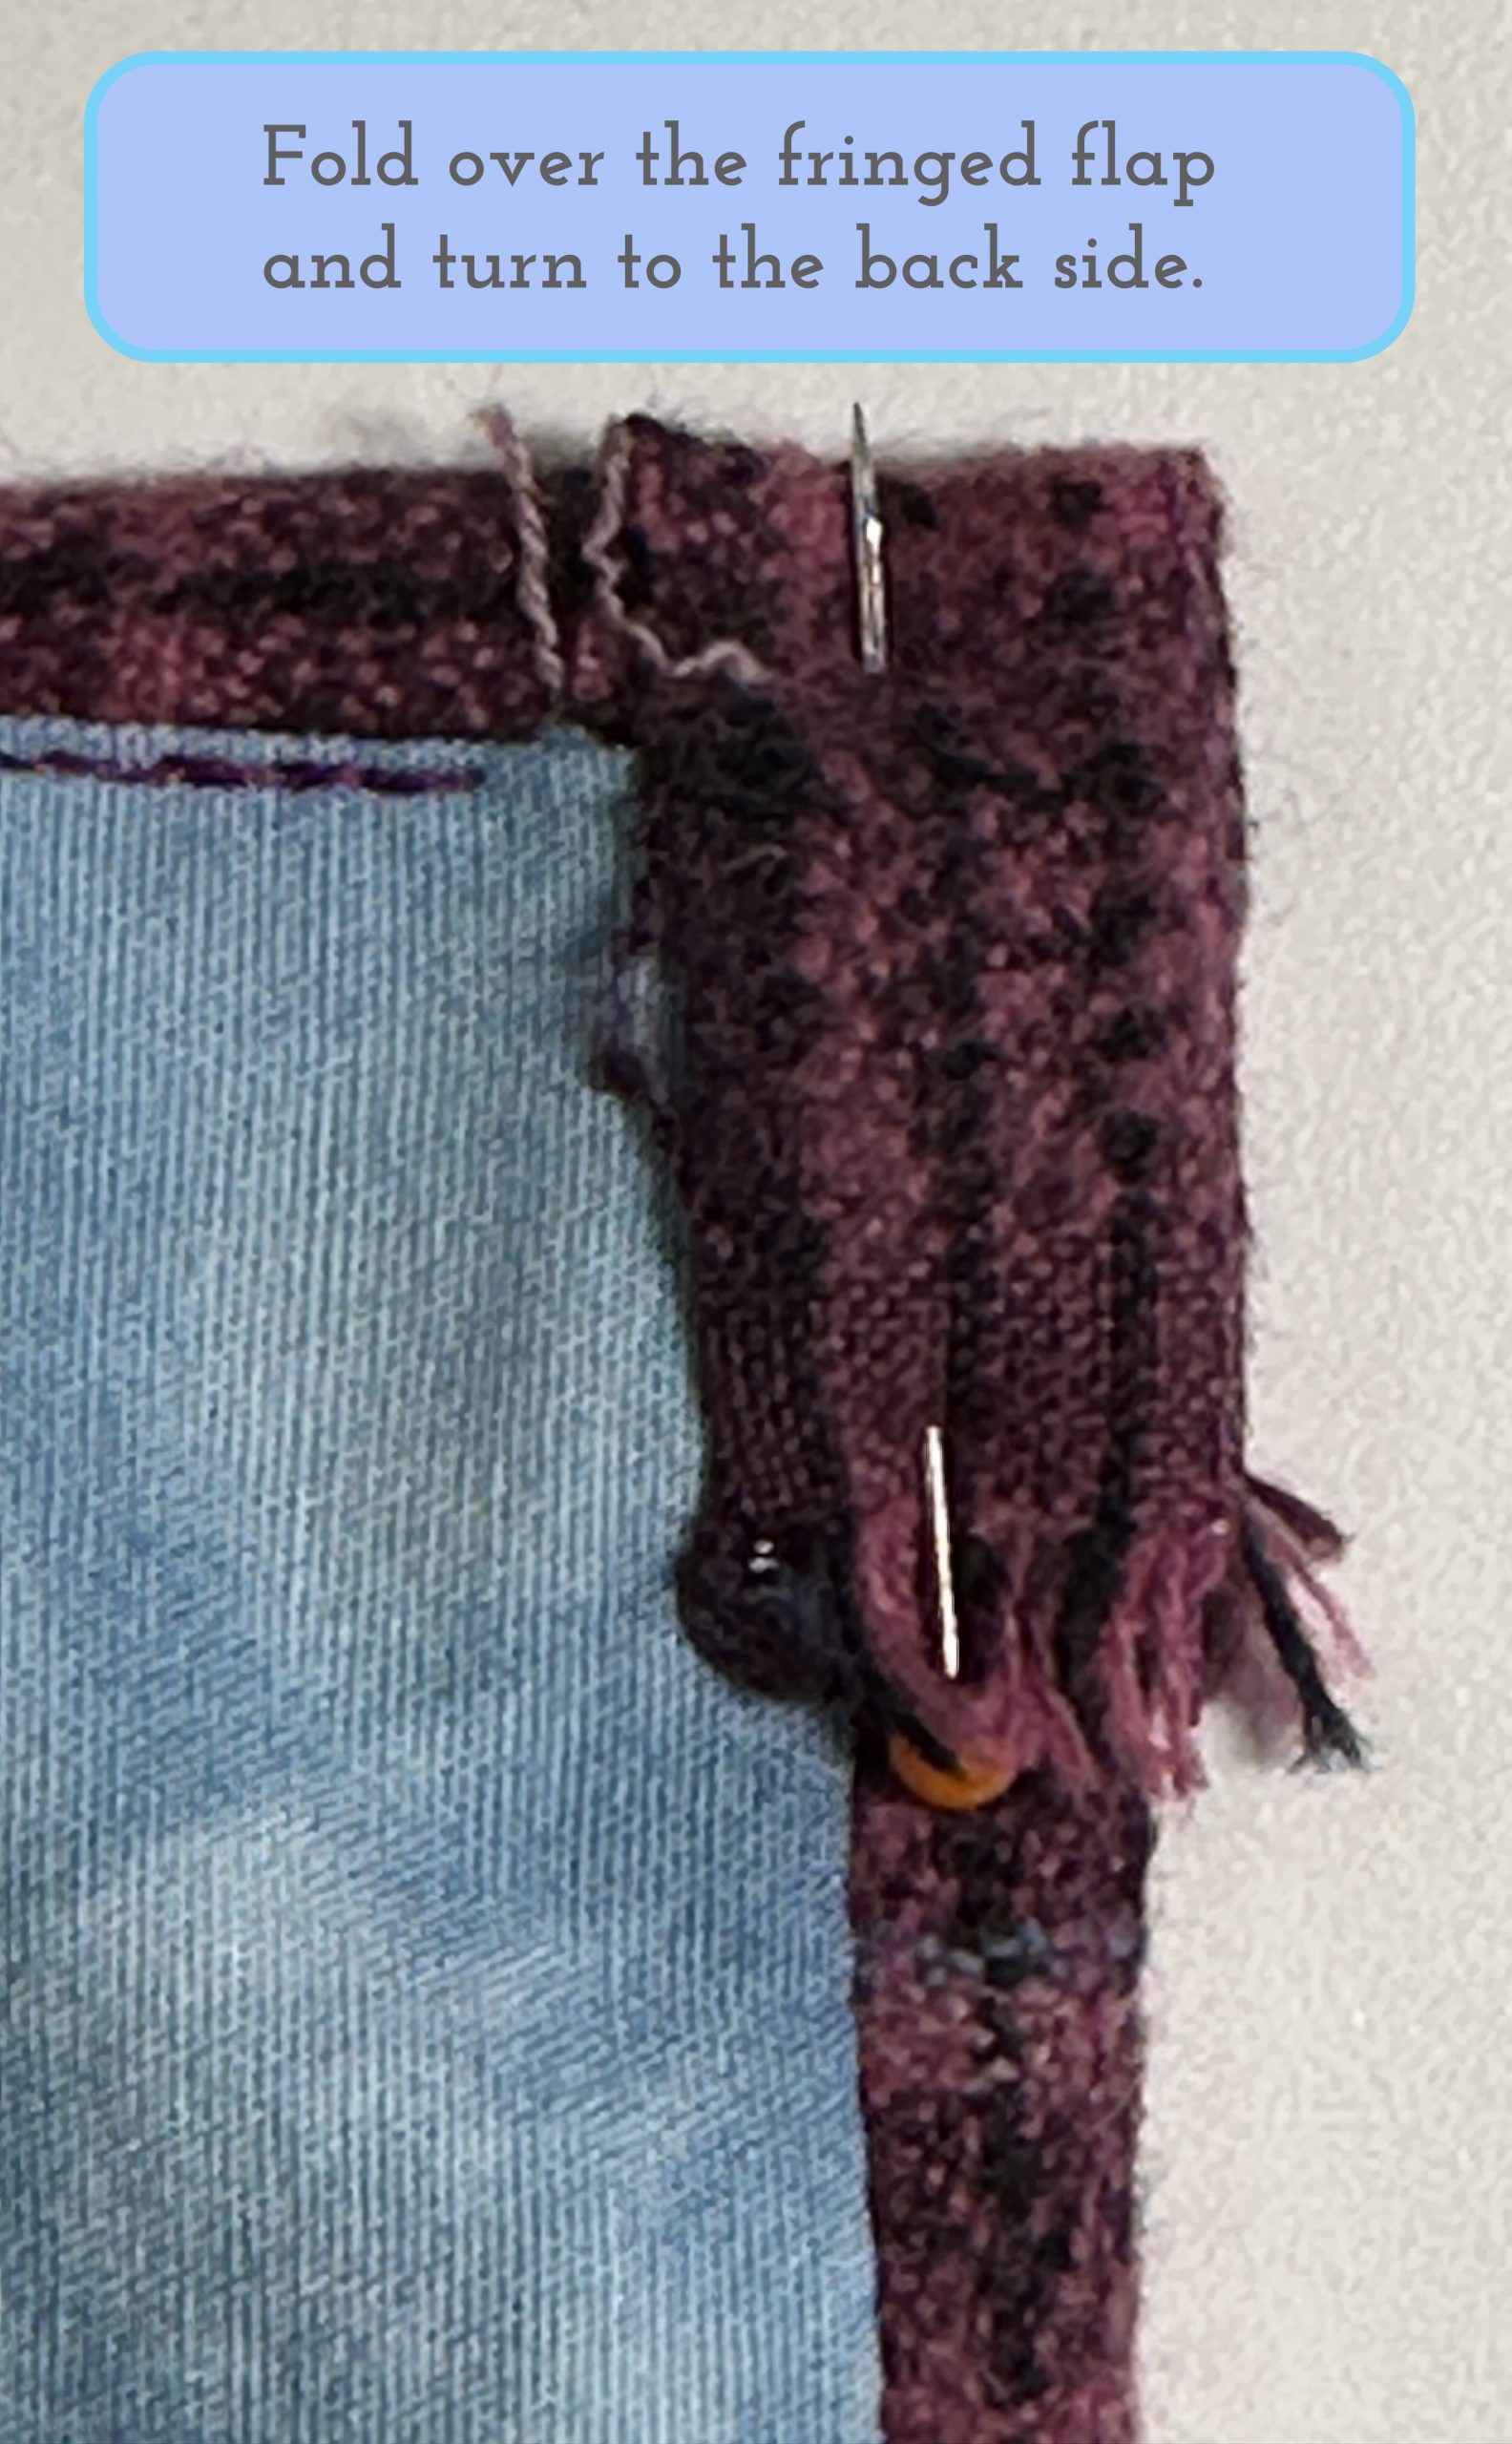
This is another spot where a dab of washable glue stick between each of the layers can help.
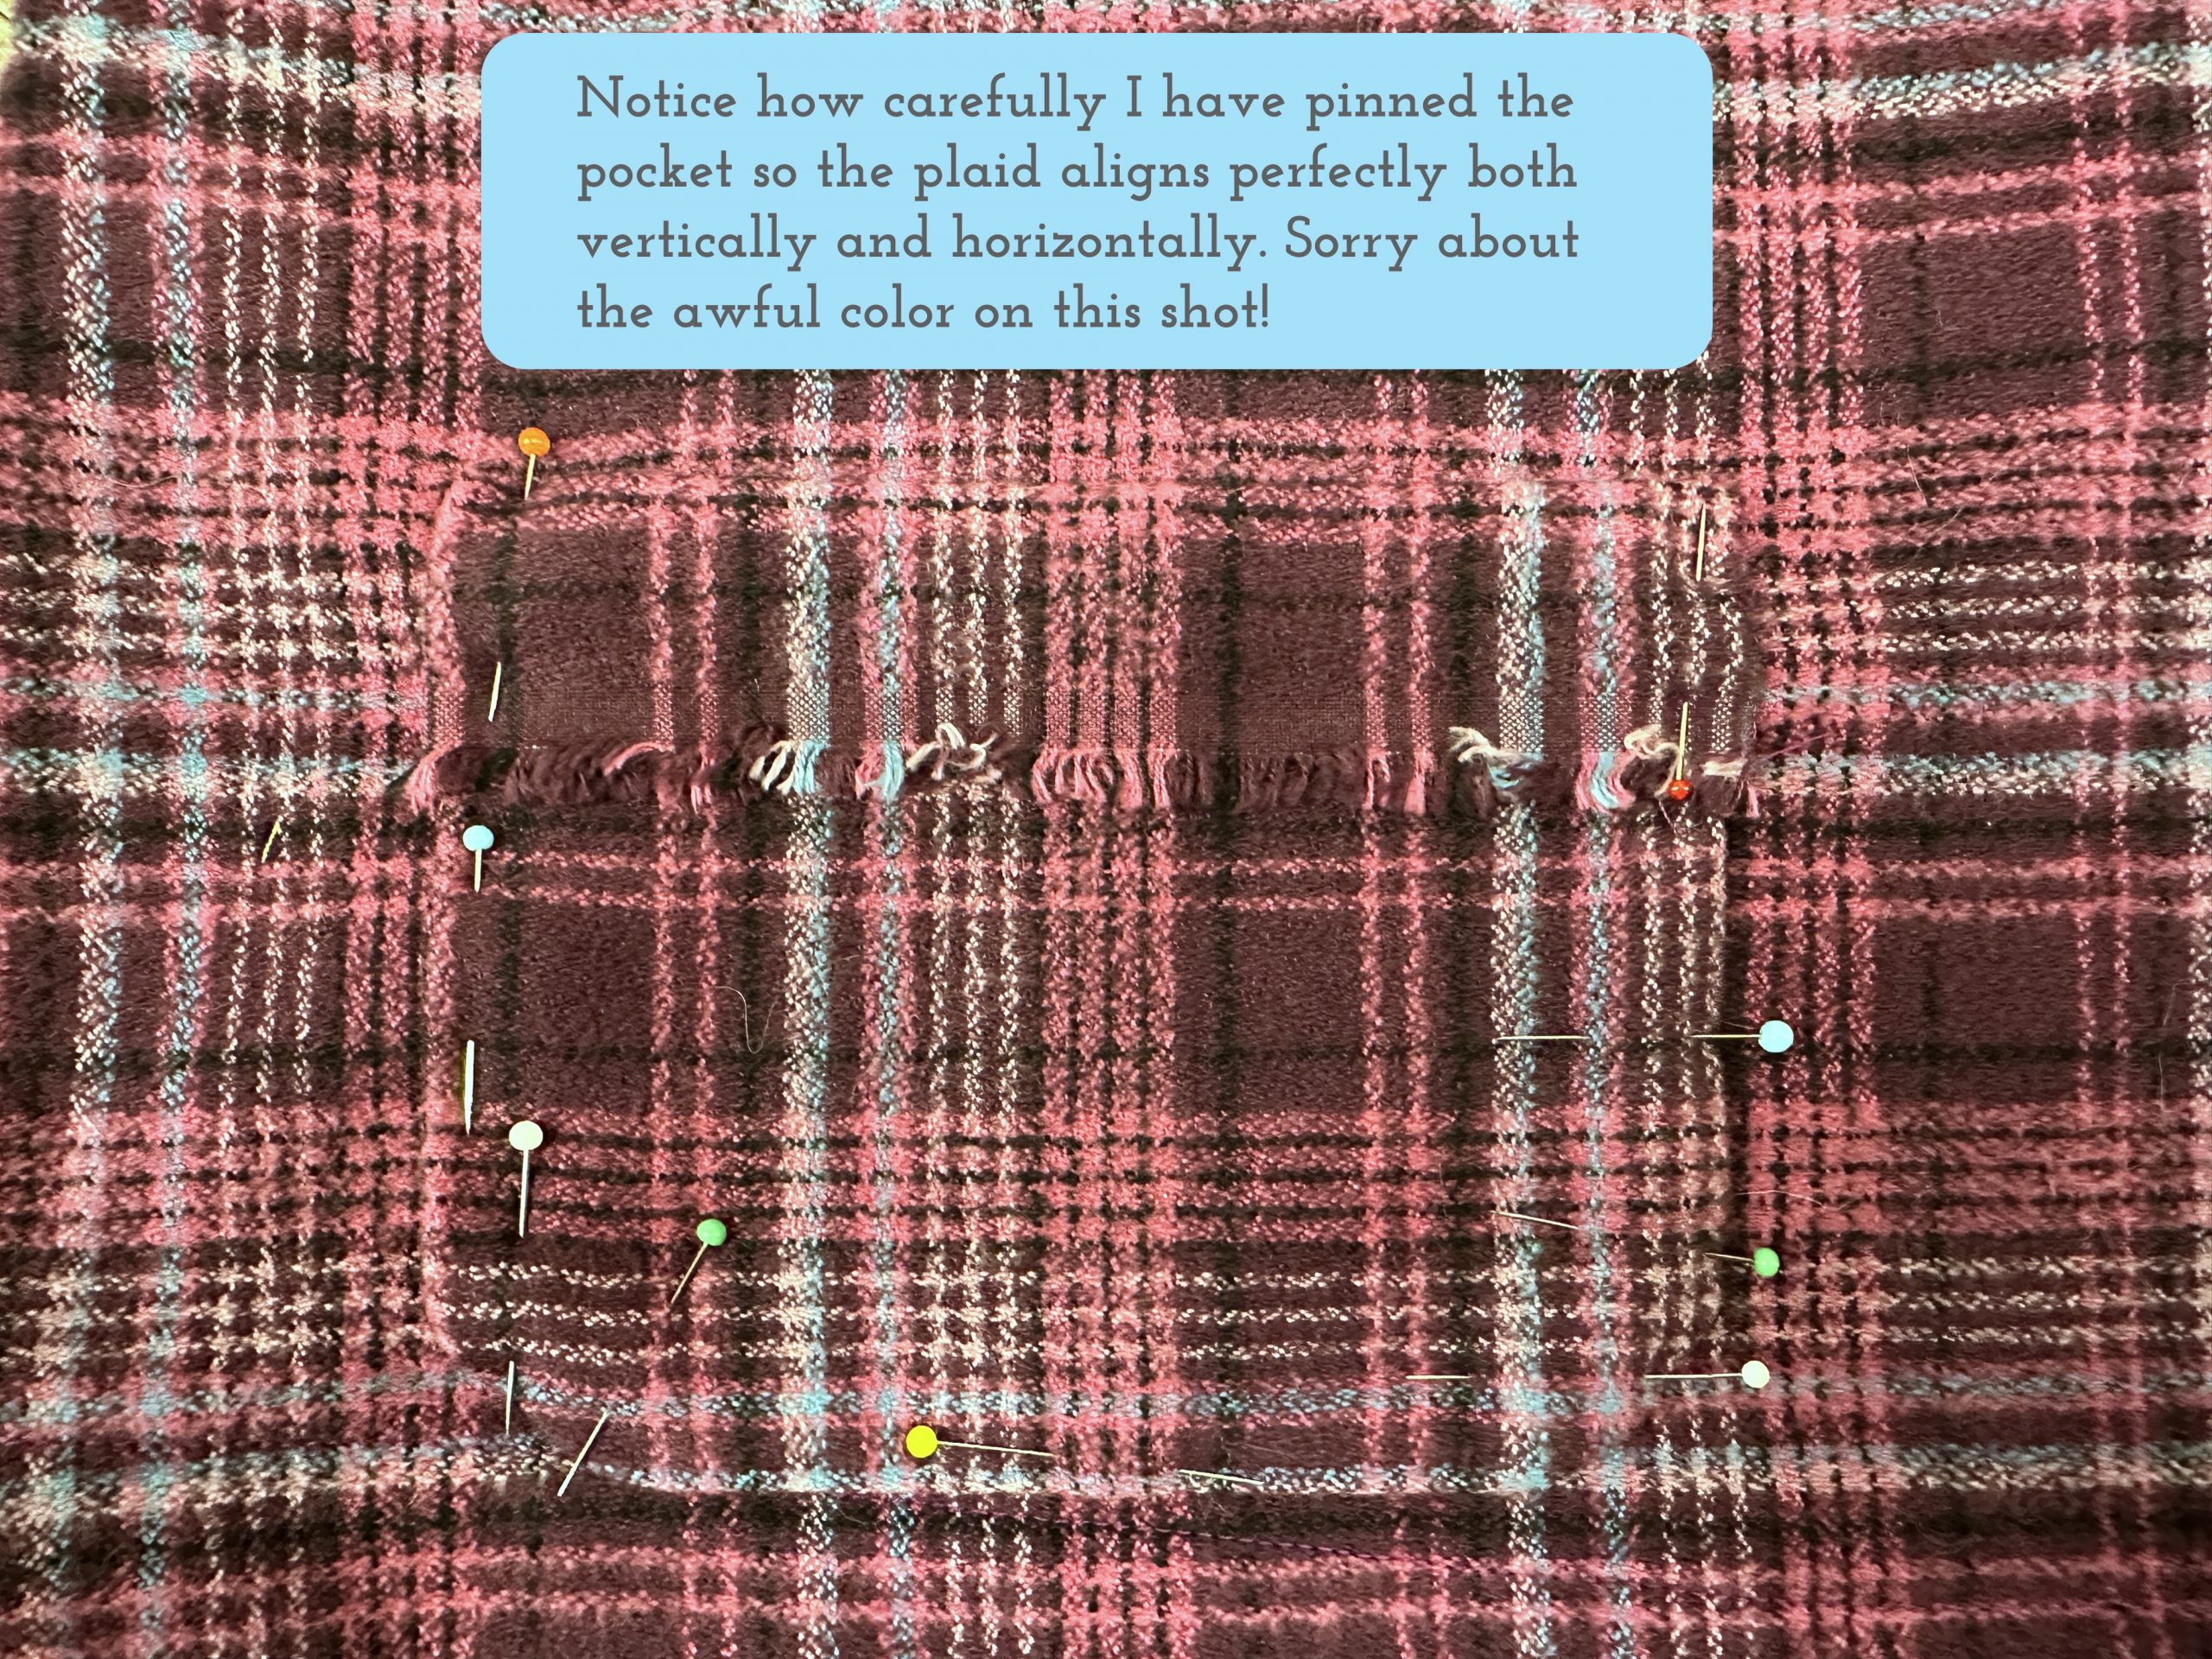
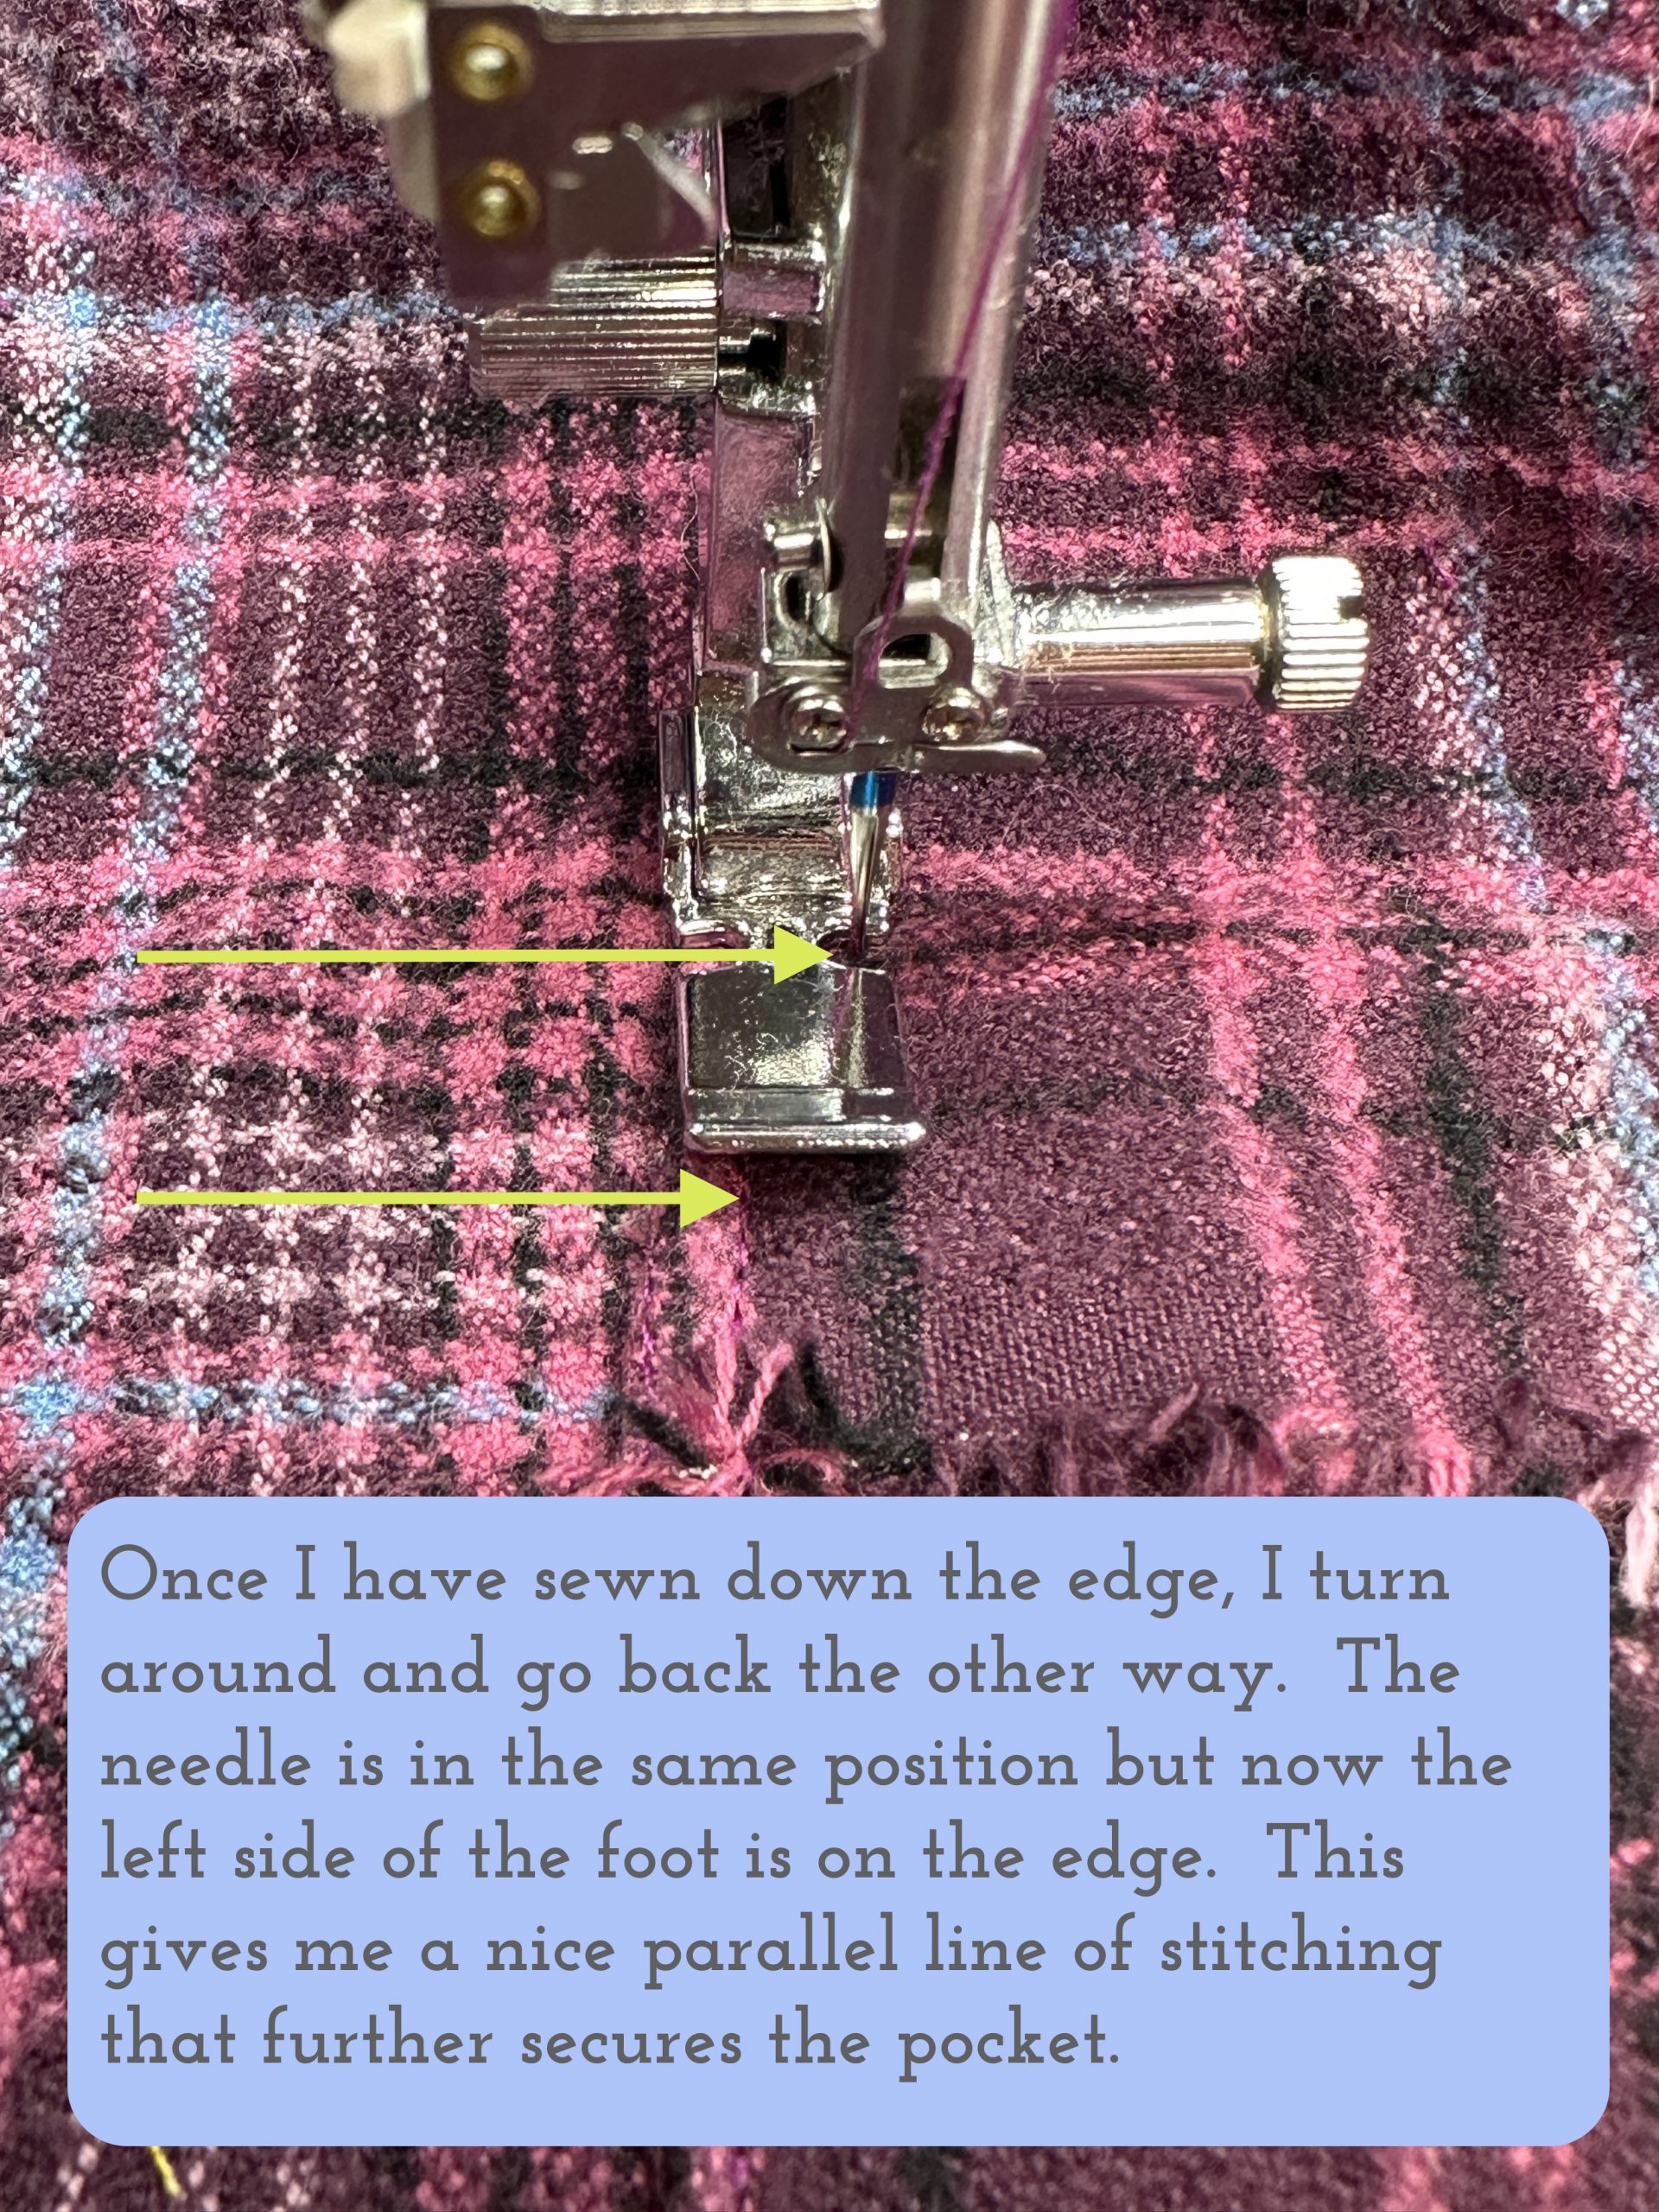
The second line of stitching, above, means that those unstitched rounded corners on the lining are trapped between the two lines of stitching and won’t go anywhere.
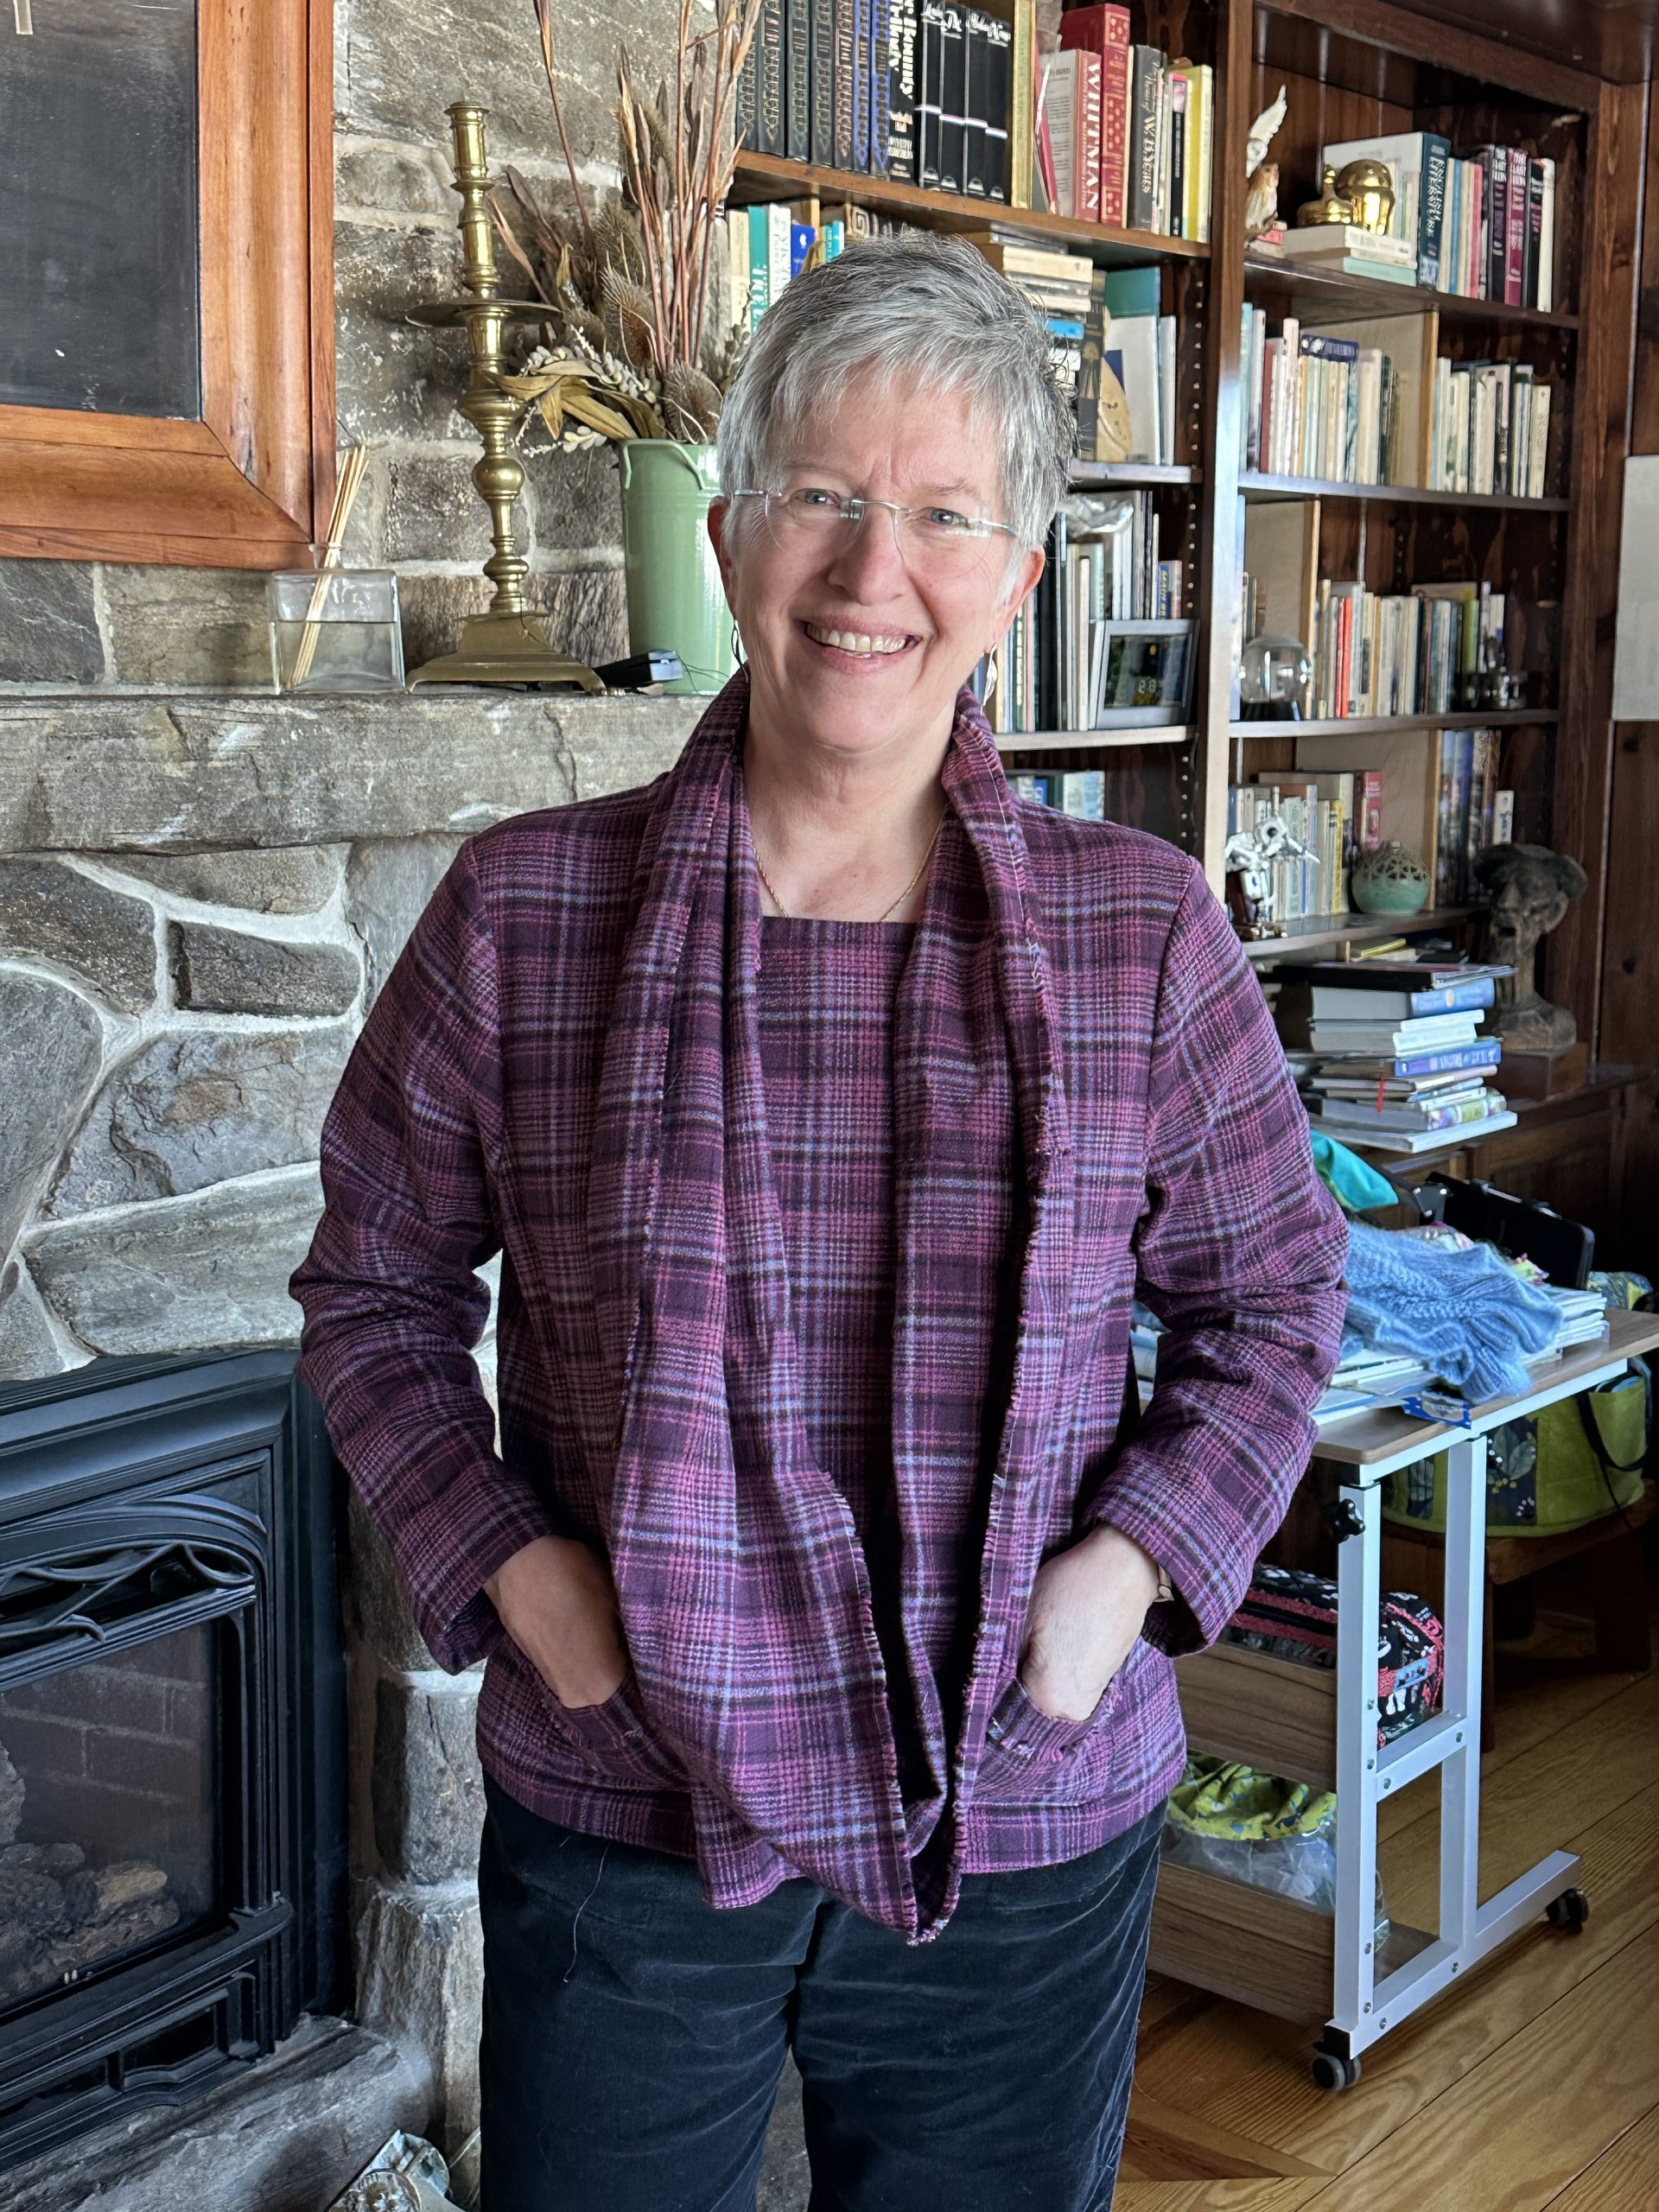
And there we go–pretty lined plaid pockets, perfectly matched, ready to use: kleenex, keys, doggie treats!
The next post will be the last in this series with hem finishing and the easy-peasy scarf! See you then!
Here are the links to all the posts in this series of lessons, techniques that can be applied to virtually any garment and many home dec projects. Let me know what you’d like to learn and see here on the blog. Cheers and thanks, Sarah
Lesson 1: Choosing a Pattern and Starting Tips
Lesson 2: Making a Muslin, Fitting and Sleeves
Lesson 3: Matching Plaids, Cutting out Your Garment Pieces
Lesson 4: Overcast Seams, just like Serged Seams
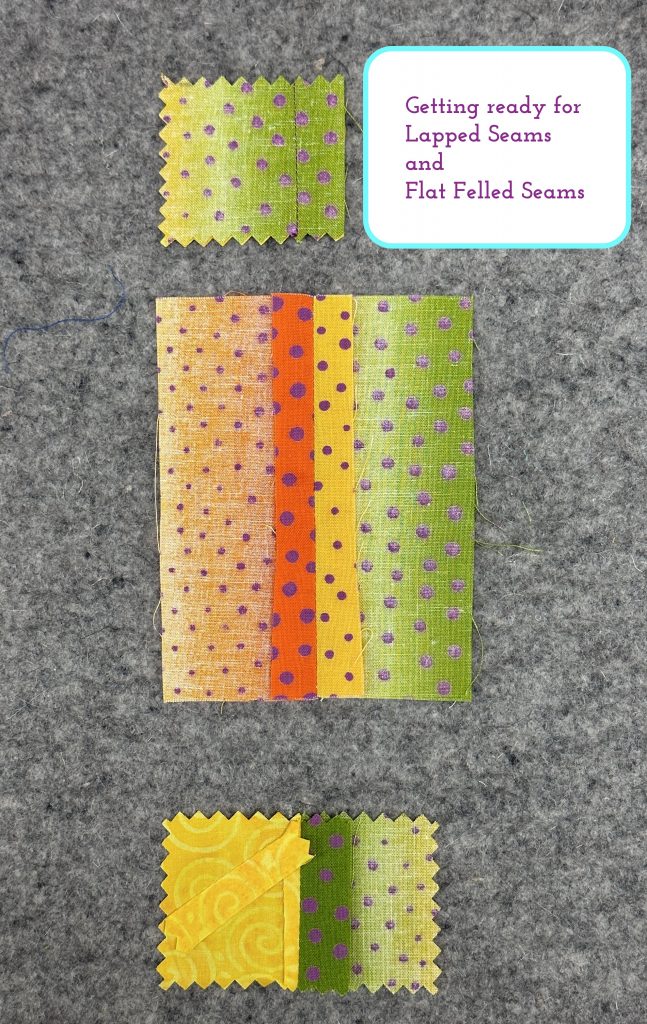
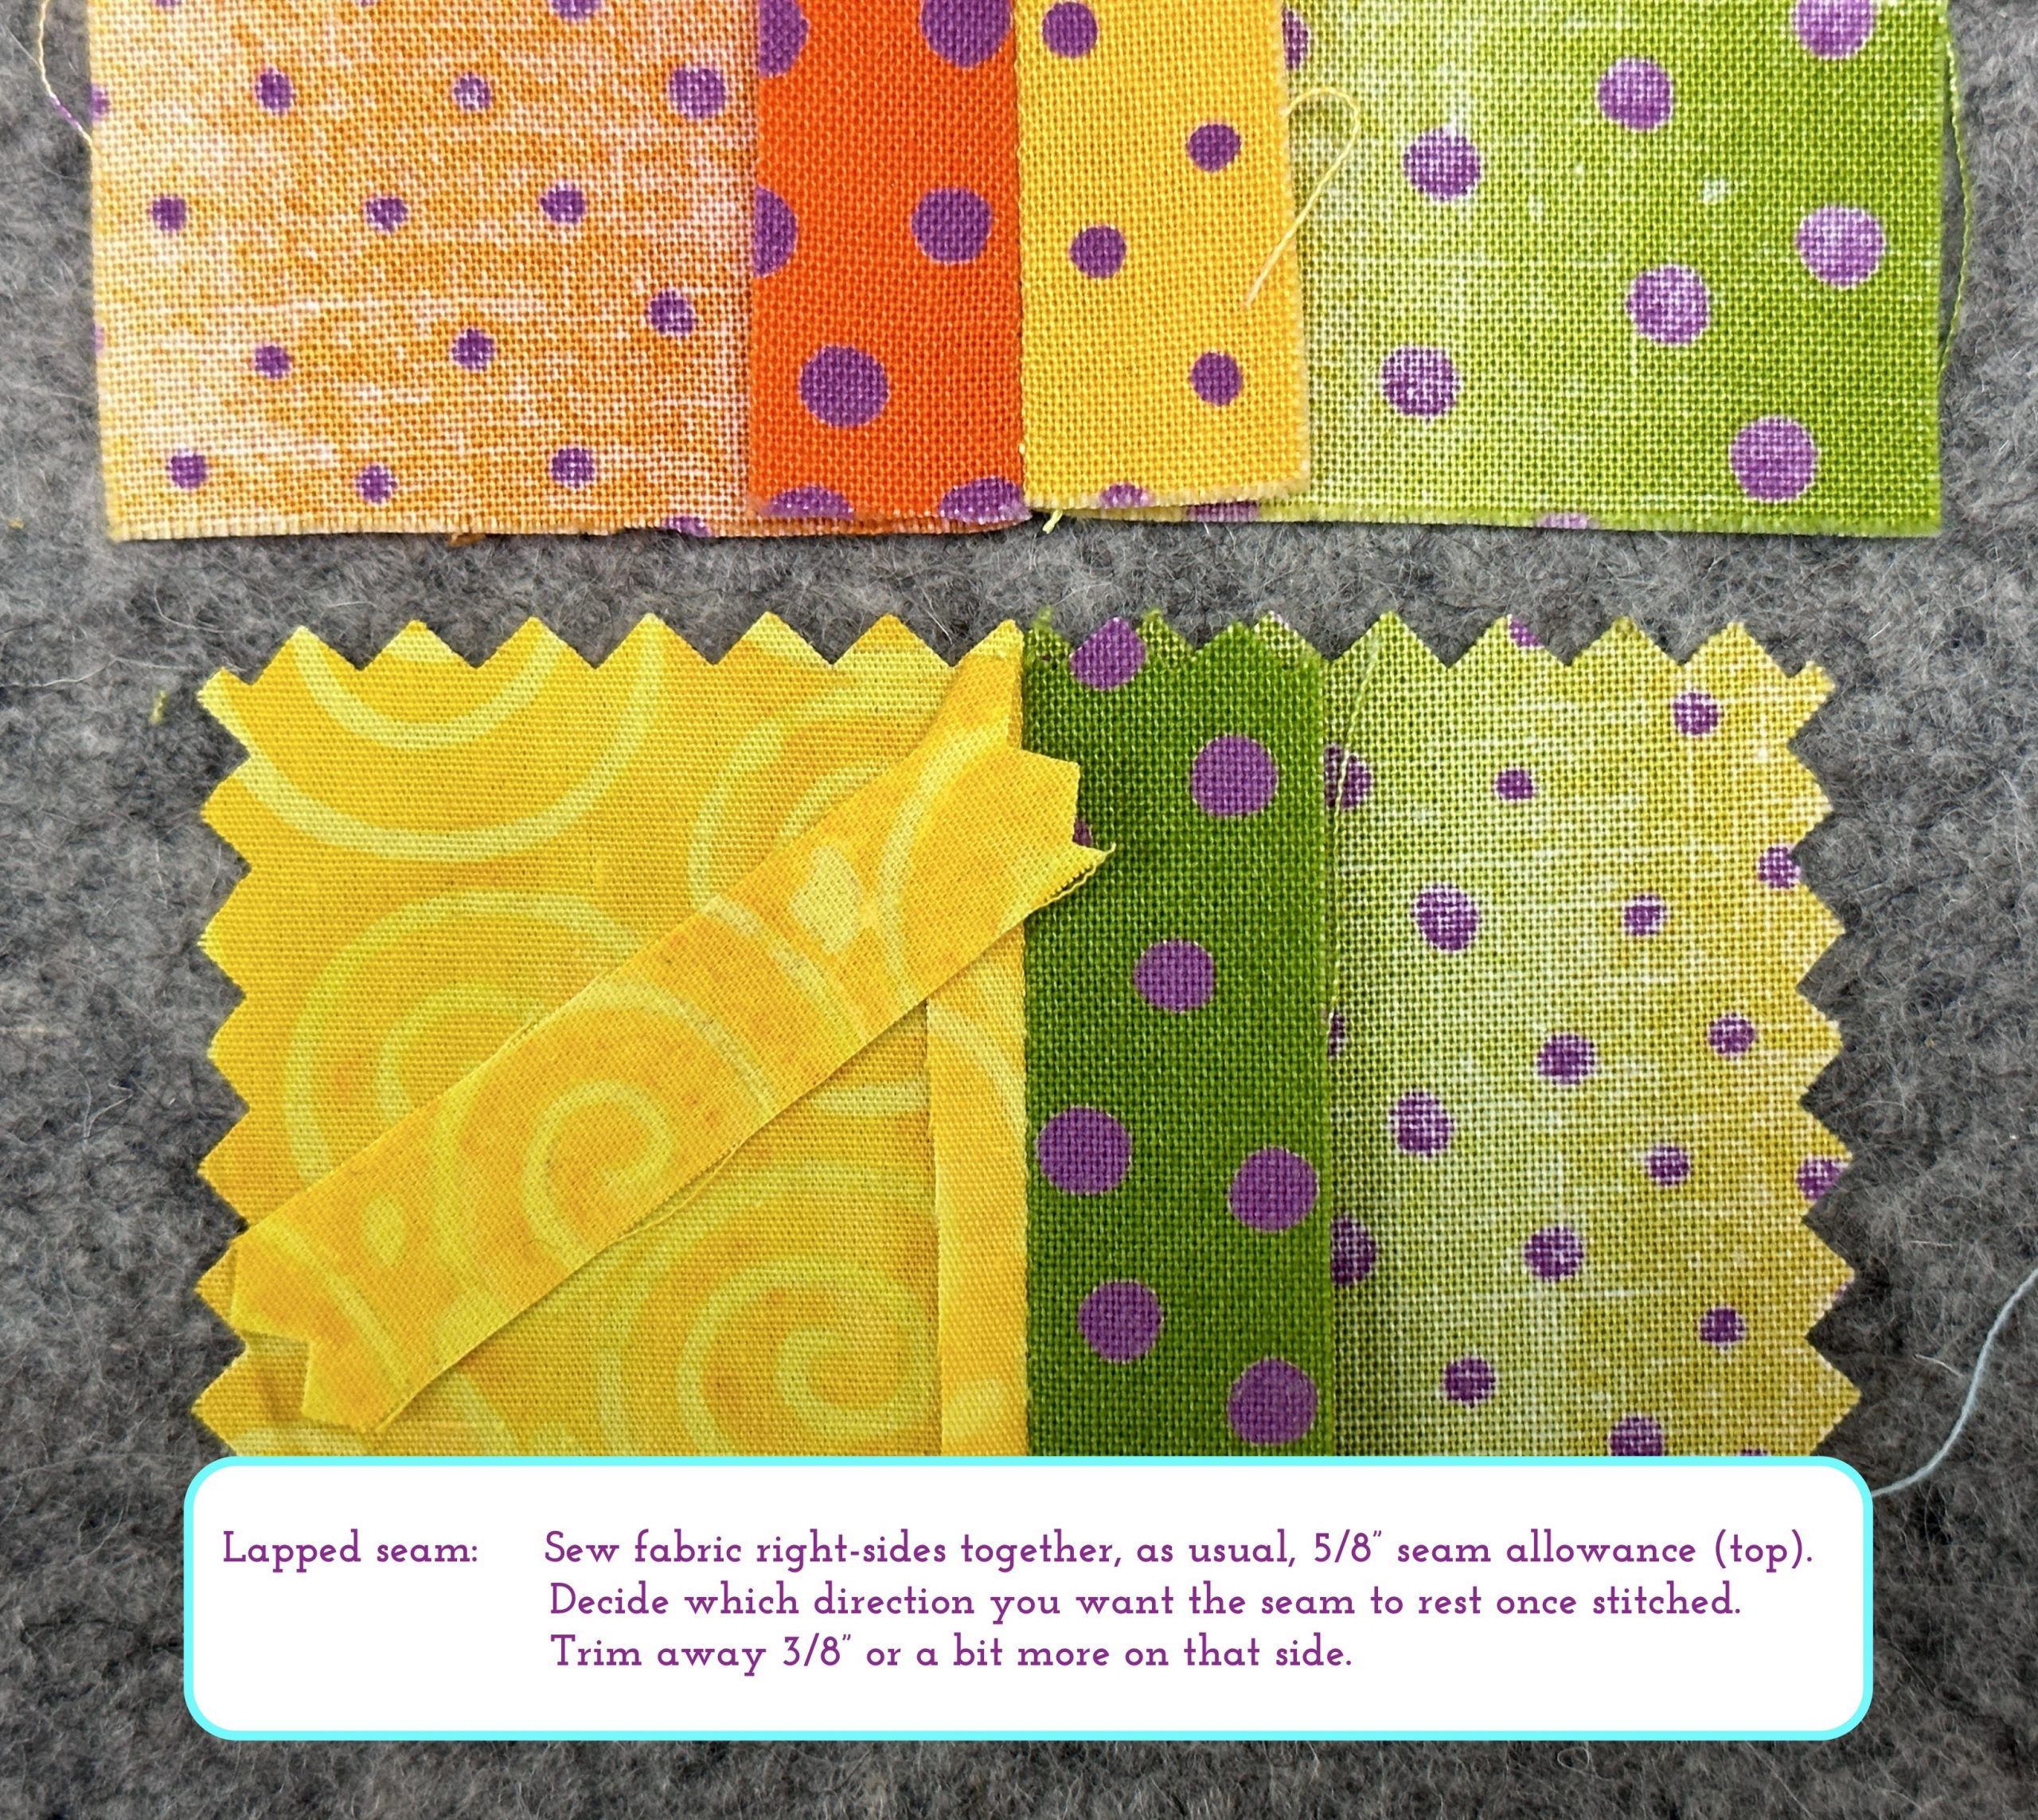
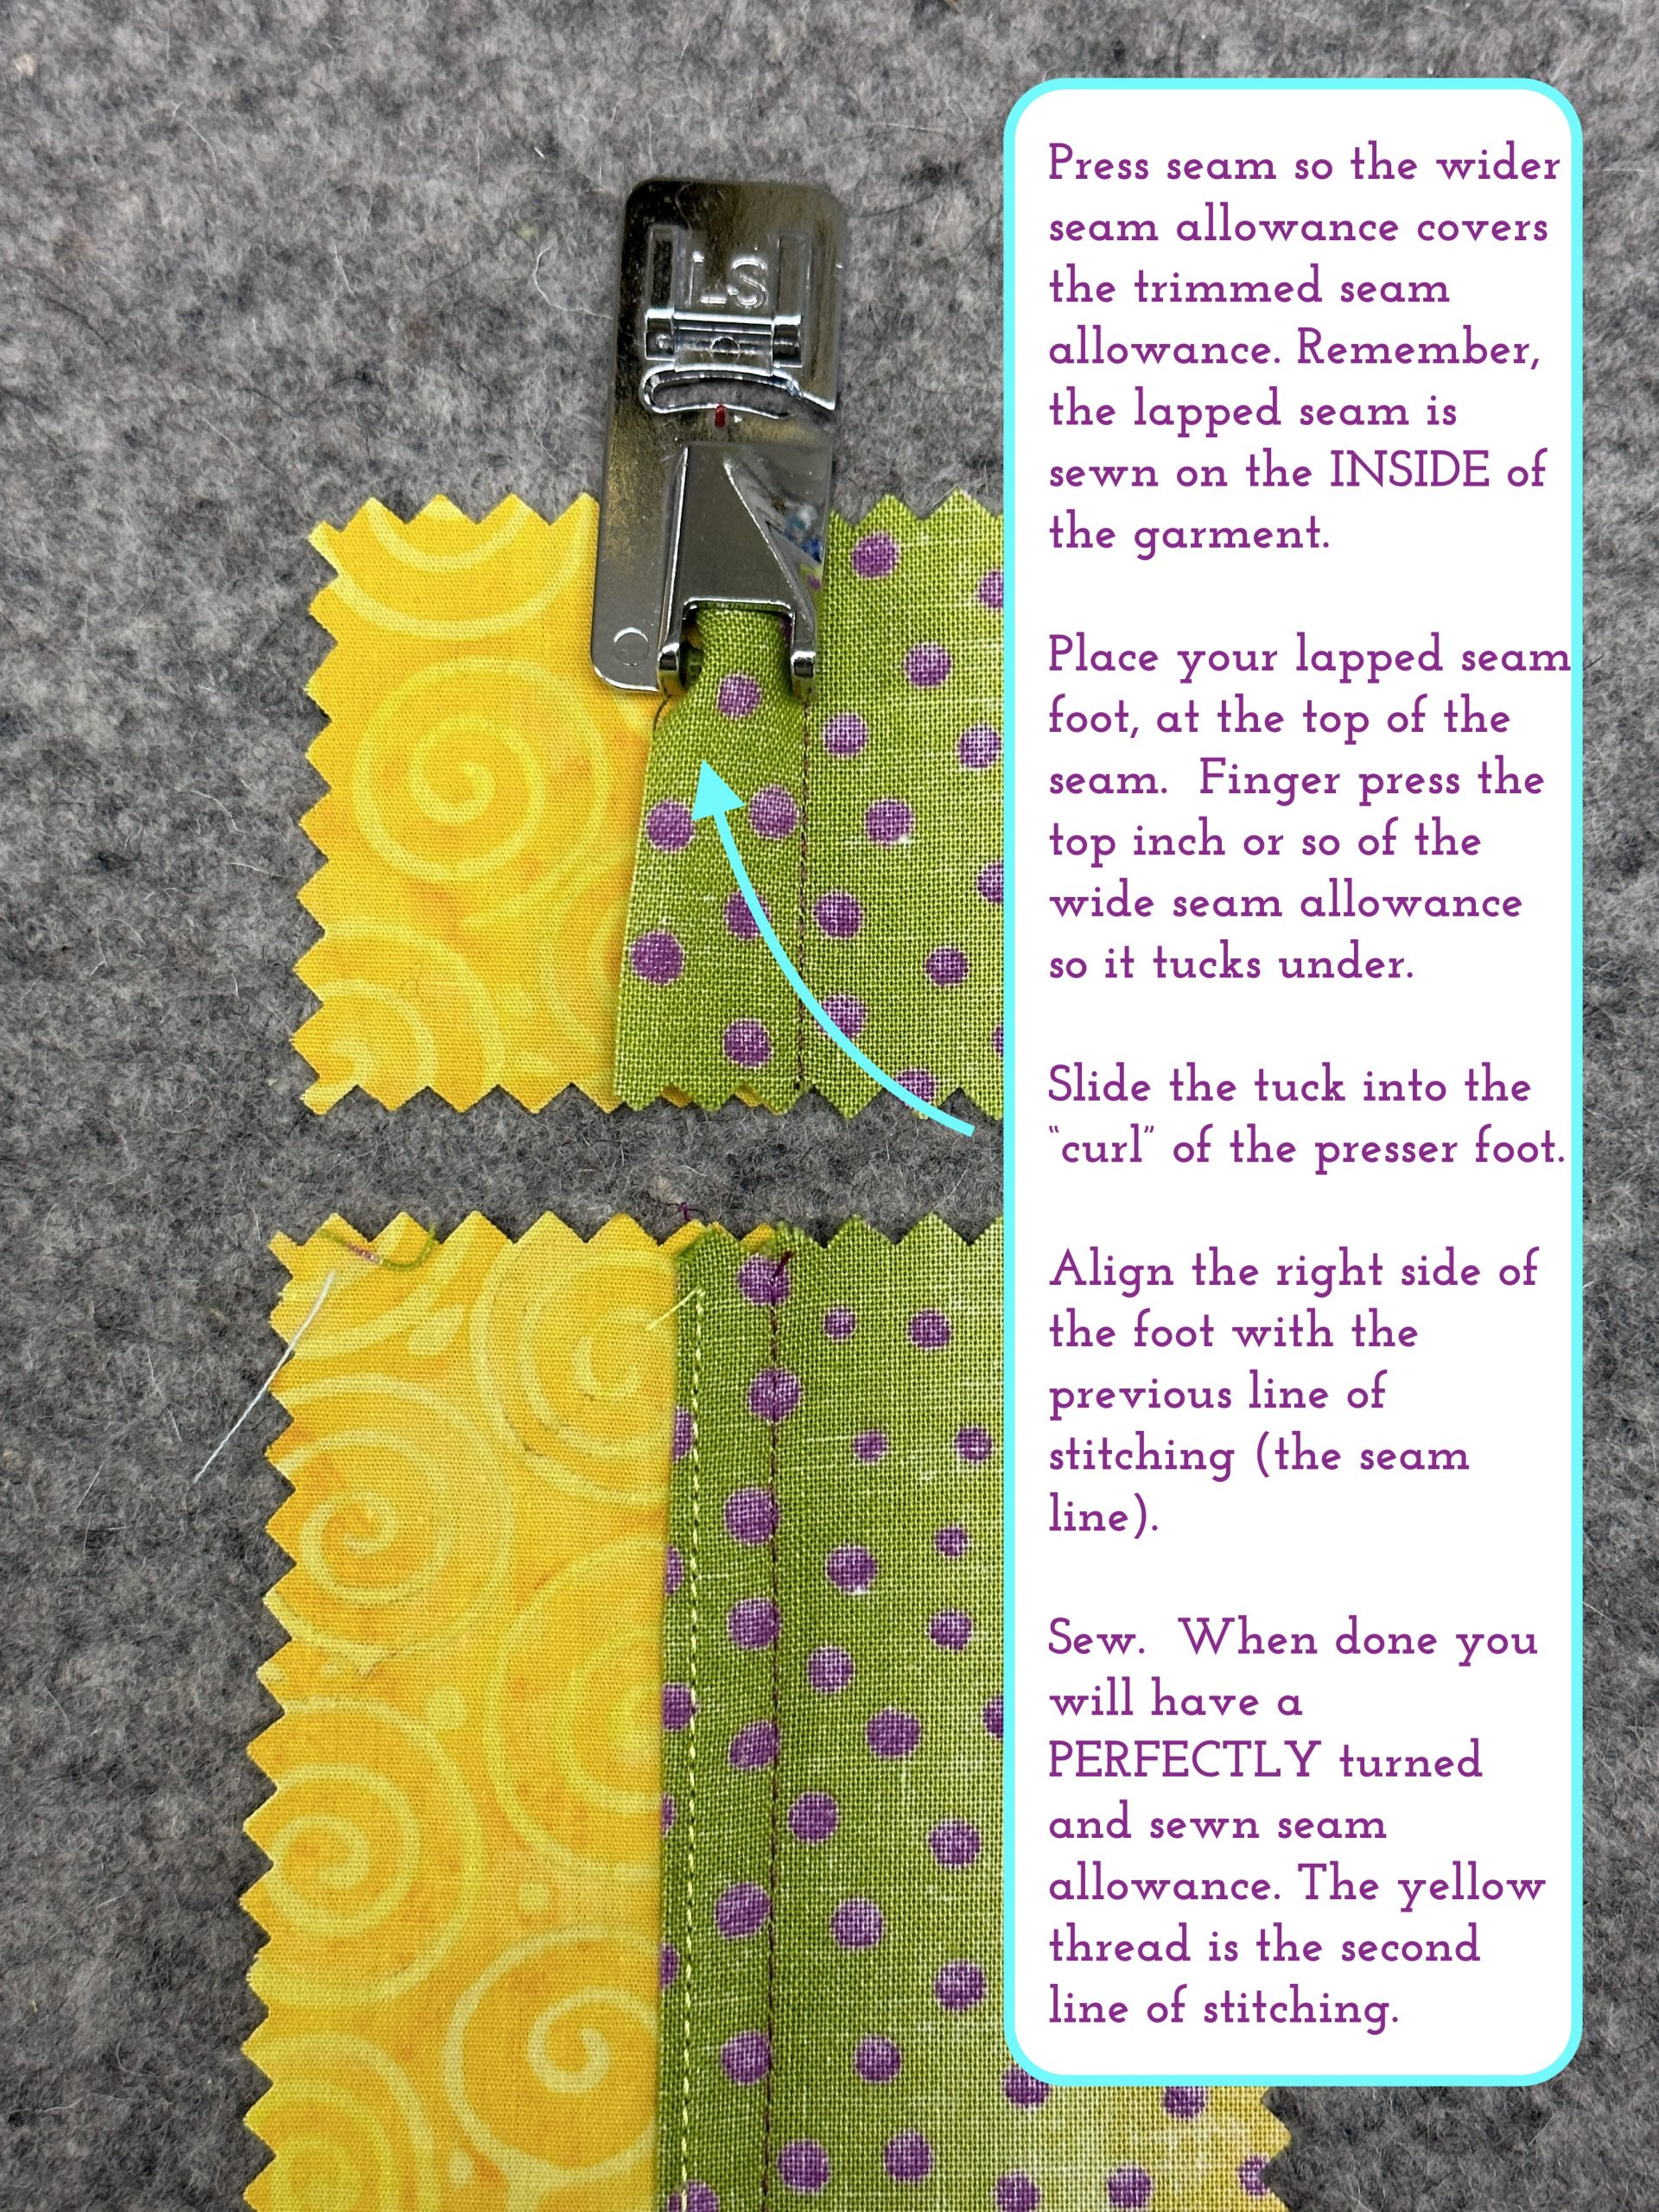
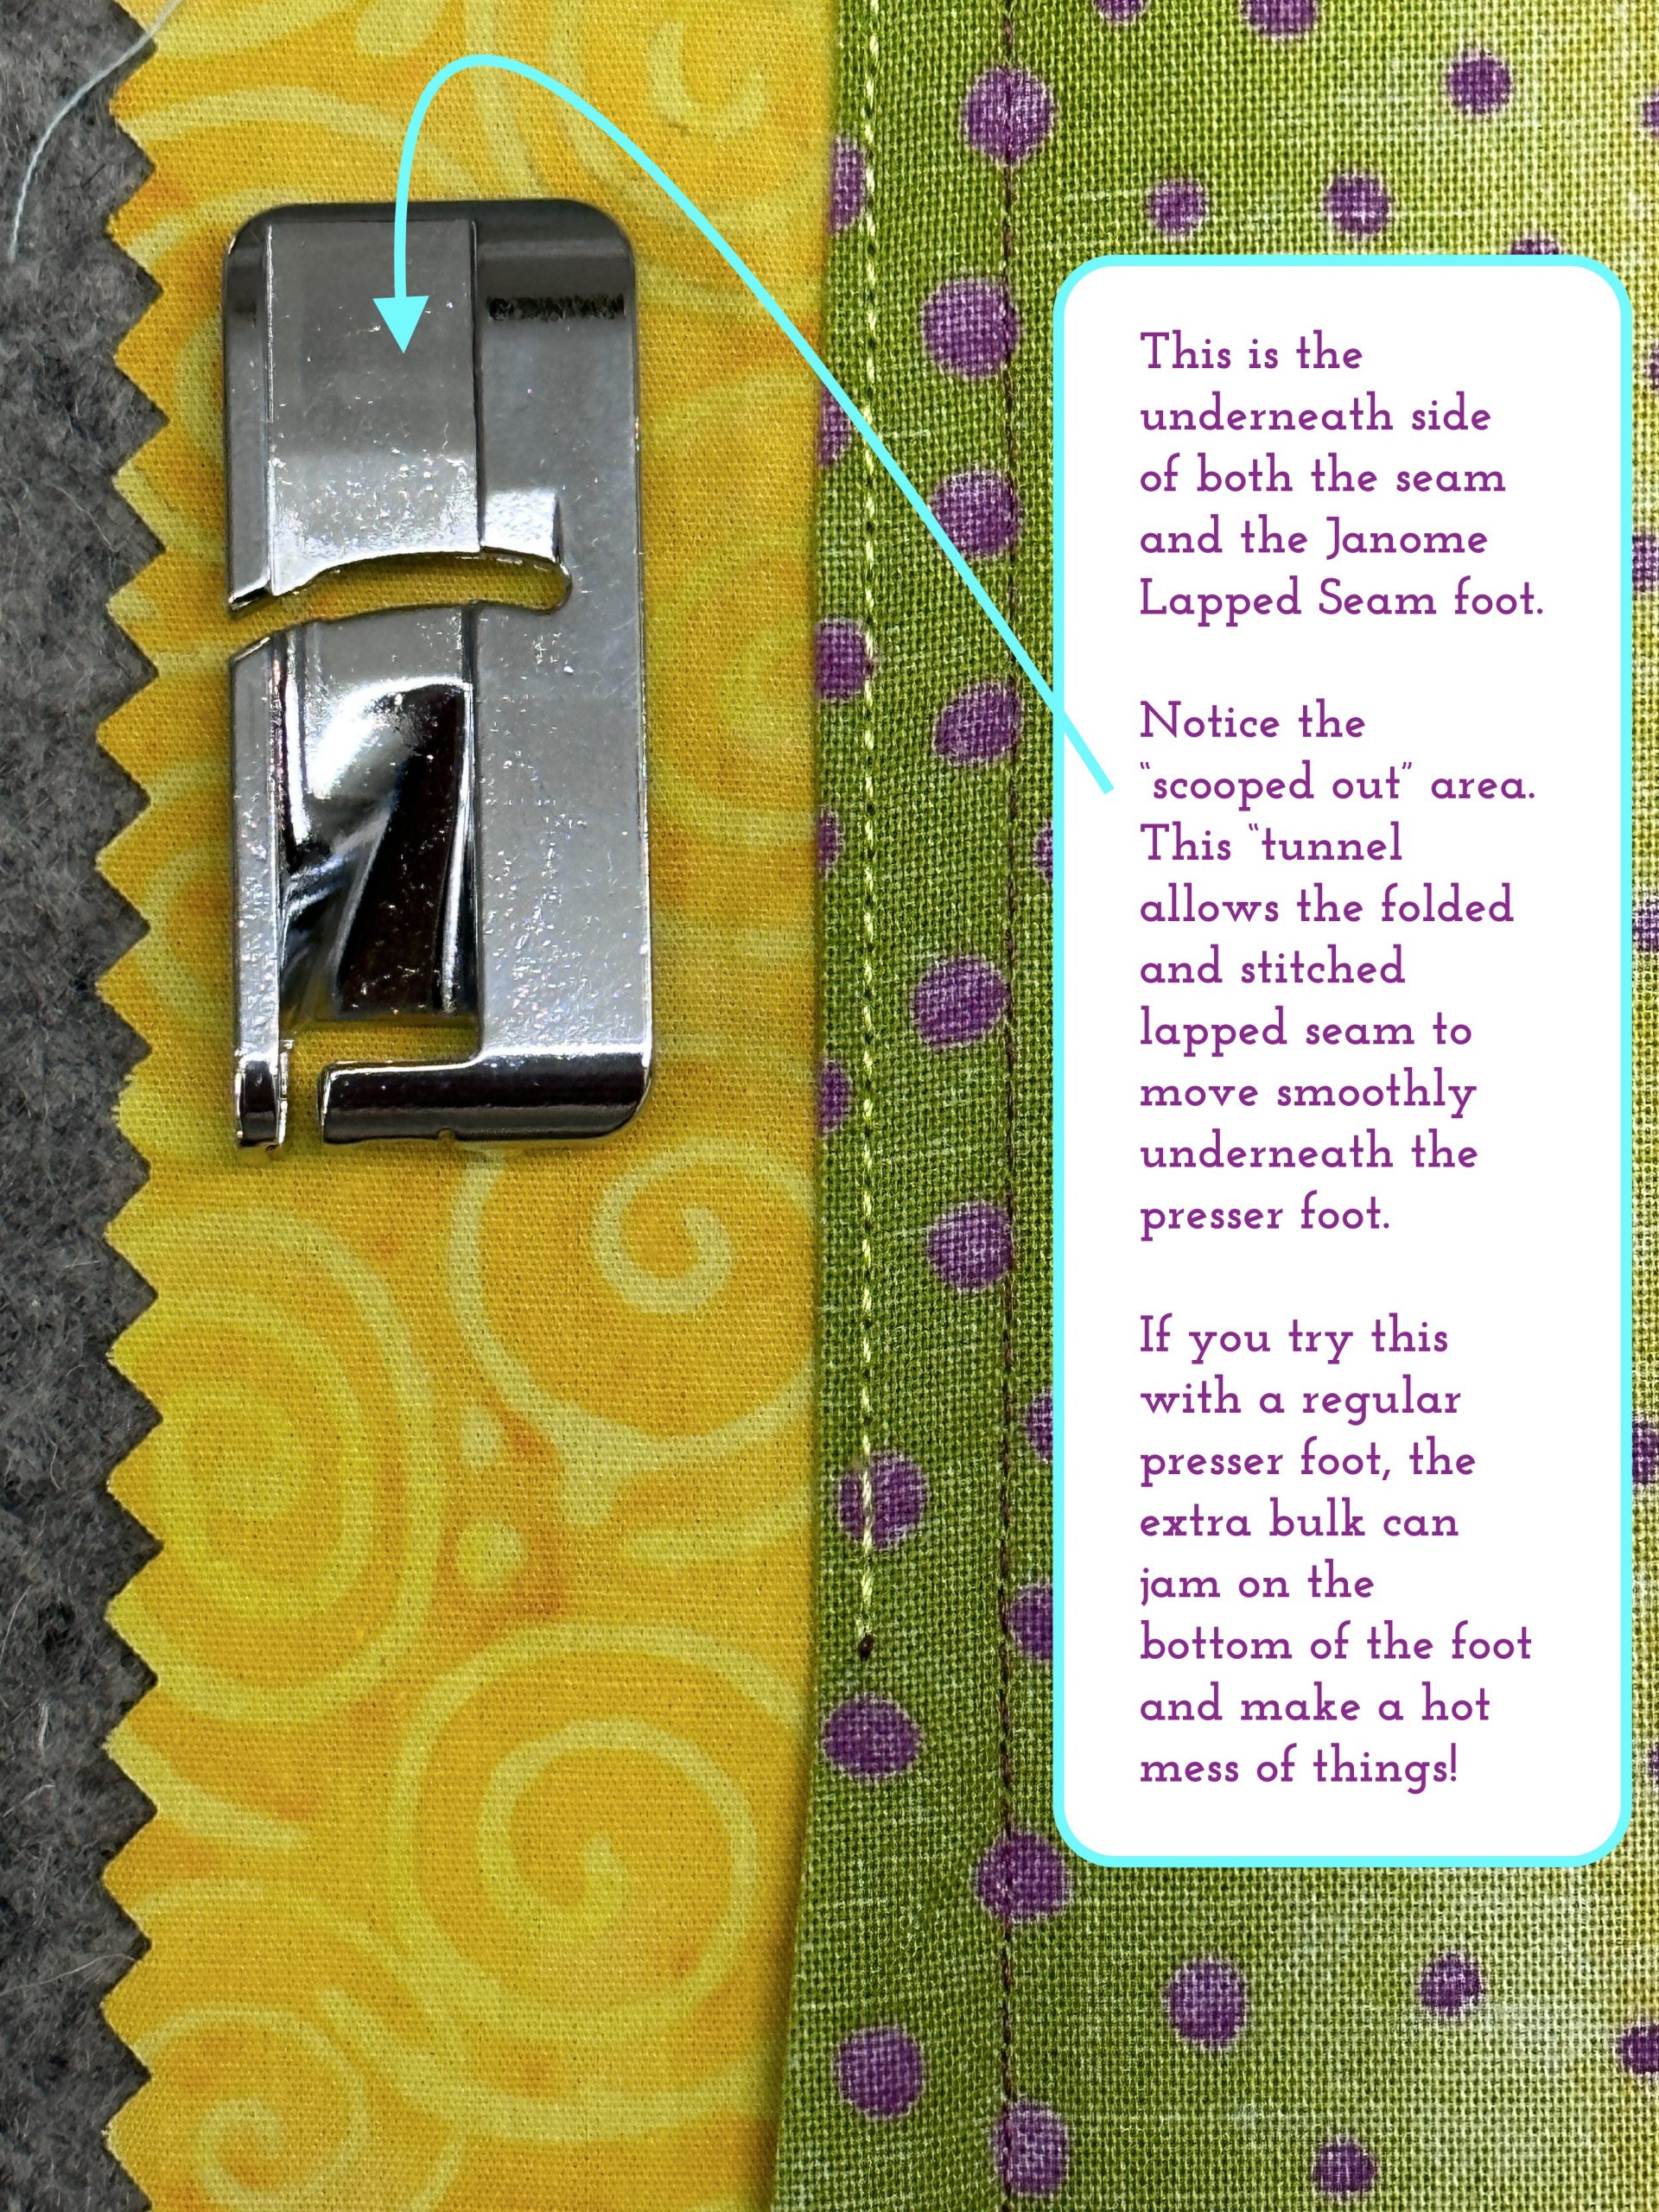
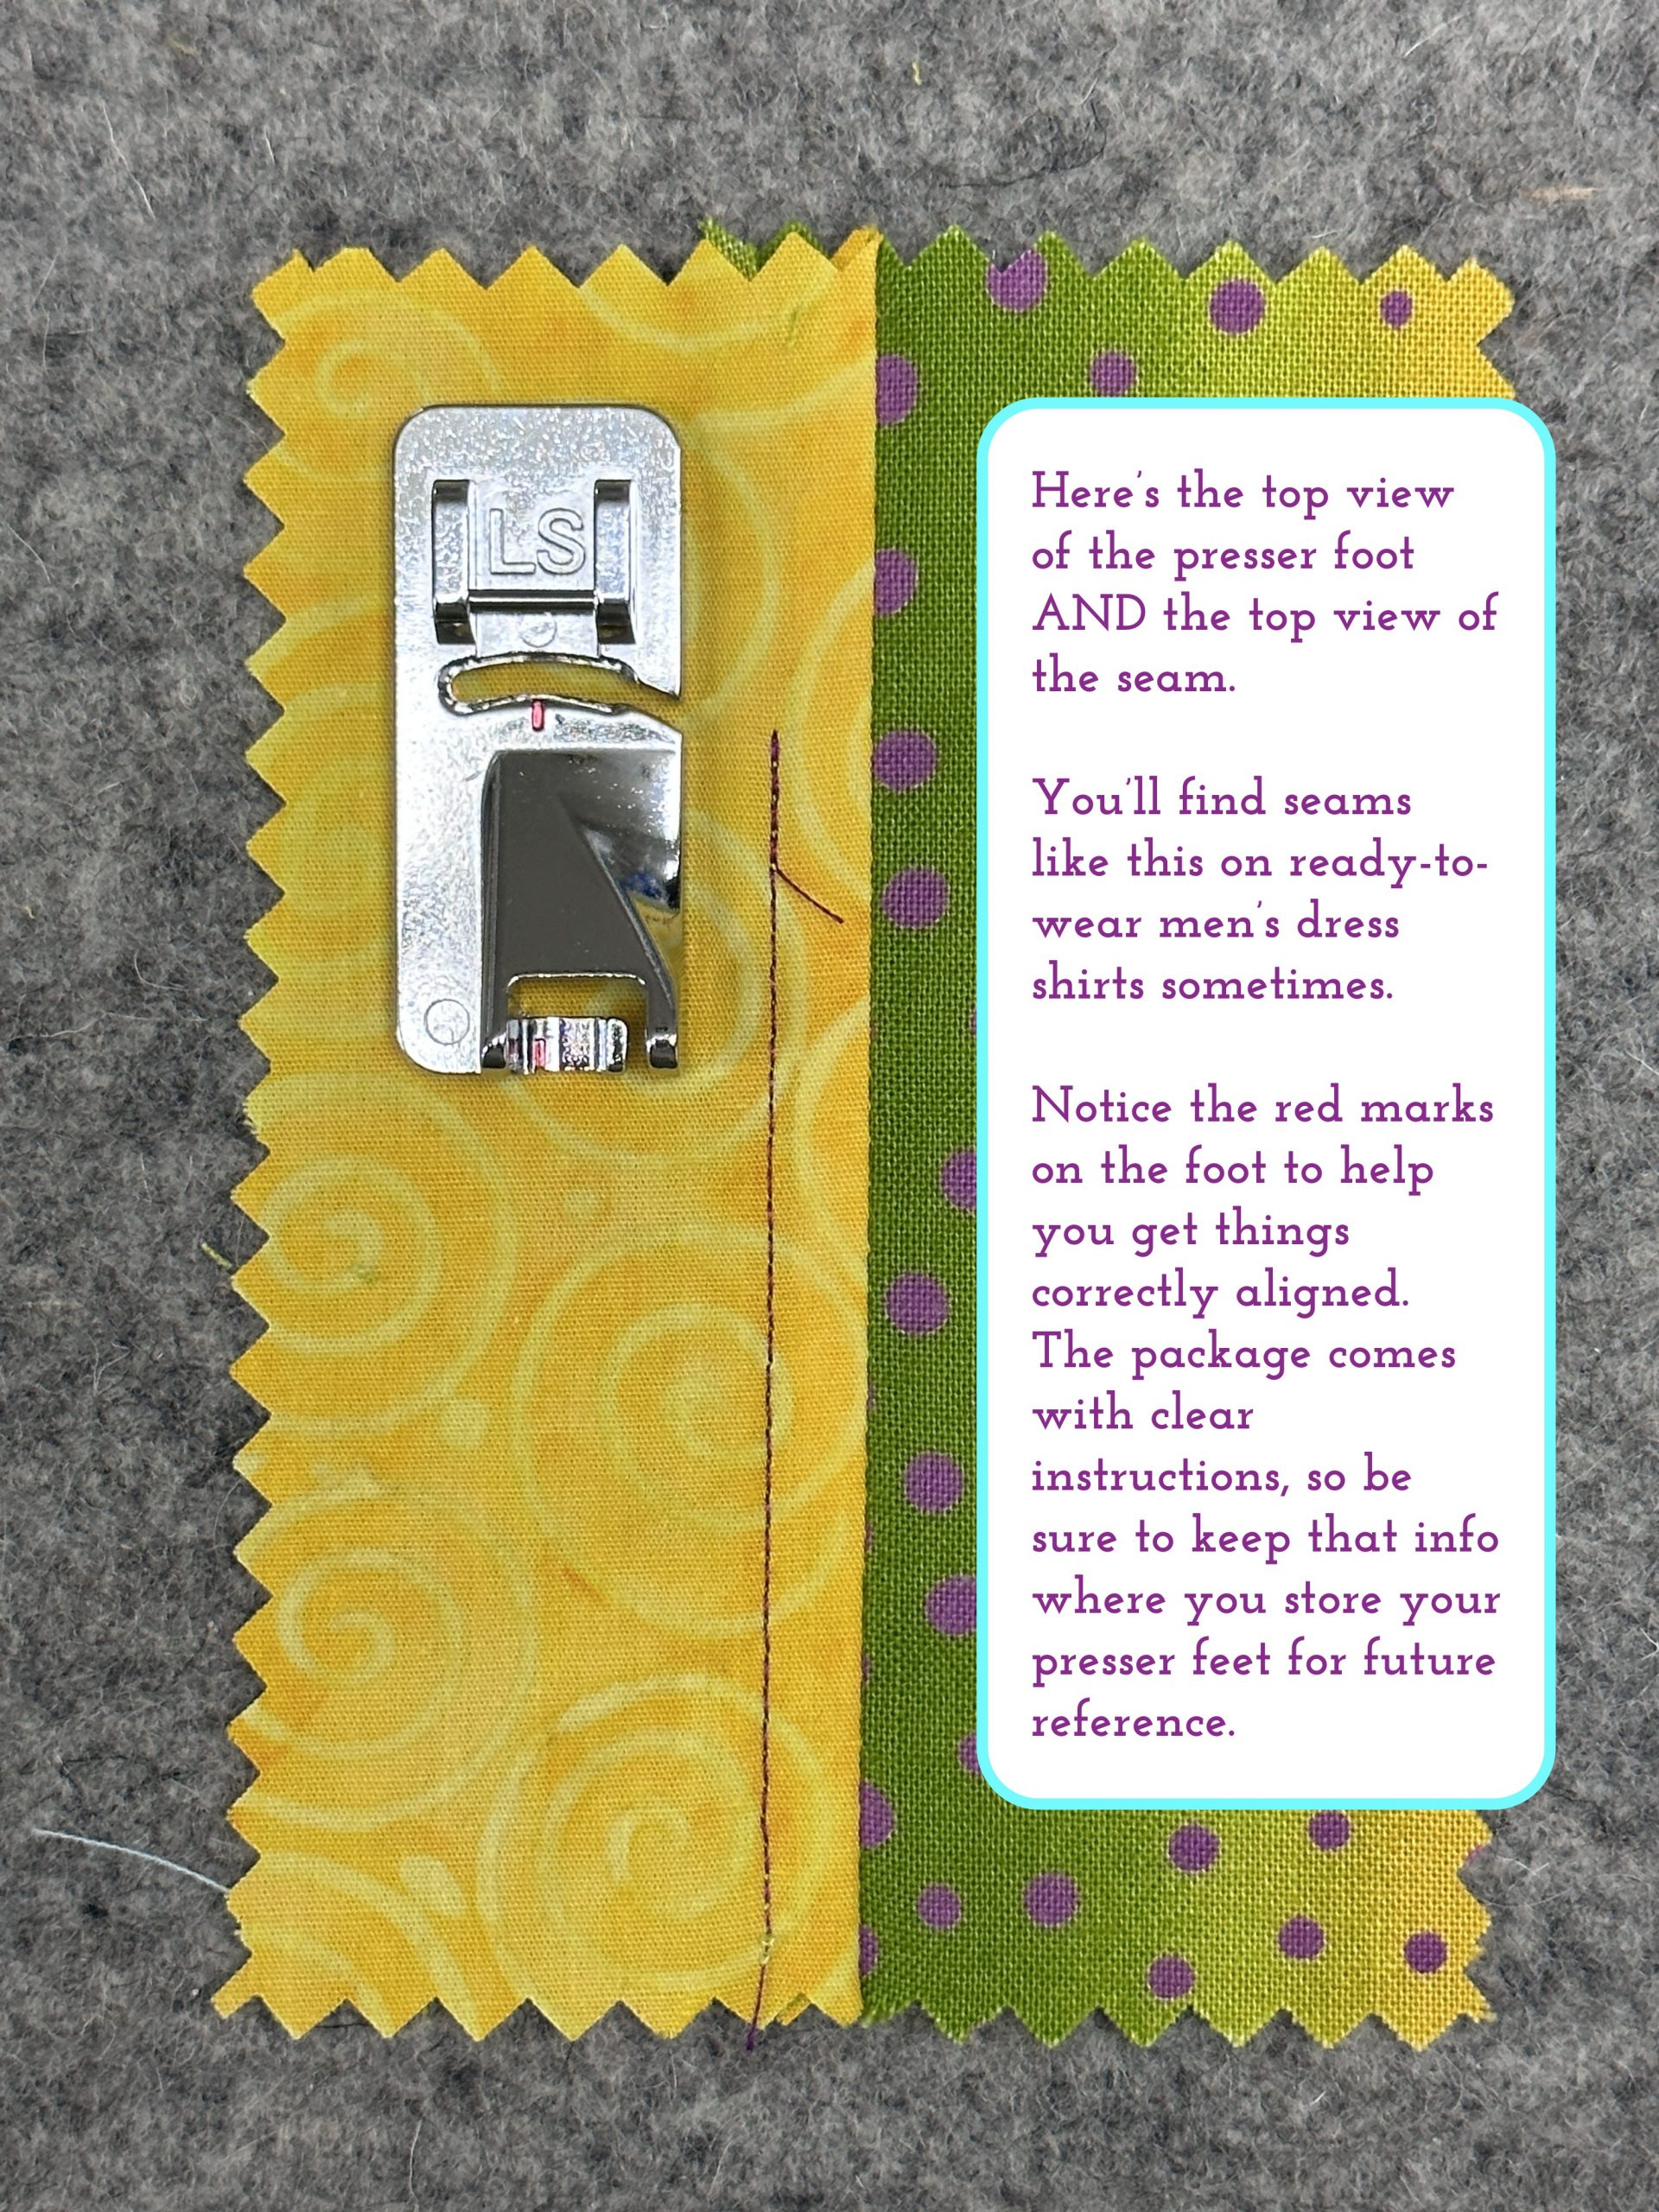
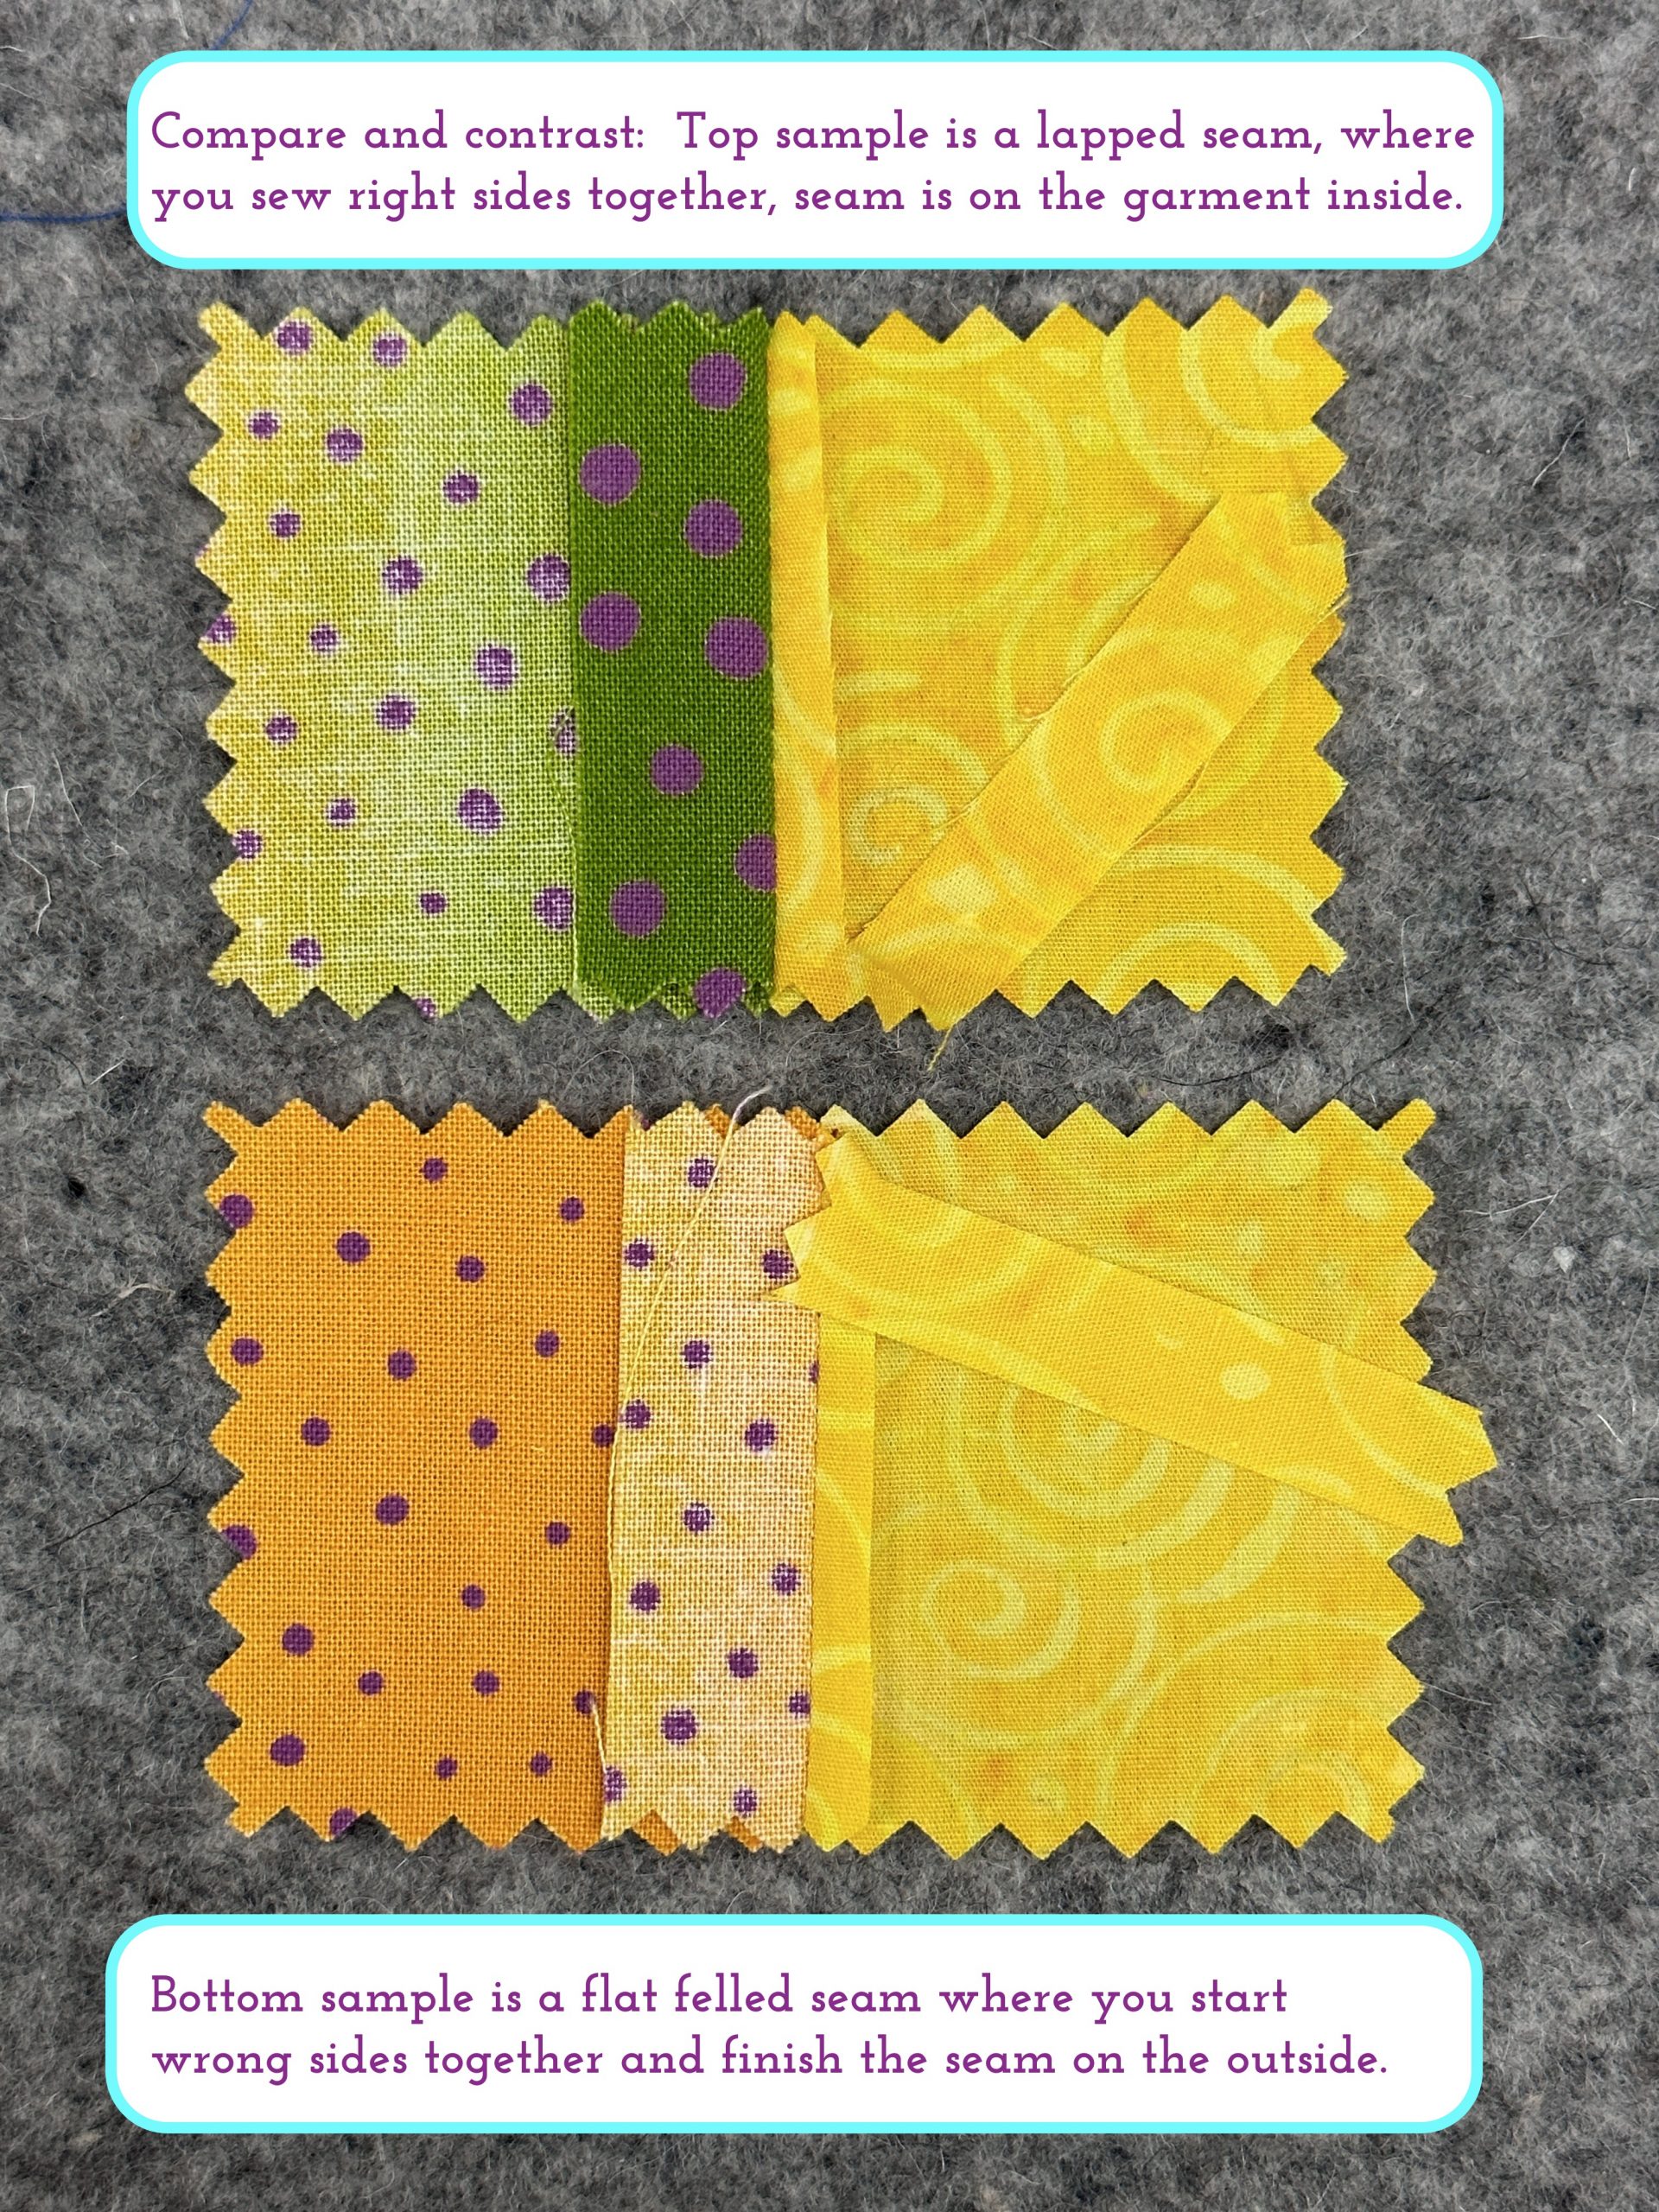
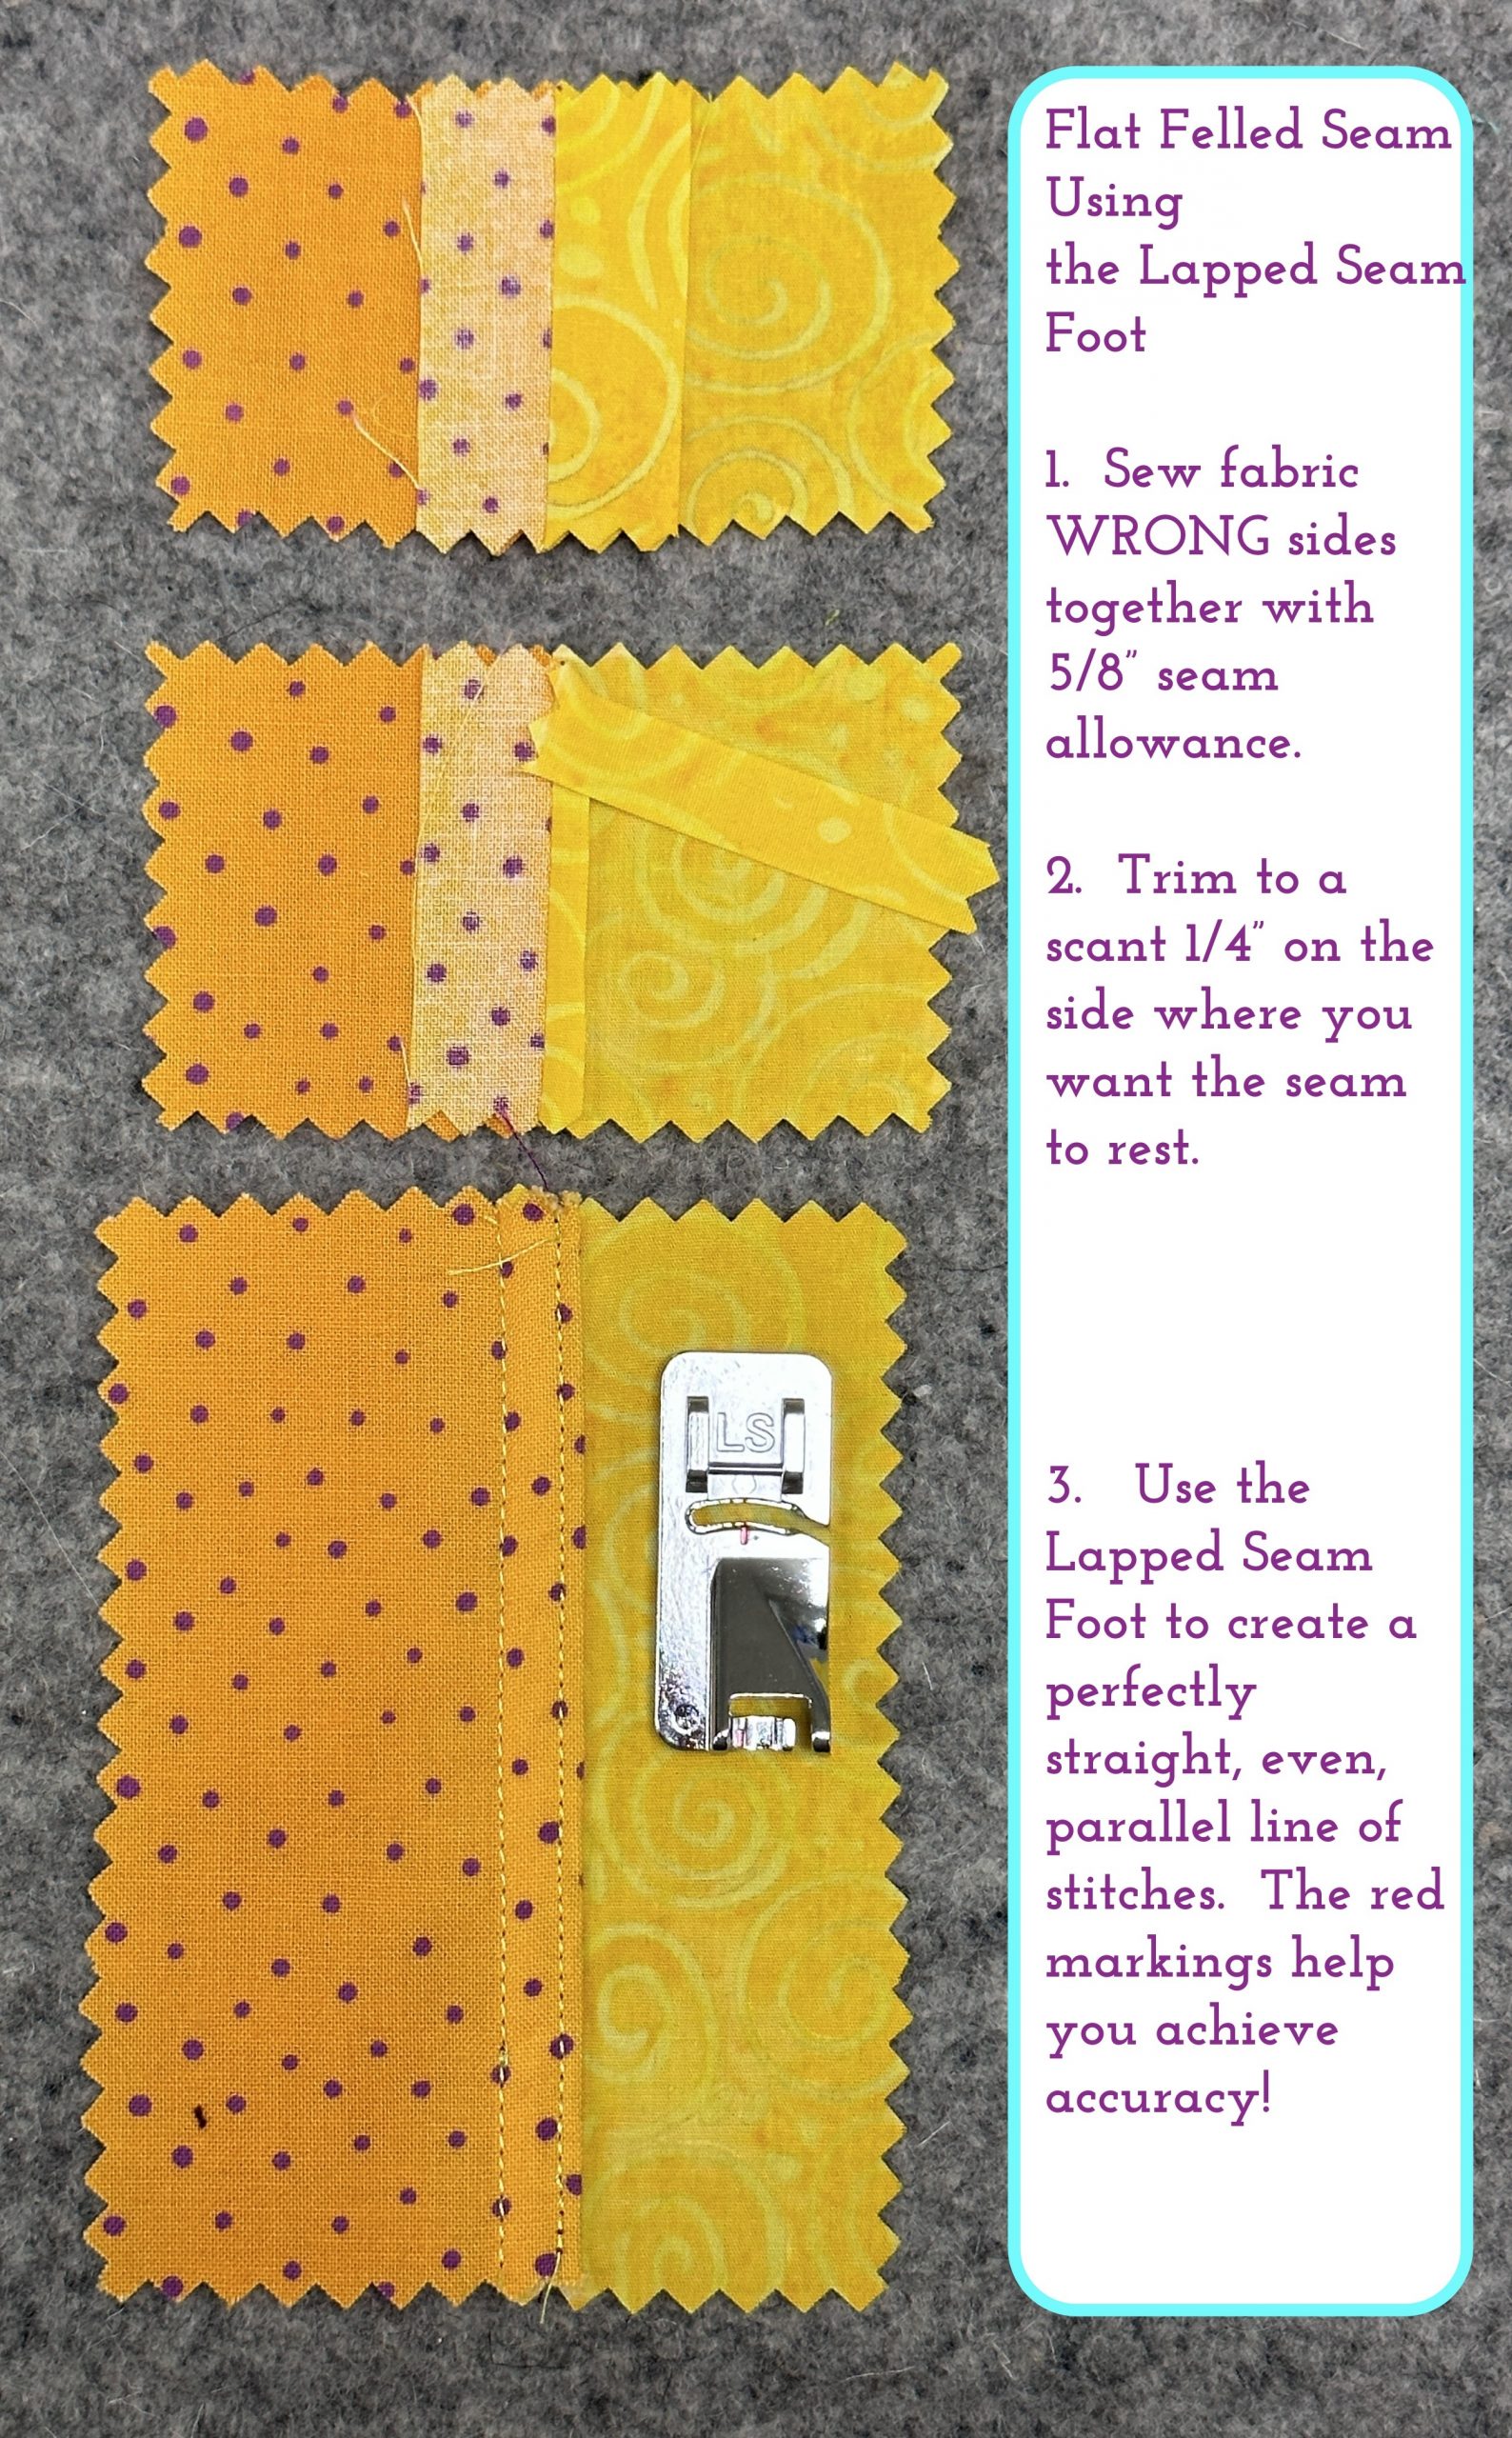
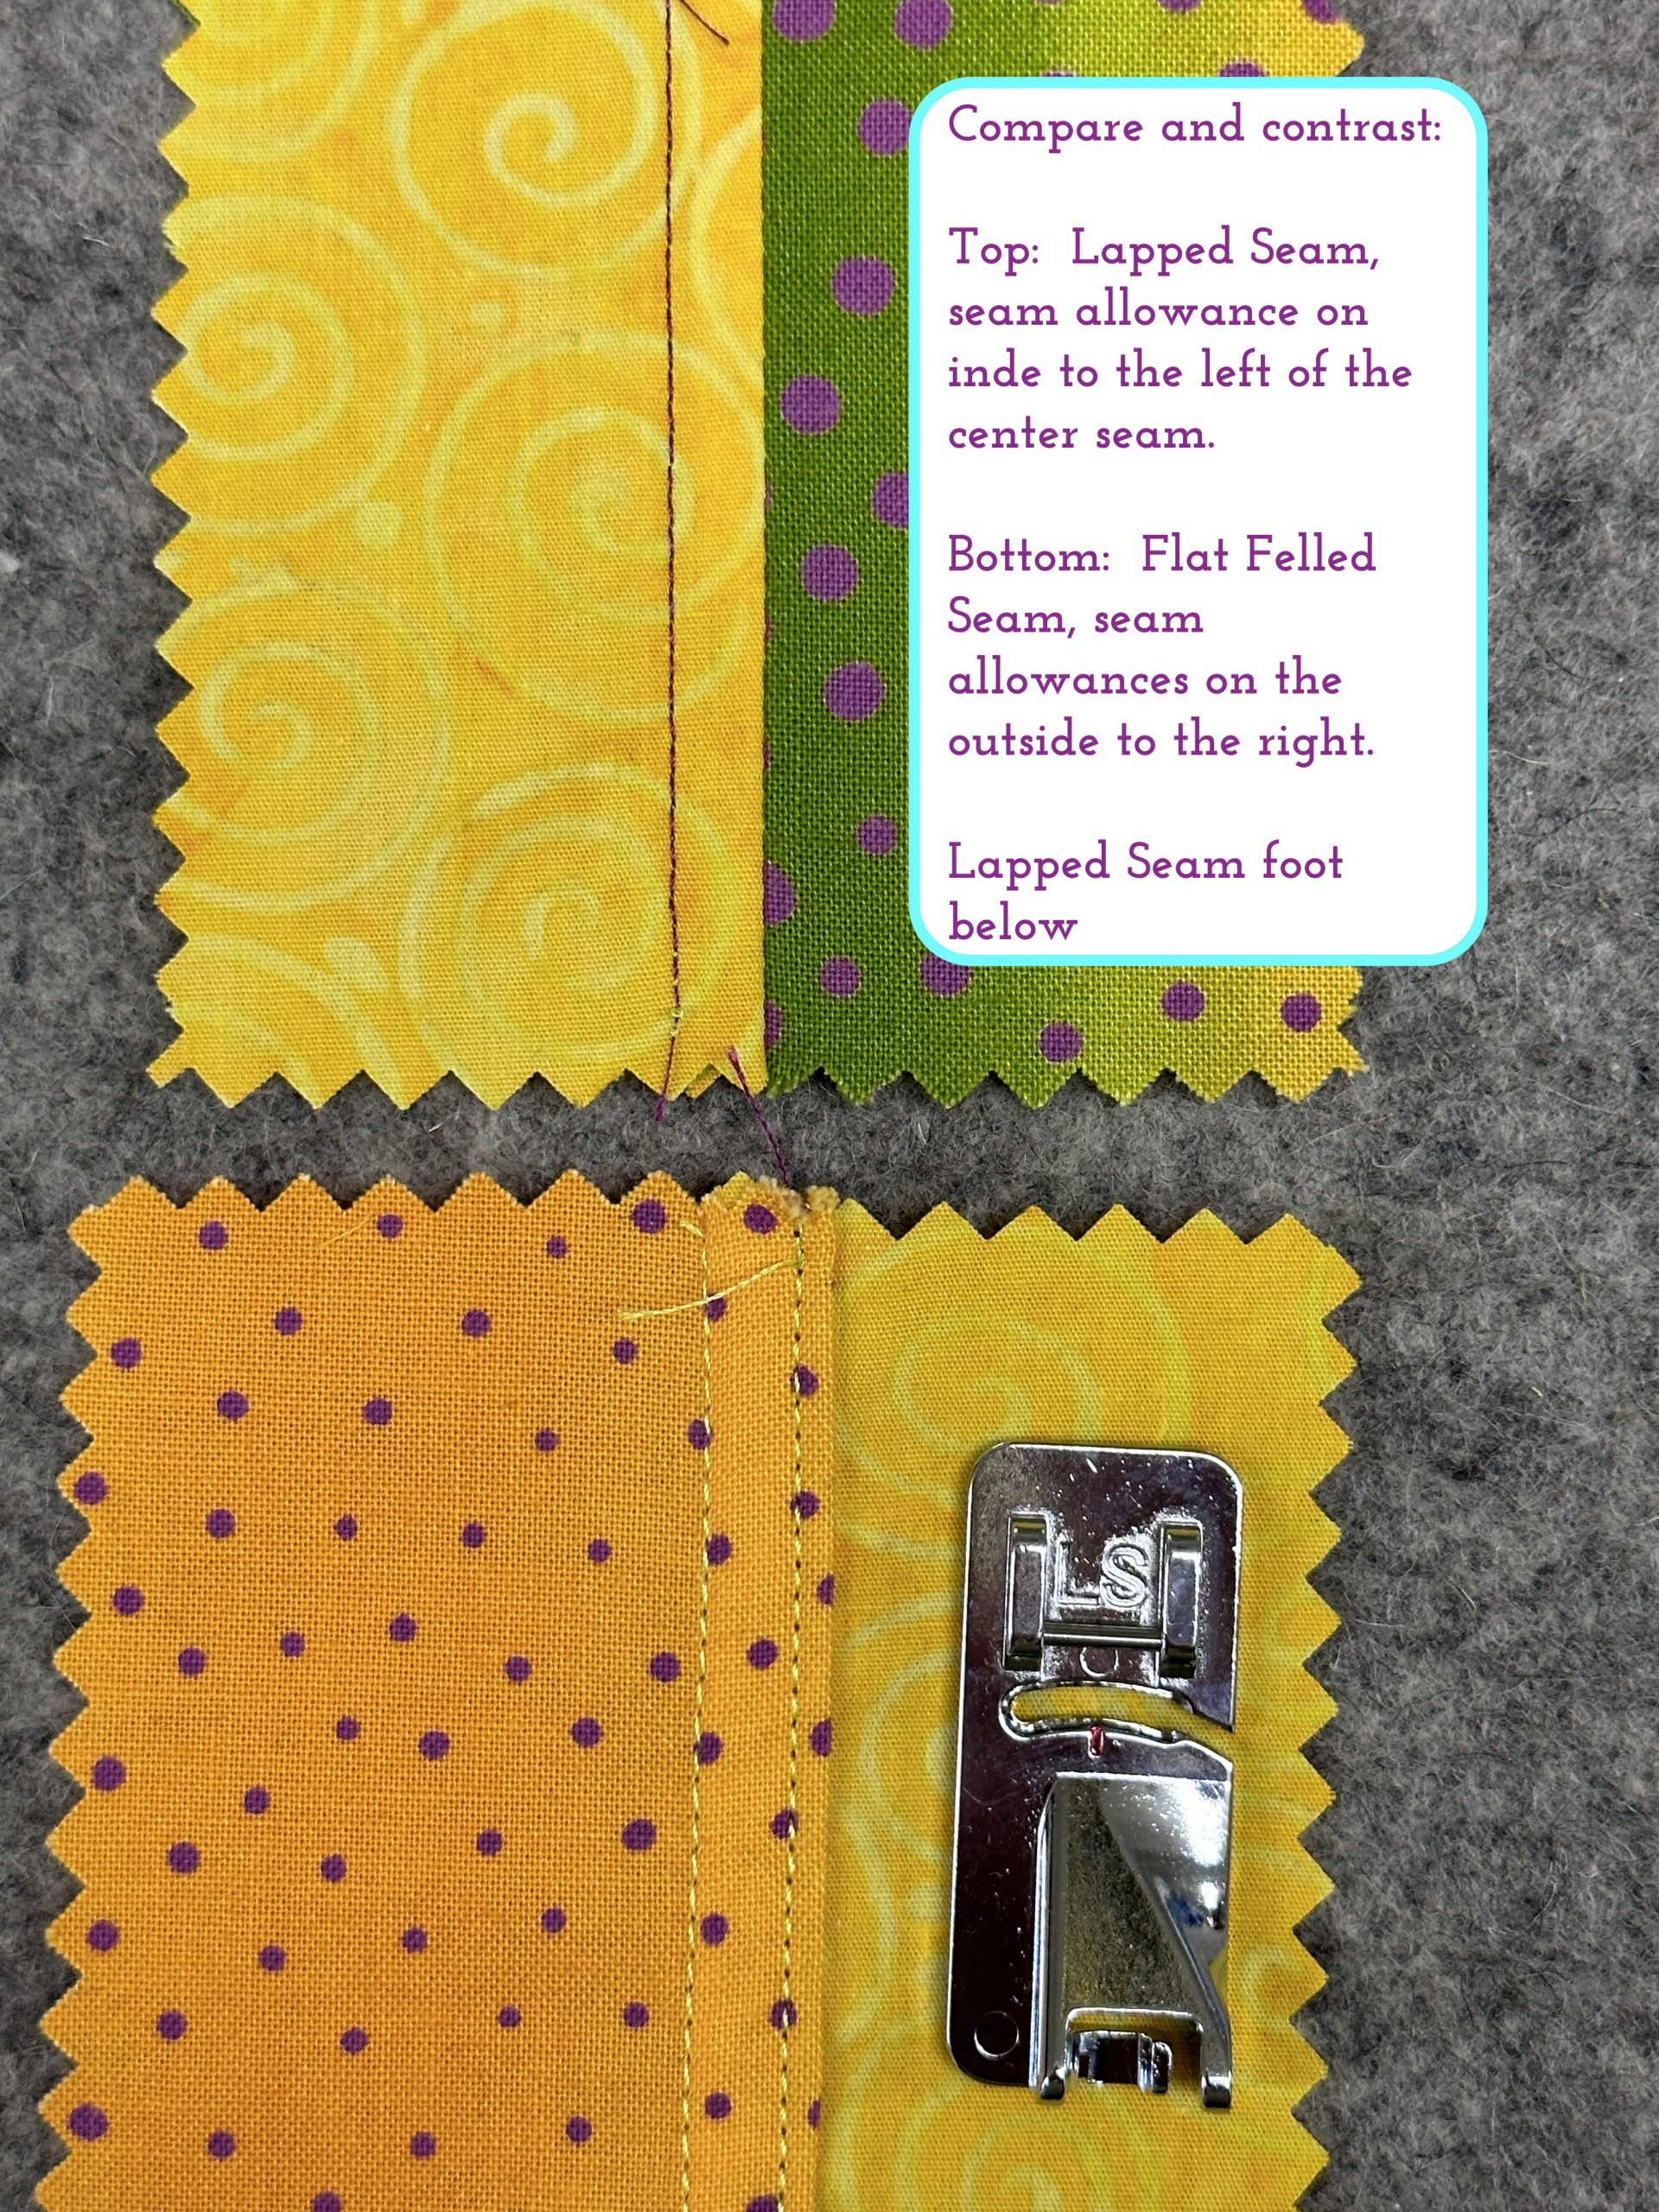
Lesson 6: Lapped and Flat-felled Seams
Lesson 7: Hong Kong Finish for Seams