email Youtube

Home
Galleries
Blog
Workshops & Calendar
Store
Resources
About
Contact

Merrimack Quilt Guild

January 30th, 2010

As you might have guessed by the lapse in posts, I was busy/away.  Last weekend was fun… on Thursday evening I gave my Decorated Quilt lecture for the Merrimack Quilt Guild of Plaistow, NH (about a stone’s throw from the Mass. border, literally!) and on Saturday taught Fabric Postcards,
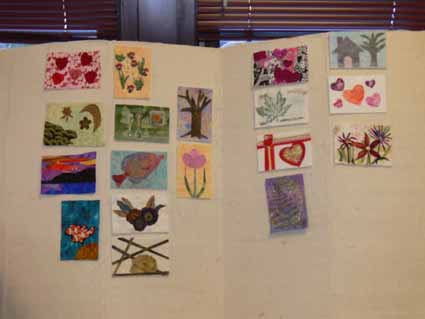
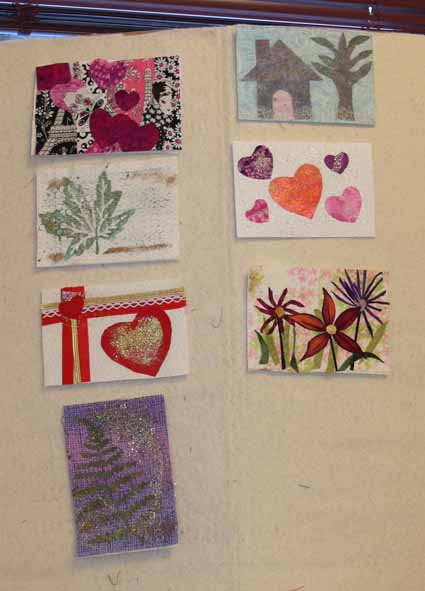
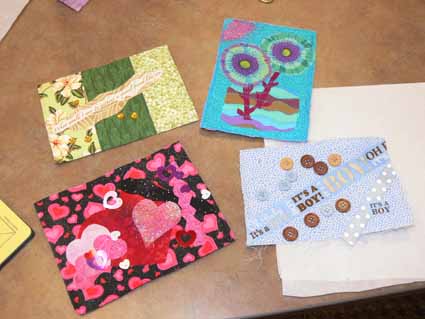
which is really a play-day with an introduction to a bunch of art quilt techniques.  Instead of having to buy a zillion things and stuff, I HAUL a zillion things and stuff and folks can try fusing to collage their postcards, Angelina, fabric stamping (I demo stamp carving, so they can see how easy it is, but too sharp tools, too many distractions to do that in the class with so much else going on), fabric rubbings, using found objects as stamps, resists and rubbing plates,  freezer paper stencils, assorted paint techniques, and finally couching yarn as an edge finish. (PS… given the costs of shipping, this class is now available only within a 2-day drive of home…..)

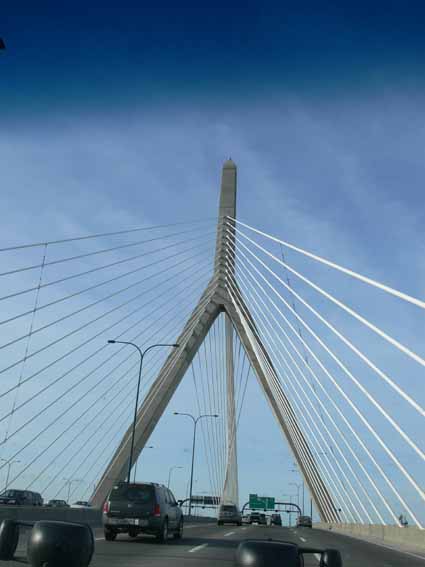
Because it was just a wee bit too far to drive home on Thursday getting home at 2 in the morning on Friday, then get up at 4 in the morning to drive back down on Saturday , my gracious host Cathy Harnish invited me to stay with her, and on Friday—oh joy of joys–we went to Ikea!  I’ve been to this one about three years ago (for a one hour zip through en route to somewhere), and the one in Seattle maybe 8 years ago?   The first time I drove through Boston after we moved to Maine, I just about flipped out…this bridge had NOT been there when I was in grad school in 1981-3!  Since I was a passenger this time, I got to snap pics.  It is supposed to echo the shape of the nearby Bunker Hill monument (an obelisk) and the sailing ships of the days of yore.  It is GORGEOUS…there is a great abstract quilt in this bridge’s lines:
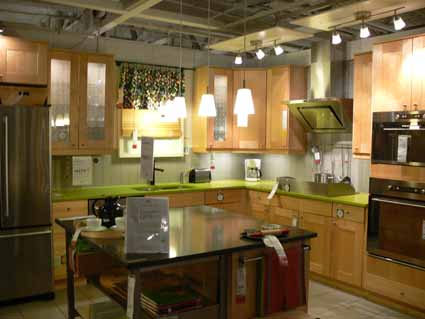
I did pretty well, buying not much–a bamboo placemat for rubbings in the class (which I forgot to unpack and USE in this class…next workshop!), a small lamp for the hall at home, and some shadow boxes in my quest for more ways to display and sell small quilts.  BUT, I saw this… I WANT THIS KITCHEN.  I WANT LIME GREEN COUNTERS!
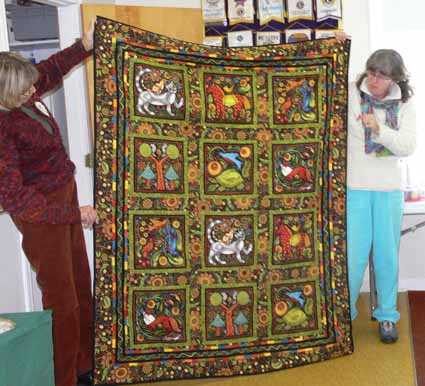
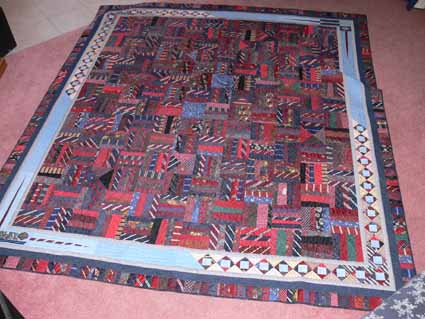
On Friday night, Cathy invited over a table full of guild members, with her dear hubby braving the table of women.  We had show and tell after, too.  While I was there, Cathy shared this commissioned quilt she did for someone made of ties and shirts.  I LOVE LOVE LOVE this border, and think it may be one of the most effective I have seen anywhere–it may have been dictated by the size of the embroideries on the shirts and the leftover scraps, but it is brilliant:
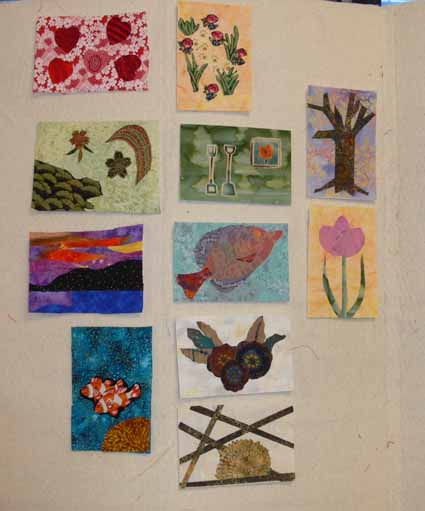
On Saturday, we had a quick set-up time, and then got going.  The morning on this class is learning to use fusibles, especially my favorite  MistyFuse (light hand, easy to use, never any “issues”).   The class was great, and enjoyed the “art smorgasbord” in the afternoon when I set out all the goodies to enjoy.  Everyone always enjoys something different… there are a few things I don’t use hardly ever, but every time I think of eliminating them from the class, there is someone who finds it to be “THEIR” thing, so I keep the materials and techniques included.

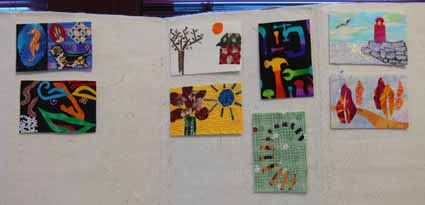
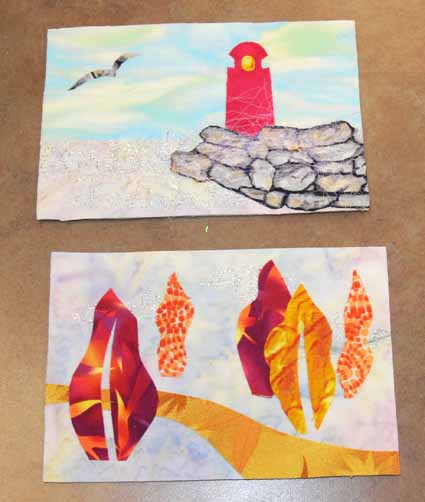
I’m afraid I didn’t get names for the makers of all these cards, but thought I’d share them with you… great variety!  Clearly the upcoming Valentine’s Day was on a couple of minds….
Thanks to all who attended the lecture and came to class… it was, as always, a gas!
Wobbly free motion straight stitches

January 27th, 2010

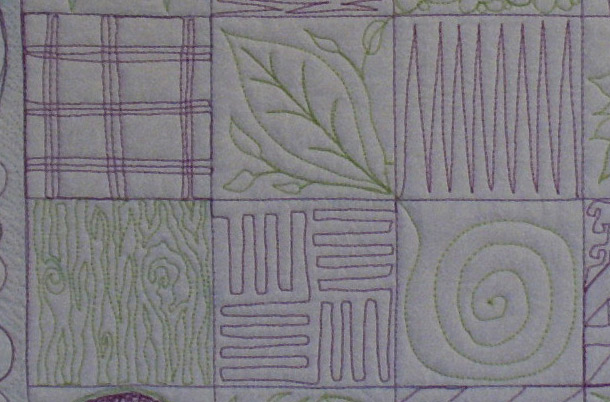
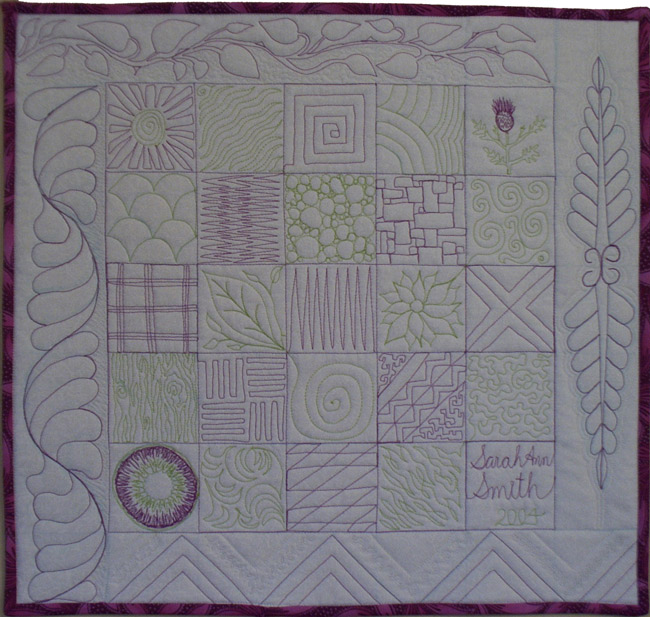
A woman on one of my e-mail lists recently asked me a question, and I think (with the help of a good mechanic at a good store) I finally have an answer:  why does one’s free-motion straight stitch sometimes wobble?  Here’s an example that she spotted in my sampler in my book (good eye! and good catch).  Look at the vertical lines in the upper left square..some wobble, some don’t (both photos are clickable for a larger view):

Here’s her original question, and portions of my replies.  I think maybe we have at long last solved the mystery of the wobbly stitch.  If anyone else has any good information, DO comment!  This is how we all learn:

***Question:

Sarah,

I posed a question to the … group about a free-motion stitch problem I was having. Since I posted the question, I found your  book (it had been “temporarily misplaced” in a sea of quilt  papers) and was looking through it. I was particularly looking at  your quilting stitches because I know you also use a 6600 and I  see my problem in one of your stitch samplers. If you would, on  page 91 of your book, the middle square on the left side, (sort  of a windowpane design), look closely at the 3 center vertical  stitches. I can see by the  path of your stitches that the first  line was stitched with the  fabric coming toward you, the center  line was stitched with you  pushing the fabric away from you, and  the 3rd line, again, was  stitched with the fabric coming toward  you. Do you see how the  center line of stitching is much  “cleaner” or neater looking than  the 2 rows on either side of it?  That is what is happening to my  stitching, and it is making me crazier than usual. Do you think that  is just something inherent  in the machine?….. I have loved my 6600 up to this  point  and I can’t imagine using a macine with a smaller harp area,  but  I really need more precision than I seem to be getting. …..

[and a note from Sarah:  the woman writing is a top award winning quilter, and was wondering how to improve her quilting having recently been plagued by some wobbles, and looked closely at both her work and mine in my book to see if she could find the answer…she used my example because it looked just like what was happening to her.   I’m thrilled she asked, because we may have both learned something!… read on)

***My first answer:

I have yet to see a good explanation of what is happening,  but I think it is a combination of two things:

going backwards isn’t always as smooth a movement as forwards

Stitching with the grain of the fabric (instead of on a bias)

I think the latter is they key thing….  it would be interesting  to try doing 3 or 5 or whatever parallel lines on the straight of  the grain, on the cross grain, and on the bias.  I *think* that  some of that wobbly look happens when you are free-motioning  parallel to the threads of the fabric.  If you go on a bias, not  an issue… it has to do with which side of the weave of the  fabric the needle enters …if you are stitching along one thread  and the needle enters on one side of the fabric-thread on one stitch, then on the other side on the next stitch…

It isn’t just our machines… I’ve noticed this on many different brands when test-driving them…..

***And my second answer, thanks to Don at Tony’s Sewing Machines in Biddeford, Maine:

…. on the way to  my teaching gig in NH last Thurs-Sat, I stopped in a really good  sewing machine store in southern Maine for a totally different  reason.  The guy there seemed knowledgeable so I asked your  question…. I have an answer, and it makes sense!

There are two reasons for the wobble [in a free motion straight stitch]… the first was my idea that the needle is coming down on opposite sides of the thread when you are  sewing with the grain.

The second, more important, reason is that the needle bar on all  zigzag machines must move.  So it does!!  When you free-motion,  vibrations, the motions, etc. cause it to wiggle sometimes, leading to  the variations in stitching.  On straight-stitch only machines (like  the Singer Featherweight which has the best straight stitch ever made because that is all it does), NO wobbling because the needle-bar is  fixed/doesn’t move.  The Mega Quilter is, I am pretty sure, a straight  stitch only, so the needle-bar doesn’t move.  On the Janome 11000 (top  of the line) there is a special “locking” mechanism that locks the  needle bar in place when set on a straight stitch, so that prevents  the problem.

Makes sense, doesn’t it?

As for the mechanic with whom you spoke…. for sure when going in reverse with the feed dogs up there are issues, like on most  programmed buttonholes, that is why the density of zigzag is different  from one side to the next.  The best programmed buttonhole I ever saw  (I think it was my old Bernina …forget the number, but it was a fancy one in 1996) went down one side in forward, then stitched in  reverse in a STRAIGHT stitch on the other side, then did the zigzag in  forward on the second side, so the two sides matched perfectly.

Anyway, I think the reverse thing the repairman suggested doesn’t  apply to free-motion,…. BUT the straight-stitch only machine /  needle-bar that doesn’t move DOES make sense…..my guess is that by  stitching on the bias, the wobble is disguised on our machines….

***As an addendum, it seems to me that reducing vibrations by slowing down and having a sturdy table/cabinet will minimize motion in the needle bar, and thereby reduce wobbles in the straight lines.  Now, to go to a show with a practice quilt sandwichand test this theory out on a number of straight-stitch only and zigzag machines!

Cookie? PLEEEZE cookie!

January 20th, 2010

Deborah Boschert, one of my Frayed Edges mini-group, is also part of a wonderful project called Twelve  x 12.  They have a blog here, and a website here, and even better…..well, not sure if I can tell you about it yet but there is something really cool coming in their future!   So hold on to that thought.  Anyway, Deborah now lives (sob we miss her) near Dallas, and the Dallas Quilt Guild is hosting a 12 x 12 challenge.  The rules:  anything goes as long as it is 12 by 12 inches.  Deborah invited us to participate and send quilts to hand in the show this March.  Well…..

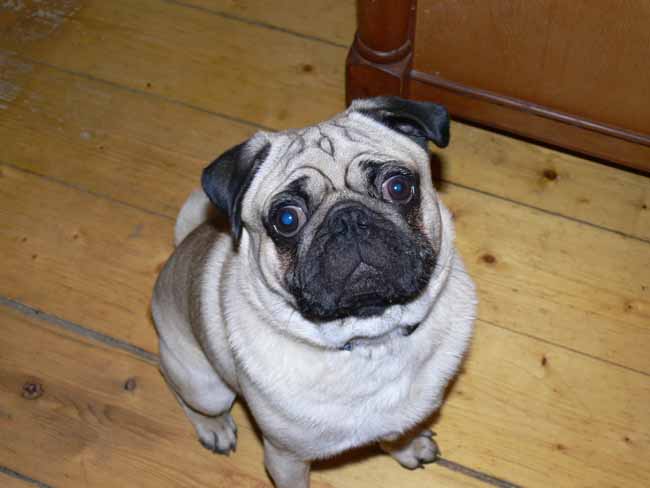
I was totally, utterly blocked.  I had NOT A CLUE.  Not a whiff of an idea.  Inside of brain darker than a cave in a coalmine with no lights.  Nada.  Nicht.  Zip.  Zilch.  Then I had to walk the dog.  This dog (note…there are fifteen photos in this post, and all are clickable for a larger view):

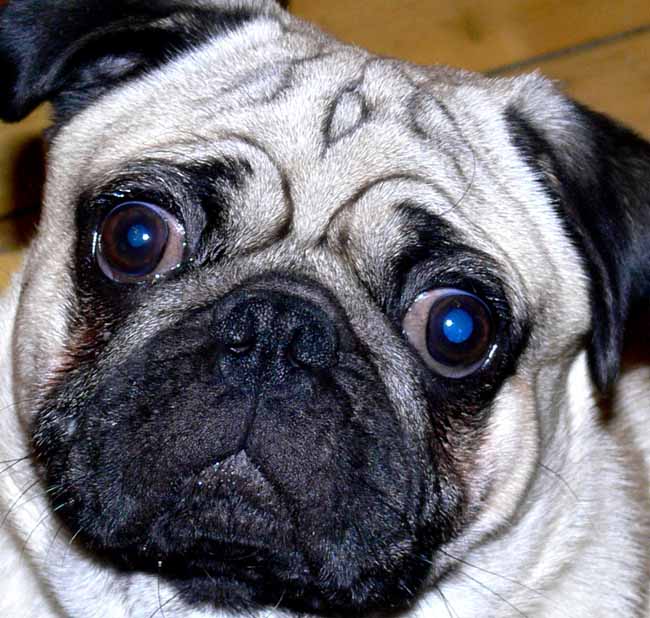
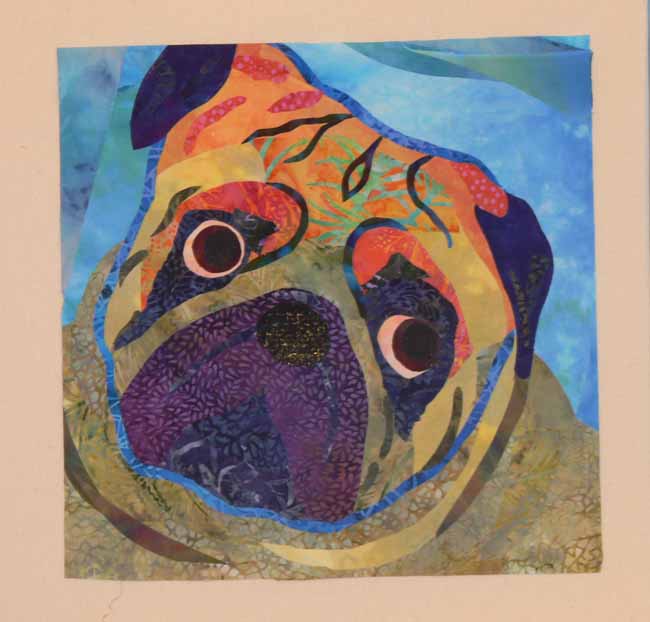
Isn’t he CUTE?  Even from the hind view with curly little tail and dog butt, he is CUTE.  Well, the good news is that the quilt is NOT of his hind end.  I figured the cuteness of a dog’s butt is not necessarily appreciated by all, but how could ANYONE not love a pug mug?   So, I scoured through the umpteen thousand (literally) photos on my hard drive, found the one above, and cropped the photo:

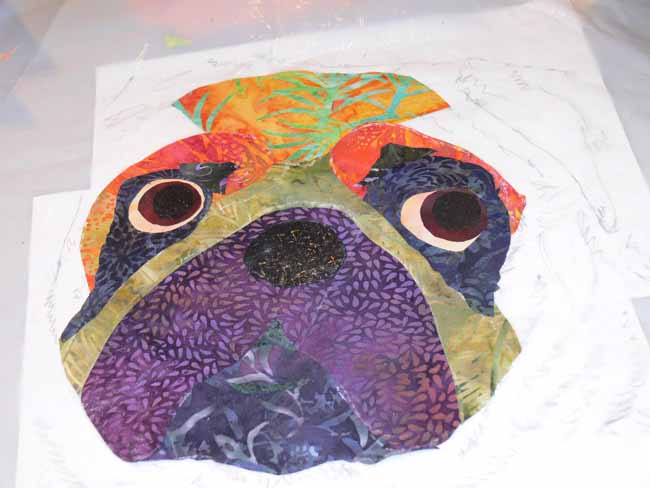
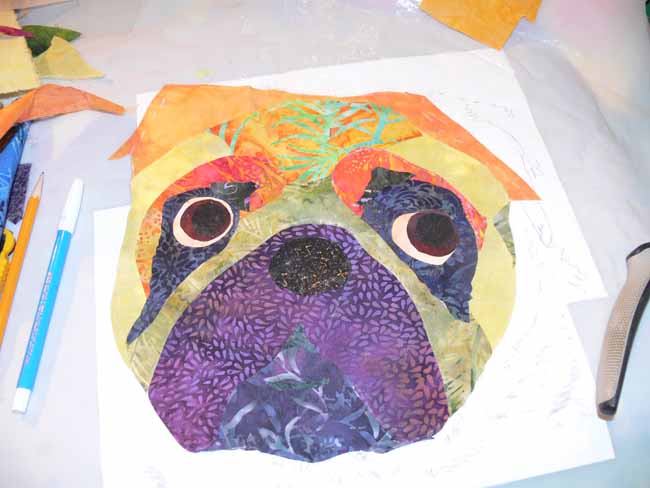
Then I decided to use value as my plan of attack for fusing up this puppy.  At first I selected beige, tan, charcoal, and went YUCK.  I wanna play with color.  Back in the fused fabric stash they went.  Out came the colored fused stash.  I started with medium values…some lovely turquoises.  Then lights, deep darks, and some transitional values.  Not suprisingly, the light lights were yellows, the deep darks were navy and purple.

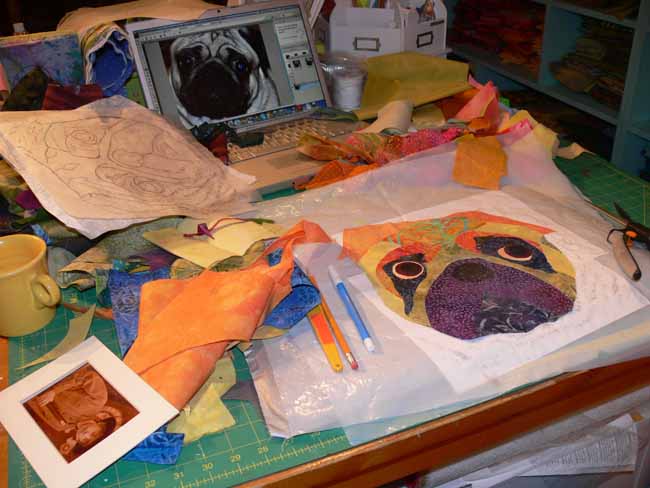
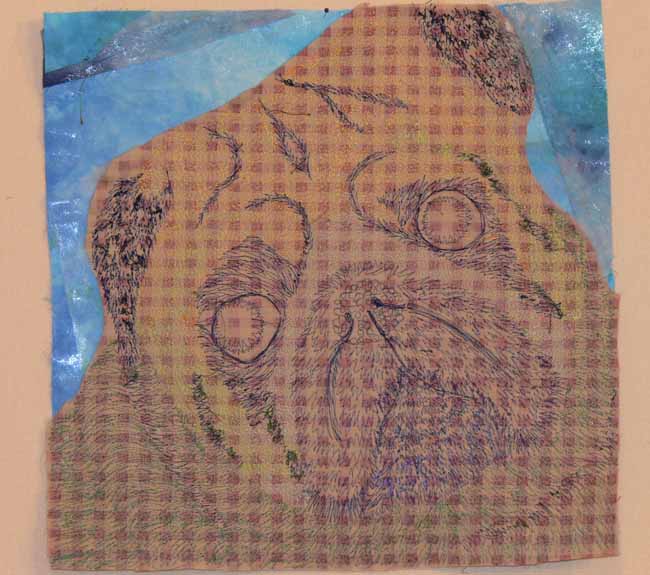
To get ready, I enlarged the photo to 12 inches on my computer, got out the large tracing paper, and traced his outlines.  This tracing was my pattern guide in cutting the pieces of fabric for his sweet face.  Here is the first bits:

Then a bit more work–you can see the tracing in the top left, the laptop with the cropped photo for reference, and the scattered bits of pre-fused fabrics tossed about (and note the yellow mug…I LOVE the fiesta ware!):

Here’s a close-up of the pug at this stage:

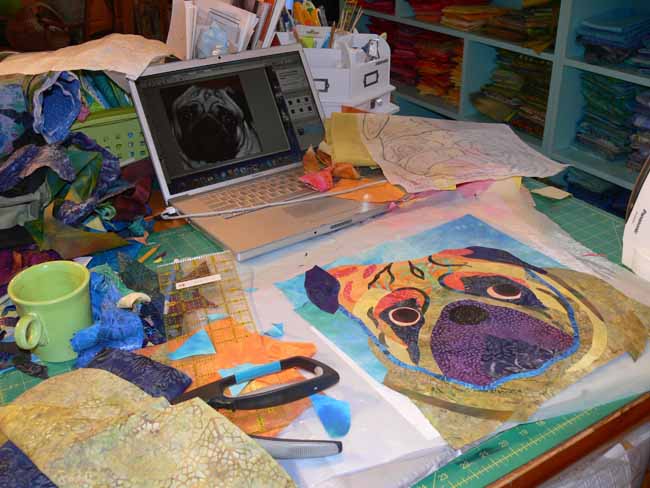
Then even more; I have added the background, but notice the face is kinda upright, not that cute cocked head, the quizzical look (note the green fiestaware mug):

Edges trimmed, but face is still upright…wrong!

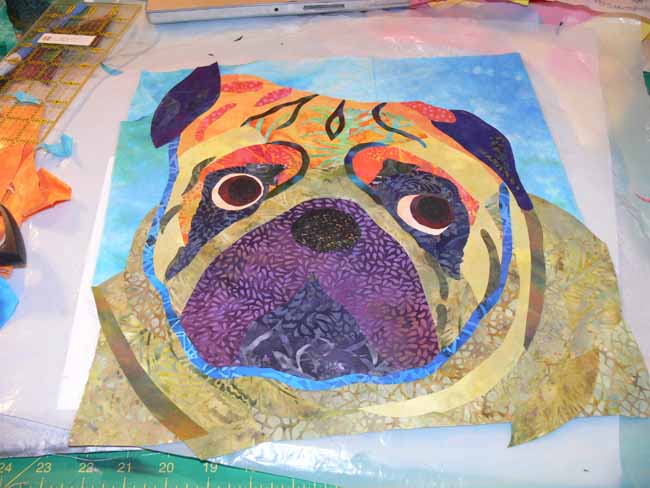
So after uttering a few cuss words at having not noticed I was trimming him with his head in the wrong position, I sliced things off and fused up some more background–and yes, there is an “issue” with the shape of his head on the left, but I knew that would be cropped off so I ignored it:

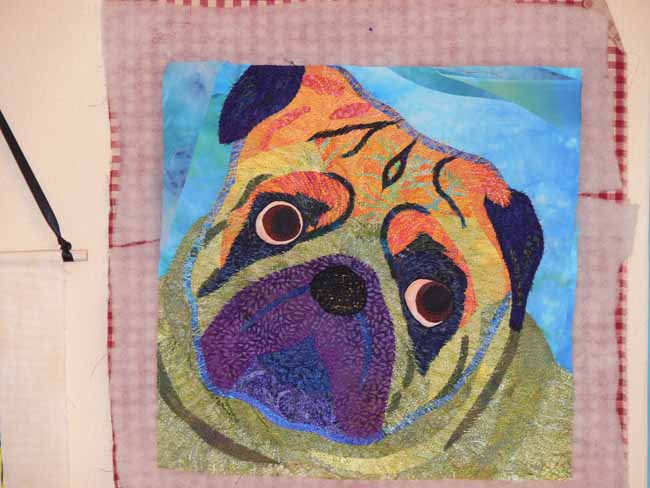
This shows ‘Widgeon quilted (tho not the background…more on that in a sec):

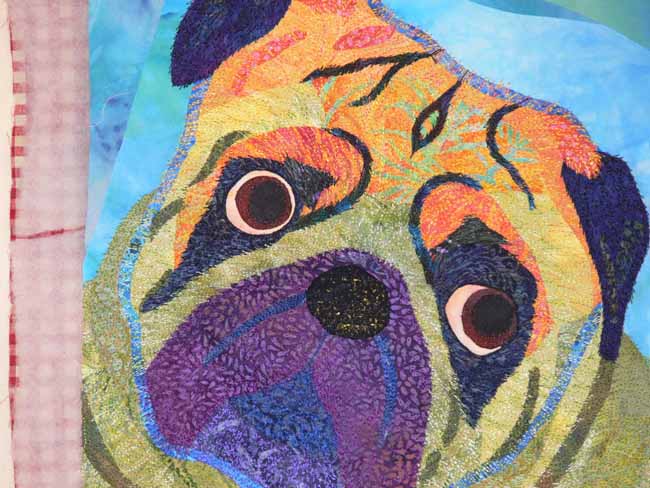
and a close-up:


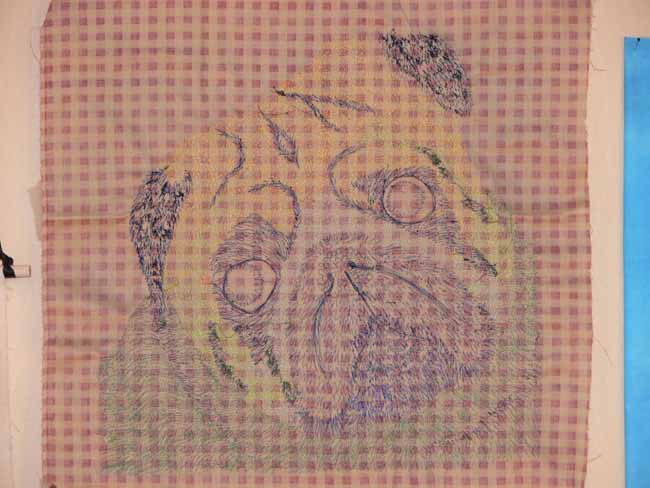
Here’s what it looks like from the back:

Next, I trimmed away the “middle-backing” and the wool batt I was using from under the turquoise background:

I then added cotton batting and the “real” backing and quilted the background, plus some of the major creases in his pug mug:

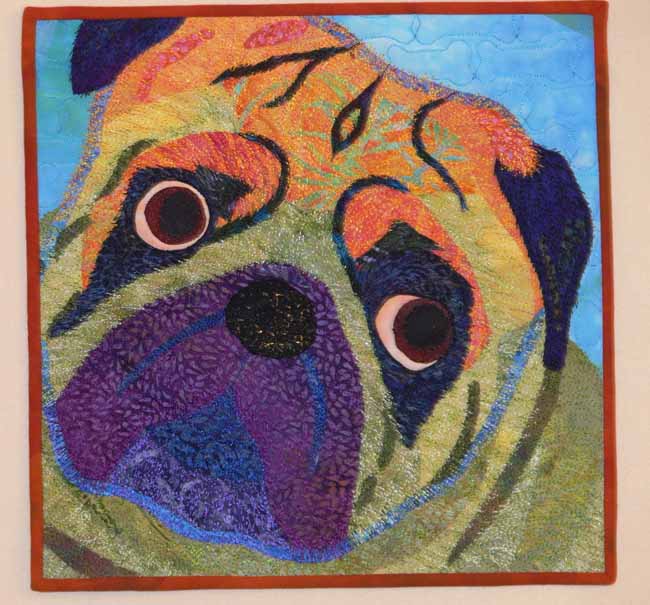
Finally, I had thought I would face the edges.  I used an old rust colored fabric on the back, and for the facings, and realized it looked MUCH better than the turned/faced edge.  So I found a better quality hand-dyed and made narrow bias bindings:

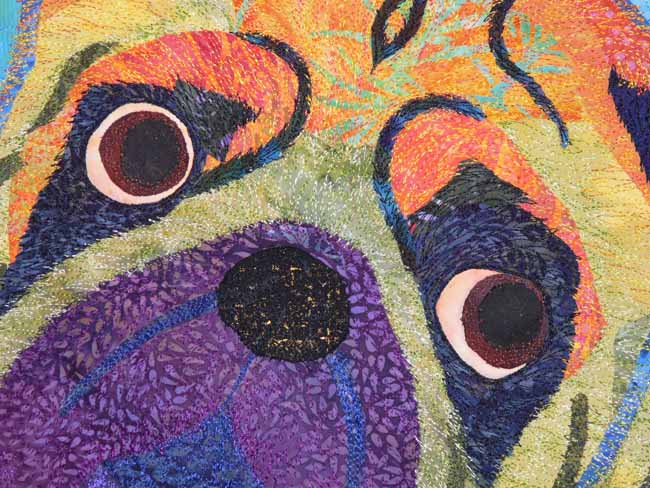
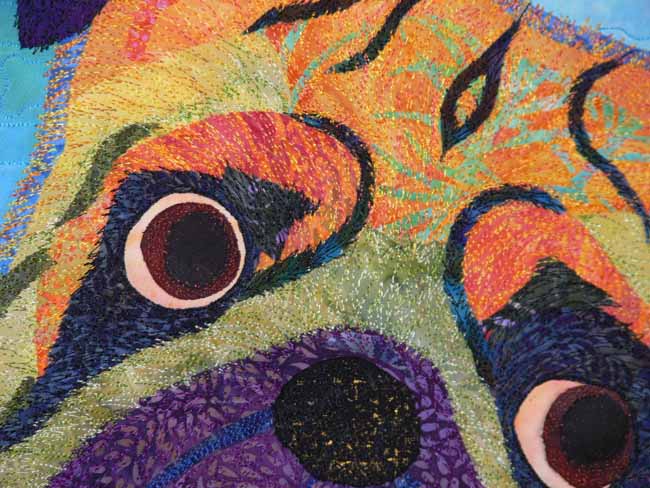
Last but not least…two close-ups.

Hope you liked the journey through the process. The quilt started out with a working title of “You want me to sit STILL?” (as in sit still so I can take a picture of you!), but that evolved into either “Walkies?  Puhleeze walkies!” or “Cookie???? PLEEEZE cookie!”  Eli (the dog is really his) and I both liked the Cookie version better, so that’s the title!

I absolutely ADORE this little 12 x 12 inch quilt… I think I did OK, because each time my sons see the quilt they start grinning, too!  Of course, we are biased and utterly in love with the little dog-beast!

Coastal Quilters, January 2010

January 18th, 2010

It has been a while since I blogged about Coastal Quilters, our wonderful local chapter of the Pine Tree Quilt Guild.  Maine is lucky to have a great statewide guild, with something like 73 local chapters.  Our group runs from traditional to art, beginner to experienced.  This month we had a fun show and tell, including my lap quilt.

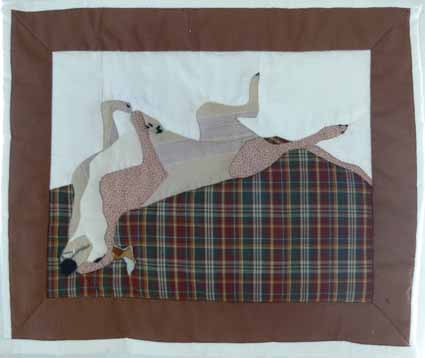
Eleanor Greenwood is relatively new to quilting, but clearly willing to try anything, and succeeds well.  She LOVES her grayhound, Louie, and is actively involved in rescue placements and supporting the organization.  She told us that he loves to sleep on his back; apparently this is quite common among the breed and is called “cockroaching” or “dead cockroach.”  I love it!  Anyway, she used a photo to hand PIECE (not applique!) this portrait of her pooch, “Jigsaw Louie”:

Great work!  If you’re interested in adopting one of these sweet dogs, visit www.greyhoundplacement.com, a 501c3 organization.

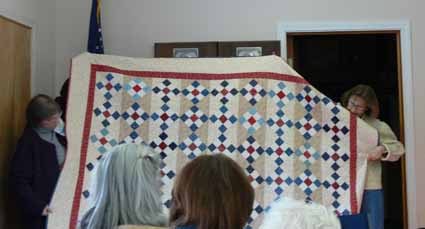
Joan Herrick is one of our traditional quilters (as well as an accomplished knitter).  Her work is meticulous…. I hope she never looks too closely at the pieced work I’ve done recently…my piecing is, well, let’s just say it’s nowhere NEAR as precise as I would like it to be, and even further away from hers!  In this photo, Joan is on the left, and another guild member (Patty C.) is on the right:

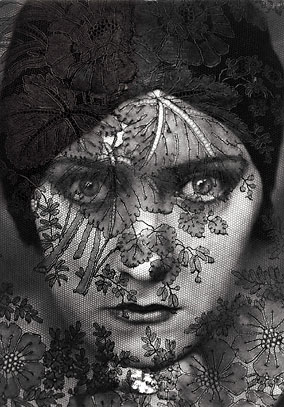
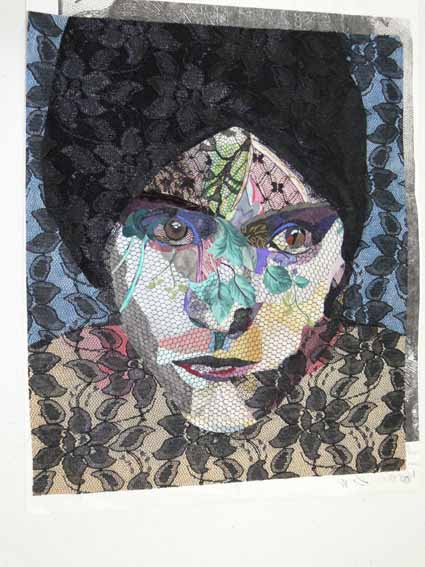
A new member, Paula Blanchard, shared some of her work with us.  In a class with Jude Spacks (an artist living in nearby Belfast, Maine) a while back, she did a fabric collage based on Edward Steichen’s photograph of Gloria Swanson, the silent film diva:

Here is her take in fabric…. I think Paula has a great future in art quilts!

And finally, my lap quilt, done.  The photo isn’t too precise, so one of these days I’ll take one that is sharper and share, but you can see now how I put it together.  Think when I’m done with writing blogposts, I’ll go cuddle under it…the back is creamy yellow minkee!  I’m on the right and Barb M., our tallest member who is always so willing to help is holding it up on the left…thanks Barb!

Fight Cancer on Tote Tuesdays!

January 15th, 2010

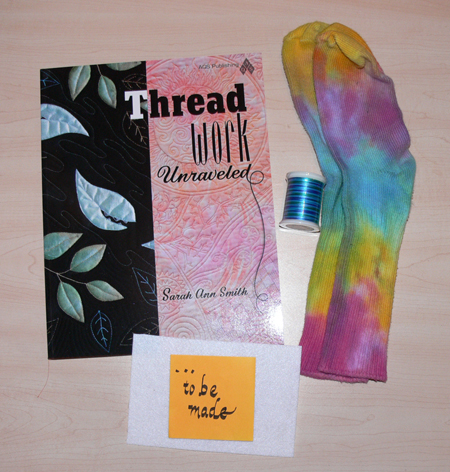
Several years back, the indefatigable Virginia Spiegel set out to raise funds for the American Cancer Society.  Her efforts have taken various forms, in which I’ve been able to participate as donor of both art quiltwork and cash:  fabric postcards and art quilt auctions.  This year, she’s got another great idea:  Totes filled with goodies from various fiber artists.  I’m thrilled to donate a copy of ThreadWork Unraveled, a spool of thread, and a fabric postcard (yet to be made!) as the contents of one of the bags.  The goal is to have bags with affordable-for-most donations as well as a few fancier ones.

Logo designed by Jeanelle McCall of http://www.fivespoongallery.com/

Here’s how it will work:

ToteTuesday, a Fiberart For A Cause fundraiser for the American Cancer Society, will open Tuesday, February 2 and continue through March.

ToteTuesday will feature themed totes filled with unique, beautiful, and inspiring items from the worlds of art quilting, fiber arts, knitting, beading, mixed media and surface design.

You can expect totes offering original artwork, autographed books, hand-dyed fabrics, gorgeous yarns, beads, handmade journals, fun and useful materials/tools for mixed-media and surface design, online classes, DVDs, and much, much more.

A list of the more than 20 themed totes now in progress is here:

http://www.virginiaspiegel.com/blog/archives/4265

100% of the proceeds will be donated directly to the American Cancer Society through Fiberart For A Cause. Fiberart For A Cause has already donated over $190,000 to the ACS:

http://www.virginiaspiegel.com/NewFiles/ACSFundraiser.html

Here’s what will be in “my” tote:

Please mark your calendar for Tuesday, February 2 and be prepared to be amazed!

To visit Jeanelle McCall’s site, click here.