email Youtube

Home
Galleries
Blog
Workshops & Calendar
Store
Resources
About
Contact

Blog Archives

Christmas Bag tutorial and fine finishing tips

Sunday, December 22nd, 2019
A quick Gift Bag Tutorial–took about half an hour even *with* being fussy! Used leftover flannel, and a trimmed off bit of fabric from a quilt back or edge as the ribbon! Read on….

Sometimes it is possible to whip up a quick something just before Christmas…I’ll have to back-to-back posts (I hope) about sewing for the holidays that include this tutorial on zipping up a quick gift bag and, next, the wonderful York Pinafore pattern from Helen’s Closet patterns.

Last year Shannon Fabrics sent me a number of different fabrics including Cuddle and Luxe, fleece and faux fur type of fabrics. They sent a vast amount of this soft and silky red (available at Fabrics.com). I’m not positive which color way it was, but it was similar to this one. I finally purchased a flannel sheet, queen size, to make a throw that is big enough for two to snuggle or to use as a cover on a twin bed! It is more than a tad wrinkled here because it has been in recent use…it’s winter in Maine! Thank you Shannon Fabrics!

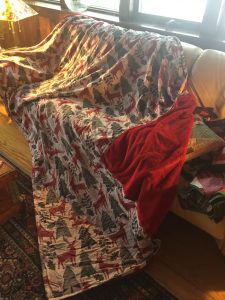
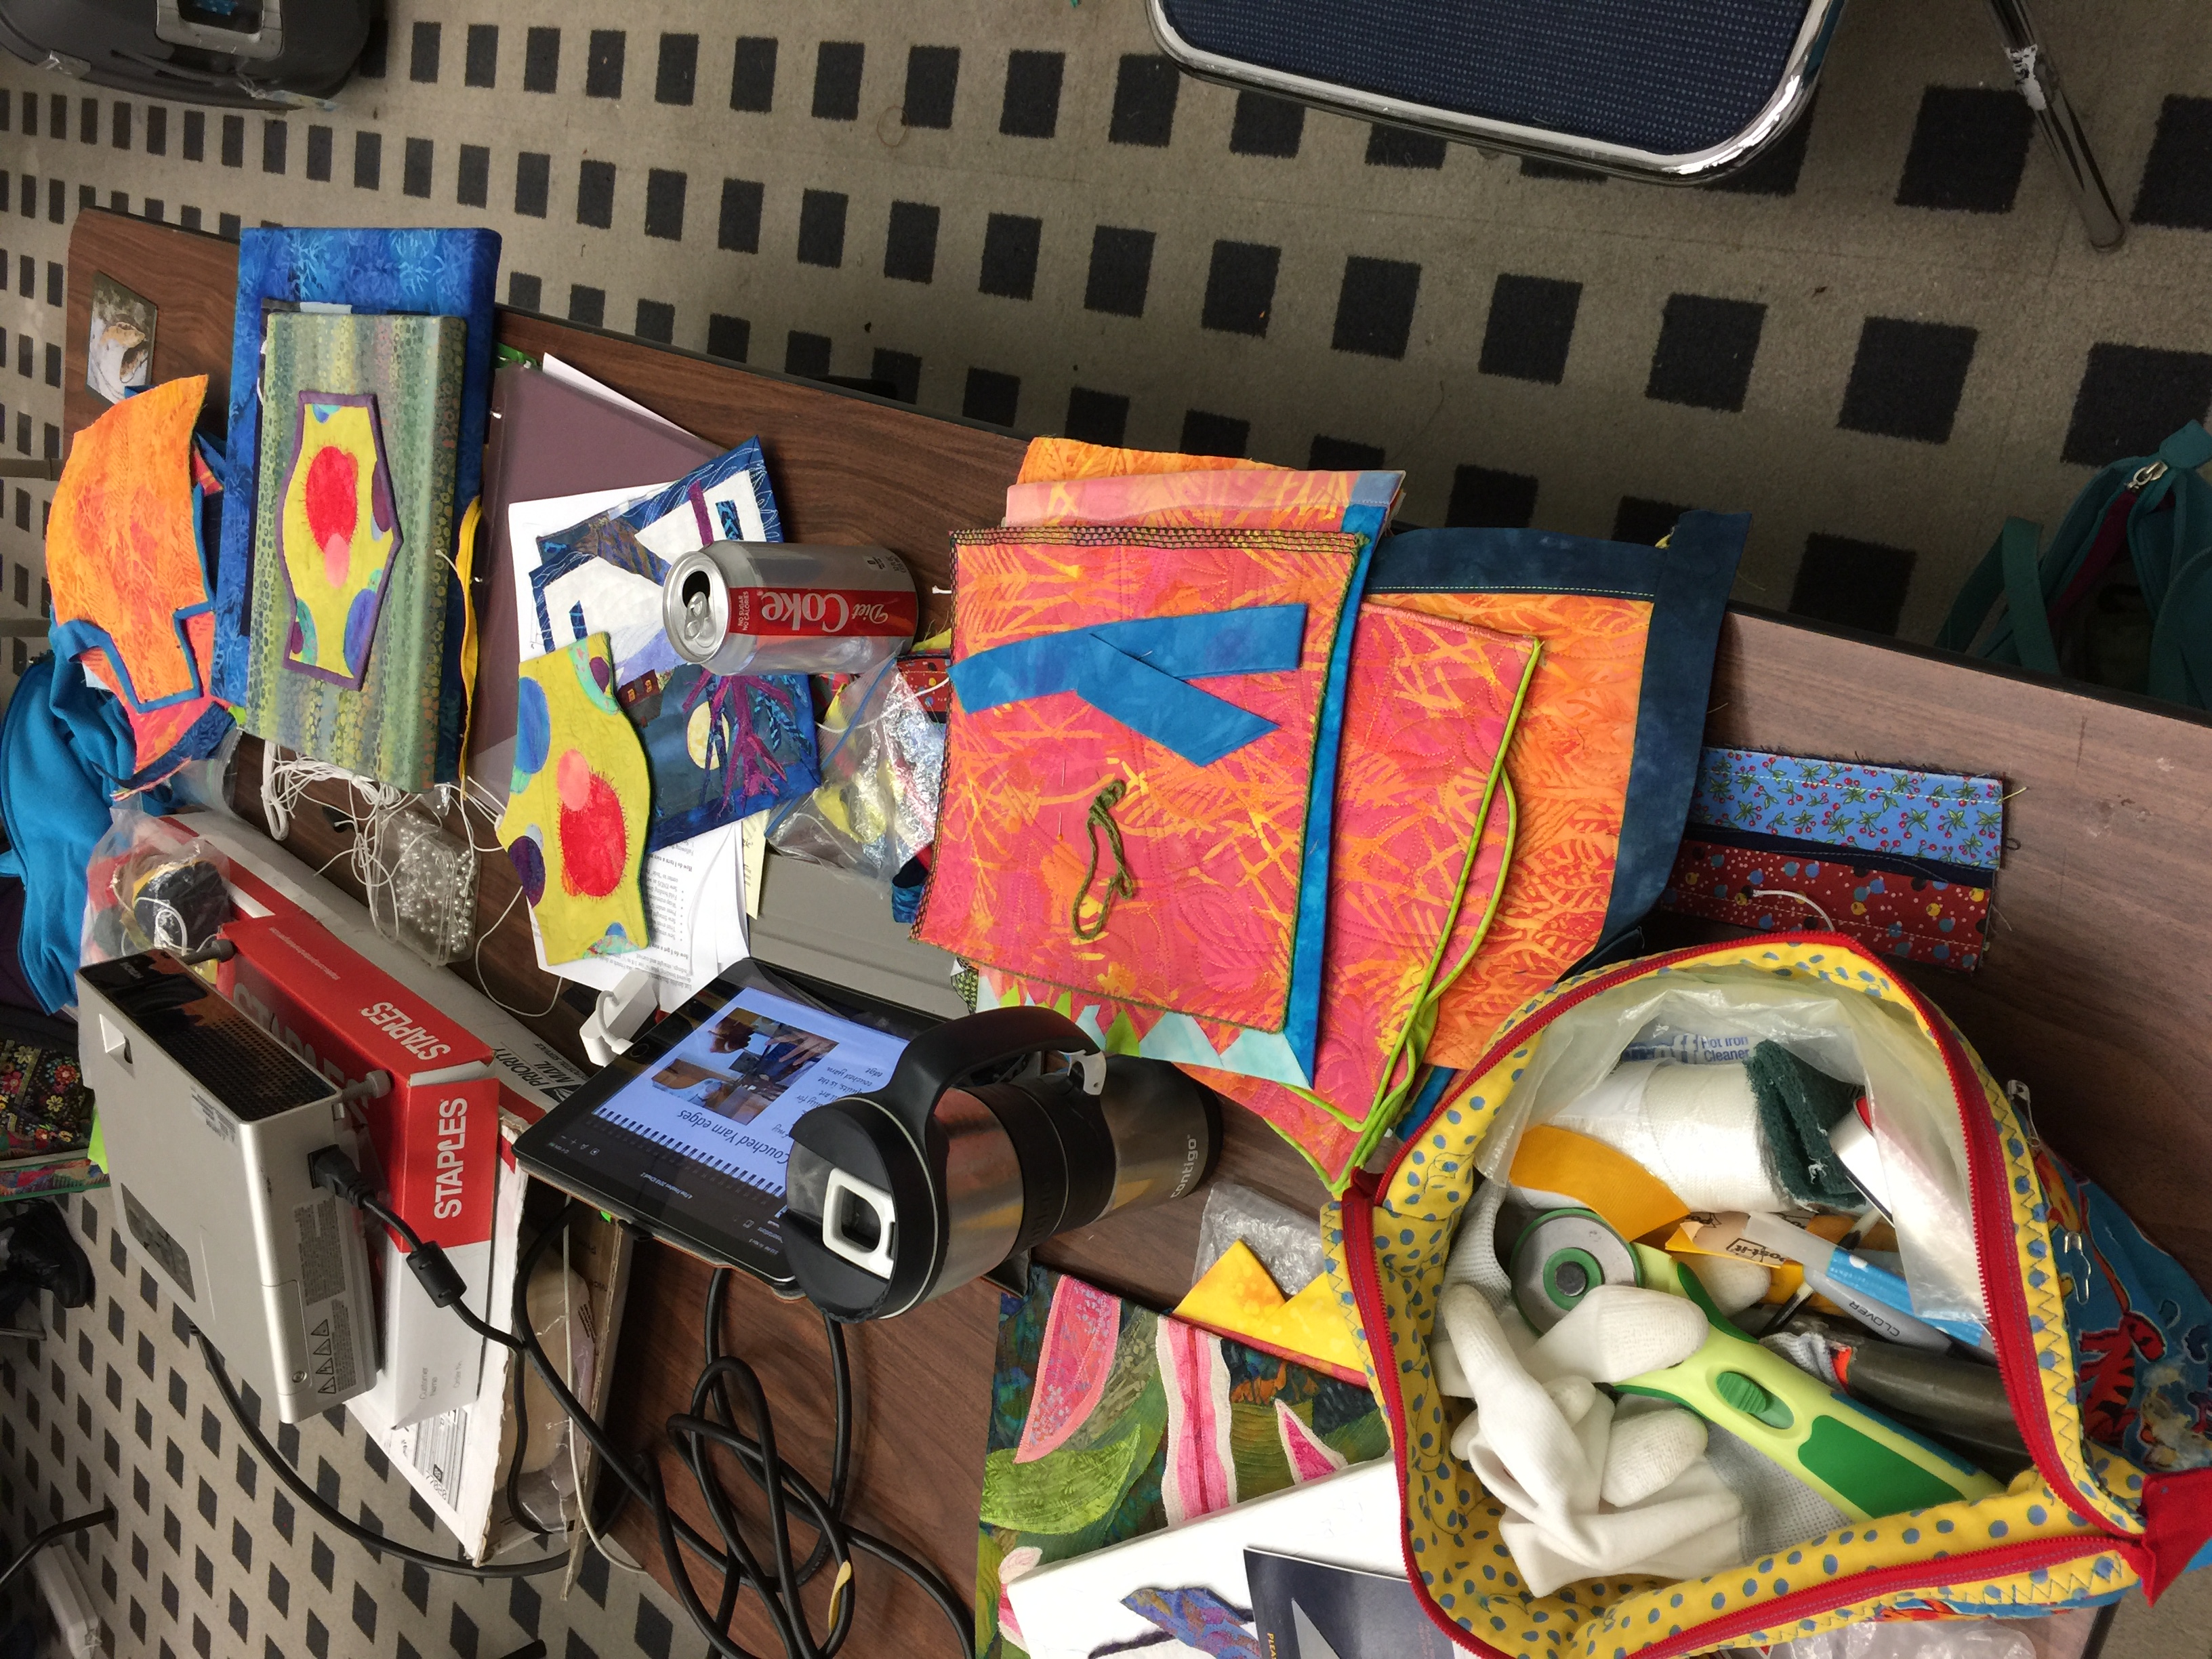
I needed the Queen Sized sheet so it would be long enough for the red Luxe that is so silky soft. That meant I had quite a bit leftover…so I thought I’d make a garment (next post). Once that was made, I still had leftovers so I whipped up two gift bags and thought I’d share it as a tutorial.

Tutorial:

  1. Cut two rectangles of fabric or one very wide rectangle. Place right sides together.
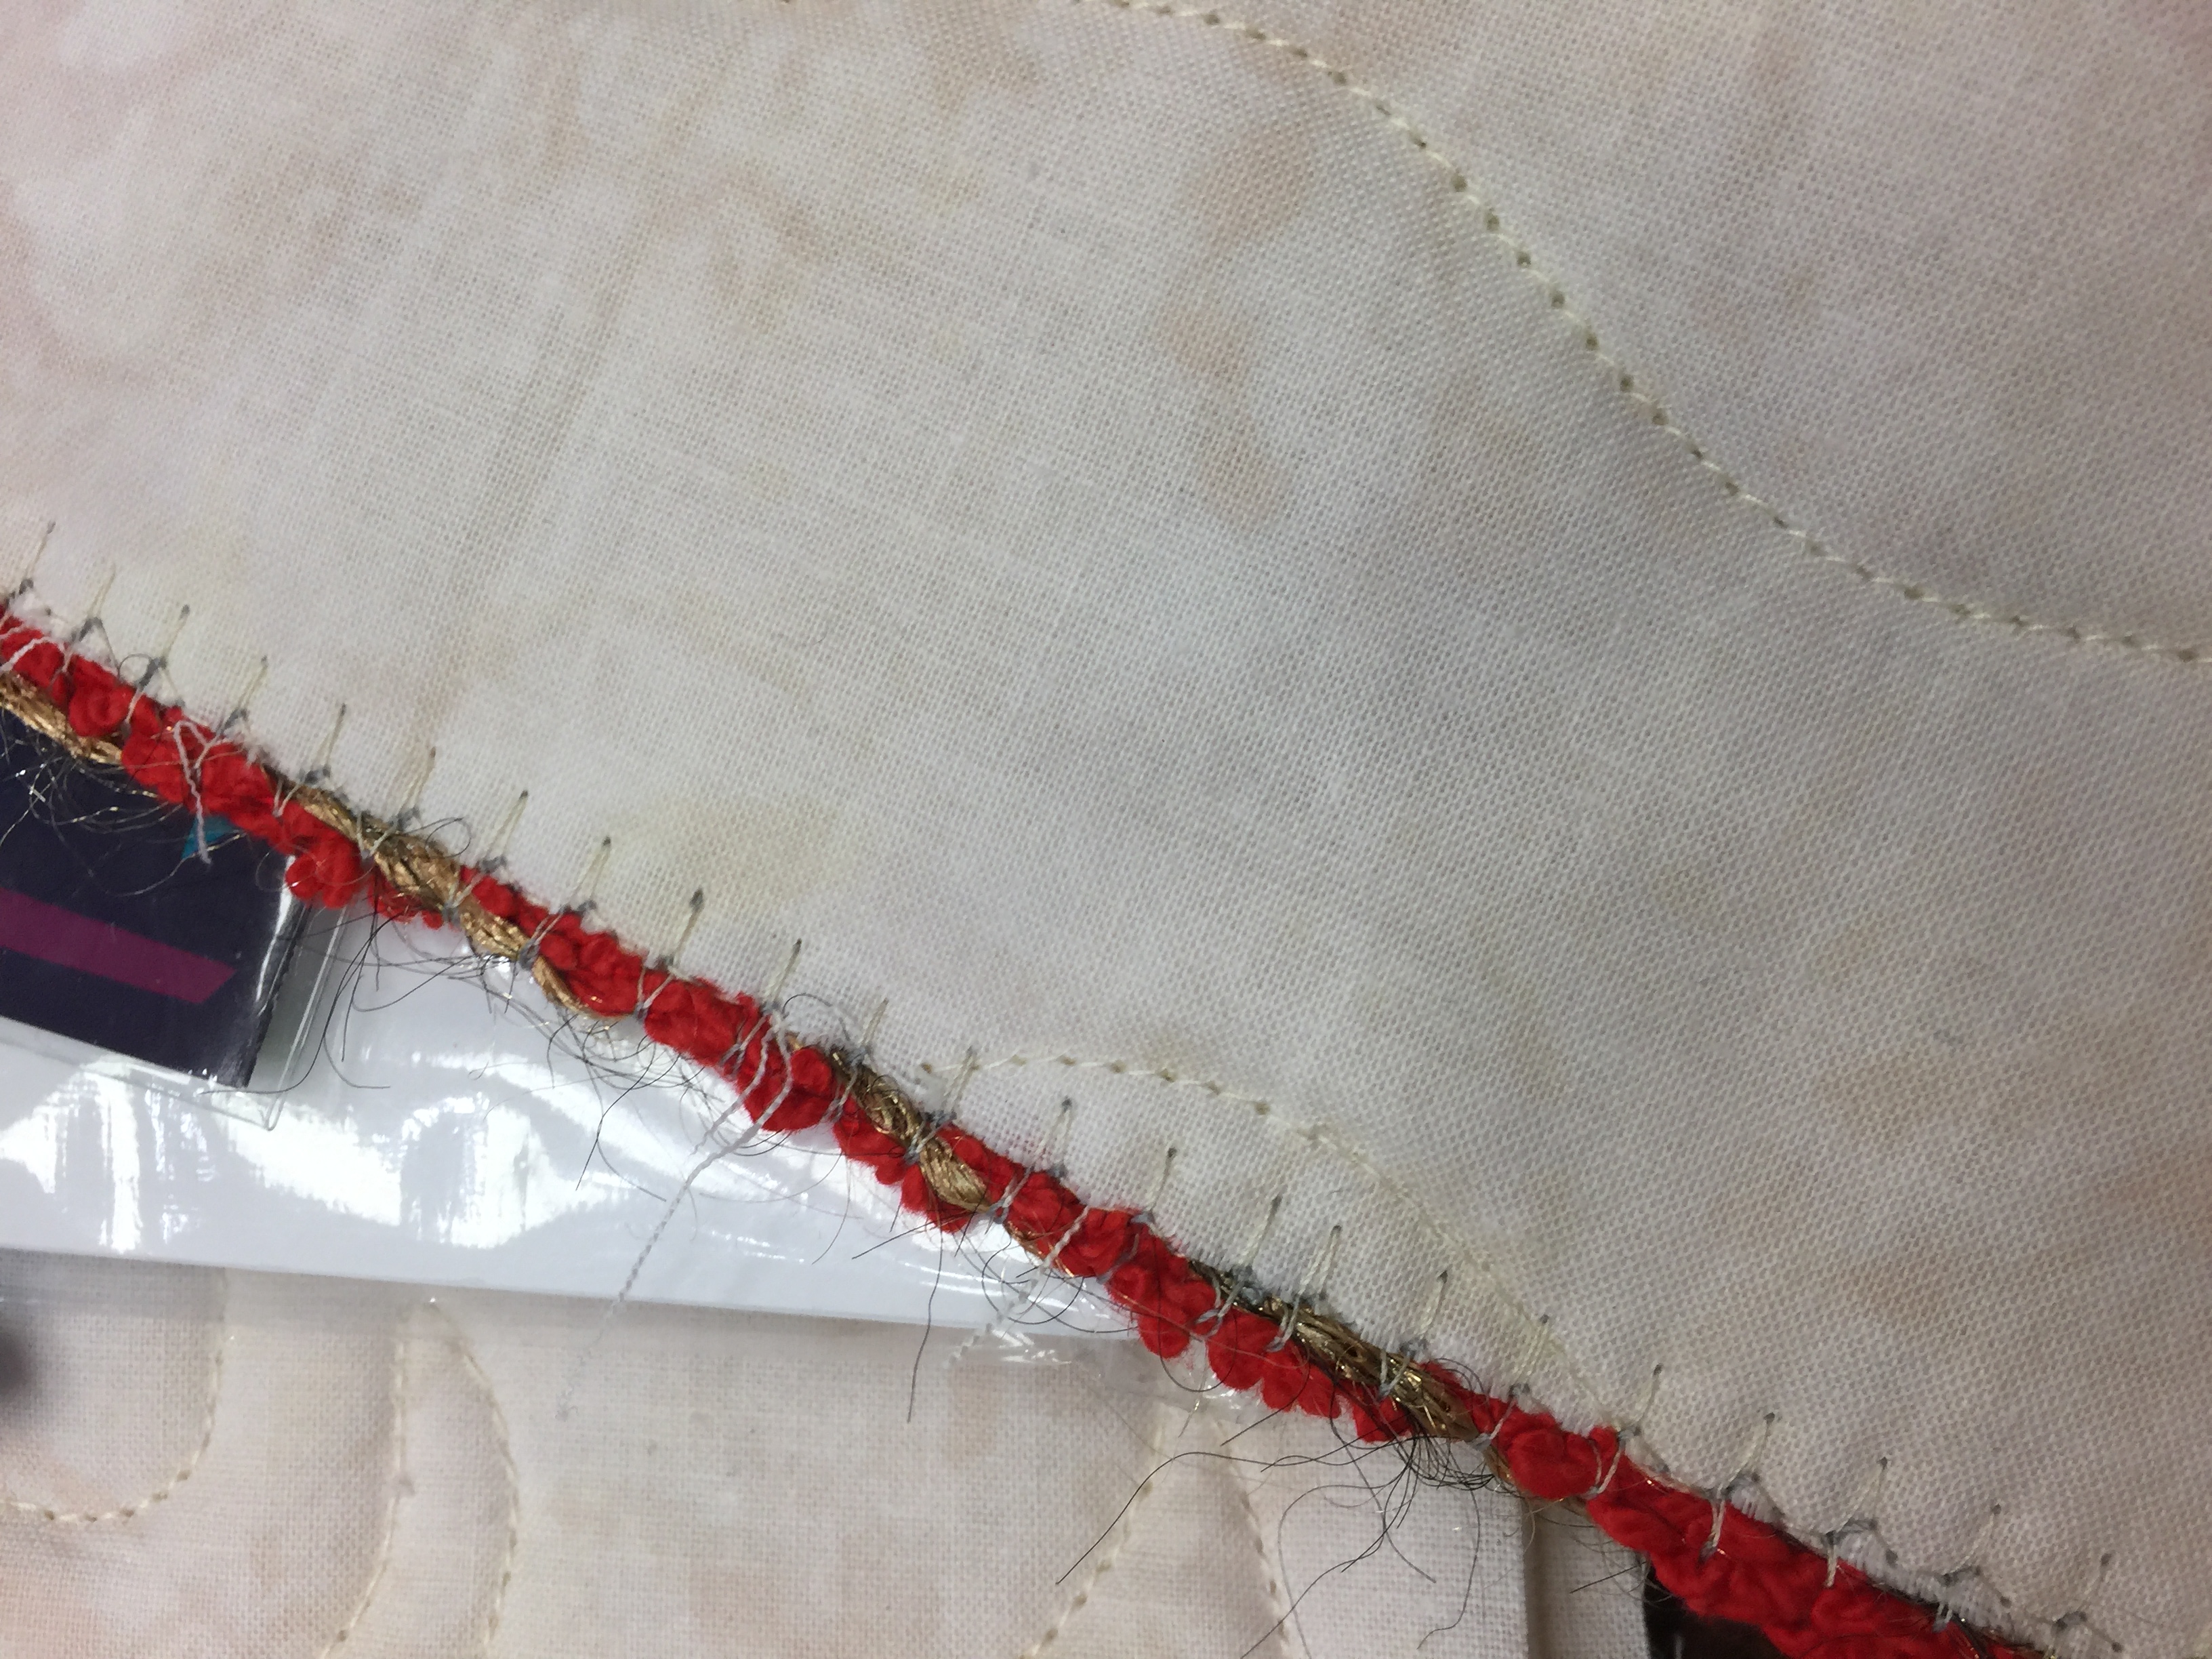
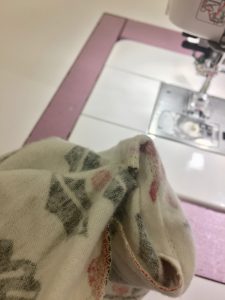
  2. Clean finish edges. You can use an overcast stitch as I did (photo below) or use a french seam (google it, or I’ll do a tutorial eventually of some basic things every sewist should know). Using the Janome’s “M” overcast foot gave results as good as a serger.
Janome America sent me the amazing new M7 Continental sewing machine (several blogposts in the new year…phenomenal machine!). I used the zigzag overcast stitch and the M foot which comes with the machine to clean finish the edges of the bag.

3. Sew a simple straight seam just inside the overcast edges. Sometimes the contents of gift bags can be heavy, and especially with soft and stretchy flannel, I felt a little extra stitching was a Good Thing.

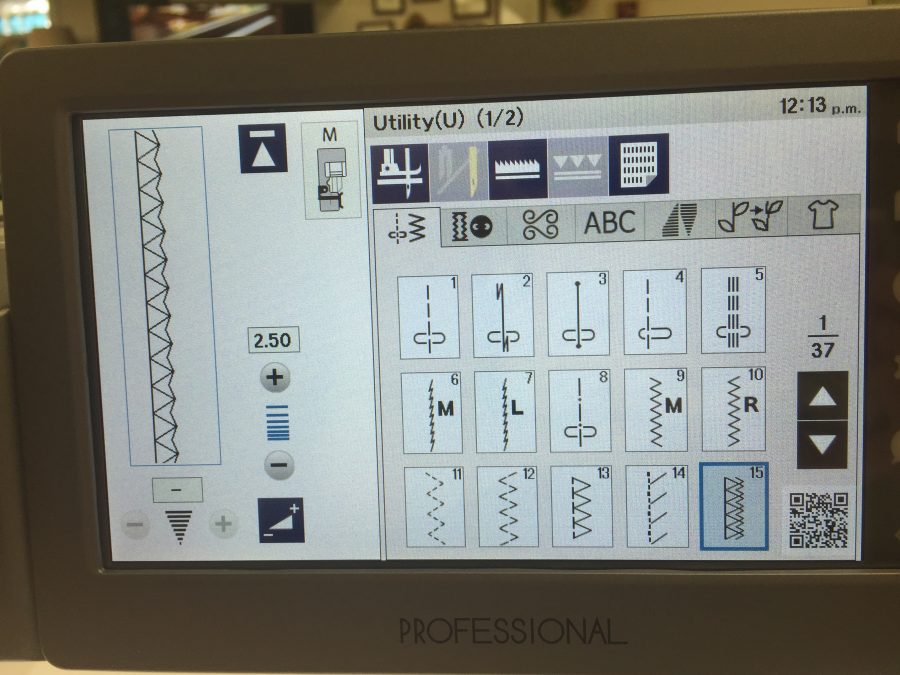
I’d never used the Lock-a-Matic stitch before because I learned to sew when we were lucky to have a simple zigzag on a machine and not all the bells and whistles.
Janome has designed the AcuSpark software. In the previous photo that QR code I pointed out: use your phone to scan and it will pull up a screen with helpful information. Here, I’ve got the one for the Lock-a-Matic Stitch!

Having started sewing when dinosaurs roamed the earth and you were lucky if your machine did anything besides a straight stitch forward and back, I am so used to just doing the lockstitch or backstitch myself that I likely will keep doing that, but this stitch automatically does a securing backstitch at the start of a seam and, when you press the back arrow, at the end. I had been concerned that it might sew a lockstitch when you pause in the middle of a long seam to re-position your hands, but it doesn’t, which is good!

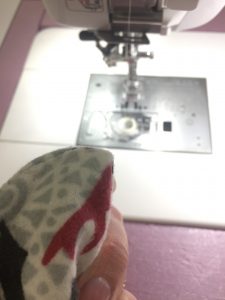
4. Turn your bag right side out.

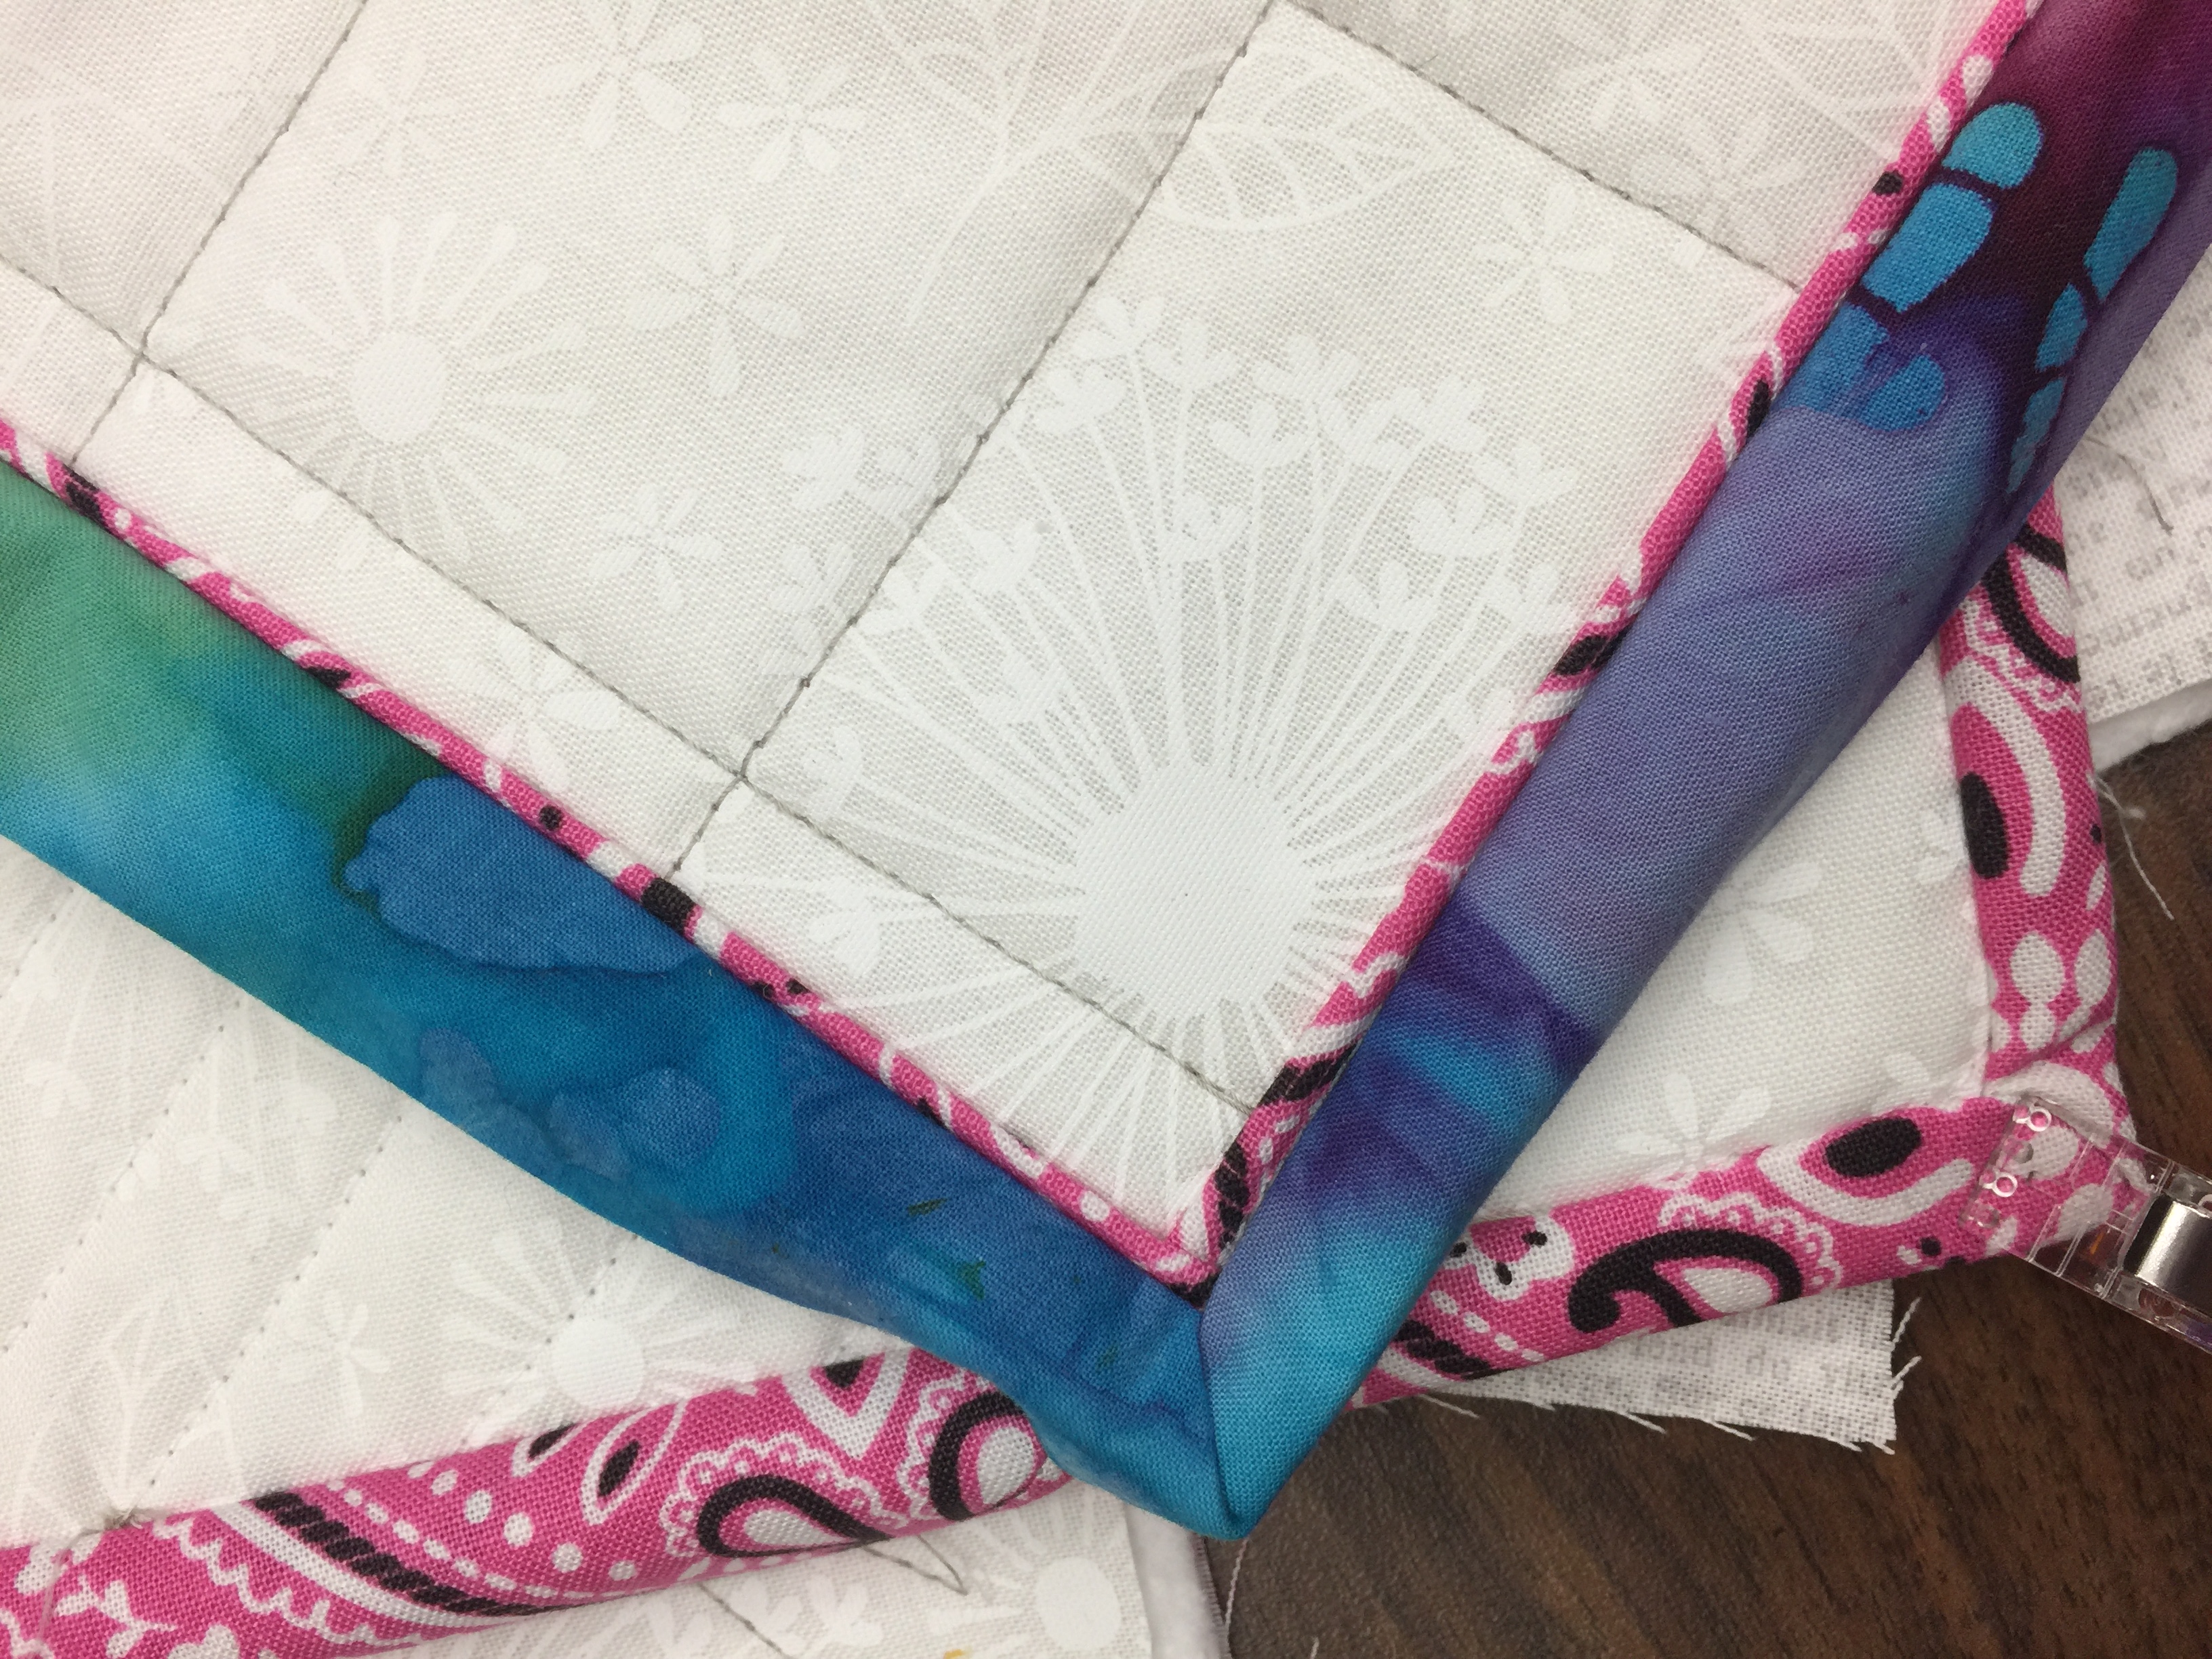
Once your seams are finished, turn the bag right side out. I like to fold the corners so that both seam allowances are to one side. My hand is inside and I’m pinching the corner together. Then keeping hold of the seam allowances, turn.

Pretty good corner, and I haven’t even eased it out yet!

5. At the ironing board, use a point turner to coax the corners out to perfect.

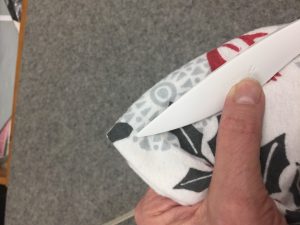
I have several point turners. This is one I bought just this year. Make by Clover, it is beautifully smooth, and has a Hera Marker (sharp edge for marking lines on cloth) on the other end. It is longer than most point turners, curved to fit the hand nicely, and I like it better than any others I have tried.

Lookit how perfect that corner is! Square as can be! I created this method for corners when doing custom home dec work for an interior designer. Some of the upholstery fabrics were so thick that I was afraid if I clipped the corner, the old school way to deal with bulk, the fabric would unravel and ruin the project, and the fabric was crazy expensive. This is secure and gets even better results.

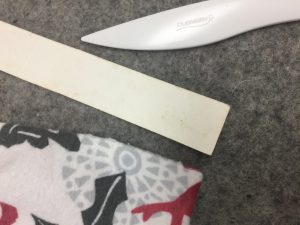
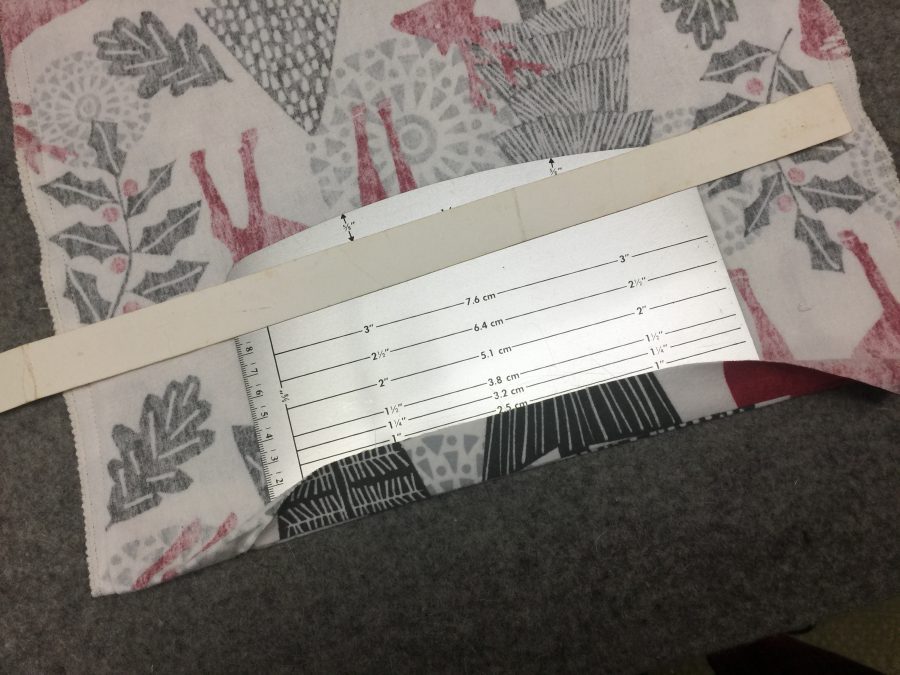
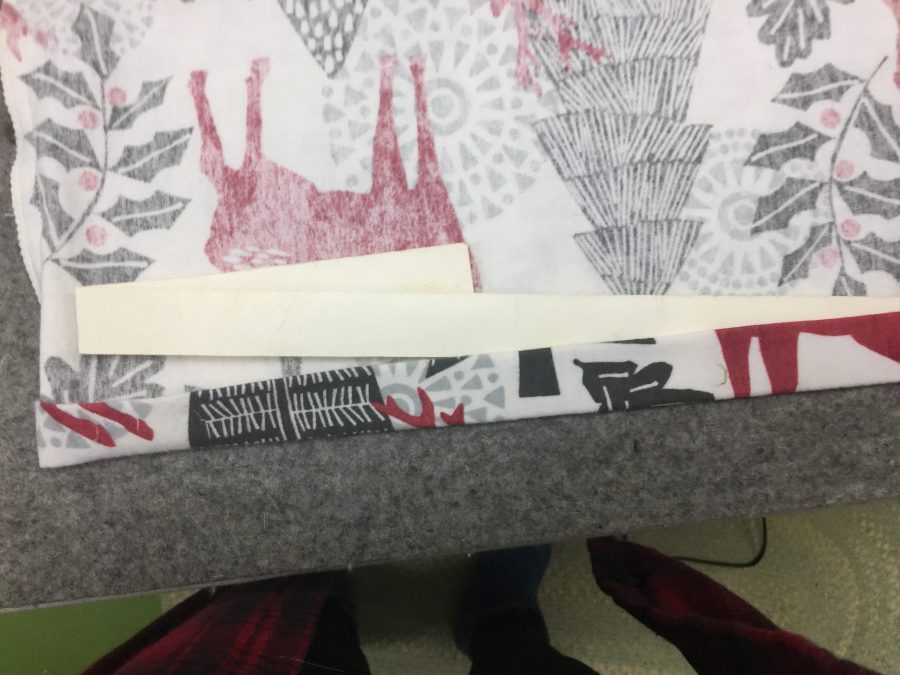
6. Hem the open end. The interior designer I worked for taught me about using poster board (or tag board or an old manila folder) to make templates for turning hems. When making curtains, the extra weight of a doubled hem helped them hang well. I called it the turn-turn hem, since you turn up two full hem-depths.

This is the first turn. I’m showing the poster board 1″ wide strip I have used –I am not exaggerating same piece of paper– for over 17 years. Place your fabric right side down on the ironing surface. Fold the hem up over the poster board, lightly snugging the board into the fold with your fingers. Press. Steam is fine–use it all the time and the poster board is still in great shape. You can also use the Dritz EzyHem tool, available everywhere. The metal is nice because it gets hot which helps set the crease, but it is short, maybe 6-7 inches. The poster board is fabulous for things like curtains and custom sheets because you can get a really long run done all at once without wobbles.
Then you turn the hem up again. Usually I keep the poster board inside the first turn and just roll it up, but for photo purposes I wanted to show you that it is the same idea.

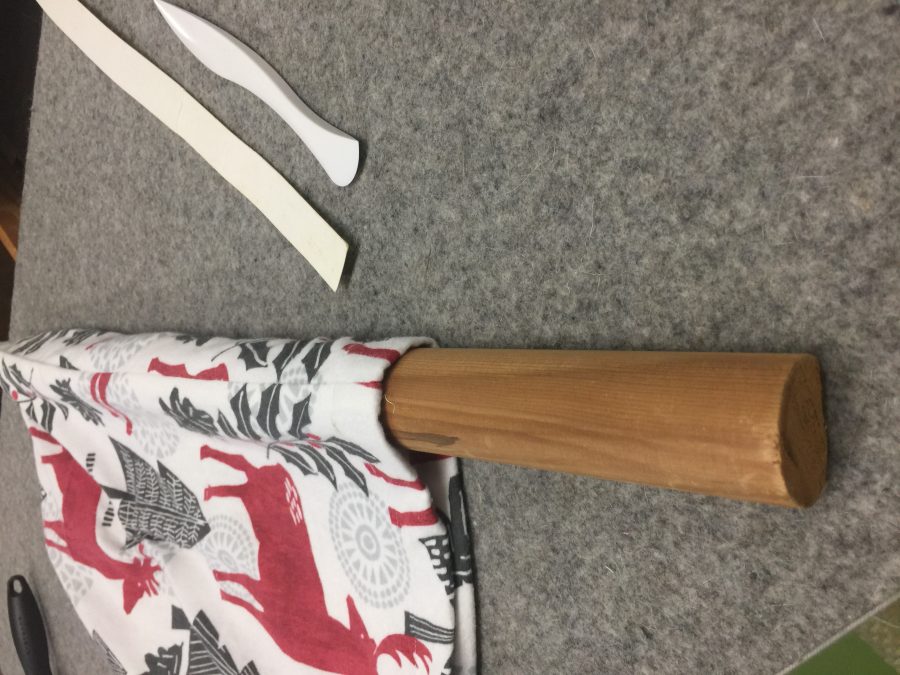
7. Press your seams to one side. Using a seam roll –in this case a piece of cheap stair handle from the big box DIY store. Dressmaking suppliers sell beautiful hardwood (maple usually) seam rolls for Lotsa Bucks. This pine stair rail handle was a few dollars for 24 inches. Sits flat on the ironing surface and does the trick.

You can see the flat end of the stair-rail-as-pressing-dowel. I’ve got the seam centered on the top and have pressed the first part of it. This set up is perfect when you don’t want the edges of the seam allowance to show through to the front of your fabric.

8. Give your bag a final press, tuck the goodies inside, and tie shut. I think, having found that strip of green, that instead of buying ribbon I might “make” some from leftover bias bindings (unfinished on the edges) or making some straps (turn seam allowances under, sew folded edges together) to use as ties for future years. Here’s that original photo again:

Someone has a special surprise inside!

Unboxing Minerva: the new Janome M7 Continental!

Saturday, November 23rd, 2019

What a BEAST! I think this machine may be able to do everything but cook and do the dishes (Janome: hint hint LOL!). While visiting with Janome America staff (Regena, that’d be you) at International Quilt Market in Houston, I was thrilled to learn that Janome wanted me to take this beauty for a test drive, blog and share and sew on it for the next year! THANK YOU JANOME, and yes indeed-y I am shouting! I’ve been beyond lucky to be a Janome Artisan since 2003–don’t ask me how I’ve lasted this long, I’m not sure, but I’m just really proud to be affiliated with them (I’m not an employee but all opinions are honest and unvarnished).


Today I’ll share a quick video of the unboxing. Then I have Christmas gifts to make, so I will share various things and features that I have found. So far I know I’m going to miss the flip-up chart of the stitches, but there are so many other beyond **amazing** features that I can cope–and photocopy the pages in the manual for ready reference! I’ll get to learn about the new AcuSpark phone app that one can use for tutorials and tips using the on-screen QR codes on how to use the machine, and I am in love before even turning it on with the new built in antenna thread stand, the fact that the antenna collapses so I can actually USE the COVER on the machine easily, not to mention the massive harp space. One bit of advice: you may need help hoisting this machine onto your table!

This box is so big that *I* could fit inside it! Widgeon is so impressed (and deaf and nearly blind) that he doesn’t realize he has a cookie on the floor in front of him!

As for the name: the Janome 7700, from some years ago, was the most beautiful ruby red on the front. I’m not much of a red fan but boy do I miss that face plate! So, as a fan of the Harry Potter books, I named that beastie Rubeus Hagrid (the gamekeeper). When I had the 15000 top of the line on loan, of course it had to be Albus Dumbledore, the greatest wizard of all time. Later, the silver-faced 9400 (and its heir the 9450) became Gandalf the Grey, because we love the Lord of the Rings, too.

BUT, I decided it was time for a POWERFUL WOMAN, so I have named her Minerva McGonagall, headmistress of Gryfindor and one of the bravest, stronger, most powerful and wise witches of all time. Here’s to Minerva!

International Quilt Festival #4: Fine Finishes (to be retitled to Bindings and Piping and Facings, Oh My!)

Saturday, November 24th, 2018

Bindings and Pipings and Facings, Oh My! class in Houston 2018:  Truth in teaching: this is usually what my teacher’s table looks like: a hot mess!

I LOVE teaching this class!  I LOVE that EVERYONE gets how to achieve a perfect mitered corner no matter what width your binding!  I LOVE showing students how to use Susan K. Cleveland’s Piping Hot Binding tool–students come into class thinking “I’ll try it but don’t think I’ll ever use it” and leave with the tool in hand planning how they CAN use it because it rocks!   Then I teach my perfect facings for art quilts which by the way is also how you can do perfect prairie point “bindings” etc.   I LOVE that this class has something for everyone:  traditional, modern, art, contemporary, whatever you do, it works.   I also LOVED that this class more than any I have ever taught immediately embraced the idea of taking notes ON their class samples:  that way the notes don’t get lost, what you need to remember about how YOU sew and what to do to improve is right there on the sample.

YES! They got it! Put the notes ON the sample to remember how to get is JUST right!

One older quilter in the class was BEAMING when she left–she was so delighted as she had never done a corner, let alone a piped corner, this good. I think I will remember her smile forever–THIS is why I teach this class!

Doesn’t the pink bandana fabric look great as piping?

More notes, during the “perfect corners” part of the class in the morning

Midday/right after lunch we get to the piping (do the precise and time-consuming stuff first). LOVE Susan K. Cleveland’s Piping Hot Bindings tool. Available here.  It may be available at larger online sites, but I like buying things direct from the creator–Susan’s website is Pieces be With You (in the link).  I wrote my own instructions for the class handouts (without looking at Susan’s), but her more in depth instructions are worth every penny!   

The best part of Festival is FRIENDS–Linda Cooper

The absolute BEST PART of International Quilt Festival is FRIENDS!   Over the summer I learned that Linda, a BFF from my life on San Juan Island, would have a quilt in a special exhibit and was coming to Festival.  On Tuesday she showed up at my classroom door at lunch break with her friend from SJI.   They decided on the spot to take my Bindings class on Friday, their last full day at Festival (pitter patter, tear in my eye)!   It was like the intervening 14 years since I left the island evaporated.

She and Barbara managed to get the stuff to make the quilt sandwiches (class prep) and amongst the three of us came up with the requisite thread, scissors, rotary cutters, etc. to use.

Class….the lunchtime lull.  Thank you Kathy Spier for being my “Teacher’s Pet”—so much fun, met Suzy Webster when she took one of my classes a couple years ago.  This year her mom took Bindings, and we all had lunch together!   Like I said, the BEST PART of Festival is friends, old ones and making new ones!

Time permitting, we even get into some fun alternative edge treatments…couched yarn is perfect for postcards and small works

And miraculously, I remembered Linda and I needed to get a photo before she packed up for the day!

Old friends reunited!


A little snowman fun amidst minor panic

Friday, November 23rd, 2018

Ashley’s snowman, sewn on my trusty Janome 9400, using the buttonhole stitch and free motion stitching. 

Do ya ever have those moments when you walk into your studio / crafting space / hides hole and have a near panic attack because there are so many mid-stream projects that serious ADHD kicks in and you can’t do anything because you keep getting distracted by yet another something?  Yeah.   It was one of those days.

I’ve  added enough books and class materials (classes I’ve taken) that my shelves are too full.   So I had to find a box and remove 15+ years of Threads magazines that I never look at to clear space because I’m tired of moving the piles from place to place.  And a bunch more tidying happened.   Really…it was like a minor panic attack.


But Ashley and Joshua are visiting.  And a while back Ashley mentioned that she liked the Apple Pin I gave her, seen here, so much she’d like to do a bunch for each season and holiday.  So I found my felt and the pin backs and made this little guy in under an hour.  He’d look adorable done with real hand stitchers!  I also need to find decent quality pi backs.  These are by Beadalon from my local quilt and fabric shop and they are junk!  Last photo is for scale.

Spool of thread shown to indicate size. Pink back is under hat brim. Need to find much better quality pin backs!

International Quilt Festival #3: Machine Quilting Forum and a free afternoon

Friday, November 23rd, 2018

Machine Quilting Forum 2018–here’s my station (the middle panel was blank as it was the de facto projector screen.  THANK YOU SO MUCH to Janome America and Greg Sanford for making sure I had a machine on which to demo!   LOVE MY JANOME!

The day began with “leisurely speed dating” for machine quilters at the Thursday morning Machine Quilting Forum.  For those who have never had the pleasure of attending, the 3-hour session begins with all the attendees sitting for the better part of an hour as the six instructors each got 8 minutes to introduce themselves and what they do.   Then, each of the teachers decamps to their station.  Attendees are assigned to one of six groups, one for each station.  For 15 minutes or so, the teacher gives his/her talk and/or demo, then the bell rings, and folks move to the next station until they’ve visited all six.  I absolutely love this session.  I remember before I started teaching they also used to have an Applique Forum and remember going “Oh I’d like to take a class from that teacher (or perhaps not),” learning HOW to PRESENT to a class (Karen Kay Buckley was so kind 15 or so years ago answering my questions before I bought my projector), and so on.  It’s also great for guilds wanting to book teachers–great preview!

The cast of happy quilters, with the teachers in the front row. If you look in the far back corner, that’s my spot

I talked about thread coloring and actually demonstrated machine quilting on this little piece which, if I get my act together, will be a SAQA or IQA donation next year.  It’s a rose hip:

Work in Progress–free-motion quilting demo and nesting threads

Then it was off to the Teacher Appreciation Luncheon and lecture by Pam Holland, then a (DRUM ROLL, sneak announcement here) taping a quick 3-minute promo with Ricky Tims because (SHRIEK check off the bucket list item) I’m going to be taping a segment for The Quilt Show in April!!!!   Should air sometime in the second half of next year!  Then a couple hours to see quilts, then dinner with friends.

Here I am, with thanks to the guard who took my picture, next to my Lilies of the Valley quilt.

I was absolutely enchanted with the portion of the Power of Women exhibit that was the 2 x 8 foot sheer panels of art cloth.  Here are the four sides.  Alas, instead of signage near the artwork, the info was in a binder on a table so I didn’t get details.   If you are one of the artists, please let me know which piece is yours and I’ll update this post.

Side 1

Side 2; I know the one on the far right is by Lyric Kinard.

Side 3

Side 4

This updated “traditional” quilt stopped me in my tracks…details in the second photo:

Then it was off to dinner with friends and fellow teachers Jenny K. Lyon, Deborah Boschert and Cindy Grisdela, at Ninfa’s on Navigation.  No Houston is complete with at least one (hopefully more) trip to Ninfa’s!