email Youtube

Home
Galleries
Blog
Workshops & Calendar
Store
Resources
About
Contact

Archive for the ‘Fun stuff’ Category

Thermofax 101: Lyric Kinard’s new DVD Workshop

Friday, May 15th, 2015
Don't know that I've ever seen #1 come up before! Well done!

Don’t know that I’ve ever seen #1 come up before! Well done!

Update:  comments are now closed.  I used a random number generator and astonishingly, No. 1 came up!  So I will be contacting Susan to let her know.  Lyric will send the DVD out directly, as will I.

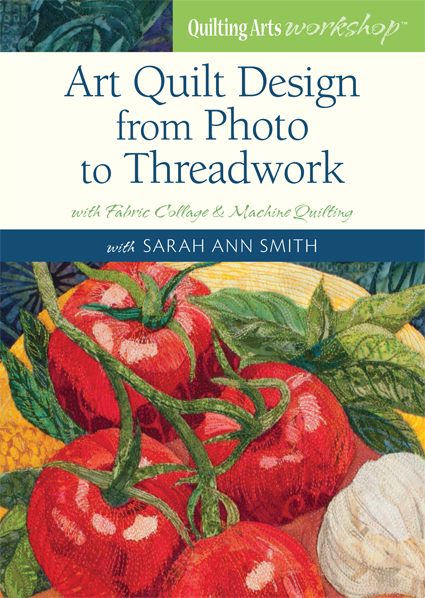
Well, you aren’t going to want to watch this once–you’ll want to watch it several times, at least!   I can’t believe how much Lyric has managed to pack into about 65 minutes of instruction on her new video workshop Thermofax 101:  screen printing made easy, from Lyric Art Publishing.  You can order it here, http://lyrickinard.com/2015/02/thermofax-101-instructional-dvd/ .  OR you can enter the giveaway–for both this DVD and my own Art Quilt Design: From Photo to Threadwork (here).  Read to the end to find out how.
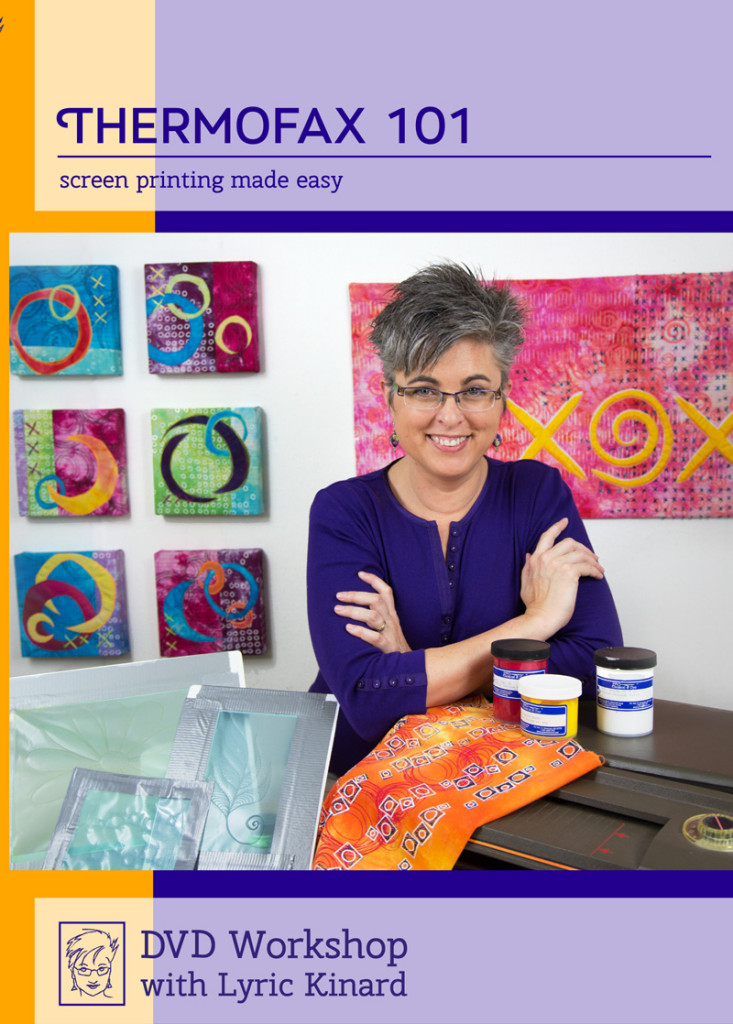
Thermofax 101, Lyric Kinard's new DVD workshop, is totally worth getting.  I can't believe how much she packed in.  Plus, how can anyone not want to spend time with someone with enthusiam and a cute smile?

Thermofax 101, Lyric Kinard’s new DVD workshop, is totally worth getting. I can’t believe how much she packed in. Plus, how can anyone not want to spend time with someone with enthusiam and a cute smile?

I was thrilled when Lyric asked if I would like to be part of her bloghop.  Not only do I have fun running into her at various fun places like teaching at quilt shows around the country, in Houston, at Quilting Arts TV taping in Ohio, and admire her art (made while being an uber-busy mom) and teaching, I’m also getting more and more into my own surface design.  I tend to use surface design differently than many—-for most who are really “in” to it, the cloth is the end product.  For me, it is something that goes into my artwork as a supporting player, not the star of the show.  So I was curious to see the “hows” and how what she teaches would fit in with my somewhat different approach.   The answer is it’s a fabulous DVD!

I watched the video as soon as I got home from about 3 weeks of being on the road, and learned a lot on the first run-through.  But I was pretty obliterated by all that travel, so I figured I’d better watch it again:  my goodness gracious but there are more and more gems salted in throughout.

There are four segments:

1.  What’s a Thermofax, which tells you just that, explains how the machine works and how you prepare the screen for use, including advantages and disadvantages of both ways.

2.  Creating Imagery:  the key here is to play.  Only YOU can figure out what makes you happy, what makes you itch to get to the studio and create.  The best way to do that is to mess around.   And then Lyric gives you about a bazillion ideas.  For those really itching to get deep into how to create your imagery, this section may be frustratingly brief.  Honestly, that’s because you could have 100 hours of video, from 33 different instructors, and you’d barely scratch the surface (ahem….pun intended).

3.  Printing Techniques.  For the FIRST TIME I’ve seen someone explain WHY you want canvas/cloth on the top of a print surface, not plastic.  Makes total sense—-why has no one in all the books I have on printing EVER explained that simple, logical (once you’ve heard the explanation) fact?  It’s at about 21:20 in the video.  And I recommend chocolate pudding, re-purpose the dishwasher detergent.  You’ll get it if you see the video LOL!  Lyric also shows how to hold your squeegee (as well as explaining what kind of squeegee or stand-in object) to get the best print, including demo-ing to you can see from various angles.  Helpful!

Lyric talks about the kind of paint you want, and mentions her favorites, but wasn’t fond of Speedball or Versatex.  I agree on the Speedball, but quite like the Versatex.  To Lyric, she doesn’t care for the hand of the cloth.  However, I have liked it on the small pieces I have done.  It’s one of those “try it all (before buying a bunch of any one product) and see what you prefer” things!
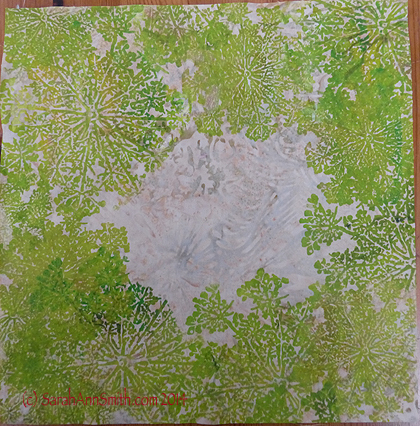
 

For the nest piece, I took some pale beige batik, my Queen Anne's Lace stencil and paint to create this cloth, which I love so much I can see making yardage of this to use!

For the nest piece, I took some pale beige batik, my Queen Anne’s Lace thermofax screen and paint to create this cloth, which I love so much I can see making yardage of this to use!  You can buy  Sarah’s Thermofax Screens at Fiber on a Whim at Fiber on a Whim.  To read more about my “nest” please see this blogpost.

4.  Designing Cloth.  Throughout the DVD Lyric salts in bits of wisdom about various elements and principles (E&P) of design.  I was SO clueless when I began art quilting.  I then got lucky and took a class at a local community college/extension service while living in Friday Harbor.  Since then I’ve looked hard at things, studied them, to internalize the “E&P” of design.  As you work with them, you get better so you don’t need to look so hard, but Lyric brings them up in an integrated manner that will help you have better results, sooner.  And she shares a tip I discovered the long way around:  if you have a yucky piece of cloth, or don’t like what you did, just add more layers.  After all, is it going to get worse?  No.  And it might well get better.

You also get a PDF on the disc with

  • a list of supplies,
  • where to get screens made in the US, Canada, Australia, England and Germany
  • info on suppliers of machines, screens, frames, textile paints and surface design supplies
  • footnotes for each chapter with internet links
  • plus Lyric has some helpful free tutorials on her website that will supplement the information on the DVD

I wish I had had this video when I started out.  Some videos about printing are Graduate Student level, and overwhelm you.  Some are so basic you could have gleaned all the good stuff from a four-page (with lots of large photos) article.   Lyric’s is correctly titled Thermofax 101 (so Lyric, will you do a 301 or 401 for us too?); it’s aimed at the newbie.  But those of us who have been doing this a bit can still learn plenty.  So I’m going to go play, then in a month or two view my copy again.

To win a copy of this DVD AND a copy of MY DVD,

my video workshop that takes you from your photo to a finished art quilt

my video workshop that takes you from your photo to a finished art quilt

leave a comment by 7 a.m. May 21st East Coast Time.  I’ll use a random number generator and whoever left that comment (please keep it to one comment per person, please) will win both copies.  Lyric will mail hers out directly, as will I.  International entries are OK!

Check out the other reviews on this bloghop:


May 14   Deborah Boschert    http://deborahsjournal.blogspot.com
May 13   Jamie Fingal http://JamieFingalDesigns.blogspot.com/  
May 12   Desiree Habicht  http://myclothesline.blogspot.com

May 11   Susan Brubaker Knapp  http://wwwbluemoonriver.blogspot.com
May 9    kathy york  http://aquamoonartquilts.blogspot.com
May 8    Carol Sloan  http://carolbsloan.blogspot.com

May 7    Liz Kettle  http://www.textileevolution.com/index.php/our-journey
May 6    Jane Davila  http://janedavila.blogspot.com
May 4    Linda Stokes  www.lindastokes-textileartist.com

May 2    Judy Coates Perez  http://www.judycoatesperez.com
May 1    Susan Price & Elizabeth Gibson  http://pgfiber2art.blogspot.com/
April 30  Judy Gula http://www.artisticartifacts.com/blog/

April 28   Sue Bleiweiss  http://www.suebleiweiss.com/blog/
April 27   Melanie Testa  http://melanietesta.com/blog/
April 25   Leslie Tucker Jennison  http://leslietuckerjenison.blogspot.com
April 24   Cheryl Rezendez  http://www.cherylrezendes.com


Hawaiian Applique in Florida! Part 1

Sunday, April 12th, 2015
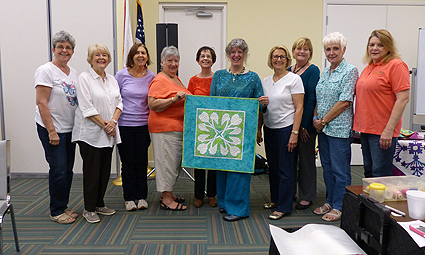
With the ladies of the Gold Coast Quilters of Boca Raton.  I was so busy I think this was the only photo I got that day!

With the ladies of the Gold Coast Quilters of Boca Raton. I was so busy I think this was the only photo I got that day!  Because my Nourish quilt and the machine appliqued Haleakala Sunrise are touring with the 500 Traditional Quilts exhibit put on by Quilts Inc (the wonderful folks that bring you International Quilt Festival in Houston and other  locales), I made two new, pillow size Taro blocks.  This one will fit a 26″ Euro Square pillow.

So there’s a reason why I haven’t been blogging much–I’ve been too busy!   First I had another kerfuffle with the person who made the apparently derivative copies of my A Sense of Place art quilts (blogpost a couple of posts below this one in early March).  She sicked an attorney on ME (!!!) for saying that she appeared to have clearly copied my work!  She made all sorts of demands, only one of which I agreed to:  I removed the letter she wrote to me from my original post.  I had to spend two full days, right before the trip to Florida, dealing with this nonsense because they wanted a reply within  8 days–days when I would be away teaching!   Sheesh!  Anyway,  I refused all requests other than the one above, such as I refused to retract my assertions that her works were derivative, refused to request the removal of the discussion of copyright from both of the closed art quilt groups on which I mentioned it (without EVER mentioning her by name or identifying her site!), refused to retract my requests to Etsy and Pinterest to remove her apparently derivative works.   I wrote the attorney a LONG letter, starting with images of my works, a photocopy of a widely distributed book in which one was published (500 Art Quilts), and basically said “can you see what the problem is?  Can this end now?”  So…no reply to date from either of them so hopefully she will go away and learn  her lesson.  And I can get on with FUN STUFF!  Like Florida.

The trip began with a flight delay leaving Maine (after getting to the airport at 5:20 am):  the previous day there had been yet another snowstorm that messed up travel up and down the  Eastern seaboard.  There was no problem, however, because I had a four HOUR layover in Boston which, thanks to delays on United, turned into a six hour layover.  Luckily, I was easily re-booked onto a later connecting flight and only got in about 90 minutes late, and didn’t have to teach or lecture until the following evening.  AND my luggage showed up!

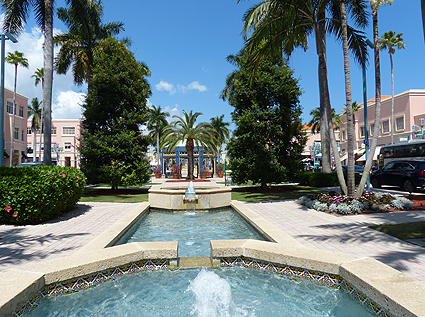
I had down time the first day--we had me come down a day early just in case, as it turns out we needed, there were weather delays.  That meant I had several hours on Tuesday to tootle around Boca Raton.  So I went to an area called Mizner Park after my gracious hostess gave me a quick driving tour of downtown Boca.

I had down time the first day–we had me come down a day early just in case, as it turns out we needed, there were weather delays. That meant I had several hours on Tuesday to tootle around Boca Raton. So I went to an area called Mizner Park after my gracious hostess gave me a quick driving tour of downtown Boca.  Thank you Marlys and Chris for taking me around!

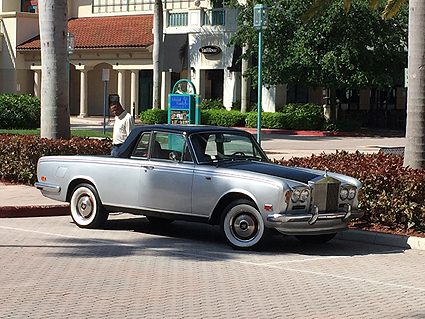
This was one of the most bizarre things I’ve seen…yes, that is a ROLLS ROYCE Pick-up truck.  One has to ask WHY?  The guy wandering buy seems as confused as I was!

So I saw this pick-up truck and figured I'd never seen anything like it.  It looked to be a Rolls, but do they make pick-ups?

So I saw this pick-up truck and figured I’d never seen anything like it. It looked to be a Rolls, but do they make pick-ups?

Here's a shot of the front--yes, that's the winged lady on the front with the RR.  One has to ask WHY?  I googled, and no, they don't really make them, but people "convert" them.  WHY?

Here’s a shot of the front–yes, that’s the winged lady on the front with the RR. One has to ask WHY? I googled, and no, they don’t really make them, but people “convert” them. WHY?

After months and months (literally) of single digit and below zero air temps and colder wind chill, it was lovely to sit in the air in shirtsleeves!

After months and months (literally) of single digit and below zero air temps and colder wind chill, it was lovely to sit in the air in shirtsleeves!

I’m also taking an online photography course with Ricky Tims, so I was on the lookout for “texture” photos, and loved these palm fronds:

2015.03.Florida.HawaiianAppl.Plus02

No idea why the (C) didn’t show on this image, but it’s mine!

The first day I had a light supper with the guild board at QuiltStitches in Boca Raton (FB link here) owned by Johanna Felderbaum.  It’s a great shop–stop in if you are in the area!  She has a great range of fabrics.  Waving hullo!   That evening I gave my “How did she do that?” lecture, followed by Hawaiian Applique the next day.  Then on Thursday, I flew from there (well, Fort Lauderdale airport) to Orlando where I was booked with the Ladies of the Lakes Guild in Lakeland, near Orlando.   More on that in a few days!

Bloghop — Inside-Out in Quilting Arts Gifts 2014!

Saturday, September 20th, 2014
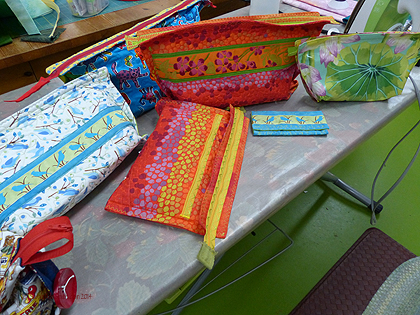
These are some of the bags you'll see on my Inside-Out bag segment (and ... hint hint... perhaps in print sometime soon too....more on that when I am allowed!)

These are some of the bags you’ll see on my Inside-Out bag segment.  The orange bags are one of my two projects in Quilting Arts Gifts 2014 along with a companion card holder.  The one on the right (the lotus fabric) is made from plasticized cloth, so great for make-up or messy stuff.

What fun I had on the set of Quilting Arts TV filming my episodes, and what MORE fun to have two projects included in this year’s Gifts 2014 magazine as well as two holiday recipes–one for a sweet treat the other is satsuma-currant scones (satsumas are similar to clementines or mandarins, use whatever citrus you have!).  Makes me hungry just thinking about them!

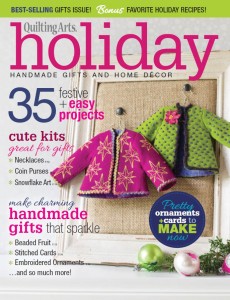
This year's issue of Quilting Arts Gifts.  I'm thrilled to have two projects and two recipes included!

This year’s issue of Quilting Arts Gifts. I’m thrilled to have two projects and two recipes included!

(Note:  to order, click here or use the Affiliate link in the sidebar on the left; the Affiliate link will get you a discount on some items!)

I thought I’d share some variations on the theme to give you ideas of how you can make your own bags–they are SO fast and easy and fun!  Use the article in Quilting Arts Holiday or the instructions in episode 1402  of Quilting Arts TV to make the bag with these variations.  Learn more about all of series 1400 here  including information about Episode 1402 which includes the bag project.

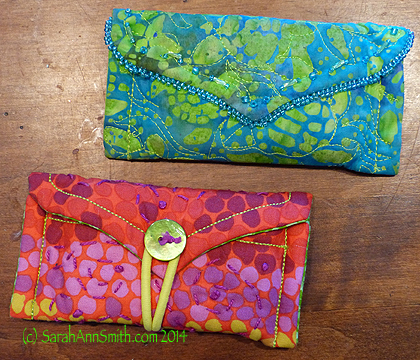
Here are two of my cardholders.  These are so fast--they would make a great gift-card "wrapping" for Christmas, then the recipient can continue to use the holder.  They are sized to fit business cards, but I use the green one for all those extra (annoying!) store cards for the grocery, discount stores, pharmacy, and so on.  The green was the original; despite being beaded on the flap and used heavily for three years, it is still in great condition.  The warm-tones bag is new.  The project in the magazine uses a snap closure, but I really like this one which uses a heavy duty hair elastic and button.

Here are two of my cardholders. These are so fast–they would make a great gift-card “wrapping” for Christmas, then the recipient can continue to use the holder. They are sized to fit business cards, but I use the green one for all those extra (annoying!) store cards for the grocery, discount stores, pharmacy, and so on. The green was the original; despite being beaded on the flap and used heavily for three years, it is still in great condition. The warm-tones bag is new. The project in the magazine uses a snap closure, but I really like this one which uses a heavy duty hair elastic and button.

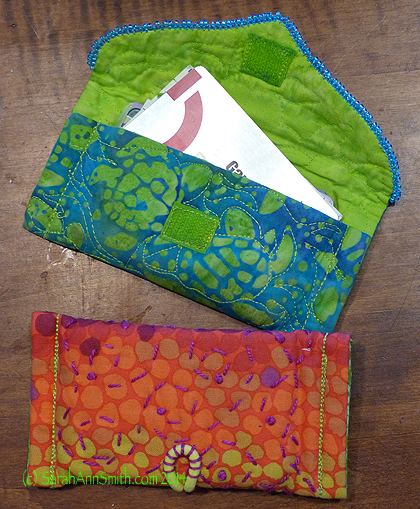
The blue-green card holder has velcro closing.  I painted white velcro with acrylic ink to match.  The warm-tones uses that thick hair elastic.  I like the way I used perle cotton to quilt the bag and stitch down the back end of the hair elastic.

The blue-green card holder has velcro closing. I painted white velcro with acrylic ink to match. The warm-tones uses that thick hair elastic. I like the way I used perle cotton to quilt the bag and stitch down the back end of the hair elastic.

I’ve also made variations on the basic flat-bottomed bag for my iPad and notebooks.

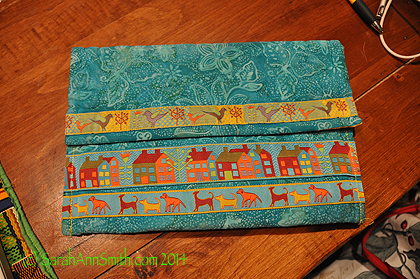
The iPad case is simply a larger version of the card holder.  The trim comes from Renaissance Ribbons.

The iPad case is simply a larger version of the card holder. The trim comes from Renaissance Ribbons.

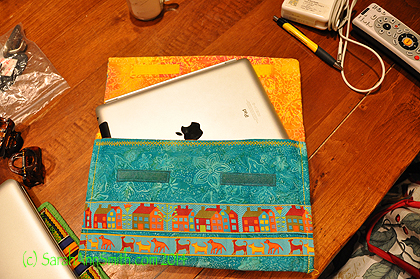
And the inside:

And the inside.  Again, I used acrylic inks to color the white velcro to match.

And the inside. Again, I used acrylic inks to color the white velcro to match.  I’m not sure that the ink is washfast, but so far I haven’t had to find out the hard way!  This bag has an outside pocket (with zipper) on the back to hold the charging stuff and stylus.

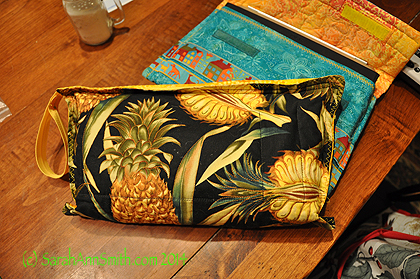
I made this bag to fit my new, slightly longer, portable watercolor palette and painting supplies.

I made this bag to fit my new, slightly longer, portable watercolor palette and painting supplies.

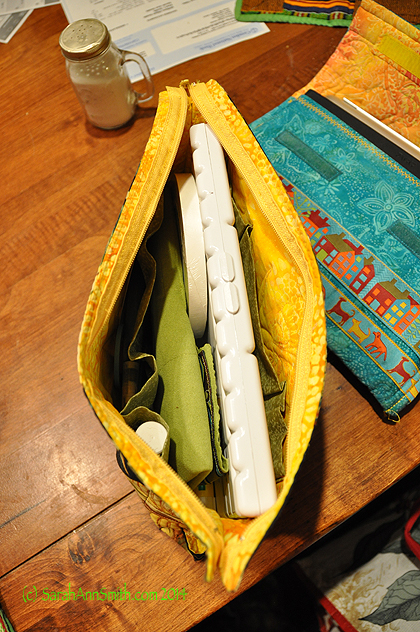
Inside of my Painting stuff bag.  It has pockets sized to fit a tube of gouache, a glue stick, eraser, and so on.

Inside of my Painting stuff bag. It has pockets sized to fit a tube of gouache, a glue stick, eraser, and so on.

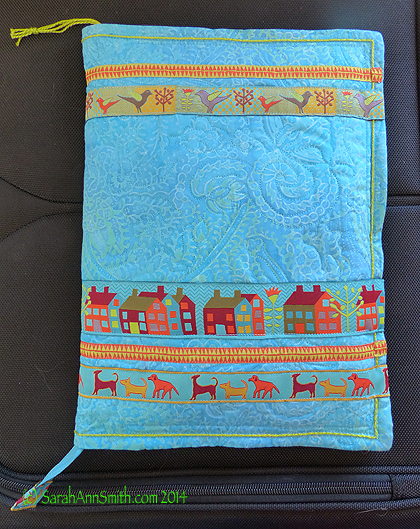
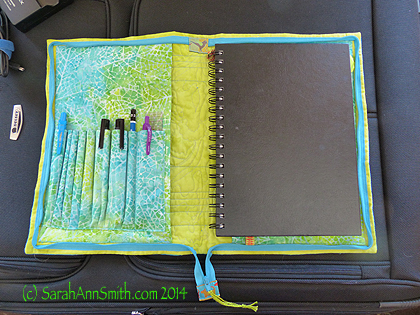
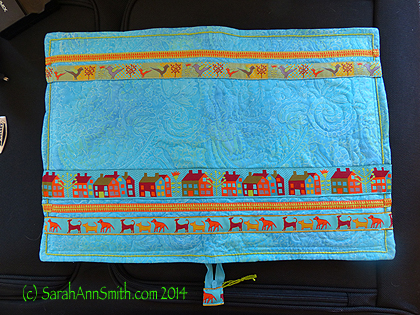
I’ve also made several notebook or sketchbook covers using this easy technique.

My notebook, zipped closed.  Can you tell I really love that ribbon from Renaissance Ribbons?

My notebook, zipped closed. Can you tell I really love that ribbon from Renaissance Ribbons?  I also couched some heavy perle cotton on the edge and used it as a zipper pull.


The notebook cover opened up.  I make pencil pockets on the left and used a 22-24 inch zipper all the way around.   When gauging the size for your cover, think about the thickness of the zipper tape.  If your notebook is really thick, you may want to add some fabric extensions to the sides so it will close nicely OR just make the cover a bit larger than you think you'll need so it will wrap and zip shut nicely.

The notebook cover opened up. I make pencil pockets on the left and used a 22-24 inch zipper all the way around. When gauging the size for your cover, think about the thickness of the zipper tape. If your notebook is really thick, you may want to add some fabric extensions to the sides so it will close nicely OR just make the cover a bit larger than you think you’ll need so it will wrap and zip shut nicely.  And you can see in the center how I had fun quilting AND used a small bit of ribbon at the top ends of the zipper and at the bottom to make a nice, clean finish.

My notebook cover, opened up, shows the ribbon extends across the back, too.

My notebook cover, opened up, shows the ribbon extends across the back, too.

I hope you’ve enjoyed these additional options for the patterns I shared in my Quilting Arts TV segment and in QA Holidays 2014!  Remember to use the link on the left if you decide to go shopping at the online Interweave Store–it may get you some discounts!  Or click on this one right here to go directly to the Holiday issue!

Here’s the list of the bloghoppers with links.   If you haven’t had a chance to visit already, please do.  Some of these folks I know, but others are new to me so I’m really looking forward to seeing  (or have really enjoyed seeing)g their blogposts and blogs!

Enjoy!

How Scissors Are Made (by Hand)

Wednesday, July 9th, 2014

I’ve been on the QuiltArt list for over a decade now, and every once in a while something wonderful pops up.  Thanks to Susan Lenz Dingman for sharing this find:

The Putter from shaun bloodworth on Vimeo.

Extreme Shepherding

Friday, June 7th, 2013

Our younger son is a fan of Stumble Upon, which took him to this video, which he shared with the comment:  People with too much time on their hands.   On the other hand, it is FUN (and probably a commercial for Samsung, but who cares because it is wonderful)!  Enjoy!