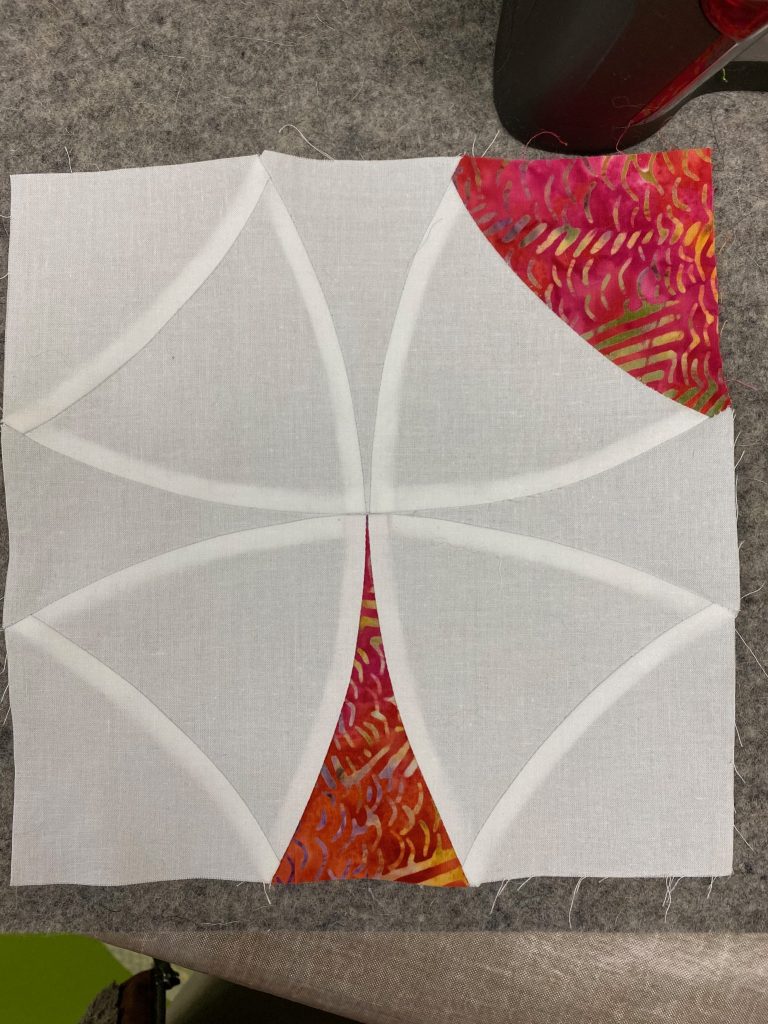
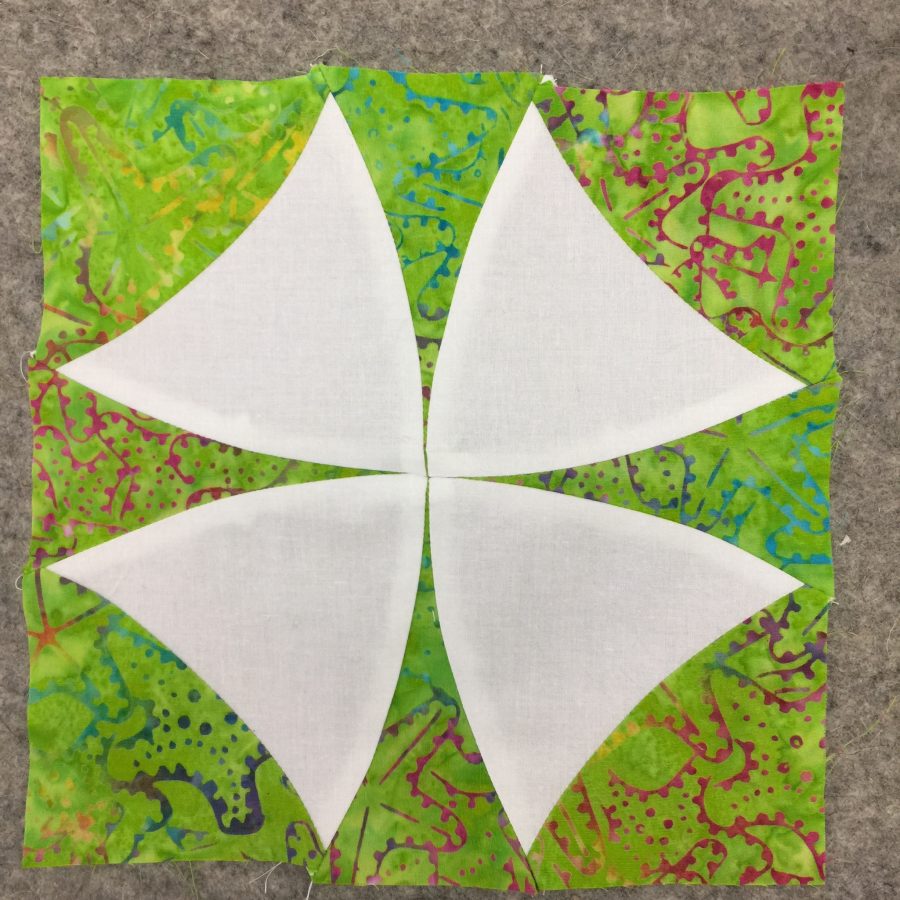
Whoo-eeeee! Lookit those perfect seams… this was my second block, and I think it looks pretty durn good for someone who doesn’t really piece a lot! There are a few MINOR things I can fuss at (like the seam allowance on the center top spike is a skosh wide and the upper left corner edge isn’t perfect, but still! Fabrics are batiks and Bright White Cotton Couture from Michael Miller Fabrics.
Precision piecing has never been my strong suit, but I am — like Michaelangelo at age 80 — still learning. One of the things I’ve learned is that it is OK to use specialty tools like the AccuQuiltGO! and byAnnie’s stiletto. Thank you to Michael Miller, for whom I am a Brand Ambassador this year) and Janome America for having me as an Artisan. For me, careful cutting for squares, rectangles and triangles isn’t too TOO challenging (as long as I’m paying attention which is never to be take for granted LOL). But CURVES? Not so much.
Back in May, I shared a video that tells yo about the amazing (Heavenly Perfection?) HP presser foot and throat plate, herhttps://www.sarahannsmith.com/weblog/?p=13206e. If you have a Janome with this option and haven’t tried it out, DO! Go watch the video… it’s a brief but I hope helpful mini tutorial. The video is also on my YouTube channel, here. I’ve been doing a bit more with brief videos…looks like about one a month. I’ll have another later this month about using the blind hem stitch for some slacks I made–you can subscribe to the channel.
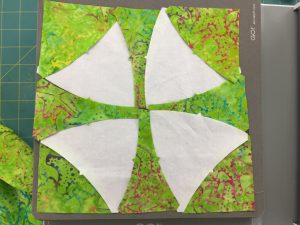
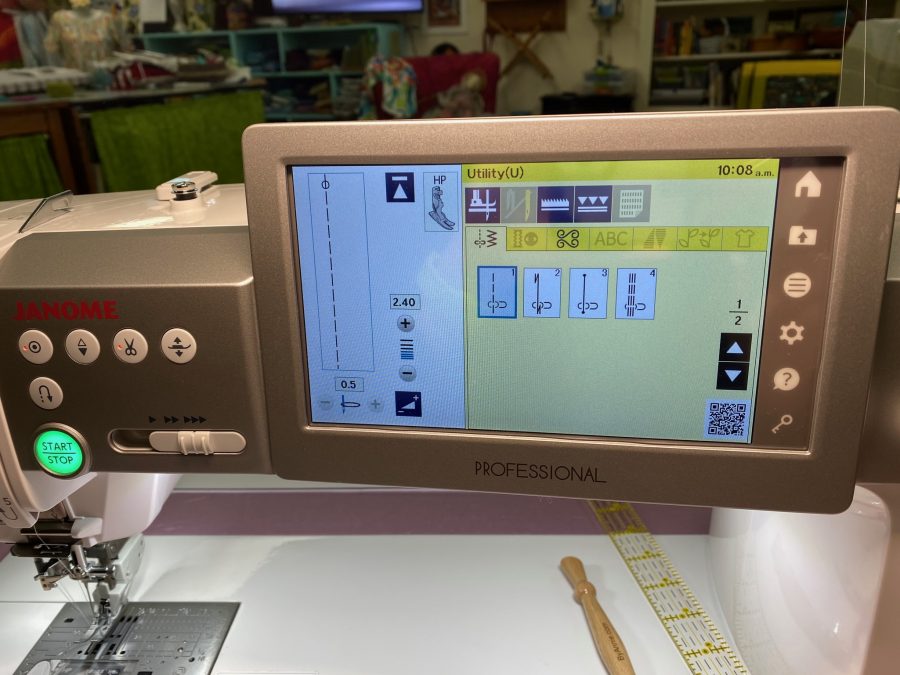
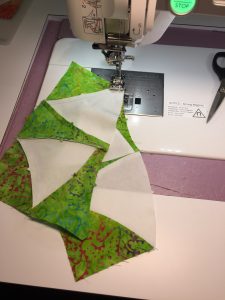
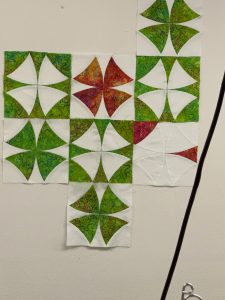
After cutting using the Winding Ways die (requires the AccuQuiltGo or similar cutter, too), I laid out the blocks to see how they looked (and to make sure I had enough of each shape).Here are the settings on my M7 for the HP foot which helped me get such amazing accuracy and careful piecing. Slowing down helps, too. Ahem.First, I cut and assembled segments.
Here’s a quick video of me using the oh-so-wonderful HP accufeed foot and throat plate from Janome, on my M7. Thanks to Kimberly Einmo who shared her love of this accessory at the 2018 Janome Education Summit! Like I said…there is ALWAYS more to enjoy learning.
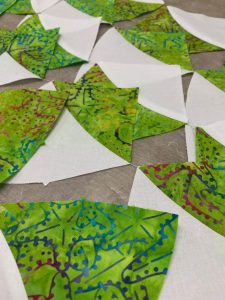
Sub-units createdFollowing the assembly instructions that come with the Winding Ways die, you press seams in specific directions and create and assemble sub-units in a specific order. Then you get as close to perfection as I am ever going to get! There is still some fine tuning I need to do (meaning the dreaded P-word: PRACTICE) to get the outside edges straight, but I mean really, look! Here’s my Winding Ways on the design wall, considering various settings. I ended up going fairly traditional…I’ll share “done” in a week or two.
Hope you’ve enjoyed my detour from art quilting. I’ve actually needed a break to recharge myself, and this has been DELIGHTFUL. I’m thrilled with the finished quilt… will post it in about a week or so.
Full disclosure: I’ve been a Janome Artisan for 16 years, and am forever grateful for their support and machines. I’m a Michael Miller Fabrics (MMF) Brand Ambassador for 2020; the batiks and white fabric were donated as part of that ambassadorship. The AccuQuiltGO! was a GIFT (!!!!) as part of the MMF thing, and I purchased the Winding Ways die once I realized that wow, I could USE this machine! Whooda thunk it? Well, I should have. Having FUN! And lastly, thanks to byAnnie.com; their donations to the Teacher Goodie Bags in Houston one year netted me that awesome (and not expensive) Stiletto!
As I transition to holding online classes to supplement live and in person classes, I needed an overhead view of my work table. The traditional way to do this (outside of a fancy filming studio) is with a “C-stand” that is sturdy/heavy, stands on the floor next to your work table and has a boom arm that extends over the table. Then you hang the camera/iPad/iPhone from the boom arm. Cue COVID delays in shipping. I tried the one I could get in time for this week’s Perfect Bindings class at the first ever Mancuso online shows. The accessories didn’t fit the boom arm. Back they went!
Cue: Mama’s brainstorming, Mama and son’s (Joshua) creativity, and Joshua’s awesome tools (Band saw! drill! Random bits and bobs) and construction experience and help, and a stand using leftover stuff and $5 in supplies.
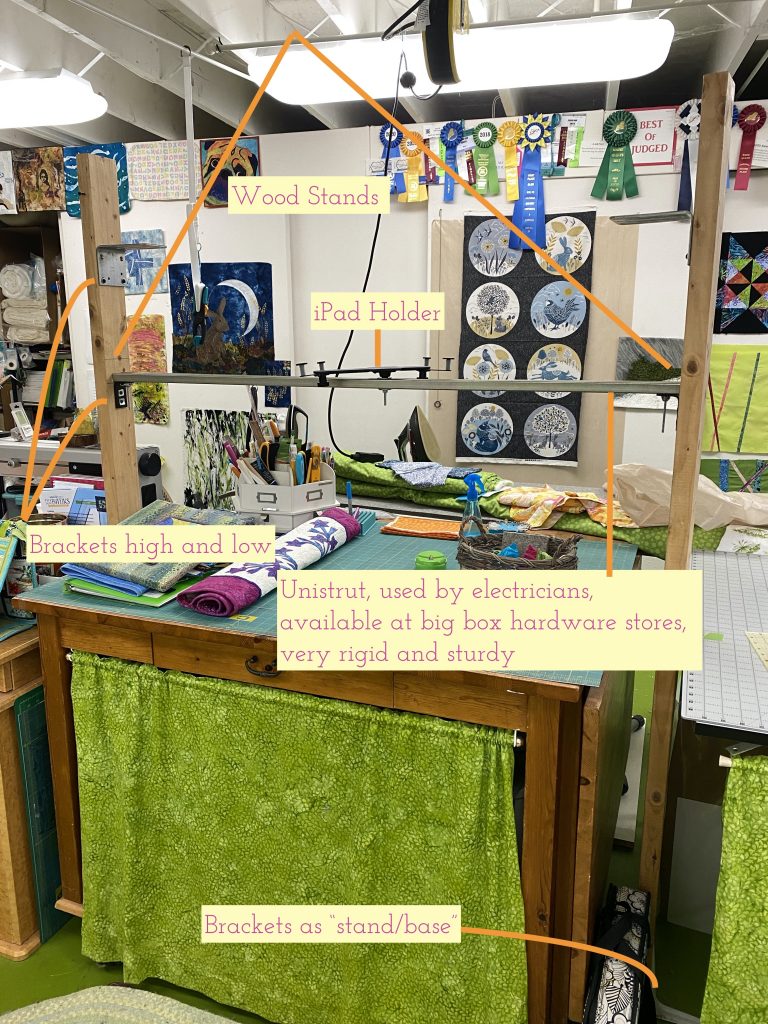
A DIY overhead camera stand
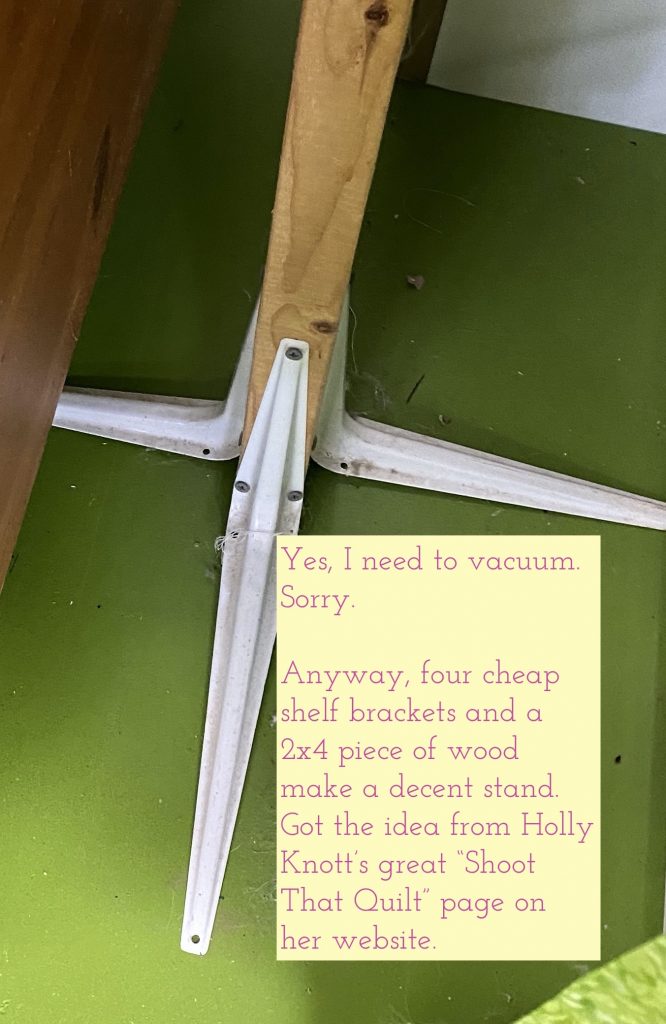
The wooden “light stands” were built based on information from Holly Knott’s wonderful “Shoot That Quilt” section on her website about taking great photos yourself of your quilts to enter in shows and magazines: two pieces of 2×4 lumber and four cheap shelf brackets for each stand.
Ignore the dust, cat hair, pug hair and thread. Please. Sorry. Here’s the link to Holly’s useful webpage on quilt photography.
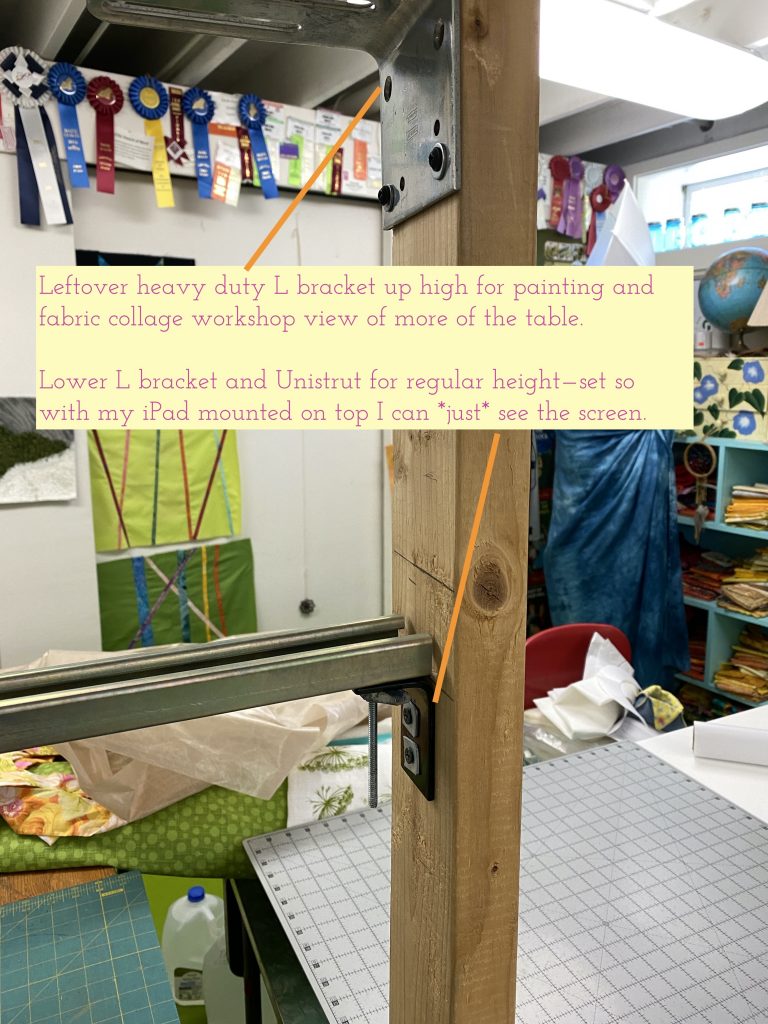
Joshua, our older son, did some electrical work for Mom and Dad (us) a while back, and introduced us to something called Unistrut. Link here. It is a bit heavy, which is why I looked at C-stands to begin with, but that is also its virtue: it is totally rigid. Rigid helps keep your camera (in my case my iPad) stable.
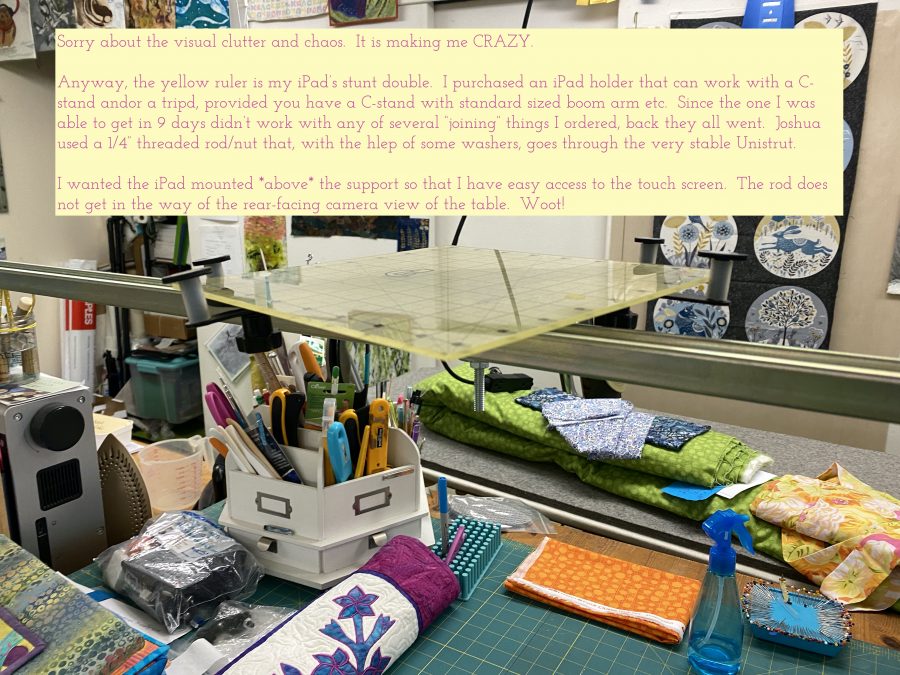
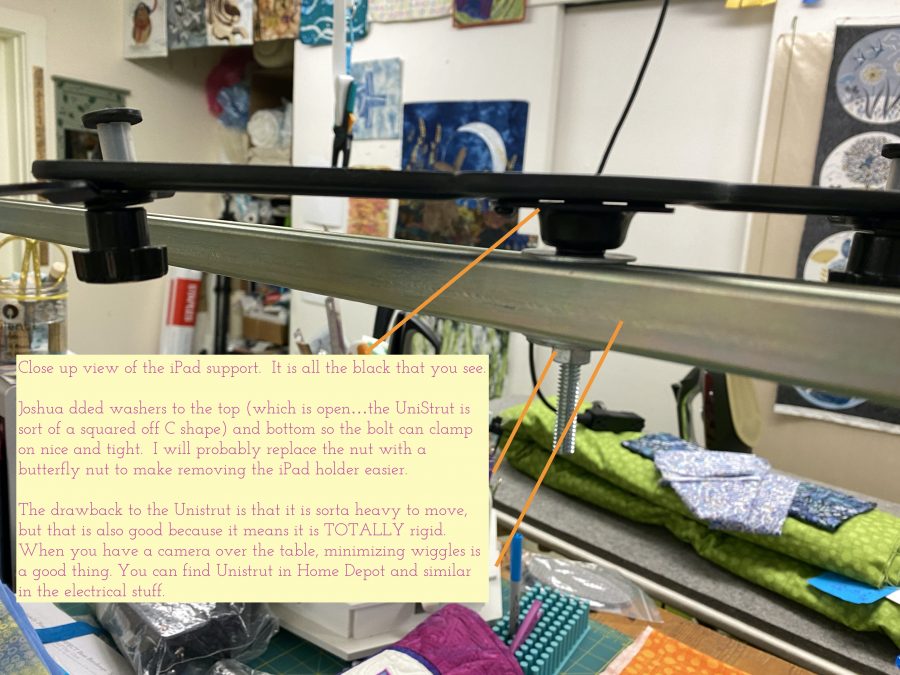
The upper brackets were from something else that was modified. Knew they’d be handy! I bought two small black brackets with one hole on each side. Joshua said I needed two holes to prevent the small L brackets from wobbling, so using his awesome power tools (tool envy!), he just drilled an extra hole. He cut the Unistrut in about 8 seconds with his band saw. It would have taken me the better part of an hour with a manual hacksaw! The length is the width of my table plus an extra inch or so to help maneuver the stand into place.The ruler is serving as my iPad’s stunt double because I was too lazy to run upstairs and get the iPad while taking photos. Can you tell from the clutter how chaotic it has been? I CAN’T WAIT to have a MASSIVE TIDY ATTACK! I wanted the iPad above the bar for added stability and so I could have full access to the screen while teaching live online workshops. A close up view of the stand attaching to the unistrut. Here’s a link to the iPad holder on Amazon. It isn’t the most rigid thing and the little grip thingies that hold the iPad in place aren’t huge, so that’s another reason to have the iPad on top supported by the cross bar and not just those four little pads.
SO if you are wondering what your teachers does to get ready for you, this is just one small but vital component. If you are going to TEACH online, I hope this helps you–please feel free to ask questions! MASSIVELY HUGE thanks to Lyric Kinard for her help on so many things on the technical side over the years, and to Lee Chappell who gave us newbie online teachers for the Mancuso show a studio tour by Zoom to share with us how she set things up. And THANK YOU to my wonderful, creative son who comes home and always wants to do some sort of “fix up” something for his mom and dad. Joshua, you ROCK!
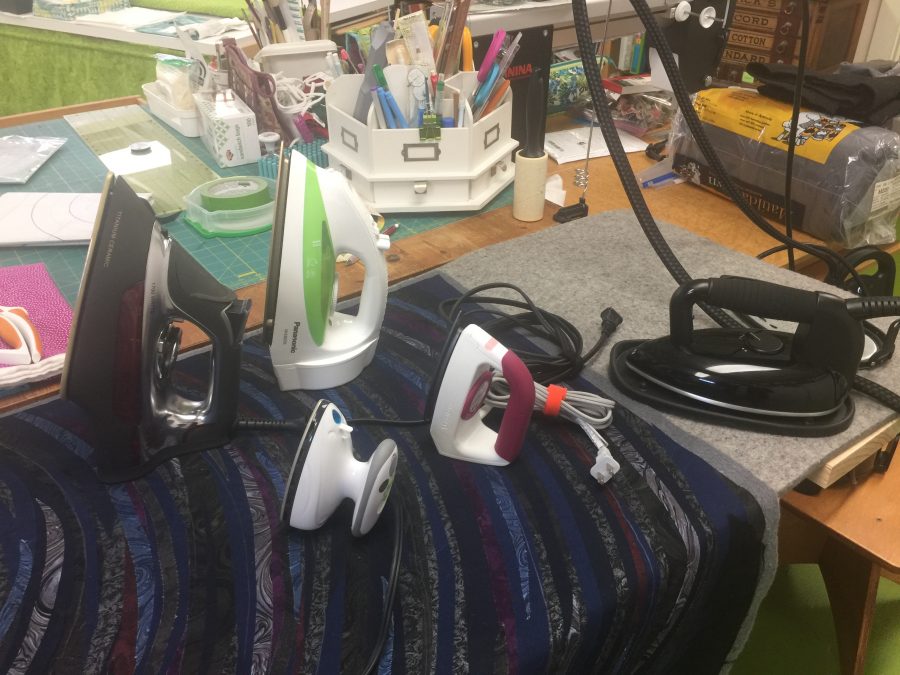
For a while now I’ve wanted to blog about irons, and why I love the ones I have. Yes, plural…..I have SIX! Three are “small” size, two are regular, and one is Sirius the Black Dragon. Yes, my Janome M7 sewing machine is named Albus (the second, he had a predecessor named Albus). There’s even a video at the end of this post about all these irons!
From left to right: the CHI, my beloved Panasonic Titanium Nonstick, the little mushroom style, the (SOB no longer made SOB) Clover, and Sirius, a LauraStar steam generator. I have a sixth sorta small iron, but it is too heavy/awkward for my hands and was upstairs for use steaming in the closet–not that I’ve actually ever used it for that. Sigh.
The Panasonic is my go-to iron for fusing. At 1200 watts, it gets hot and has acceptable steam, although I almost always use it as a dry iron. I love this iron so much I wore the finish off my last one! I always have one that is my working iron, and a brand new spare in the closet in case the cats or I knock it off the ironing board one time too many (studio is in the basement, cement floor…not good for falling objects). I can LITERALLY place this on Mistyfuse or other fusible web, melt it all over the bottom of the iron and WIPE IT CLEAN. No more hot iron cleaner fumes (which cannot be good to inhale–they set off smoke detectors)! For the price of four tubes of iron cleaner, you’re golden. This link takes you to the one I am currently using–I like that it has auto off because I am easily distracted. As of April 2020, it is a whopping US $27. Even if you only use it for fusing, it’s worth it!
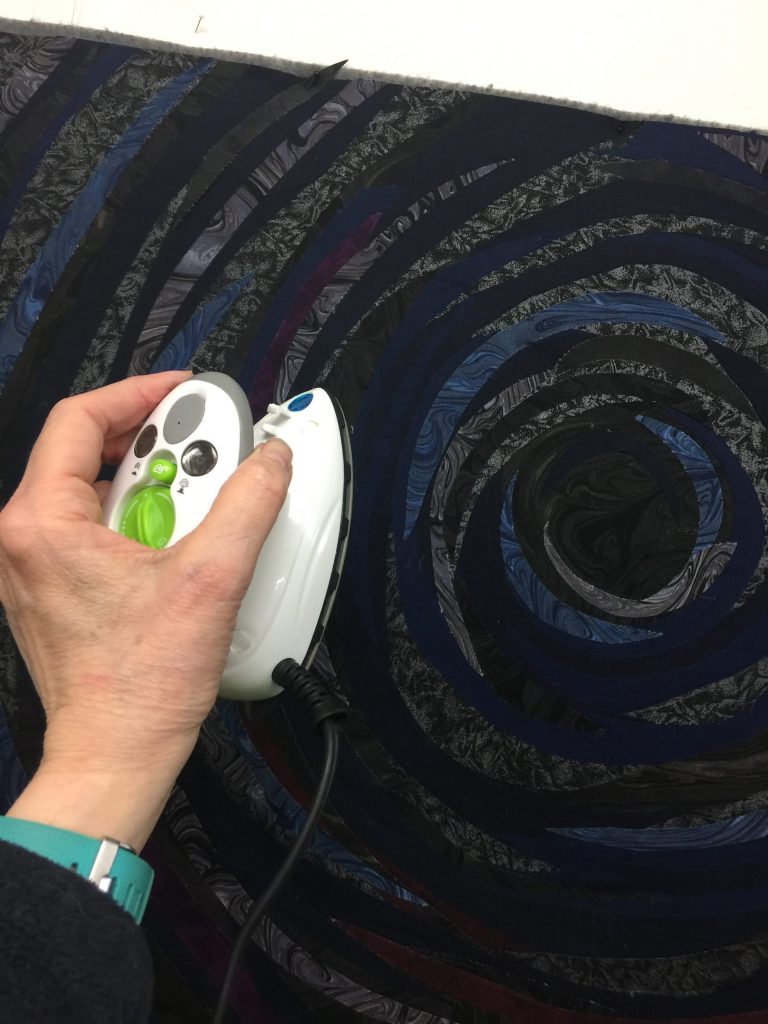
I fuse on top of my ironing surface, but also on the design wall. Holding the iron (which is relatively light) had gotten uncomfortable because I have arthritis in my thumbs and wrists. So I tried the little mushroom iron, the ones you see in classrooms and at retreats–many folks can plug them in and not blow the fuses. It is quite comfortable to hold when used on a flat surface, but on the design wall it requires you to bend your wrist, and that hurts for me.
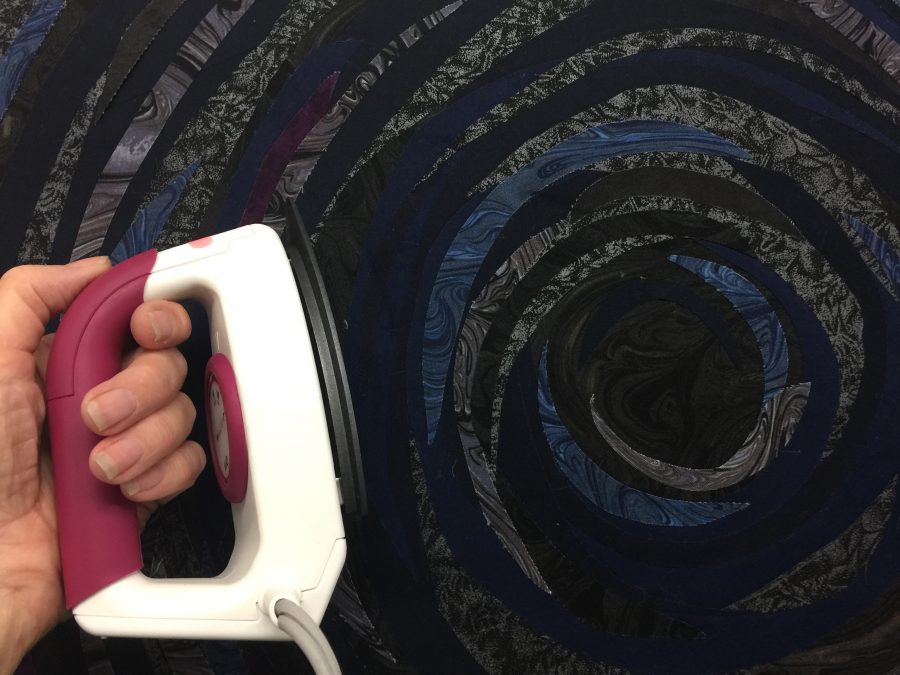
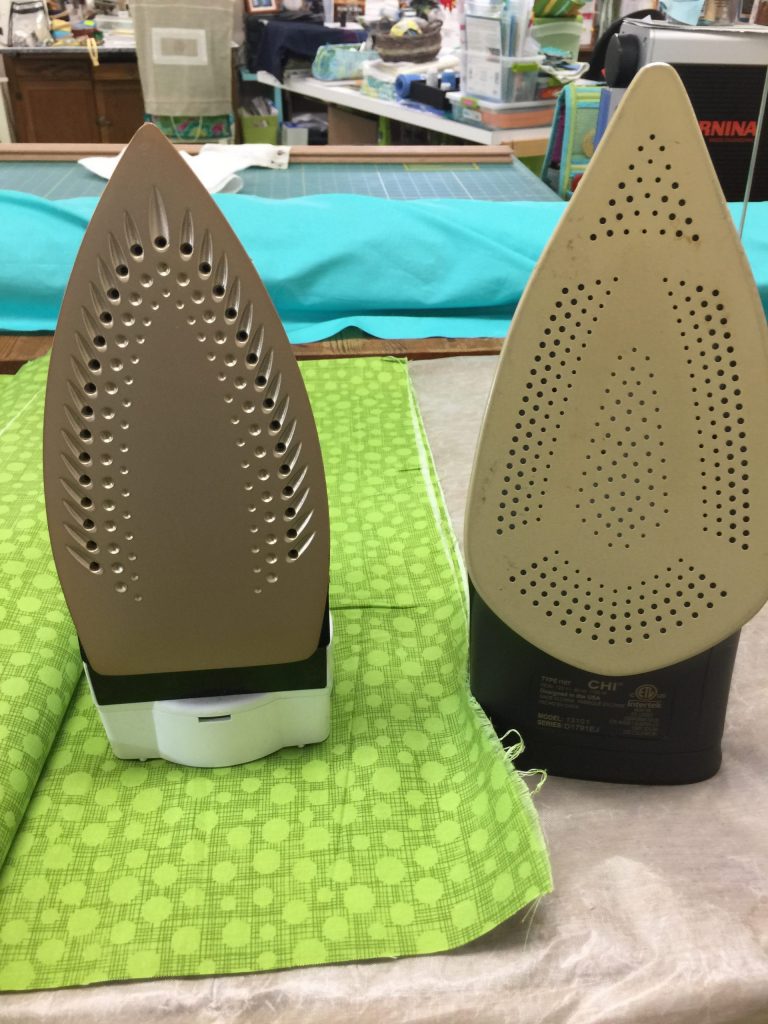
Here I am holding the iron on the design wall, and I have to bend at the wrist which causes discomfort. That’s why I really prefer the…SOB….not longer available Clover iron. Yeah, I’m sorry, I know that doesn’t help you very much. I haven’t included a link for the little mushroom style irons…there are a bazillion available on Amazon, at quilt shops and so on. From what I can tell they are fairly similar.The Clover iron is ideal for the design wall. The “mug” handle rests on my fingers, and I can see my hand and forearm in a single line–as if I were wearing a brace. That means I can tap it onto the design wall as I work with no pain at all. I don’t know if there are any models similar to this style out there….If ANYONE KNOWS OF SOMETHING SIMILAR, please TELL ME! I’d love to test one out and see if I can recommend it to my students. And if anyone knows someone at Clover that we can all write and beg them to make this again, tell me that, too!The 1200 watt Panasonic Titanium non-stick iron is on the left, the CHI 1700 watt is on the right, and that glorious fabric is Meadow color of HashDot by Michael Miller Fabrics.
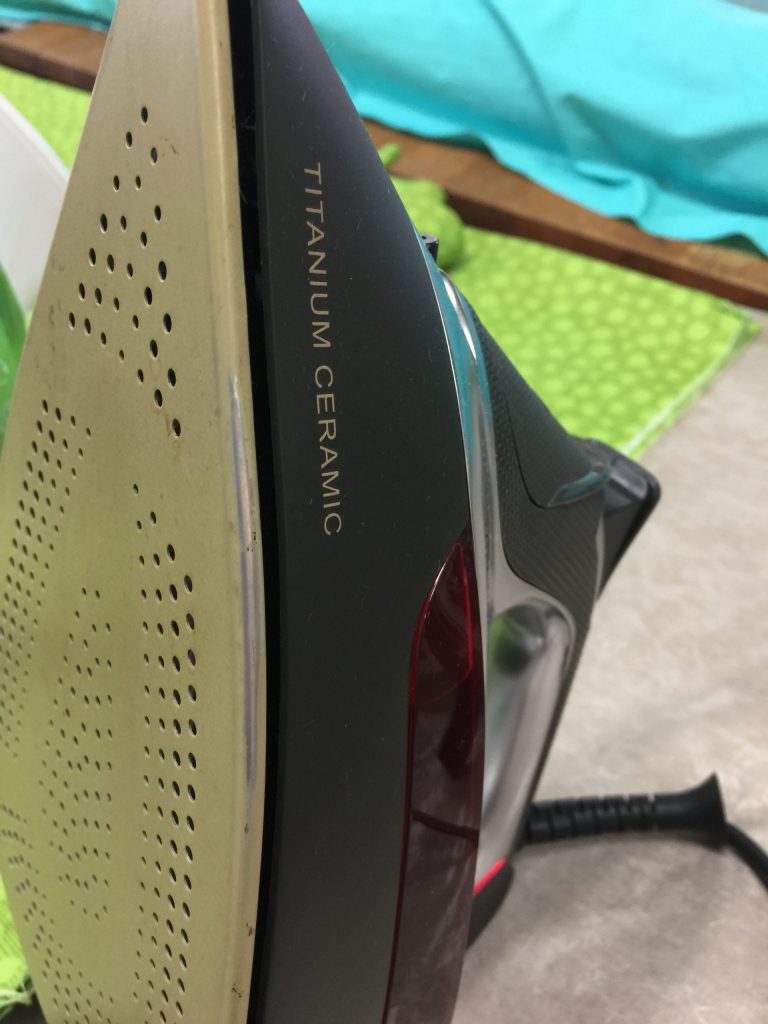
For years I have recommended the Panasonic Titanium nonstick iron to students–Panasonic should give me free irons for life I’ve sold so many for them LOL! But I had (note the past tense) suggested that the gold-ish colored titanium appears to be the key. Not so much. First, my “in the closet” iron-in-waiting is a Panasonic Titanium ordered earlier this year, but is now a silvery color instead of gold-ish, but still works the same. Second, not all Titanium non stick is the same. I decided to give the CHI Titanium Ceramic, below, a try. It costs more, about $59, and has 1700 watts so lots of heat and power and good steam. It’s great for steam ironing, but not so great at the non-stick–it really doesn’t wipe clean the way the Panasonic does. Here’s what happened:
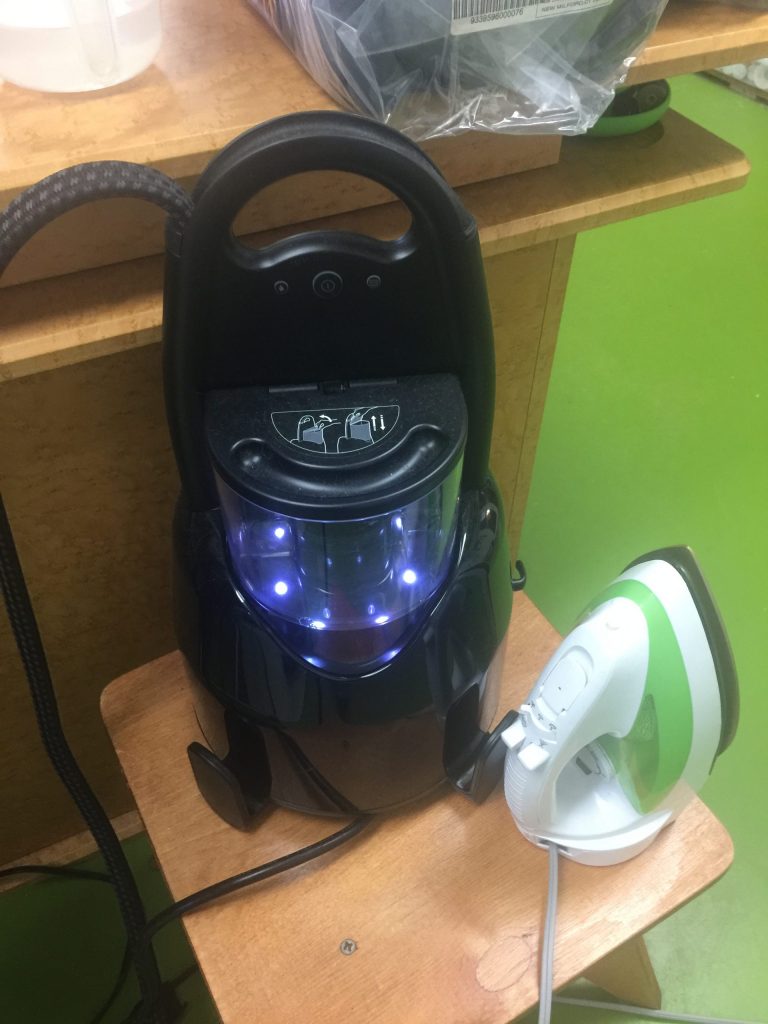
I needed to (yuk) get out the hot iron cleaner. This surface just doesn’t wipe clean well. I use Faultless Iron Off hot iron cleaner on a soft white terry towel. And look what happened: I rubbed off the finish on the gunky edge!!!!!! It’s still a good iron, and I use it, but not for fusing. It has quite a large capacity water reservoir which is good in principle, but again that pesky arthritis poses a problem: it’s heavy. That’s where Sirius the Dragon comes in. Keep reading. ANYway, if you don’t use fusibles (or even if you do) this is a good, hot iron with good steam. The LauraStar steam generator is a grand indulgence! Please be sure you are sitting down when you see the price on this black beauty…they are expensive. But OH MY! I had been lusting after a steam generator for a long time, but (to repeat myself in a short space) they are expensive. And this is on the expensive end of expensive. But I’m sure glad I indulged–nothing beats a great tool.
The model I purchased is the same as this one (minus the soleplate cleaner, which I wish I had). The steam is IMPRESSIVE…literally, it sends out a jet about six feet….watch the video below! It comes with a cord stand (which I don’t point out in the video. There is the power cord and, wrapped in cloth, the line that powers the iron and brings the steam to it. Unlike a regular steam iron that produces steam constantly (if you set it to do so), you need to push the button, but that is easy to do given the location on the handle.
The steam cord is a bit stiff, which is why having the clamp-on cord guide is so helpful. You also get a silicone mat so you don’t have to tip the iron on end, just set it on top of the mat. That is comfortable for my arthritis. So is the light weight of the actual iron. AND you can steam things that hang, like curtains and garments!
When I have a lot of ironing (like yards of dyed fabric, or just washed fabric), the steam generator is a DREAM. Also excellent when doing a final fusing of the finished art quilt top and when blocking a quilt. Many steam generators if the tank runs dry, you have to turn it off, wait for it to cool, then add water. Not so this one–just open the lid to the easily accessed tank and add water (shown in video). BINGO! WINNER! Just be sure not to send a blast of steam in the direction of your other hand. Guess you don’t need to ask why I advise you of that. Ahem. Only did it once! If you are also a garment maker, you’ll love this. I will grant you, it is *expensive.* But in my case, worth it.
Bottom line: I use the Panasonic for all fusing. For smaller ironing jobs, I use the CHI. For working on the design wall, I use the Clover. And when I need STEAM or have a lot of ironing to do, the LauraStar. So there you have it…why I ned at least FOUR irons! What are your favorites, and why?