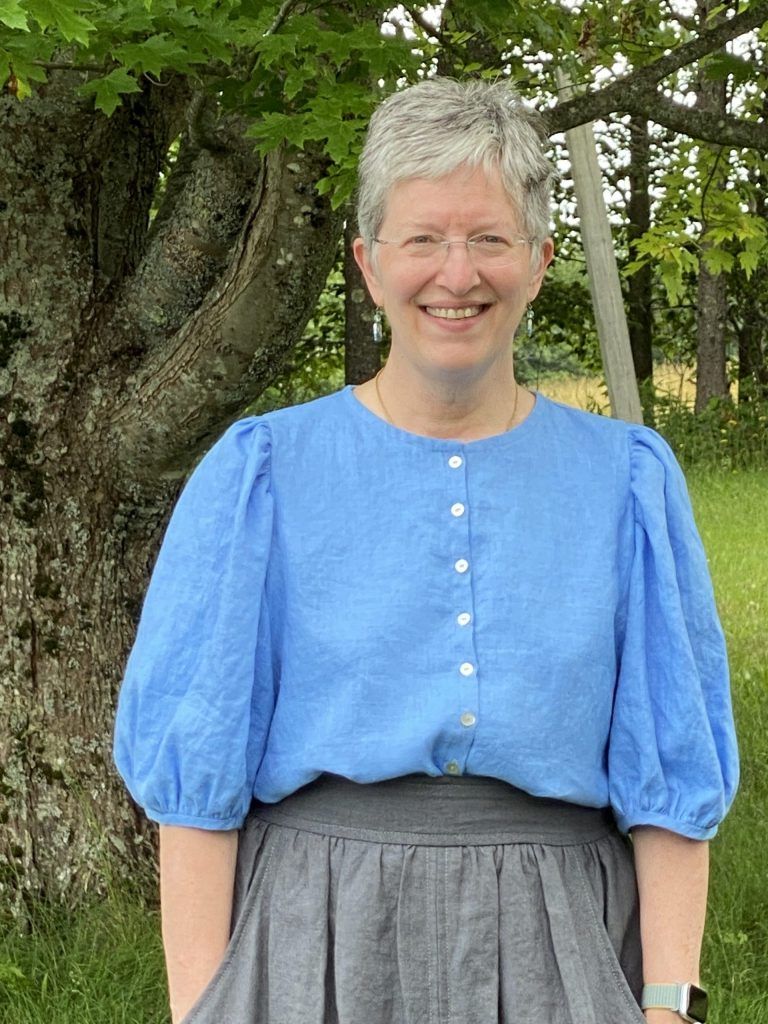
While visiting my favorite local shop, Fiddlehead Artisan Supply, one of the young women working there had on her version of this blouse. Asked the pattern name–Anthea by Anna Allen–went home and ordered it! The colors I’m wearing are Maine Summer and it is so flattering to many body types and comfortable.
Today’s blogpost takes you through making an entire blouse, which presser feet I use on my Janome (I’m a brand ambassador and compensated, but I’d say all this good stuff anyway…they rock!) m7Continental, why and offer tips and tricks for garment construction. Pretty much all Janome machines have or have available these presser feet with the possible exception of the automatic buttonhole, which many but not all of the Janome models have. Comment and let me know what more you’d like to know and what you’d like me to feature on the blog! I’m scaling back travel teaching and hope to have more time for this sort of thing.
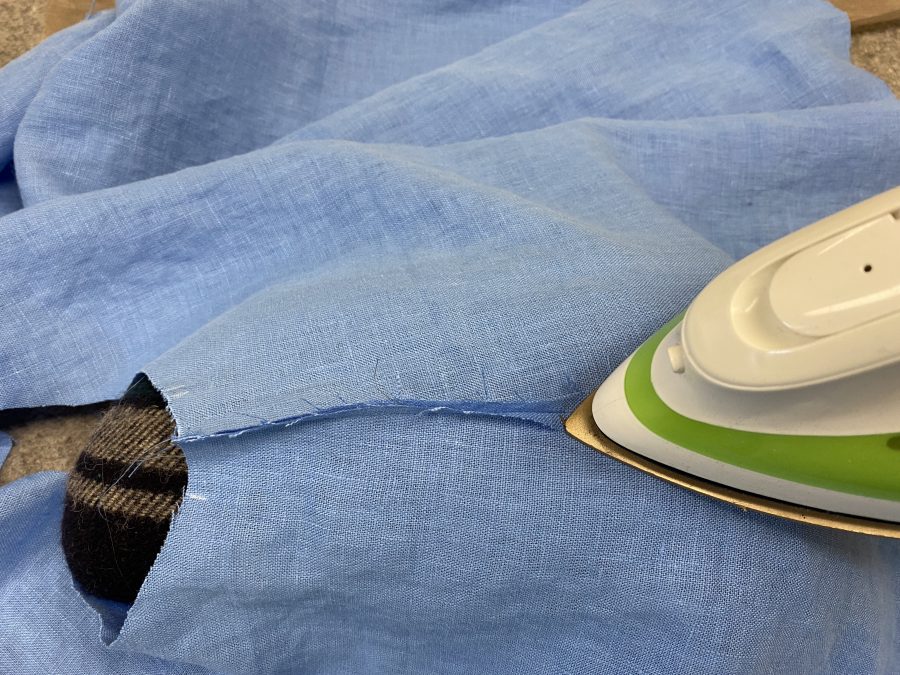
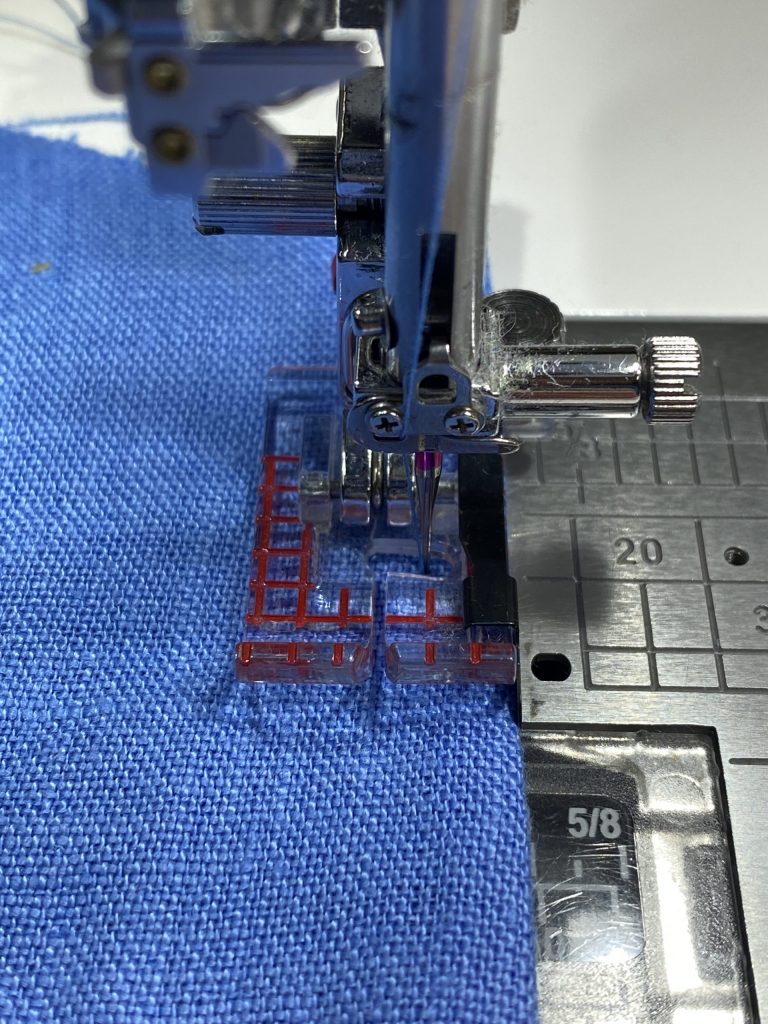
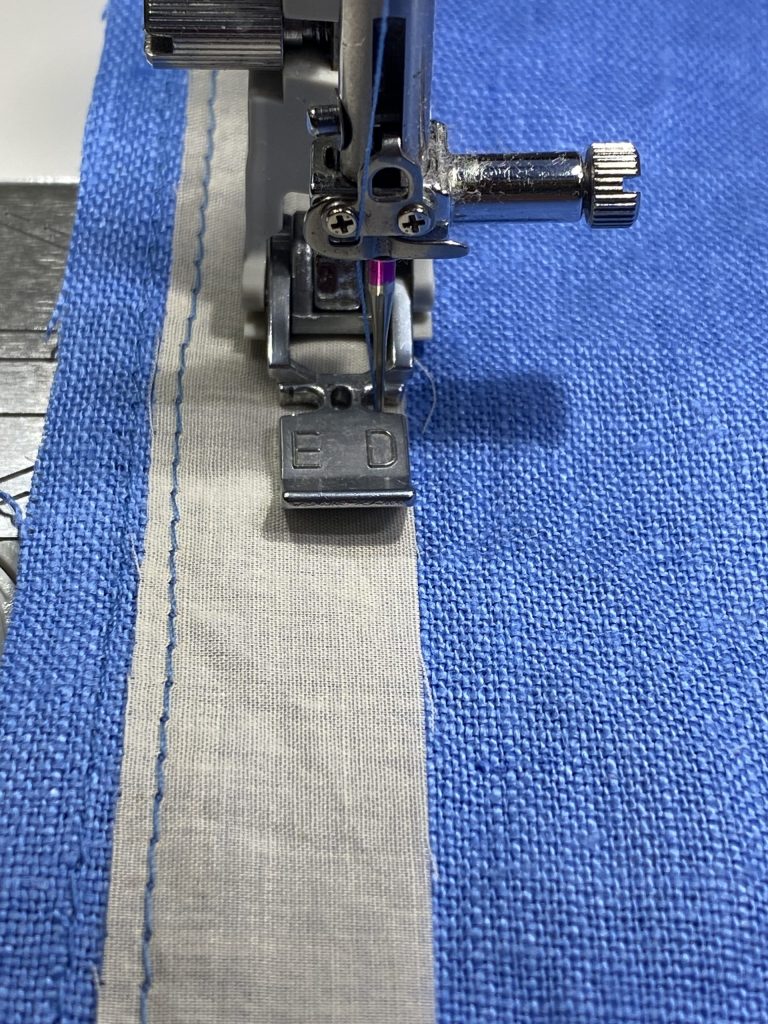
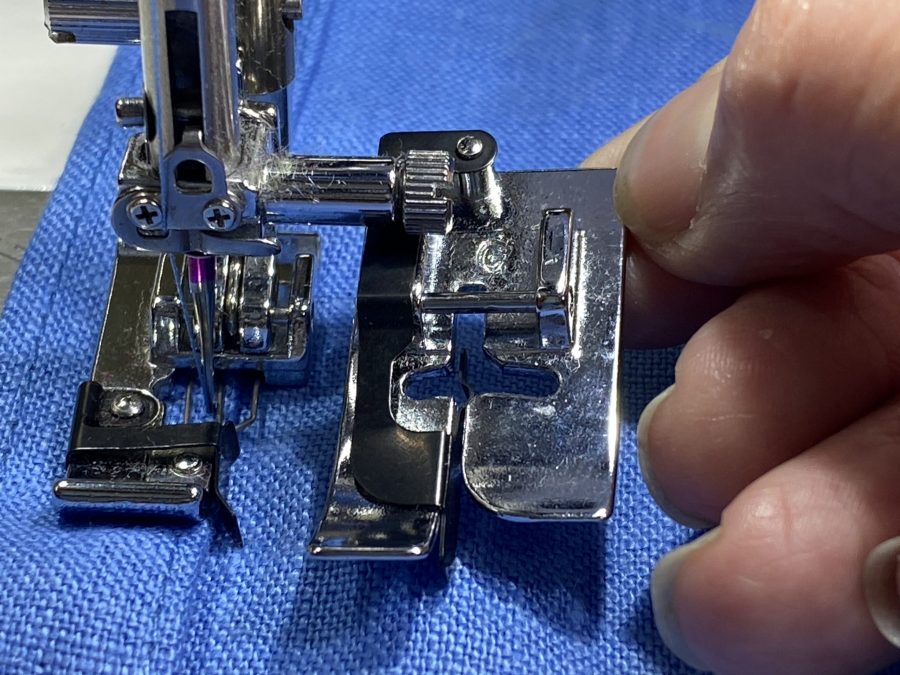
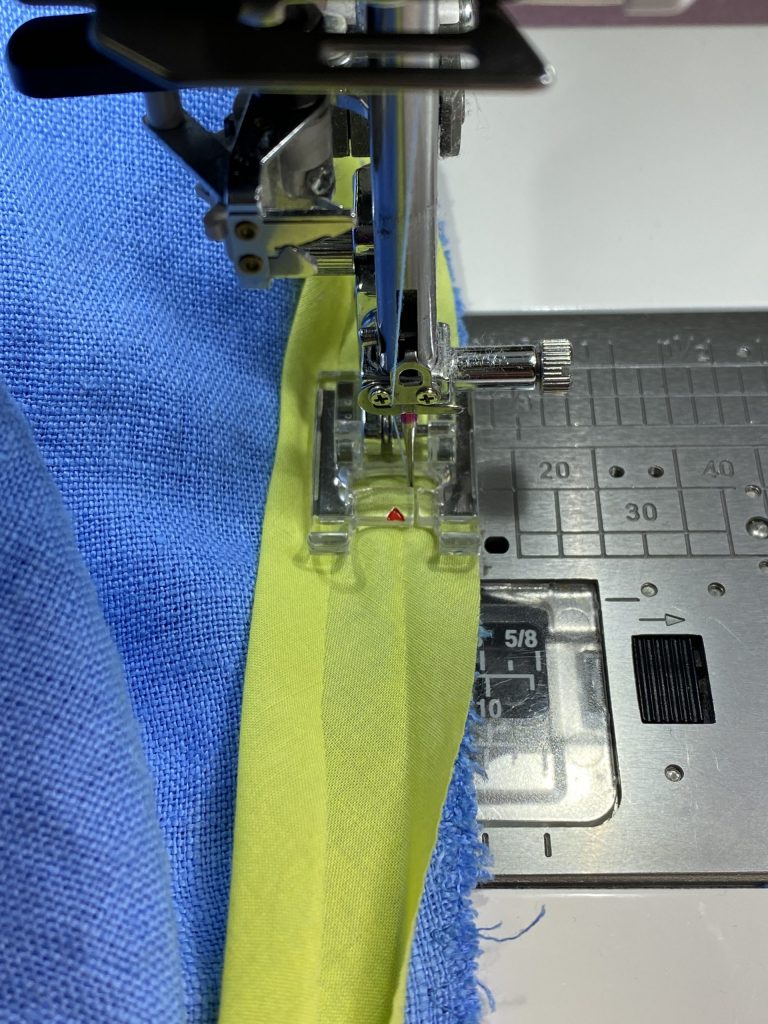
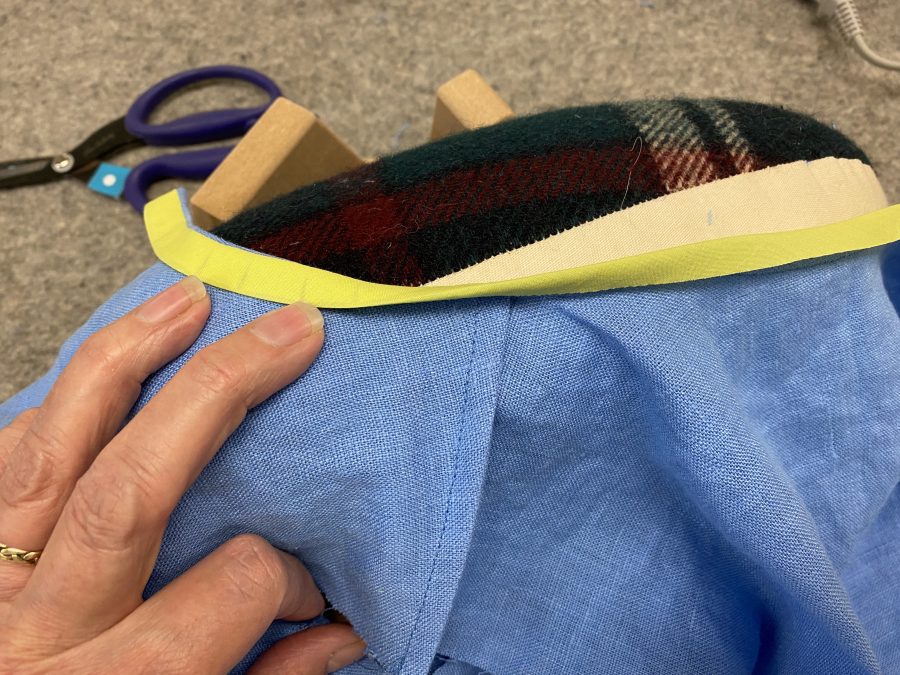
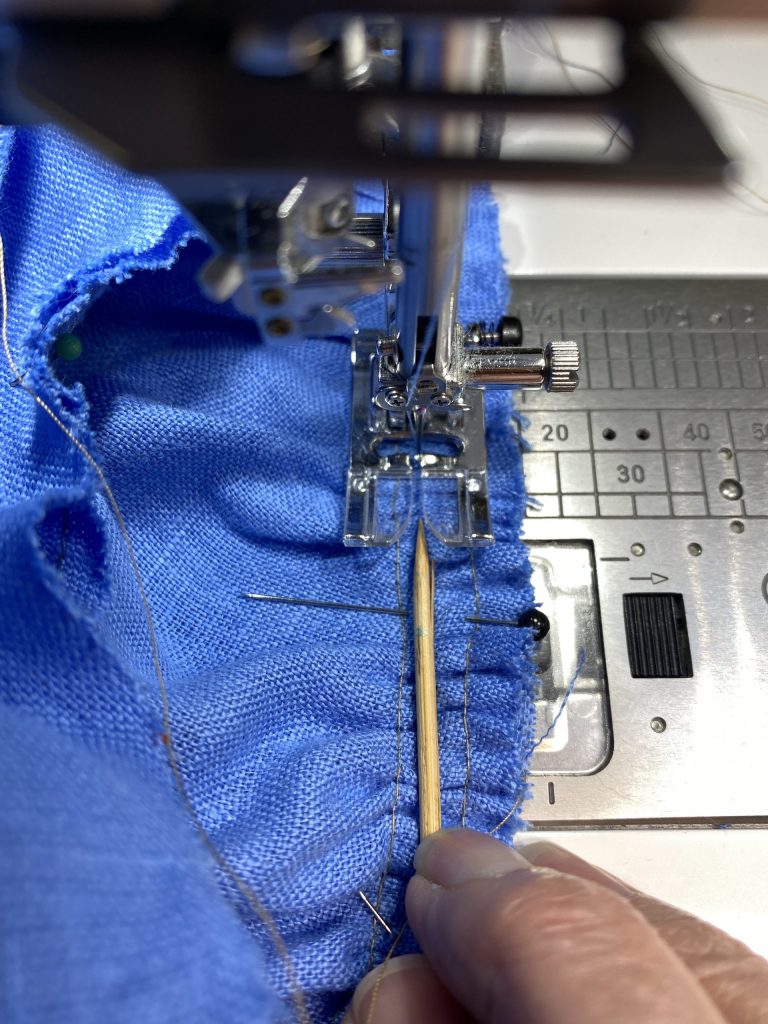
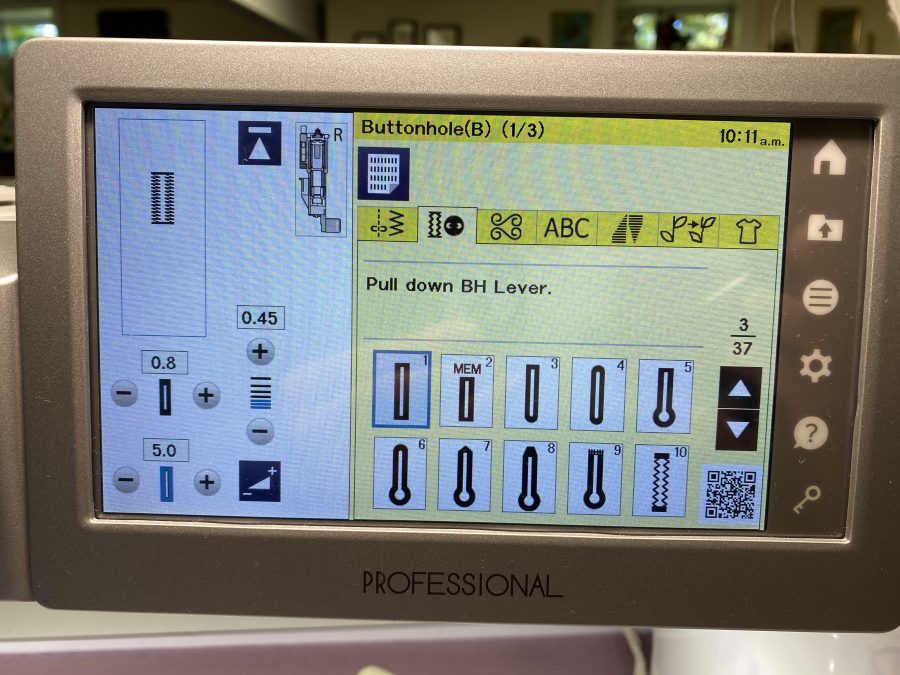
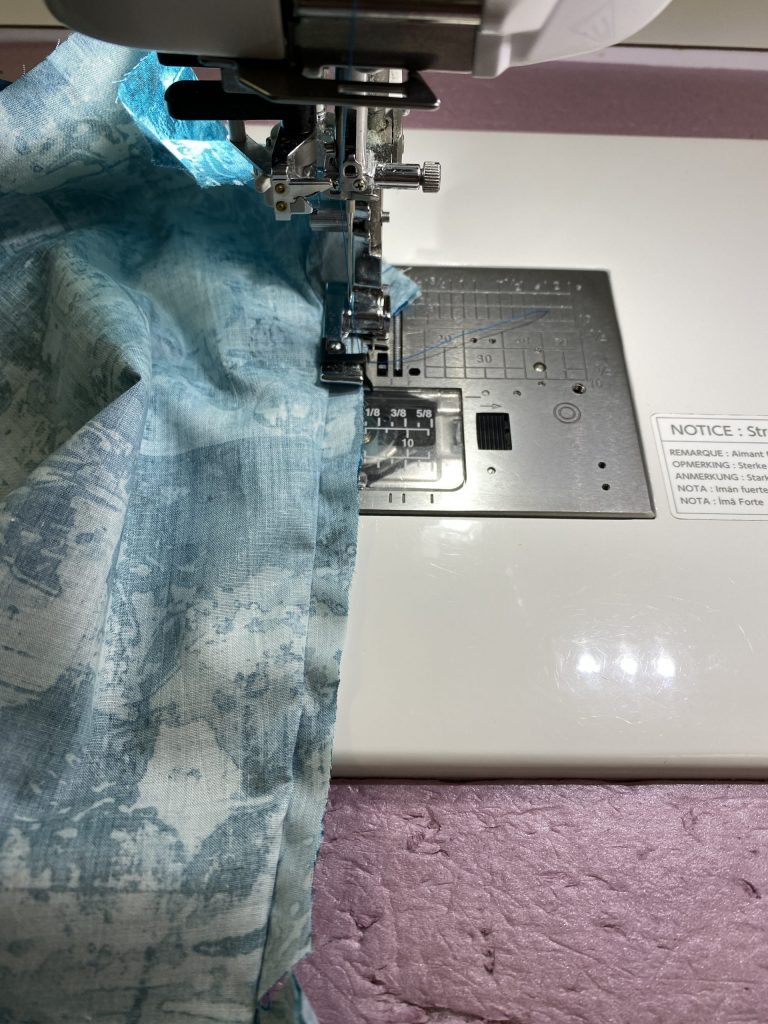
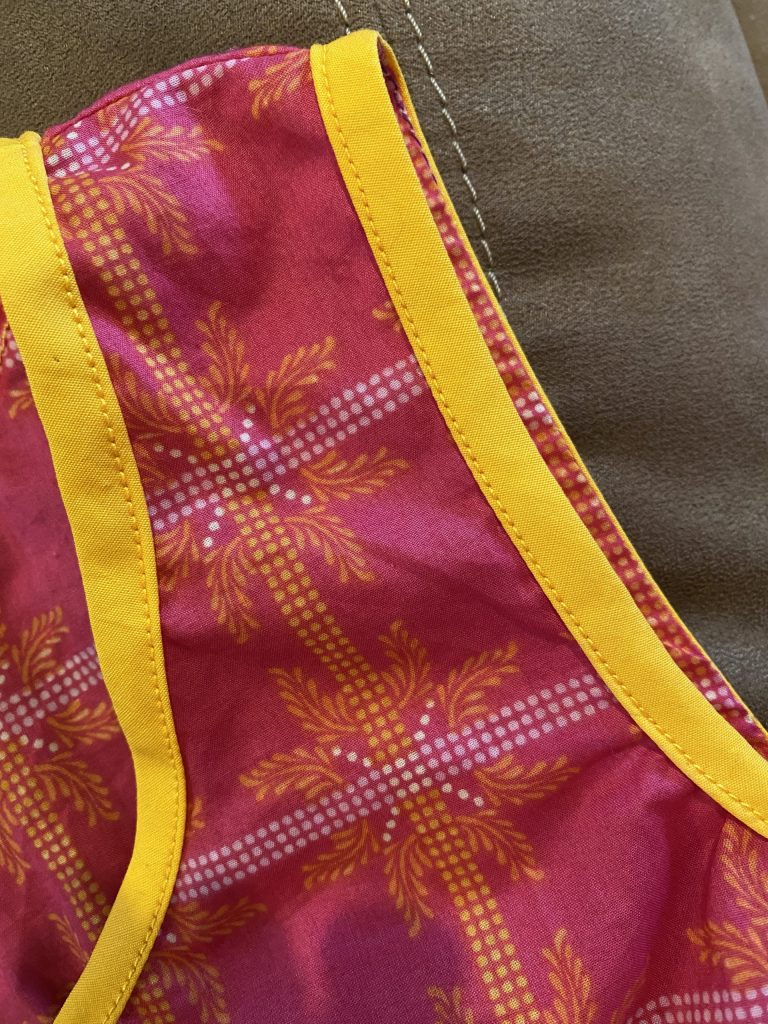
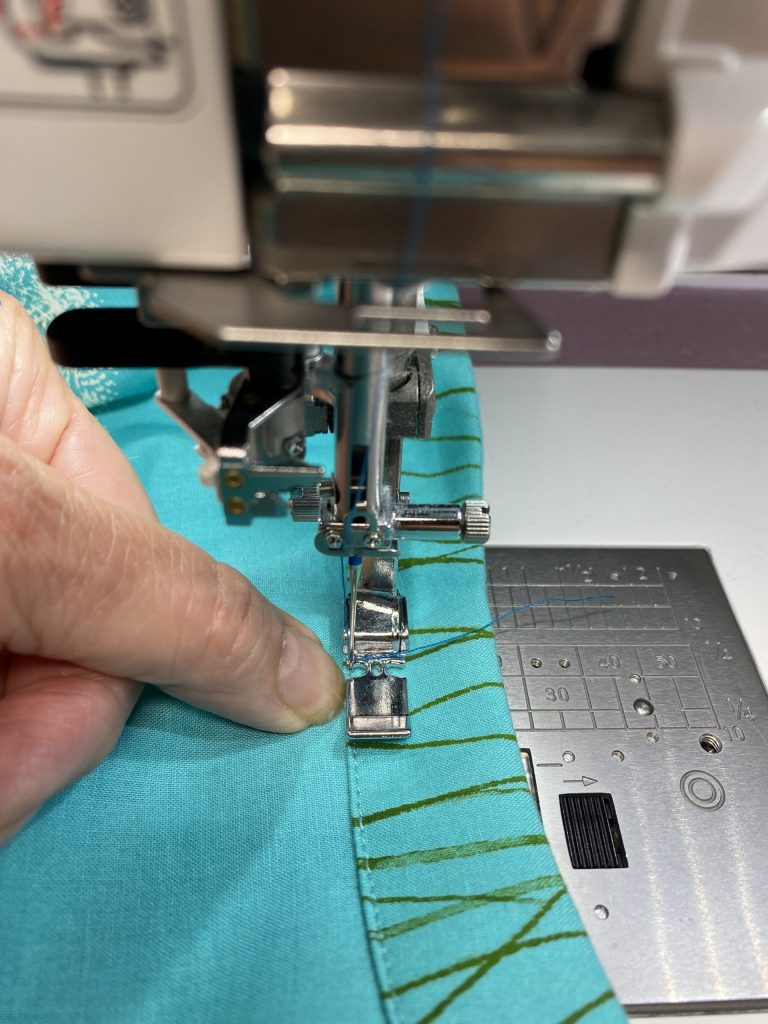
The first thing to do is sew your side and shoulder seams. I opted for French seams for a clean, no-fraying finish. With a 5/8″ seam allowance, I sewed with the WRONG sides together at 3/8.” First press the seam as stitched (flat), then trim to a scant 1/4″ and press the seam allowance open.Be sure to trim off the whiskers–you won’t be able to coax them inside the enclosing seam and trimming them later.is a headache.This shows me holding the fabric with right sides together; the fabric is folded EXACTLY on the first line of stitching. You then sew 1/4″ away to enclose all the raw edges. Sew the second part of the French Seam at 1/4″. If you’ve trimmed any stray threads/whiskers, you’ll have a beautiful clean seam. Press to one side (for my blouse I pressed to the back). Notice that the edge of the fabric/seam is on the 3/8″ line but the needle is moved right of center to be at the 1/4″ seamline.Next, I am stabilizing the button band by using cotton voile (preshrunk) as my interfacing. Unlike the polyesters or fusible we are used to using, it provides strength without bulk and retains a soft, fluid hand to the garment. I sewed the edges in place (so the strip won’t wiggle and wad up during use). The zipper foot is one of my favorite ways to get a perfect, consistent edge: set the side of the foot on the edge of the interfacing and move the needle toward the center. Be sure it won’t hit the foot but also doesn’t ride on the very outer edge of the interfacing and chew it up. ON the left you can see stay stitching.I’ve folded the cut-on button band to the inside and am now stitching it to the front. When I have a “lip” or folded edge and want to edge stitch, I use either the edge stitching foot (on the right, which I think of as the Ice Skate with the metal guide in the center) or the over cast foot (on the left, in use). Using a straight stitch, place the foot so the blade is snug against the fold and move the needle to make a nice, narrow topstitch. Be sure the needle won’t hit the wires in the presser foot by hand-walking the needle for one or two stitches.Next up: applying a bias binding to enclose the seam and act as a facing on the neckline. Here I’m using what may be my favorite presser foot, the F2 appliqué foot. The wide open toes and clear visibility help me sew more carefully and precisely. This photo applies to both facing the neckline and covering the edges of the set-in sleeve seam.Buying a GOOD quality tailor’s ham and base to hold it has been one of the best, most useful purchases of the year. After 50 years of using my mother’s horrid old ham, I’m ready to sew! Here I’m pressing the bias in place on the neckline. You can see the narrow French seam on the shoulder in the center of the photo. As I press, I am easing the bias so that it lays nice and flat. I used my seam gauge to make sure the depth is even, then edge-stitch all the way around the neck.Once the body is complete (except for the hem), it is time to start the sleeves. Although I have sewn garments for almost (GULP) 60 years–yes I started very young–I’ve been taking an outstanding online course with Philippa Naylor, Garment Makers Question Time. The price is phenomenal for the amount of instruction you get each of the 12 months. More projects coming up! Anyway, I learned to set the gathering stitches at 1/2″ and 3/4″ and sew down the middle at 5/8″. Philippa’s way works better: sew your gathering stitches one thread into the seam allowance from the final seam line and 1/4″ closer to the raw edge. Gather, distribute the gathering appropriately, and then sew the seam just barely to the left of the left-side gathering stitch. I like using a thin bamboo skewer to coax and ease the gathers as I stitch. Again, I love that open visibility foot!
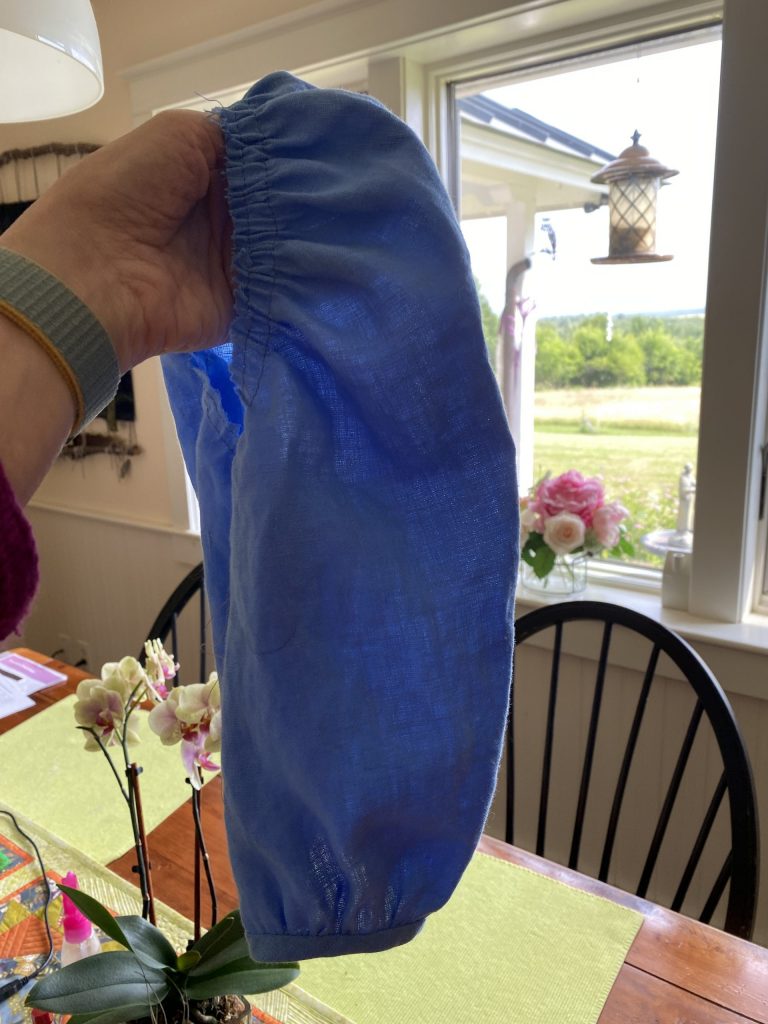
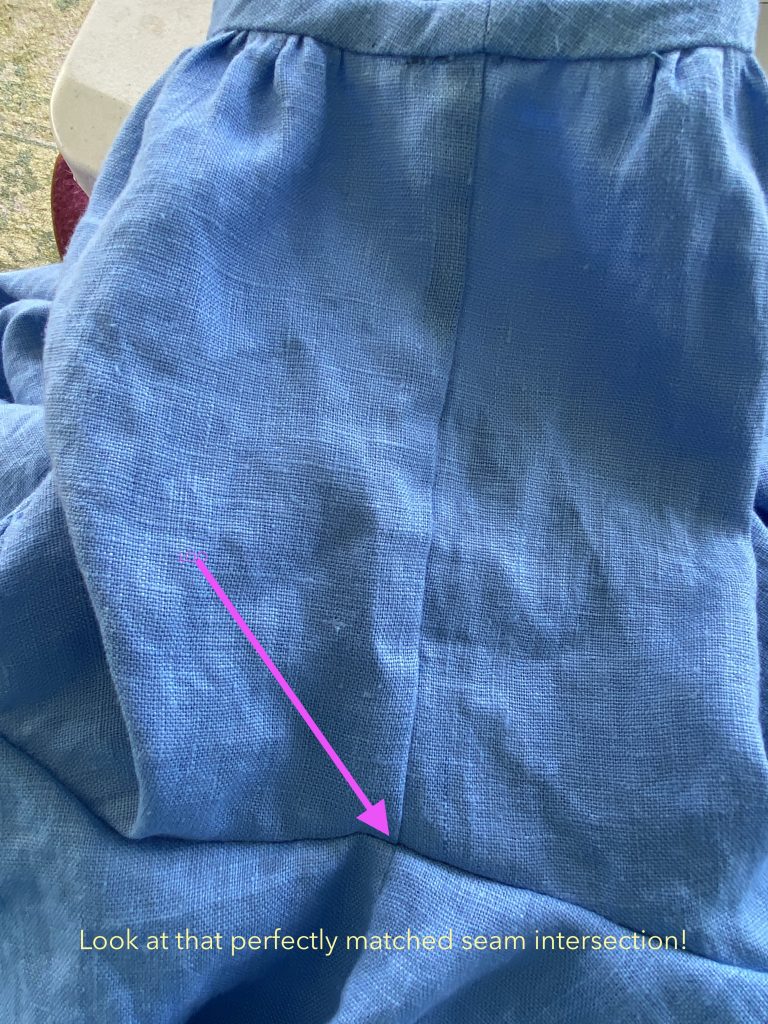
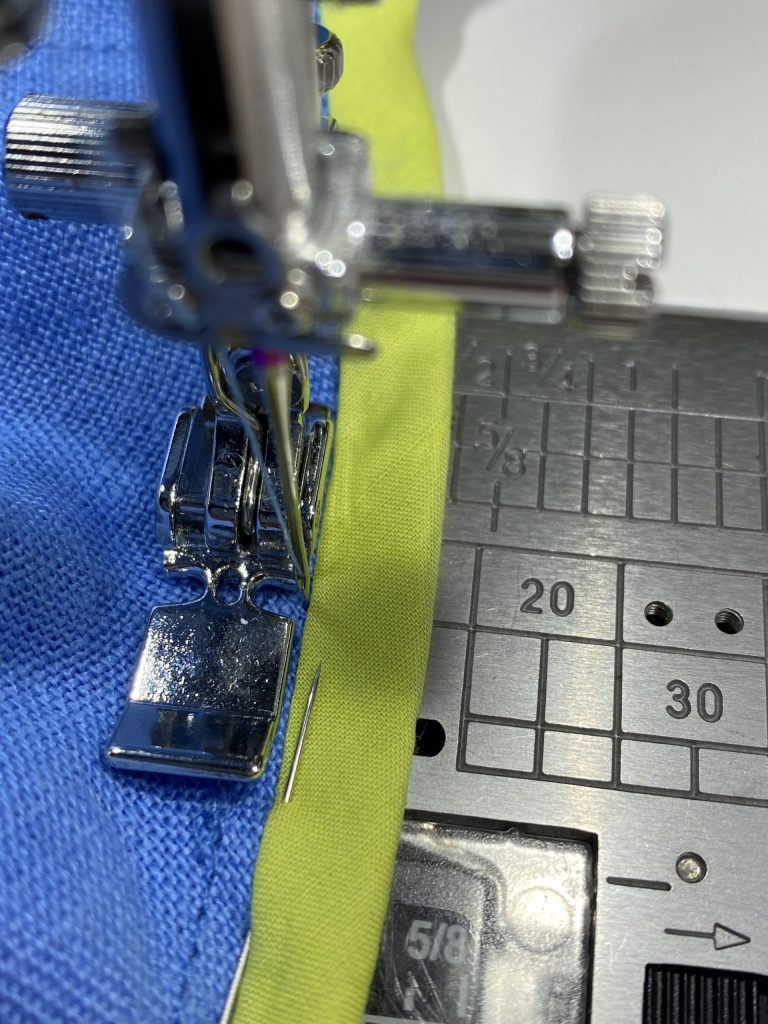
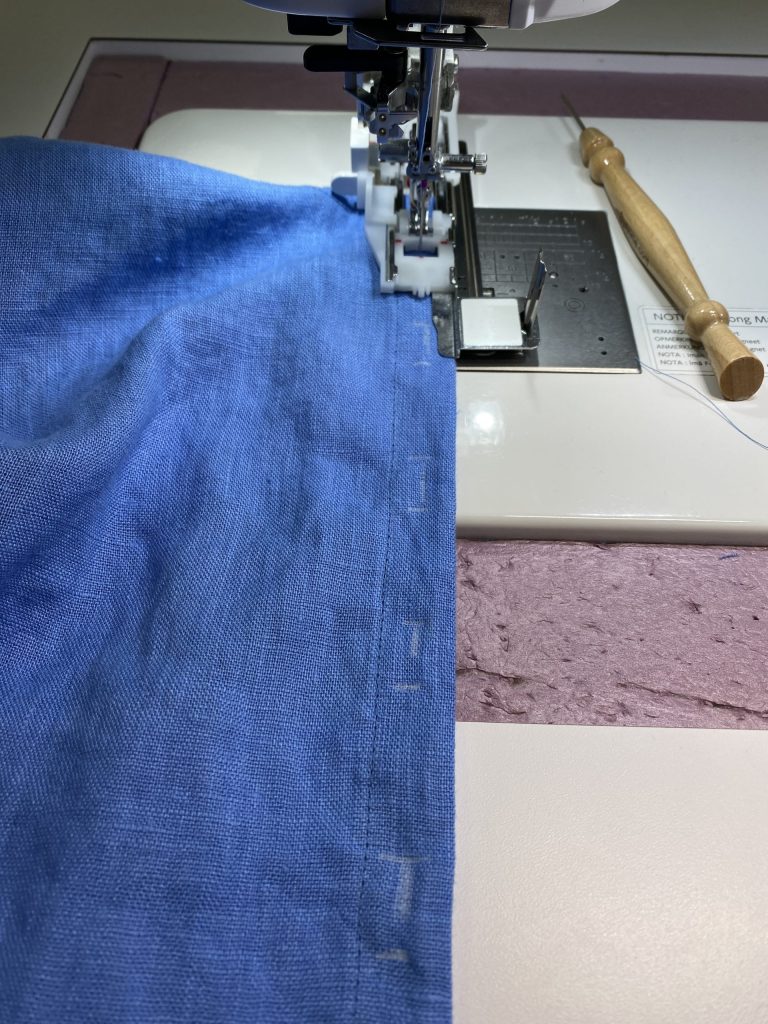
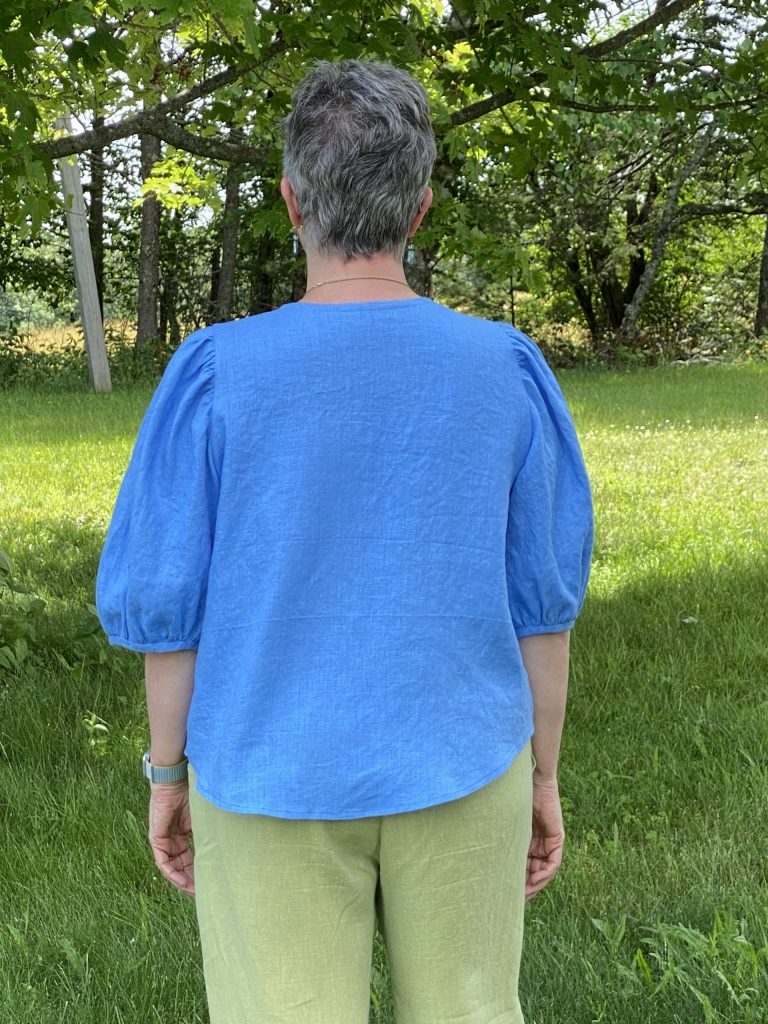
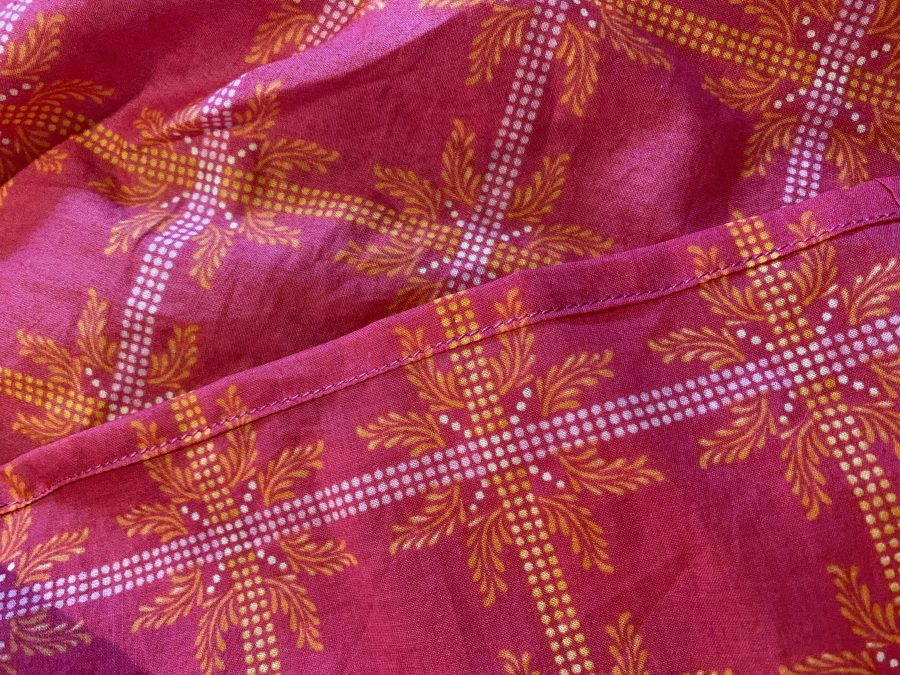
Here is the sleeve with the seam sewn and gathers gathered. I was a tad leery that the shoulders would be too narrow, but I did the right thing and made a toile (practice garment) out of cheap cheap cheap white fabric, and the sleeve seam is indeed set in from the shoulder point–this helps the gathers get that nice rounded puff! For the hem, at the top of the next photo, I sewed a linen bias strip to the right side, turned to the inside, and hand-sewed it into place. LOOKIT that perfect match! On the first try no less! Once the sleeves are sewn to the bodice, you’ll need to finish the raw edges. The gathers in the sleeves make it too thick for a French Seam, so I chose to use I used a bias edge finish similar to a single-fold bias binding on a quilt. On the neck, the bias was entirely folded to the inside of the garment. Here, you stitch the bias strip of fabric–a lightweight cotton lawn in lime green–to the seam, wrap it around the raw edges, then stitch in the ditch to secure it. I also managed a perfect join on the bias for the “cuff.” Note that the pattern has a wide opening for the bottom of the sleeve–way too wide for the size of my arms. I gathered it up more, making sure it still moved smoothly over/around the elbow, and just made mine narrower.Covering up the raw edges where the sleeve joins the body. Again I’m using the zipper foot. For the way my eyes and brain work, I get the needle closest to the edge of the bias using the zipper foot and moving the needle as far right as it goes. Keep a hawk eye on your stitching because it is all too easy to wander and veer onto the bias.Janome’s automatic buttonhole foot (available on select models including the 9450 and M7) is amazing. You set the button into the back and it picks the perfect size. You can fine tune it if the button is thick or thin. ALWAYS to a test-stitch on a scrap (using the same interfacing and number of layers). You can see I have carefully marked the center of the button holes plus the start and stop lines. The Janome foot has a metal base plate that keeps everything flat and feeding perfectly. Here’s a video of it in action!
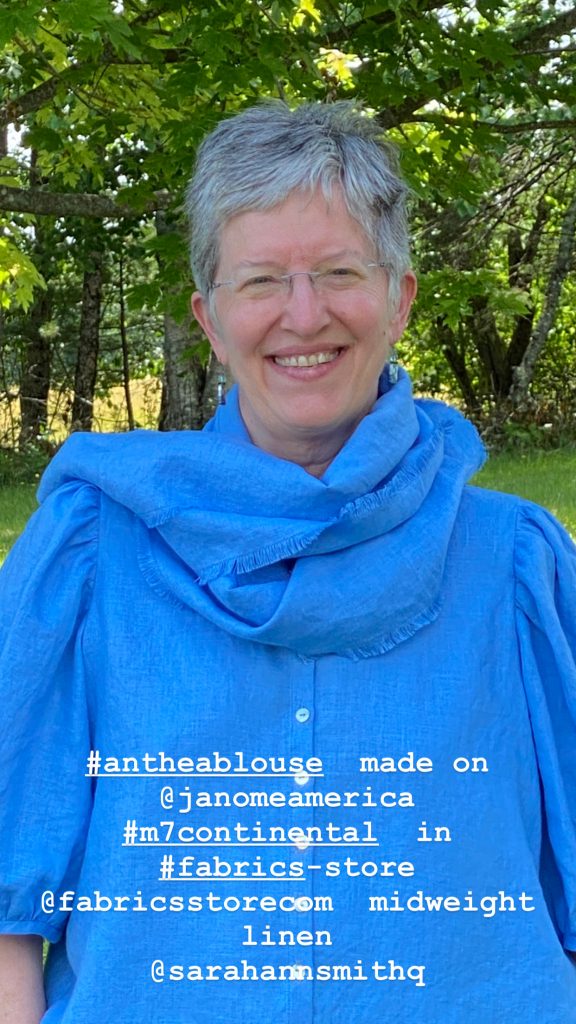
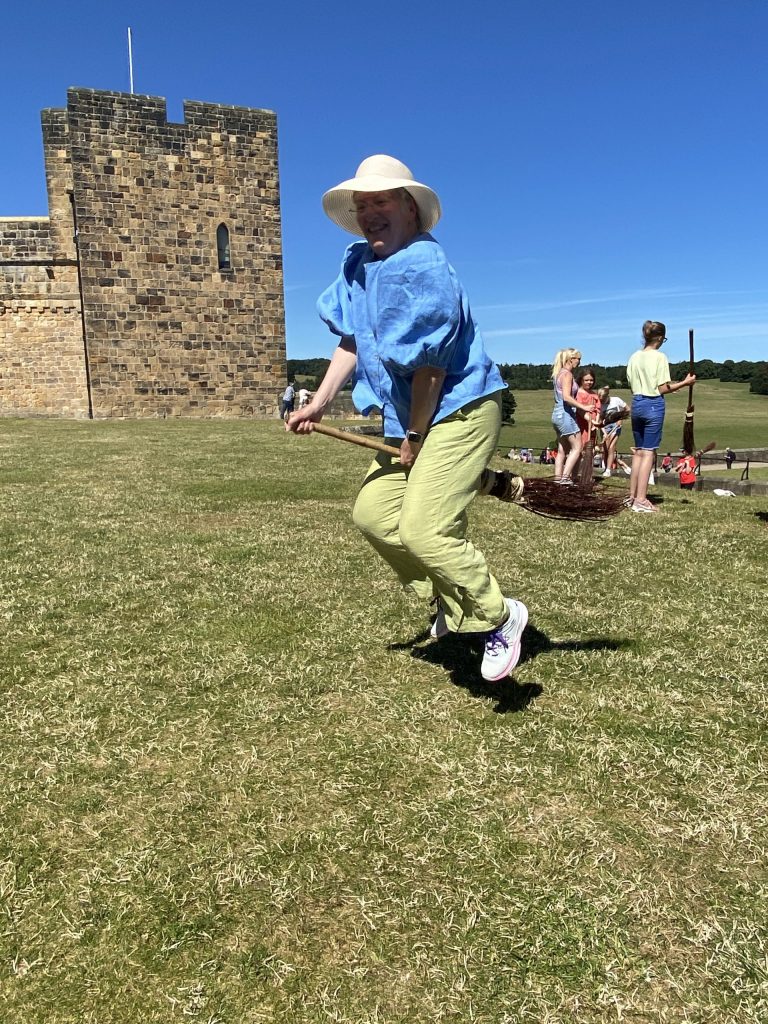
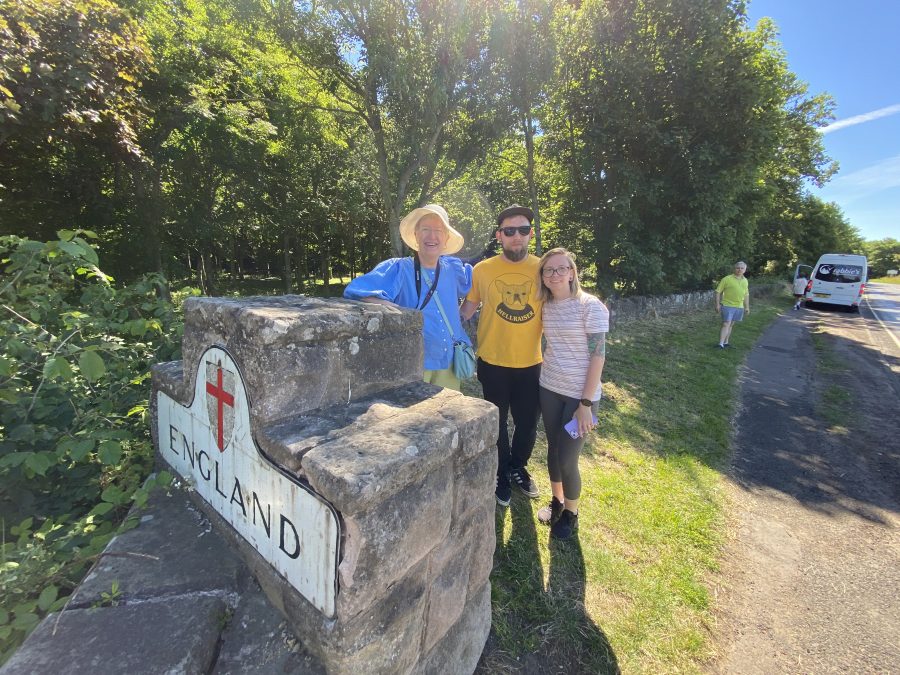
You can subscribe to my YouTube channel by clicking on the YouTube link (bottom left) and then following the subscribe button on that site, I don’t post often, but there are some useful videos there. Or just click here to go to my YouTube home page. This is the setting I used.Worn tucked in with a linen skirt in gray. Blouse fabric is the IL-19 5.3 oz linen from Fabrics-store.com. Skirt linen is the Driftwood Linen from Fiddlehead Artisan Supply near me in Belfast, Maine; I bought the Brumby skirt pattern there, too. Yes, they do online / mail order!I had some leftover linen, so I made a scarf, too. I sewed a narrow zigzag on all four sides, then carefully frayed the edges. Here’s the link to the pattern again: Anthea by Anna Allen.You can also wear the blouse out–it has a narrow 1/2″ hem. You can even wear it to Broomstick Riding Lessons (at Alnwick Castle this summer)! Funnest photo and time ever! And you can also wear it after you have walked from Scotland to England—all the way across a 100 foot long bridge! With my oldest son and DIL on a trip of a lifetime.
Well I can’t believe it has been half a year since I blogged… that tells you how crazy busy this summer has been. All good stuff, but all at once. I am looking forward to being HOME for three straight months once I return from Houston / International Quilt Festival where I’ll be teaching again. I will try my best to be back before the end of the year…like maybe even in a month?
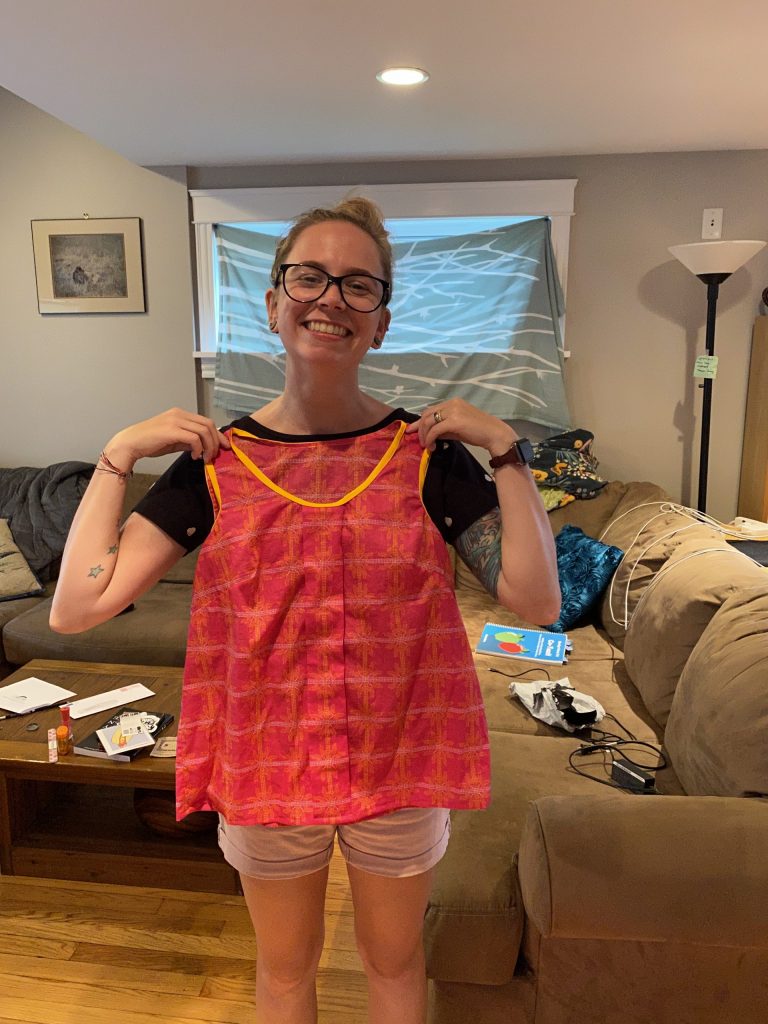
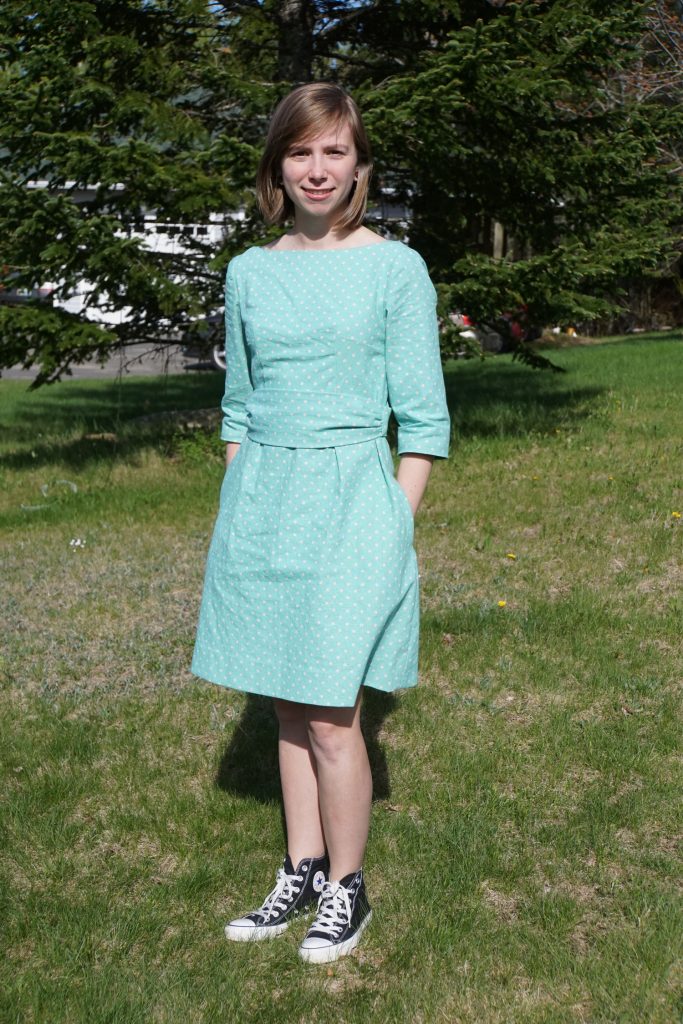
Another new make on the Janome M7 using various stitches and features to make a great dress perfect! I found a link to a free blouse pattern on the Australian Peppermint Magazine on Spoonflower. Following the trail of cookie crumbs (or thread bits), I then found the Wide-Strap Maxi dress pattern, which is a free PDF download. They ask if you’d like to make a donation to support the cost of the site, so I did, and I GOT A THANK YOU! Nice! Click on the pattern name or here for the hotlink. Along the way I took pictures and the edited them into this under-3-minutes video:
There’s no audio for the first two minutes, but there are captions. At the end for the video of me out in the yard, you may want to turn up the sound…I increased the volume on the film clip, but it is still sorta quiet when I am turned around.
Here are some of the pictures from in the video!
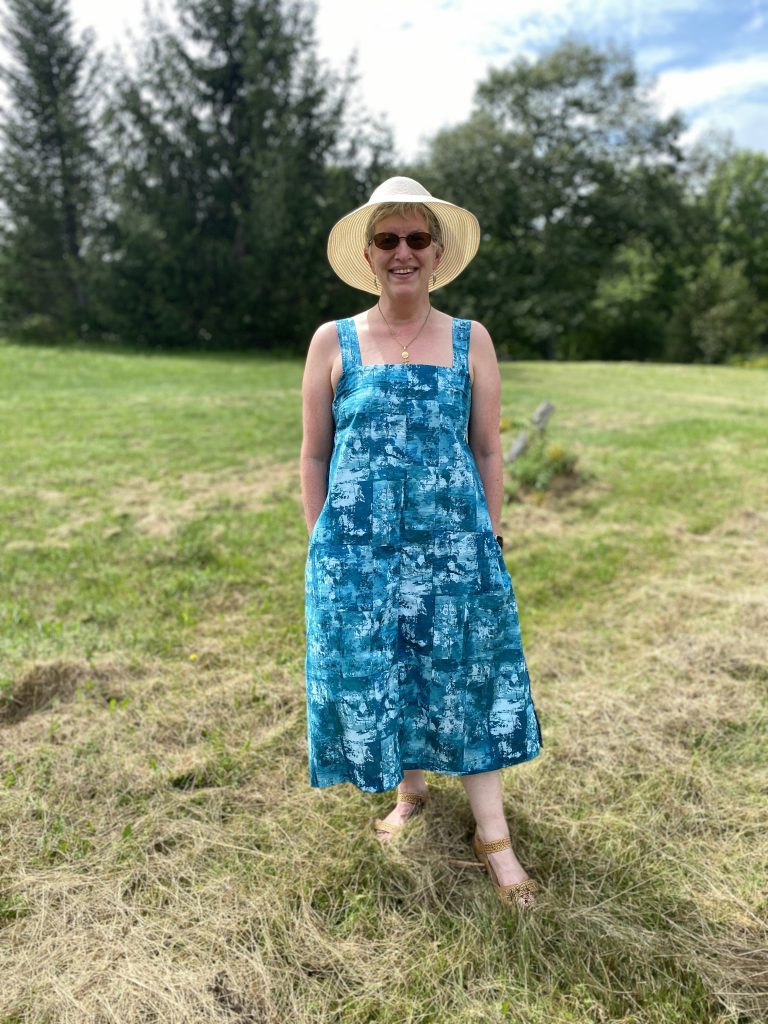
The cotton lawn fabric is from Leslie Tucker Jenison’s Wildwood line for Robert Kaufman. I purchased mine on Etsy in late spring 2021. The dress has a facing on the front and wide straps (hence the name Wide-Strap Maxi Dress). I shortened the dress by 8 inches to a midi length. The only other change was to add interfacing to the facing since the cotton Lawn is so soft. If made in linen or a heavier weight cotton or tercel, would likely not need the interfacing.
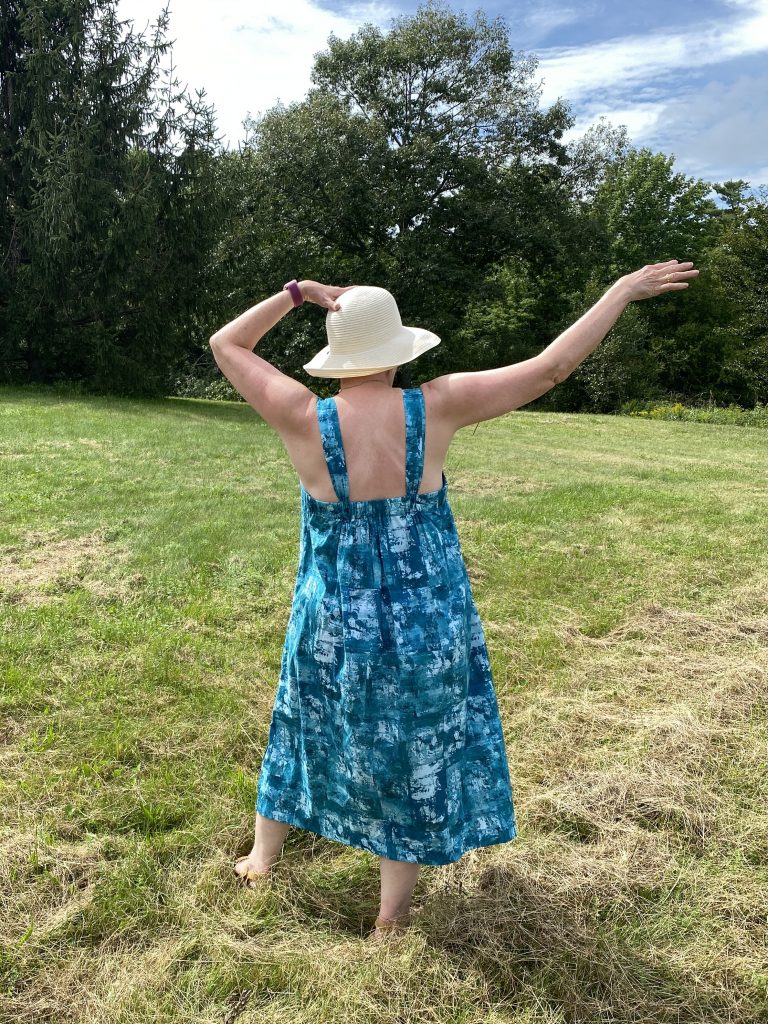
From the back: there is a casing at the top, with wide elastic inside. You set the length so that it holds the dress snug against your back (NO wardrobe malfunctions!) but not tight (no “muffin top”!). The pattern suggest testing the placement of the straps. I agree. The gathers had a tendency to move, with the dress going flat in the center and the straps moving towards my underarms. Which led to the straps falling off my shoulders. So with the dress OFF, I move the straps toward the center and safety pinned them in place. This concentrates most of the gathers in the center, which makes it flattering from the front and solves the straps-falling-off issue. I will stitch a vertical line on the casing/elastic so I can remove the pins, but using pins first to get the straps where YOU want them is a good idea. I also now understand why some sundress patterns have the straps go really narrow and “V” in the center. This way, though, they easily cover bra straps.
Since I live in Maine and my 20s and 30s were long ago, I find that I feel rather bare, but I am getting used to the open back. I had thought even before making it that I would shorten the straps to be less bare, but discovered that would put the darts well above my bust and make the front fit poorly. If/when I make this again, I will cut extra at the top sides, shorten the straps, and then figure out a better-for-my-body placement of the darts.
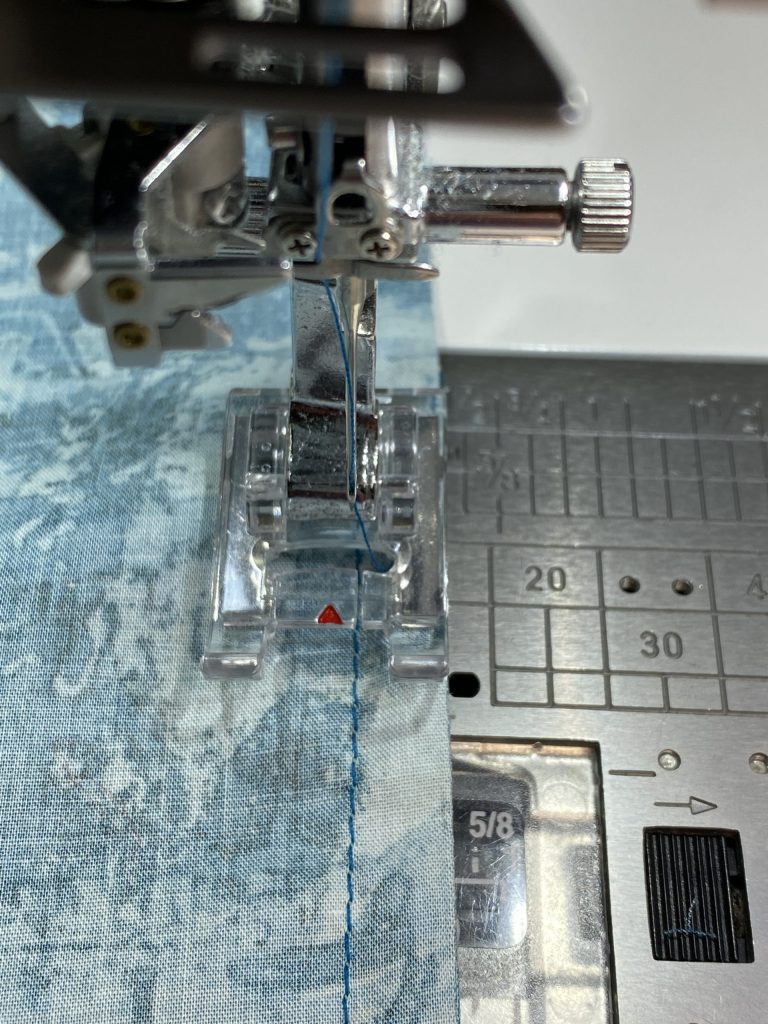
Like many of the indie patterns now, the instructions are like a class in a bag–they certainly aren’t like the bare-bones info in the Butterick and Vogue patterns from the 70s, 80s and 90s that I grew up using. There are delightful instructions for using French seams which totally enclose the raw edges. Hint: be sure to trim the edges of any fraying threads before you sew the second part of the seam so that no “whiskers” pop out.
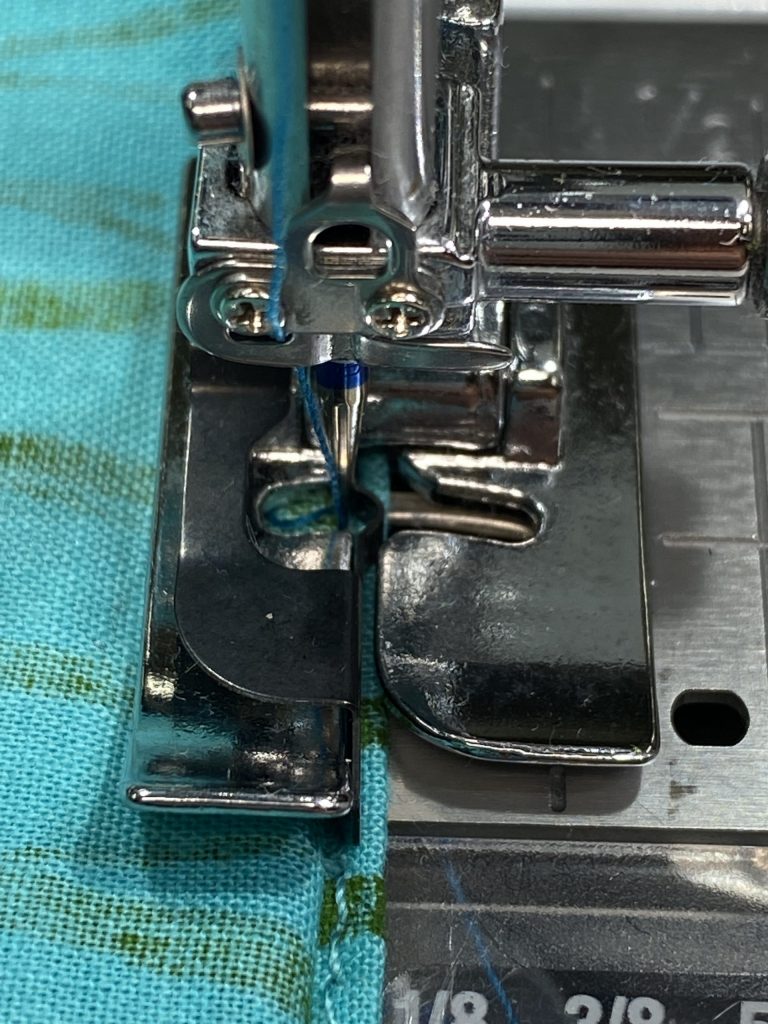
Align right edge of foot with first sewn seam on a French Seam. Move the needle so that it encloses the first, narrow seam.
Using the overcast foot to get a clean finish on a raw edge.
Having a selection of presser feet makes it SO MUCH EASIER to do beautiful work! I like my clothes as pretty on the inside as on the outside!
Thanks as always to Janome America for having me as a Janome Artisan since 2003!!!!!!!
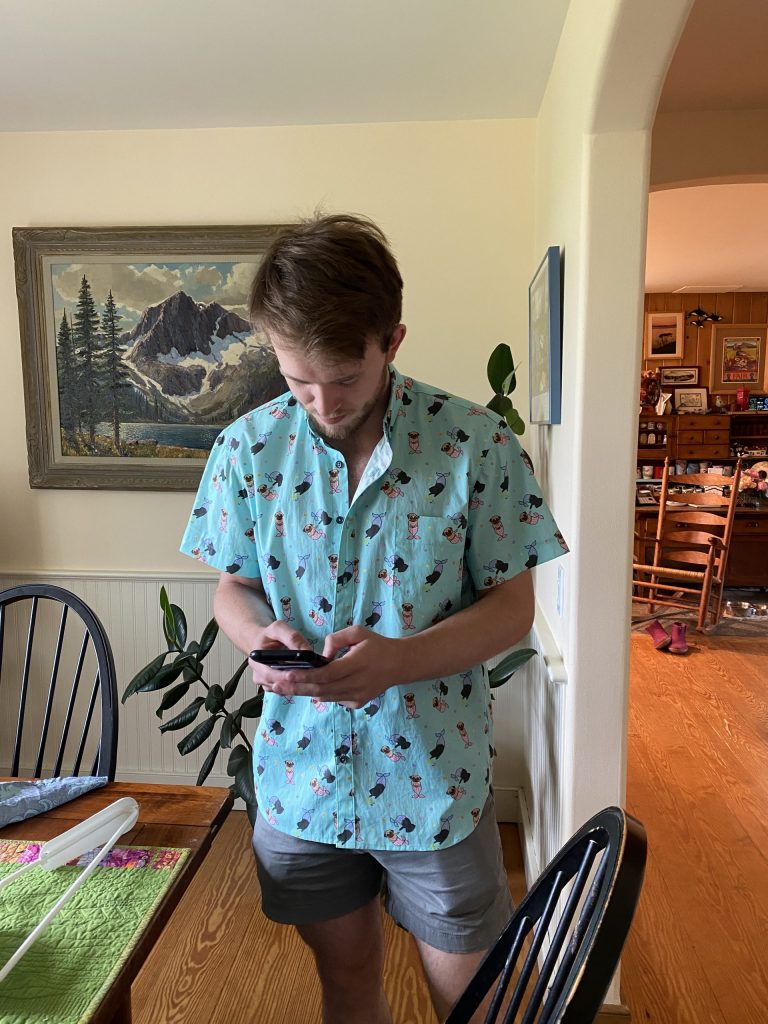
It’s a delightful feeling when your young adult son asks you to make a shirt for him. Since he lives about 5 hours away, going to a fabric store together wasn’t a good option, so I sent him to Spoonflower. LOVE it when his sense of humor prevails: he selected Mer-Pugs! Here’s the link to the fabric; I chose to print on cotton poplin as I’m not fond of their Signature Petal cotton. Needing to order 3 yards, it was a splurge, but it turned out great and he loves it!
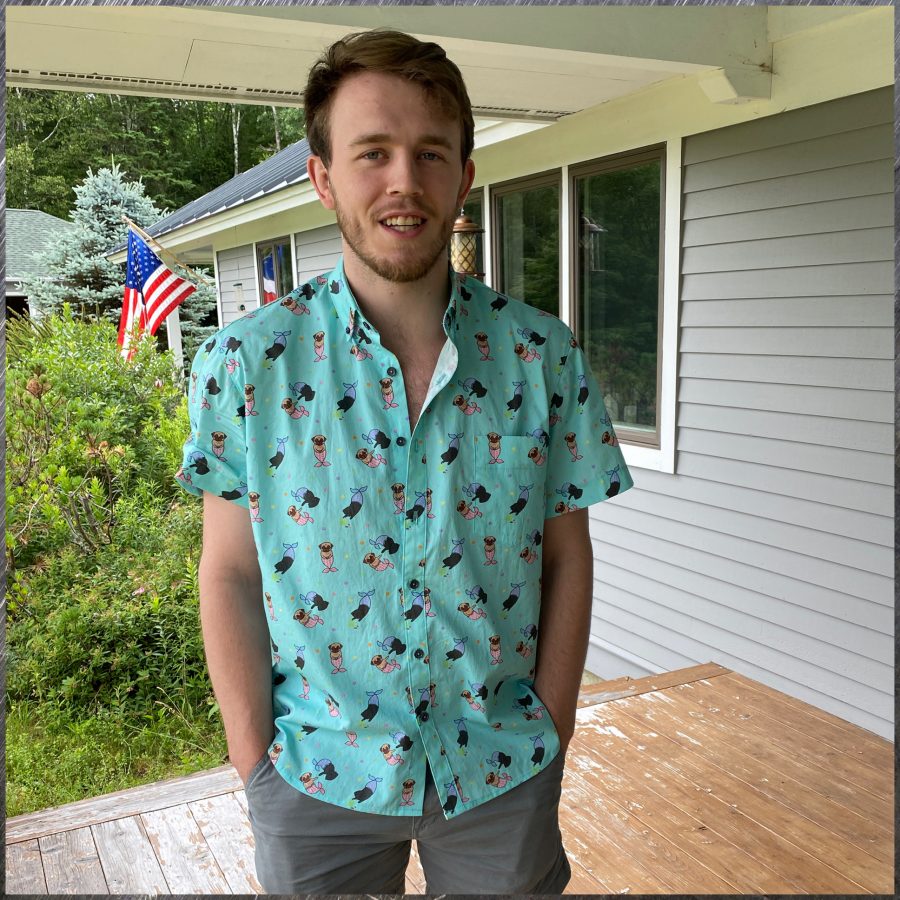
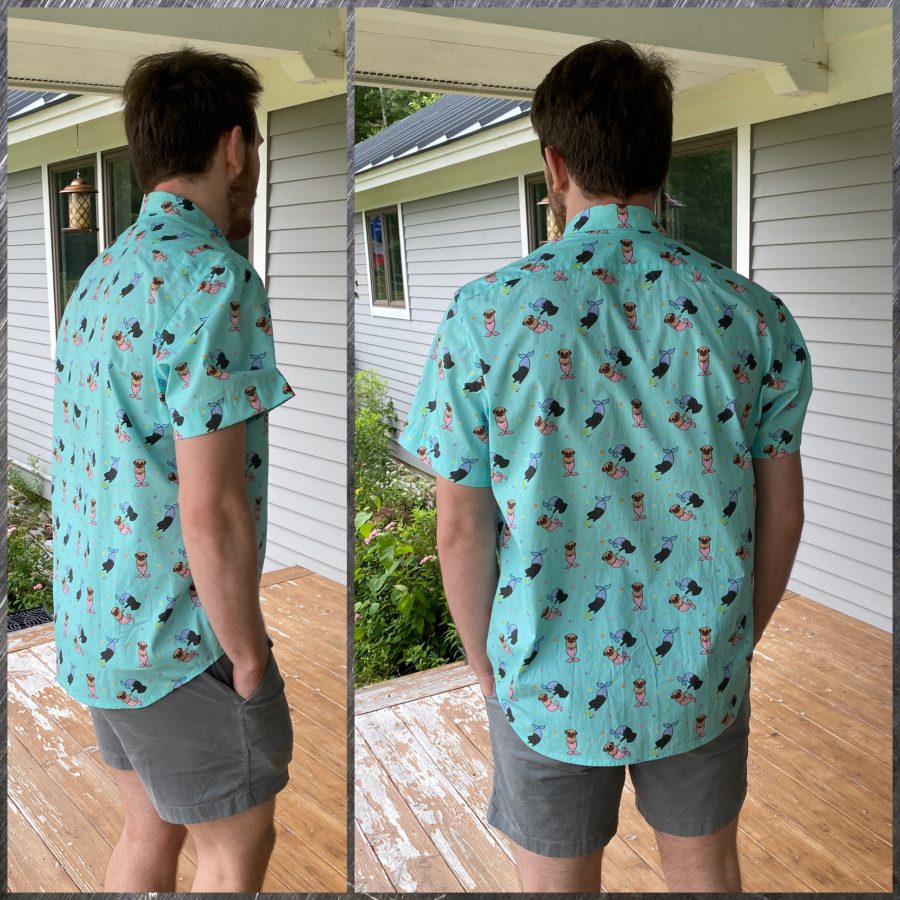
Eli’s shirt fits perfectly!
The pattern is Liesl & Co.’s All Day Shirt Pattern. I used this earlier when I made Joshua’s donuts shirt (yes, they both have the same sense of humor!). Since Eli is a bit bigger, I was able to use what I learned making Joshua’s shirt in 2019 (blogpost here). I still had some issues getting the collar to be the size I wanted on the collar stand–I was careful to follow the instructions, but think the collar should be about 1/8″ longer on each side. Eli did not want any pleats on the back but did want short sleeves. He lent me a shirt that fits just the way he wanted so I kept that in the studio to compare as I made the merpugs shirt …much easier to adjust that way!
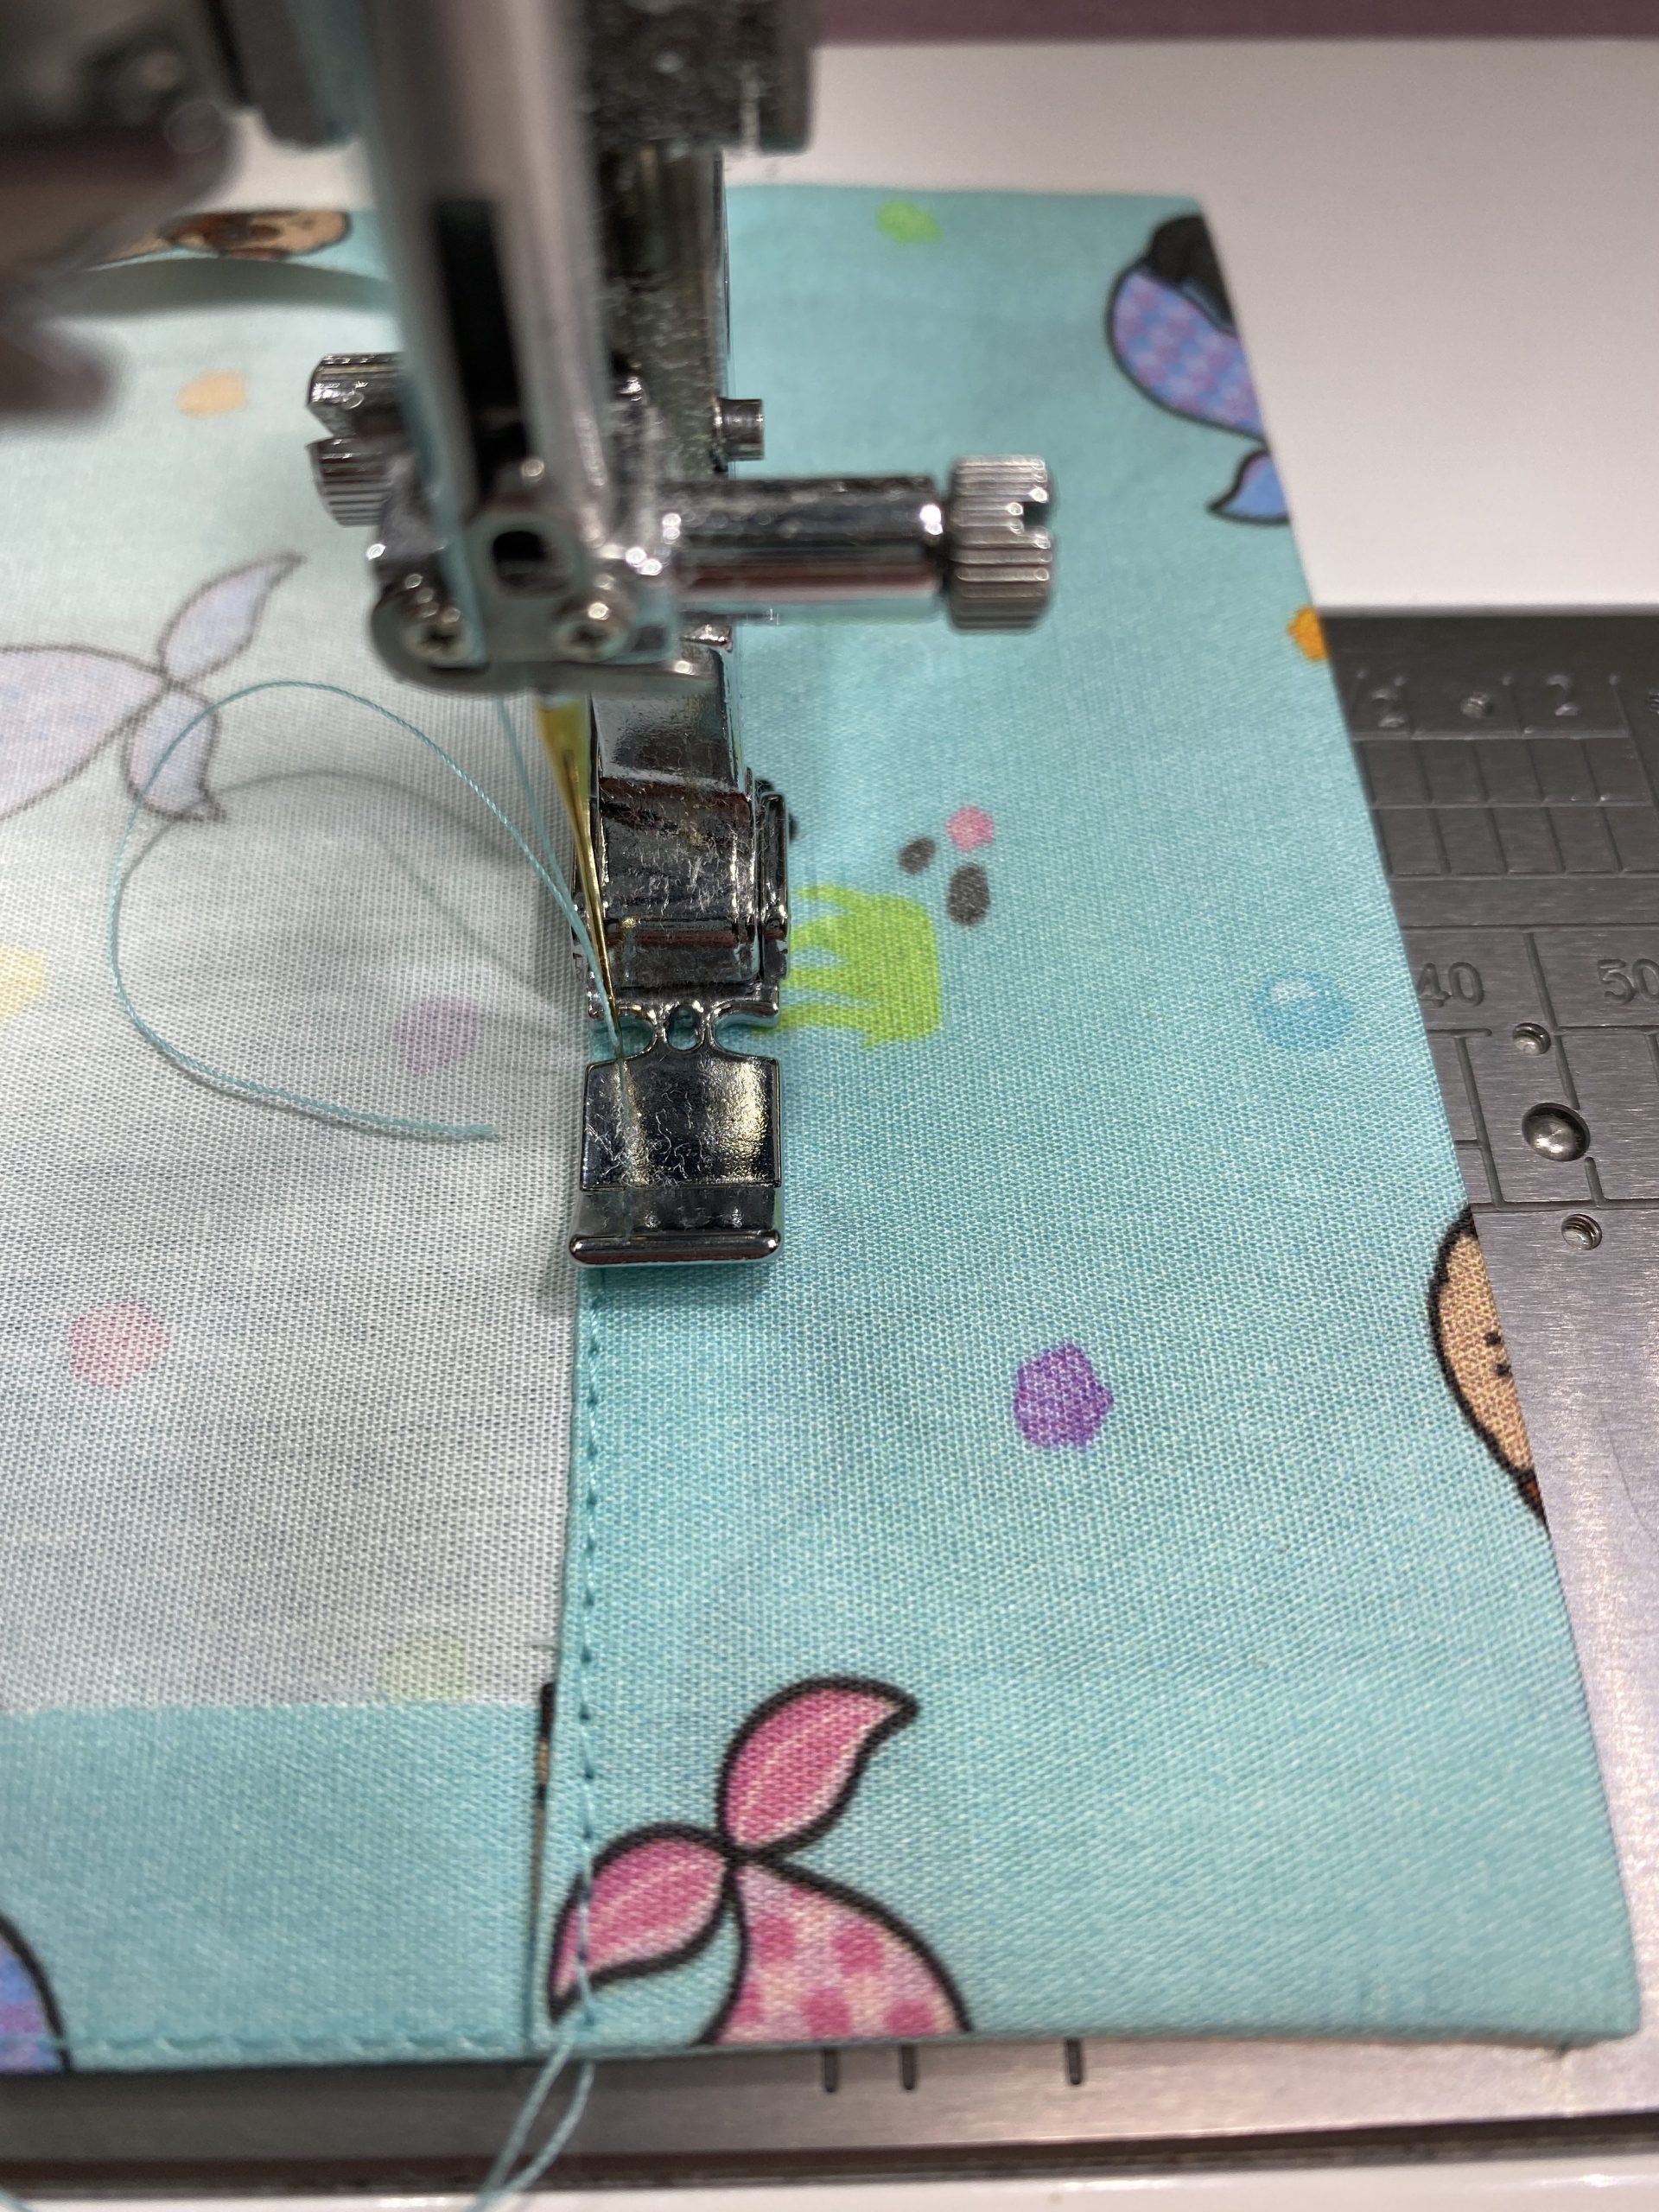
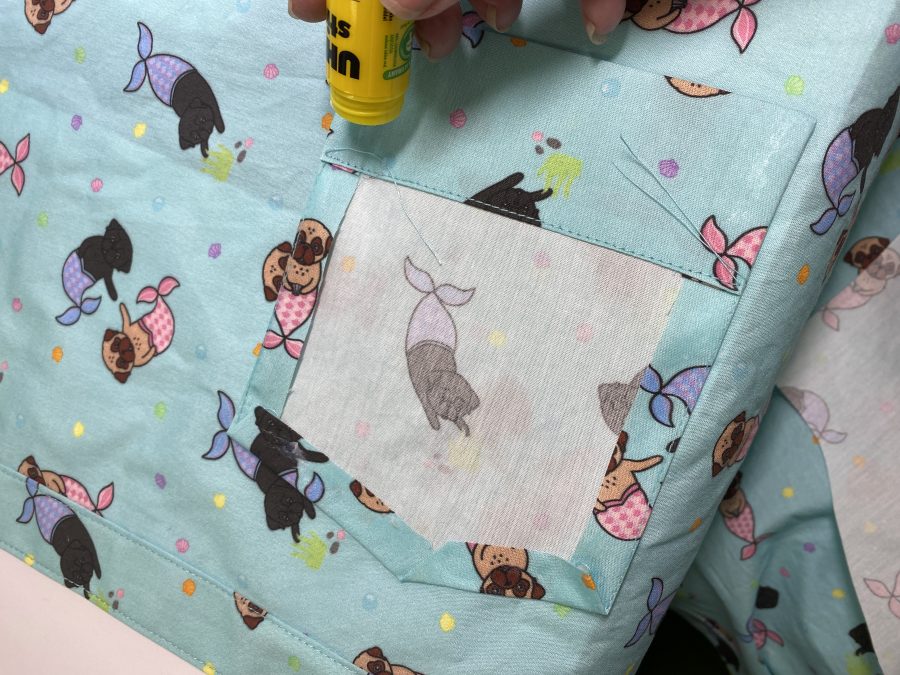
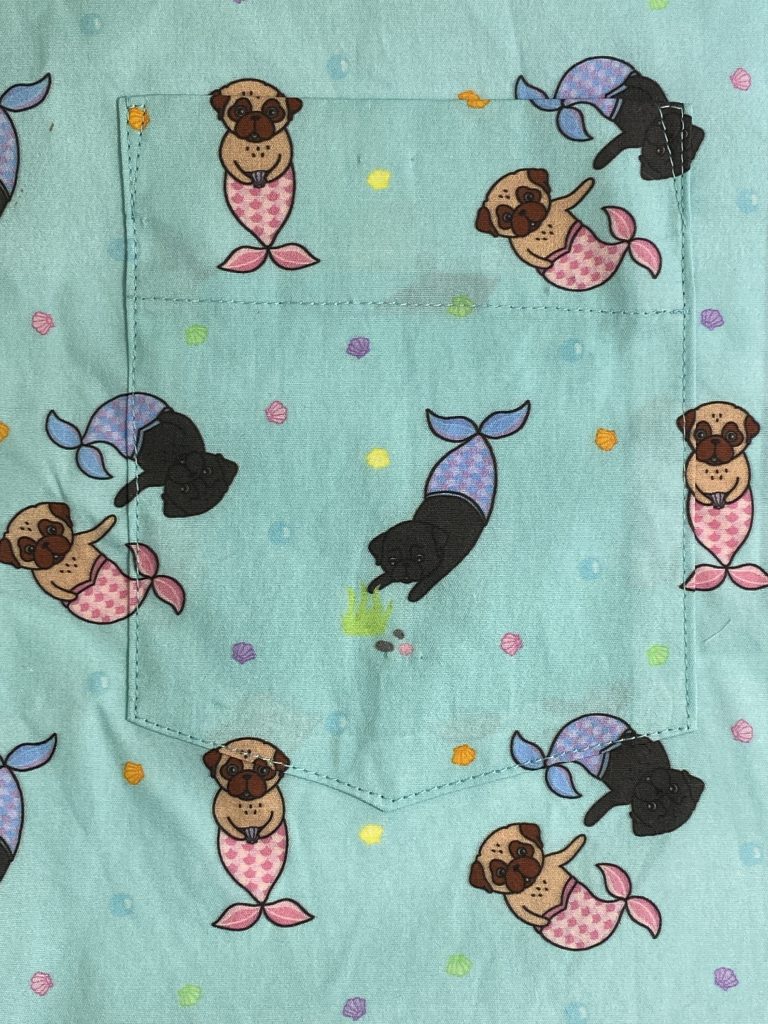
Earlier this year I showed on Facebook and Instagram how perfectly I was able to align and topstitch the pocket:
First, prepare the pocket. Turn under seam allowances; pattern instructions have you sew 1/2″ from edge, then iron under concealing the stitching. I did that, but having done perfect edges before without the bother of stitching, I’ll go back to my easier way next time. I love my zipper feet for all sorts of things especially perfect edge stitching. I just get better results than using the edge-stitching foot–try several ways and use what gives YOU your best results. I align the edge of the foot with the fold of the fabric, move the needle in the distance I wish, then keep my left thumbnail on the edge of the fold and foot to keep it straight. Next tip: GLUE STICK! Be sure to use a WASHASBLE glue stick, not permanent! Run a bit of glue along the sides and bottom.Glue stick the pocket so you have ABSOLUTELY positively PERFECT alignment. For me, this works better than pins and you get no ripples/distortion from the pins. As with the pocket hem, use the zipper foot, adjust the needle drop to the perfect spot, and sew in place. LOOKIT how those merpugs just swim from the shirt onto the pocket!Side and back views. Perfectly aligned the pugs from collar to yoke to shirt back! Having a machine with precision feed like the Janome M7 makes it easy!
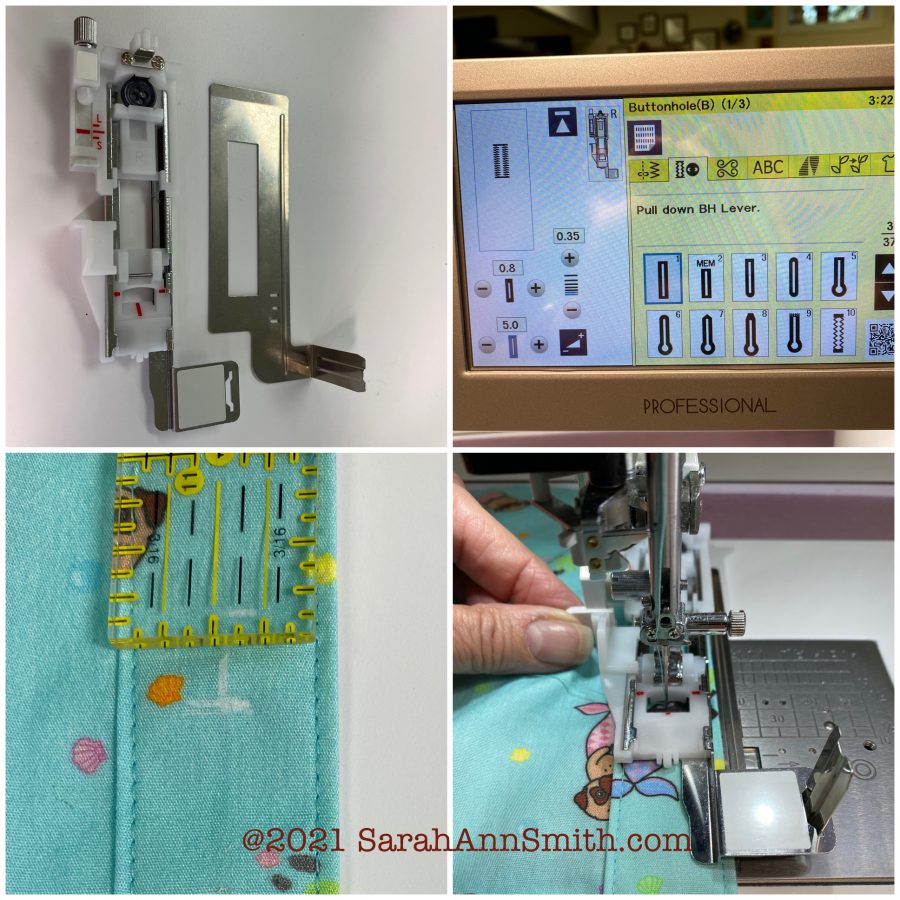
My voice sounds funny because I am getting over a cold! Anyway, here’s a quick demo of how FAST it is to do an automatic buttonhole! Next photo shows a side view of the automatic buttonhole foot
From top left, clockwise: Automatic buttonhole foot with stabilizing plate, buttonhole options on the Janome M7 Continental, pulling down the “stop” level on the buttonholer, measure and mark the start point and center line carefully
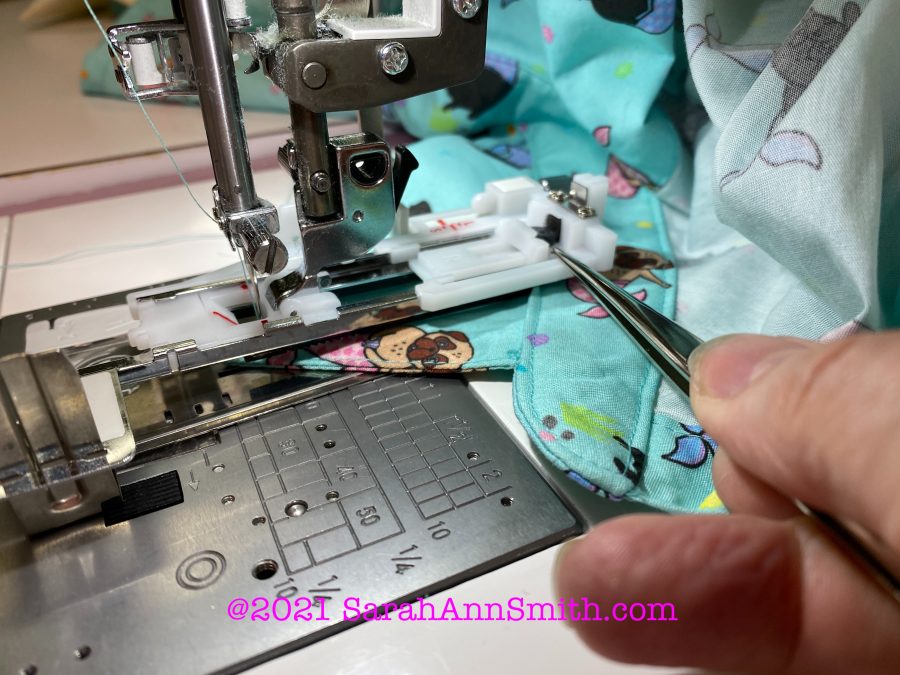
The tip of my awl is pointing to the small button in the back of the automatic buttonhole foot. This is how the foot knows exactly how large to make the buttonhole. It even worked with the teeny tiny buttons (about 3/8″) on the collar!What does a 20-something do as soon as one puts on a new shirt? Check the phone!
Hope you’ve enjoyed this! If you haven’t already, I’d like to invite you to sign up for my monthly (or thereabouts) newsletter! Just look in the right-hand sidebar on this page to sign up, or at the bottom of all the other pages on my blog. Thanks for stopping by!
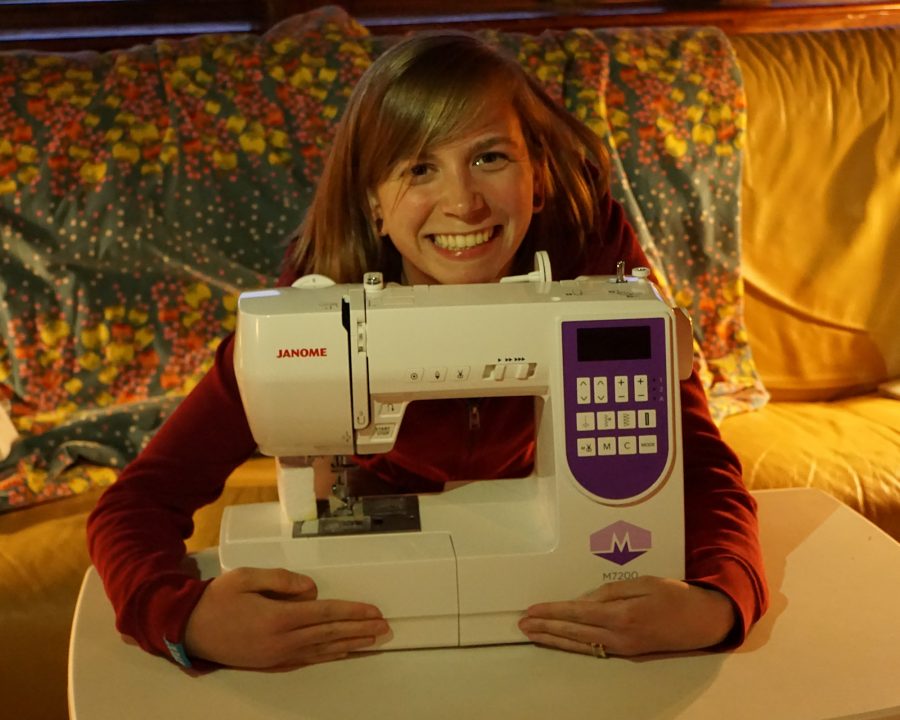
My daughter-in-law Ashley is my “daughter by another mother.” She is crafty and smart and nice and boy did I get lucky! (Well, my son Joshua was smart too….) Anyway, she was interested in sewing, so for a few years we worked on small projects together. She liked it so much we decided to SPLURGE two years ago and give her a combined Birthday and Graduation from College with Honors with a Teaching degree (yup, popping proud): her very first sewing machine, the Janome M7200. What with moving, starting her teaching career, lack of space in the first apartment in Portland, she just finished her first solo garment, the Sorbetto top, and I am SO impressed! She has every reason to be proud!
Here she is on a HOT summer’s day in Portland (Maine) showing her beautiful work, all done on her Janome M7200 (pic below, keep reading!). The pattern is free online at Collette patterns, https://www.seamwork.com/catalog/sorbetto. LOOK at that PERFECT edge stitching!!!!! I couldn’t have done better myself. There are many specialty feet, but I go old-school as I get best results that way: use a zipper foot, carefully position the needle in the “U” shape, and then keep the edge of the foot exactly on the edge of the fold. She ROCKED IT!And the hem….. without so much as a prompt or suggestion from me, she realized that it’s delightful to align the stripes on the inside and she did it! I’m “one of those people” sometimes, I think the backs and insides need to be just as lovely as the fronts/outsides!
Our sewing garments journey began before graduation, when Ashley said she’d like to make her own dress for graduation. She picked a pattern with (!!!!) fitted bodice, set-in sleeves and an invisible zipper! We sewed in my studio on the Janome 9450 I was using at that time (I’m a Janome Artisan and have been on the loan program for 16 years now!). I’d do the first half of something to show her, then she’d do the second half, including a complete set-in sleeve perfectly done on her own! From the start, she showed an inclination to make my heart go thumpity-thump: do it WELL with care and attention to detail. Here’s Ashley modeling the dress in our yard just before and then at graduation:
Too cute for words!Graduation day 2018Back in May 2018…. The SPLURGE once-in-a-decade gift for combined birthday and college graduation: a Janome M7200. Thanks a bazillion to Dave LaValley at Bittersweet Fabrics in Boscawen, NH, for recommending this machine. I told him my budget, and that I wanted a machine that will do well by Ashley for a decade for garments, home dec, crafts and maybe someday even quilting. He steered me to this one, which I had thought was more than I could afford, because it is such a well made, sturdy and durable machine, AND made it fit our budget! Dave, we’ve got a budding lifelong sewist in the family! If any of you ever get to Vermont Quilt Festival, you MUST go to the awards ceremony. In honor of his mom, who opened the shop 50 or so years ago, he GIVES a small Janome to EVERY first-time-youth entrant in the show!!!!!! The kids get up on stage… I remember one 4-year old–the machine came up above her knees! Everyone goes armed with hankies! THANK YOU DAVE!
Thank you Joshua from bringing Ashley into our family. Thank you Ashley for being you! Thank you Sue for being my co-mother-in-law and raising such awesome girls! And thank you Ashley for letting me share and brag on you!
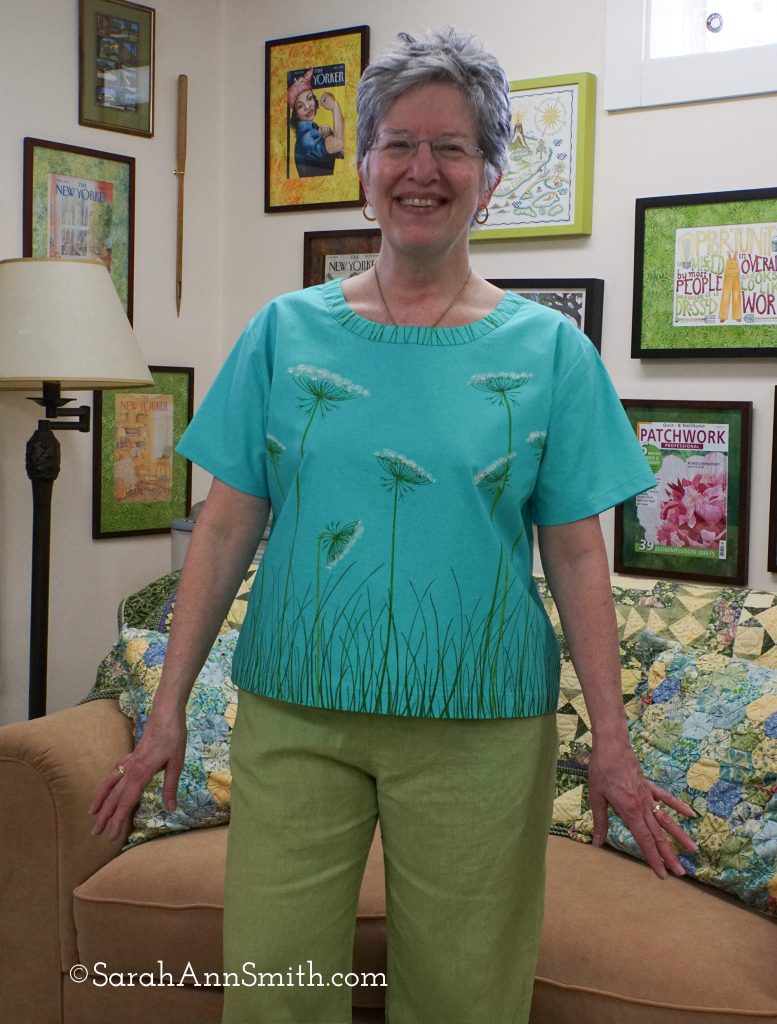
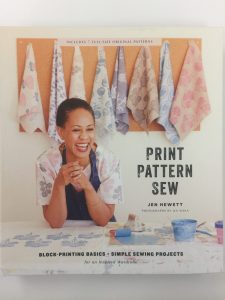
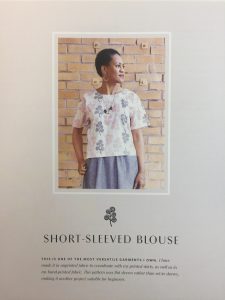
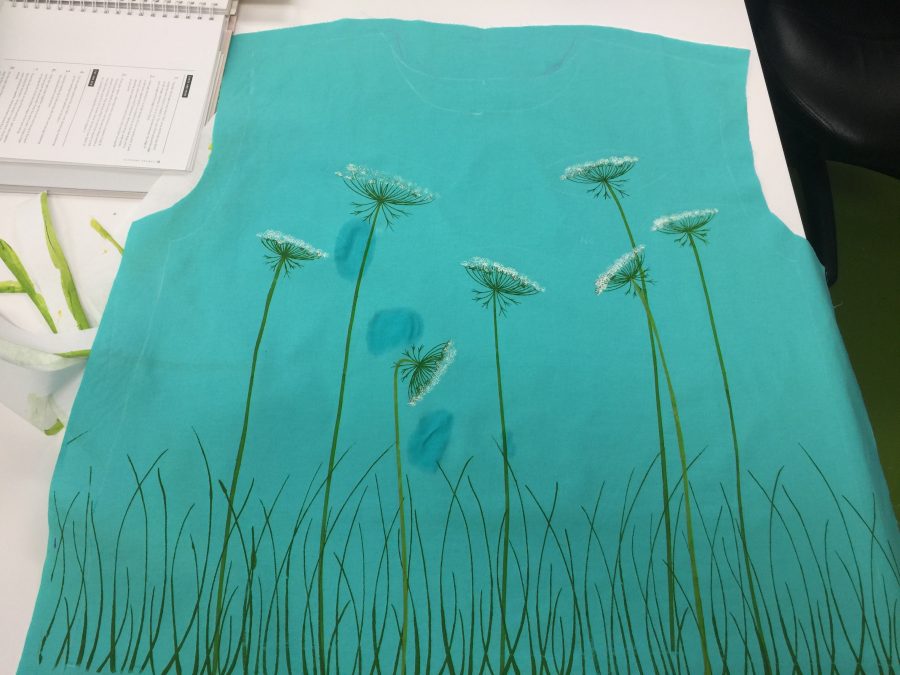
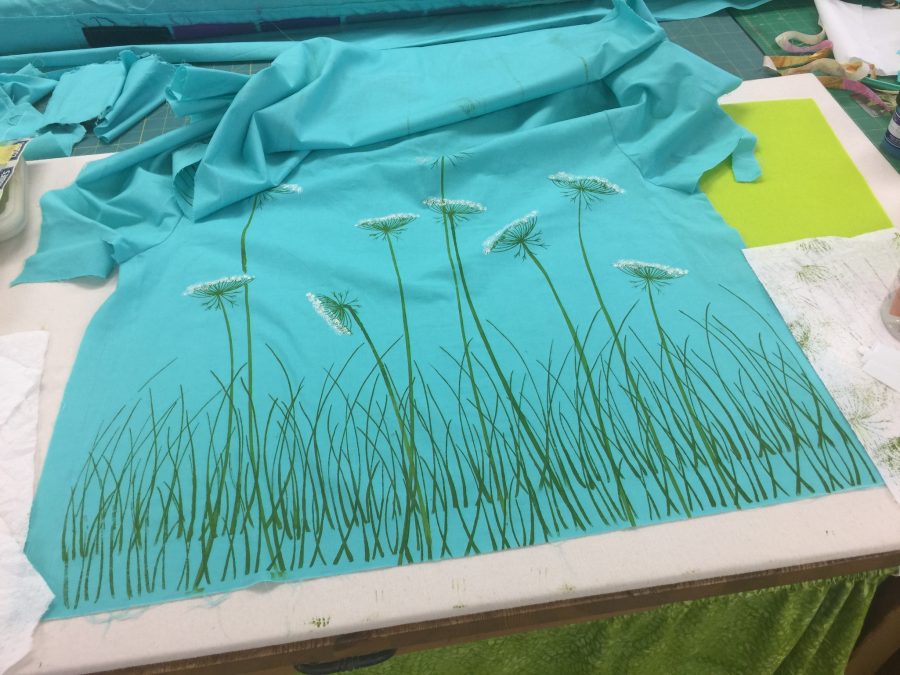
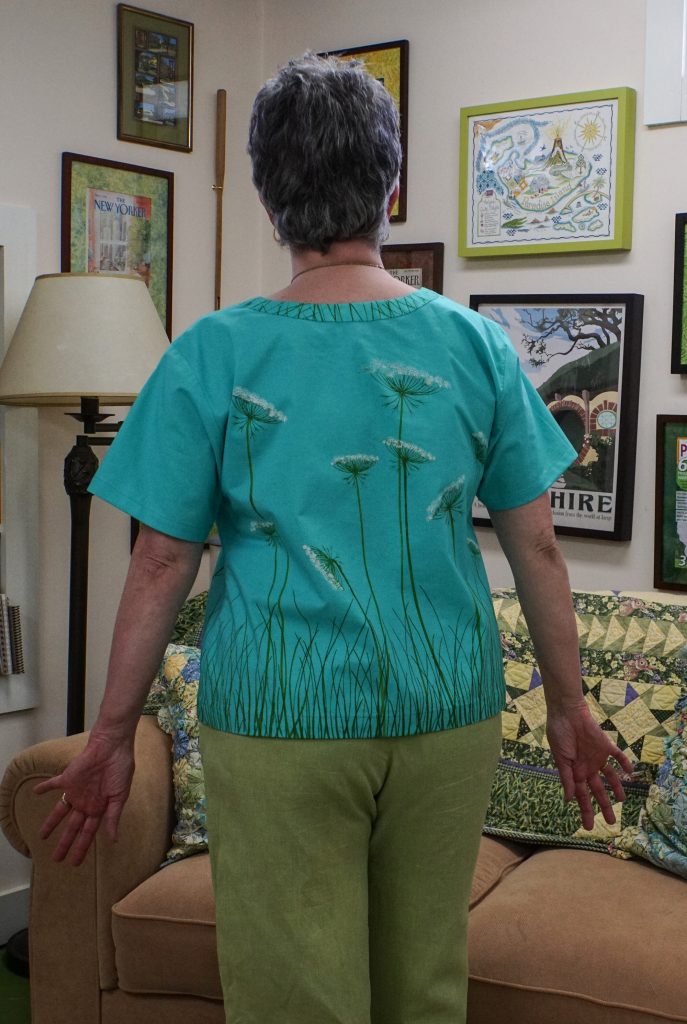
My new Queen Anne’s Lace top. I screen printed my custom designs onto Cotton Couture solids (courtesy of Michael Miller Fabrics), this color is “Luna.” In the summer of 2020 I saw Print Pattern Sew by Jen Hewitt somewhere online and ordered it immediately. It’s FAB! is available many places including Amazon . DO check out Jen’s site, here. Of course it took until April to start playing and until now to post. For the workshop and this post I wanted to use a pattern currently available that is similar to two vintage (circa mid 1980s) patterns that I still make over and over because I love them so much. There are LOTS of great photos and step outs in the book.Table of ContentsSince my favorite patterns are decades out of print, I selected this one for this project in case anyone wants to buy the book for further instruction. It comes with the pattern included.
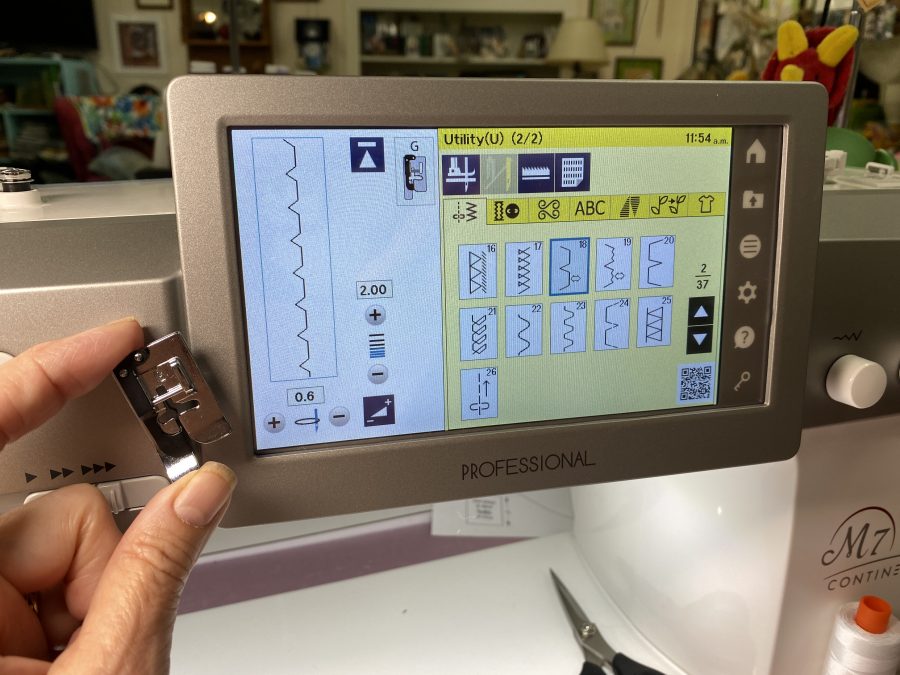
I’ve been developing some new classes using paint on cloth and I thought as part of being a Michael Miller Brand Ambassador and a Janome Artisan what better thing to do than combine all these things I love in one! Some of you may remember this post from when I did a DIY improvement to my hall sconces; one of the lampshades was Queen Anne’s Lace screen printed on linen. I used the thermofax screens I made for that again for this top.
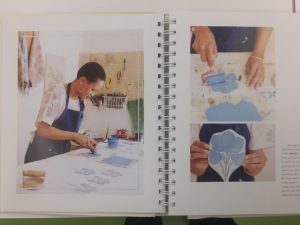
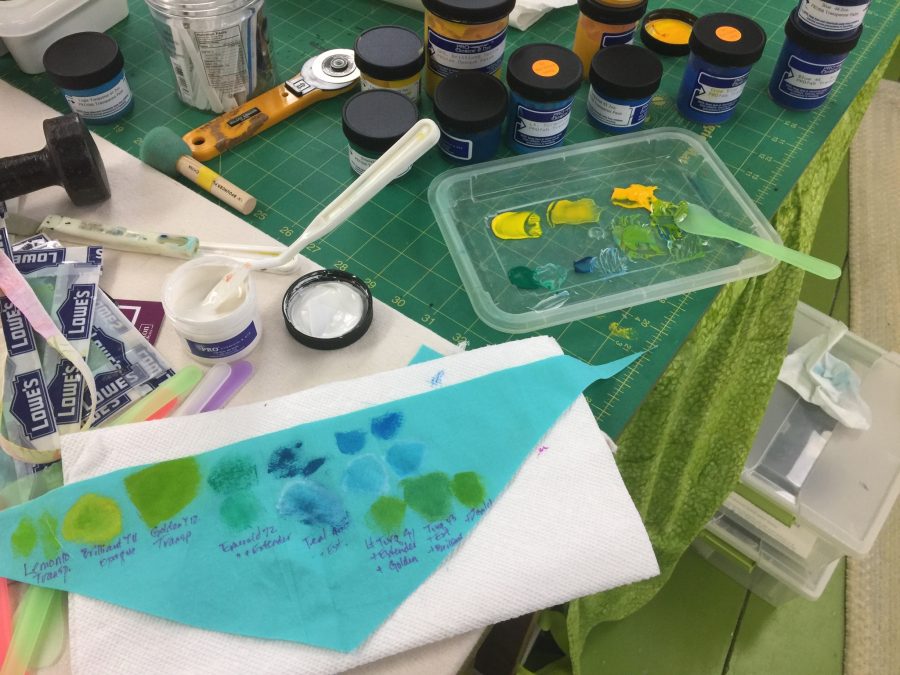
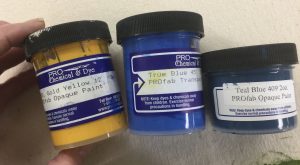
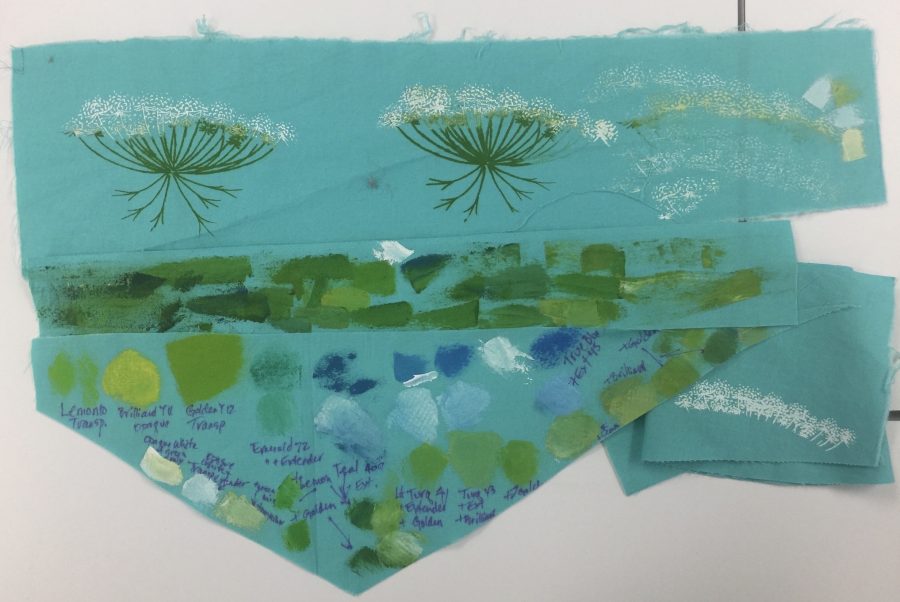
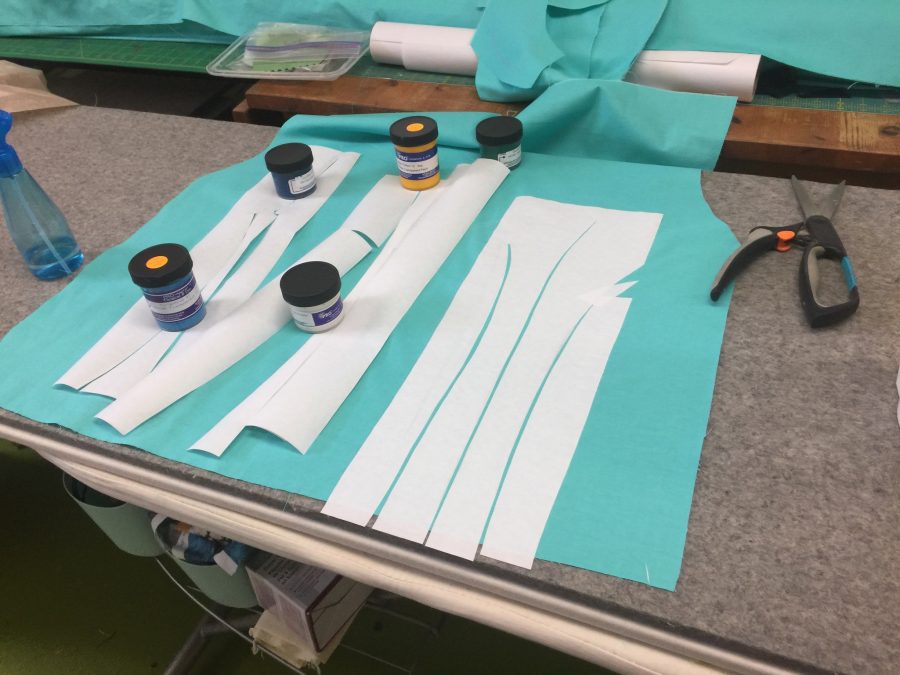
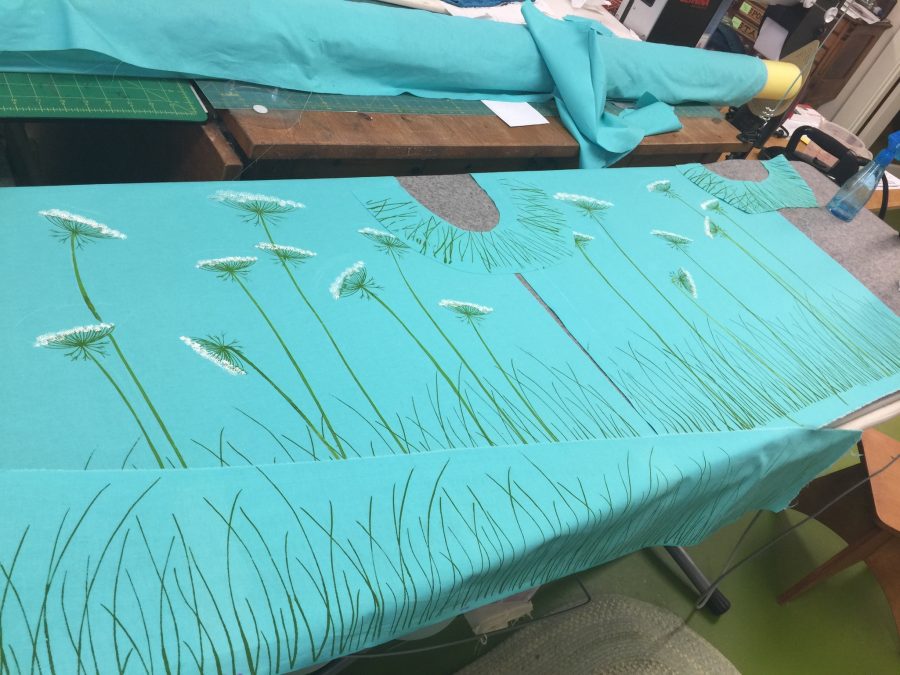
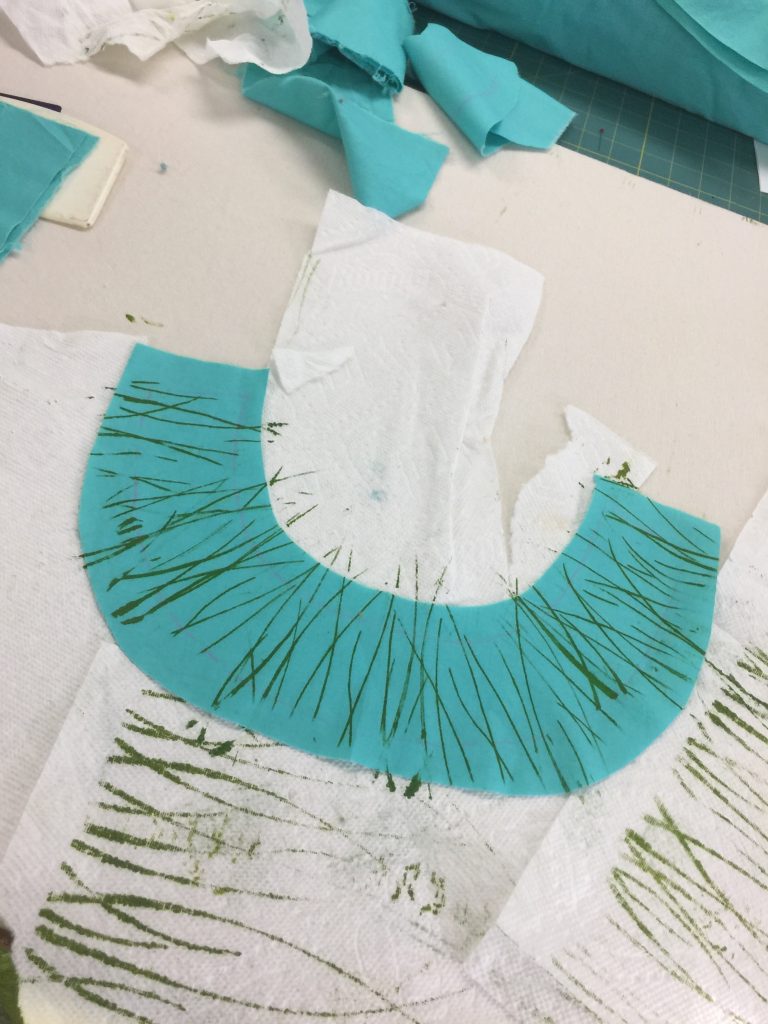
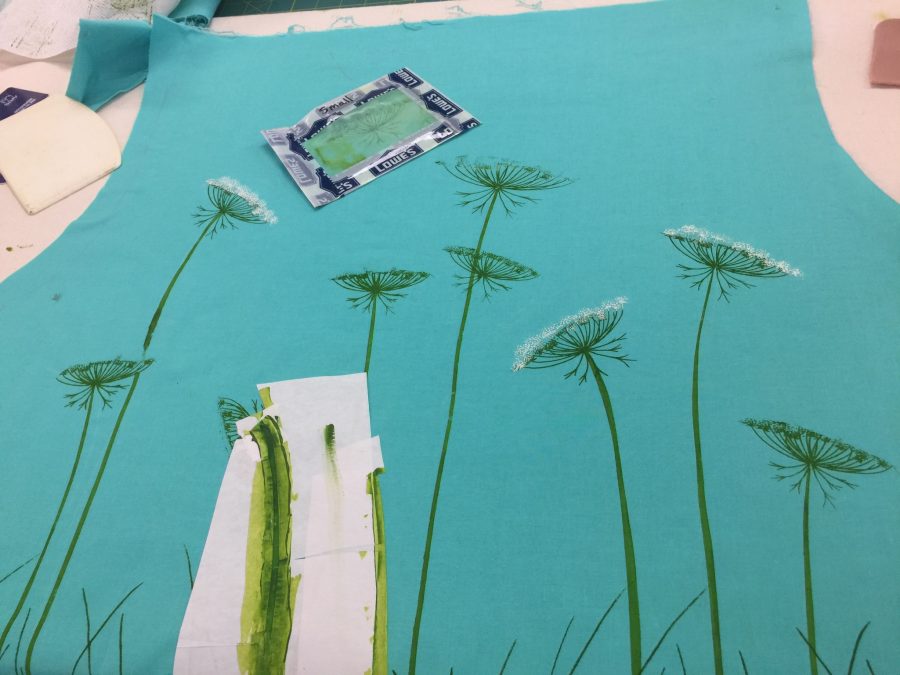
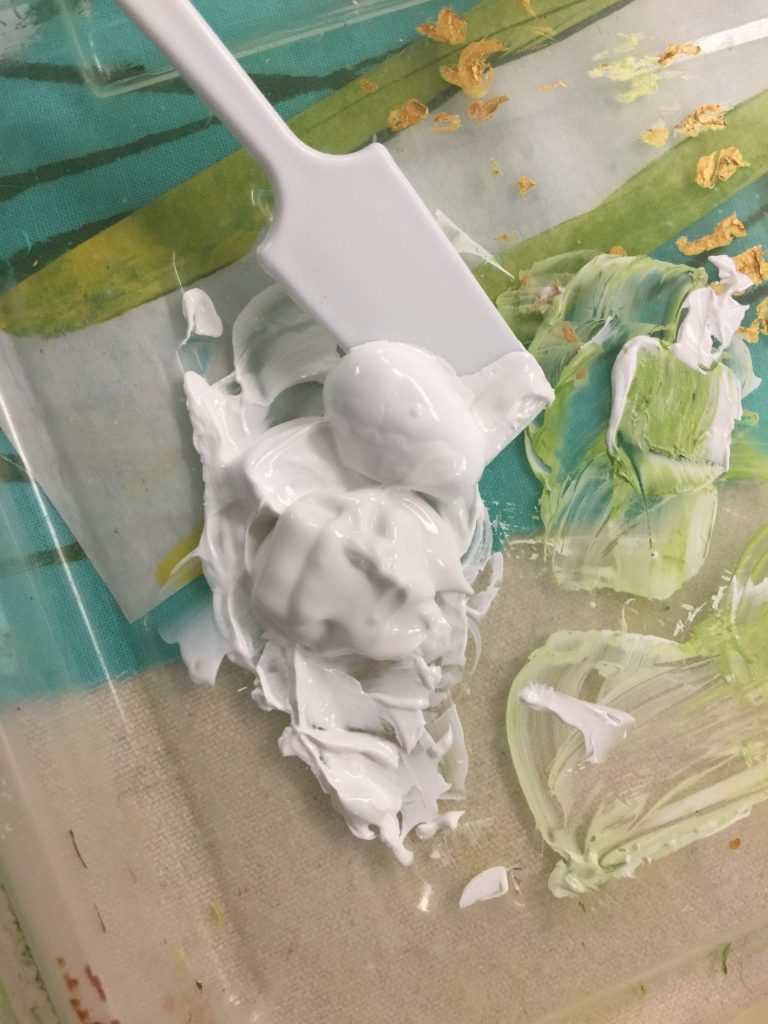
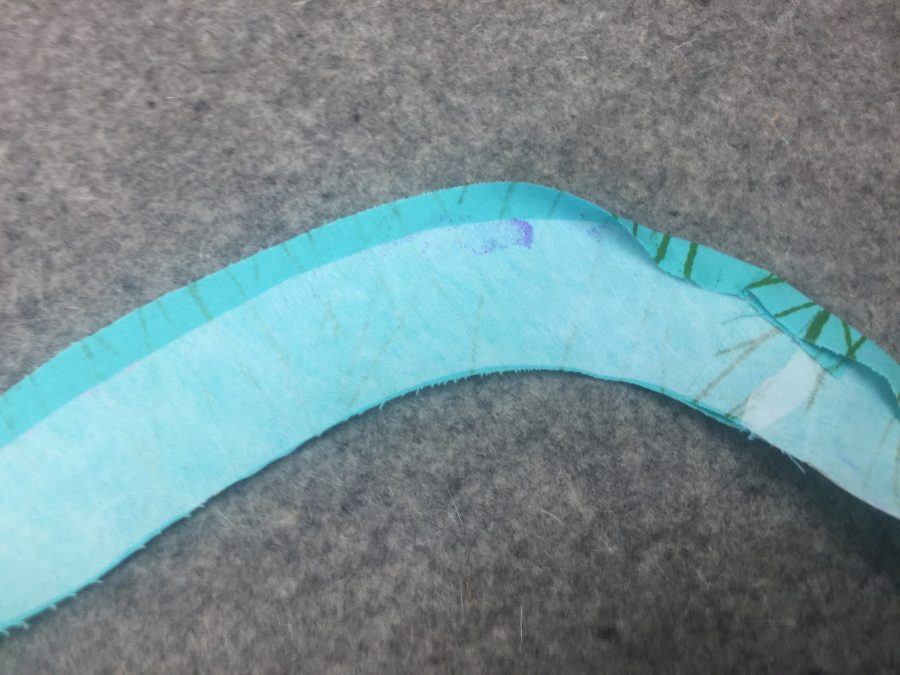
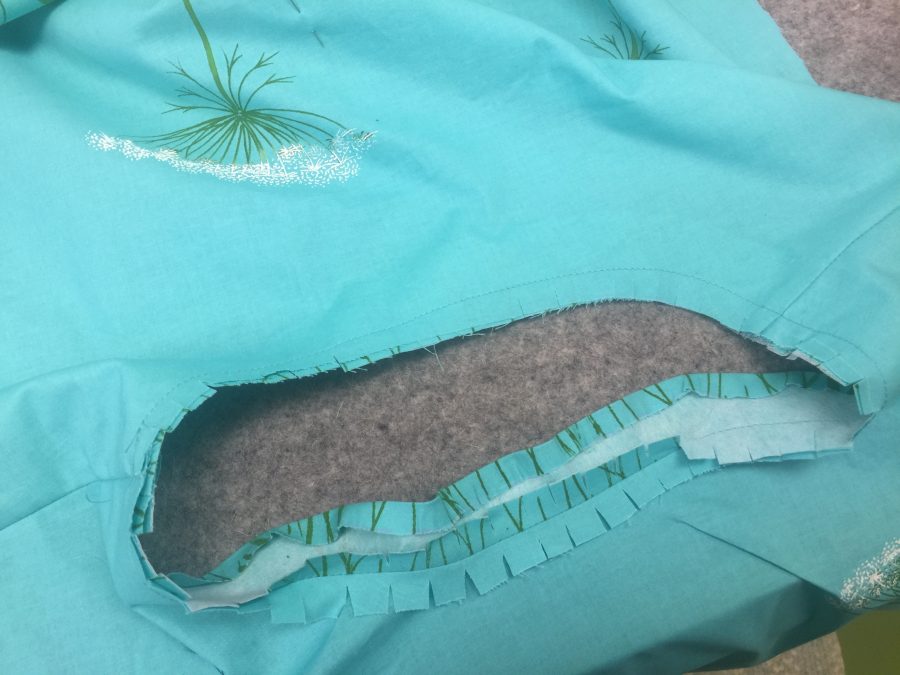
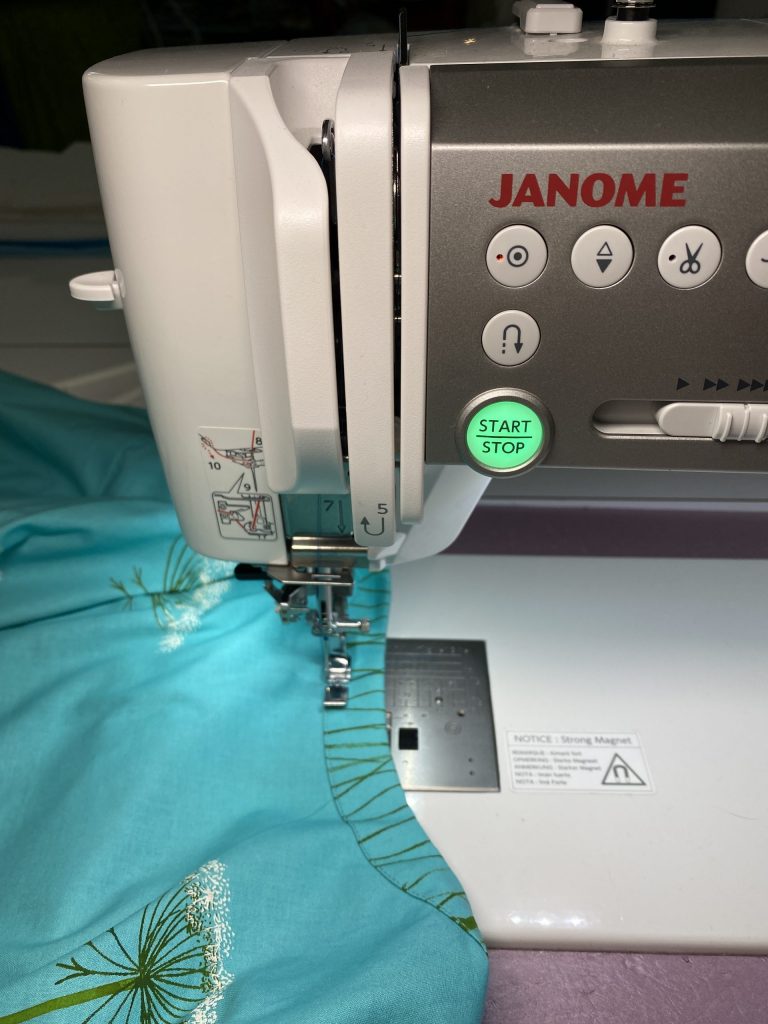
Step one is testing various mixes of color to get just what I wanted. You can see a colorful little plastic “flat not-a-spoon”–that is a make-up paddle, available in packages on Amazon for about $5 for 100 (more than a lifetime supply). They are great for getting into small paint jars. I used to use some Gelato spoons a shop gave me, but the flat paddles are better for scraping off (and not wasting) excess paint). The paints I used are ProFAB Transparent paints from ProChemical and Dye, but most textile paints will work. These have a particularly soft hand to them. Starter kits are a great and cost-effective way to try them out (I have a pair of kits available here; also available in just one or the other types of paint).LABEL what you use, what base paints are in the mix. I can promise you, with three yellows and three blues in 15 minutes I will forget which one is which! I keep these test-scraps for future reference. I used freezer paper to make stencils for the stems. I could have made a thermofax screen, but the mesh is expensive and Freezer Paper is cheap. I used a thermofax screen of grasses I had used for my lampshade for the bottom of the garment. I cut oversized pike for the front, back, and what I thought would be a trim for the sleeves. I later decided to leave the cuff/bottom of the sleeves plain. I used the grass screen to decorate the “facing” piece. Instead of putting the facing on the inside of the garment, I turned it to the outside as a decorative element. Ooops! Sometimes goobers happen. Any unwanted random little smudges of paint are quickly wet and scraped away. Or you just live with them.The printing was done in four steps: 1. Print stems over freezer paper stencil and let dry. I ended up adding another flower later on, so had to add another stem as seen here. 2. Print grass with thermofax screen. Let dry. 3. The thermofax screen for the Queen Anne’s Lace was made from my pen and ink drawing. My lampshades were all green on white linen. For this blouse, I wanted the flowers to be white, so I **carefully** screen printed the stems through the screen (seen above left) and let them dry. 4. Then I went back in with a creamy white (mixed from white with a dab of yellow) to do the flowers. This is the point where you pray you don’t mess up!When mixing light colors, start with a larger amount of the lightest color and put in just the TINY-est touch of color…it takes surprisingly little yellow to turn that glob of white into a softer white or barely-green. After purchasing the multicolored make up paddles, I discovered these square cornered white ones. They are great for applying small amounts of paint carefully through a thermofax screen and for getting into the bottom edges of the ProChem jars.Once I had the front and back printed, I pinned them together and tried them on. The grasses on the bottom looked sparse, wimpy. And I wanted the shirt a bit shorter. So I went back in with the same screen, offsetting it so the same shapes weren’t repeated too closely, and did a second layer higher up. I didn’t care if the printing didn’t follow all the way up what would become the hem on the inside. And that way I could just use the same screen instead of making another one.For the “facing” on the outside, I cut the outer edge of the interfacing very carefully so I could iron the seam allowance over it and create a lovely, smooth outside curve.If you are new to garment making, be SURE to clip your curves well so that the facing turns and lies nice and flat.My favorite way to get a perfect edge stitch is old school: using the zipper foot!Place the edge of the zipper foot against the edge where you want to stitch. In this case I need to use the left side of the foot. Move the needle so that it drops a few threads away from the folded edge. I use a fingernail or thumbnail as an edge guide and don’t sew too quickly. There are indeed “edge feet” for this purpose, but I find that the blades can bend or not be as precise as I want them to be (not to mention visibility isn’t as good as doing it this way). I’d already completed the top when I took this shot, so you can see how perfectly my Janome M7 stitched!For the hem, I decided I would use a blind hem stitch instead of hand-sewing it. The blind hem stitch I selected is for woven cloth, with straight stitches in between the zigs (#18…on the yellow part of the screen you can see that stitch 19 is a blind hem stitch for knits). Over on the white, it shows the settings and to use the G foot which I am holding up It has an “ice skating blade” (i.e. guide) in the middle.You can see the metal guide in the center of the foot. As above, I set up this photo after the garment is complete, which is why you see stitching at th bottom of the image. To prepare for blind hem stitching, you fold the hem up with the raw edge pressed to it will be inside the hem. You then fold back the outside of the garment so that the soon-to-be-hidden part of the hem is barely visible, about 1/8″. The body of the garment folds away to the left. The straight stitching on the hem is done with the needle in the curvy part of the “blade” where it stitches on the inside of the hem. The flat part of the blade snugs up against the folded back fabric, and the “Zig” part of the stitch takes a little nibble of the outside of the garment. My thread matched the Luna Cotton Couture perfectly. It is challenging to see those tiny hem stitches on the right side of the garment.Back viewSide view–I love how the design goes all the way around. I hope you’ve enjoyed this mini tutorial! Thanks again to Janome for their 16+ years of sponsorship and to Michael Miller for having me as a Brand Ambassador this year!