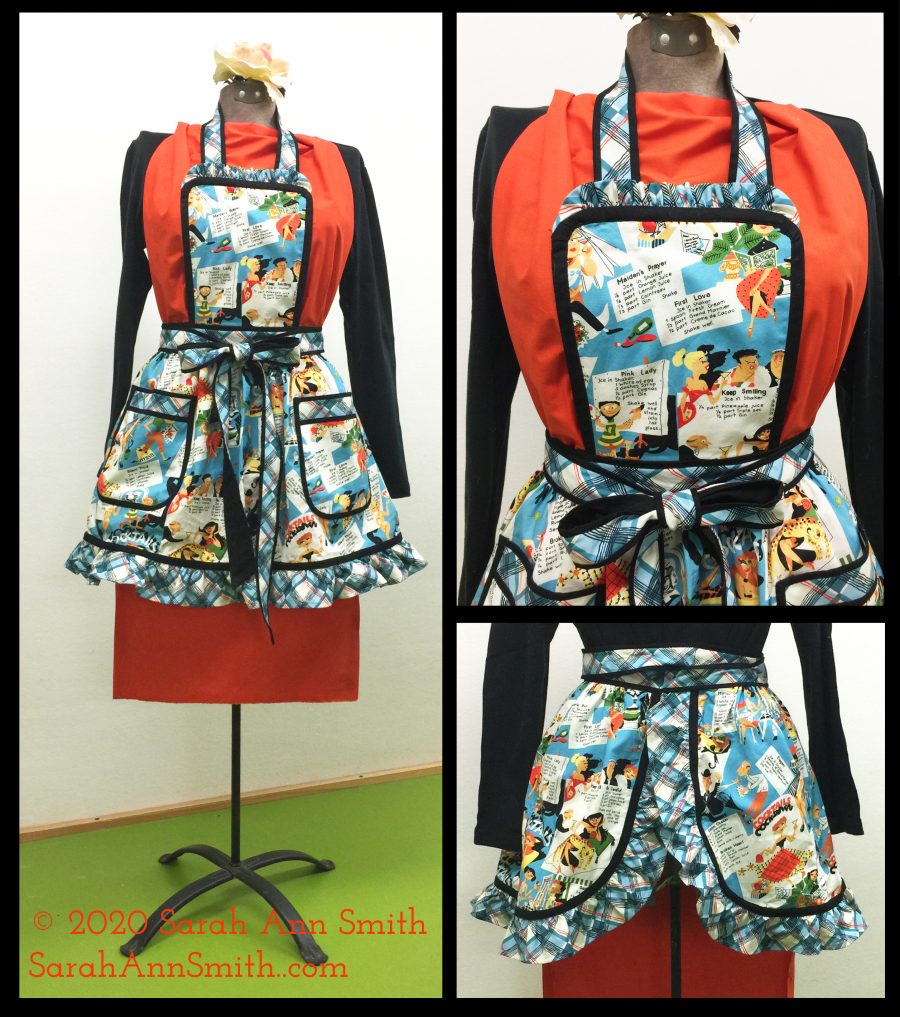
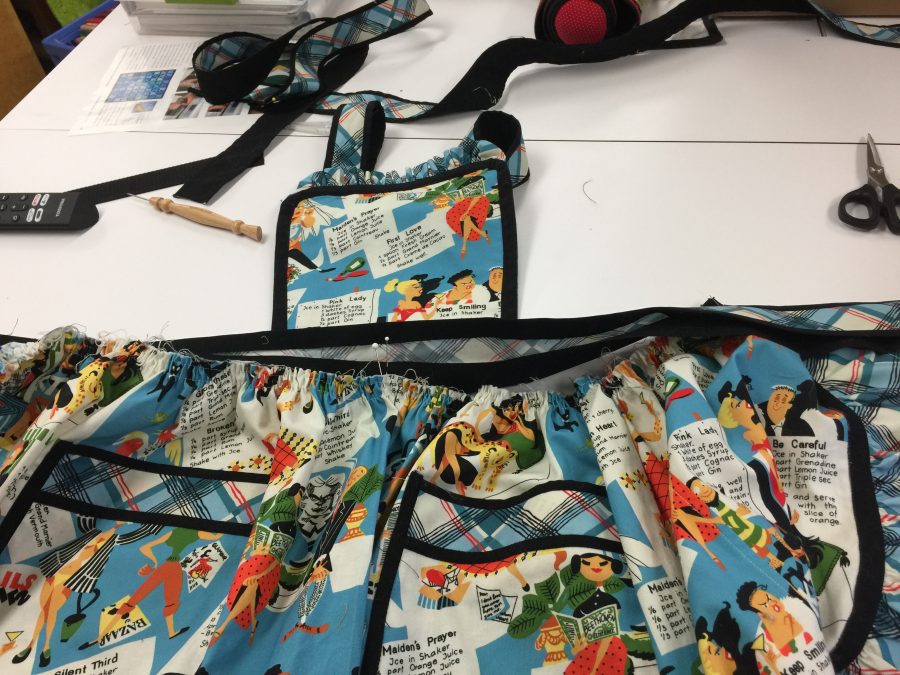
Today we’ll wrap up the last steps in this fun apron. Get ready to make a Kitschy Cocktail wearing the cutest apron ever to cover a frock. Enjoy a nice sip, preferably with a little paper umbrella! Make mine a pina colada, please! For the blogpost for Part 1 of this pattern, click here. For the blogpost for Part 2 of this pattern, click here. To download a Free-in-2020 PDF pattern with ALL the instructions and images, click here.
The Rockin’ Retro Apron in Kitschy Couture by #MichaelMiller Fabrics. The fabric was provided as part of the Michael Miller Brand Ambassador 2020 program, and my brilliant Janome M7 Continental is provided to me as a Janome Artisan. Thank you!
Sew the waistband and finish neckband
Administer chocolate or wine as needed—you’re near the end!
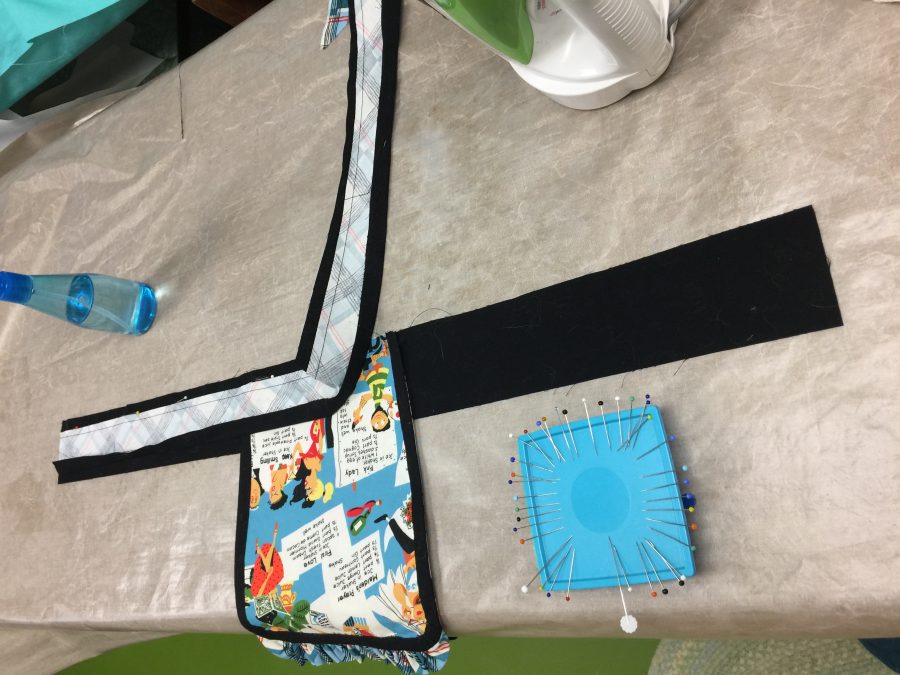
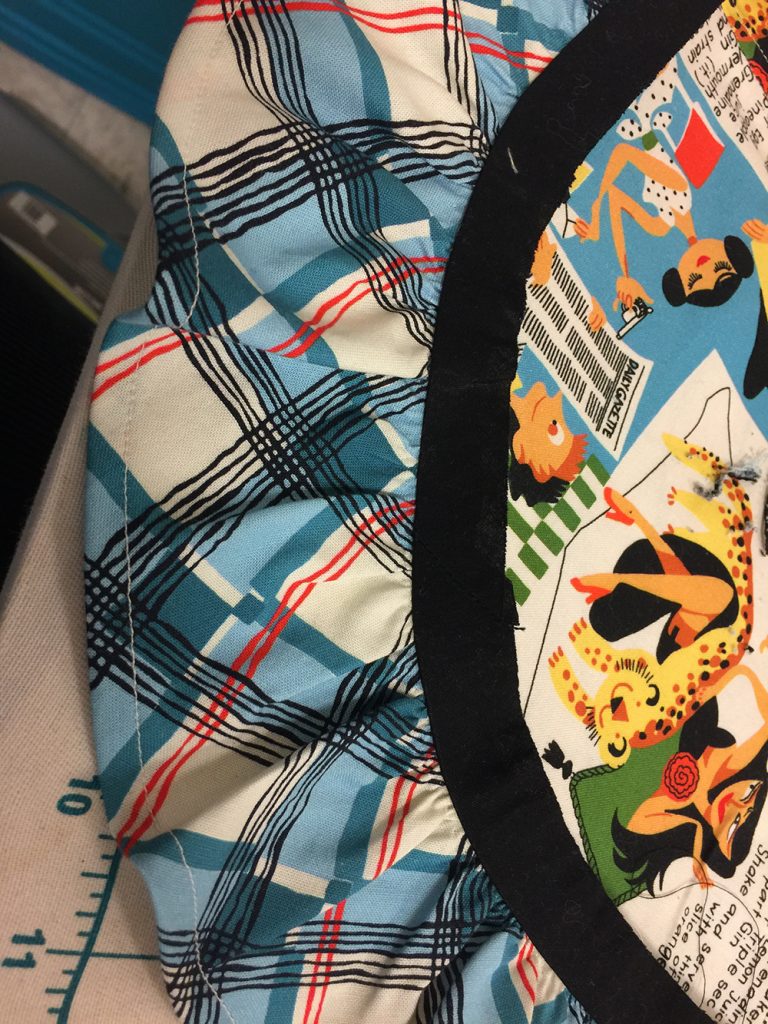
Sew 1” strips of black to each side of the starched plaid waistband piece. Press seam as stitched, then press seams away from plaid. On top edge, wrap fabric around to the back and press. See photos below.
FITTING NOTE: this is where you get to alter the size to fit you. I wanted my apron to come around my hips to the back. This is your apron, so make yours the way you like best! It can come just to your sides, be almost all on the front, or wrap well around you. I’m messy, so far around was my choice!
Sandwich the lower edge of the bib between the back and front of the waistbands. Optional: baste the bib to the center of the solid black waistband (back side). Photo below.
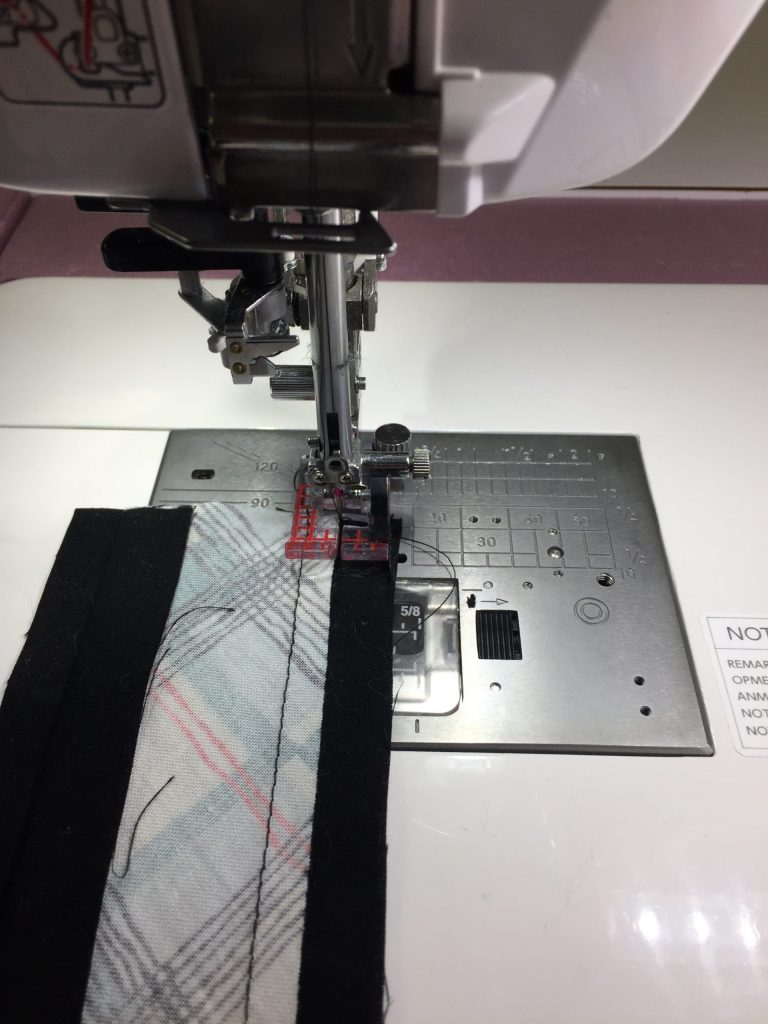
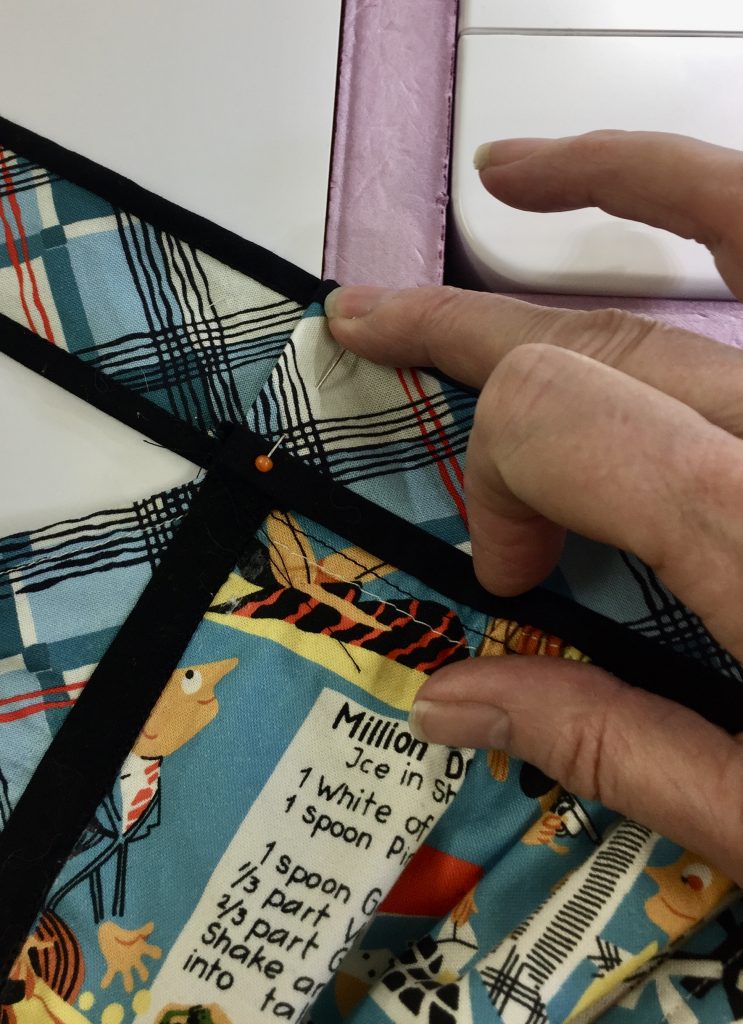
Pin the plaid waistband front and sew. In the third photo below, I aligned the right side of the presser foot with the edge of the seam and positioned my needle just below the seam edges.
After making the center waistband (plaid edged on both long sides with black) sew the waistband front and waistband back together, sandwiching the bib in the center.Close up of waistband/bib.Use your presser foot and move the needle to get perfect placement for the seam. The Janome M7 Continental and many of their other fine machines give you a wide range of needle-drop positions which makes perfect alignment easy peasy!
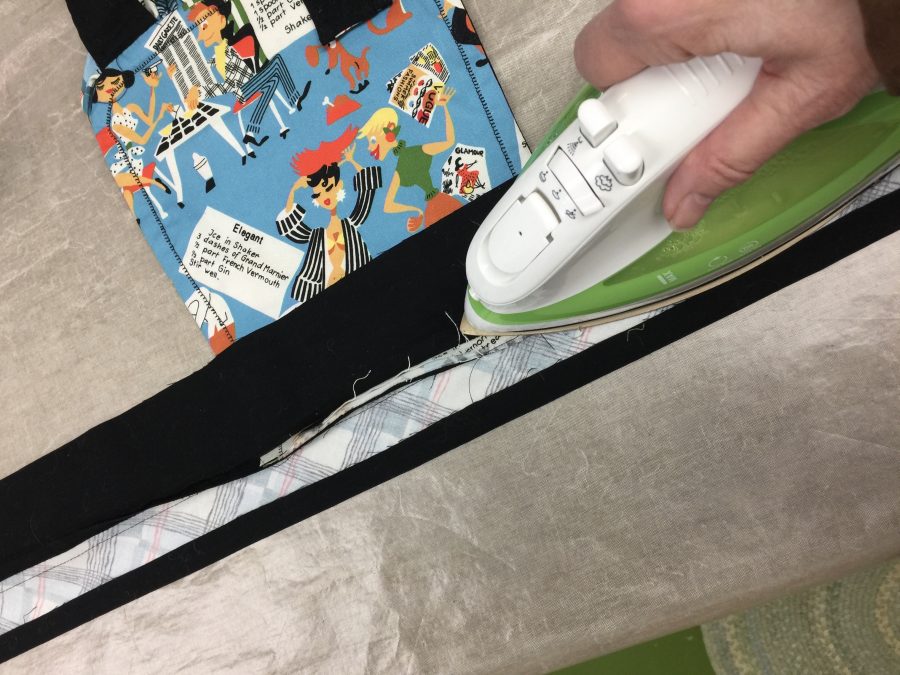
Press seam as stitched, then press all fabrics away from the bib portion. Photo below.
Press seams as stitched, then press the front and back waistbands down.Next, you pin the black back waistband to the skirt and sew with a 3/8″ seam.
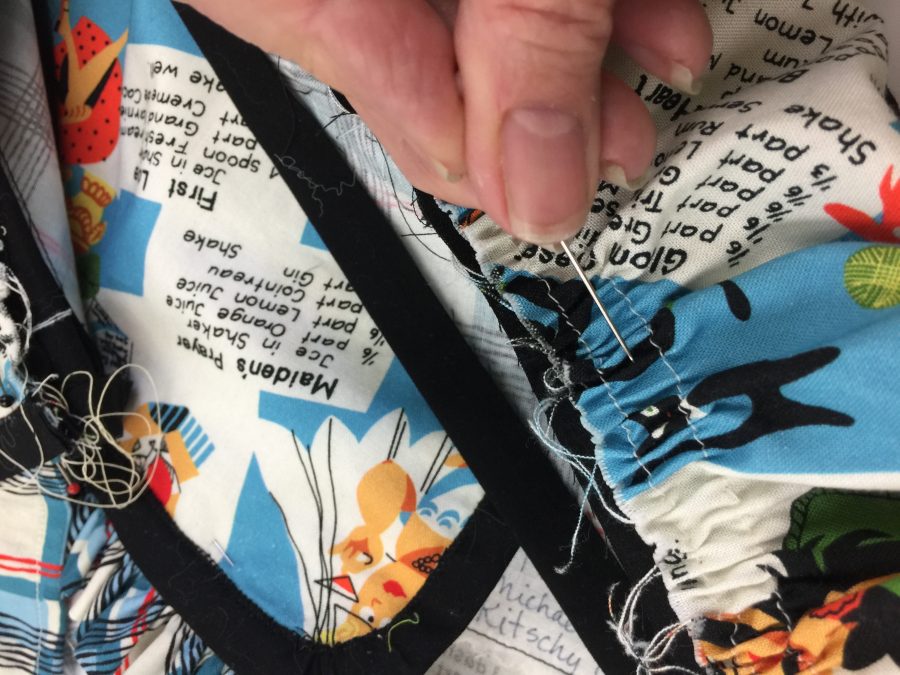
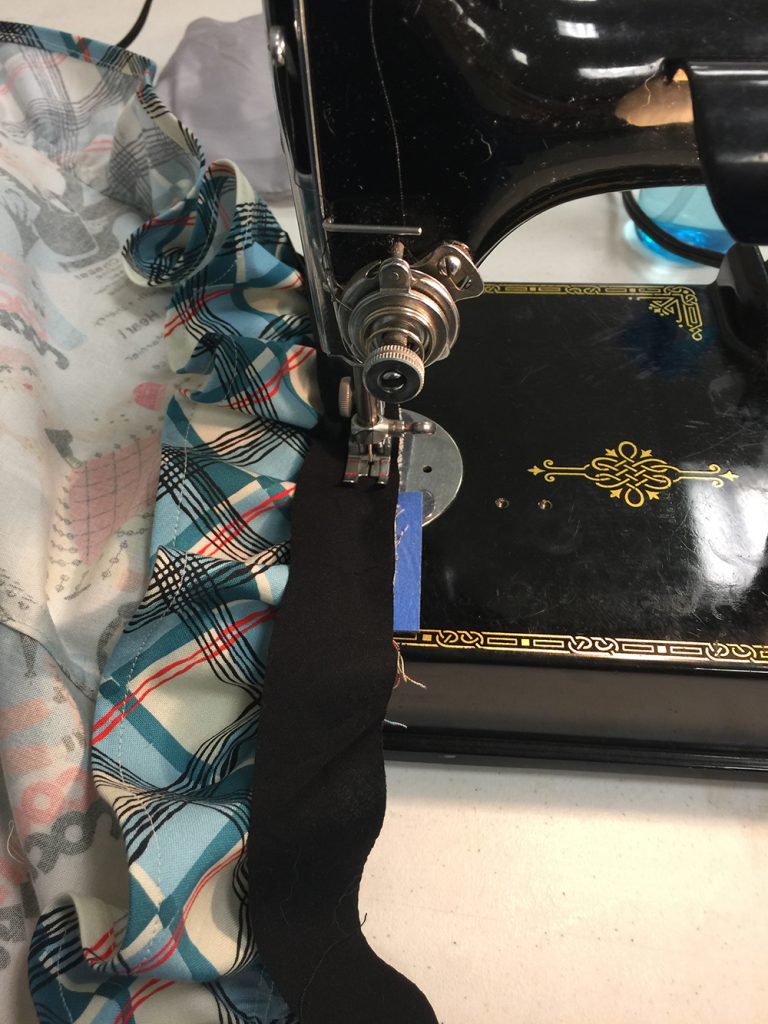
Pin apron skirt to black portion of waistband, wrong side of apron to the right side of the black leaving ½” extra on each end (see step 43). Distribute gathers as desired/evenly. You can use the tip of a pin to scrape the gathers into place, photo below right. Sew.
Use the tip of a strong pin to help adjust the positioning of the gathers. For me a pin works better than fingers or stiletto.
Sew apron skirt to black waistband back with a 3/8” seam. Use the pin to prevent tucks from forming as you stitch. You may wish to decrease the presser foot pressure so the bulk travels more smoothly under the presser foot. Remember to change it back when done.
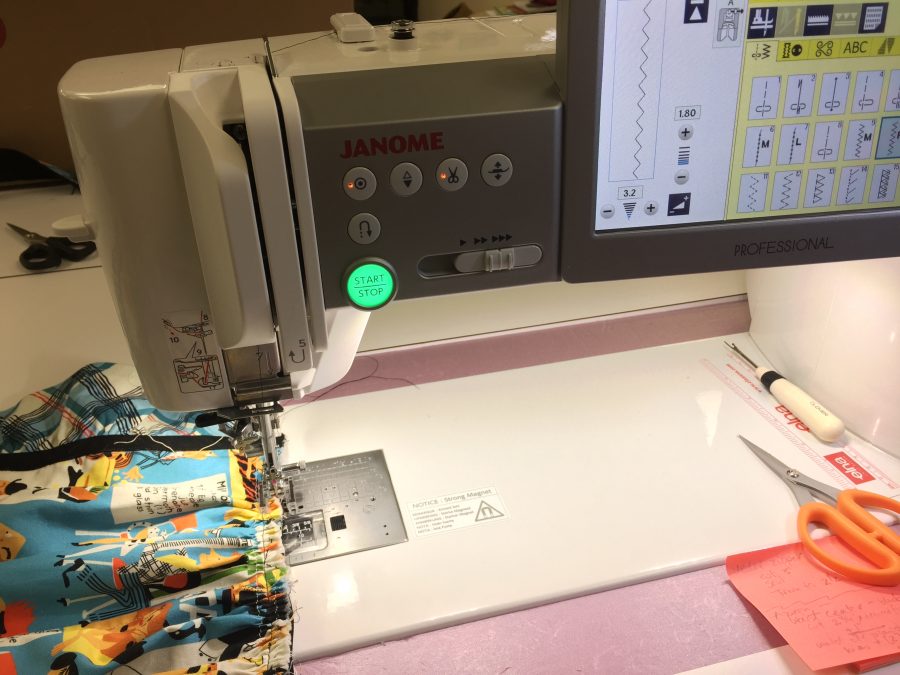
I cannot tell you HOW MUCH I LOVE THIS MACHINE. All the Janome machines I’ve sewn on have been really good, and I keep thinking they can’t get better but they do. But this M7 is just a whole ‘nother world. Color me in love! Here, I’m using a simple zigzag to seal the seam edge together. Even though it will be fully encased within the waistband, stitching like this controls the bulk and makes it look better once all is said and stitched.
Check to make sure you like the way it looks, then zigzag the edges, see right photo above. This will make the next two steps easier.
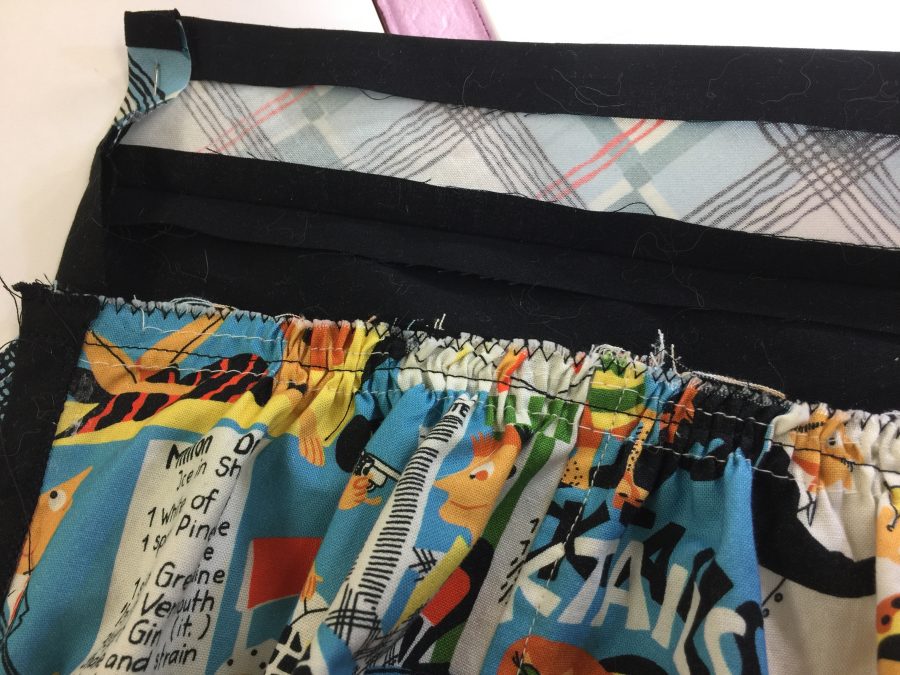
Fold under the extra 1/2″ on either end of the waistband.Tuck the tie inside the waistband, then line up the black edging as close to perfectly as you can.
Fold in the ½” extension on the waistband upper photo above. Tuck the square end of the waist band ties into either end of the waistband, lower photo above. Fold the waistband front over the seam you just stitched, being sure to cover the seam line. As best you can, get the skinny bits of black on the waistband and ties to line up.
Stitch on the edge of the black waistband front to secure the waistband to the top of the apron.
Stitch in the ditch or on the edge of the black of the waistband as well as along the ends where you tucked in the ties.
Tie the apron to your waist. With the unfinished end of the strap behind the bib, adjust the length of the neck strap to suit you. If it is long enough to pull over your head easily, trim with about an inch of extra length. Tuck the ends in and stitch closed. Pin the strap to the bib at the desired spot and machine stitch in the ditch next to the black trim near the top ruffle. If it’s awkward to pull on and off, use Velcro or snaps instead
HALLELUJAH you’re DONE! Put it on, wear it with gusto! Grab some bubbly or mix yourself a Kitschy Cocktail and celebrate a party apron made with the finest of details and finishing—not a raw edge to be seen anywhere. (And if need be, give it a wash or wipe to remove any visible glue stick—it’ll come out in the wash.)
THANK YOU for following along this intricate project. Yes, you could have overcast edges and make it faster, but this way you’ve learned some fine finishing techniques to apply to garment and home dec sewing AND made yourself a Rockin’ Retro Apron!
And of course, Thank you to Michael Miller Fabrics for selecting me as a 2020 Brand Ambassador and to Janome America for having me as a Janome Artisan since 2003. I am honored, humbled and grateful for your support.
Welcome to my first Brand Ambassador project for Michael Miller Fabrics, a fun and funky Retro Apron featuring Kitschy Cocktails and Mad About Plaid in blue (available starting February 2020). For all of 2020 this will be a FREE pattern available using this link and in a link on my Resources page titled Retro Apron. The plaid fabric just grabbed my attention and demanded I use it, on the bias…total fun! In this and a subsequent blogpost or two I will share the entire pattern and the included images. But you can download and print the illustrated pattern at home.
I’ve tried to teach fine finishing details throughout. I love nice clean, finished edges, so there isn’t a raw edge in this apron…everything is tucked behind trim or finished to hide the raw edges. These techniques can be applied to all your sewing, so read on and learn! Using good fabric and my brilliant Janome M7 Continental machine made it easy to produce such a well-made garment.
Today, I’ll start with the fabric and supplies needed, cutting instructions and the first steps in the construction process. Subsequent steps will be posted over the next week, but the ENTIRE pattern is available in the Rockin’ Retro Apron PDF. Apologies for any formatting inconsistencies in the blog…it’s not wanting to play nicely with me today.
FABRIC AND MATERIALS--Preshrink all fabrics!
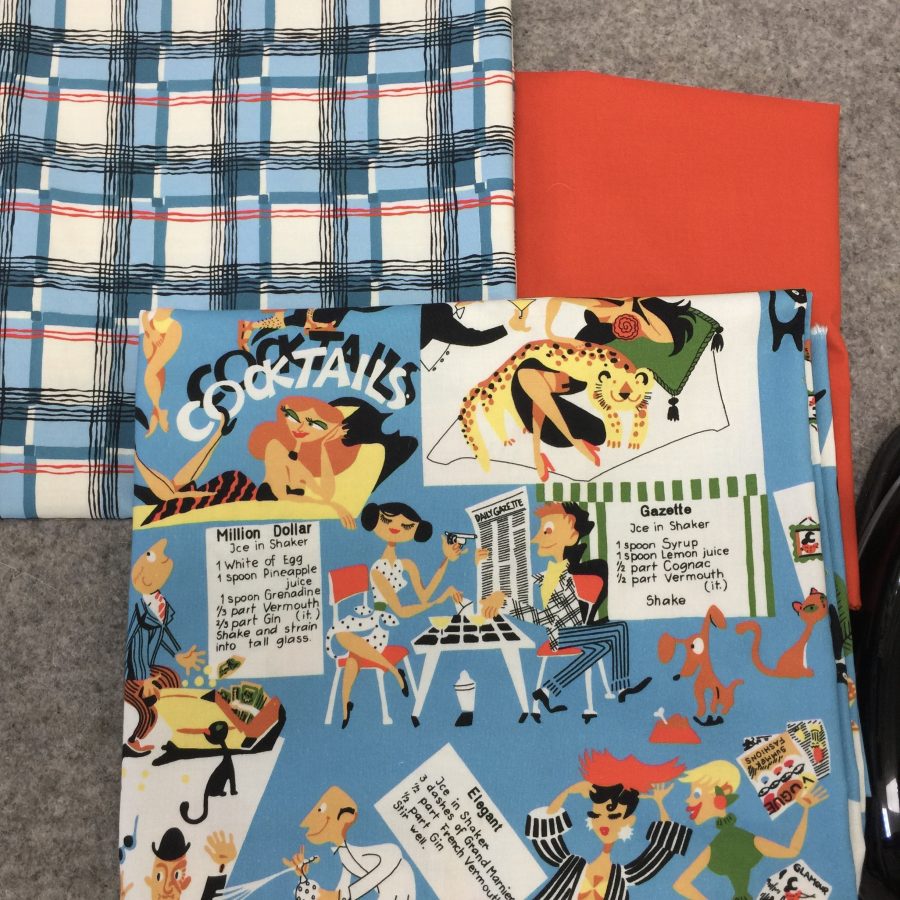
Close up of the Kitschy Cocktails focus print and Mad About Plaid coordinating print. I ended up going with the Jet Black instead of this vibrant orange for the accent color.
Ask your local shop to order!
FITTING NOTE: Please read through ALL the instructions for FITTING NOTES before cutting, since you may wish to adjust the cut sizes to better suit your build. If you are larger or smaller than my average height and Medium-Large frame, you may wish to add a bit more yardage.
Focus Fabric 1: Kitschy Cocktails, blue 1 1/4 yard
Focus Fabric 2: Mad About Plaid, blue 1 yard
Accent: Cotton Couture Jet Black 1 yard
Matching thread (I used off-white and black)
Glue stick—washable! A school/craft glue stick is fine.
Spray starch
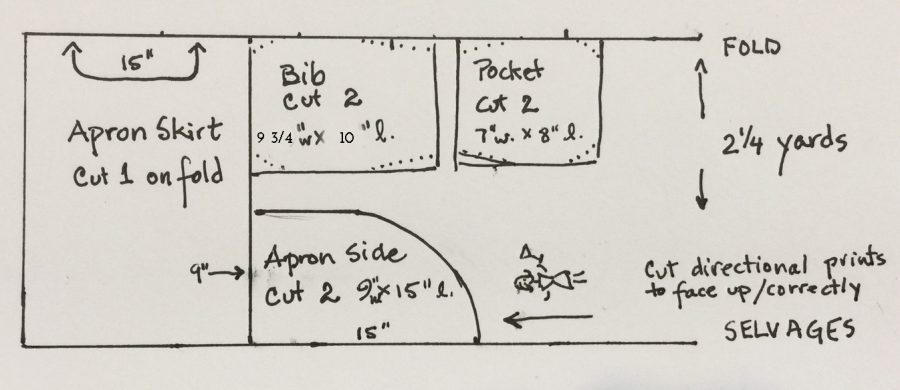
FABRIC LAYOUT & Cutting
TIP: Use sticky notes, removable file folder labels or painter’s tape to label pieces. Check each box (on printed pattern only) as you have cut the pieces.
Focus Fabric 1 / Kitschy Cocktails: Be sure to cut pieces with the design facing the correct direction.
Be sure to cut pieces with the design facing the correct direction.
Apron skirt front: Cut ONE on fold, 15” by 40-44” (width of fabric)
Apron skirt sides: Cut TWO 9” wide by 15” tall
Apron bib: Cut TWO 9” wide by 12 tall”, see FITTING NOTES and instructions for shaping
Apron pockets: Cut TWO 7” wide by 8” tall
Focus Fabric 2 / Plaid:
Cut on the bias:
Hem ruffle: Cut THREE — 4 ½” across the full width of fabric, about 45”
Bib ruffle: Cut ONE — 2 ½” by 24” long
Pocket trim: Cut TWO — 1 5/8” by 9” (will be trimmed later)
Waistband: Cut ONE — 1 5/8” by 30” (see FITTING NOTES above and below)
Long ties: Cut TWO — 1 5/8” across the full width of fabric, about 45”
Neck band: Cut ONE — 1 5/8” by 24” long (will be trimmed later)
Accent / Michael Miller Jet Black:
Cut on the straight grain before cutting bias strips:
Long ties: Cut TWO — 3” by 40-45” (can be pieced if necessary; make shorter/longer ties as desired)
Next, cut on the bias:
1 1/8” strips for edging the skirt/ruffle edge, bib and outside pocket edges. You will need a total of about 180.” Sew strips together as you would for a quilt binding. I used the 1 1/8” width strips to make turning the ¼” under easier and still have enough left to cover the bulk of the gathers and finish at about 3/8 – ½” on the apron-to-ruffle seam and the front of the bib.
Finally, cut on the straight grain:
End of long ties: Cut TWO — 1” x 5”
Waistband: Cut ONE — 2 ½” by 30” (adjust length to match desired size, see FITTING NOTES)
Cut ONE — 1” by 30” (ditto) for top edge of waistband
Cut ONE — 1 ¼” by 30” (ditto) for bottom edge of waistband
Pockets: Cut ONE — 1 5/8” by 9” for top edge of pocket trim
Cut ONE — ¾” by 9” for lower edge of pocket trim
NOTE: If you are using a print instead of a plaid or stripe, you can cut these on the cross-wise grain. You will need a bit less yardage overall.
NOTE: I had enough black in my stash to cut on the lengthwise grain which is more stable. You can just as easily cut the straight-grain pieces on the cross grain so you don’t need to buy as much fabric.
NOTE: Seam allowances are either ¼” or 3/8.” Please follow instructions for each section.
NOTE: Ties were designed to be long enough to wrap around to the front. Depending on your measurements you may need to shorten/lengthen these ties, or you can cut them shorter and tie the bow in back. Figure out your waist, how much you need to wrap the ties to the front and, if needed, cut additional strips of black and of plaid.
CONSTRUCTION:
I’ll admit it…there are a lot of steps to this apron. Lay in a supply of nibbles and remember to take breaks to re-focus your eyes and move your body!
Due to the blog formatting, numbers for each step are omitted on the blog. In the PDF Rockin’ Retro Apron pattern, use the numbers and check off each step/number as you work along so you can find your place after a break.
Make the Apron Skirt
FITTING NOTE: This apron was designed to be about 28-30 inches along the waistband/top edge, which wraps most of the way around my body. Decide how long you want the top gathered edge to be and adjust accordingly (this comes into play when attaching the waistband in a later step). For those smaller than I am, just gather your skirt more or make the center panel narrower. For those who are larger, gather less; or you may (or may not) wish to make your side panels wider.
Length: With a ruffle that finishes at 3”, this apron skirt is about 17” long. You may wish to adjust for your height and preferred length.
Sew apron skirt side panels to center panel. I created a mock flat-felled seam: sew wrong sides together with a ¼” seam.
First photo: Trim underneath seam allowance. Press second seam allowance toward center. Use glue stick to “pin” second side of the seam allowance in place. Second photo: glued seam allowance. Now stitch in place.
Press as stitched, then press open.
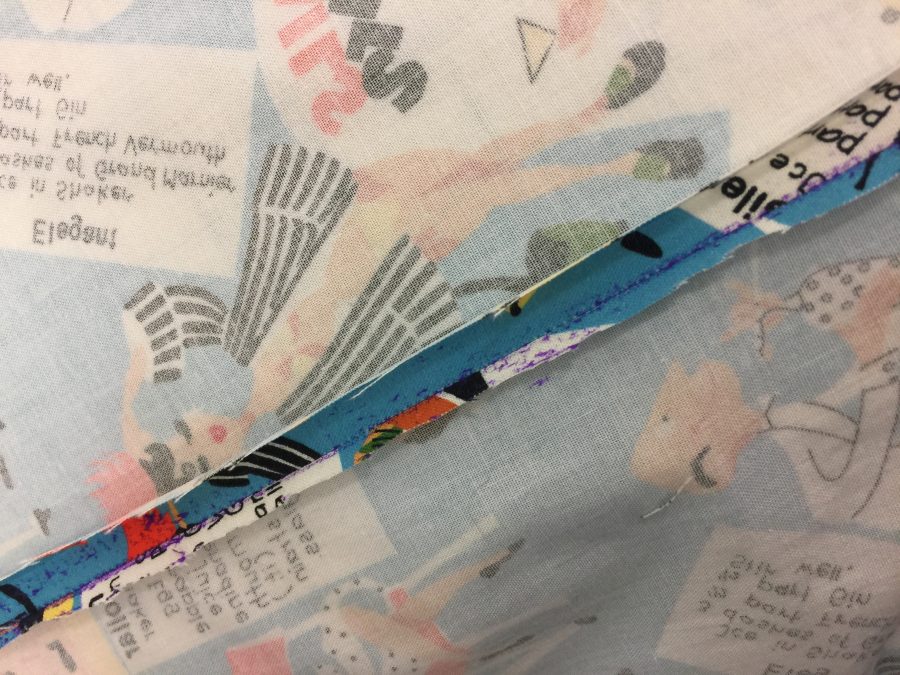
Trim seam allowance on side panels to 1/8” (first photo above).
Fold other seam allowance in half so the raw edge nearly touches the seam. Apply glue stick to the 1/8” side. Press down; heat from iron will set and dry the glue—way easier than pins! Second photo above.
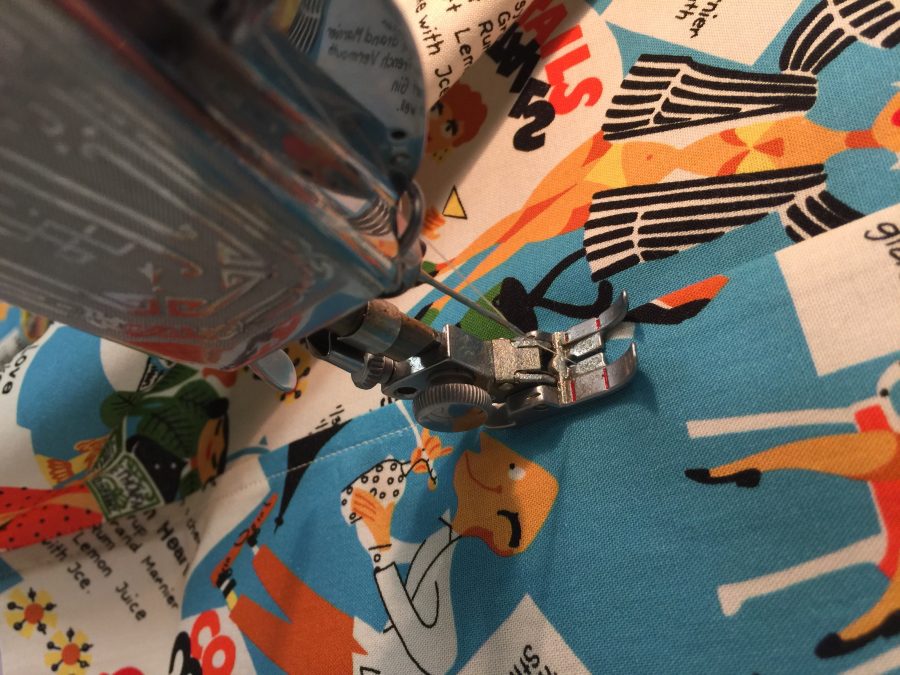
From the right side, stitch seam allowances in place, above left. I prefer to use an edge stitch or quarter-inch-piecing foot with the blade in the ditch/lower side. Move your needle to the left so that it is towards the left side of the seam allowance. Stitch. See first photo above.
Hem lower edge of skirt ruffle.
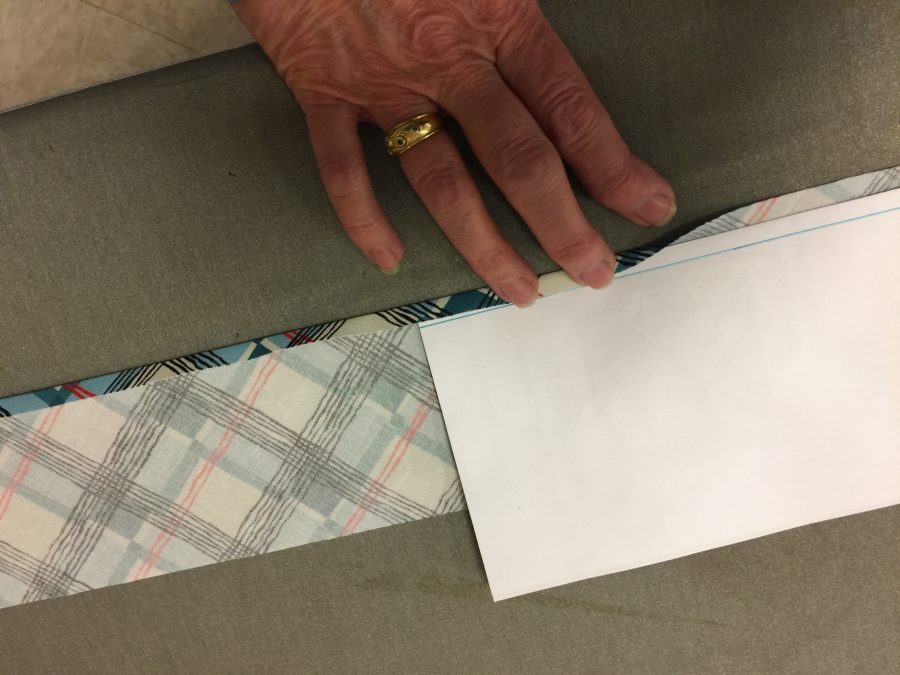
Fold a piece of copy paper in half lengthwise, or use a file folder or piece of poster board. Mark a line ¼” from the long edge. Use this as a press guide to get a perfect ¼” turn. Second photo above.
Repeat so that raw edge is inside the hem. I call this a “turn-turn” hem.
Stitch, again using an edge stitch foot and moving the needle to keep the sewing line a perfect distance from the edge.
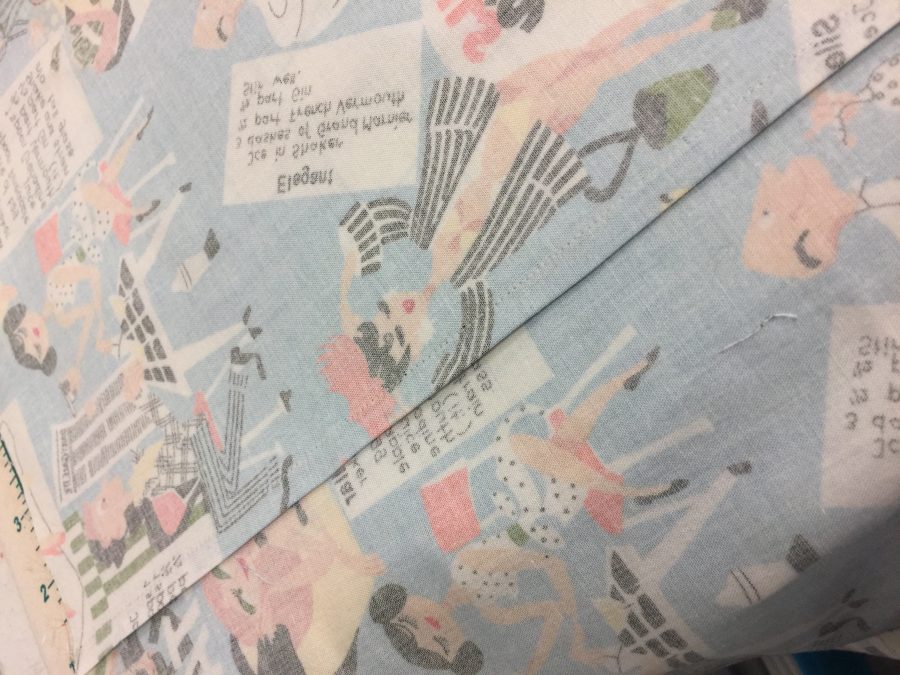
For the ends, I retained the 45-degree angle and hemmed it the same way. You could also choose to round off the corner. Make sure the angles will curve / bend up to the gathered edge of the ruffle.
Gather hem ruffle:
Mark center of ruffle on the with a pin!!!! Do not sew over the pin! You can put the pin on the hemmed side.
Hem the ruffle **before** gathering. Sew basting/gathering stitches at 1/4 and 1/2″ distances from the raw edge.
Run two lines of basting stitches ¼” and ½” from raw edge of ruffle with bobbin thread on the wrong side of the ruffle. If desired, loosen tension a bit to make the bobbin thread easier to pull.
Holding both ends of the bobbin threads, pull to gather. The gathers will be fairly dense, so you’ll need to stop and move the gathers towards the center periodically. I worked the gathers from both ends.
Place the ruffle along the lower edge of the apron skirt and adjust gathering so that it fits.
Place a pin at either end and wind the bobbin thread tails around the pin in a figure 8 to secure them while you work.
Sew ruffle to skirt WRONG sides together with a 3/8” seam, photo at right. Photos below.
Black bias trim: Sew cut strips together as you would for a quilt binding, using a ¼” seam allowance. Press seams as stitched, then press seams open.
Cut a length of black trim the length of the lower apron edge plus a couple inches just in case. Press under ¼” on one edge.
First photo: sew the black bias to the same seam line that joined the ruffle to the skirt. Second photo: press black to the skirt, tucking under the seam allowance. Sew.
Sew the black trim to the seam that joined the ruffle to the skirt with a 3/8” seam allowance. Photo at near right. The folded edge is on the left; when you turn the bias strip toward the skirt in the next step, the fold will be on the inside of the seam. See first photo above.
Press the seam as stitched. With the right side up, press the seam allowance and black bias strip toward the apron skirt.
Use your glue stick and iron to “pin” the black strip in place, covering the raw edges of the skirt/ruffle. Press The ¼” seam allowance turns to the inside. See second photo above.
Sew the black strip. I began using a narrow buttonhole stitch for my applique, but switched to a straight stitch which I think looks better. Again, the edge-stitch foot or quarter-inch foot is perfect for getting precise seams and stitching lines. Remove any visible basting/gathering thread. Refer to second photo.
YEEEHAW! You’re made it about halfway! In the next post we will work on the ties and bib, then finish things up in a third post. Once they are all live, I’ll add the links following this paragraph.
And once again, here’s the PDF for Sarah’s Rockin’ Retro Apron, free to download in 2020. Thank you to Michael Miller Fabrics for selecting me as a Brand Ambassador for 2020 and to Janome America for having me as a Janome Artisan since 2003! Good fabric and brilliant machines make it so much easier to do a brilliant sewing project!
Interested in trying your hand at art quilts? Not sure where to start? This class has proved a perennial favorite at IQF Houston (and elsewhere)–sign up soon!
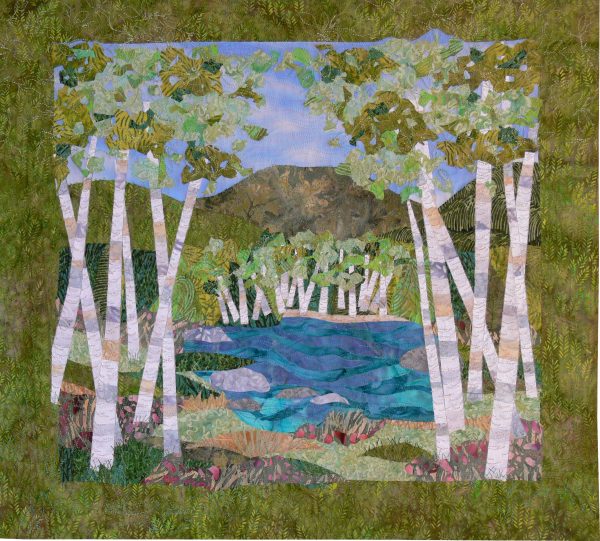
On Tuesday, the day between Quilt Market (open to the trade only) and Quilt Festival (open to anyone who pays admission), I’ll be teaching Birch Pond Seasons. The wonderful thing about this workshop is that you can bring a photo of your own favorite pond or hills and morph my pattern into your special place! The class is always full or almost full–I’m hoping that with it scheduled on Tuesday I’ll be able to entice some Market-goers to stay over for a workshop.
Here’s the summer version:
Summer version
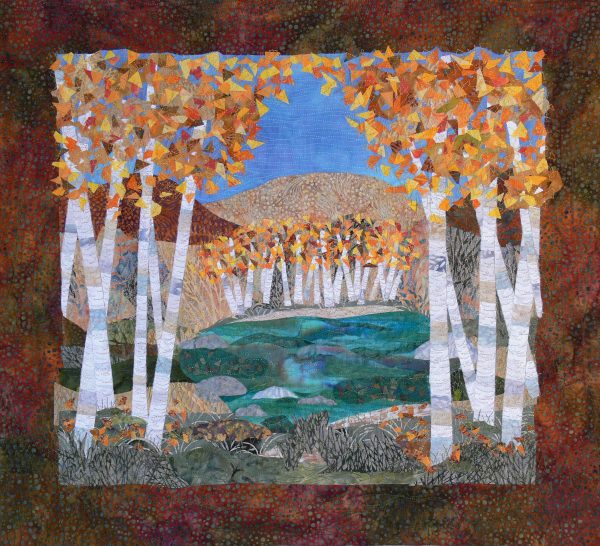
And autumn:
Autumn at Birch Pond
You’ll learn basics of fusing, working from a pattern without having to cut a bazillion pattern pieces, working a bit more free-form and improvisationally, how to “strip fuse,” fusing easy-melt fabrics like synthetic sheers, fabric selection, and time-permitting in the afternoon we’ll talk about quilting. The class includes a kit fee that covers handouts, pattern sheet, a full package of white Mistyfuse, and a few tidbits. You bring a range of fabrics but not a ton of any one fabric (maybe a fat quarter for sky and half that for the pond)…a range of fabrics is more important than a lot of any one thing.
Here is a blogpost about students taking this class some years ago. This post will give you a feel for the class.
If you click here to get to my classes page, scroll down to Birch Pond Seasons class and you can click on the link for the PDF Class supply list, too.
Sign up before it fills! If you have questions, just leave a comment or contact me via the Contact page (link up top). Here’s the link to IQF enrollment again. See you there!
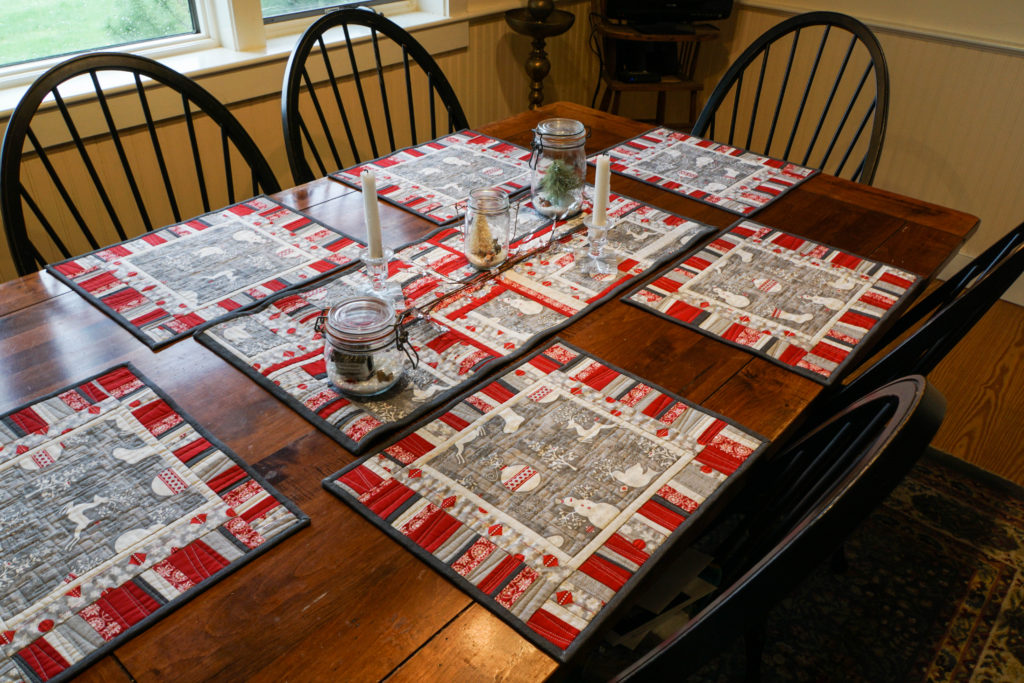
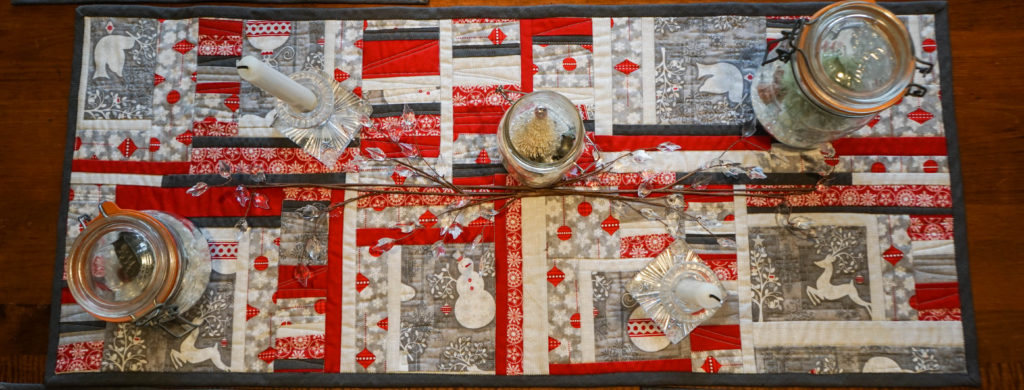
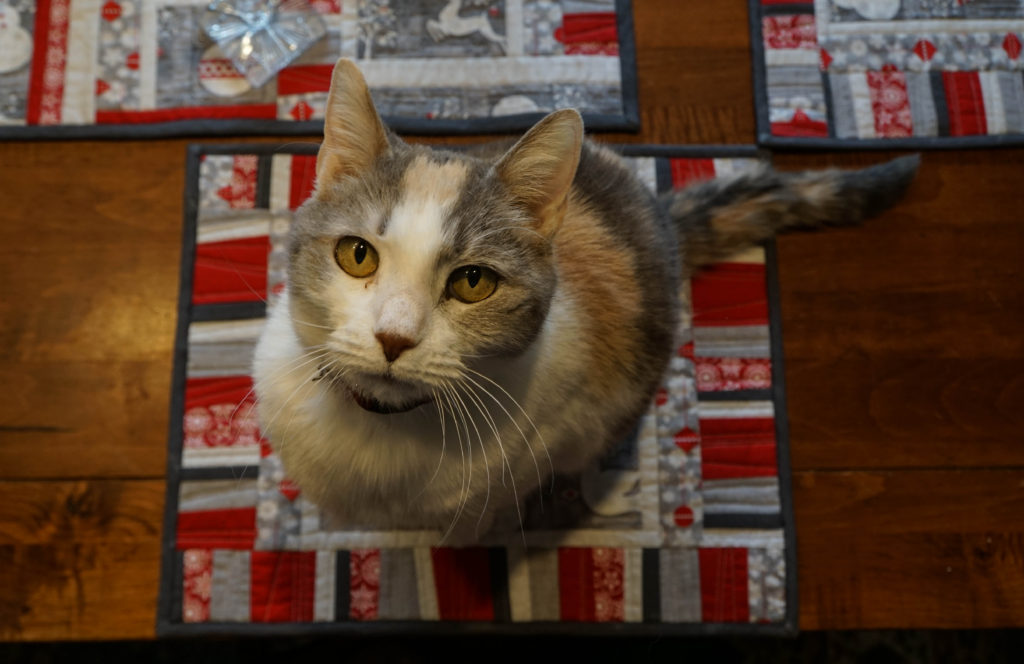
Last December at our local Coastal Quilters Christmas/Holiday meeting, we had a little game where you each bring a giftie, and end up with a different giftie. I ended up with a lovely set of fat quarters in very “Quilt Modern” colors: the red, white and gray winter themed ones. I decided to add some new winter placemats and table runner made from the theme fabric using improvisational piecing. You can find the pattern at Janome America’s blog, here.
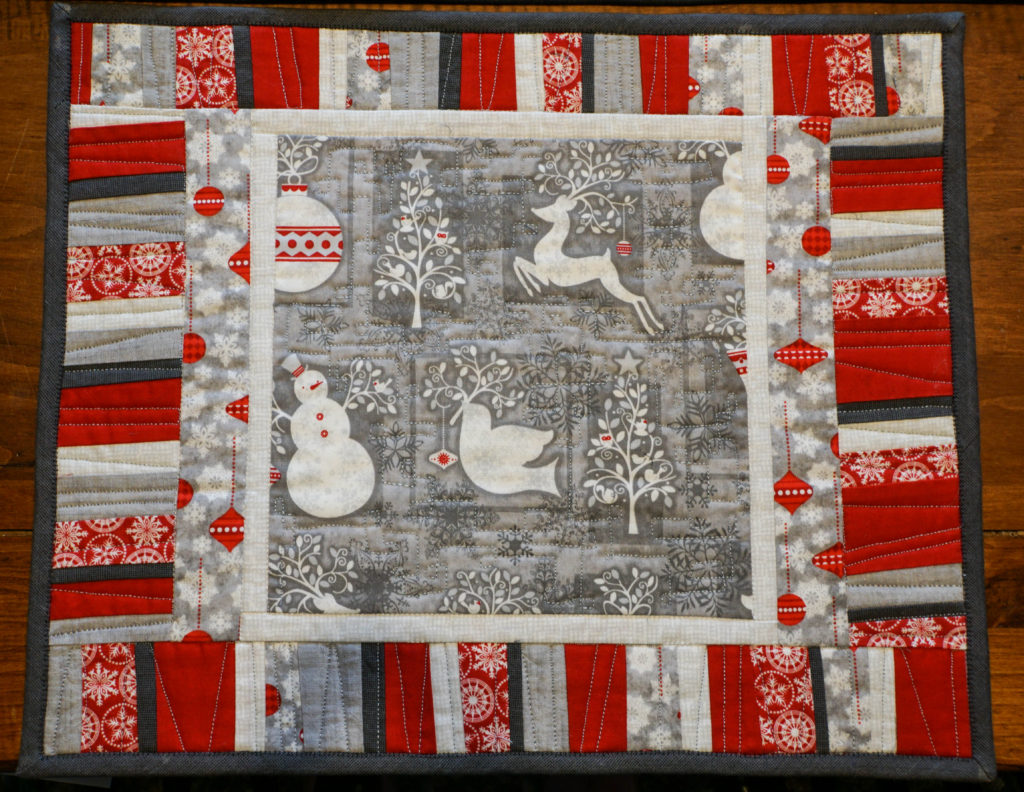
Modern Winter placemats and table runner.
I added the solid red and dark gray fabrics. I will advise you: MEASURE YOUR TABLE FIRST. I made the placemats first, rather oversized. I had two of them bound. Then I discovered they were too big, had to pick off the binding, cut them down (the instructions on the Janome site are for my final size), and re-do. Erk.
Depending on the fabric you select as a feature fabric for the centers, you can adjust the size of the inner borders (or omit them entirely). I had just a half yard of the feature print, so I needed to use smaller cuts and build them out. If you buy a little more, then you can omit the inner border and strips.
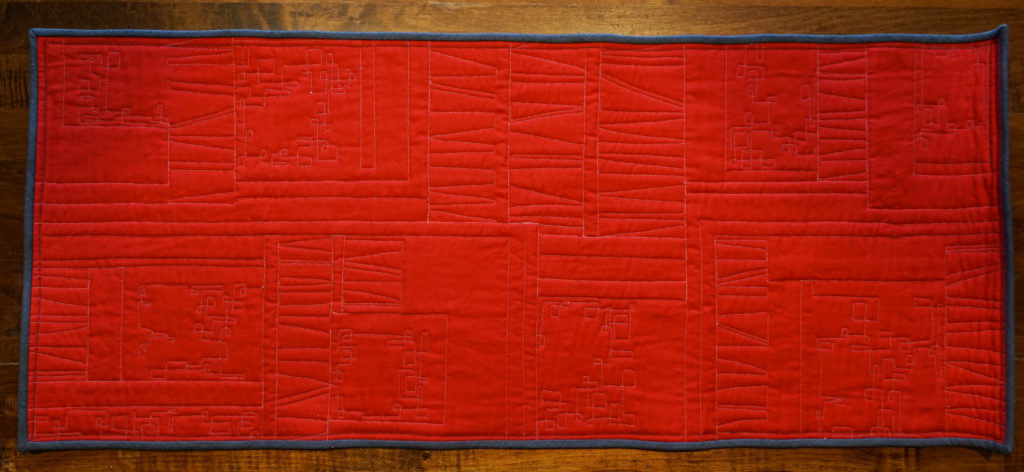
An overhead view of the table runner; I used the few remaining bits of the feature print and built them out with strips, then fit them together. Can you say “liberal use of partial seams?”
Overhead view of placemat
My favorite way to do bindings is by machine. My secret: glue stick! I only use the glue stick on things that will be washed (probably often), so I wouldn’t do this on a high-end art quilt, but for a baby or bed quilt or table linens? You betcha!
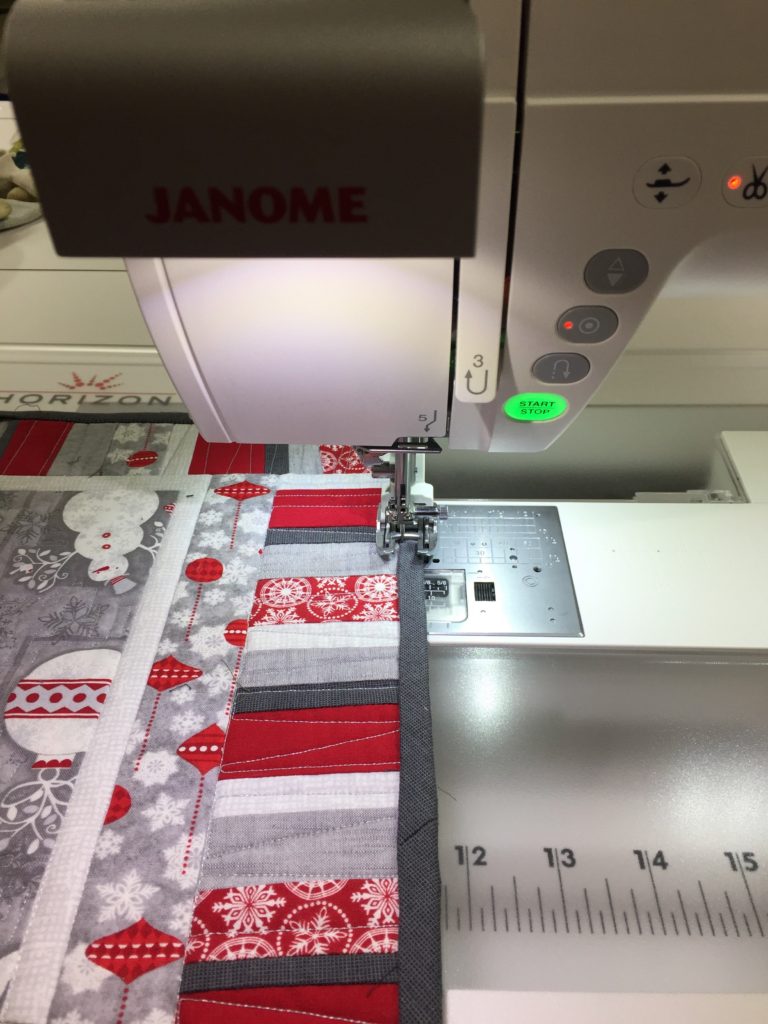
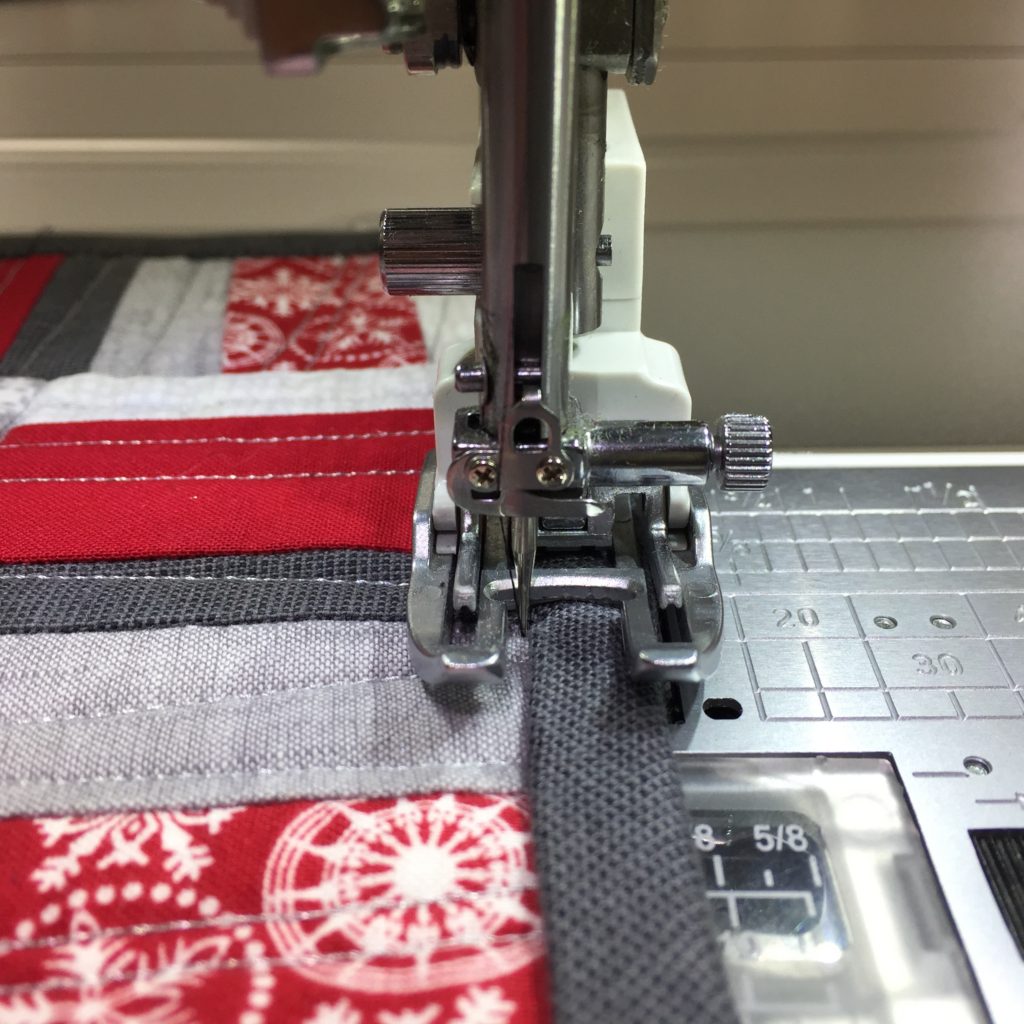
Stitching down the bindings on the Janome 9400. Love that pull-out light! I sew the binding to the back, wrap it to the front, then at the ironing board use glue stick on the seam allowance. I press the binding down and it stays put–no pins! no bumps! no wiggling out of place!
I used a blanket stitch, with the straight part in the “ditch” (just to the left of the dark gray binding), and the “zig” going onto the binding.
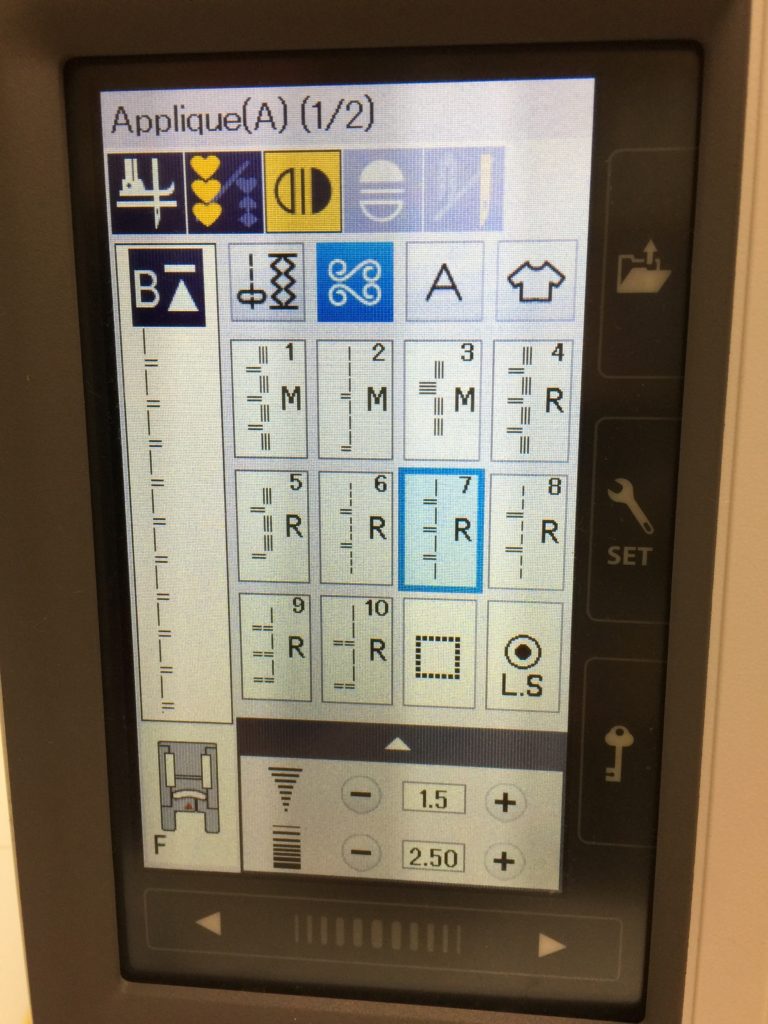
I used this stitch to finish the bindings, and used the mirror image button (above in yellow) so that the swing of the stitch goes to the right of the straight line (see the stitch as displayed at the left of the screen).
A closer view. The needle just barely misses the binding when going straight, then swings over onto the binding to hold it in place.
Back view of my quilting. I used a FMQ ruler (thicker than a cutting ruler) with the QO foot (this is not necessarily recommended, you really should use a proper “Ruler Foot” but I was extra careful) to do the straight line quilting across the strip sets, then used a squared off loop in the background of the feature fabric bits.
It must be good: it has passed the cat-sitting-on-it seal of approval!
I’m thrilled to be so busy and hope to meet many of you. Here’s a blogpost about The Nest, a new and totally fun half-day (or full day if a guild wants a full day) class, it’s a blast and the extensive kit/materials provided make it easy to prep. I’m also teaching my intermediate/advanced Tame Fussy, Fiddly Threads for Machine Quilting class for those of you who want to learn more about the “cranky” threads–that really aren’t cranky if you just learn how to use them!
Houston has revamped the catalog a little bit. There are now (yeah!) pictures in the catalog (not just online) and there are weblinks so you can go to my website for the FULL supply list and handouts. To shorten the process, if any of the above look good to you, you can go to my class listings page here for info about my classes. Each description has a hotlink to the pdf Supply list. If I have blogged about a class, that also is in the description. You can also find all my supply lists in one place on my Resources page. If you click on “Resources,” Look at the jump links at the top. Click on Class Supply Lists and it will jump you down the page (instead of having to scroll down).
Here are some more blogposts about the classes I’m offering in Houston: