email Youtube

Home
Galleries
Blog
Workshops & Calendar
Store
Resources
About
Contact

Archive for the ‘Patterns’ Category

Plaid Top Tutorial: Lesson 1-Choosing a pattern and starting tips

Friday, February 17th, 2023
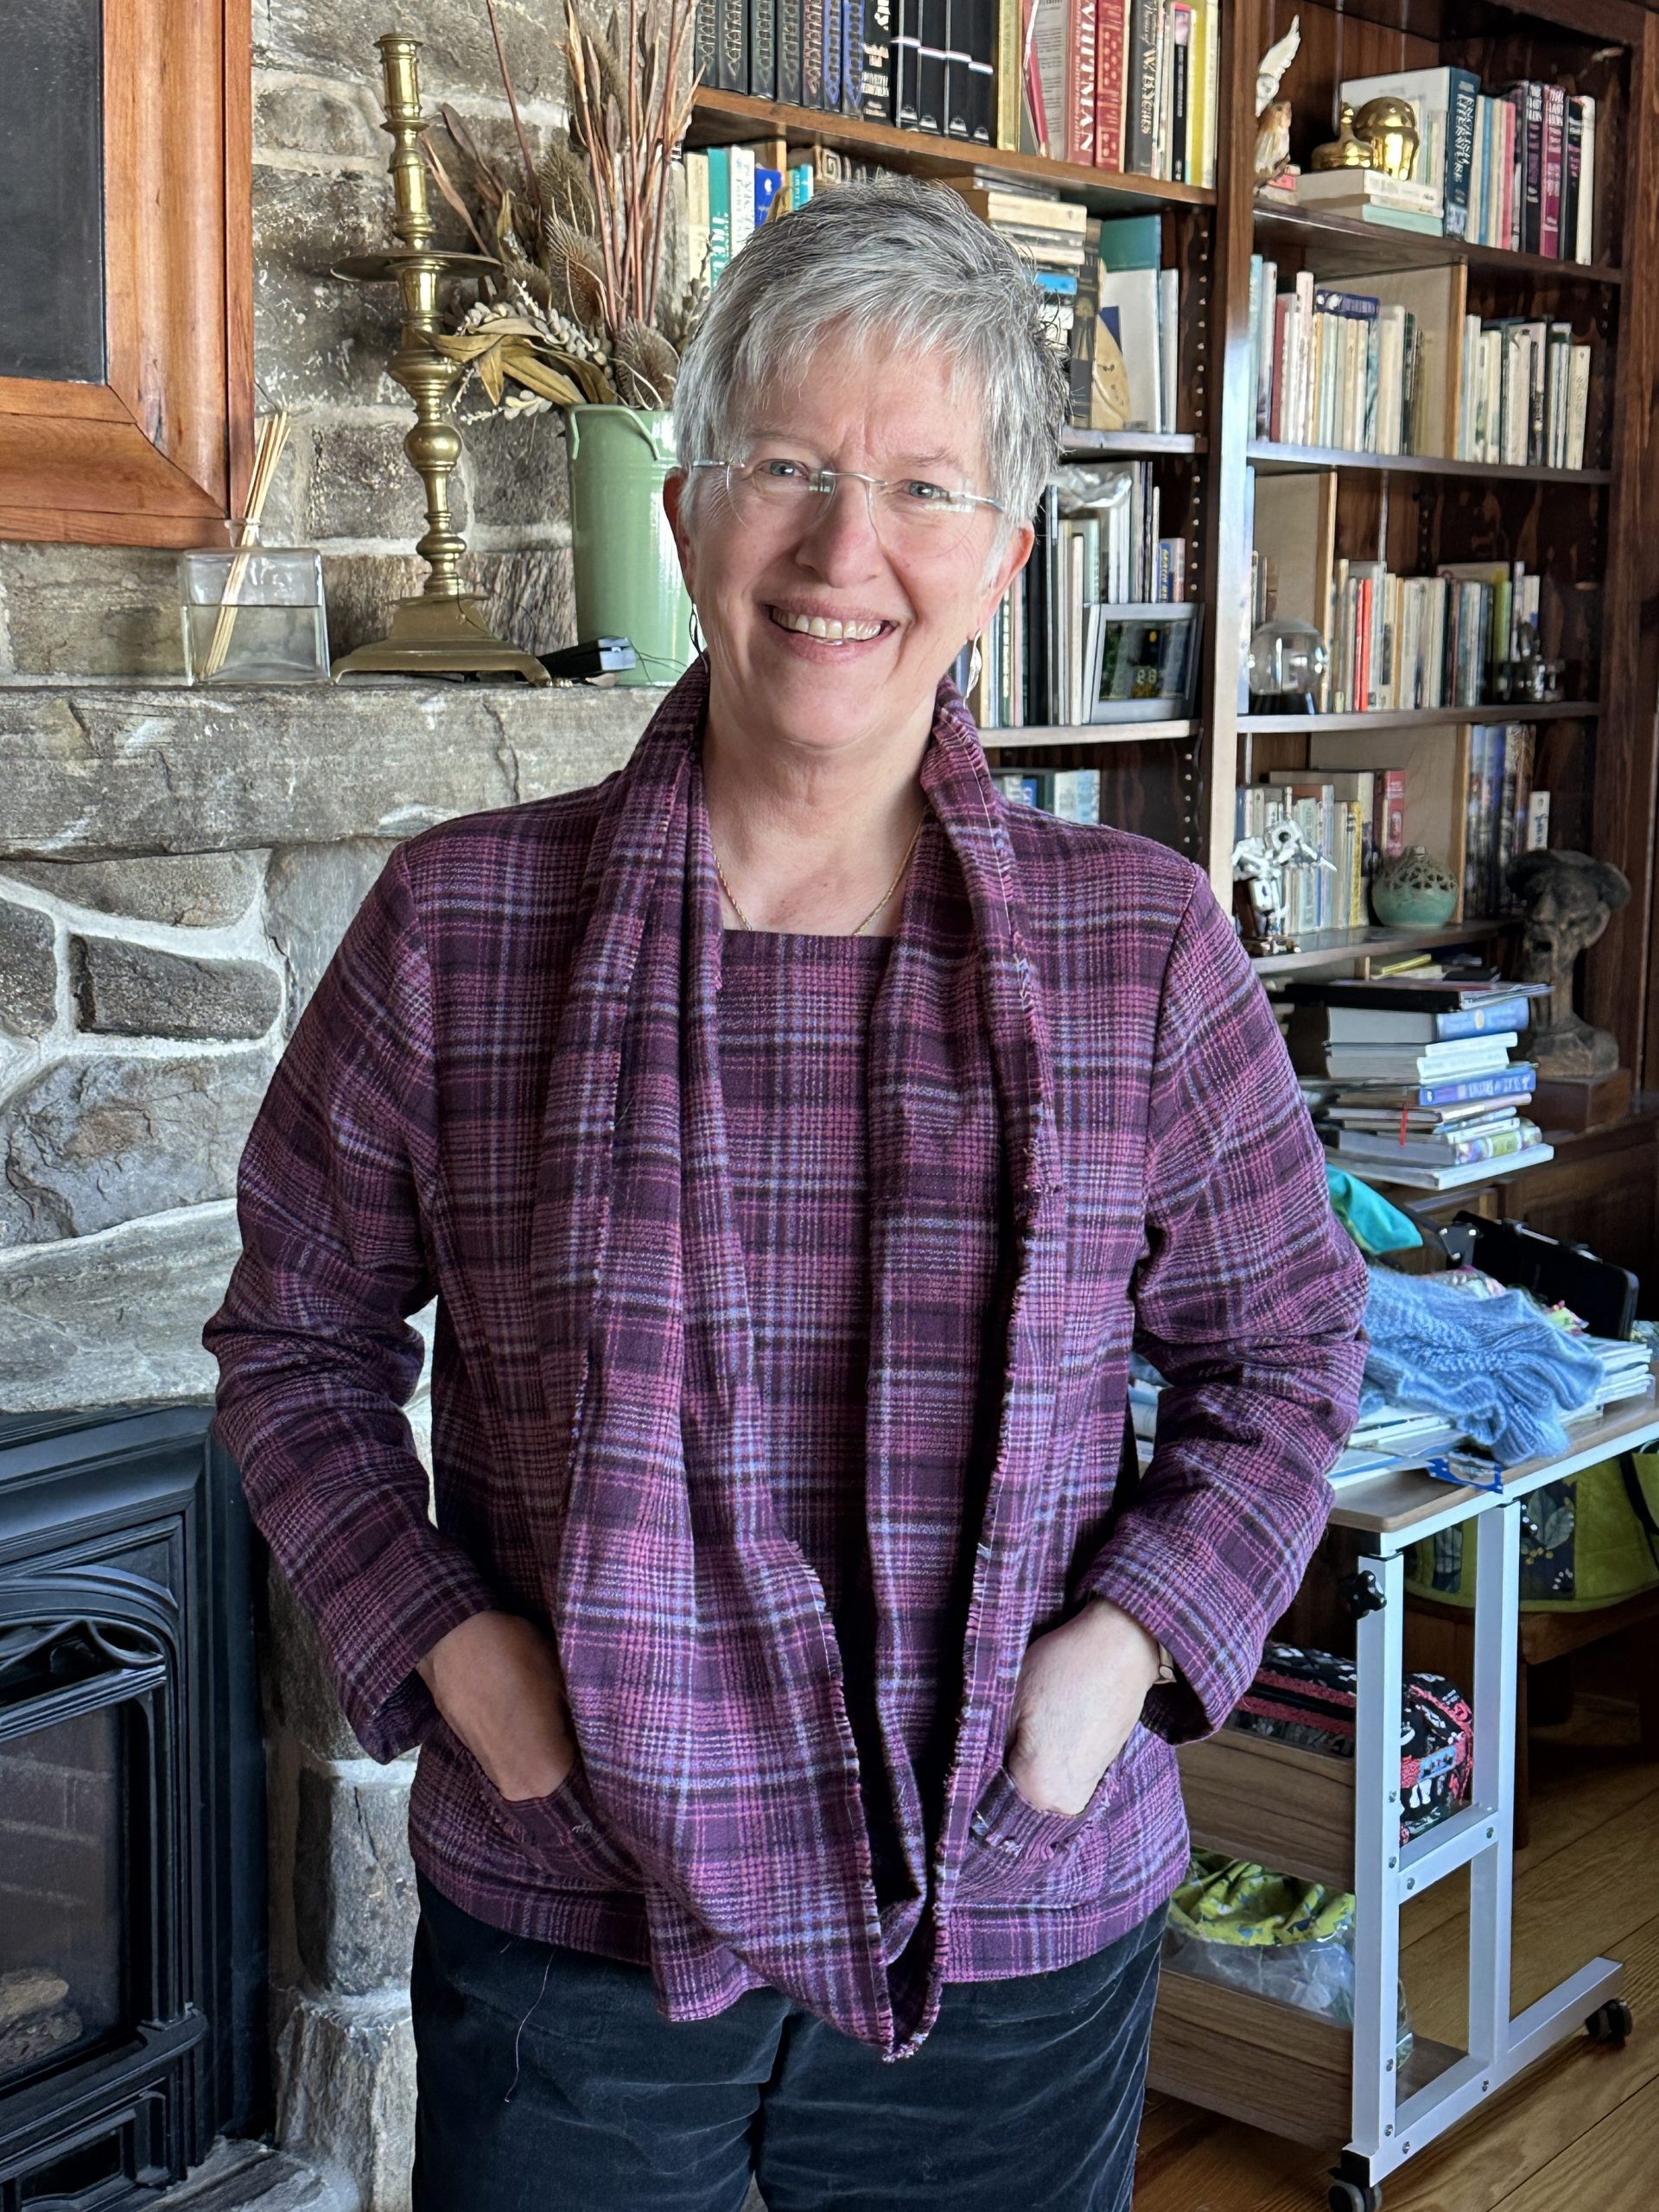
Flannel Plaid top and scarf

I thought it would be fun to teach some basic garment sewing techniques using a simple “T” top in woven fabric as the platform, tossing in a few special lessons along the way. This isn’t a class in how to make a blouse–rather it is a way to teach several techniques that are useful in garment making and home dec across the board.  There will be 9 posts total that will publish on Tuesday and Friday through March 21. As they go live, I will update a list at the bottom of each post that has links to all the other lessons. Today, I’ll cover:

1. What to look for in a pattern
2. Figuring out what fits you by looking in your closet
3. Wearing Ease
4. Pre-shrinking!
and a tease….be sure to look at the photos at the very end!

Future posts will touch on

–alterations including length, shoulders and bust adjustments (full and small)

–Matching plaids when cutting
–fine seam finishes including
     *Overcast
     *French seams
     *Flat-felled and lapped
     *Hong Kong finish–not used on the top but good to know
and a bit on when to use each


–Lined Patch Pockets, getting a smooth curve, presser foot tricks

–a bonus Infinity Scarf and wrap up

Please note:  I am affiliated with Janome as a Janome Artisan and am compensated.  However, my reviews are honest and I would say what I say whether affiliated or not.  I’ve also chosen to be affiliated with Janome since 2003 (!!!) because their machines are so good and they are so responsive to the interests and needs of their customers.  
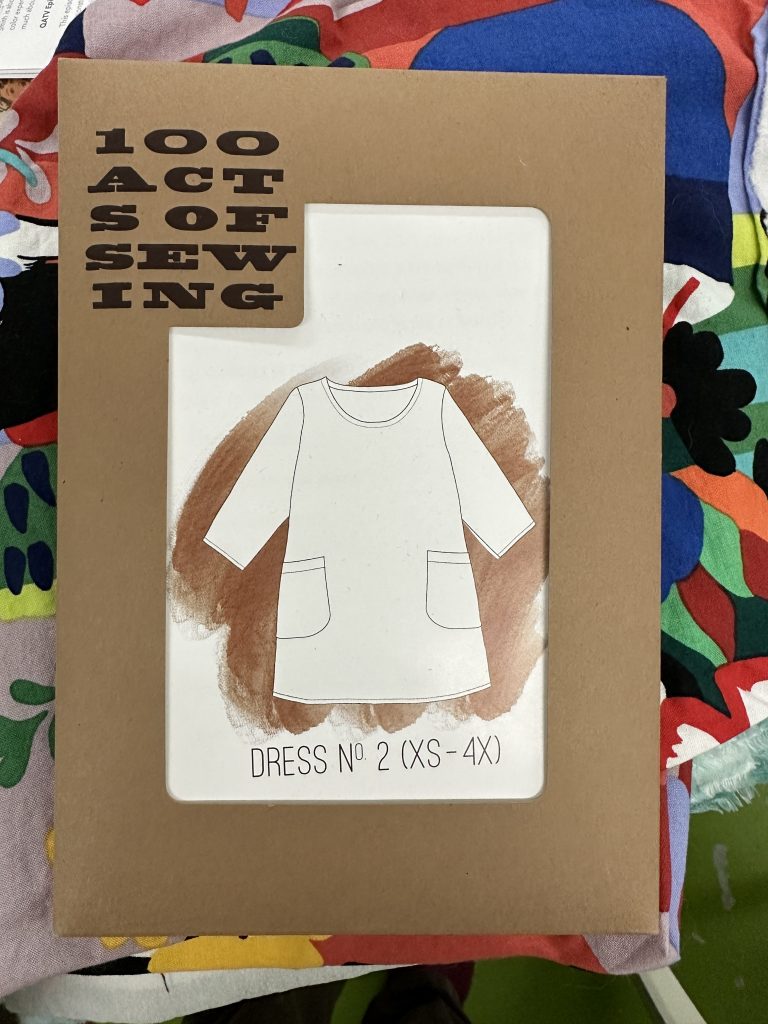
100 Acts of Sewing, Dress No. 2
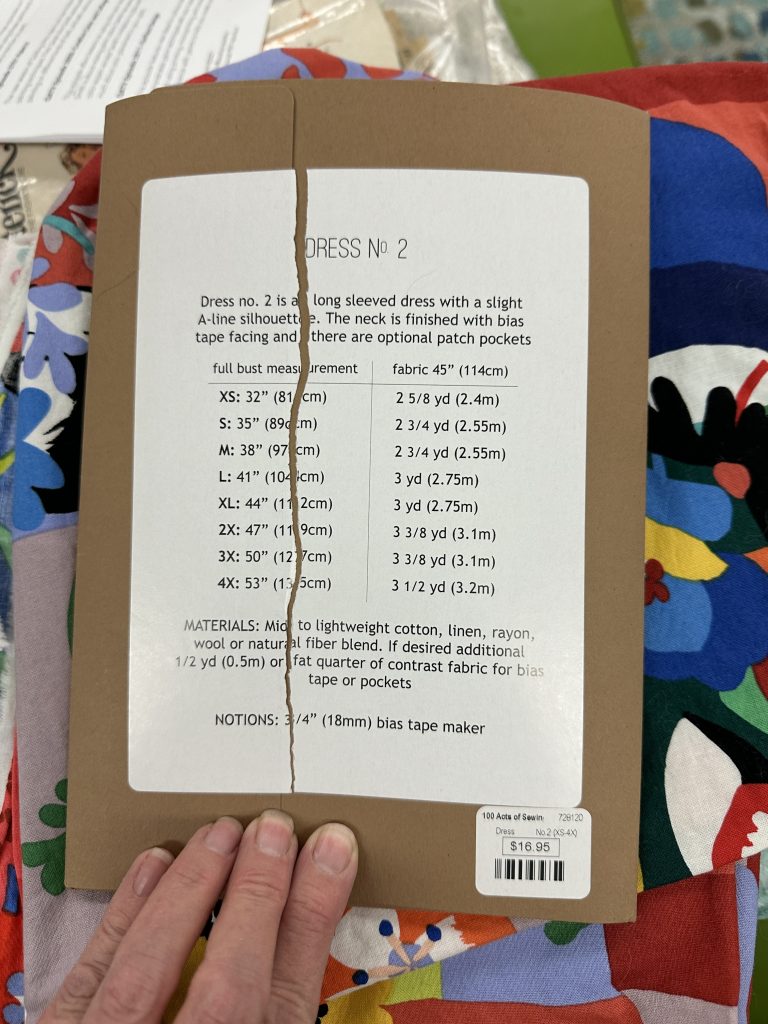
Pattern back

A dear friend loves this very popular pattern and has made it many times. It is a simple “T” shape and is supposed to be geared to beginners with simple shaping and few pieces. By making it shorter, you can have a top or a dress from one pattern, and the size range is good for almost all bodies. Or so it would appear. All I can say is that I am so sorry I cannot recommend it. At ALL. I’ll show you why.
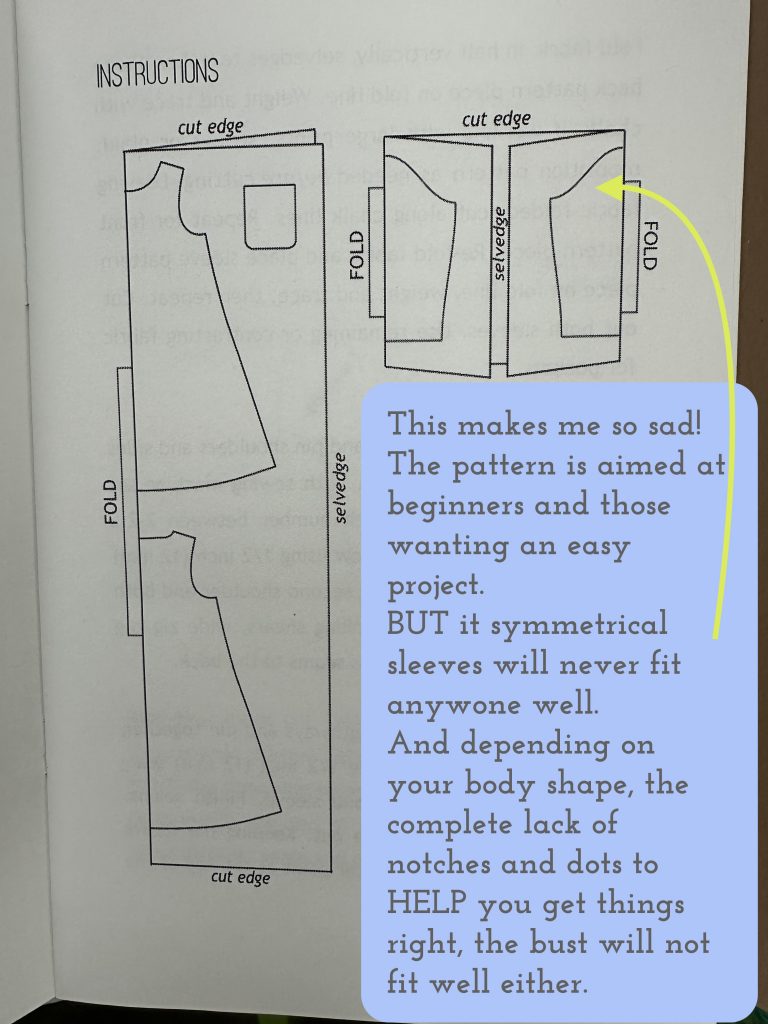
Pattern layout. I knew there was a problem as soon as I saw the sleeves were cut on a fold with no shaping of the sleeve cap. It got worse when I discovered the front and back of the dress are exactly the same shape, with no allowance for a bust, even a small one!

As you can see from the cutting diagram on the left, it has a simple flared silhouette with a front, a back, a pocket and two sleeves. Easy peasy, right? WRONG. Here’s why: Registration marks are found on most patterns–I had thought they were on all but I was mistaken because there are none on this one. You see, notches make it EASIER for you to match what goes where and properly align your pieces. Registration dots do the same thing–there is usually a dot somewhere at the top of the sleeve cap which you align with the shoulder seam to position the sleeve so it will fit the body. Lengthen/shorten lines tell you where to do just that, because after all we aren’t all the same: some folks have long torsos, others are short-waisted, and arms–our arms are all sorts of different proportions. AND, there are NO DARTS. Can you imagine an A-cup and a DD-cup trying to fit into the same tent shape? Yeah. As someone I once heard say, one-size-fits-all means looks good on no one.

I am guessing the reason the designer had for omitting these essential marks was to not intimidate the beginner. Unfortunately, all that will happen is the newbie will make something that doesn’t fit any which way and will think they are the problem, when in fact the pattern is doing them a disservice. Like I said, I really wanted to love this pattern and use it as one that you could buy. Don’t. Please keep reading!
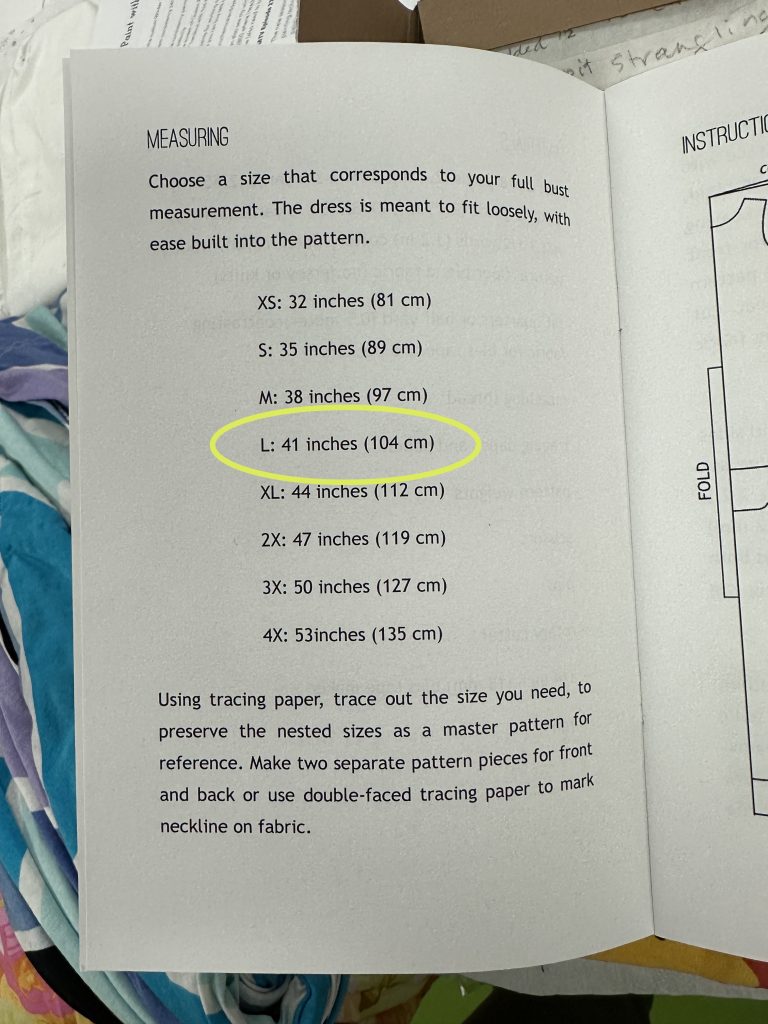
 

Since my bust measures 39″ the Size Medium is too small. I figured with my broad shoulders, the Large, to fit a 41″ bust would be good. WRONG.

You’ll want to measure your full bust, around the widest point of your bust line; wear a snug camisole so that you are measuring your body not bulky clothes as well . Then you want to measure the high bust, which is around the torso above the bust, kind of up under the armpits. If you have a large cup size, you will want to choose a pattern that will fit your shoulders, then do a full bust adjustment. Luckily, many of the independent designers now design for full bust–I have to skip those lines or down-scale the fronts so they don’t look concave and sag on me. The major companies tend to design for a B-cup, but some have started offering patterns for various cup sizes–smart!

Make a drawing! + photo of measuring a blouse

Then there are sizes. In this pattern, I opted for size Large since my bust measures 39″ and I have broad shoulders. The Medium would have been too small. a Many patterns from the traditional Big-4 companies, Simplicity, McCall’s, Butterick and Vogue, are based on sizes that DO NOT correspond to off the shelf. I am usually two sizes larger in one of these patterns than in ready to wear. Not to mention that my ready to wear, depending on the company, ranges in size from Small to Extra Large. I’m not exaggerating…we all know sizes are all over the place.

The key is to measure yourself AND measure a garment you have that fits you comfortably and looks good. Then compare those measurements to the information on the pattern. You can usually find two measurements: the size of the body and the size of the finished garment. The difference is wearing ease (see below). 
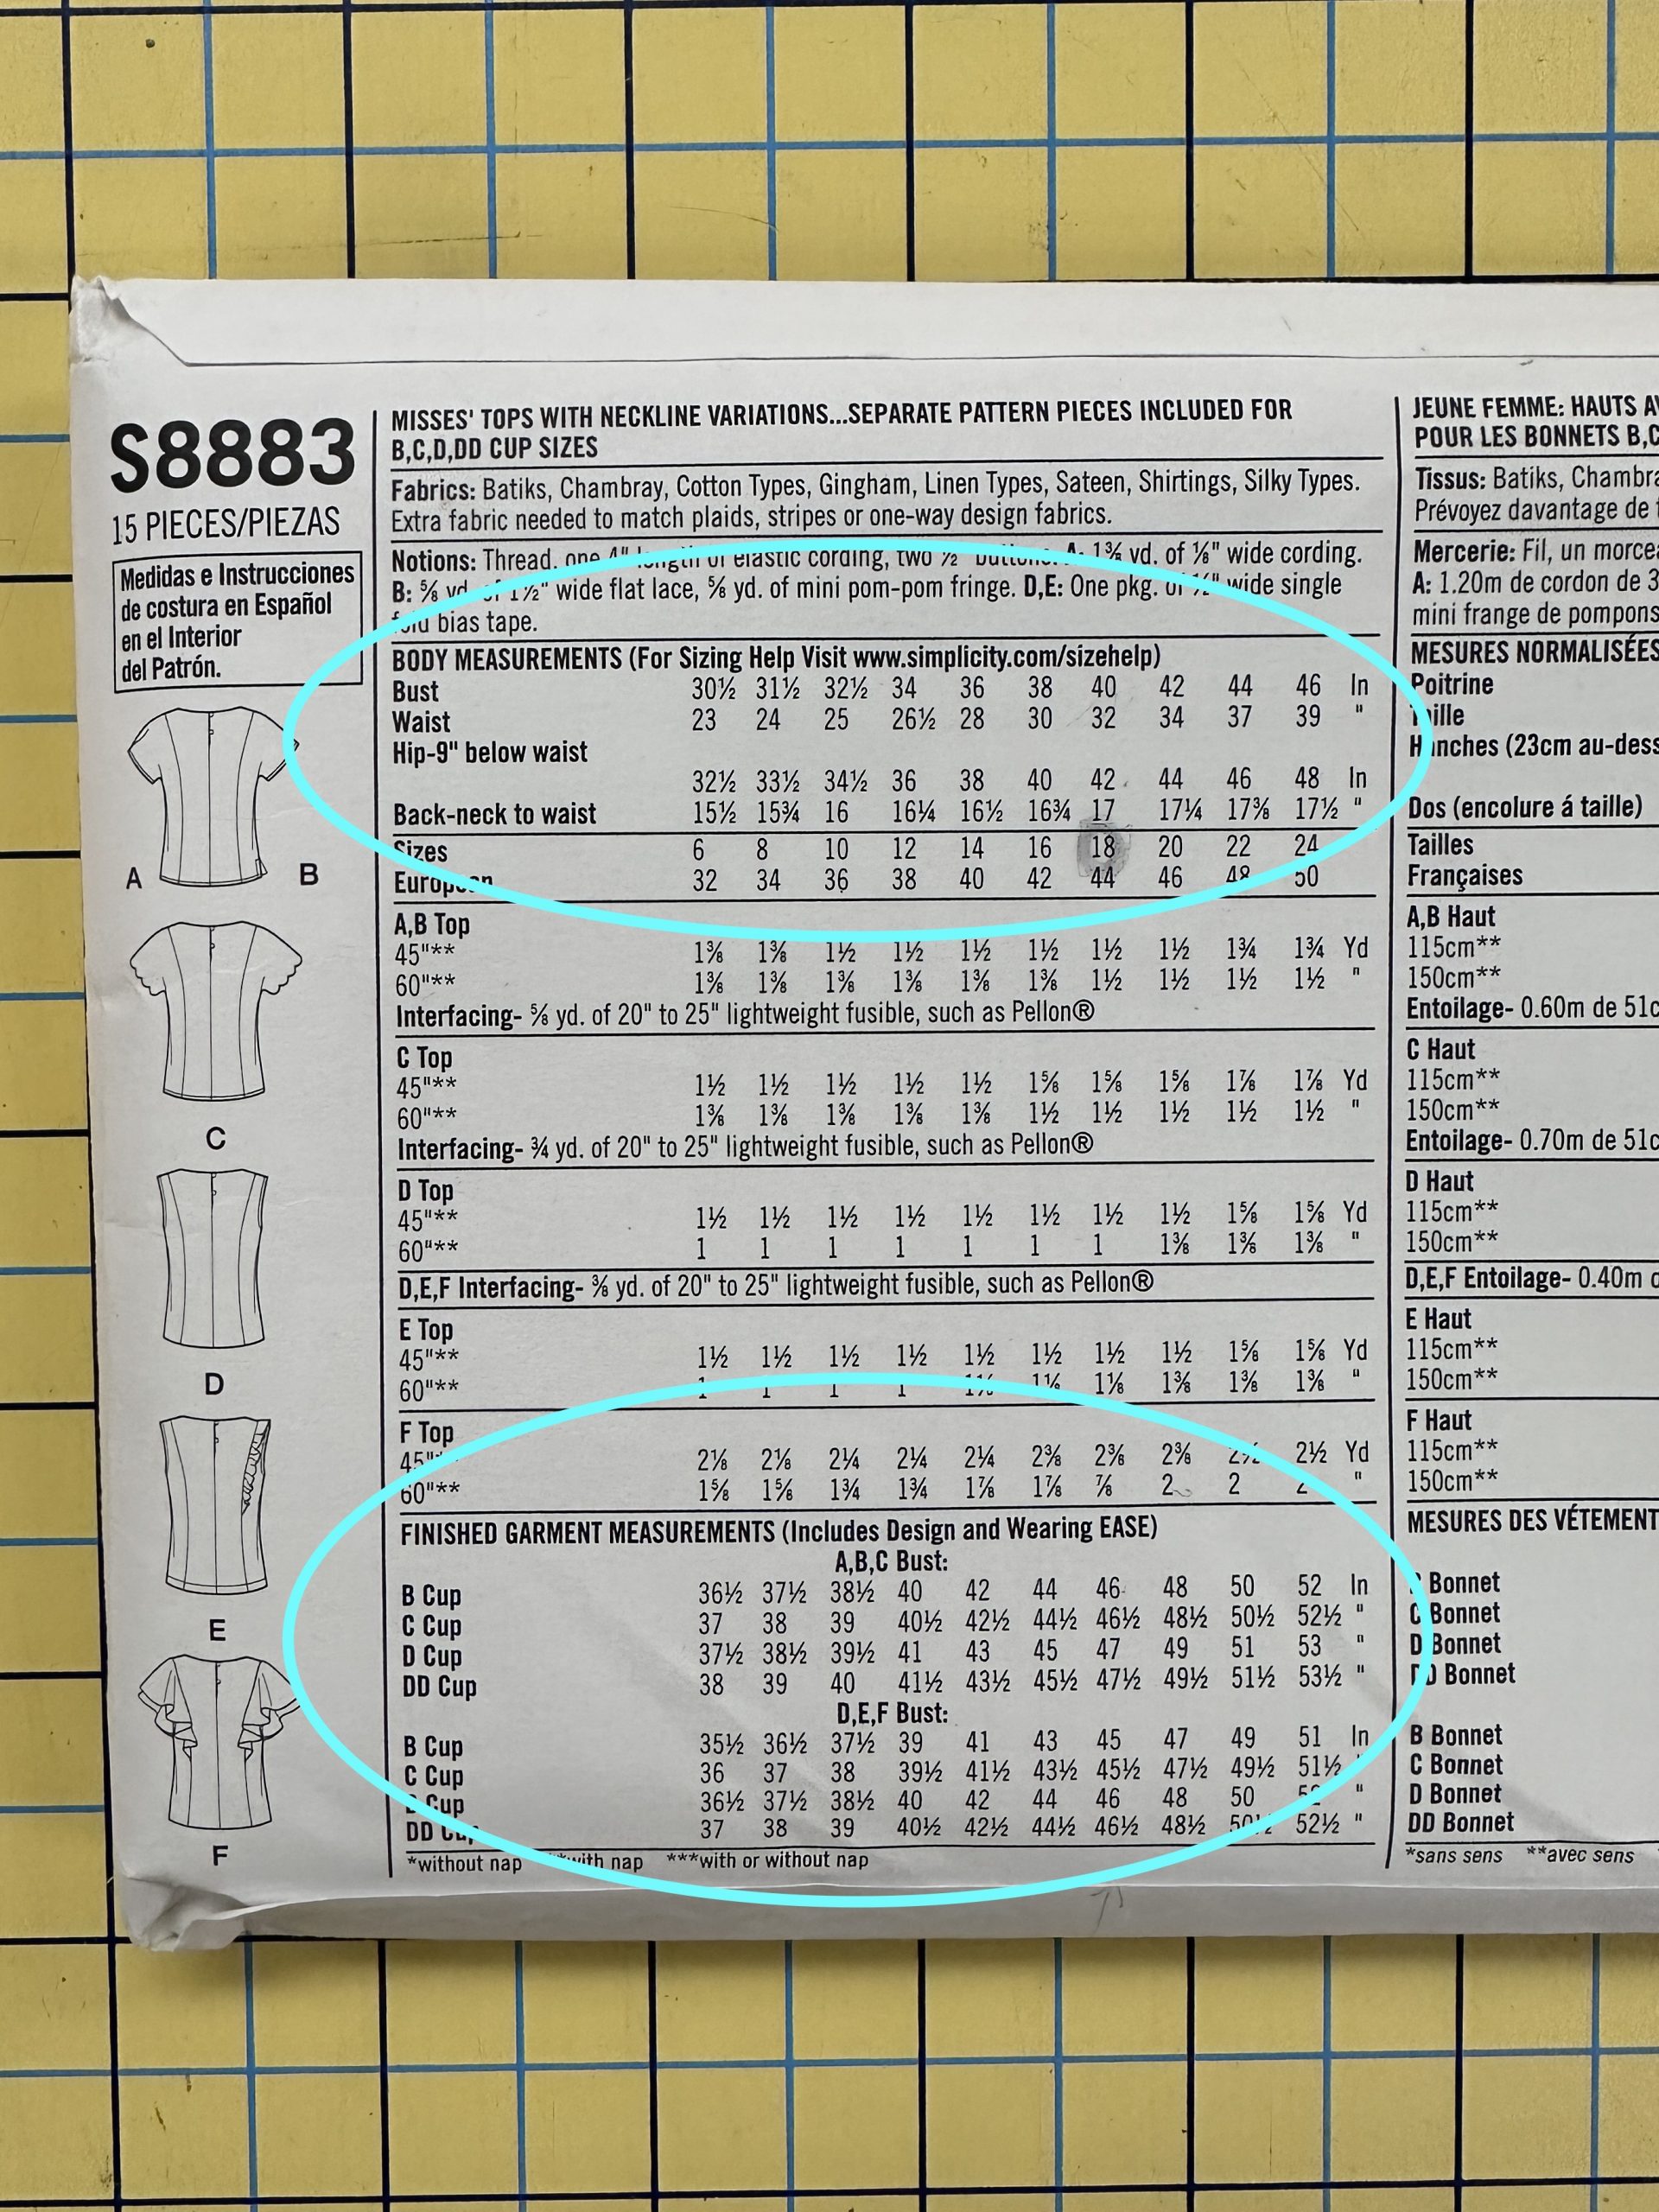
This is the back of Simplicity S8883. I was elated to discover it had cutting lines for various cup sizes. I still had to decrease to an A cup, but with the various cutting lines it was easy to see what I needed to alter. It shows, for a 40″ bust, a B Cup top would measure 46″, which is fairly roomy.
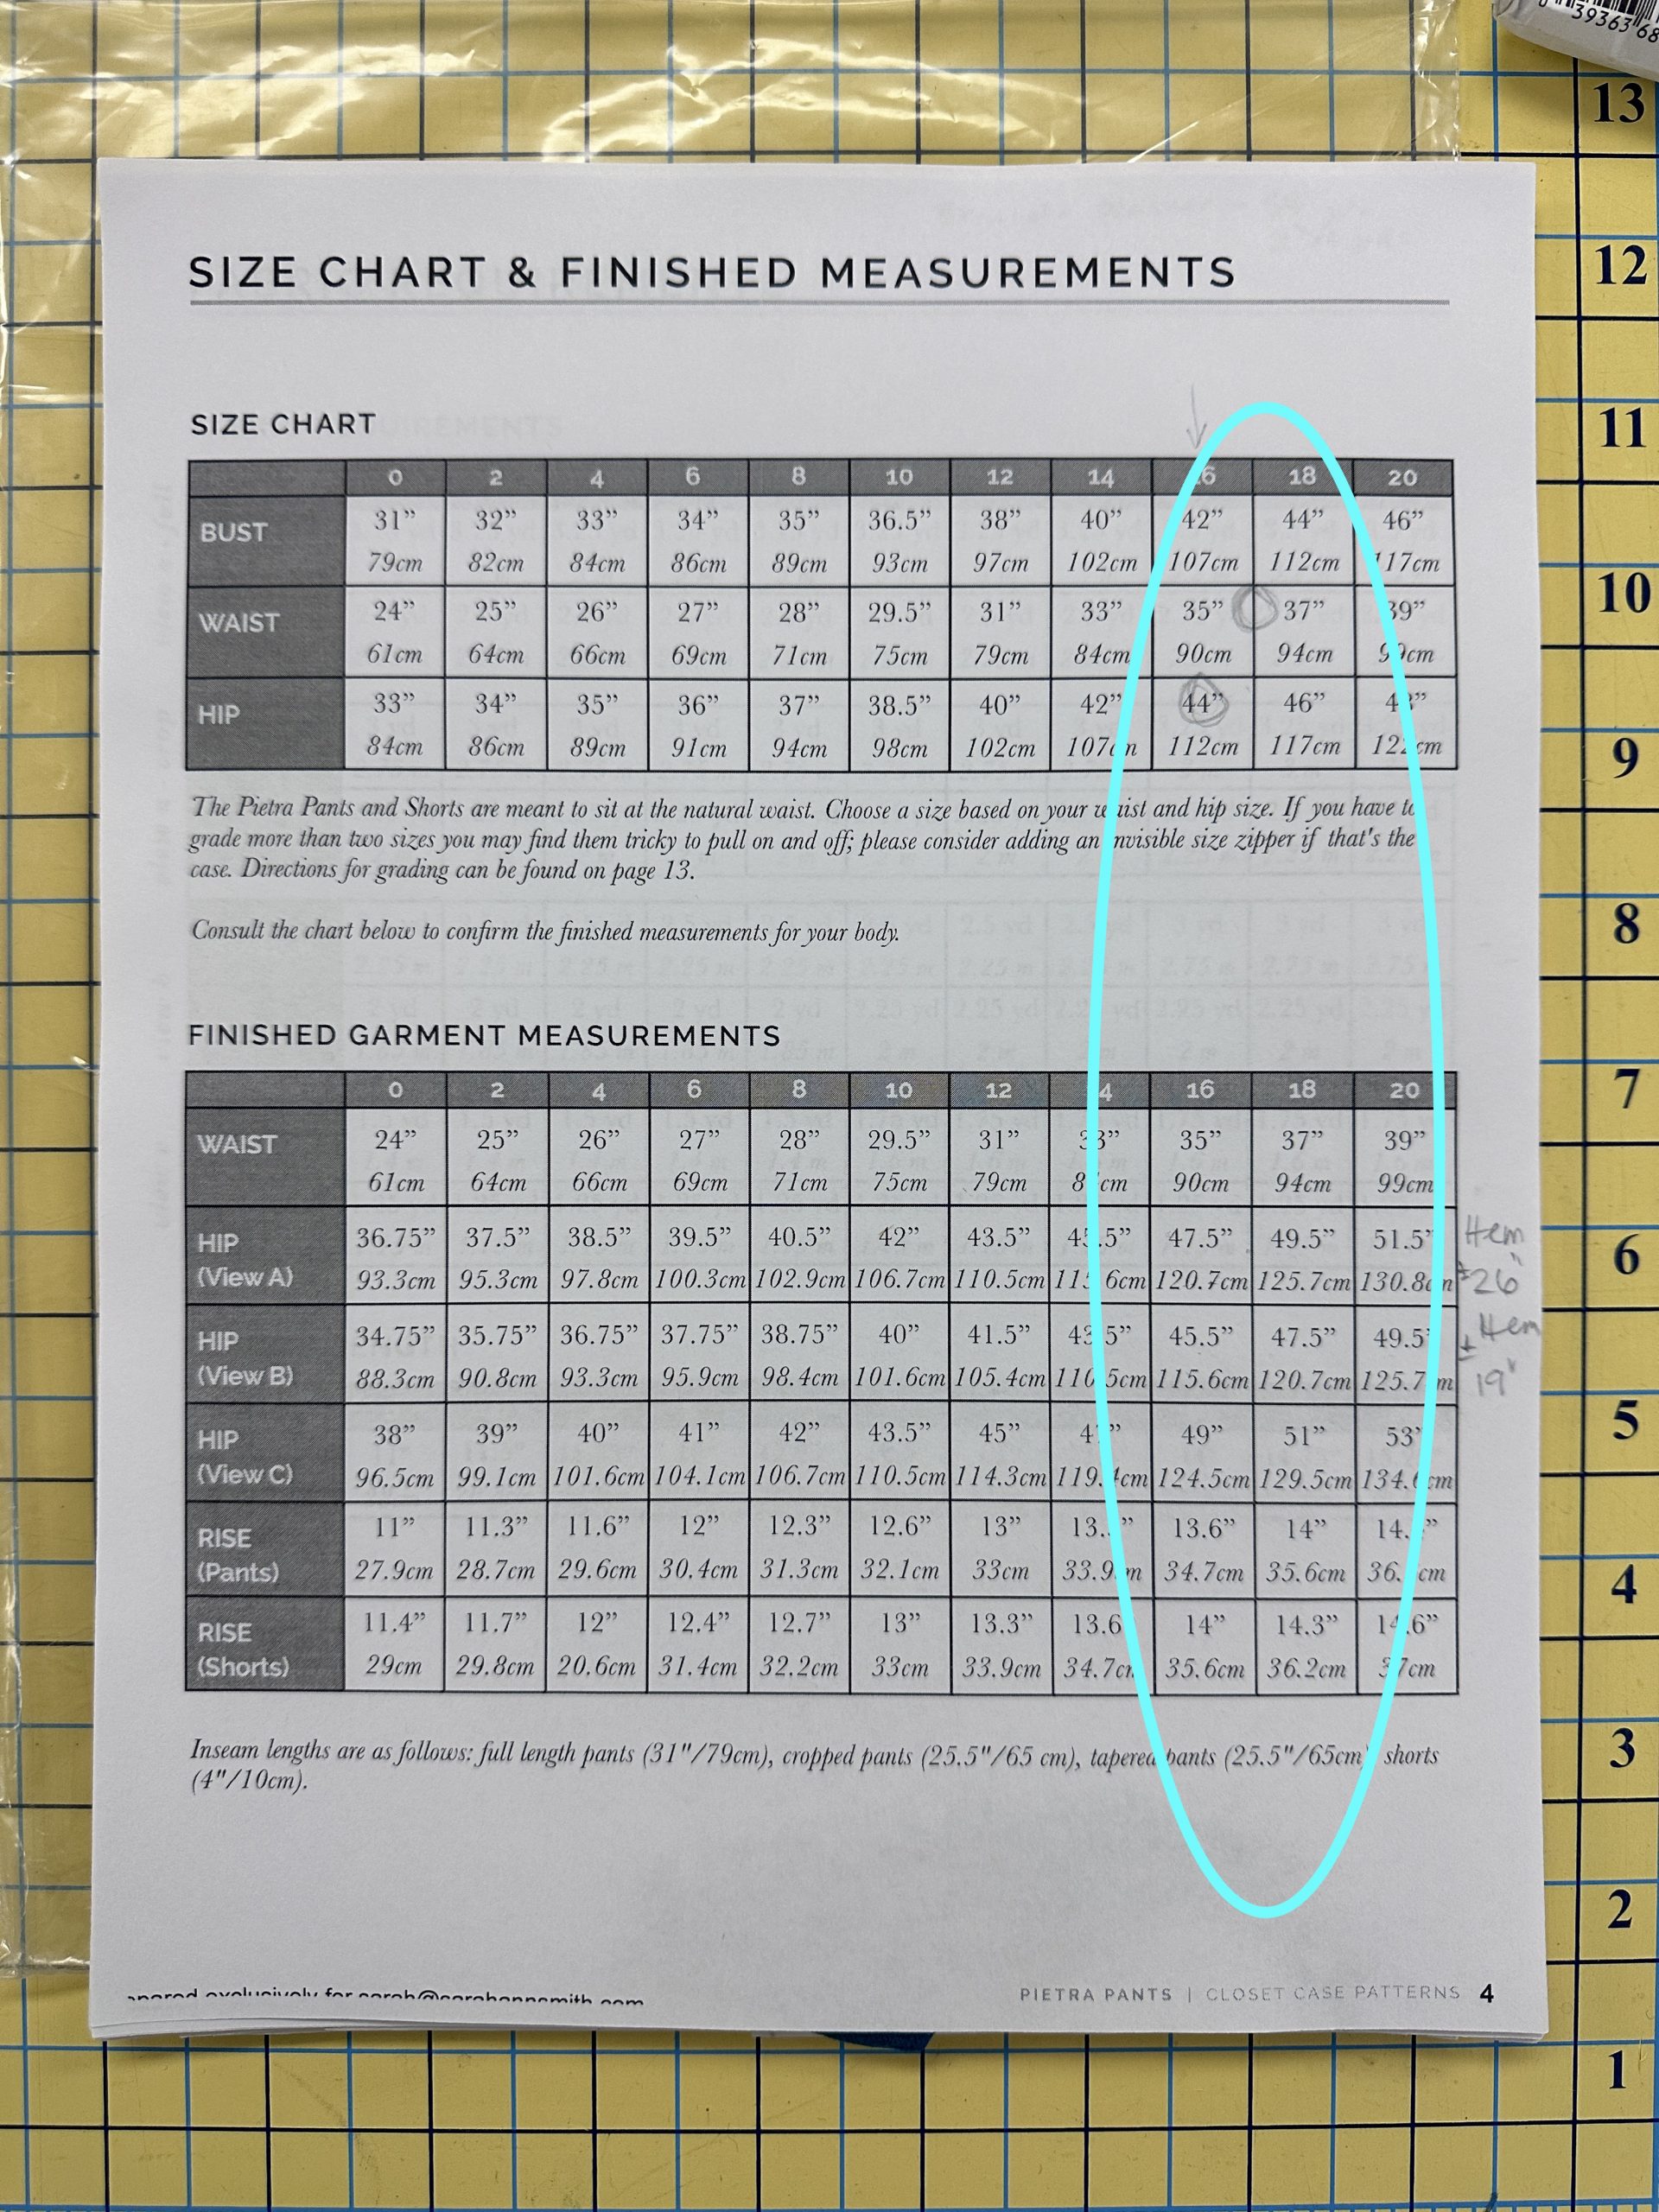
The Pietra Pants pattern is an Indy pattern design, and as with many of them, comes with lots of detailed information. I am between a size 16 and 18.  All that ice cream has made my waist a bit bigger.  It is also WONDERFUL that it includes the rise–the measurement of the crotch seam from front to back.  No more camel toe (those pants that pull and and cut into you in a very unattractive way)!  It also reveals the difference in wearing ease in the 3 views of the pants/shorts.  This helps you compare to something you have that fits (or doesn’t), so you can adjust accordingly.

Then, measure across a blouse (make sure you compare like items, so if you are making something with woven cloth, measure a garment with woven, not knit, fabric) at the bust line. That will have anywhere from zero to 4 or more inches extra. This is called wearing ease. Some of us like very fitted, body skimming clothes, while others (like me) prefer things a bit looser or even very loose. Fitted garments tend to have 0-2″ ease, while semi-fitted are 2-4″, and roomy is even larger. If you have a flowy top that measures 52″ over a 44″ full bust, that is 8 full inches difference. Knowing that amount of easy will help you choose a pattern that will you give you the results you want! There is also something called negative ease, found in knit garments.  If you want a form-fitting garment, it will be cut 0-2 inches smaller than the finished size, then the stretch in the fabric will make it fit you snugly and show off your beautiful curves.  

Pre-shrinking fabric: This is always a debate among quilters, but for garments there is no question. If you intend to wash or clean your garment, you MUST pre-shrink! Don’t do all that work, finish the garment, love it, then have it turn one or two sizes too small after you clean it. Even woolens that will be dry cleaned need a bit of a steam press! Since most of us wear things we wash and dry (hang dry or in the dryer) at home, treat the fabric you have purchased the way you will the finished garment. If working with tricky fabrics like rayon or silk, do some self–education on the internet about how to handle them. For now I’m going to talk only about this cotton flannel top.

I’ll explain the what and why in my next post, but for now, just LOOK at this! The Dress No. 2 was made for a 41″ bust. There is indeed enough room for a bust larger than my 39″, but the shoulders were TWO FULL INCHES TOO NARROW!
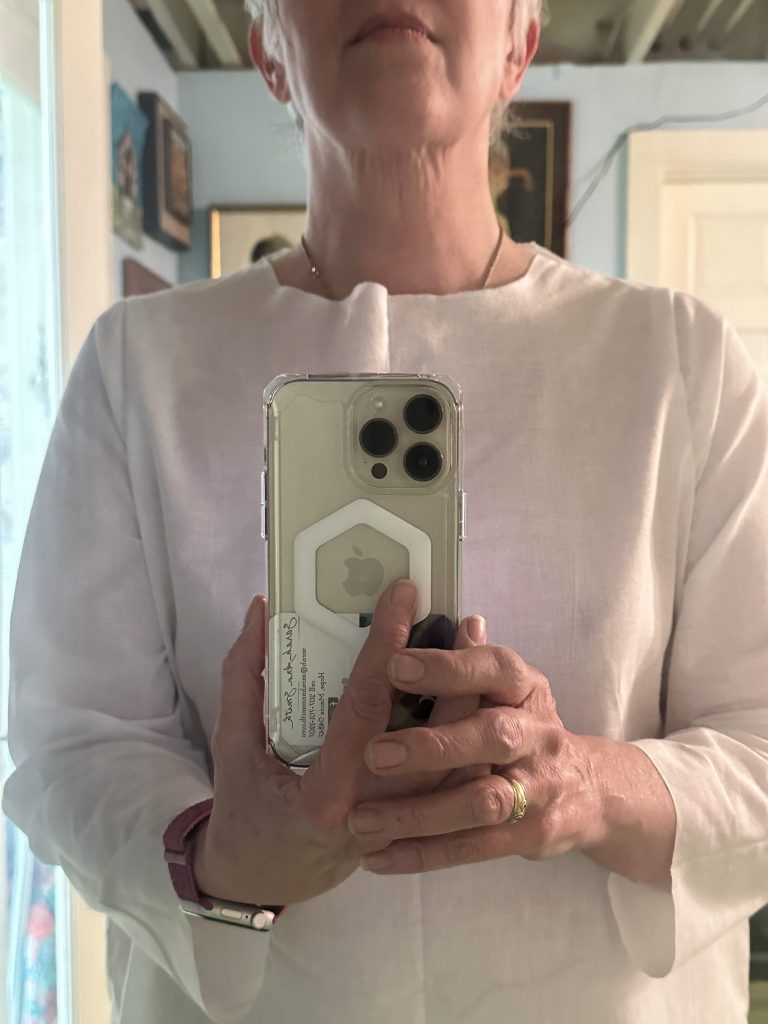
The muslin doesn’t fit any which way. And those sleeves are supposed to be LONG sleeves. On whom? They stop 2 inches above my wrists, and that is unhemmed!

Remember what I said about size, and picking Large for this top. Thankfully I made a muslin, above–
Above, the top as made per the pattern in a practice muslin to gauge the fit; I used super-cheap white cotton whose purchase price was, I think, $1 a yard which tells you how cheap it is. The shoulder seams are WAY in from the actual shoulder point, causing the shirt to pull up and strangle my armpits (yes, I DO have broad shoulders but this is crazy), which then causes the center front to ripple, not to mention feels uncomfortable. The way to figure out what needs to be done is to slice open where it is too tight. I marked the spots with a pen, took off the muslin, sliced, and put it back on. The next photo shows a gap of just one an INCH on just one shoulder!

If I had measured the pattern piece before I started cutting (smacking self upside the head) and compared it to an existing top that fits, I would have realized the problem and been able to take remedial action. But no matter what, doing a practice muslin saves money and effort in the long run. More in the next post on how I fixed it.
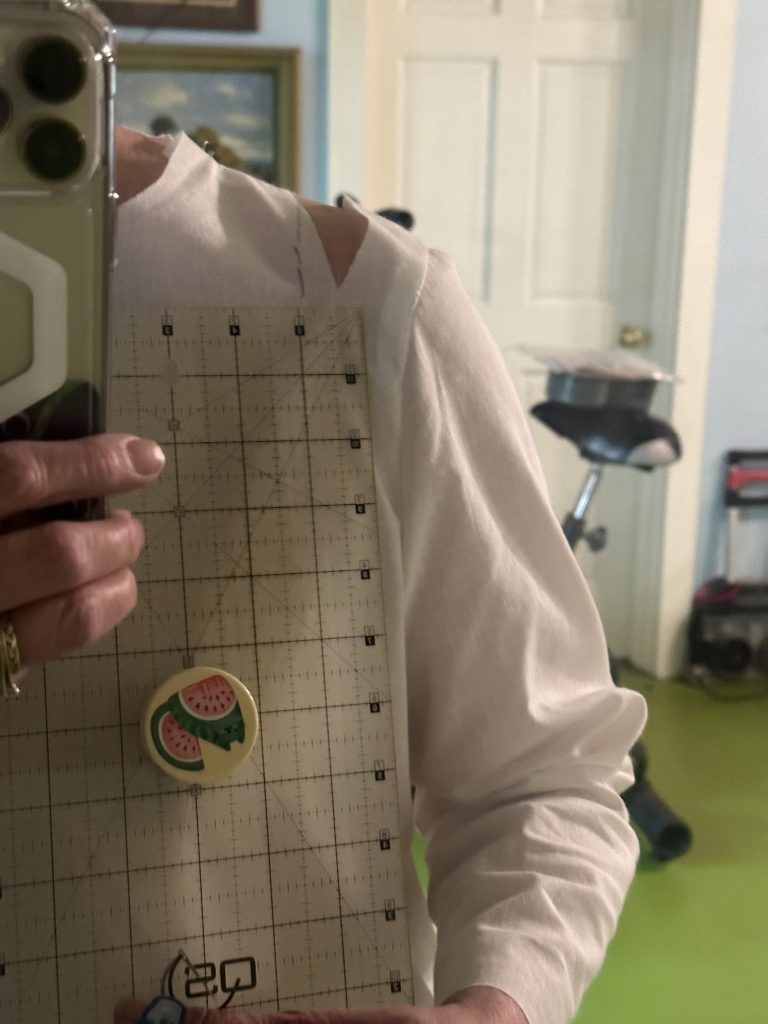
By slicing the too-tight top, I can see how much needs to be added to the pattern.  And how did I learn to make these miraculous adjustments?  …read the next paragraph! 

I will share fitting in the next post (on Tuesday, February 21, 2023), but they key is this:  In late 2021, I signed up for a fabulous set of 12 monthly lessons from Philippa Naylor, who is known for her prize winning quilts with immaculate construction and her wardrobe.  With significant experience working in professional garment making and patterning, she offers Garment Makers Question Time (GMQT) an online workshop with new lessons that build upon the previous ones.  The value for price, $15 a month, is simply phenomenal–I’m not affiliated in any way other than being a very pleased student.  Participants range from people who have never made a single garment to some of us who have been sewing for 50 years.  The amazing thing is that we are ALL happy and learning.  In my series of lessons here, I am sharing things I have learned over the years, not replicating what she has taught.  But I can heartily recommend GMQT–if you want to make garments that fit and are well made, this is the workshop that finally helped the alteration process click for me.  One key is to get someone (pay someone who does alterations if need be) to measure your body accurately–that’s what I did at a local fabric shop that has a teacher who gives semi-private lessons.  Again, that is Garment Makers Question Time.  Truly, I can’t say enough good things about the whole series! Look for more garments this year once my travel teaching is done!

Here are the links to all the posts in this series of lessons, techniques that can be applied to virtually any garment and many home dec projects.   Let me know what you’d like to learn and see here on the blog.  Cheers and thanks, Sarah

Lesson 1:   Choosing a Pattern and Starting Tips

Lesson 2:   Making a Muslin, Fitting and Sleeves

Lesson 3:   Matching Plaids, Cutting out Your Garment Pieces

Lesson 4:  Overcast Seams, just like Serged Seams

Lesson 5:   French Seams

Lesson 6:  Lapped and Flat-felled Seams

Lesson 7:  Hong Kong Finish for Seams

Lesson 8:  Lined Patch Pocket Tutorial
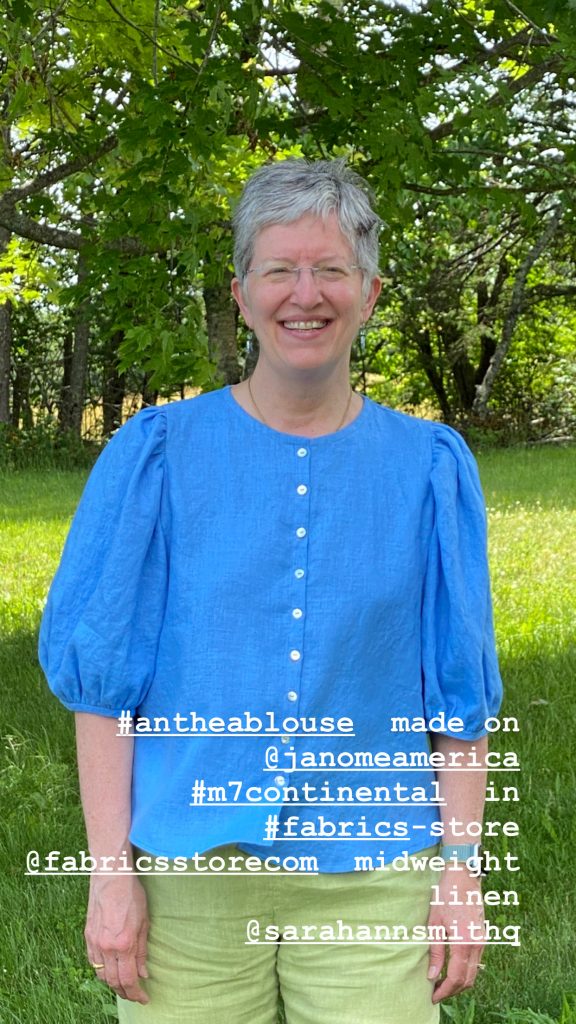
Lesson 9:  Hems and Scarf


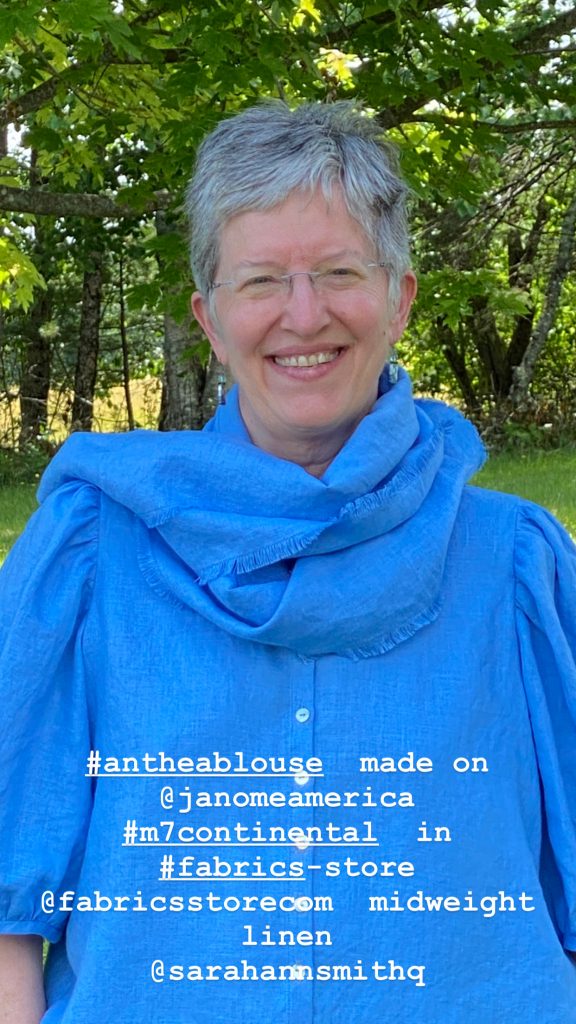
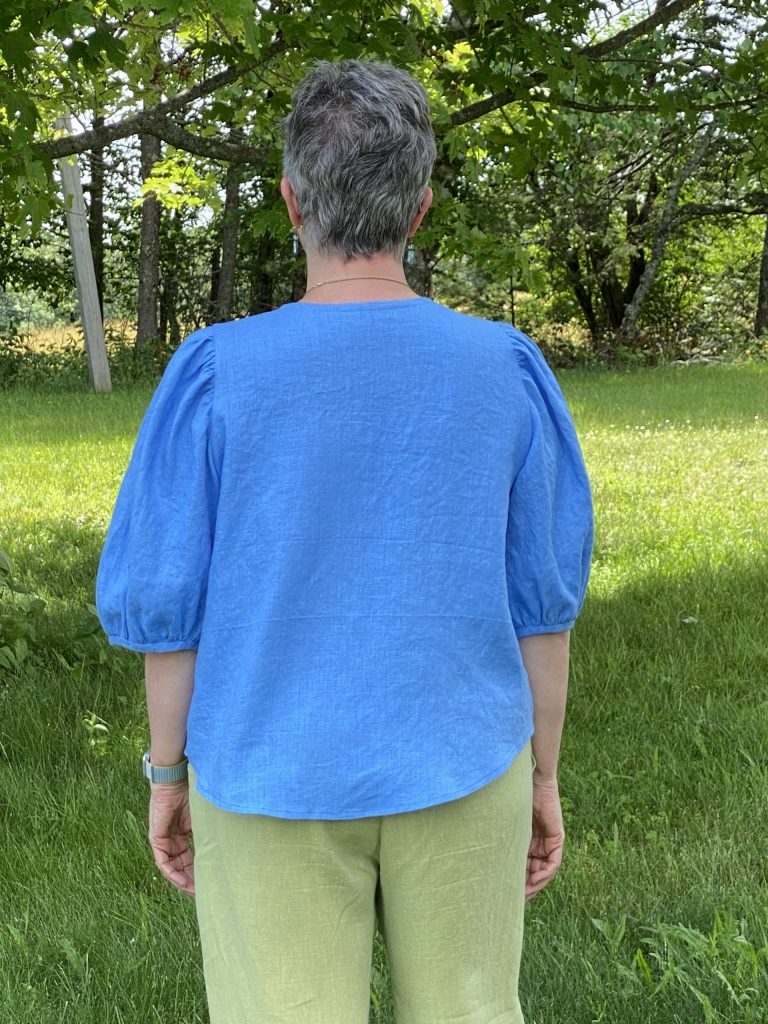
Anthea Blouse in Sky Blue Linen

Thursday, October 6th, 2022

While visiting my favorite local shop, Fiddlehead Artisan Supply, one of the young women working there had on her version of this blouse. Asked the pattern name–Anthea by Anna Allen–went home and ordered it! The colors I’m wearing are Maine Summer and it is so flattering to many body types and comfortable.
Today’s blogpost takes you through making an entire blouse, which presser feet I use on my Janome (I’m a brand ambassador and compensated, but I’d say all this good stuff anyway…they rock!) m7Continental, why and offer tips and tricks for garment construction. Pretty much all Janome machines have or have available these presser feet with the possible exception of the automatic buttonhole, which many but not all of the Janome models have. Comment and let me know what more you’d like to know and what you’d like me to feature on the blog! I’m scaling back travel teaching and hope to have more time for this sort of thing.
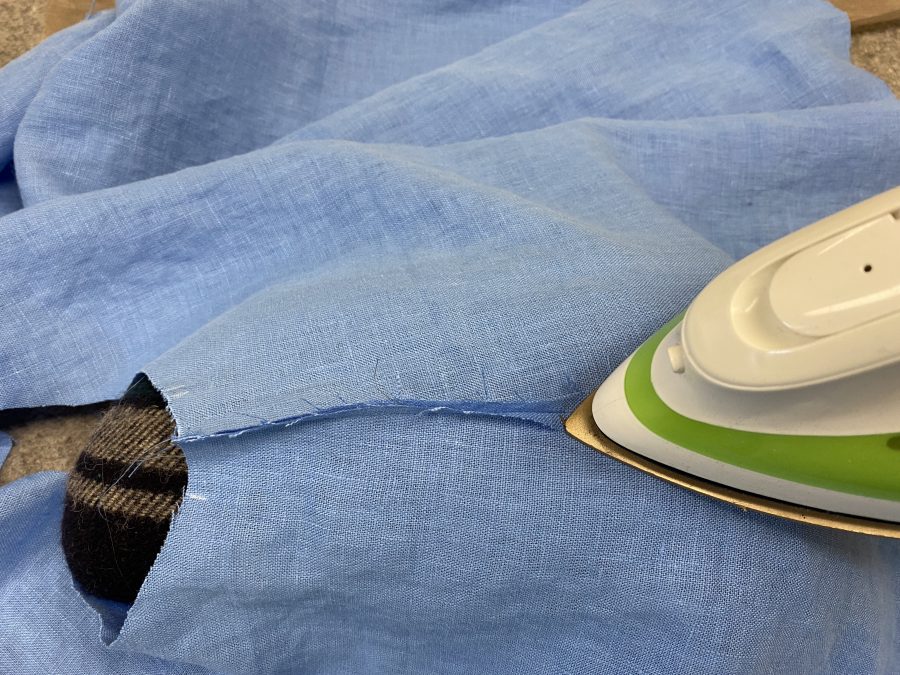
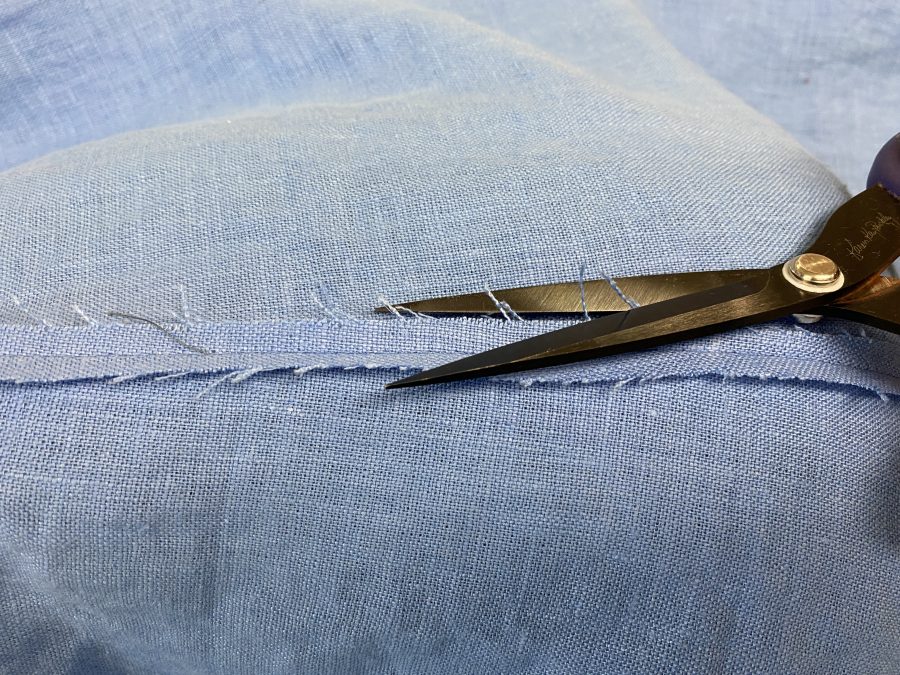
The first thing to do is sew your side and shoulder seams. I opted for French seams for a clean, no-fraying finish. With a 5/8″ seam allowance, I sewed with the WRONG sides together at 3/8.” First press the seam as stitched (flat), then trim to a scant 1/4″ and press the seam allowance open.
Be sure to trim off the whiskers–you won’t be able to coax them inside the enclosing seam and trimming them later.is a headache.
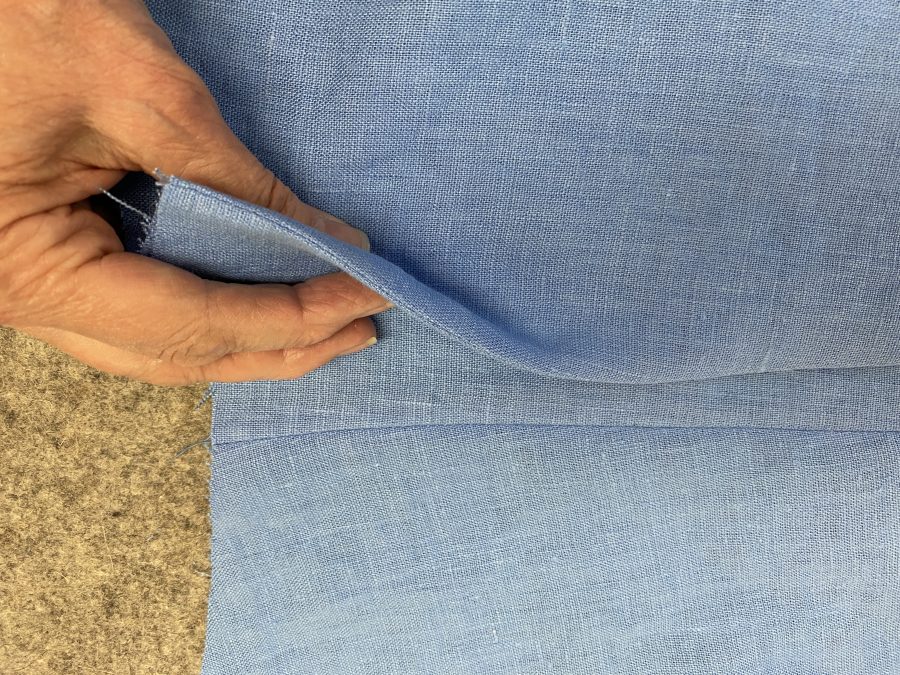
This shows me holding the fabric with right sides together; the fabric is folded EXACTLY on the first line of stitching. You then sew 1/4″ away to enclose all the raw edges.
Sew the second part of the French Seam at 1/4″. If you’ve trimmed any stray threads/whiskers, you’ll have a beautiful clean seam. Press to one side (for my blouse I pressed to the back). Notice that the edge of the fabric/seam is on the 3/8″ line but the needle is moved right of center to be at the 1/4″ seamline.
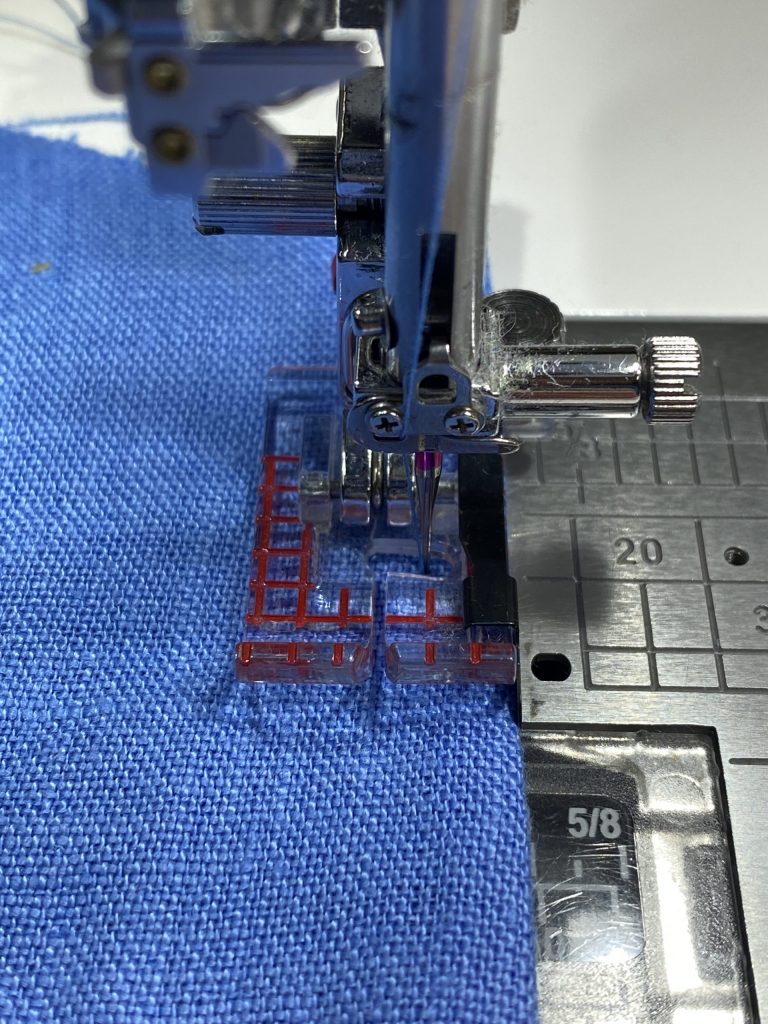
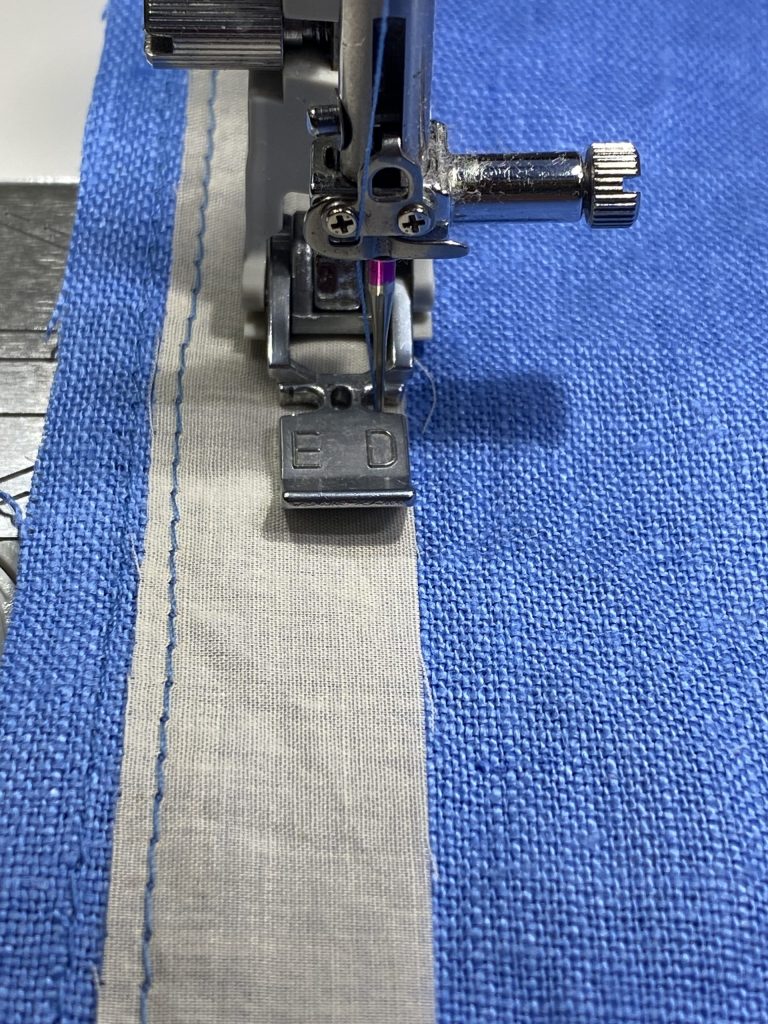
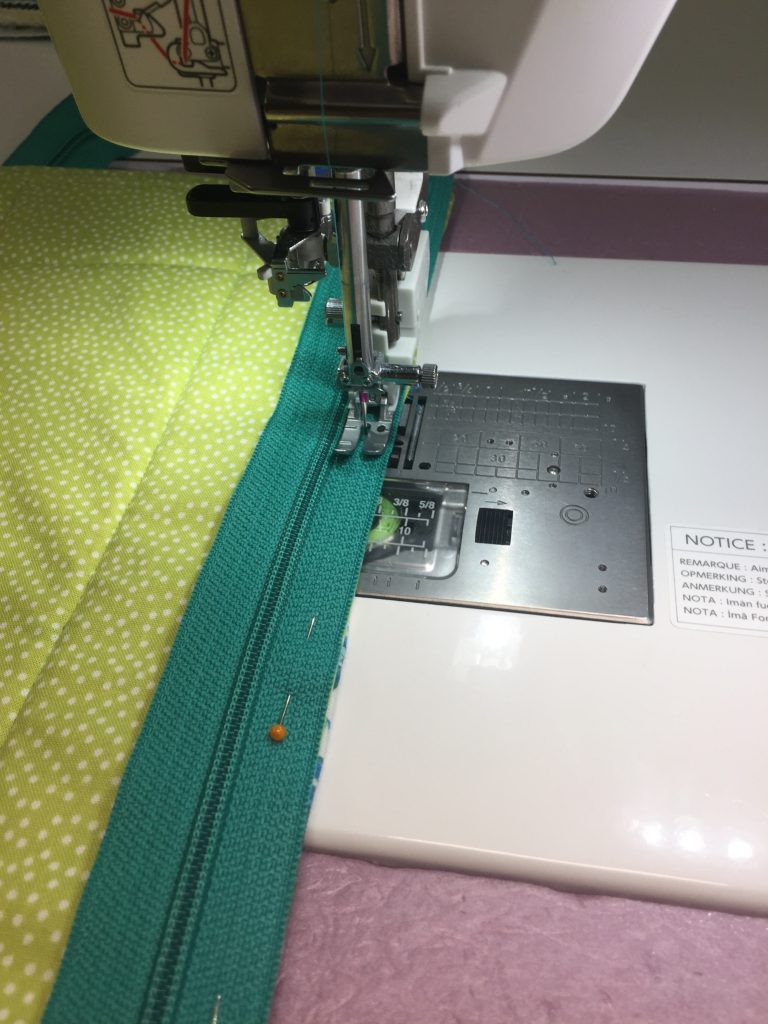
Next, I am stabilizing the button band by using cotton voile (preshrunk) as my interfacing. Unlike the polyesters or fusible we are used to using, it provides strength without bulk and retains a soft, fluid hand to the garment. I sewed the edges in place (so the strip won’t wiggle and wad up during use). The zipper foot is one of my favorite ways to get a perfect, consistent edge: set the side of the foot on the edge of the interfacing and move the needle toward the center. Be sure it won’t hit the foot but also doesn’t ride on the very outer edge of the interfacing and chew it up. ON the left you can see stay stitching.
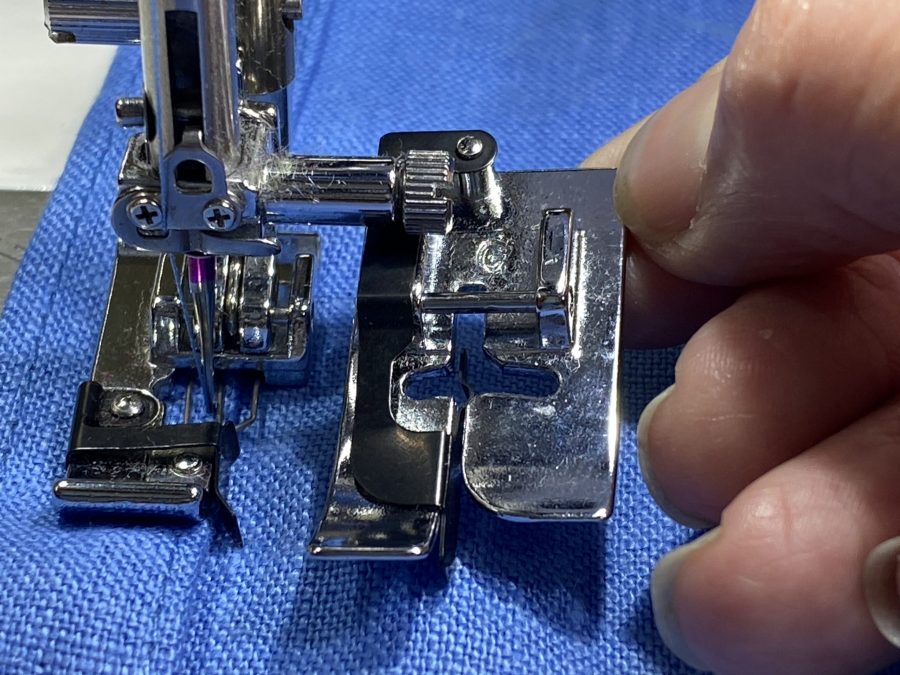
I’ve folded the cut-on button band to the inside and am now stitching it to the front. When I have a “lip” or folded edge and want to edge stitch, I use either the edge stitching foot (on the right, which I think of as the Ice Skate with the metal guide in the center) or the over cast foot (on the left, in use). Using a straight stitch, place the foot so the blade is snug against the fold and move the needle to make a nice, narrow topstitch. Be sure the needle won’t hit the wires in the presser foot by hand-walking the needle for one or two stitches.
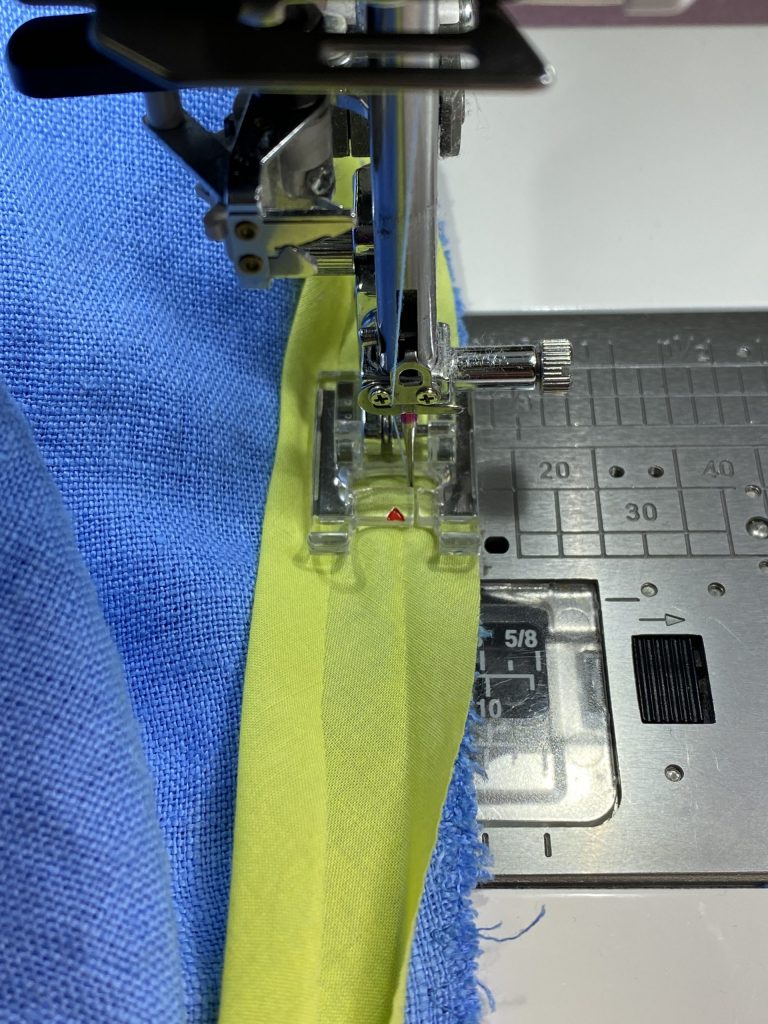
Next up: applying a bias binding to enclose the seam and act as a facing on the neckline. Here I’m using what may be my favorite presser foot, the F2 appliqué foot. The wide open toes and clear visibility help me sew more carefully and precisely. This photo applies to both facing the neckline and covering the edges of the set-in sleeve seam.
Buying a GOOD quality tailor’s ham and base to hold it has been one of the best, most useful purchases of the year. After 50 years of using my mother’s horrid old ham, I’m ready to sew! Here I’m pressing the bias in place on the neckline. You can see the narrow French seam on the shoulder in the center of the photo. As I press, I am easing the bias so that it lays nice and flat. I used my seam gauge to make sure the depth is even, then edge-stitch all the way around the neck.
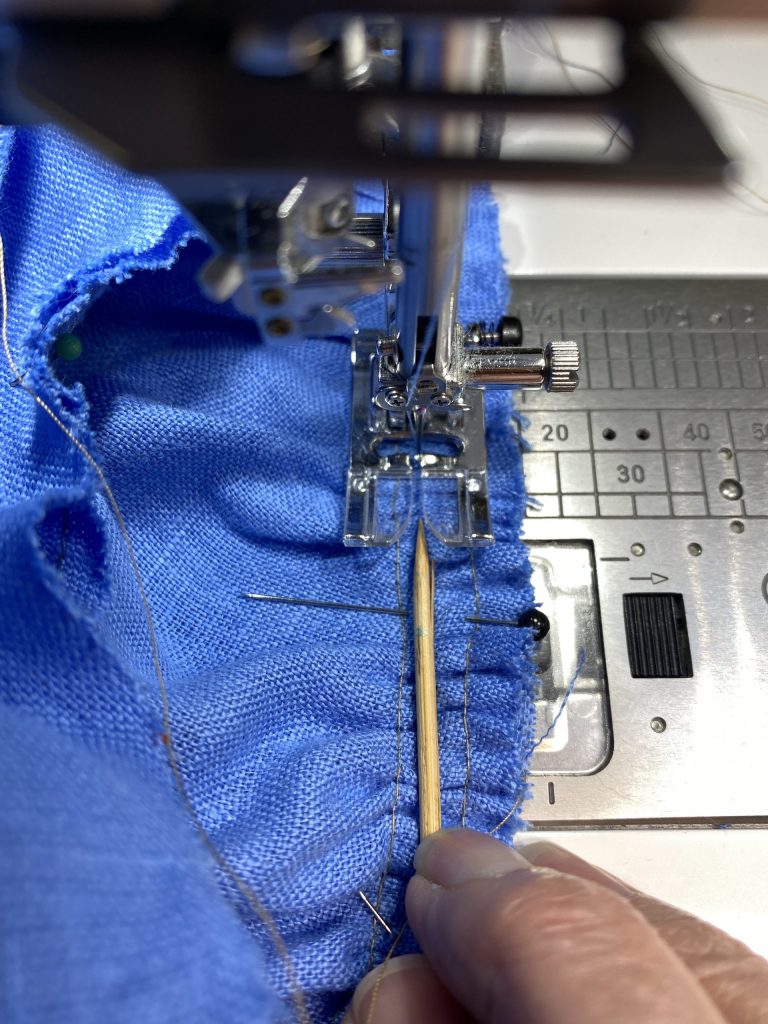
Once the body is complete (except for the hem), it is time to start the sleeves. Although I have sewn garments for almost (GULP) 60 years–yes I started very young–I’ve been taking an outstanding online course with Philippa Naylor, Garment Makers Question Time. The price is phenomenal for the amount of instruction you get each of the 12 months. More projects coming up! Anyway, I learned to set the gathering stitches at 1/2″ and 3/4″ and sew down the middle at 5/8″. Philippa’s way works better: sew your gathering stitches one thread into the seam allowance from the final seam line and 1/4″ closer to the raw edge. Gather, distribute the gathering appropriately, and then sew the seam just barely to the left of the left-side gathering stitch. I like using a thin bamboo skewer to coax and ease the gathers as I stitch. Again, I love that open visibility foot!

Here is a link to Philippa’s Garment Makers Question Time home page. Highly recommended!

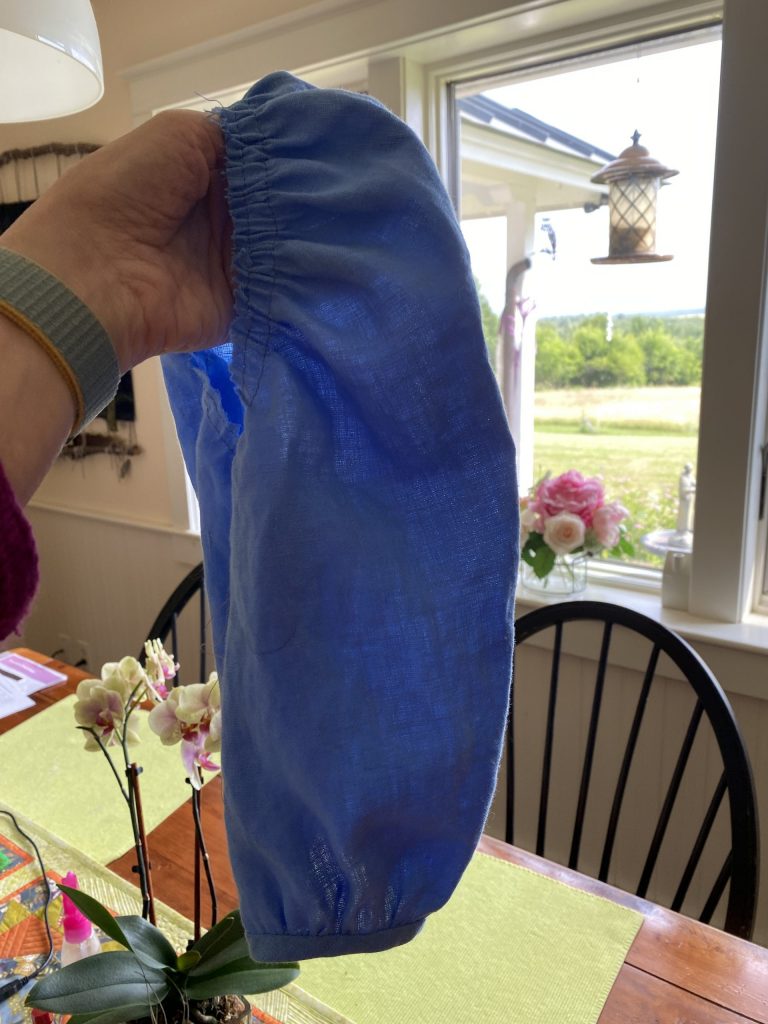
Here is the sleeve with the seam sewn and gathers gathered. I was a tad leery that the shoulders would be too narrow, but I did the right thing and made a toile (practice garment) out of cheap cheap cheap white fabric, and the sleeve seam is indeed set in from the shoulder point–this helps the gathers get that nice rounded puff! For the hem, at the top of the next photo, I sewed a linen bias strip to the right side, turned to the inside, and hand-sewed it into place.
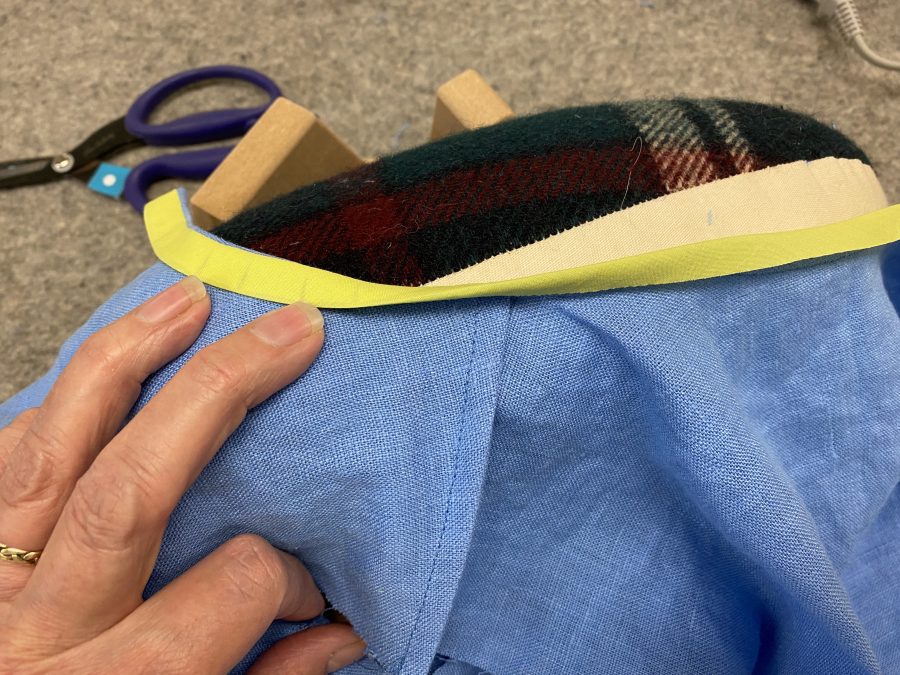
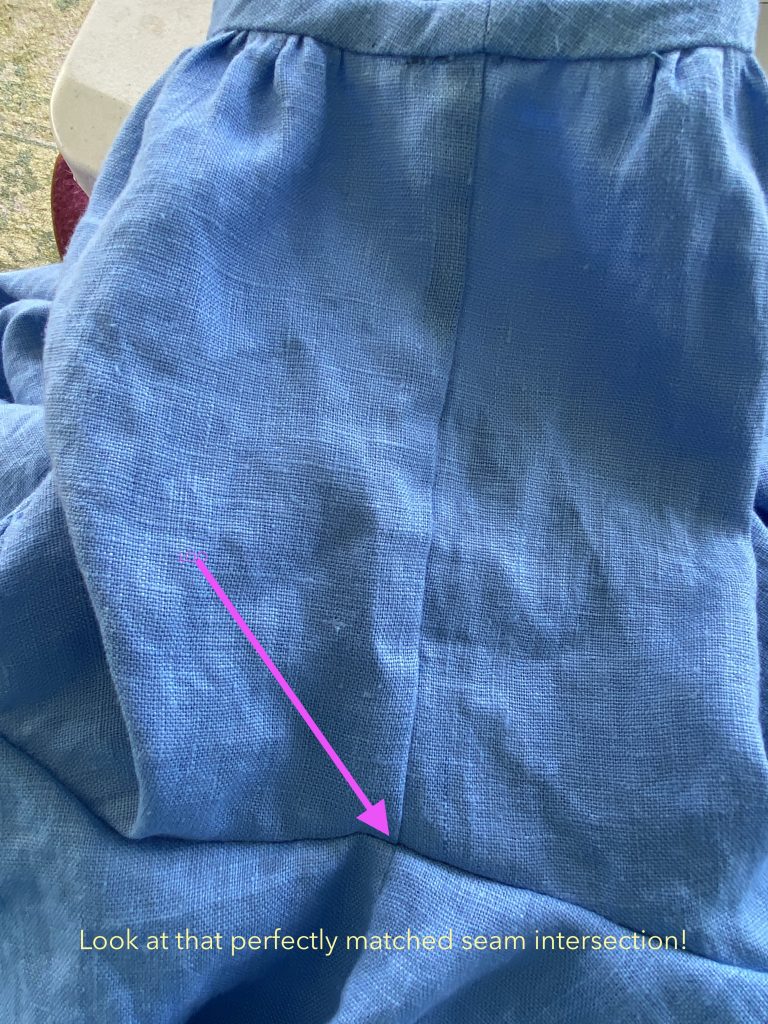
LOOKIT that perfect match! On the first try no less! Once the sleeves are sewn to the bodice, you’ll need to finish the raw edges. The gathers in the sleeves make it too thick for a French Seam, so I chose to use I used a bias edge finish similar to a single-fold bias binding on a quilt. On the neck, the bias was entirely folded to the inside of the garment. Here, you stitch the bias strip of fabric–a lightweight cotton lawn in lime green–to the seam, wrap it around the raw edges, then stitch in the ditch to secure it. I also managed a perfect join on the bias for the “cuff.” Note that the pattern has a wide opening for the bottom of the sleeve–way too wide for the size of my arms. I gathered it up more, making sure it still moved smoothly over/around the elbow, and just made mine narrower.
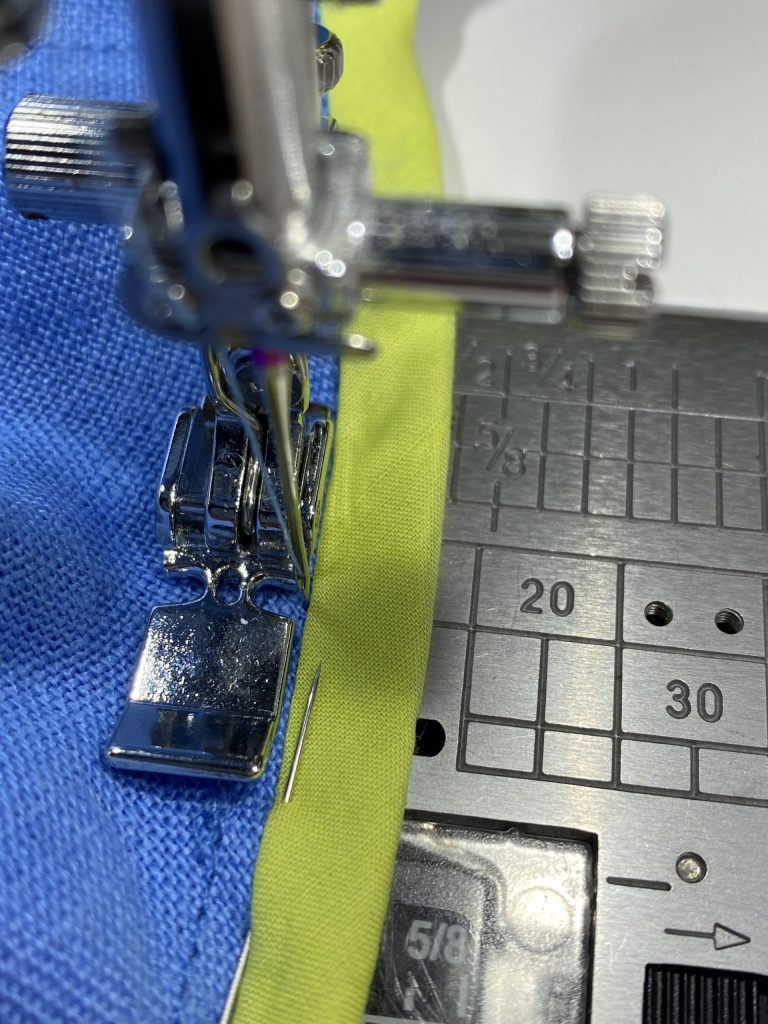
Covering up the raw edges where the sleeve joins the body. Again I’m using the zipper foot. For the way my eyes and brain work, I get the needle closest to the edge of the bias using the zipper foot and moving the needle as far right as it goes. Keep a hawk eye on your stitching because it is all too easy to wander and veer onto the bias.
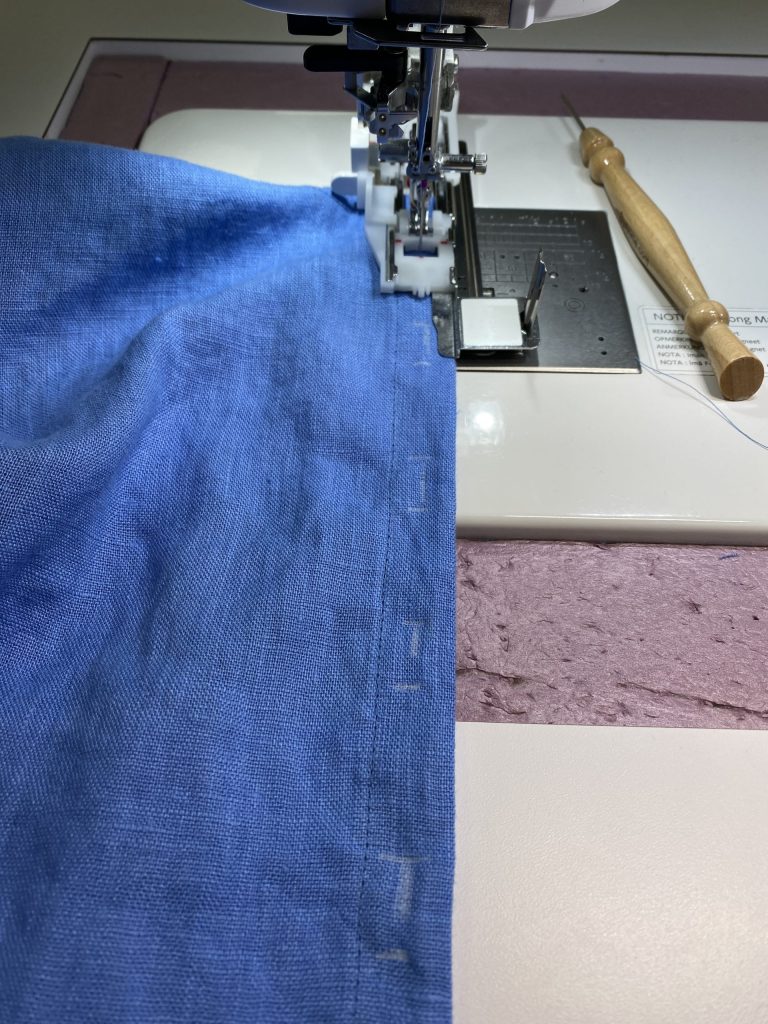
Janome’s automatic buttonhole foot (available on select models including the 9450 and M7) is amazing. You set the button into the back and it picks the perfect size. You can fine tune it if the button is thick or thin. ALWAYS to a test-stitch on a scrap (using the same interfacing and number of layers). You can see I have carefully marked the center of the button holes plus the start and stop lines. The Janome foot has a metal base plate that keeps everything flat and feeding perfectly. Here’s a video of it in action!
You can subscribe to my YouTube channel by clicking on the YouTube link (bottom left) and then following the subscribe button on that site, I don’t post often, but there are some useful videos there. Or just click here to go to my YouTube home page.
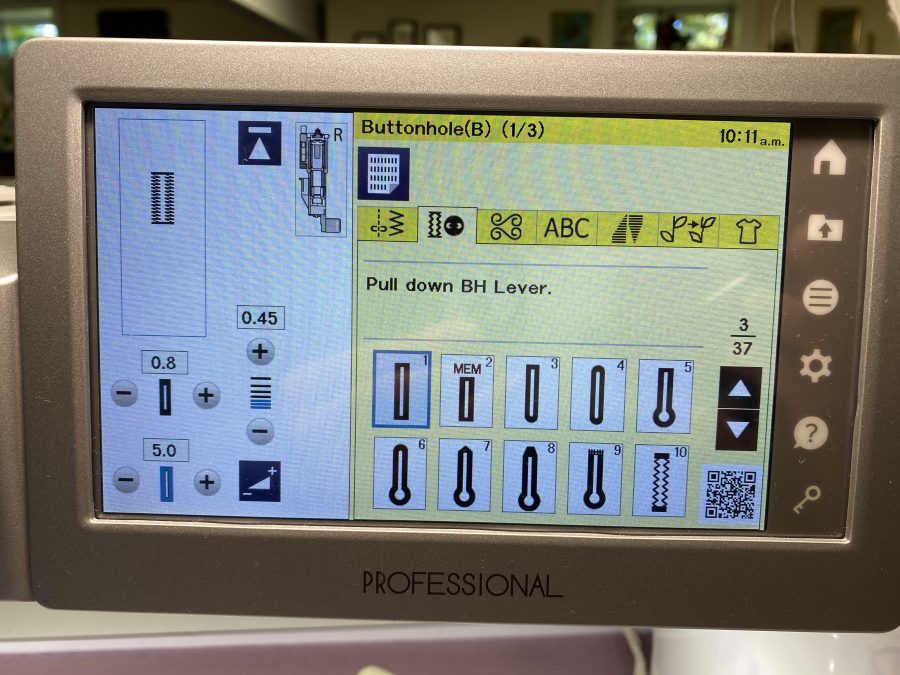
This is the setting I used.
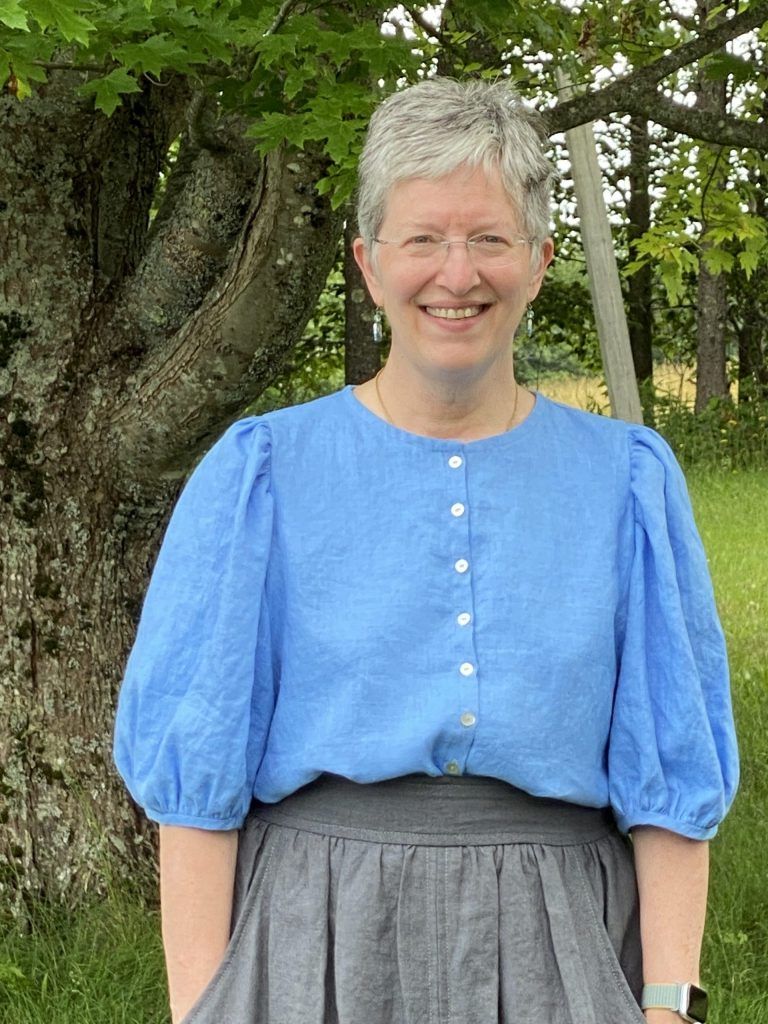
Worn tucked in with a linen skirt in gray. Blouse fabric is the IL-19 5.3 oz linen from Fabrics-store.com. Skirt linen is the Driftwood Linen from Fiddlehead Artisan Supply near me in Belfast, Maine; I bought the Brumby skirt pattern there, too. Yes, they do online / mail order!
I had some leftover linen, so I made a scarf, too. I sewed a narrow zigzag on all four sides, then carefully frayed the edges. Here’s the link to the pattern again: Anthea by Anna Allen.
You can also wear the blouse out–it has a narrow 1/2″ hem.
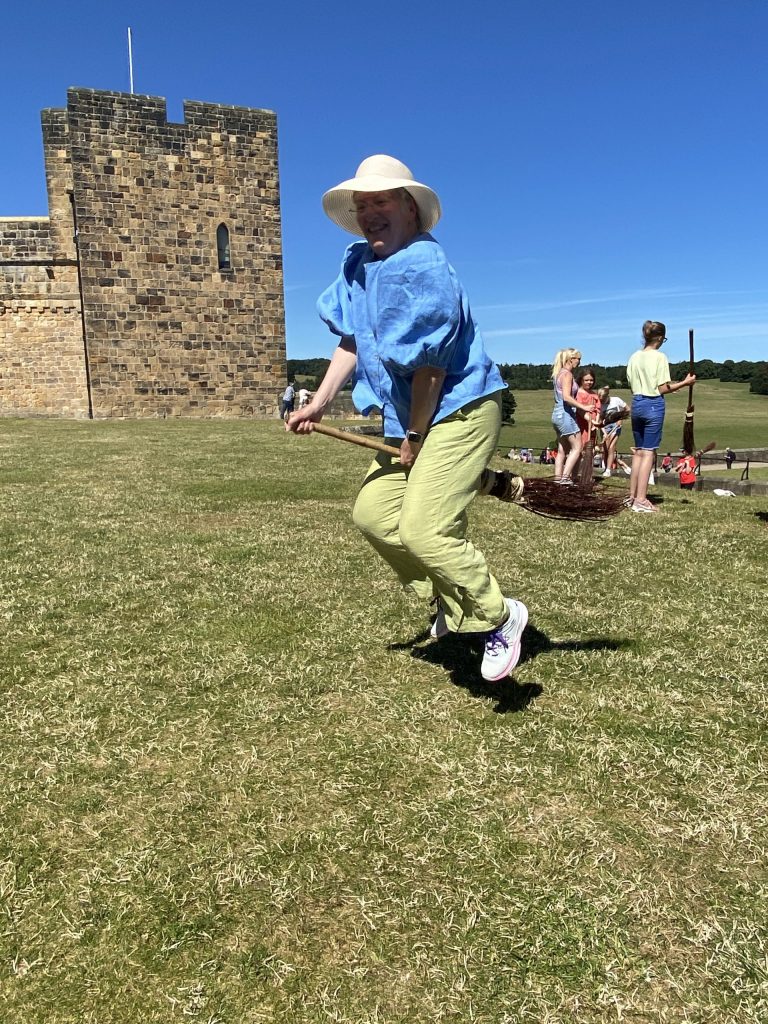
You can even wear it to Broomstick Riding Lessons (at Alnwick Castle this summer)! Funnest photo and time ever!
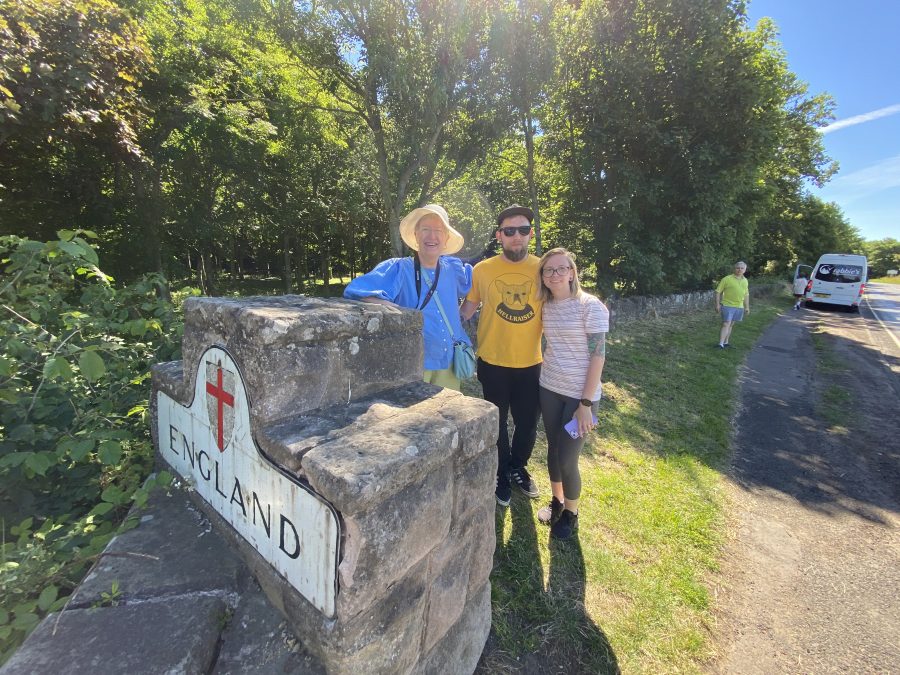
And you can also wear it after you have walked from Scotland to England—all the way across a 100 foot long bridge! With my oldest son and DIL on a trip of a lifetime.

Well I can’t believe it has been half a year since I blogged… that tells you how crazy busy this summer has been. All good stuff, but all at once. I am looking forward to being HOME for three straight months once I return from Houston / International Quilt Festival where I’ll be teaching again. I will try my best to be back before the end of the year…like maybe even in a month?

Mer-Pugs Summer Shirt for Eli

Thursday, July 8th, 2021

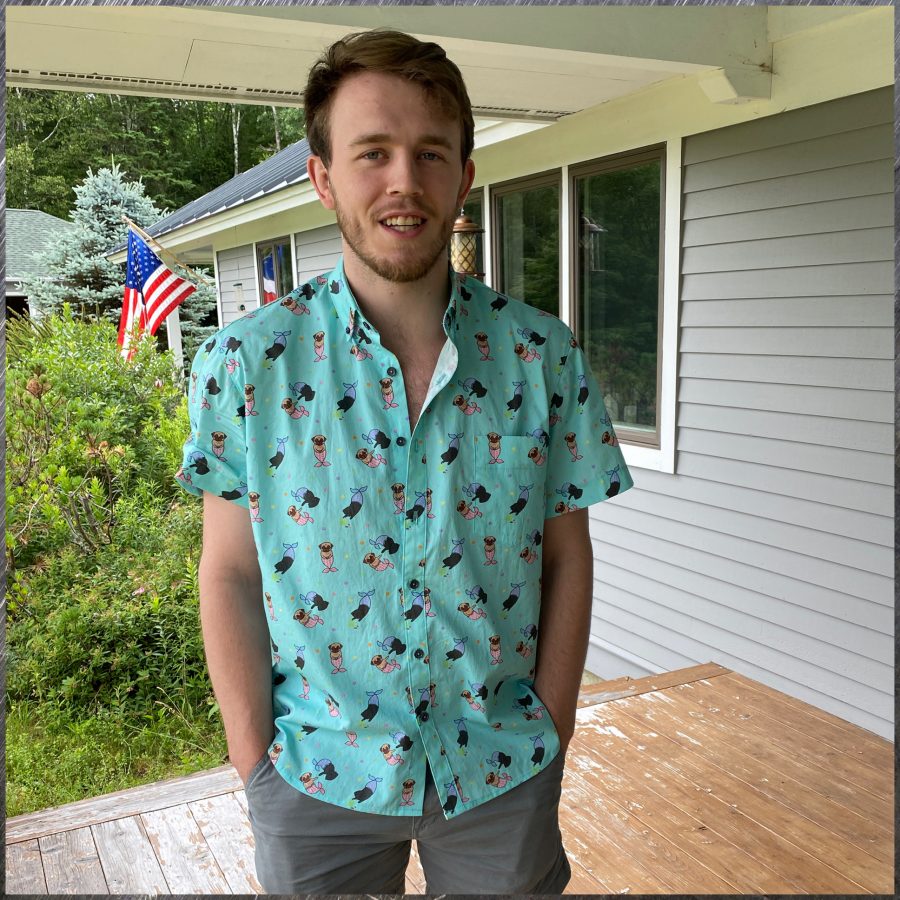
It’s a delightful feeling when your young adult son asks you to make a shirt for him. Since he lives about 5 hours away, going to a fabric store together wasn’t a good option, so I sent him to Spoonflower. LOVE it when his sense of humor prevails: he selected Mer-Pugs! Here’s the link to the fabric; I chose to print on cotton poplin as I’m not fond of their Signature Petal cotton. Needing to order 3 yards, it was a splurge, but it turned out great and he loves it!

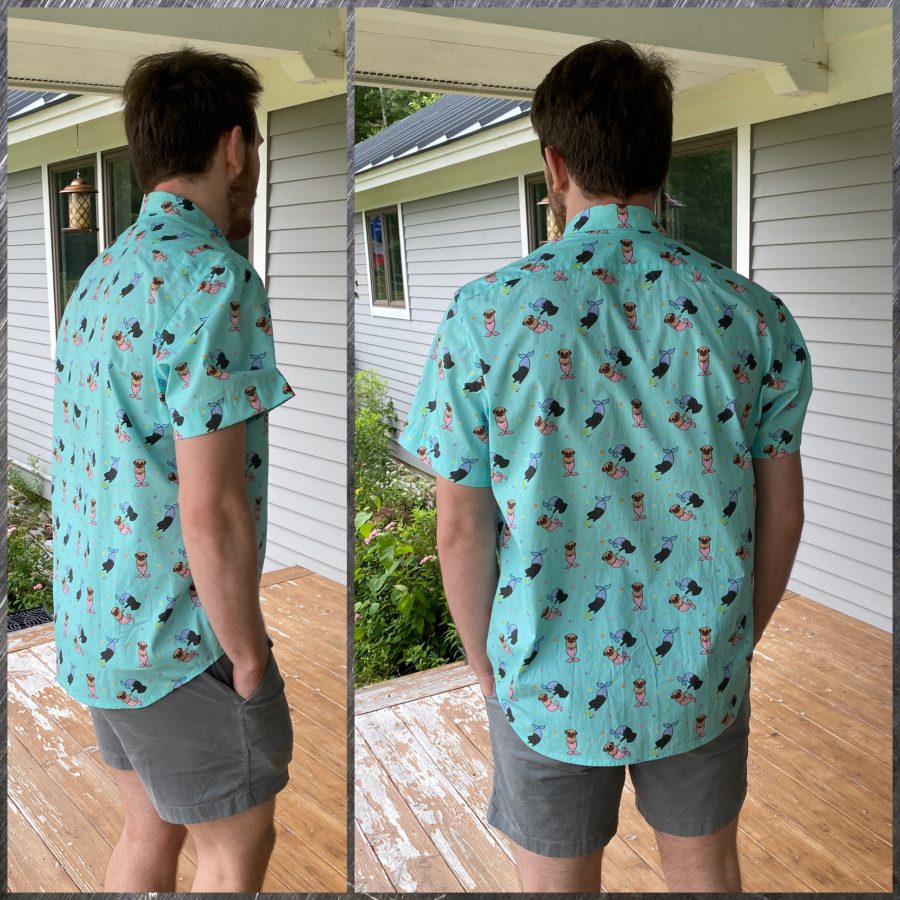
Eli’s shirt fits perfectly!

The pattern is Liesl & Co.’s All Day Shirt Pattern. I used this earlier when I made Joshua’s donuts shirt (yes, they both have the same sense of humor!). Since Eli is a bit bigger, I was able to use what I learned making Joshua’s shirt in 2019 (blogpost here). I still had some issues getting the collar to be the size I wanted on the collar stand–I was careful to follow the instructions, but think the collar should be about 1/8″ longer on each side. Eli did not want any pleats on the back but did want short sleeves. He lent me a shirt that fits just the way he wanted so I kept that in the studio to compare as I made the merpugs shirt …much easier to adjust that way!

Earlier this year I showed on Facebook and Instagram how perfectly I was able to align and topstitch the pocket:

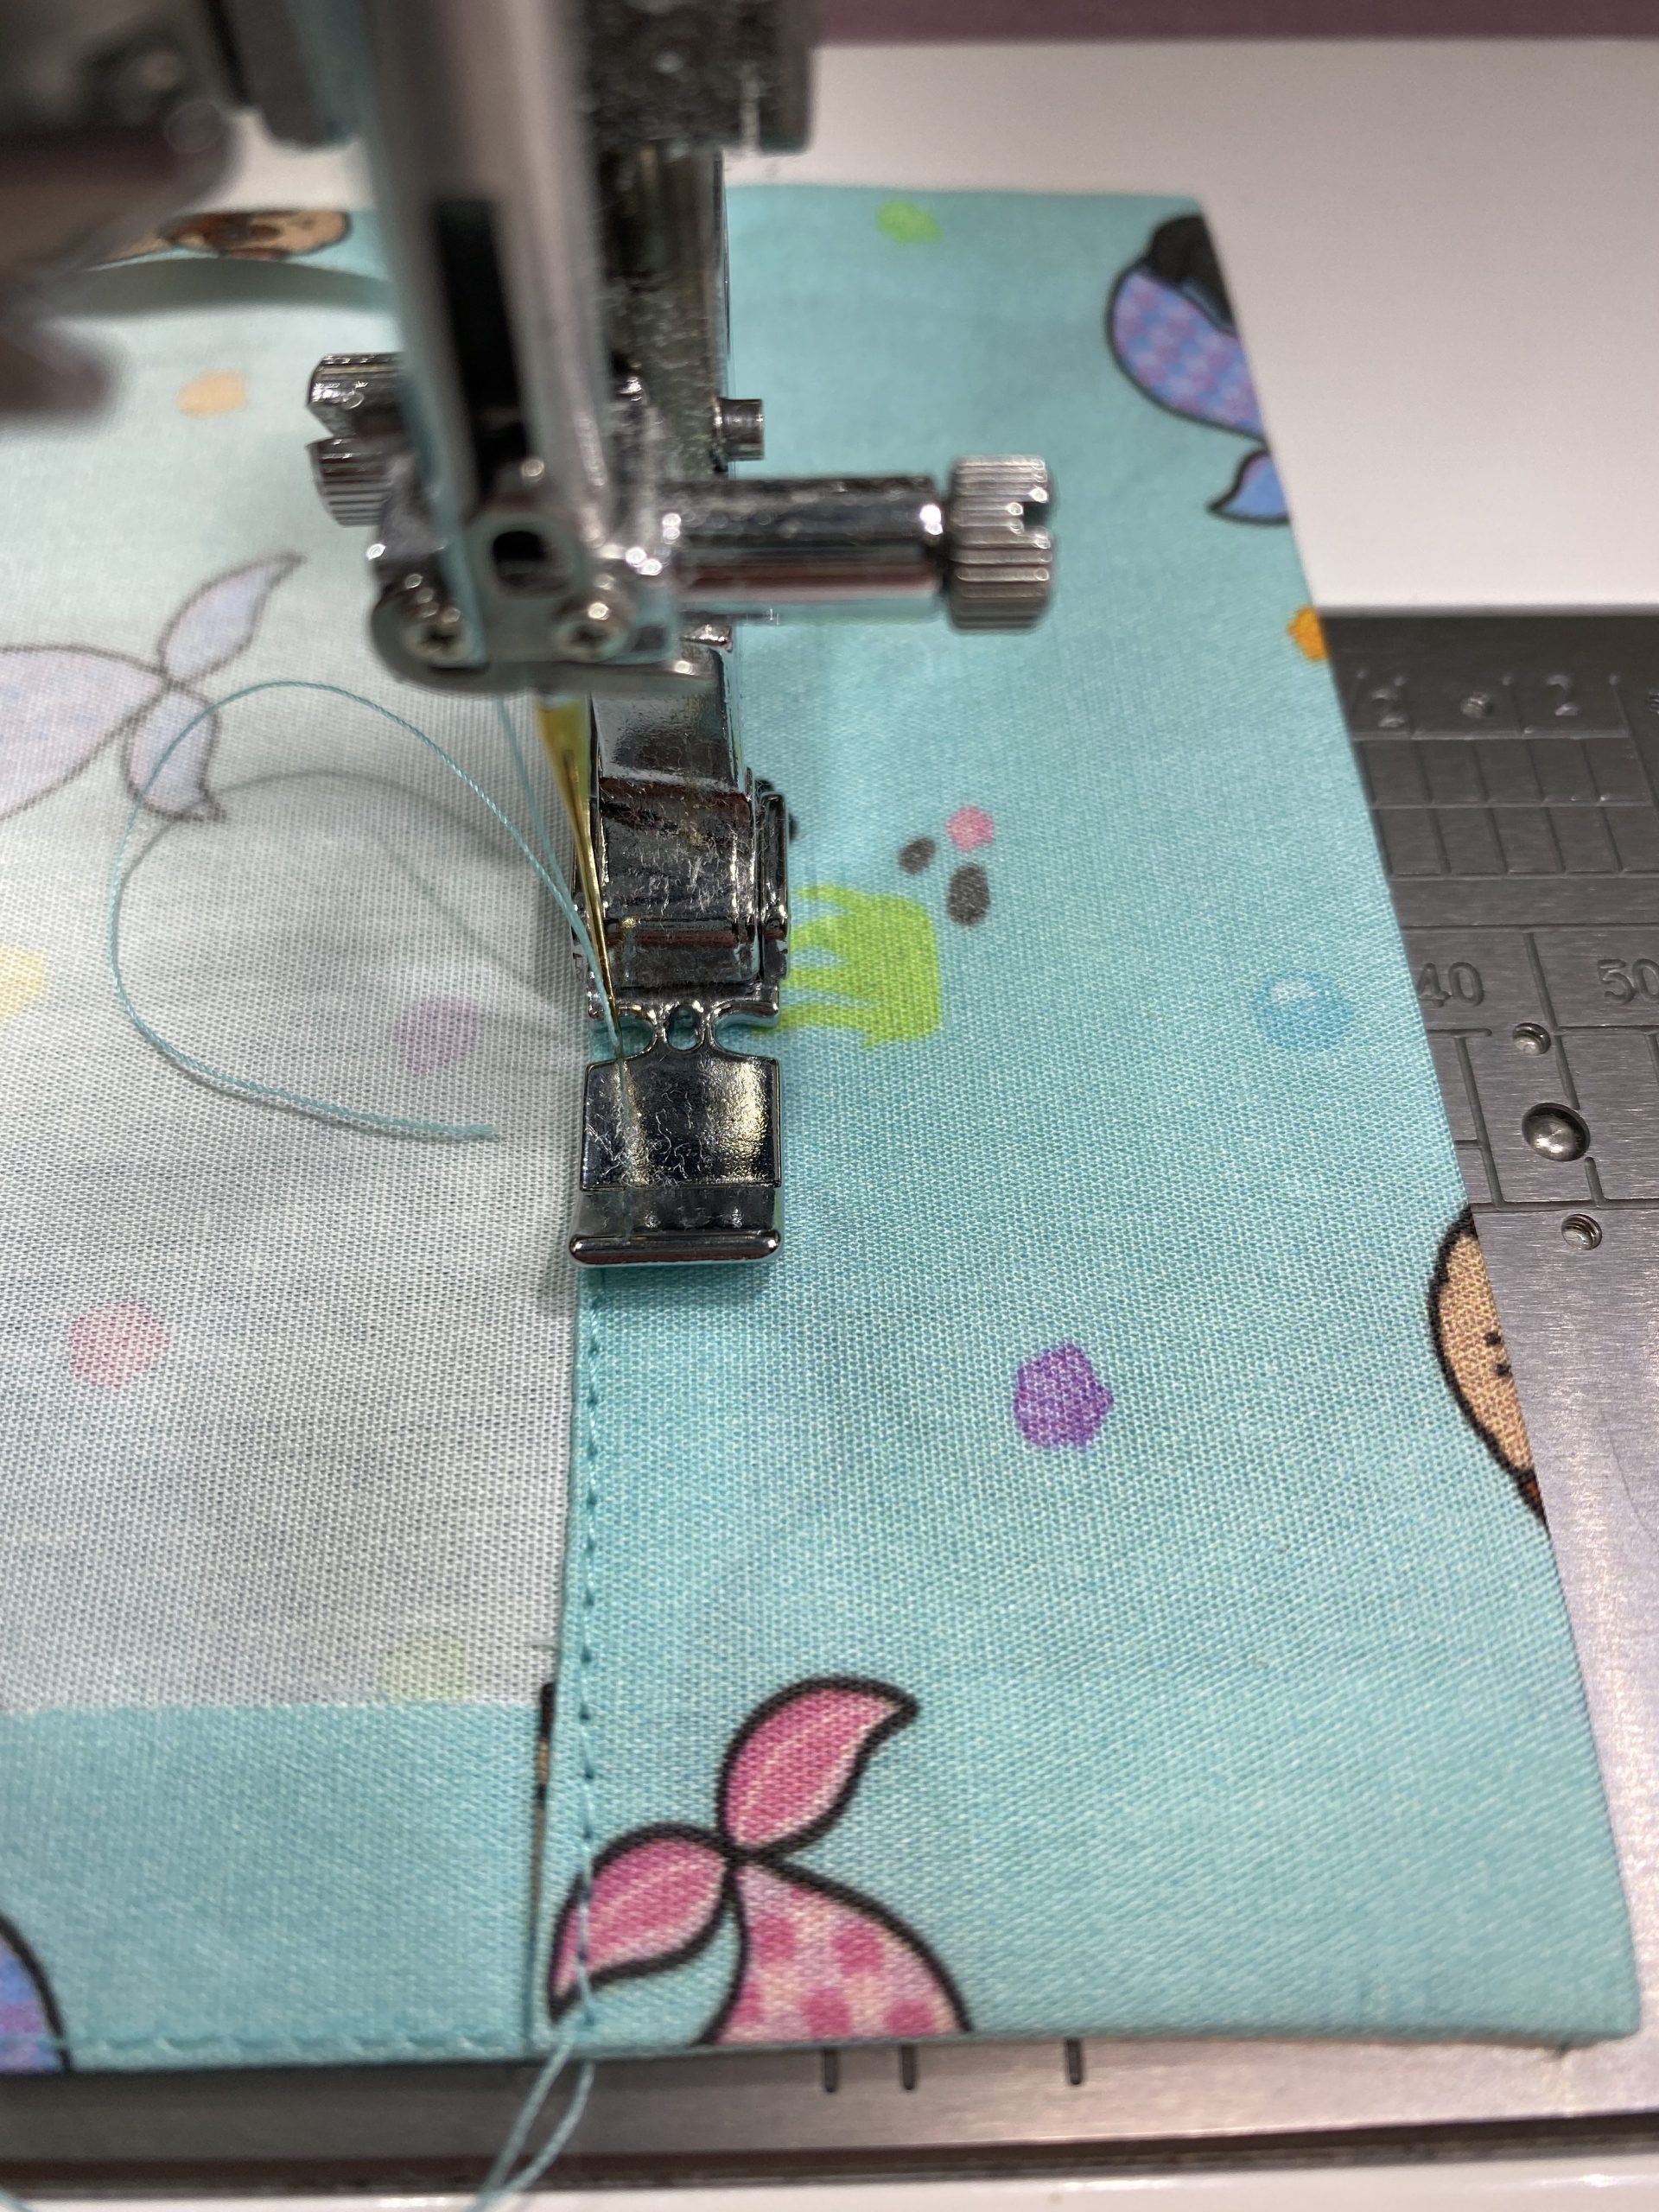
First, prepare the pocket. Turn under seam allowances; pattern instructions have you sew 1/2″ from edge, then iron under concealing the stitching. I did that, but having done perfect edges before without the bother of stitching, I’ll go back to my easier way next time. I love my zipper feet for all sorts of things especially perfect edge stitching. I just get better results than using the edge-stitching foot–try several ways and use what gives YOU your best results. I align the edge of the foot with the fold of the fabric, move the needle in the distance I wish, then keep my left thumbnail on the edge of the fold and foot to keep it straight.
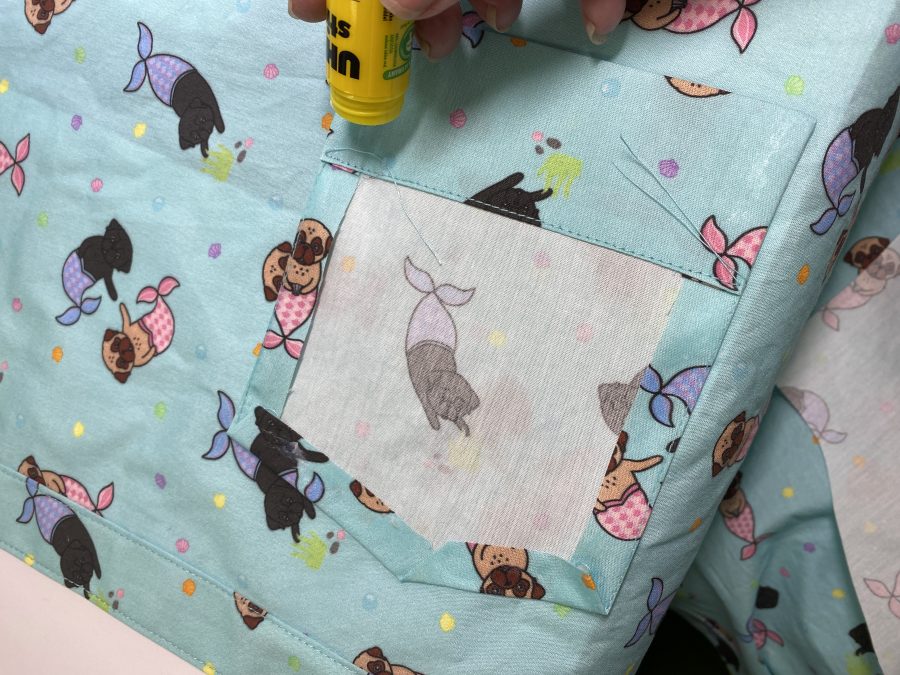
Next tip: GLUE STICK! Be sure to use a WASHASBLE glue stick, not permanent! Run a bit of glue along the sides and bottom.
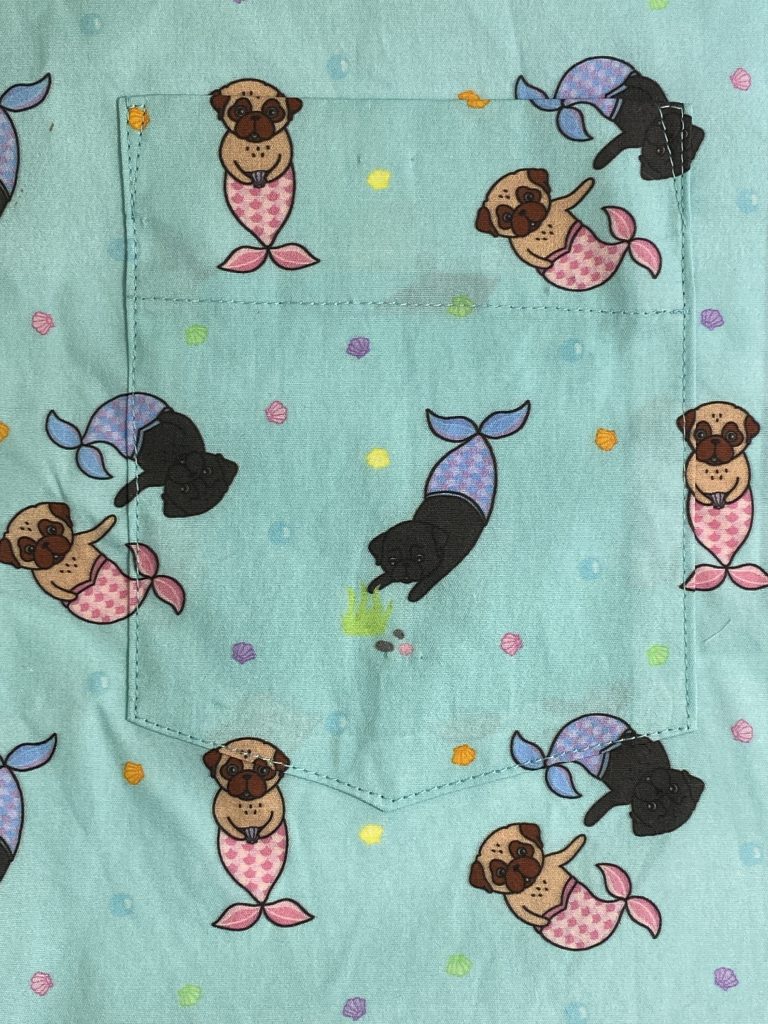
Glue stick the pocket so you have ABSOLUTELY positively PERFECT alignment. For me, this works better than pins and you get no ripples/distortion from the pins. As with the pocket hem, use the zipper foot, adjust the needle drop to the perfect spot, and sew in place. LOOKIT how those merpugs just swim from the shirt onto the pocket!
Side and back views. Perfectly aligned the pugs from collar to yoke to shirt back! Having a machine with precision feed like the Janome M7 makes it easy!
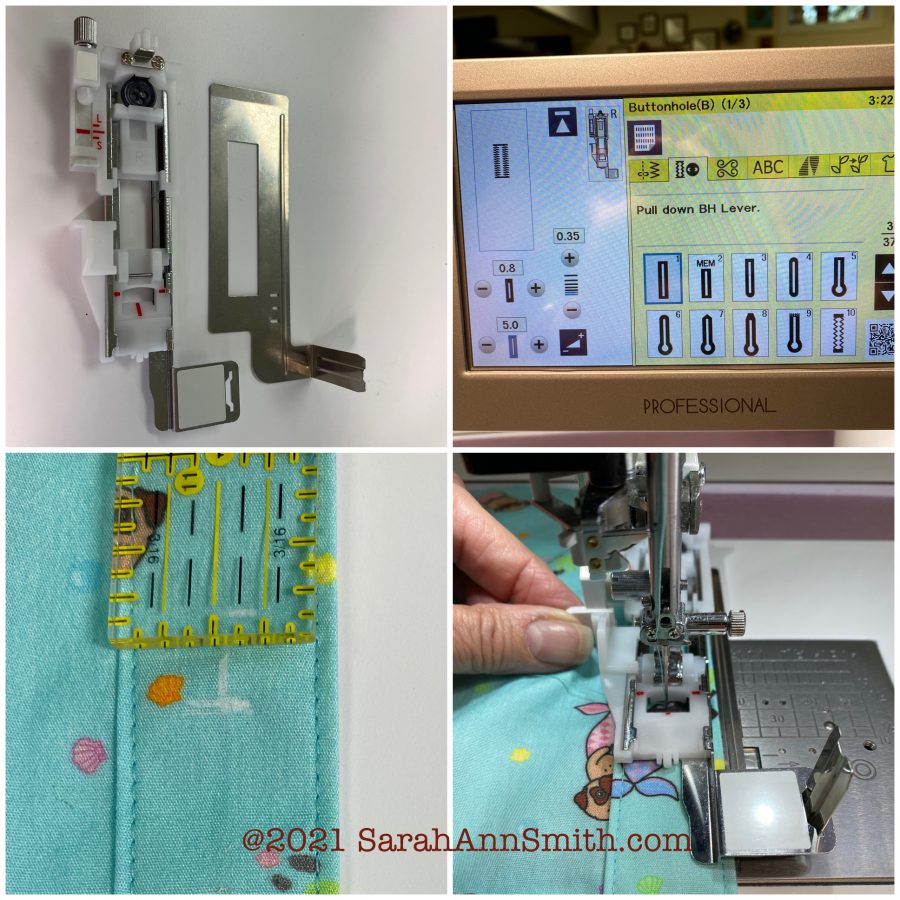
My voice sounds funny because I am getting over a cold! Anyway, here’s a quick demo of how FAST it is to do an automatic buttonhole! Next photo shows a side view of the automatic buttonhole foot
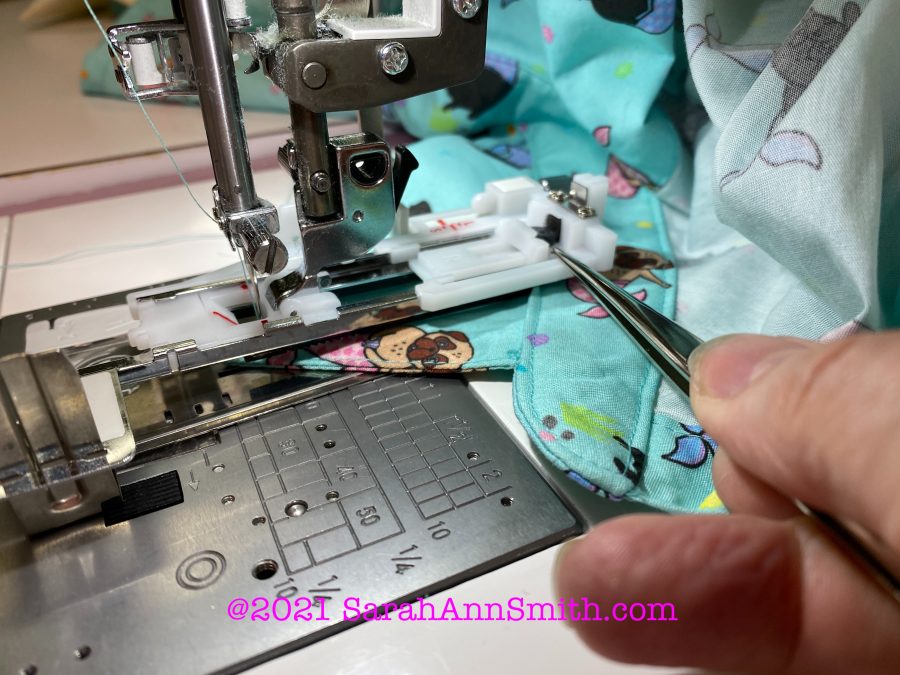
The tip of my awl is pointing to the small button in the back of the automatic buttonhole foot. This is how the foot knows exactly how large to make the buttonhole. It even worked with the teeny tiny buttons (about 3/8″) on the collar!
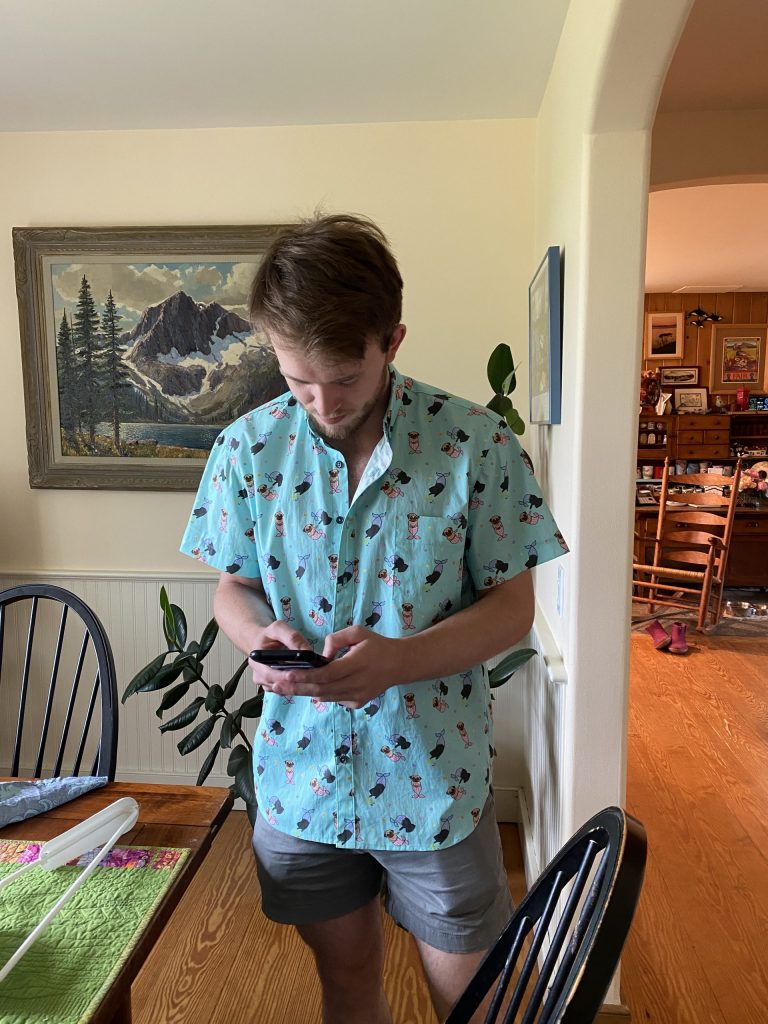
What does a 20-something do as soon as one puts on a new shirt? Check the phone!

Hope you’ve enjoyed this! If you haven’t already, I’d like to invite you to sign up for my monthly (or thereabouts) newsletter! Just look in the right-hand sidebar on this page to sign up, or at the bottom of all the other pages on my blog. Thanks for stopping by!

Perfect Pattern Weights free pattern!

Wednesday, December 9th, 2020

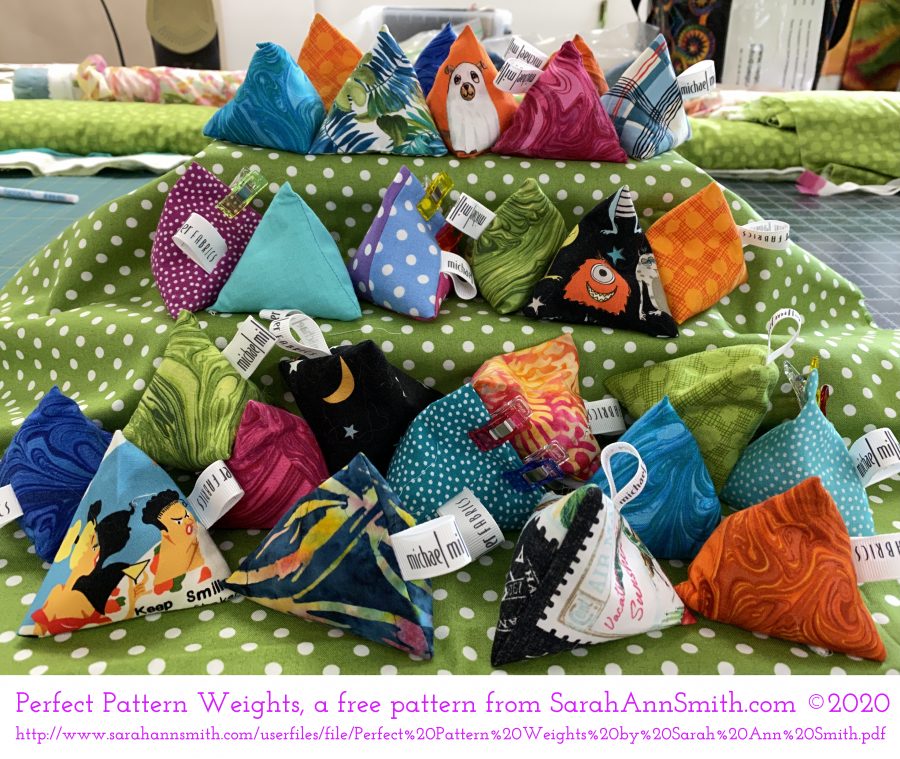
These just-perfect sized pattern weights, 3″ on a side, are not only just the thing for YOUR sewing room, but they make quick and easy gifts for anyone you know who sews!

PerfectPatternWeights by SarahAnnSmith.com
Can you tell how much FUN I had? Lookit the doggie as a Halloween Ghost (top row) and the goofy Space Alien (center right) and those fantastic Garden Pindots (middle and lower rows)! See free PDF for pattern and Michael Miller Fabrics fabric details.

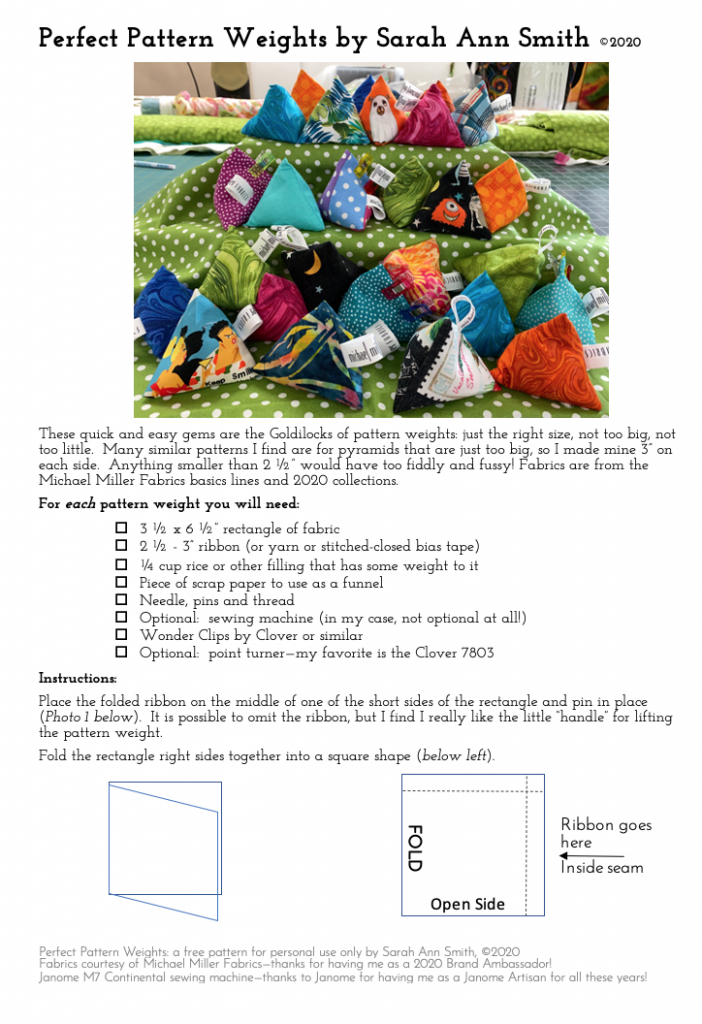
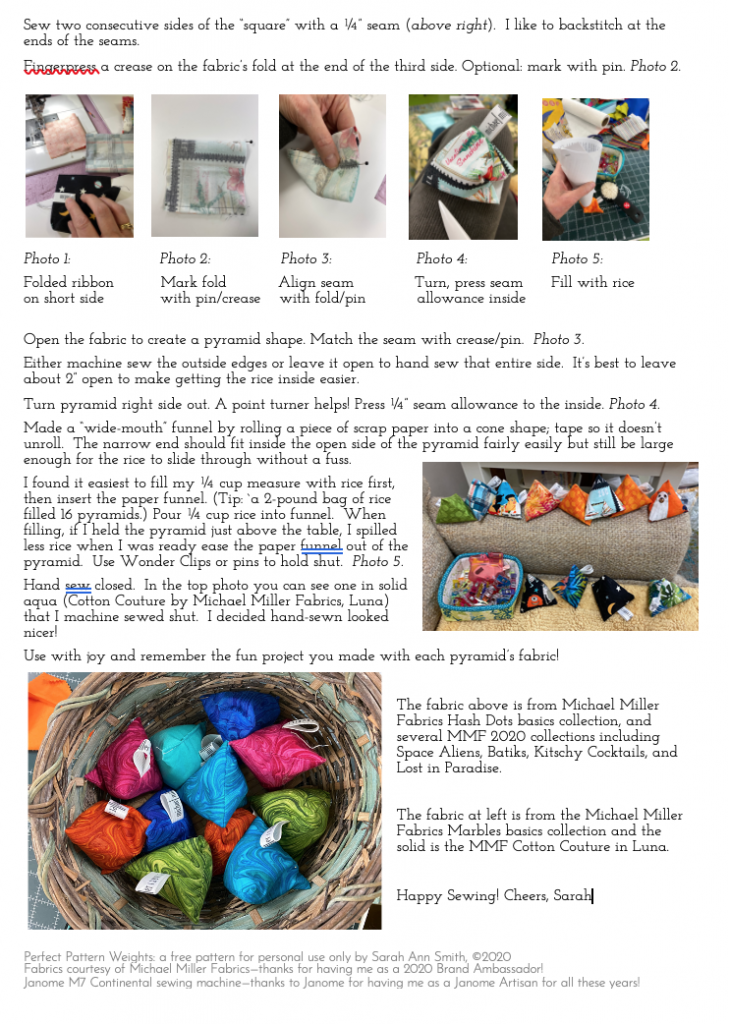
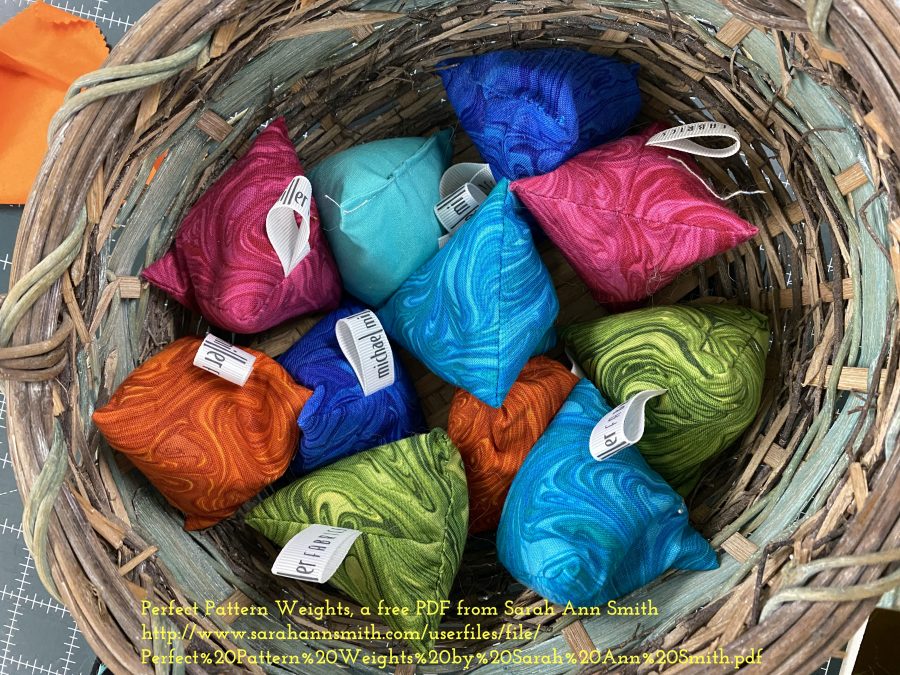
Early in my year as a Michael Miller Fabrics Brand Ambassador for 2020, I decided to use some Marbles (MMF Basic collection) for a much-wished-for set of pattern weights. Most patterns on the internet were way too big–at least 4″ on a side. I wanted mine smaller, to fit into smaller areas. As I made them I thought what fun it would be to remember this year by using fabrics from each collection and project that I made in more weights. It’s now December, and here’s what I have….FUN! Even better, Here is a FREE Printable PDF so you can make your own. The printable version duplicates what comes next:

Here’s the hotlink again to the printable PDF.

And some new info: My cousin said the rice filled ones can be popped into the microwave (briefly!) and make nice handwarmer’s, and a friend said she uses a combination of fiberfill for soft outside and buckshot for the center to add the heft that you need for a pattern weight.

ENJOY and stay safe–here’s to hoping next year at this time we’ll be like to something approaching normalcy with COVID controlled, almost everyone vaccinated, and holidays celebrated with a LOT OF HUGS!

Easy Peasy meets Soft ‘n Stable

Thursday, June 11th, 2020

In my last post I shared the Clam Up bag from byAnnie.com, and earlier I shared my AWESOME Running With Scissors bag made for her patterns. I love bags and baskets and boxes and things to organize. One of my favorite classes to teach is my Easy-Peasy Inside-Out Bag, which makes a great 3 hours quickie class for a bag (or two if you are fast) or full day class where you can learn more details and extras. I decided to try Annie’s Soft ‘n Stable stabilizer instead of batting to see how it would work in MY bags, which are quick quick quick and FUN! (Like potato chips, you can’t make just one!)

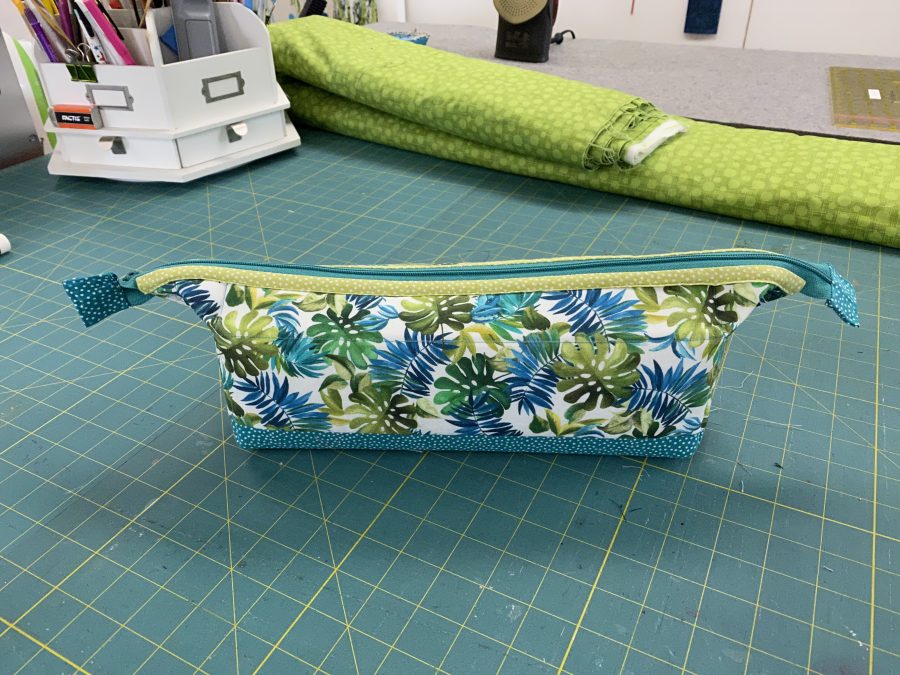
Here it is: the Easy Peasy process using Soft ‘n Stable and accenting the zipper with “binding” the way Annie Unrein teaches in her patterns at byAnnie.com The fabric used is courtesy of Michael Miller Fabrics–the main fabric is from the Lost in Paradise collection (shipped May 2020) and the other fabrics are the Garden Pindot collection on the outside and the inside (and that’s Hash Dots on the backing of the quilt you see awaiting quilting on the back of the table).
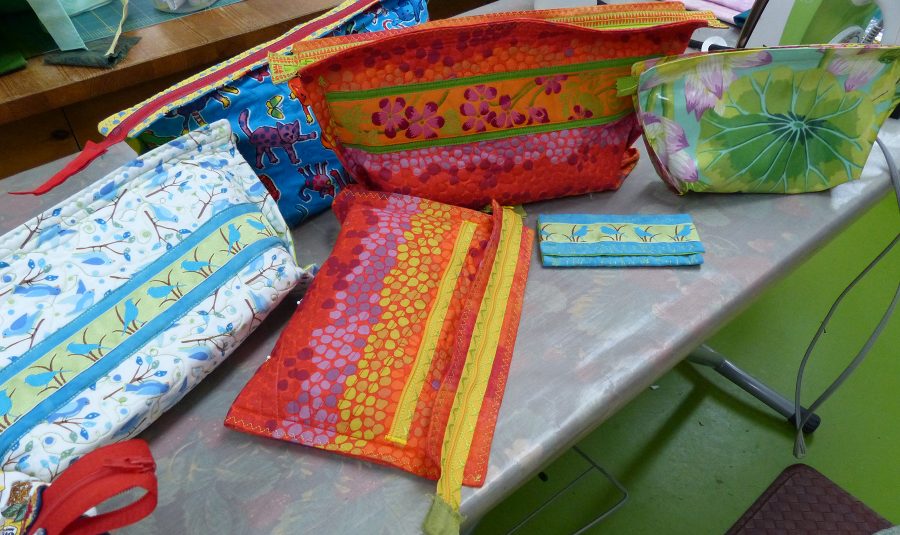
This is a sampling of the fun bags I teach in the Easy-Peasy Inside-Out Class…. if you think you’d like me to teach this for your guild–including LIVE ONLINE workshops, leave me a comment! They are fast and fun and can be customized so many ways.
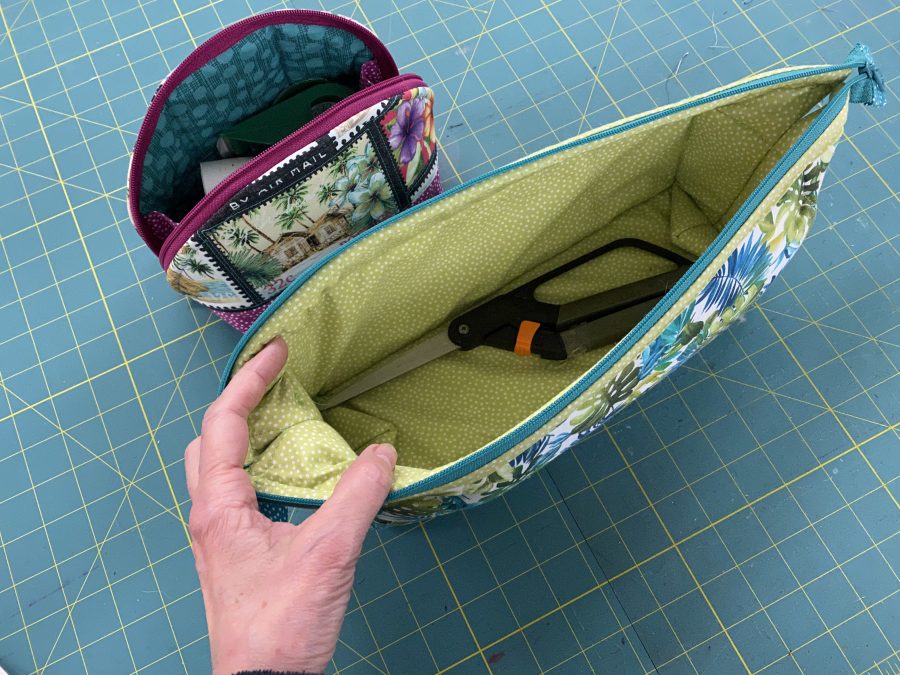
This shows the Clam Up bag and my Easy-Peasy next to it. I made this bag long enough to hold my large Fiskars flat on the bottom. Frankly, it is large enough it could hold a small knitting project or paper piecing supplies! One thing I will do differently next time is FUSE the lining to the back side of the Soft ‘n Stable. I didn’t use the walking foot and it shows. Oh well…lesson learned!
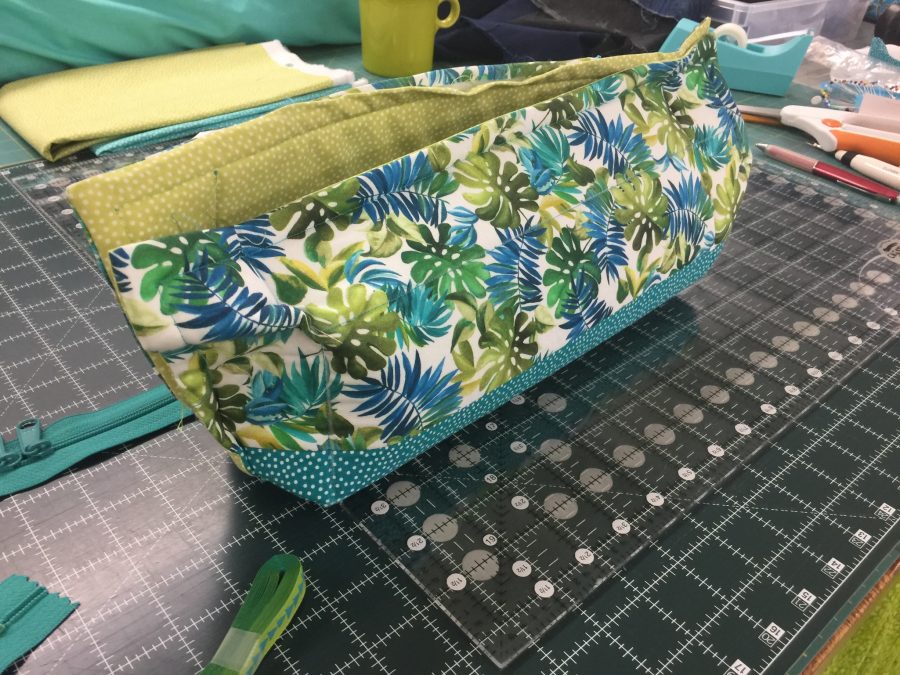
Before installing the zipper and sewing the seams, I pinned it together to check size and how I wanted to finish it. Most of my Easy Peasy bags leave the boxed corner triangles on the outside (see that photo above with the many colorful bags made with batting). Leaving the triangles outside acts to stabilize the bag and keep it upright. With the Soft ‘n Stable doing that job, I chose to tuck the “corners” inside for this bag.
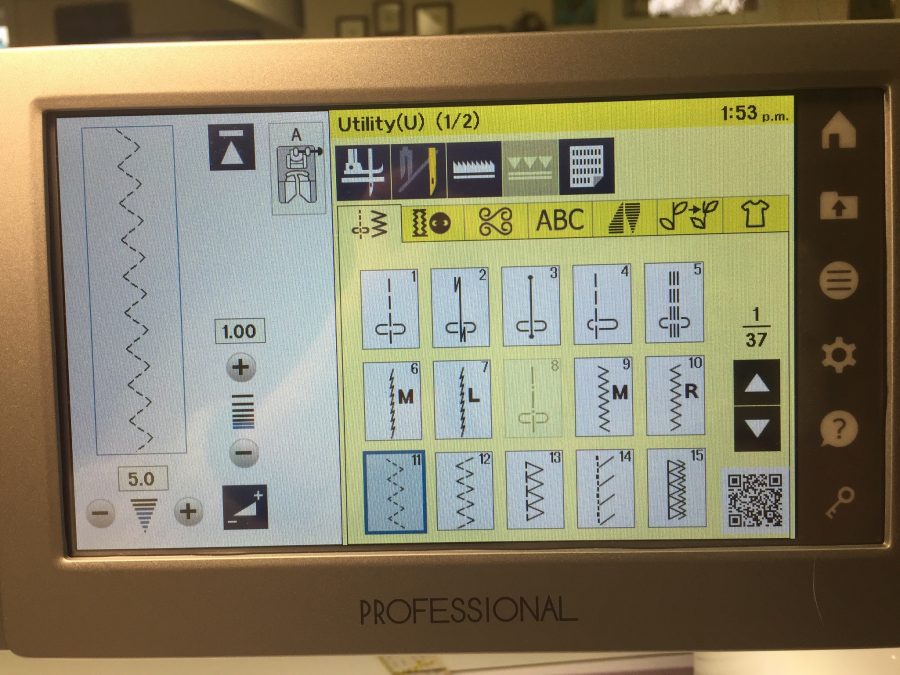
Next, before boxing the bag into shape, I used the 3-stitch zigzag to secure and tidy up the edges.
The narrow accufeed foot on my Janome M7 makes it a breeze to sew zippers to a quilted, puffy base without distortion.
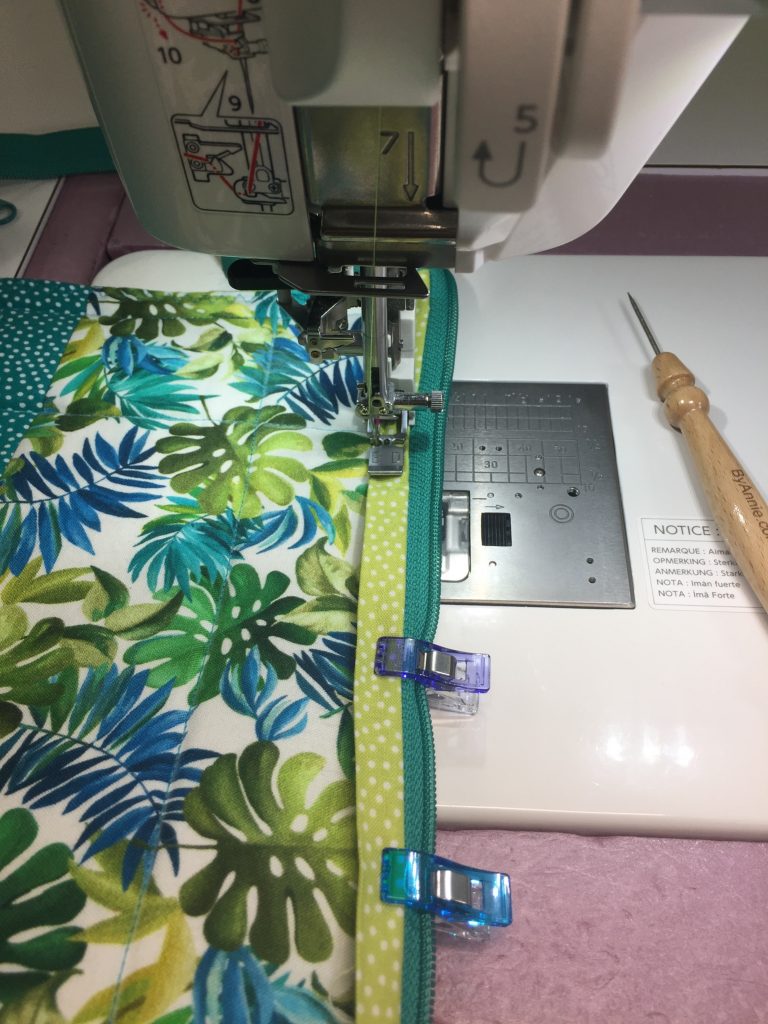
Here I’m adding a decorative element to the zippers. Gotta love wonder clips!
On my Janome M7, I the three-stitch zigzag looks like this, but it is available on all but the most basic machines as a standard utility stitch. The M7 allows me great flexibility in both stitch width and length–not all machines do!

My Easy-Peasy Inside-Out process is fun, fast, and infinitely adaptable. I’ll be making a new version of my notebook cover–I’ve also got an iPad case, a business card case, and a few other goodies up my sleeve. Maybe I’ll self-publish a book of patterns and variations on the theme…what do you think?

Next up, I’ll share a basket pattern that again modifies what I’ve learned from the byAnnie.com patterns! Stay tuned!