email Youtube

Home
Galleries
Blog
Workshops & Calendar
Store
Resources
About
Contact

Author Archive

Irons: from tiny to dragon!

Saturday, April 18th, 2020

For a while now I’ve wanted to blog about irons, and why I love the ones I have. Yes, plural…..I have SIX! Three are “small” size, two are regular, and one is Sirius the Black Dragon. Yes, my Janome M7 sewing machine is named Albus (the second, he had a predecessor named Albus). There’s even a video at the end of this post about all these irons!
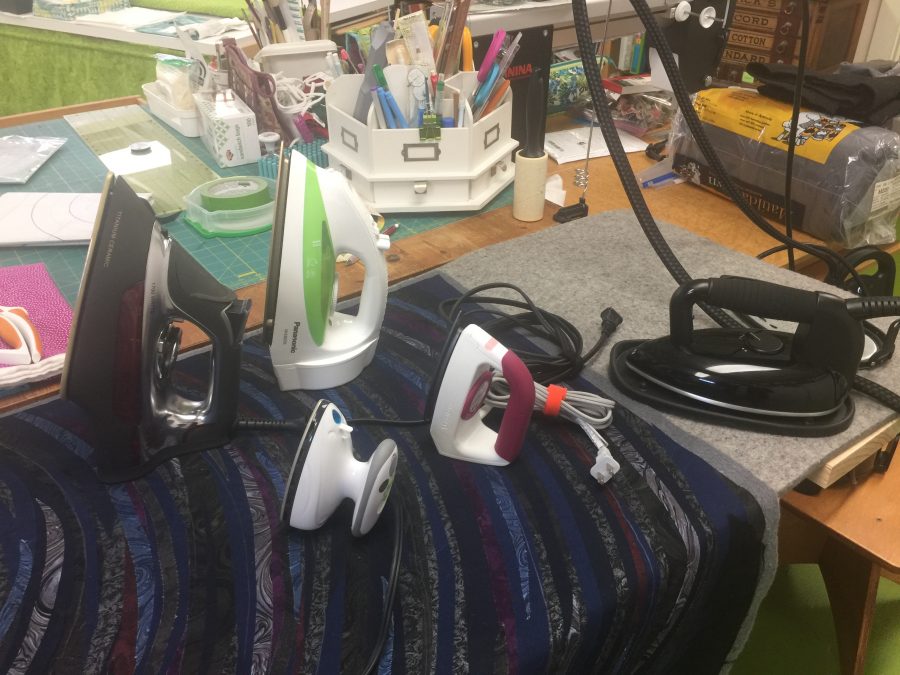
From left to right: the CHI, my beloved Panasonic Titanium Nonstick, the little mushroom style, the (SOB no longer made SOB) Clover, and Sirius, a LauraStar steam generator. I have a sixth sorta small iron, but it is too heavy/awkward for my hands and was upstairs for use steaming in the closet–not that I’ve actually ever used it for that. Sigh.

The Panasonic is my go-to iron for fusing. At 1200 watts, it gets hot and has acceptable steam, although I almost always use it as a dry iron. I love this iron so much I wore the finish off my last one! I always have one that is my working iron, and a brand new spare in the closet in case the cats or I knock it off the ironing board one time too many (studio is in the basement, cement floor…not good for falling objects). I can LITERALLY place this on Mistyfuse or other fusible web, melt it all over the bottom of the iron and WIPE IT CLEAN. No more hot iron cleaner fumes (which cannot be good to inhale–they set off smoke detectors)! For the price of four tubes of iron cleaner, you’re golden. This link takes you to the one I am currently using–I like that it has auto off because I am easily distracted. As of April 2020, it is a whopping US $27. Even if you only use it for fusing, it’s worth it!

I fuse on top of my ironing surface, but also on the design wall. Holding the iron (which is relatively light) had gotten uncomfortable because I have arthritis in my thumbs and wrists. So I tried the little mushroom iron, the ones you see in classrooms and at retreats–many folks can plug them in and not blow the fuses. It is quite comfortable to hold when used on a flat surface, but on the design wall it requires you to bend your wrist, and that hurts for me.
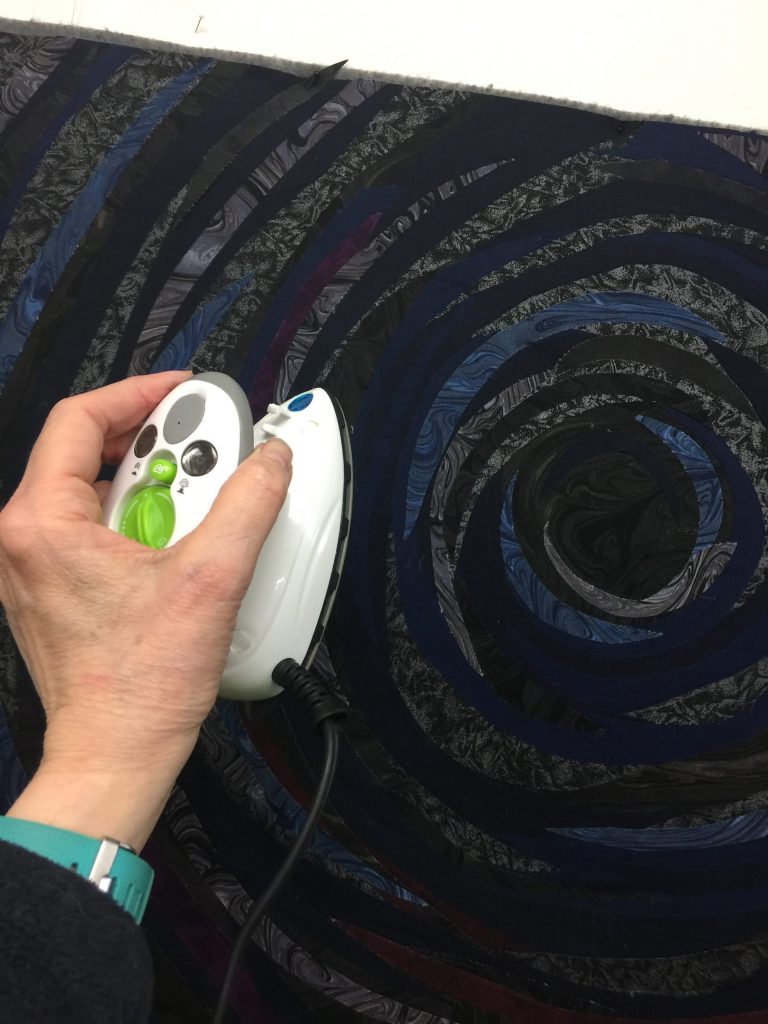
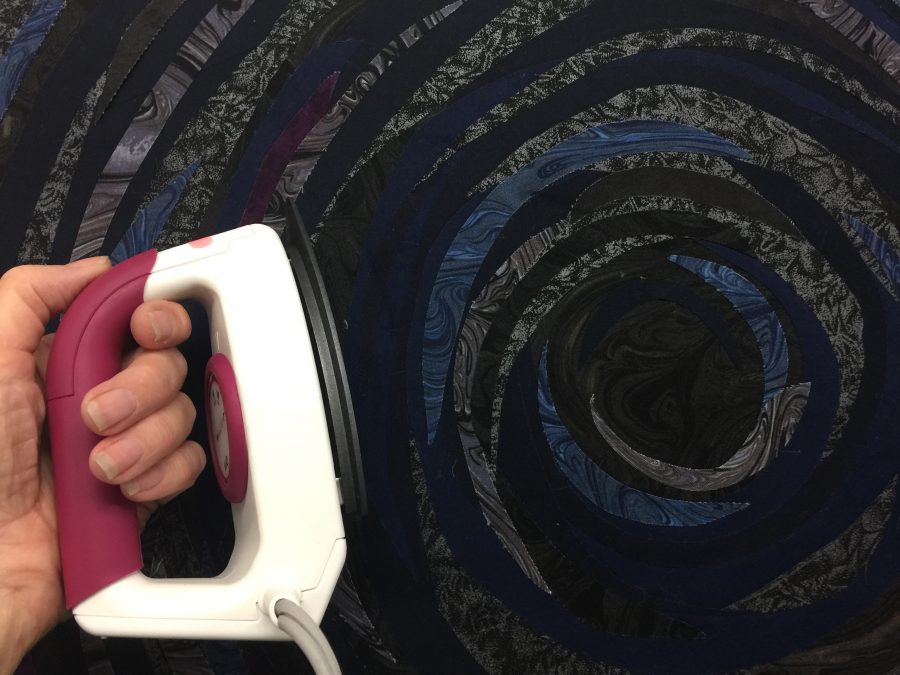
Here I am holding the iron on the design wall, and I have to bend at the wrist which causes discomfort. That’s why I really prefer the…SOB….not longer available Clover iron. Yeah, I’m sorry, I know that doesn’t help you very much. I haven’t included a link for the little mushroom style irons…there are a bazillion available on Amazon, at quilt shops and so on. From what I can tell they are fairly similar.
The Clover iron is ideal for the design wall. The “mug” handle rests on my fingers, and I can see my hand and forearm in a single line–as if I were wearing a brace. That means I can tap it onto the design wall as I work with no pain at all. I don’t know if there are any models similar to this style out there….If ANYONE KNOWS OF SOMETHING SIMILAR, please TELL ME! I’d love to test one out and see if I can recommend it to my students. And if anyone knows someone at Clover that we can all write and beg them to make this again, tell me that, too!
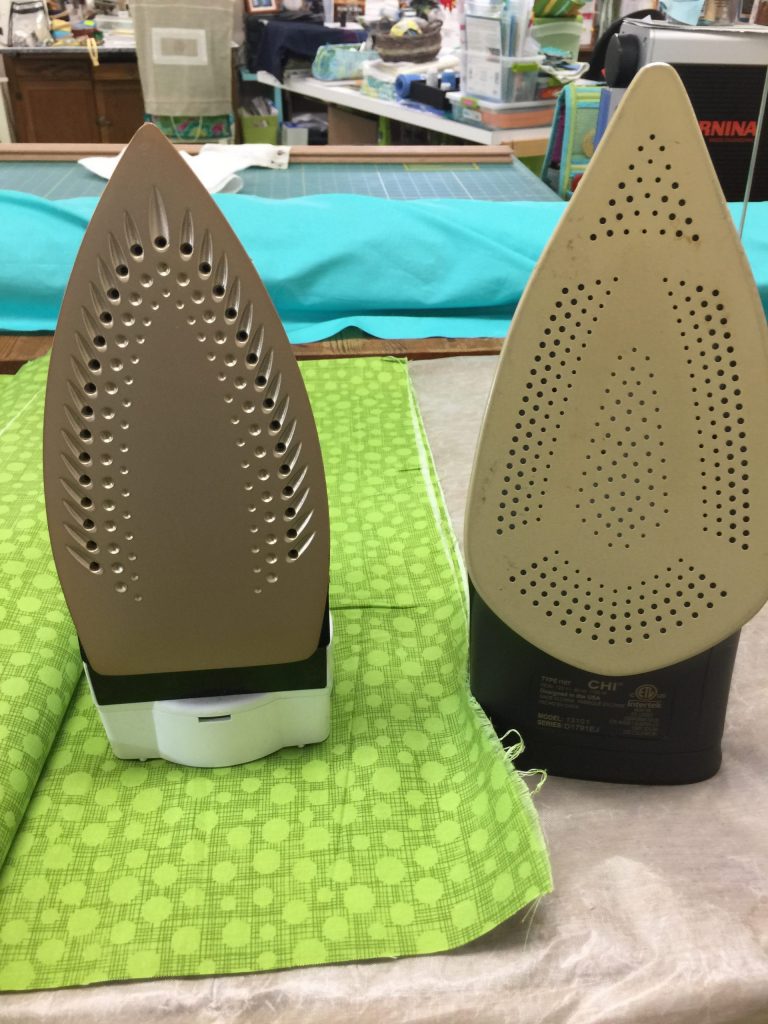
The 1200 watt Panasonic Titanium non-stick iron is on the left, the CHI 1700 watt is on the right, and that glorious fabric is Meadow color of HashDot by Michael Miller Fabrics.

For years I have recommended the Panasonic Titanium nonstick iron to students–Panasonic should give me free irons for life I’ve sold so many for them LOL! But I had (note the past tense) suggested that the gold-ish colored titanium appears to be the key. Not so much. First, my “in the closet” iron-in-waiting is a Panasonic Titanium ordered earlier this year, but is now a silvery color instead of gold-ish, but still works the same. Second, not all Titanium non stick is the same. I decided to give the CHI Titanium Ceramic, below, a try. It costs more, about $59, and has 1700 watts so lots of heat and power and good steam. It’s great for steam ironing, but not so great at the non-stick–it really doesn’t wipe clean the way the Panasonic does. Here’s what happened:
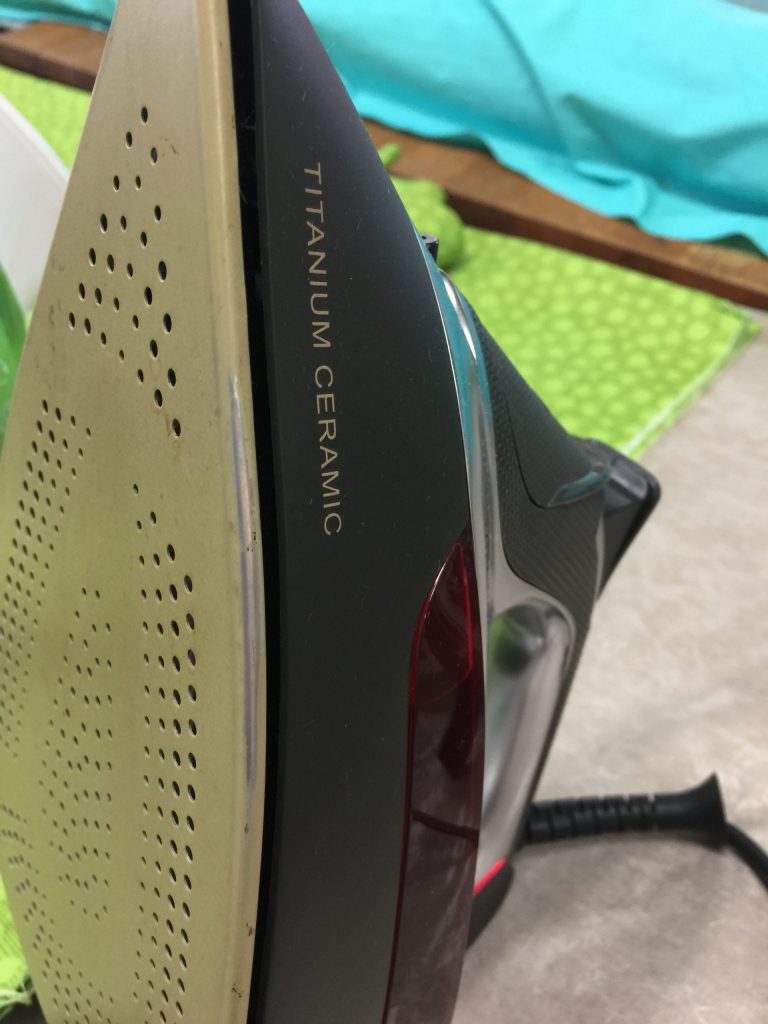
I needed to (yuk) get out the hot iron cleaner. This surface just doesn’t wipe clean well. I use Faultless Iron Off hot iron cleaner on a soft white terry towel. And look what happened: I rubbed off the finish on the gunky edge!!!!!! It’s still a good iron, and I use it, but not for fusing. It has quite a large capacity water reservoir which is good in principle, but again that pesky arthritis poses a problem: it’s heavy. That’s where Sirius the Dragon comes in. Keep reading. ANYway, if you don’t use fusibles (or even if you do) this is a good, hot iron with good steam.
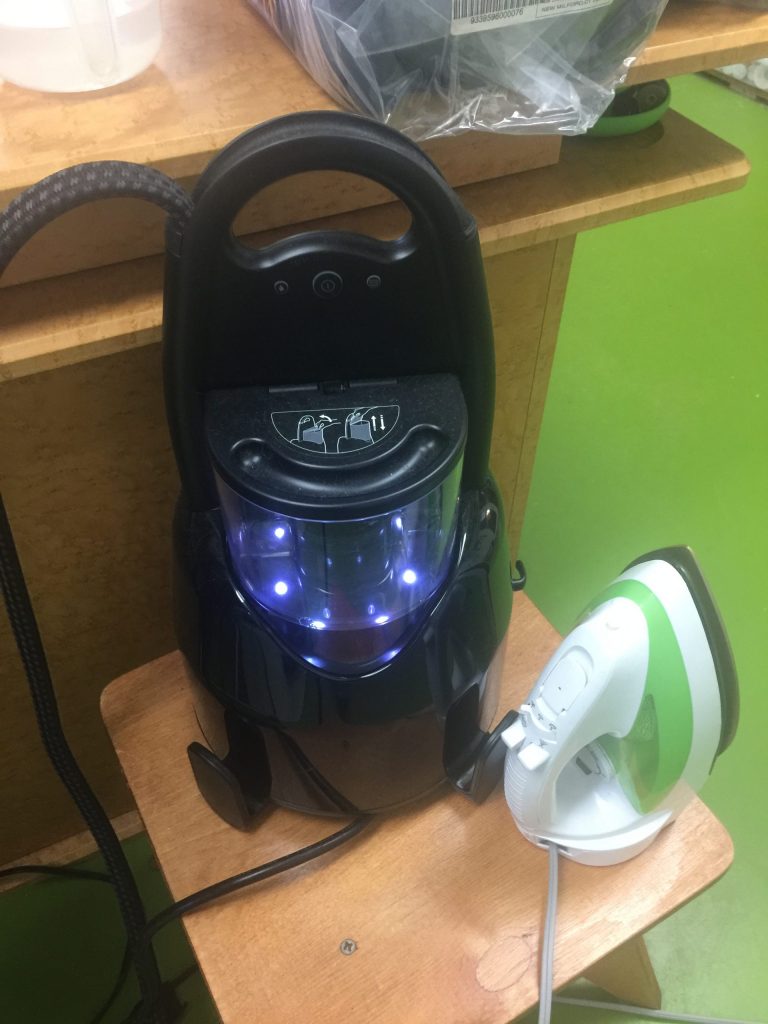
The LauraStar steam generator is a grand indulgence! Please be sure you are sitting down when you see the price on this black beauty…they are expensive. But OH MY! I had been lusting after a steam generator for a long time, but (to repeat myself in a short space) they are expensive. And this is on the expensive end of expensive. But I’m sure glad I indulged–nothing beats a great tool.

The model I purchased is the same as this one (minus the soleplate cleaner, which I wish I had). The steam is IMPRESSIVE…literally, it sends out a jet about six feet….watch the video below! It comes with a cord stand (which I don’t point out in the video. There is the power cord and, wrapped in cloth, the line that powers the iron and brings the steam to it. Unlike a regular steam iron that produces steam constantly (if you set it to do so), you need to push the button, but that is easy to do given the location on the handle.

The steam cord is a bit stiff, which is why having the clamp-on cord guide is so helpful. You also get a silicone mat so you don’t have to tip the iron on end, just set it on top of the mat. That is comfortable for my arthritis. So is the light weight of the actual iron. AND you can steam things that hang, like curtains and garments!

When I have a lot of ironing (like yards of dyed fabric, or just washed fabric), the steam generator is a DREAM. Also excellent when doing a final fusing of the finished art quilt top and when blocking a quilt. Many steam generators if the tank runs dry, you have to turn it off, wait for it to cool, then add water. Not so this one–just open the lid to the easily accessed tank and add water (shown in video). BINGO! WINNER! Just be sure not to send a blast of steam in the direction of your other hand. Guess you don’t need to ask why I advise you of that. Ahem. Only did it once! If you are also a garment maker, you’ll love this. I will grant you, it is *expensive.* But in my case, worth it.

Bottom line: I use the Panasonic for all fusing. For smaller ironing jobs, I use the CHI. For working on the design wall, I use the Clover. And when I need STEAM or have a lot of ironing to do, the LauraStar. So there you have it…why I ned at least FOUR irons! What are your favorites, and why?
Mastering Metallics

Thursday, April 9th, 2020
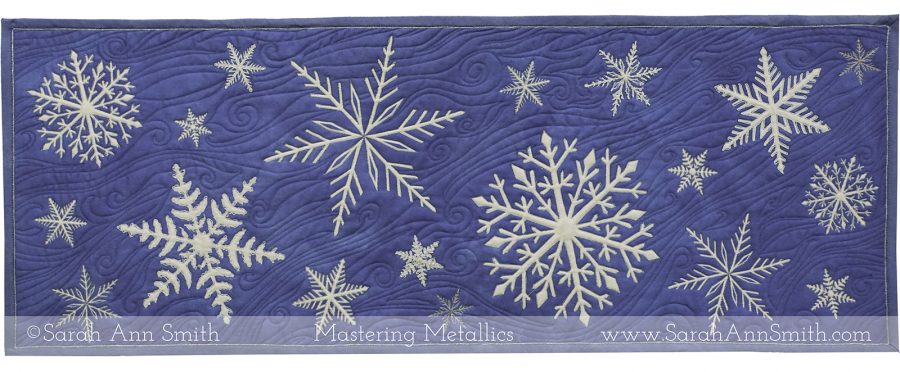
Mastering Metallics is a half day workshop which will teach students to use metallic in both the needle and the bobbin. The workshop will debut at International Quilt Festival in Fall 2020, and is the half-day version of my Tame Fussy Fiddly Threads class. The class is Wednesday afternoon. Fly in Tuesday, join me in the Machine Quilting Forum (there are TWO this year!) Wednesday morning, then come take this workshop with me on Wednesday afternoon. We will finish up just in time to get to Preview Night at 5!

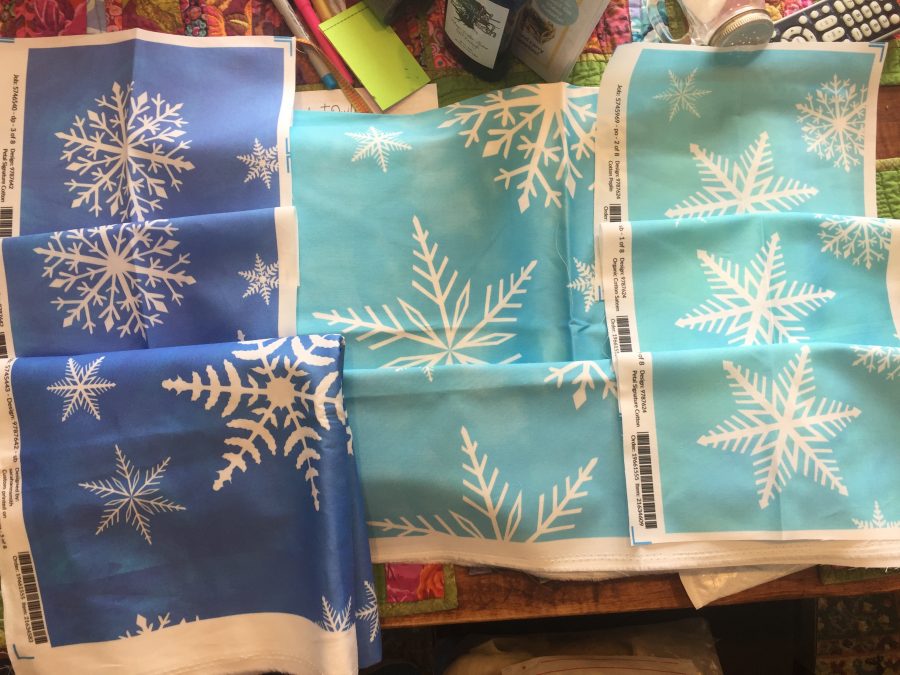
Ta DAAAA! A month or so ago, I asked for input from folks on Facebook about which color to make my project for my new Mastering Metallics workshop. Folks liked pretty much all THREE versions. I ordered up samples from Spoonflower:

Here’s the rather spendy order testing all three color ways and three fabrics: Petal Cotton (the basic), Cotton Poplin and Organic Cotton Sateen. Left to right colors are blue, sky blue and aqua, with the later two being VERY close…the aqua has just a bit more yellow in it.

I am hoping to sell the fabric on Spoonflower later this year–if anyone is interested, let me know and I’ll email you when it is ready. I am planning to offer the blue and aqua (but if someone REALLY wants the sky blue, in the middle above, just ask and I’ll add that also). I need to re-do the master graphic file to be 44″ across rather than 36″ vertically–I will need to add some larger snowflakes so they fit a 12 x 44″ space nicely without getting cut off at a 12″ line. This way, one yard would yield a table runner and four to six placemat tops. The Blue works perfectly with Michael Miller Cotton Couture Sailor, which I will use in class kits for the back and binding.

I ordered a full yard of the Sateen, which is what I used for my Thread-Coloring the Garden workshop which features a photo printed on fabric. I was delighted that the new Cotton Poplin showcased the snowflake design as well as the more expensive sateen, so I’ll use that in the workshop. That also means the table runners will be width-of-fabric, not the shorter 36 inches (I learned the hard way you need to print designs so the lengthwise grain of the fabric is vertical on the photo image with the sateen!).

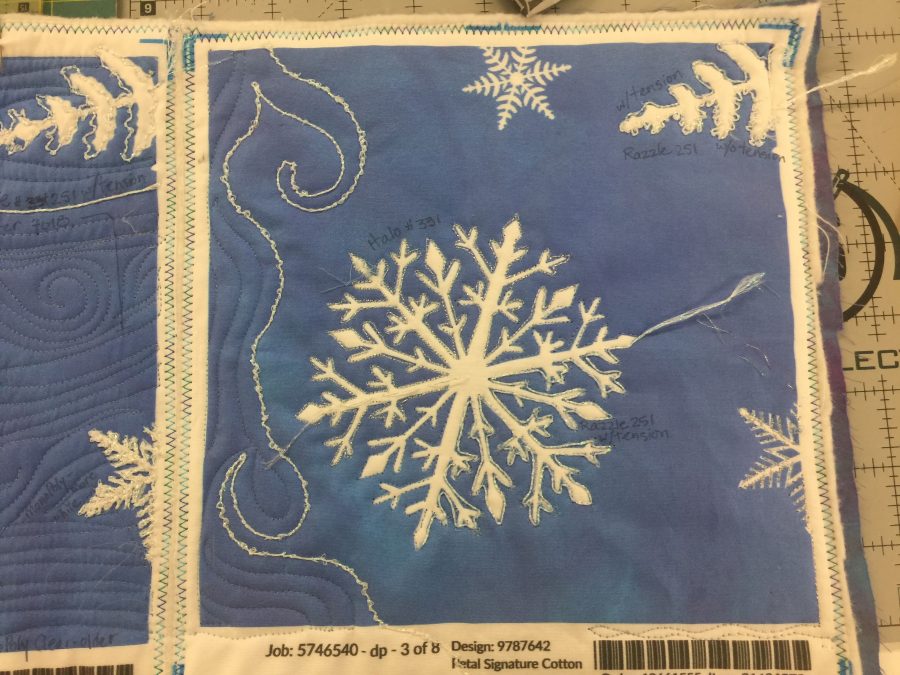
First I used two of the less expensive 8″ samples to test various threads. The Petal cotton has a coarser weave–not as clunky as Kona Cotton, and the image is nice and crisp. The Cotton Poplin is softer and has a lovely hand to it, so I will choose that for the class kits.
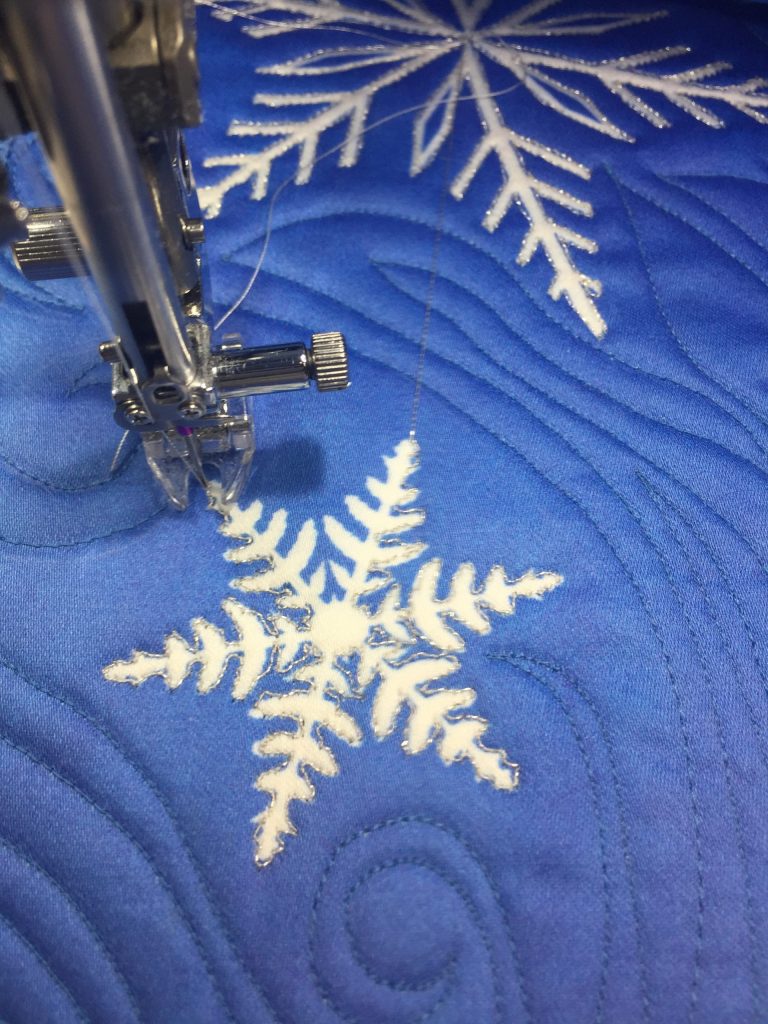
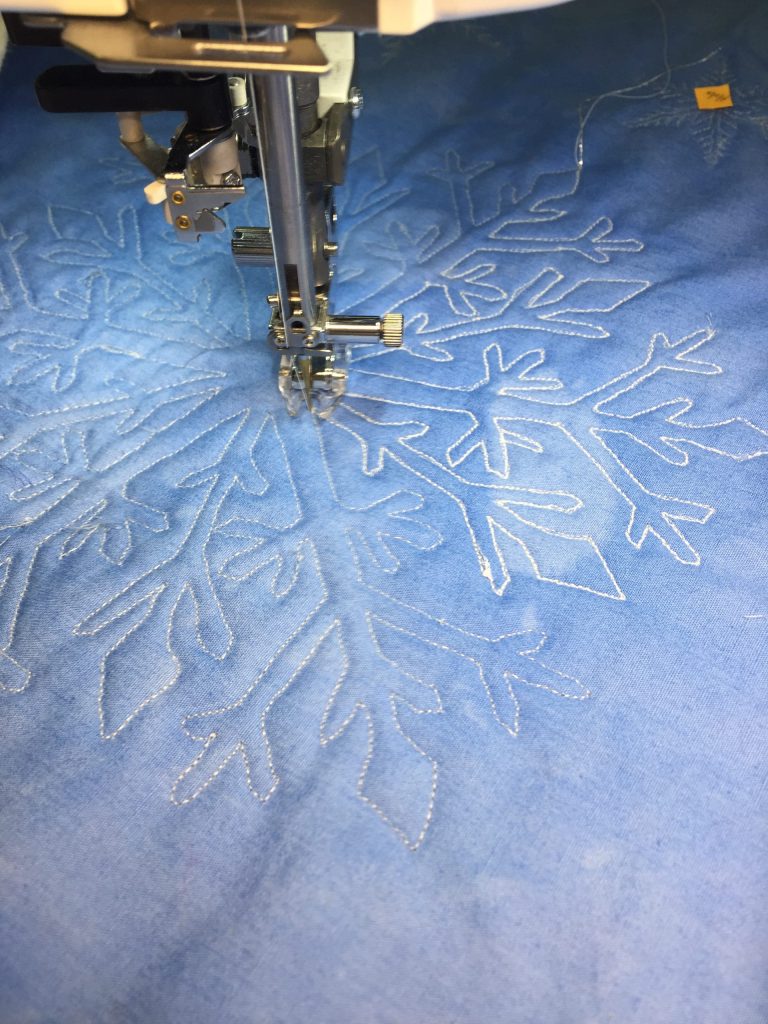
The workshop kit will include Silver metallic (the snowflake being quilted here) and Halo used in the bobbin (upper snowflake). I’m also showing how to use the very heavy Razzle Dazzle on the sample, but to keep kit costs down won’t include it since the class time is just 3 hours. I will have some for sale, and it is of course readily available from Superior Threads. The heavy sateen is gorgeous, but given the cost I’ll use the still very nice poplin for class kits.
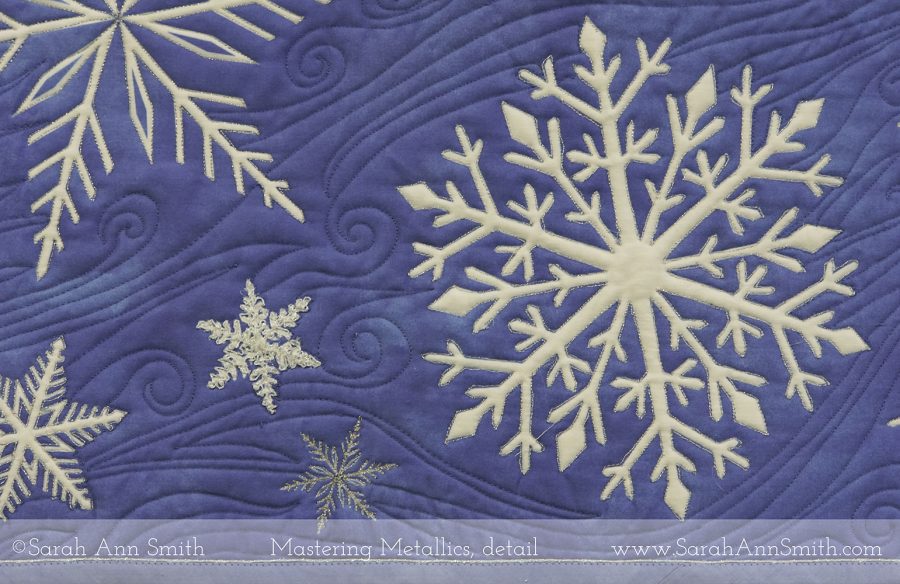
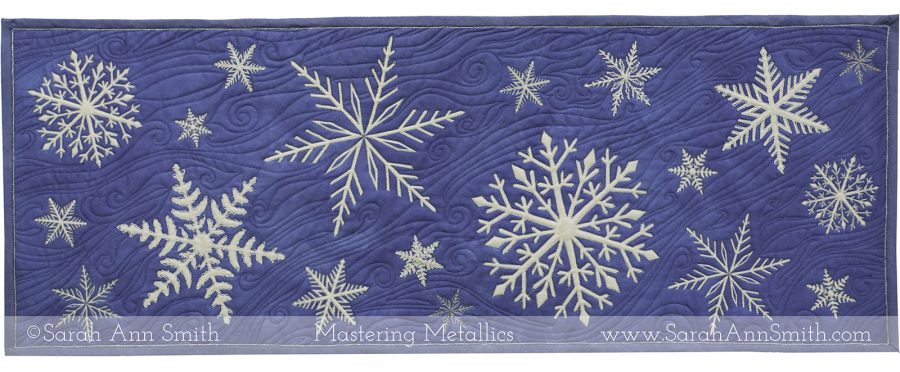
Detail of finished tablerunner. The crinkly looking snowflake is the Razzle Dazzle used in the bobbin. The others are done with Silver Metallic or Halo.
The quilting on the back looks awesome if I say so myself. LOVE my Janome M7 Continental! I’ll be teaching in Janome classrooms, so I wanted to fine tune settings to share with class by quilting this on my Janome. I ended up dyeing this fabric to sorta match. Because of the COVID-19 shut downs, I was unable to order the Cotton Couture Sailor (blue) fabric and receive it in time, and I needed to get the sample done quickly for Quilts. Inc to put in the class catalog. Kits will include backing, and I will have some extra if folks want to buy enough to bind the quilt. You can also order — Michael Miller is AMAZING at getting perfect color matching so one can also order the Cotton Couture Sailor to use on the back and bindings without worrying about color matching.
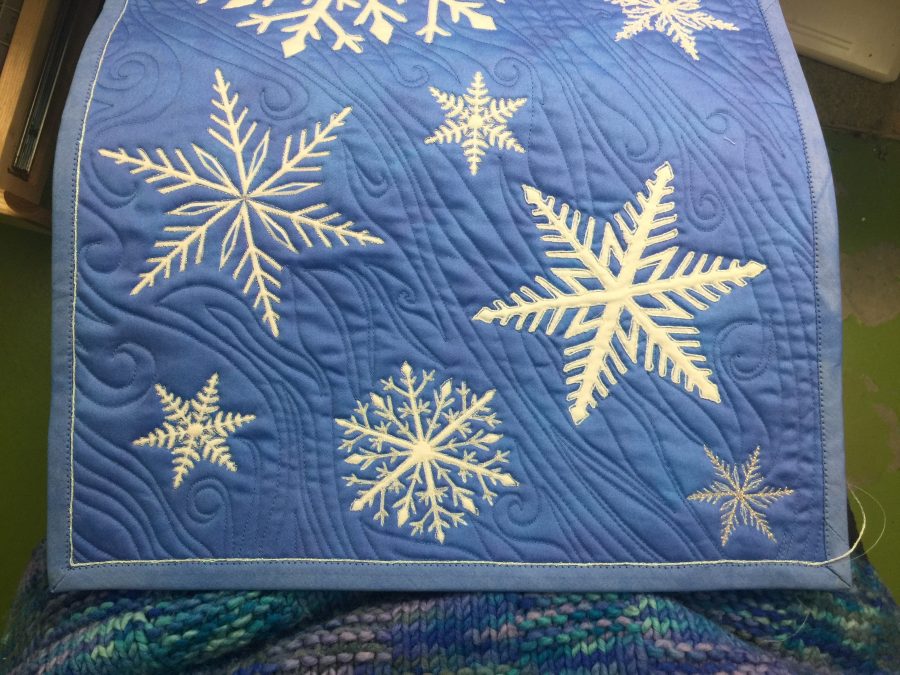
And one end of the table runner after I finished the binding and a little extra how-to tip that I’ll share in class.

I hope some of you will want to join me in class at International Quilt Festival–this pandemic physical-distancing should be well over by then! Sign ups usually go live in July, and I will be sure to share with you my teaching schedule, times, class numbers and so on. In the meantime, if you are interested in purchasing fabric from Spoonflower, let me know! If there is a fair bit of interest I’ll move that to a front burner on the to-do list.

A “Covichat” with Lyric Kinard

Monday, April 6th, 2020
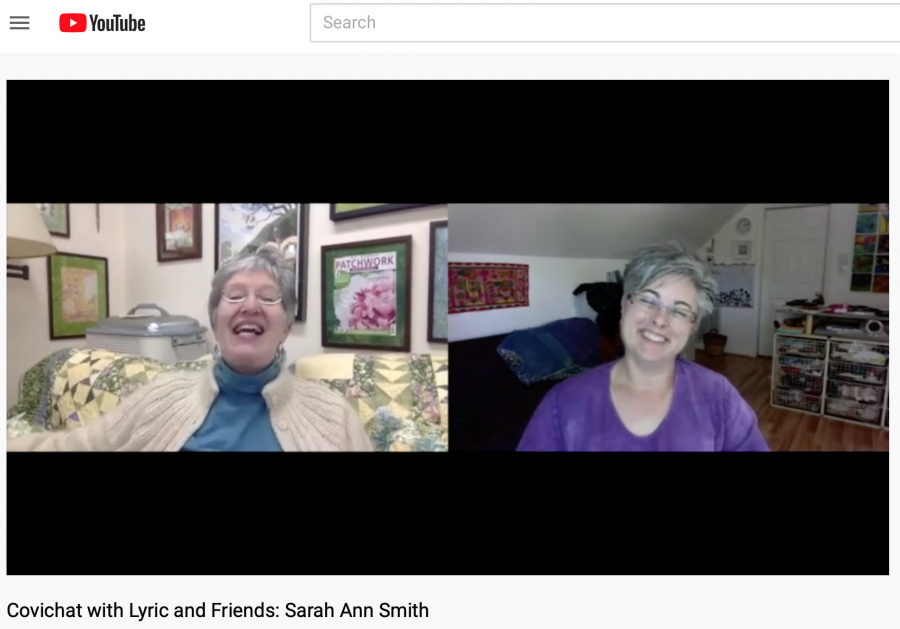
Had such a fun chat with Lyric…this is a screen shot, but I’ll embed the video below, and you can also see it on Lyric’s YouTube channel, Lyric’s blog, and my YouTube channel too.

What FUN! My friend and artist and teacher extraordinare Lyric Kinard has started doing a series of taped video chats with folks in our line of work and art. We chatted last Friday, and the Lyric uploaded the video today. So ENJOY!

In the video I mentioned a bunch of things…things which aren’t on my blog yet! BUT…

Mastering Metallics workshop is described here on my website, where you’ll also find the class supply list (I may need to update that though, so just get a rough idea). It is a half-day class that will debut at International Quilt Festival Houston this coming Fall–sign ups usually start up in July. You’ll learn tons, get a full kit with top, batting, backing and thread so all you need to do is show up. This is the project, a wintry tablerunner. Additional fabric will be available for purchase, and I may make it available on Spoonflower for orders from home. Let me know if there is interest.

I also mentioned some bags and projects fro Michael Miller Fabrics using byAnnie patterns. The first blogpost will go live on April 9th, and there will be another in May. Stay tuned!

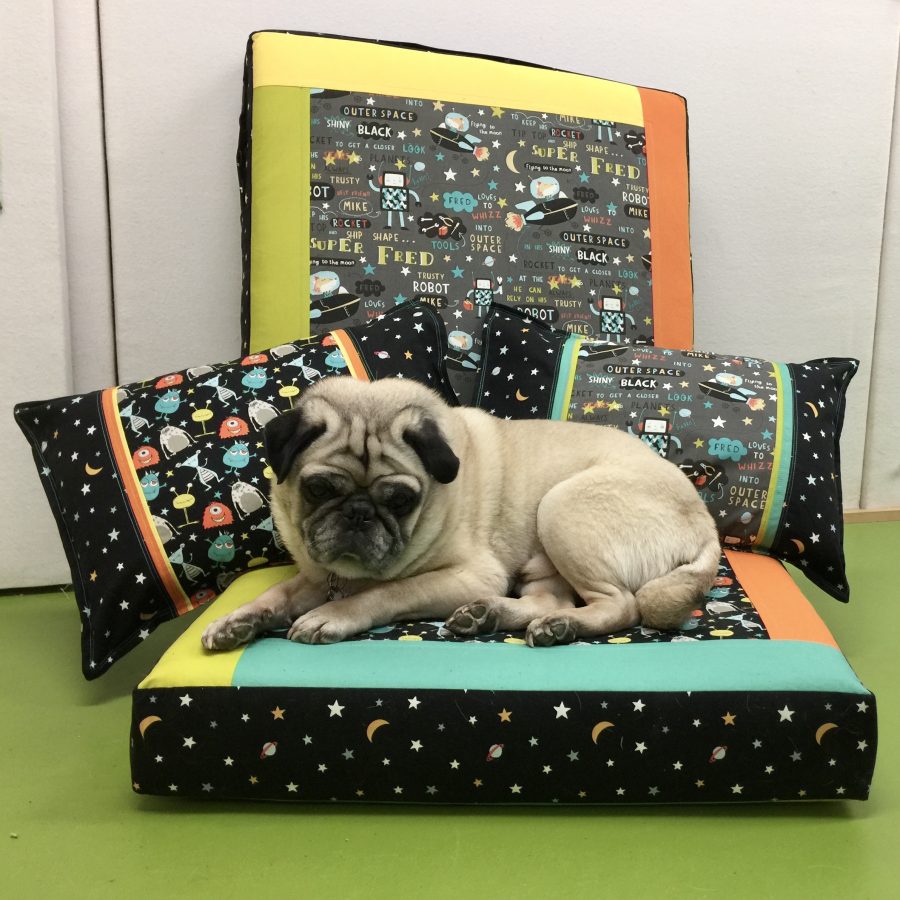
And if you liked that floor cushion, the fabric line is Space Pals and Super Fred. You can find the fabrics usually at Fabric.com, but right now things are messed up due to international shipment restrictions and low staffing at workplaces. So when all this stay-at-home is over and quilt shops can get back in business, as your local shop to carry the line.

The PATTERNS are free and available here with even more information on my blog. Go Here (1) and Here (2) for pdf links and lots of great info and detail.

Widgeon loves the cushions!

I’ve already watched Lyric’s interview with Robbi Joy Eklow and look forward to catching up on the chats with Pepper Cory and Thomas Knauer. Thanks for asking, Lyric…it’s always so easy to do these sorts of things when you’re already friends!

A sweater-hug

Sunday, April 5th, 2020

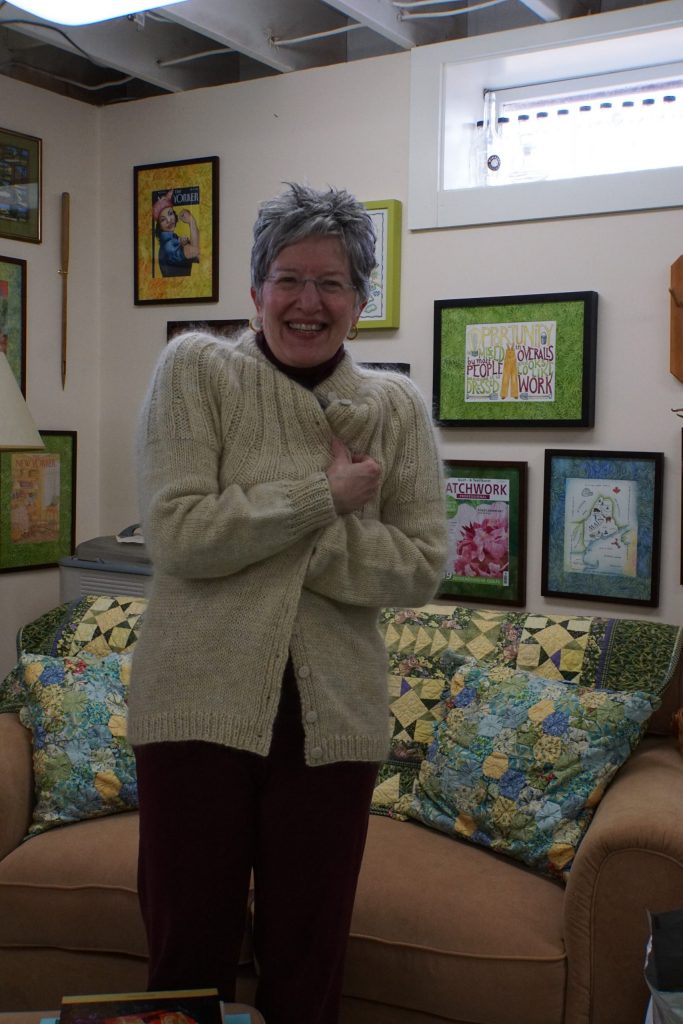
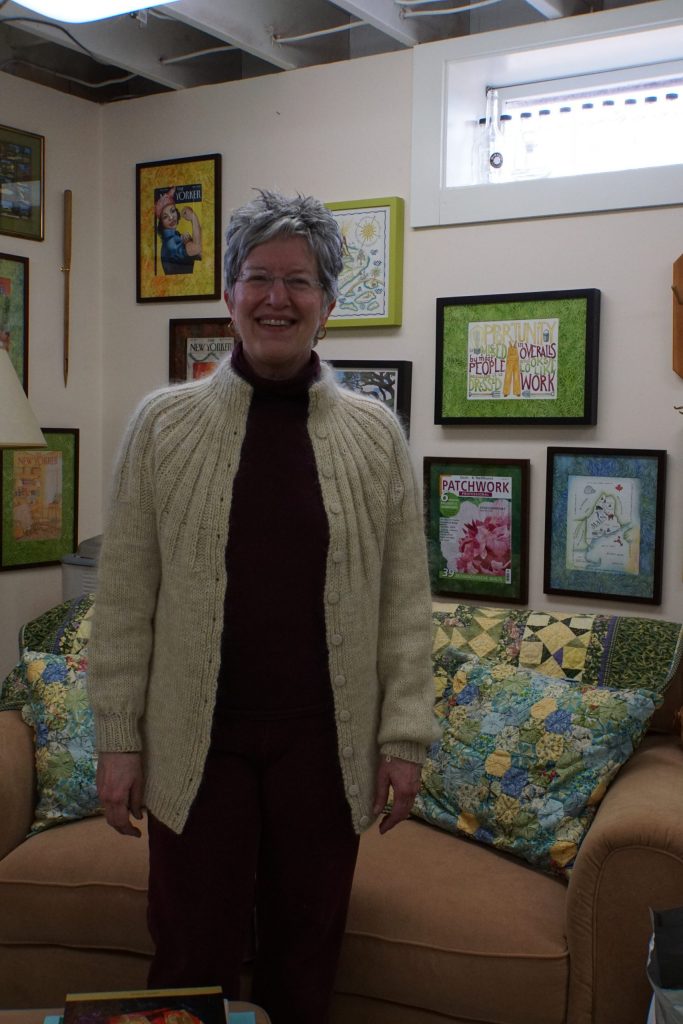
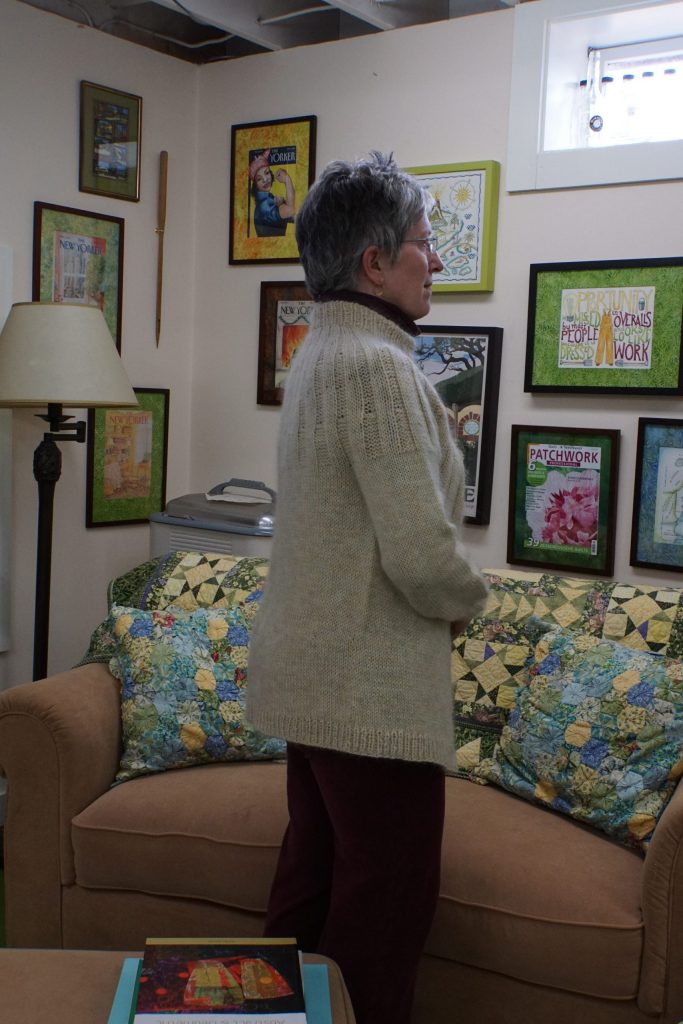
Talk about COZY and warm! I fell in love with the relaxed and comfy look of the Sunday Cardigan (on Ravelry) mohair edition and regular edition immediately and knew I wanted a slouchy, oversized hug-of-a-sweater. So I made one! And then I made another. Here’s the second one, which is what I was craving:

Yes, it feels like a hug!

Now I KNOW many of you are thinking “mohair…ITCHY!” I agree. But this one is made with Rowan’s Kidsilk Mohair, a blend of mohair and silk and it is heavenly soft and doesn’t itch me!

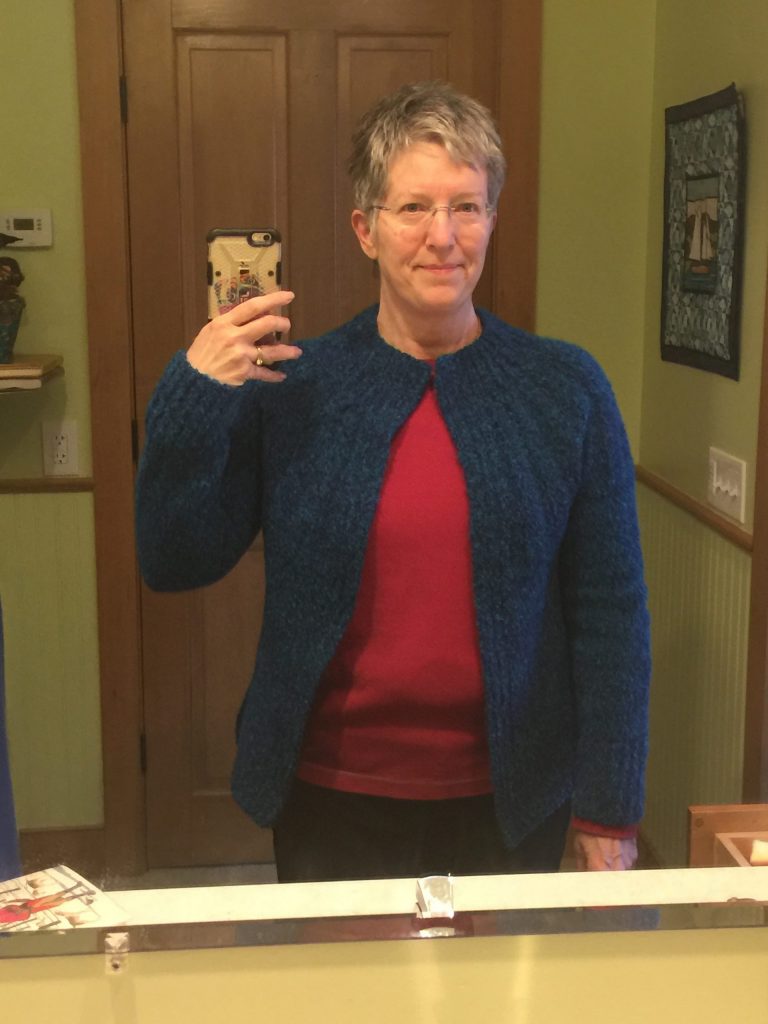
BUT, before I got to this one, I used up some stash. Yes, I used yarn stash! I had this alpaca boucle (according to the receipt in the bag) about a decade. Ahem. I wasn’t sure if I would have enough, so I made a size medium just to be sure. I couldn’t believe how quickly it knit up. My previous sweater was 24+ stitches to 4 inches. This was 12 (!!!!) stitches to four inches. And it knit up in a matter of a few weeks! It is quite fitted, and I’m fine with that. I like the sweater, it is comfortable, and looks good. But I wanted that huggy-oversized look.

As you can see, the blue sweater fits and looks good, but is not that oversized hug. I can tell already, though, that it will get a lot of use. And did I mention, I used up yarn stash?!!!!

So I bought new yarn at Heavenly Yarns in Belfast, Maine. Thankfully, they got in a new order of the Kidsilk before the current shelter-in-place-followed-by-quarantine-then-extended thing. I wanted mine quite long, so I used just over 4 skeins of Cascade 220 in an oatmeal color (reasonably priced) and four skeins (down to the last 30 inches) of Kidsilk (honestly, a bit expensive) in a soft white. If you want to geek out and are a Ravelry member (free to join), you can see project notes here. The blue version is here. I could have done the math and made a different size of the regular version, but I sprang for the whopping $6 for the mohair edition pattern which did the math for me. My version is a bit of a hybrid: I made the mohair version using one strand of Cascade 220 held together with just one (not two as recommended) strand of Kidsilk and got the gauge of 14 stitches to the inch. Given how warm it is, I’m glad I don’t have another strand of mohair in there!

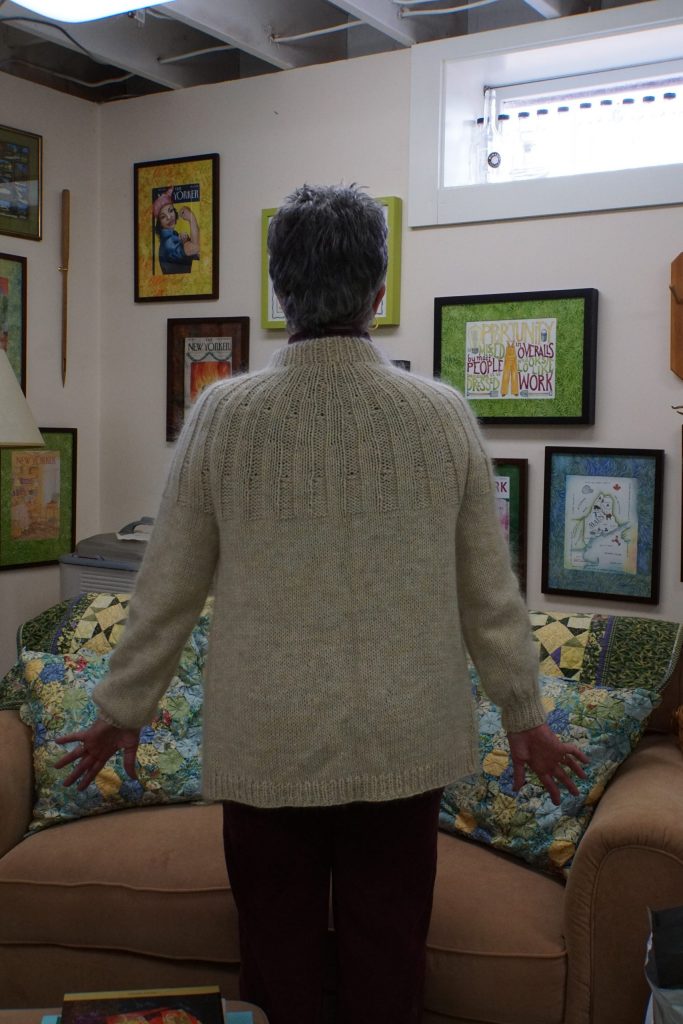
Even after blocking, it didn’t grow longer…hooray! just what I had hoped it would be.

I opted to make the fold-over collar from the standard version and sew it down as in that pattern (even though I didn’t sew down the collar in the blue one!) and add buttons. I followed the directions in the standard pattern for opening up the stitch rather than making a proper buttonhole. Since I had no idea how long I was going to make mine, that was easier. However I think next time I will do a proper buttonhole that looks better. I also made my sweater longer, with sleeves that are neither snug nor full.

Side view: if I am not tugging on the front of the sweater, it is actually FLAT and even at the hem!
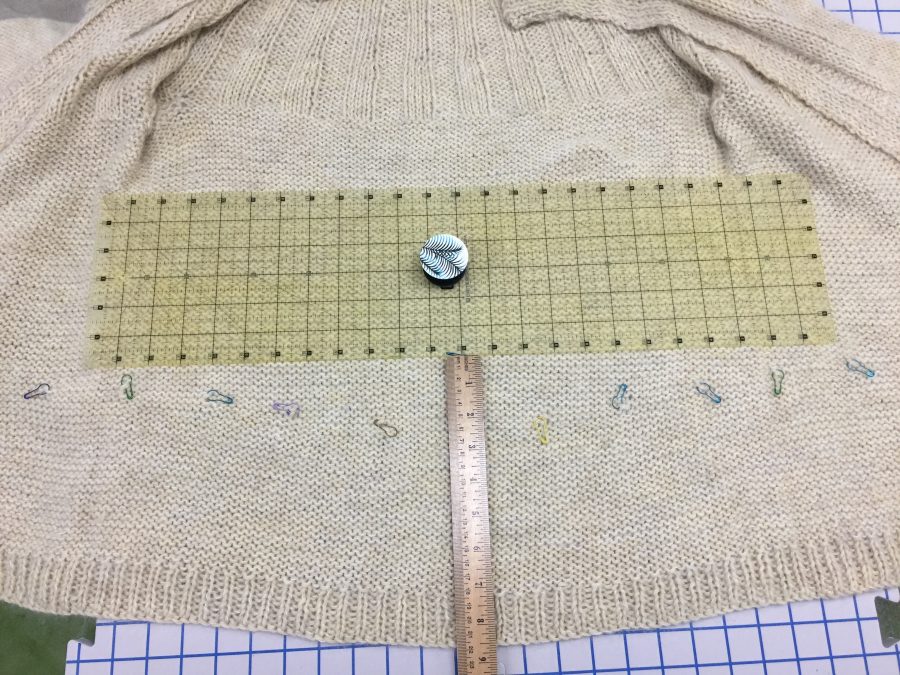
Most garment patterns are made for full busted women. I am not among that group. So I always need to make modifications. changing a front and neckline is tricky. It is far easier to do short rows on the back to even out the tilty hem. Above, the bottom of the ruler is on a single row of knitting. The pins mark where I did short rows, turning the work to add almost 2 1/2″ of length in the center back. I went beyond the side seams about 1-2 inches onto the front area. Next time, I would extend the short rows to within 3 inches of the center front. I would also do the short rows just above the hem, but I thought I was gong to make this as long as the four skeins of Cascade lasted, but after doing the short rows decided I really wanted it longer. But the short rows mean that the sweater doesn’t hang down and sag and point to the ground in the front! Problem solved!
On the blue sweater, the medium version really wasn’t large enough for my broad shoulders, so the collar–which was designed to be doubled over–got pulled outwards. So I decided not to fold the collar to the inside and stitch and just left it as is because my neck gets cold in winter. For my oatmeal version, I made a size L and made sure that I had enough rows in the yoke that I didn’t have that problem in my Hug Sweater!

So that’s what I’ve been doing in the evenings while watching Midsomer Murders on Amazon Prime on my iPad. Next up: a pattern hack of Jeri Riggs’s stunning Lily of the Valley vest. I’m attempting to do my own thing and make a linen t-shirt with two columns of the Lily of the Valley motif up the center front, mimicking one of my favorite cloth shirt patterns that has a square neck and short sleeves. The Quince and Co. linen yarn isn’t fun to work with my arthritis, but everyone tells me I will LOVE the yarn once it is all done and washed. About 24 stitches to the inch, so it is slow going, but I’m about 6 inches up from the bottom. Hopefully it will be done by the time it is warm enough to WEAR it! And hopefully we’ll be able to go out!

Dealing with the achy parts…a quick project

Friday, March 20th, 2020
Sarah Ann Smith's easy peasy arm support

How to deal with aches, be thrifty and creative

So in January I was diagnosed with bursitis in my right elbow. Seemingly overnight a big bubble popped up on the outside of the elbow–like half a golf ball big. ( I hear my father saying Keep your elbows off the table! Remember that?) It didn’t really hurt, but if I leaned on the table it was annoying. For a long while I used an empty squeeze bottle (one I use for dyeing). I had first brought it up to support my wrists at the computer instead of buying an expensive do-dad for such purpose. I realized I could use the bottle to elevate my forearm so I could sit at the table as I always do, lean on my arms, but not aggravate the bubble (by the way, two months later it is pretty much finally gone). But the cat kept stealing the bottle as a toy.

I remembered those wrist supports they sell and thought “I’ll bet I could make something.” So, I did. For a whopping $1.99 for a length of foam pipe insulation (I used the kind for 1/2″ diameter copper pipe, the one with the smallest hole in the center) and scraps of cloth, fusible and batting. Here’s what and how I did it, and what I’d do differently.

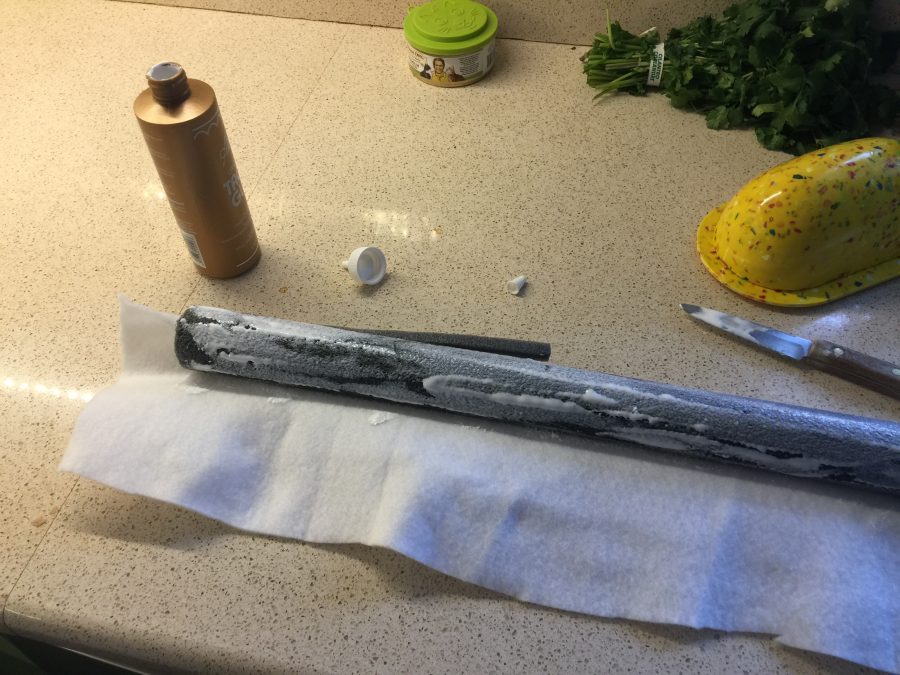
I measured how long I wanted the foam support to be, then cut a batting scrap (ya know those long skinny ones you can’t quite toss?) to fit around plus 1-1 1/2″ extra on the circumference, plus an extra 1 1/2″ on either end. Next, open up the sliced bit. Then, I used some, um…., “vintage” Aleene’s tacky glue, which meant I needed to spread it since it wouldn’t pour. Ahem.

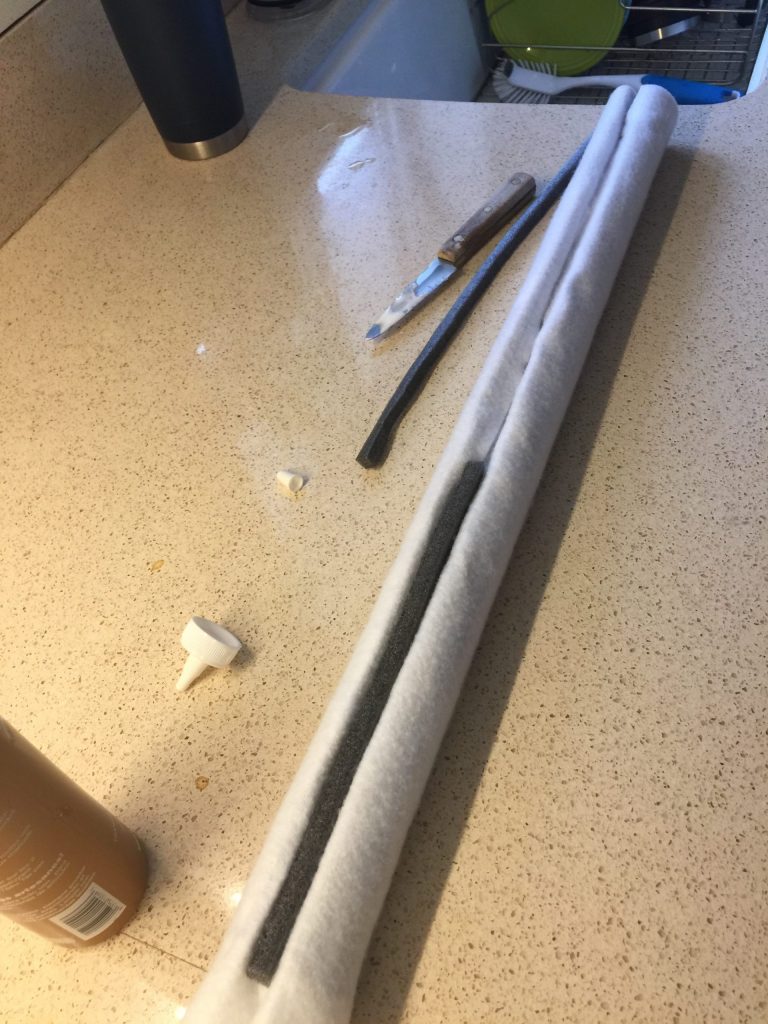
I tucked the batting inside the slot, then filled in the hole in the center with remnants trimmed for extra pipe insulation. If I leaned on the tube, it sorta collapsed, so I just stuffed it. Do NOT glue this bit! You may opt to tuck things in.

THIS IS WHERE I’D DO IT DIFFERENT:
Next time, I think I would fuse the fabric to the batting first rather than later because the outside isn’t quite as smooth as I could like.

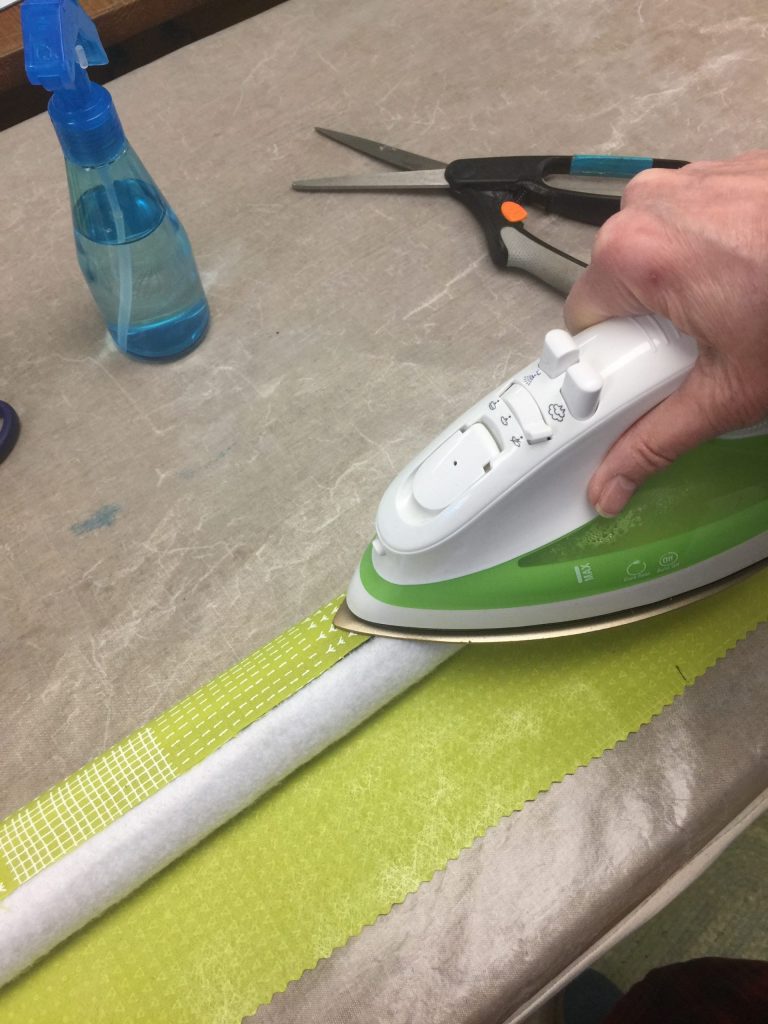
I refused my fabric (cheerful!) and fused it to the roll. If I were to make another, I’d fuse it to the batting first. I added the batting because I thought trying to fuse directly to the foam would not be successful–melted foam? No thanks.

I used a wave/pinking blade to trim the exposed edge of the fabric, overlapped the edges and fused together. Next time (if there is one), I would tuck the ends into the slice, then glue it shut.

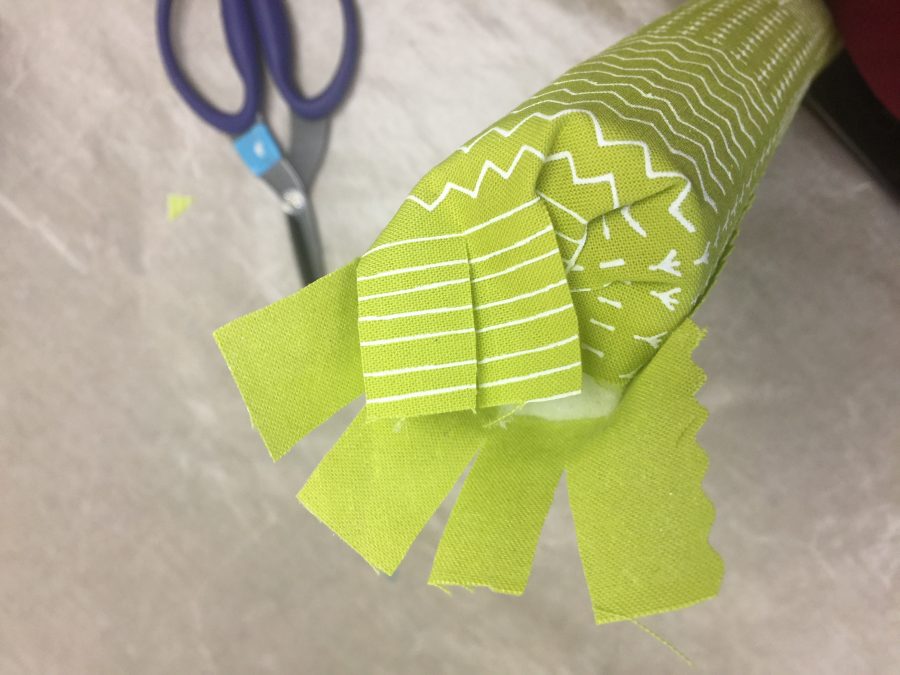
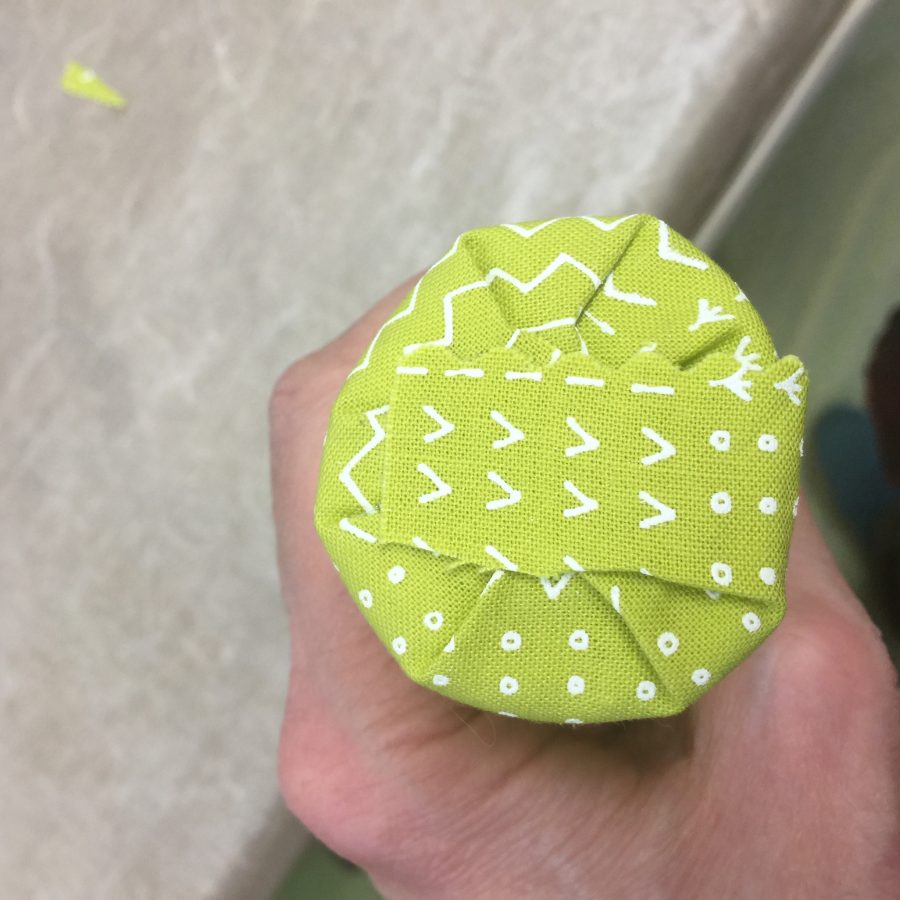
For the ends, I snipped the excess at the ends to 1/4″ away from the foam pipe. I worked my way around from the underneath edge to the overlap edge of the fabric, fusing as I went. By not cutting to the outside edge I got a neat fold that won’t ravel.

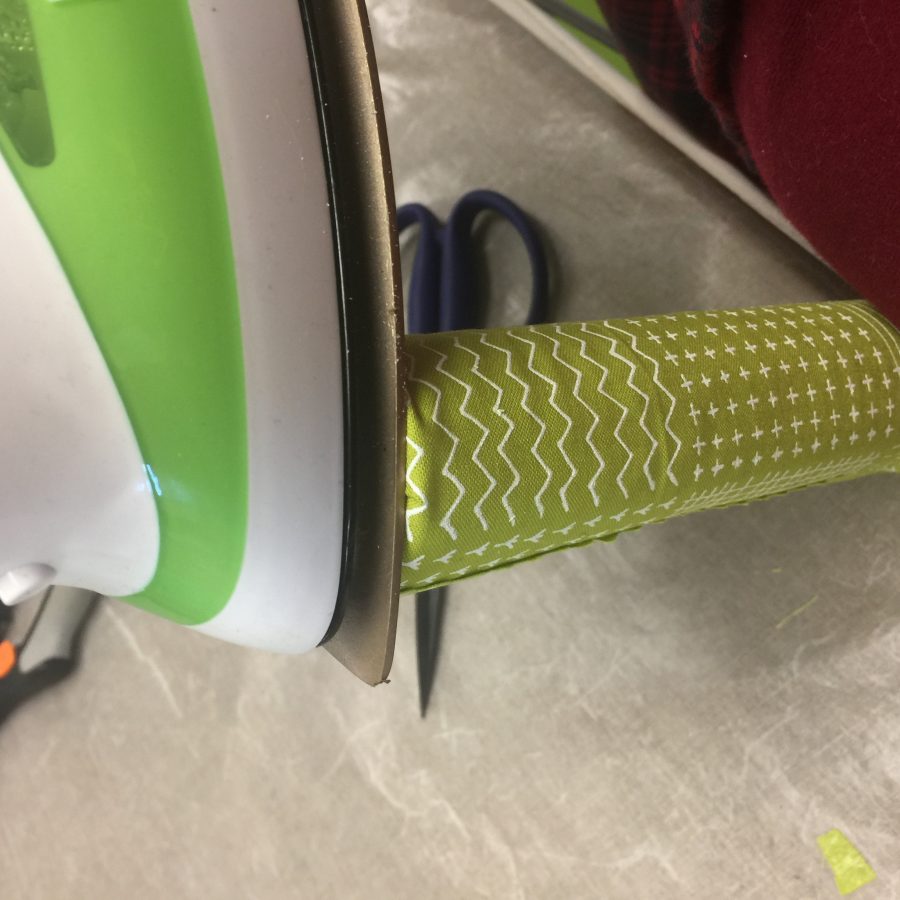
Just place your iron on the end and fuse as you work your way around. When it’s all down, hold the iron on the end for a bit extra to get it to really stick.

PS: Best fusible in the world: MISTYFUSE. Hands down. The Best!

And here’s my end.

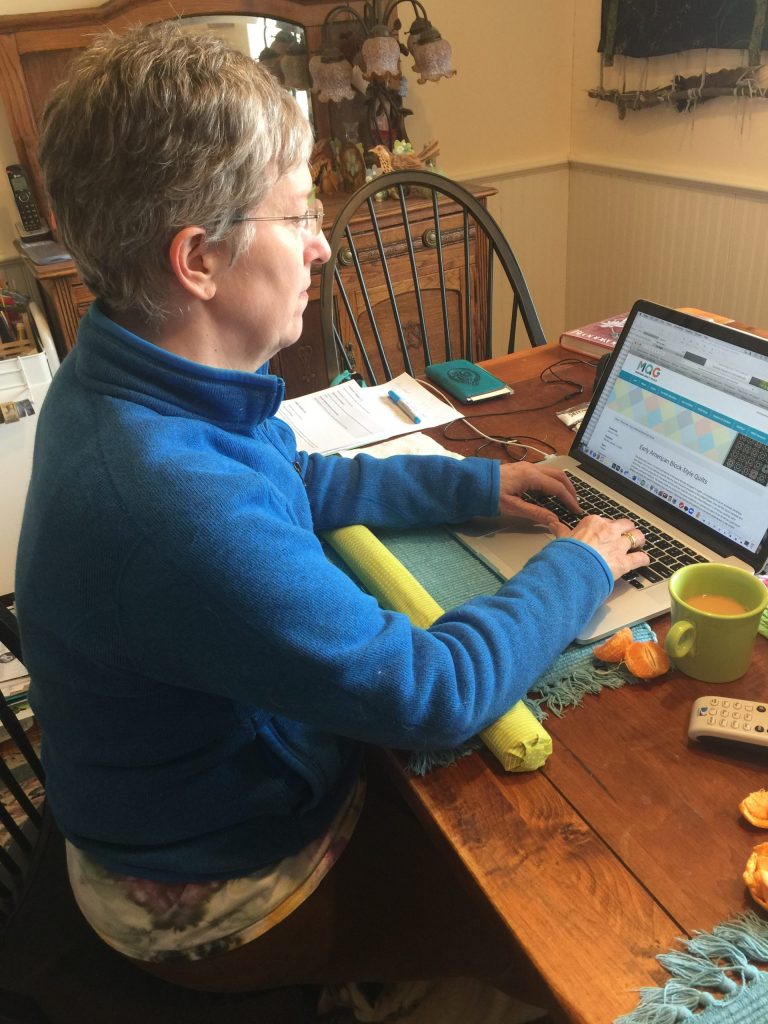
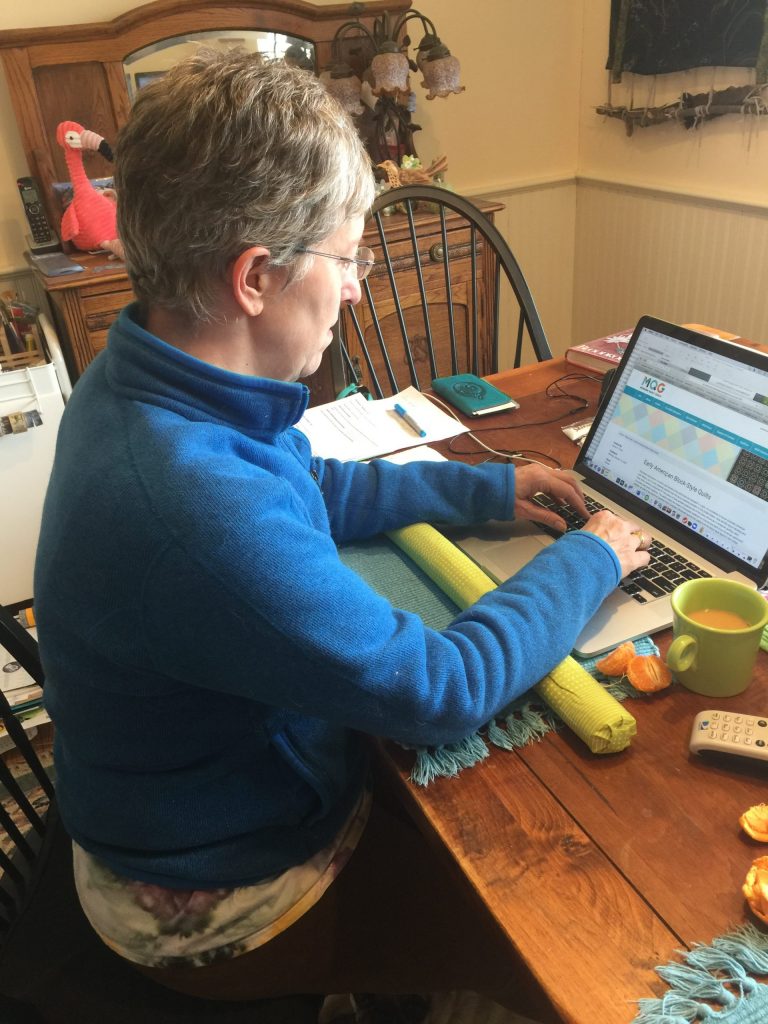
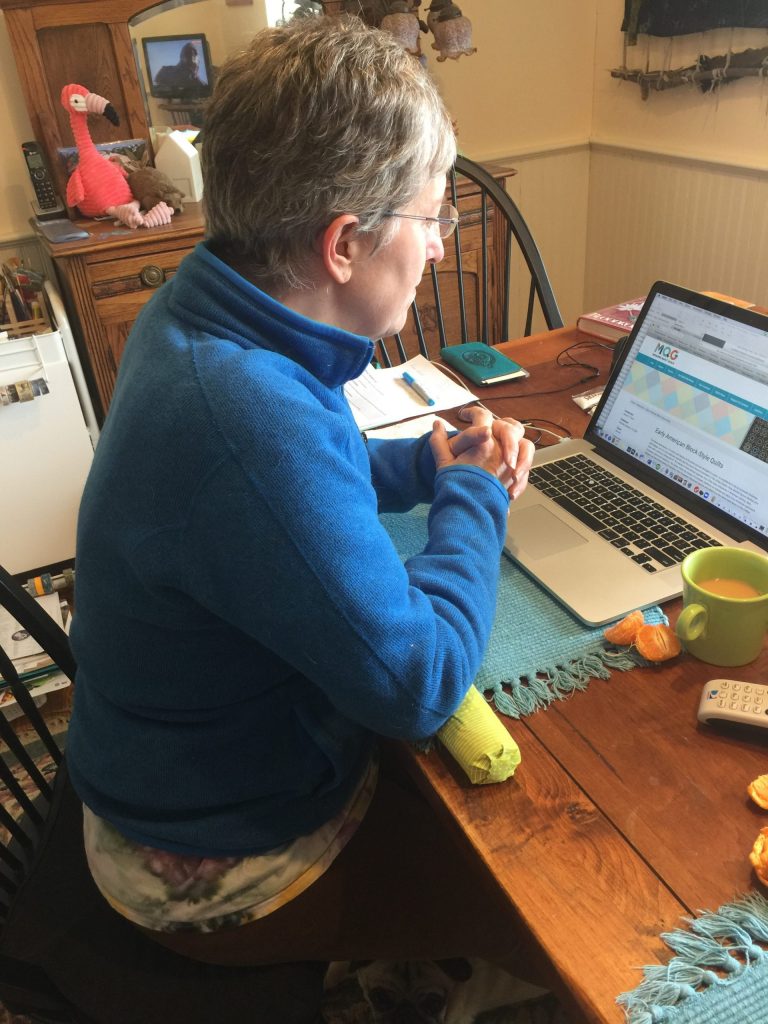
Using the roll as a support for my forearms, which keeps my wrists straight and not bent (since the arthritis in the wrists acts up when bent).

How I spend way too much of my life…at the laptop! Business and friends and internet happen!

Hope this mini tutorial will help you or someone you know. Thanks for reading!