A quick Gift Bag Tutorial–took about half an hour even *with* being fussy! Used leftover flannel, and a trimmed off bit of fabric from a quilt back or edge as the ribbon! Read on….
Sometimes it is possible to whip up a quick something just before Christmas…I’ll have to back-to-back posts (I hope) about sewing for the holidays that include this tutorial on zipping up a quick gift bag and, next, the wonderful York Pinafore pattern from Helen’s Closet patterns.
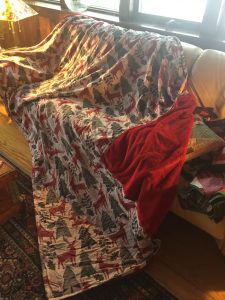
Last year Shannon Fabrics sent me a number of different fabrics including Cuddle and Luxe, fleece and faux fur type of fabrics. They sent a vast amount of this soft and silky red (available at Fabrics.com). I’m not positive which color way it was, but it was similar to this one. I finally purchased a flannel sheet, queen size, to make a throw that is big enough for two to snuggle or to use as a cover on a twin bed! It is more than a tad wrinkled here because it has been in recent use…it’s winter in Maine! Thank you Shannon Fabrics!
I needed the Queen Sized sheet so it would be long enough for the red Luxe that is so silky soft. That meant I had quite a bit leftover…so I thought I’d make a garment (next post). Once that was made, I still had leftovers so I whipped up two gift bags and thought I’d share it as a tutorial.
Tutorial:
Cut two rectangles of fabric or one very wide rectangle. Place right sides together.
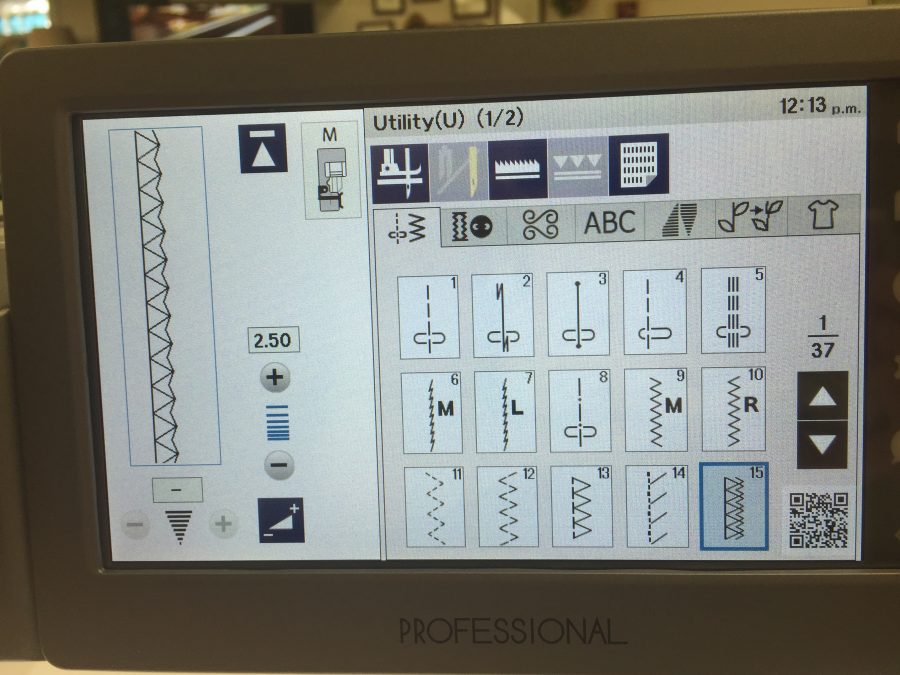
Clean finish edges. You can use an overcast stitch as I did (photo below) or use a french seam (google it, or I’ll do a tutorial eventually of some basic things every sewist should know). Using the Janome’s “M” overcast foot gave results as good as a serger.
Janome America sent me the amazing new M7 Continental sewing machine (several blogposts in the new year…phenomenal machine!). I used the zigzag overcast stitch and the M foot which comes with the machine to clean finish the edges of the bag.
3. Sew a simple straight seam just inside the overcast edges. Sometimes the contents of gift bags can be heavy, and especially with soft and stretchy flannel, I felt a little extra stitching was a Good Thing.
I’d never used the Lock-a-Matic stitch before because I learned to sew when we were lucky to have a simple zigzag on a machine and not all the bells and whistles. Janome has designed the AcuSpark software. In the previous photo that QR code I pointed out: use your phone to scan and it will pull up a screen with helpful information. Here, I’ve got the one for the Lock-a-Matic Stitch!
Having started sewing when dinosaurs roamed the earth and you were lucky if your machine did anything besides a straight stitch forward and back, I am so used to just doing the lockstitch or backstitch myself that I likely will keep doing that, but this stitch automatically does a securing backstitch at the start of a seam and, when you press the back arrow, at the end. I had been concerned that it might sew a lockstitch when you pause in the middle of a long seam to re-position your hands, but it doesn’t, which is good!
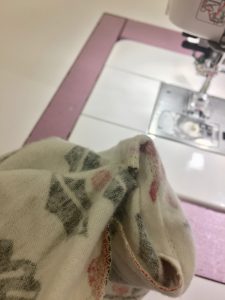
4. Turn your bag right side out.
Once your seams are finished, turn the bag right side out. I like to fold the corners so that both seam allowances are to one side. My hand is inside and I’m pinching the corner together. Then keeping hold of the seam allowances, turn.
Pretty good corner, and I haven’t even eased it out yet!
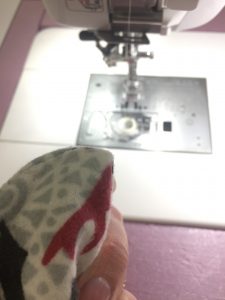
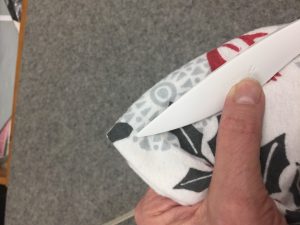
5. At the ironing board, use a point turner to coax the corners out to perfect.
I have several point turners. This is one I bought just this year. Make by Clover, it is beautifully smooth, and has a Hera Marker (sharp edge for marking lines on cloth) on the other end. It is longer than most point turners, curved to fit the hand nicely, and I like it better than any others I have tried.
Lookit how perfect that corner is! Square as can be! I created this method for corners when doing custom home dec work for an interior designer. Some of the upholstery fabrics were so thick that I was afraid if I clipped the corner, the old school way to deal with bulk, the fabric would unravel and ruin the project, and the fabric was crazy expensive. This is secure and gets even better results.
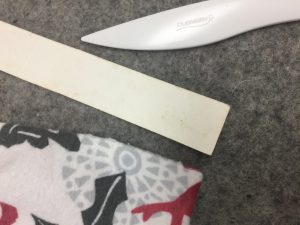
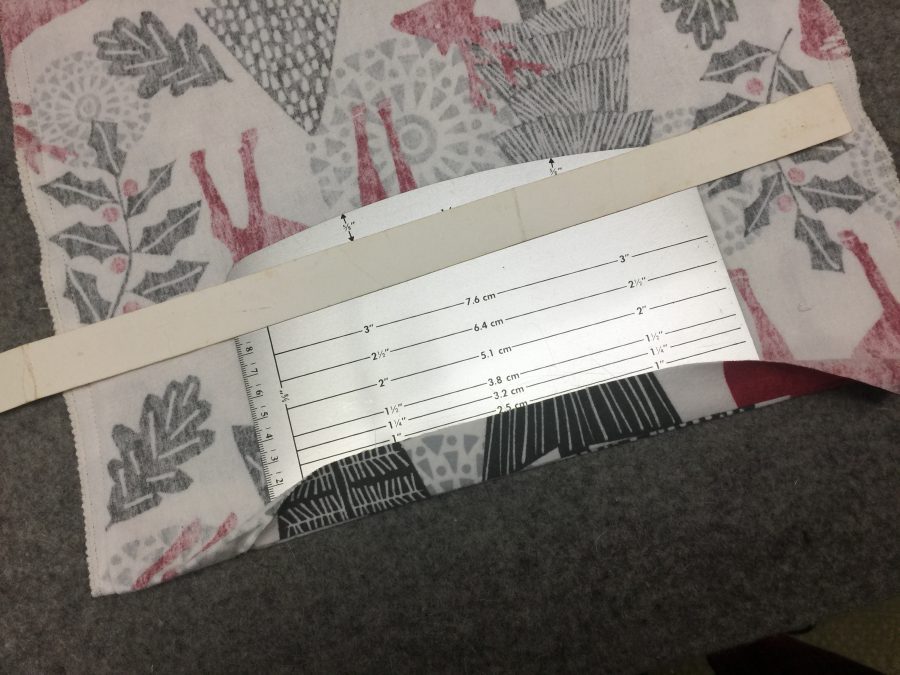
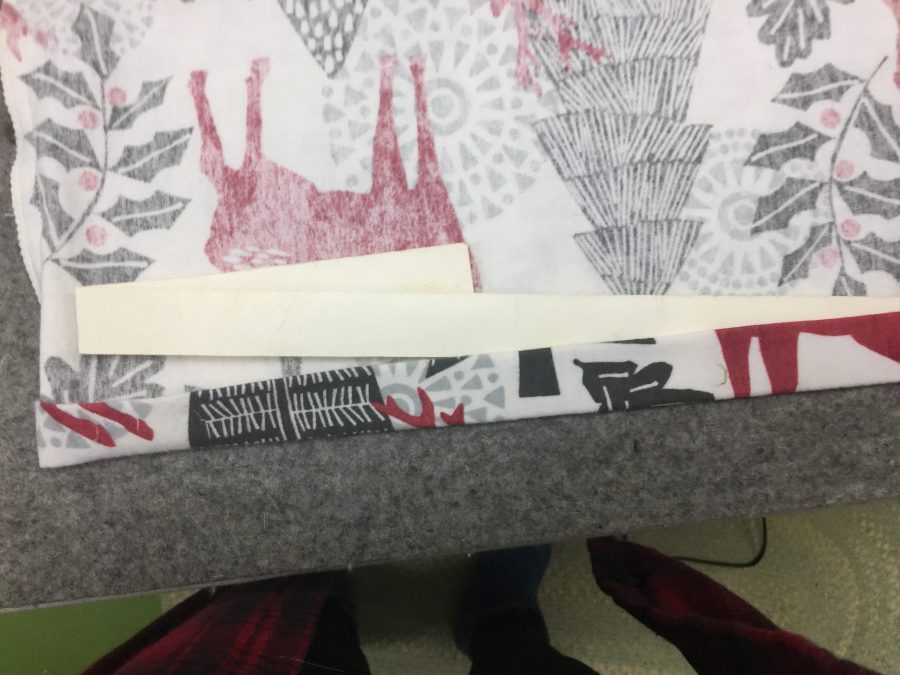
6. Hem the open end. The interior designer I worked for taught me about using poster board (or tag board or an old manila folder) to make templates for turning hems. When making curtains, the extra weight of a doubled hem helped them hang well. I called it the turn-turn hem, since you turn up two full hem-depths.
This is the first turn. I’m showing the poster board 1″ wide strip I have used –I am not exaggerating same piece of paper– for over 17 years. Place your fabric right side down on the ironing surface. Fold the hem up over the poster board, lightly snugging the board into the fold with your fingers. Press. Steam is fine–use it all the time and the poster board is still in great shape.
You can also use the Dritz EzyHem tool, available everywhere. The metal is nice because it gets hot which helps set the crease, but it is short, maybe 6-7 inches. The poster board is fabulous for things like curtains and custom sheets because you can get a really long run done all at once without wobbles.Then you turn the hem up again. Usually I keep the poster board inside the first turn and just roll it up, but for photo purposes I wanted to show you that it is the same idea.
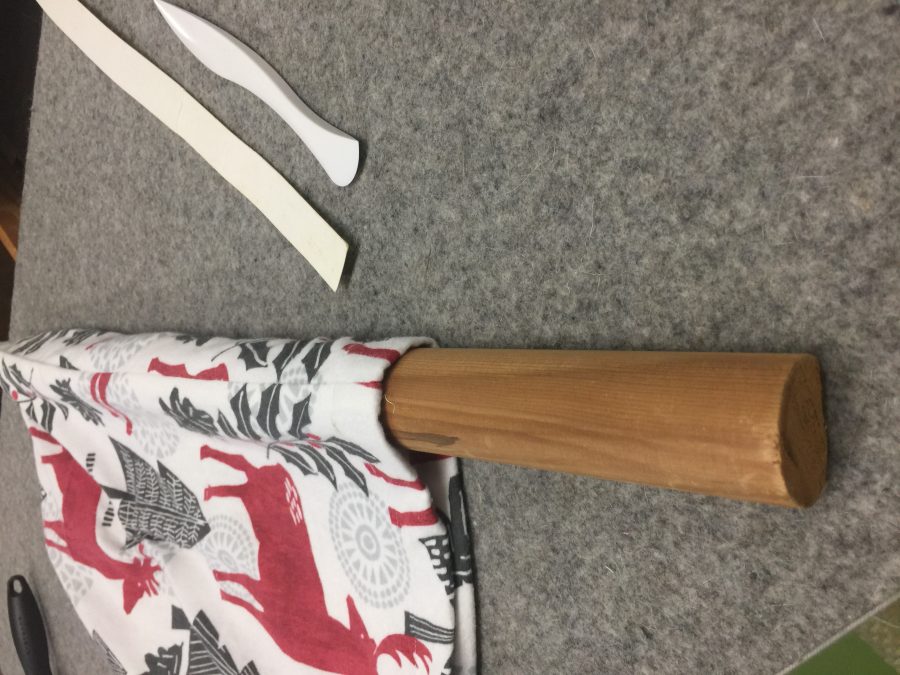
7. Press your seams to one side. Using a seam roll –in this case a piece of cheap stair handle from the big box DIY store. Dressmaking suppliers sell beautiful hardwood (maple usually) seam rolls for Lotsa Bucks. This pine stair rail handle was a few dollars for 24 inches. Sits flat on the ironing surface and does the trick.
You can see the flat end of the stair-rail-as-pressing-dowel. I’ve got the seam centered on the top and have pressed the first part of it. This set up is perfect when you don’t want the edges of the seam allowance to show through to the front of your fabric.
8. Give your bag a final press, tuck the goodies inside, and tie shut. I think, having found that strip of green, that instead of buying ribbon I might “make” some from leftover bias bindings (unfinished on the edges) or making some straps (turn seam allowances under, sew folded edges together) to use as ties for future years. Here’s that original photo again:
That’s it in a nutshell! I really need to go buy a lottery ticket! During International Quilt Market, which I recently blogged about, I stopped in the Michael Miller booth while swooning over many things, including the indigo design minky (!!!) and the Cotton Couture solids. One of the staff members mentioned the Brand Ambassador program….when I got home I followed up, submitted an application and this morning this happened ……
Ta DAAAAAAAAA!
Today started off with a great big WHOOOP when I saw an email titled “2020 Michael Miller Fabrics Brand Ambassador Selection” and that began with “Congratulations! You have been chosen…..”
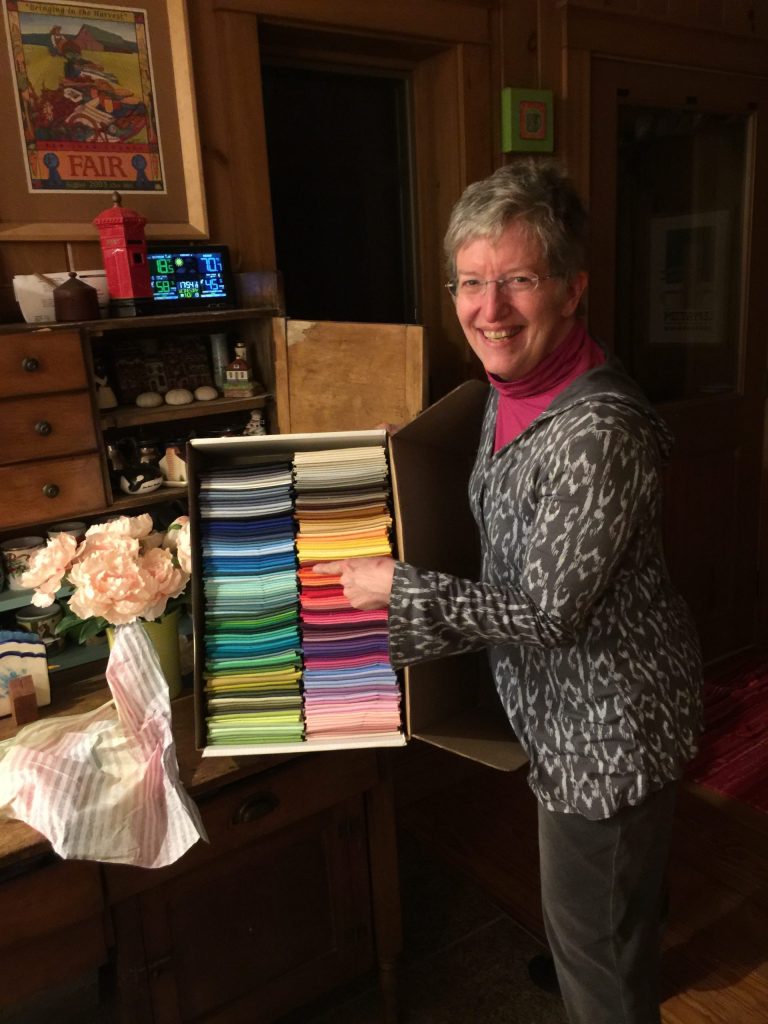
I wasn’t sure as an art quilter I’d be up their alley, but clearly they are willing to give it a go and so am I. Early next year I’ll let you know more about what it that means and what I’ll be doing as a Brand Ambassador, and in the meantime I have already ordered 3 yards of a print minky of theirs coming to help me make a lap quilt of a top I finished at least a decade ago from a charm square pack purchased in Hawaii circa 2002! And I ordered 7 yards of an aqua in Cotton Couture (Luna) to play with those amazing fat quarters in the giveaway I won….remember this? Can’t wait for it to arrive!
That’s how happy one looks when you’ve just won 214 glorious fat quarters in the softest cotton fabric around!
Now, alas, reality intrudes and I’m going back to cleaning the kitchen (so it can get really mucked up over the next couple of days…makes total sense, right?)! But I’ll go back to work happy as a clam!
What a BEAST! I think this machine may be able to do everything but cook and do the dishes (Janome: hint hint LOL!). While visiting with Janome America staff (Regena, that’d be you) at International Quilt Market in Houston, I was thrilled to learn that Janome wanted me to take this beauty for a test drive, blog and share and sew on it for the next year! THANK YOU JANOME, and yes indeed-y I am shouting! I’ve been beyond lucky to be a Janome Artisan since 2003–don’t ask me how I’ve lasted this long, I’m not sure, but I’m just really proud to be affiliated with them (I’m not an employee but all opinions are honest and unvarnished).
Today I’ll share a quick video of the unboxing. Then I have Christmas gifts to make, so I will share various things and features that I have found. So far I know I’m going to miss the flip-up chart of the stitches, but there are so many other beyond **amazing** features that I can cope–and photocopy the pages in the manual for ready reference! I’ll get to learn about the new AcuSpark phone app that one can use for tutorials and tips using the on-screen QR codes on how to use the machine, and I am in love before even turning it on with the new built in antenna thread stand, the fact that the antenna collapses so I can actually USE the COVER on the machine easily, not to mention the massive harp space. One bit of advice: you may need help hoisting this machine onto your table!
This box is so big that *I* could fit inside it! Widgeon is so impressed (and deaf and nearly blind) that he doesn’t realize he has a cookie on the floor in front of him!
As for the name: the Janome 7700, from some years ago, was the most beautiful ruby red on the front. I’m not much of a red fan but boy do I miss that face plate! So, as a fan of the Harry Potter books, I named that beastie Rubeus Hagrid (the gamekeeper). When I had the 15000 top of the line on loan, of course it had to be Albus Dumbledore, the greatest wizard of all time. Later, the silver-faced 9400 (and its heir the 9450) became Gandalf the Grey, because we love the Lord of the Rings, too.
BUT, I decided it was time for a POWERFUL WOMAN, so I have named her Minerva McGonagall, headmistress of Gryfindor and one of the bravest, stronger, most powerful and wise witches of all time. Here’s to Minerva!
And yes, there was even more fun stuff at Market…see why I never got to the quilts? (Previous two posts have more good stuff.)
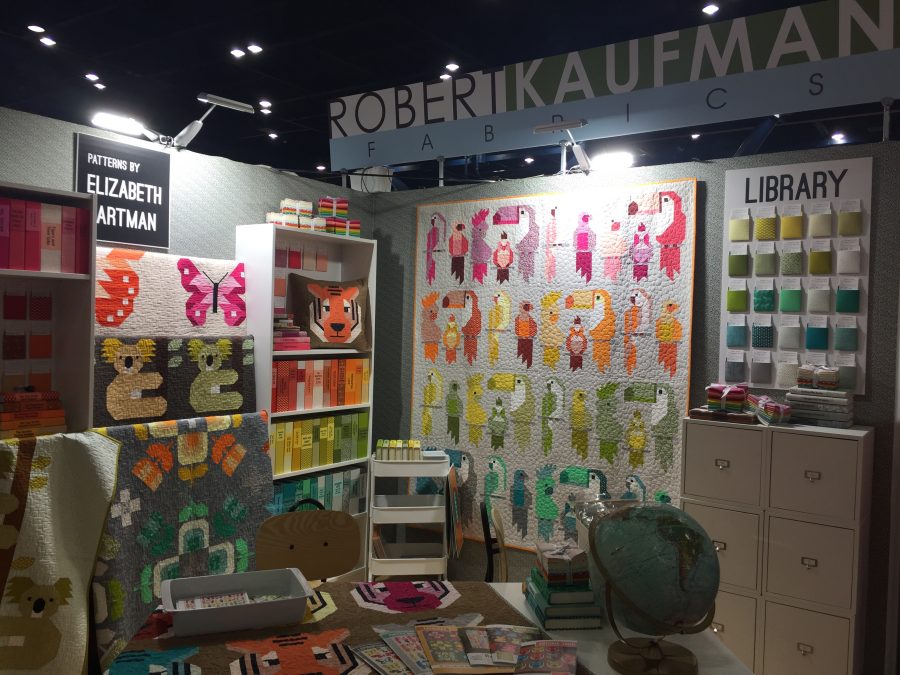
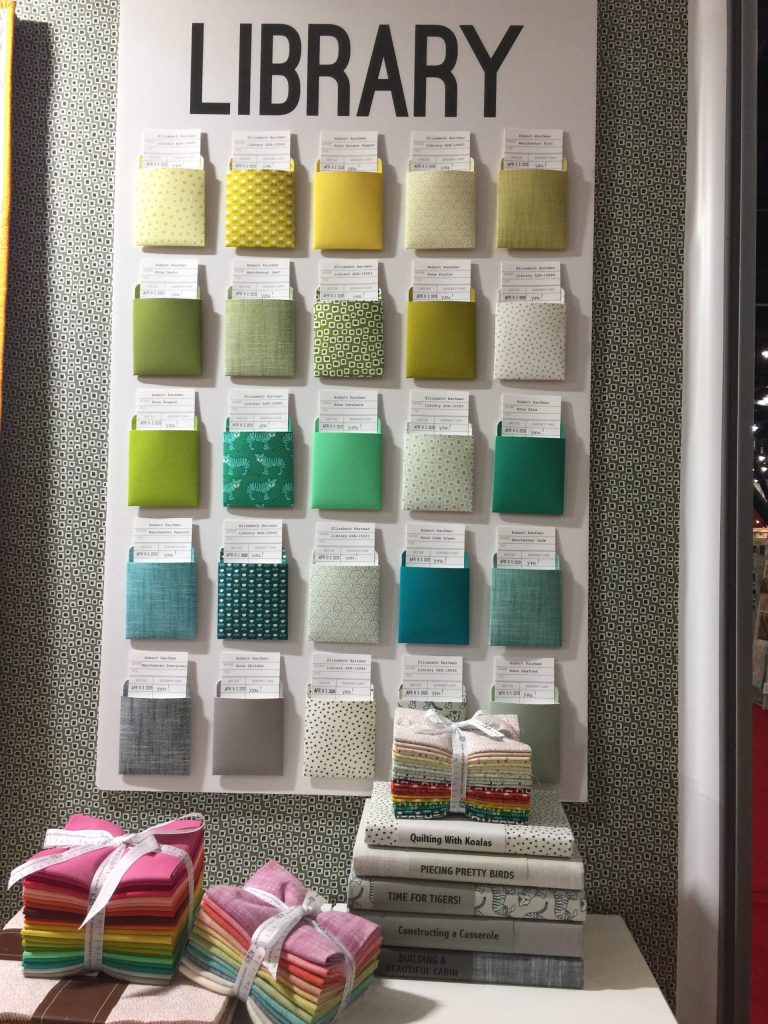
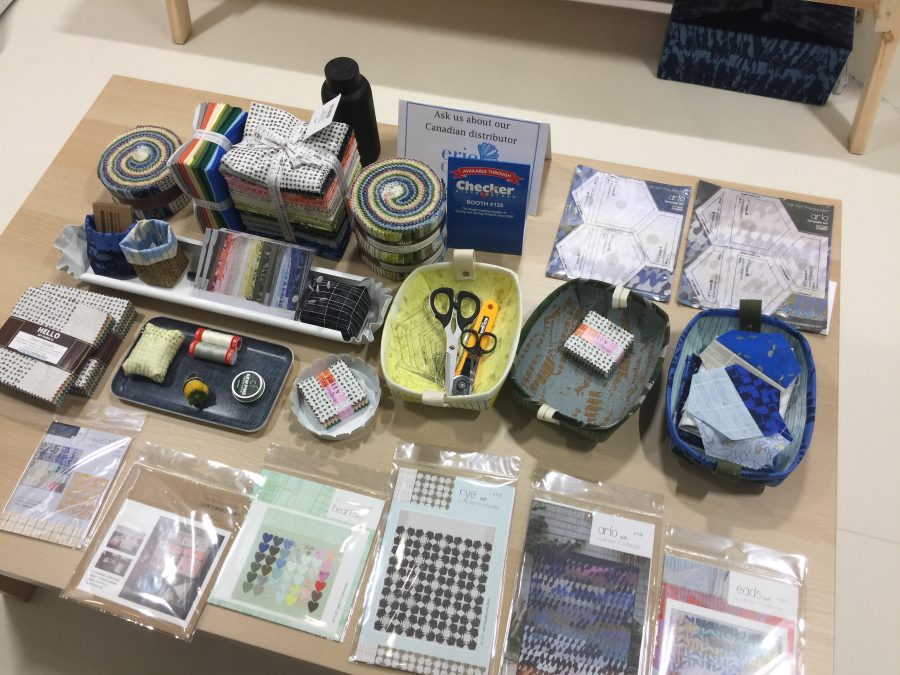
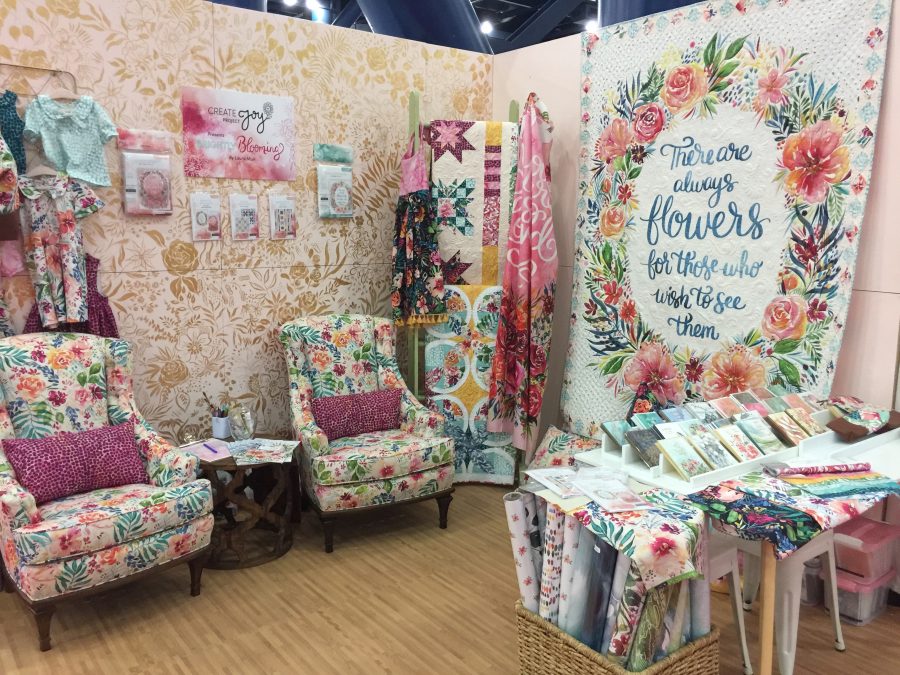
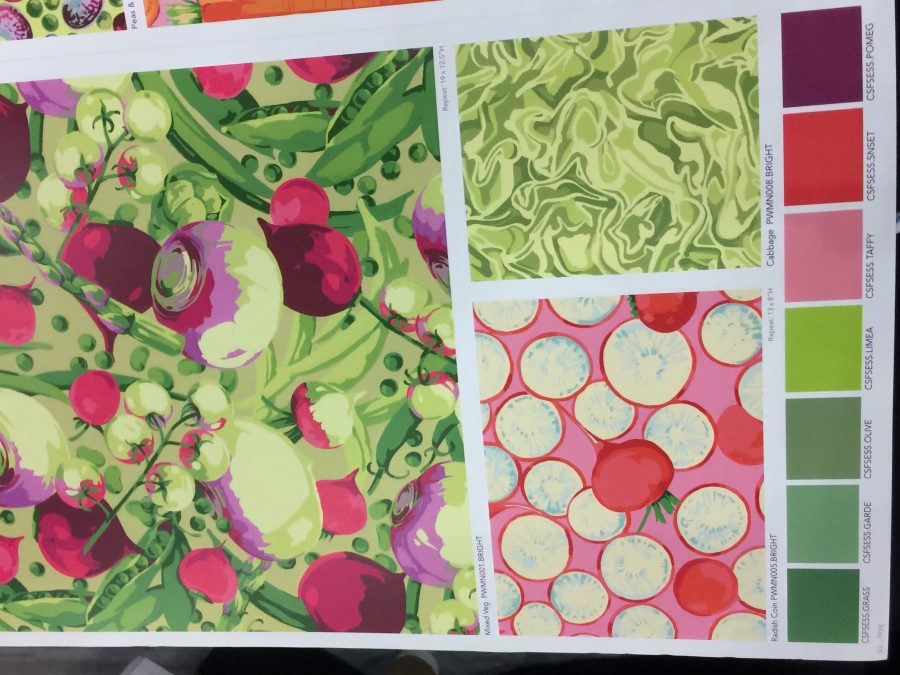
Loved the Robert Kaufmann display, especially the Library Pockets, which of course made me think of my friend Kate C. who is the Bowdoinham town librarian and wonderfully crafty and artful! Can’t you just see this for a teacher’s room, or library, or your studio, or a busy family?What a lovely display of little “this and thats”The artwork in these fabrics made me stop in my tracks! I snagged a brochure… and yeah, I’d like THOSE chairs too…. The quilt on the right is a panel. I’m not sure I would use that, but the coordinating fabrics, and even just cut up those BIG flowers, and then cut the text up into smaller bits to piece into something amazing……
One trend I noticed across various fabric booths is that they are getting super smart about cross-marketing. The artwork isn’t just in quilting cotton, but heavier and/or lighter weights (in this case a canvas weight for a jacket, chair upholstery or tote), wall paper, gift paper, note cards, little stationery items. Smart.
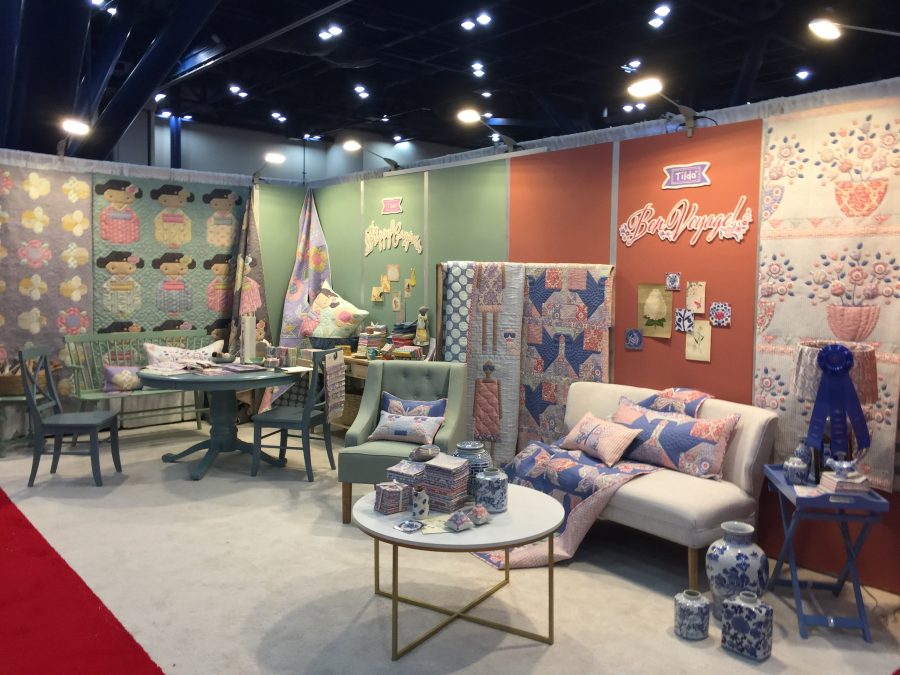
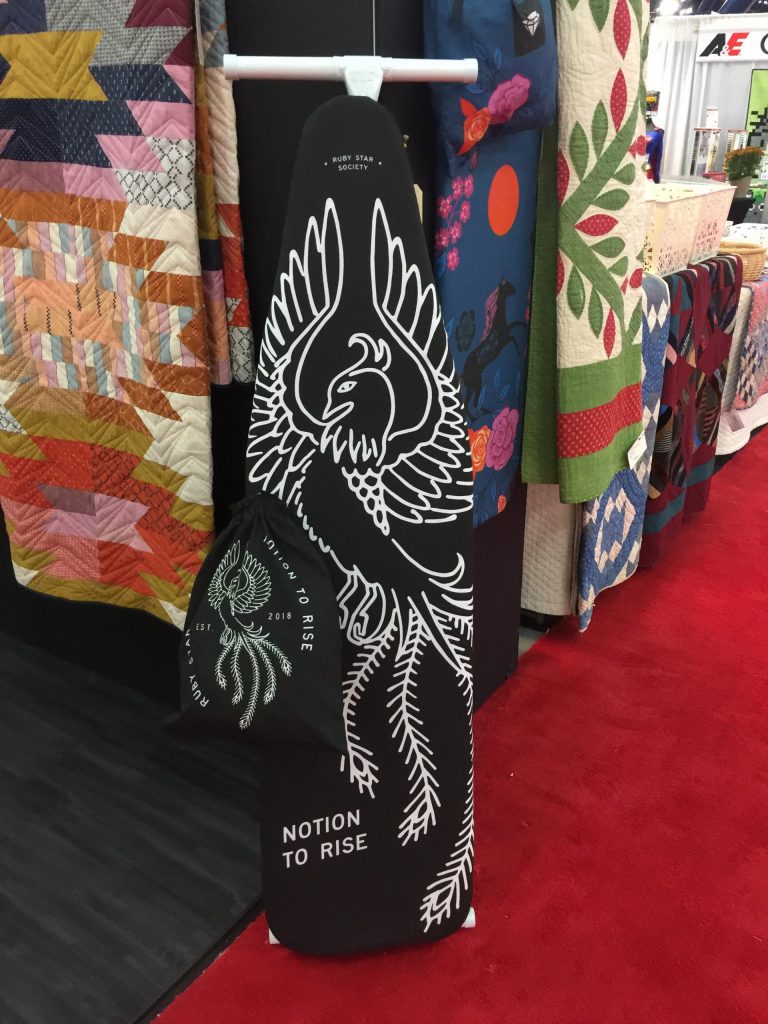
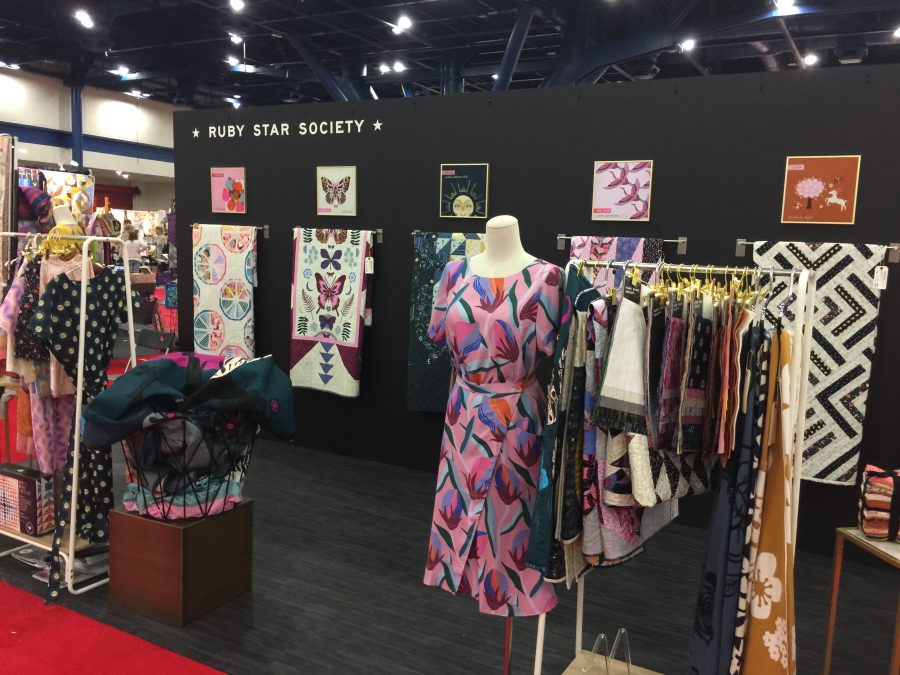
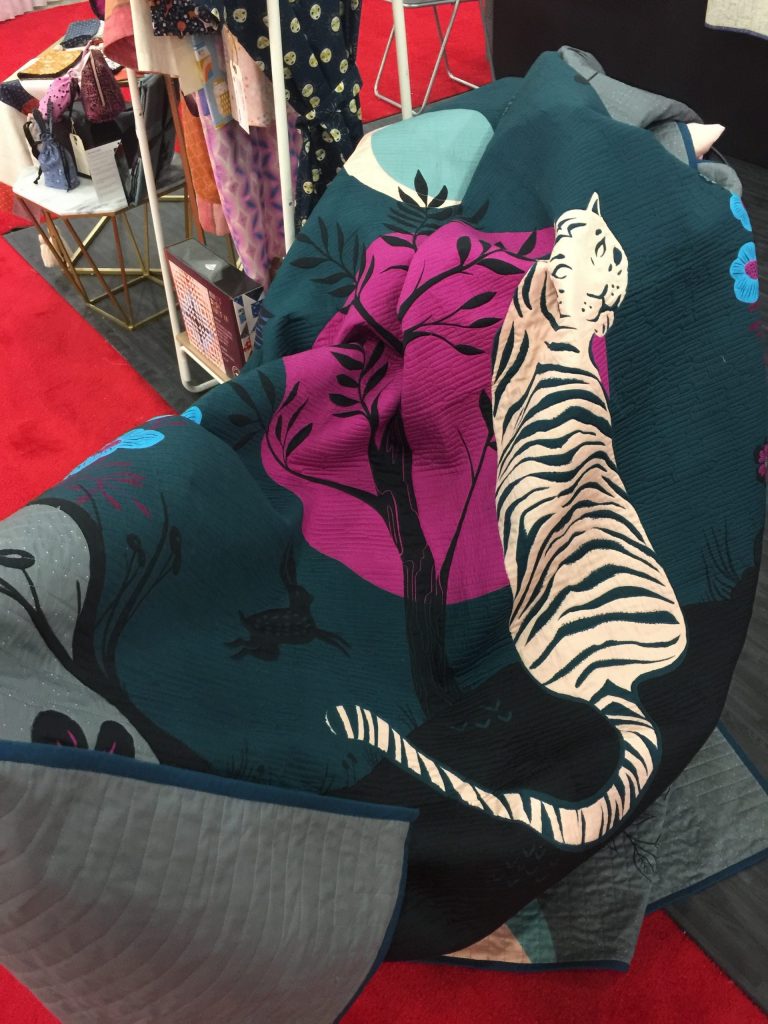
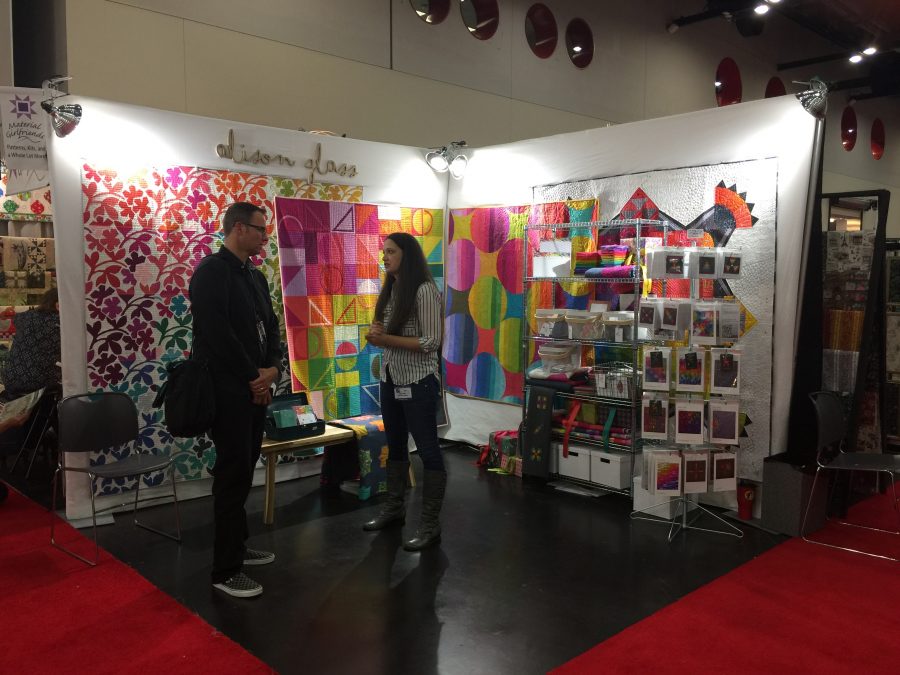
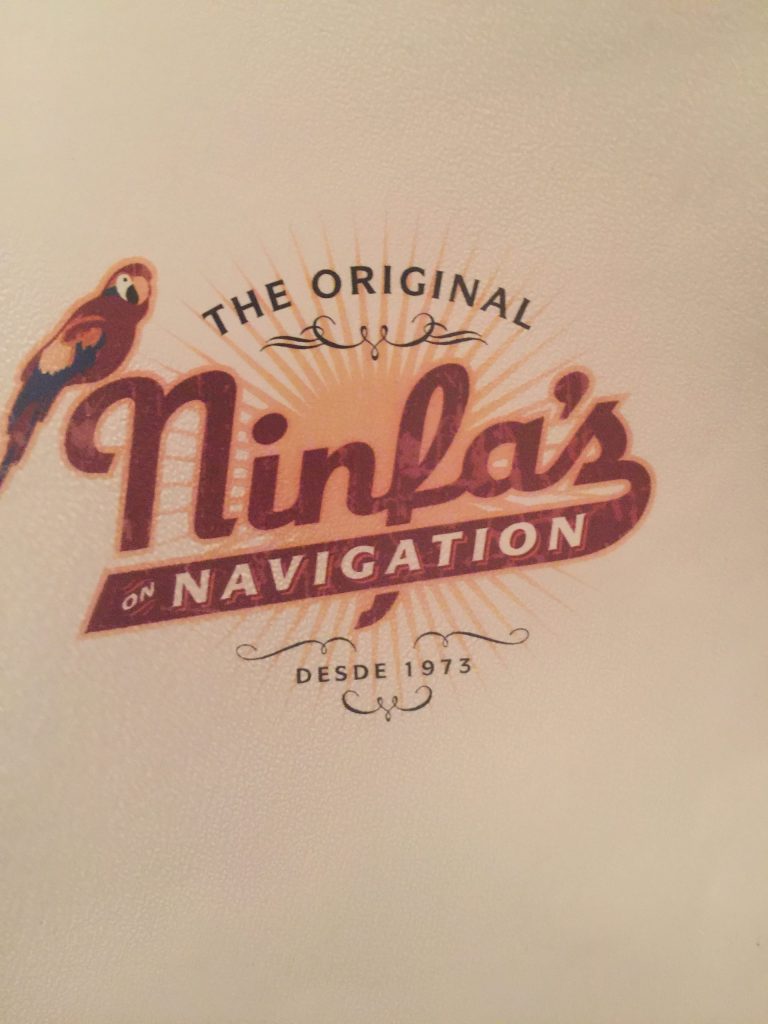
I adore the look of watercolors…. look at the coordinating green and aqua prints on the right! Wonder if Fiddlehead Artisan Supply in Belfast, Maine, will carry these? Or Alewives Fabrics in Damariscotta Mills? And the Tilda booth….would love to just SIT for a momentThe Ruby Star Society booths and displays were another WOW moment. Almost makes me wish I didn’t have a Big Board and just a regular ironing board–I’d so buy this cover!And Ruby Star also is marketing designs in different weights, like the drapey fabric in the dress. For the first time, they had a guest designer! LOVE her bold prints. And that quilt in the basket on the left…OMG it is a PANEL….No one was around this late on Monday (within a half hour of closing) so I opened it up a bit to get this photo. It is the Tiger Fly panel by Sarah Watts. WOW!And for my friend Tori, the Alison Glass display!No trip to Houston is a success unless it involves dinner at Ninfa’s. I got to go twice! On Monday my friend Susan Fletcher King picked me up when Market closed, and we spent a lovely rest of the afternoon at her house. Then Lauretta Crites joined us for supper after teaching that day.I’m a creature of habit: El Henry! Taco, enchilada and ….YUM OH YUM… tamale!
A perfect end to a fun Quilt Market. More on the house renovations, Festival, family and more in the coming weeks.
So I actually did see things besides the productive visit in the Michael Miller booth (previous post). The Martha Negley quilt and fabrics were across the avenue in the Free Spirit booth:
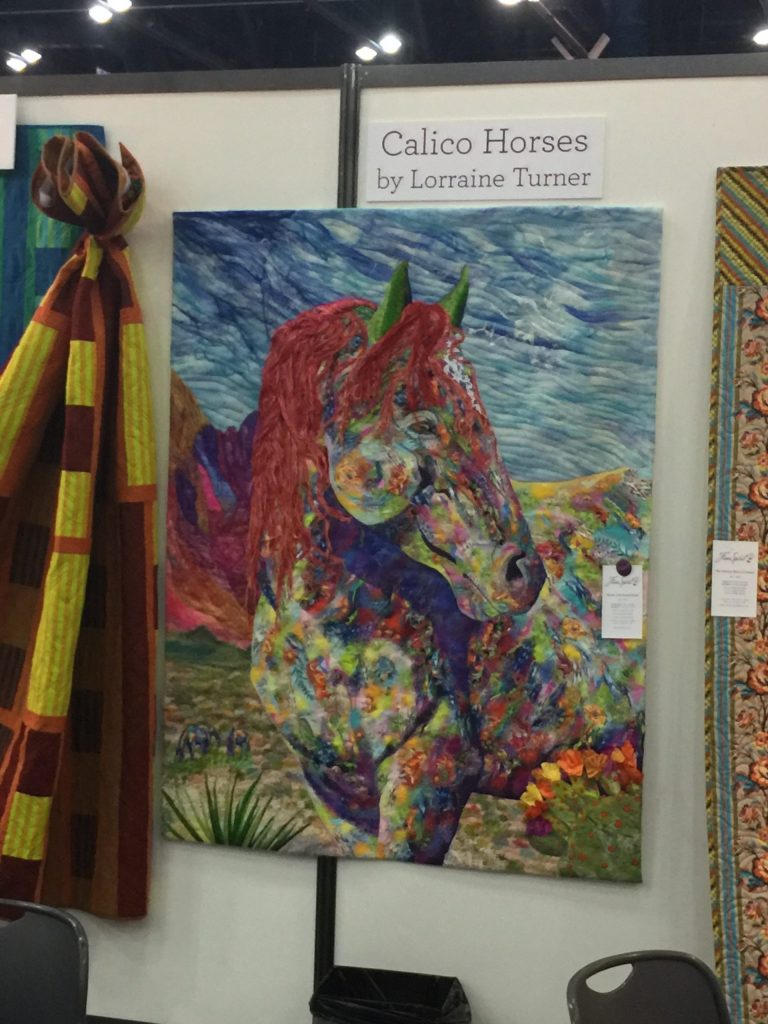
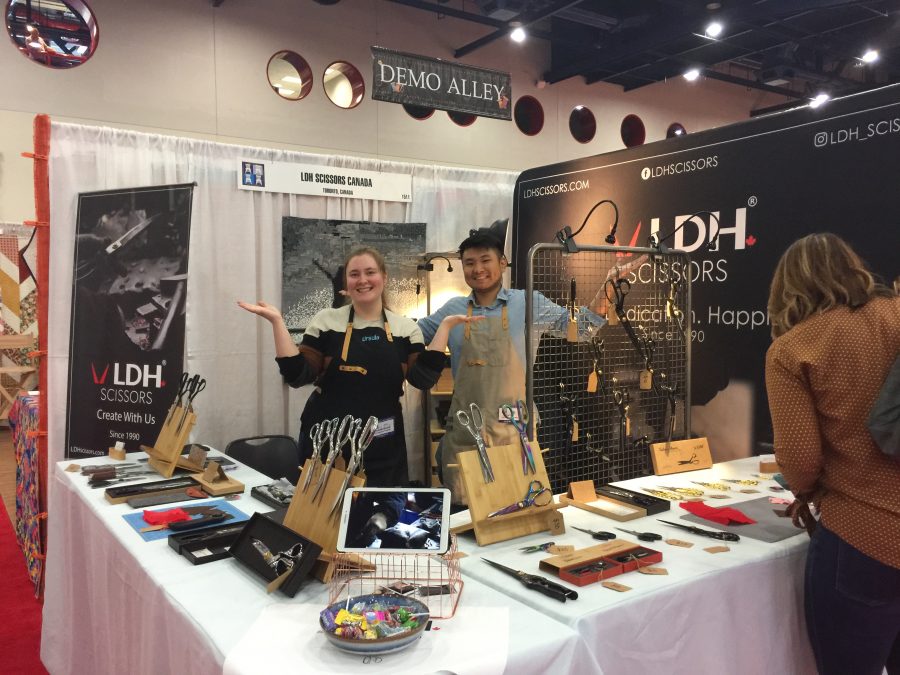
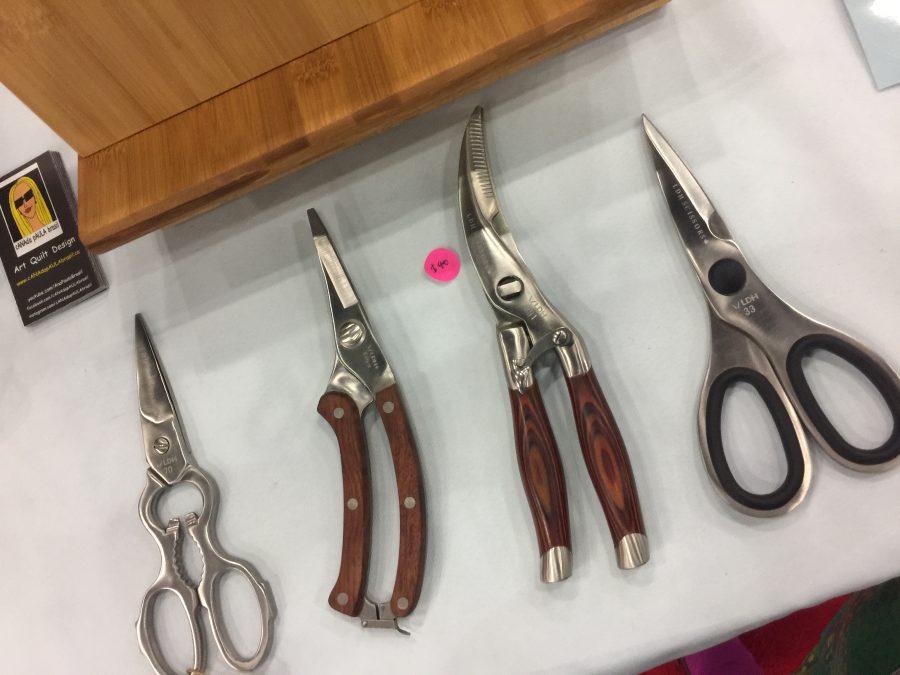
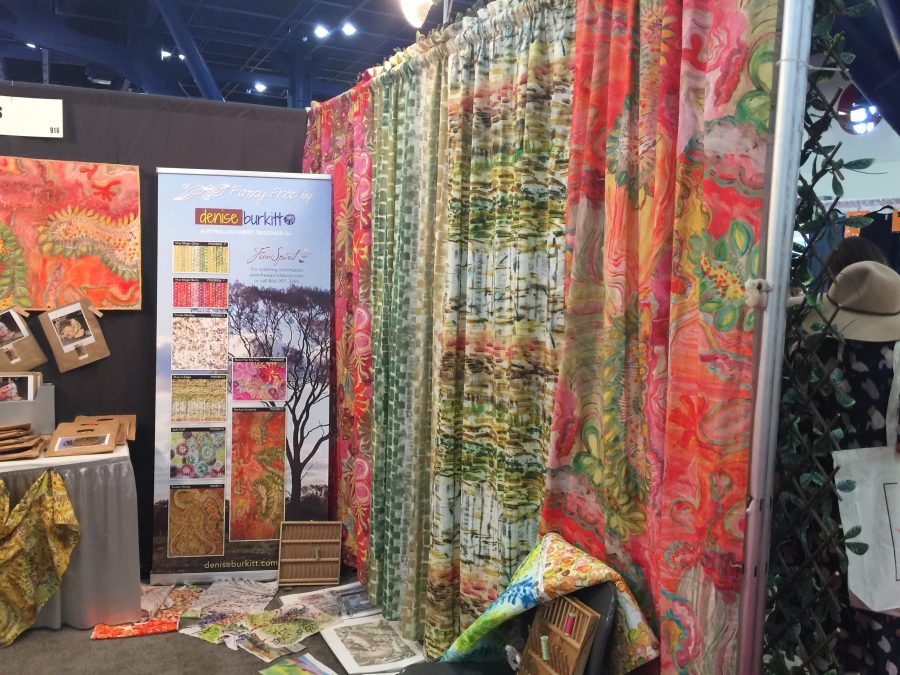
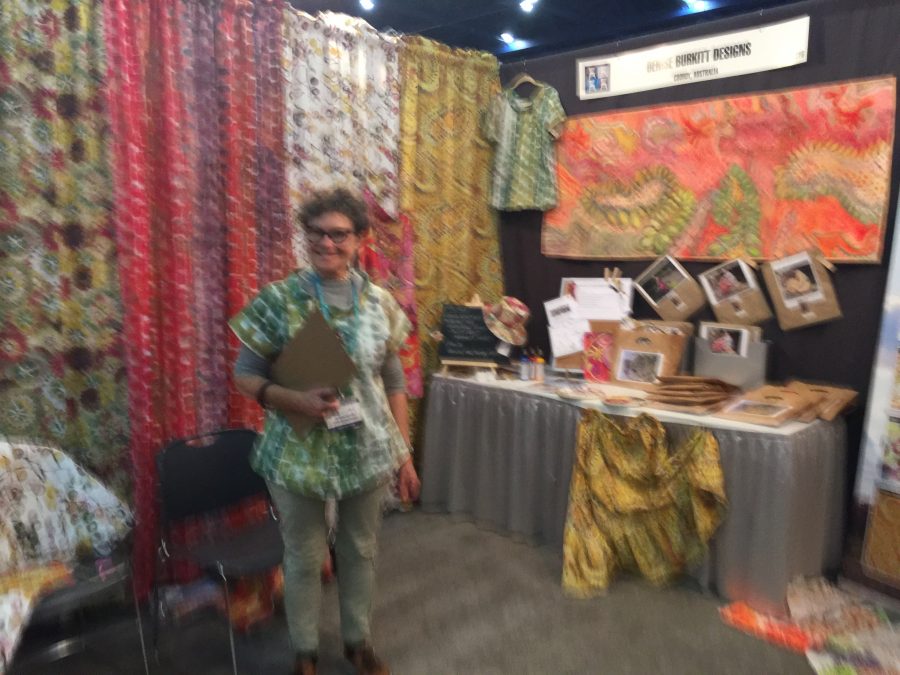
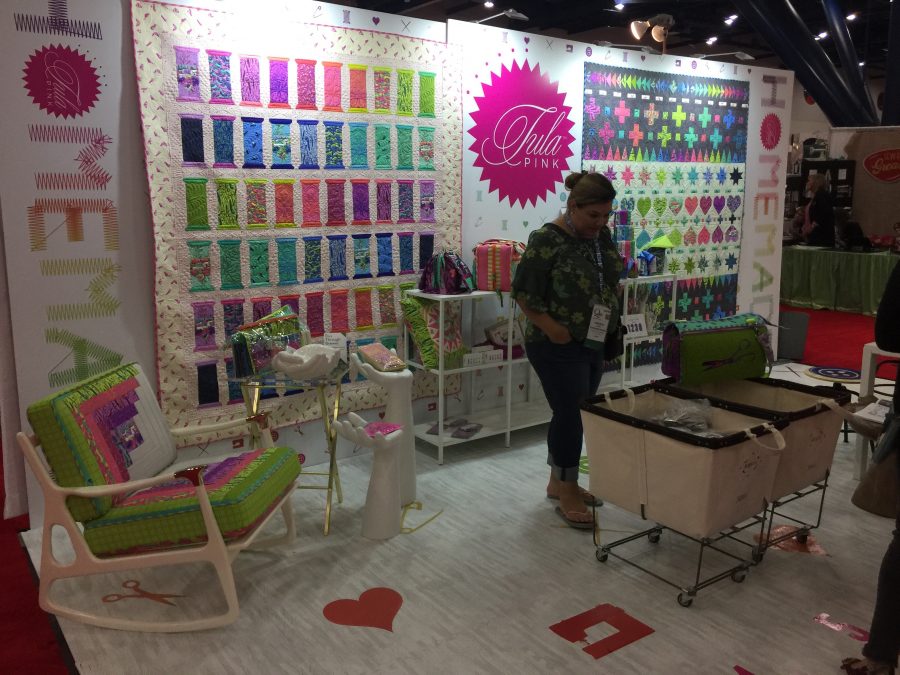
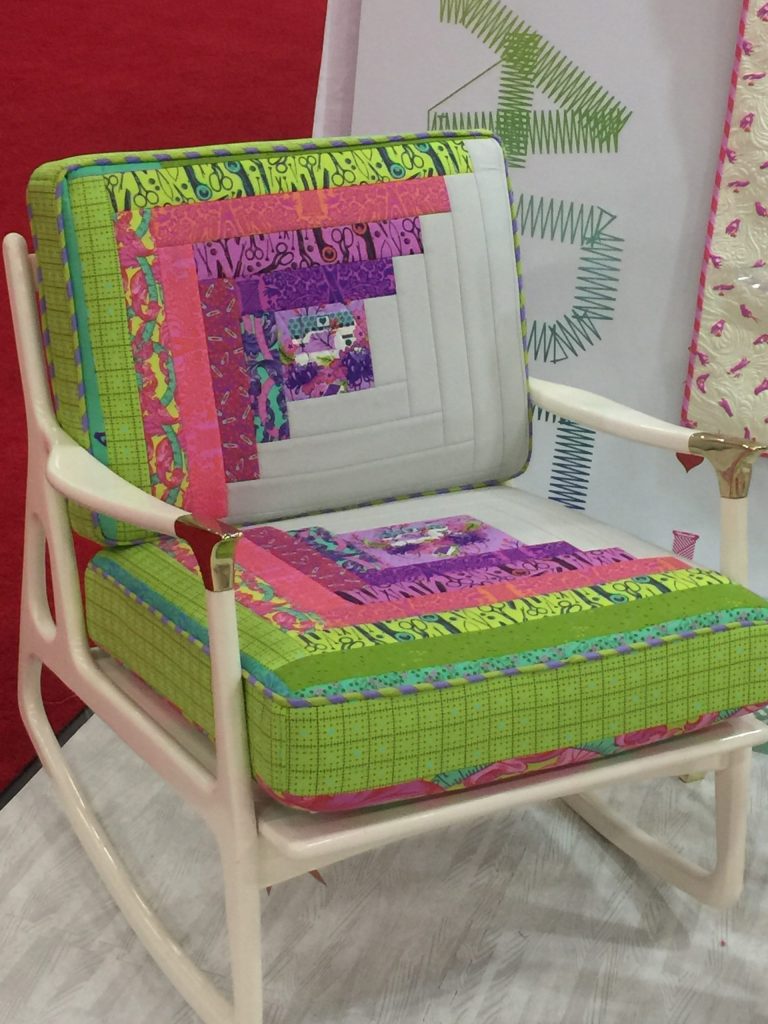
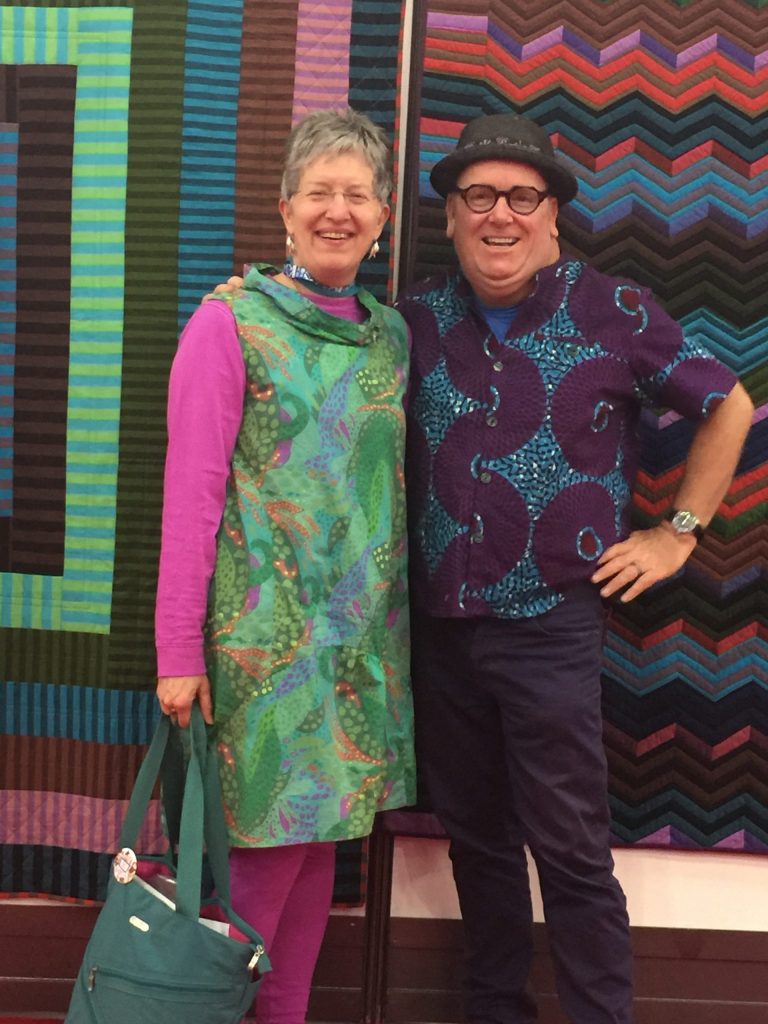
I had so much fun tootling about and was delighted to see that Martha Negley fabrics are again available…she is one of my favorite designers. In the Free Spirit booth. I also saw this amazing quilt across from the Martha Negley display:Calico Horses by Lorraine Turner has all sorts of cool stuff including wool roving and yarn as well as regular cottons. Free Spirit booth.The feel of the scissors in this booth were amazing quality for price. Based in Toronto, Canada, I think this young couple is just adorable! Here’s to their success! And yes, I bought a pair of scissors for me. https://shopldh.com I put them in contact with SAQA (Studio Art Quilt Associates) which is looking for vendors for the conference in Toronto in March. They even have a few kitchen items (not all on their website yet). I bought the wood-handled poultry shears for Joshua’s birthday. Even if he just hangs them on the wall they are beautiful, but they work. AND the two on the right separate easily for cleaning kitchen yuck!Denise Burkitt’s fabric for Free Spirit made my heart soar! I just fell in love with everything about it. She is a fabric dyer, so I totally swooned over the original pieces and the phenomenal printing that captures the hand of the artist in the cloth. WANT! And want to channel her muse when I’m next in the dye studio.Alas, my photo of Denise is blurry. She made a shirt out of some of her fabric — it is her own design but I’d love to find a pattern like it, the collar is so flattering and versatile (wear long sleeve underneath in winter). And I’m really loving what Free Spirit is selling!Tula Pink is always amazing, with a beautiful booth. (this is a visitor in the booth, not Tula)In Tula Pink’s booth: I WANT THIS. I have been thinking of re-doing our cushions for the porch rockers and settee. I’m now thinking pieced!I wore my Vogue 9112 dress made from a fabric by Brandon Mabley that I have hoarded for years…I love it! Well, as I’m walking market who do I see taking a bit of a short rest in the Kaffe Fassett booth but Kaffe Fassett, Brandon Mabley and Liza Prior Lucy. So as I walk by I say loudly “Hey Brandon” and point to my dress. He came out immediately and we got this selfie even though he said he is usually reluctant to do them…thank you!
So that is part 2… I think I’ll save the rest for a third and final post about Market. And no, I didn’t really get to see many of the quilts at all–I was having way too much fun doing Market!