email Youtube

Home
Galleries
Blog
Workshops & Calendar
Store
Resources
About
Contact

Archive for the ‘Thermofax’ Category

Busy busy busy

Saturday, January 5th, 2019

Do you ever have those days where you are trying to cram so much into one day you think your head will explode? Yeah. Today!

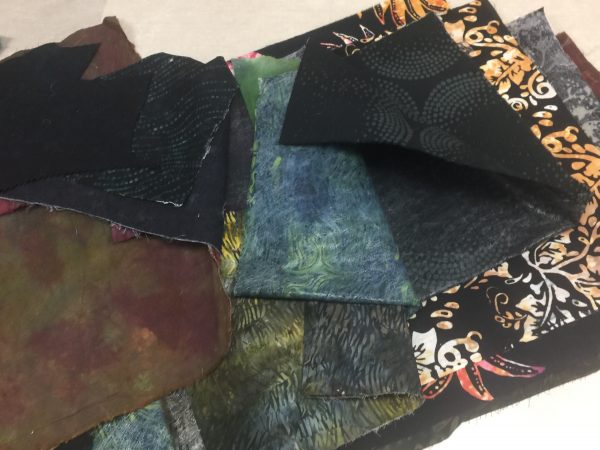
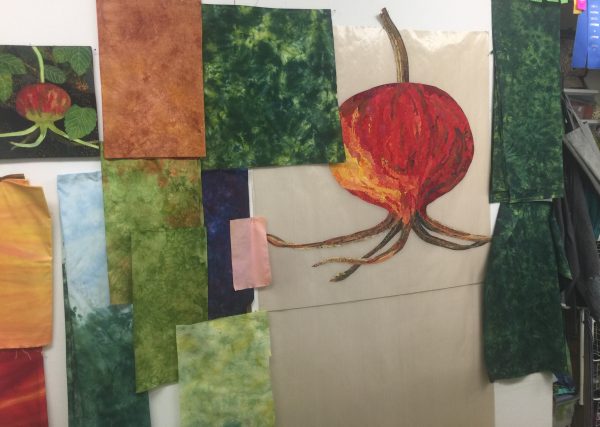
Rose Hips, large version, testing leaf fabrics
The best news is that the greens will work! This is my enormous rose hip in progress. The 12″ square “test drive” and demo sample is on the left. The big one will finish 36″ tall, probably square, possibly not.

So far today:

  • Rinse out hand-dyes from yesterday, hand wash
  • Machine wash and dry hand-dyes from yesterday, iron
  • View SAQA Webinar on 3-D artwork considerations
  • Create “artwork” for three simple thermofax screens
  • Add more things to the To Do list as remembered
  • Scan said artwork
  • Manipulate said artwork in Photoshop, sent to printer
  • Eat lunch
  • Send email relating to upcoming The Quilt Show appearance
  • Review email and reply as appropriate
  • Refill RX–call it in
  • Think about booking plane tickets for TQS trip, decide to deal with it later
  • Make another pot of tea — perhaps turn on Father Brown on PBS / recorded
  • Think about making thermofax screens today
  • Think about making stew for supper first instead
  • Decide to blog before dealing the three previous thoughts
Test drive background fabrics for large Rose Hip quilt
These are both the fused or the right side of fabrics I’ll possibly use as background pieces. Some clearly need some over-painting to knock down the high contrast.

So that’s my Saturday…how is yours going? I think I’d prefer a novel with that (decaf) tea right about now, and it’s only 2:12 p.m. I need to “set a spell!”

Photoshop–Finding the Stamp Tool, Thermofax screens

Tuesday, March 28th, 2017

WAHOOOO!   I’ve discovered something almost as cool as the holy grail!  At least if you want to make thermofax screens…..and yes, you may liberally share the link to this blogpost so that others may learn and play with paint.
If you want to find out how to do this the easy way, keep reading!

So I was on a quest for my next project:  creating thermofax screens using my new (to me) thermofax machine.  I remembered a tool I loved in Photoshop Elements (PSE), but it wasn’t in Photoshop (PS–full thing).  How could that be?  So I opened up my 2010 PSE software and discovered the tools I liked were called Stamp and Photocopy, in Sketches under Filters.   So I googled around to find out how to create actions in full PS to do what those tools did.  Turned out I didn’t need to–Adobe included those tools but then HID THEM.   So here is how to find and use these awesome tools.

Note:  I realize this will sound like gibberish unless you are into PSE or PS….if you aren’t, just skip!  But this is SO AWESOMELY COOL AND USEFUL for those of us who want to make Thermofax screens and use Photoshop! So if you are interested, read on!

First, you need to install all of the Filters in the Filter Gallery.  Yeah right.  Not as hard as it sounds.  Under Photoshop, find and click on Preferences.
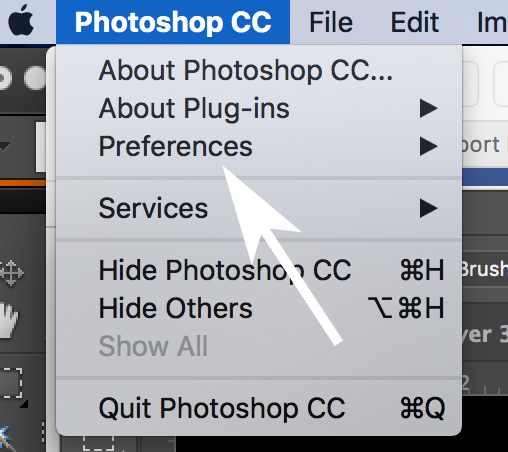
First you need to find Plug-Ins and load the Sketching filters.

That will cause a pop-out to appear; look for and click on Plug-Ins:
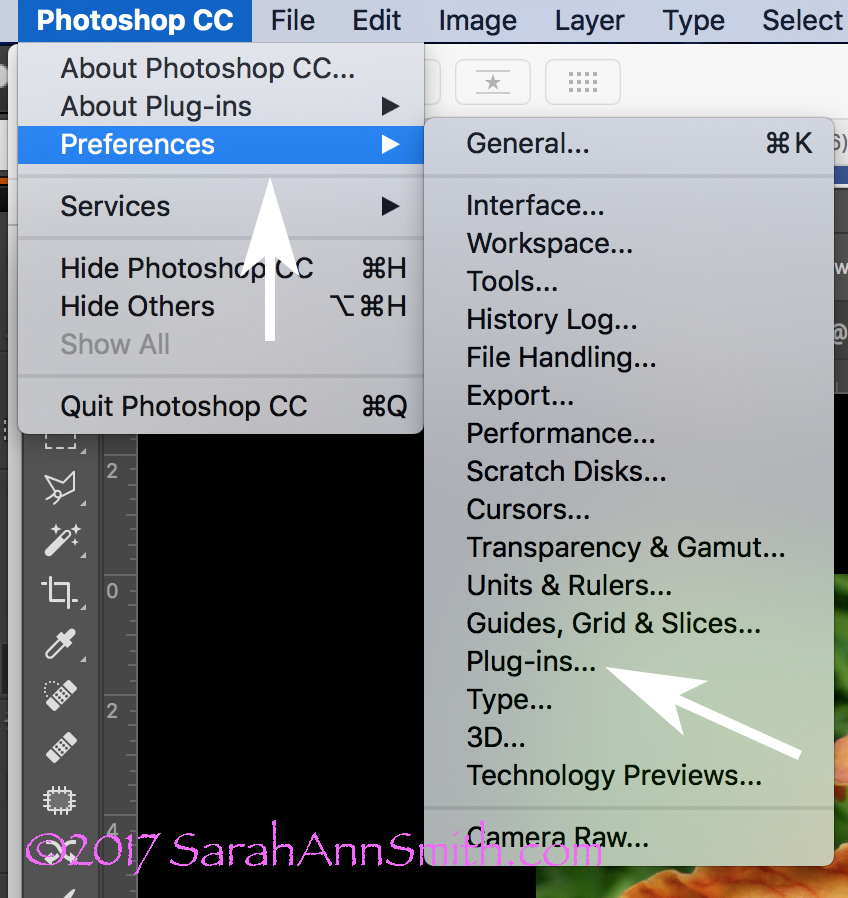
The flip-out widow reveals Plug-Ins. Click on it.

When you click on Plug Ins this window opens up.  Check the box to show ALL Filter Gallery Groups and names.  Sheesh….why was this not the default?????
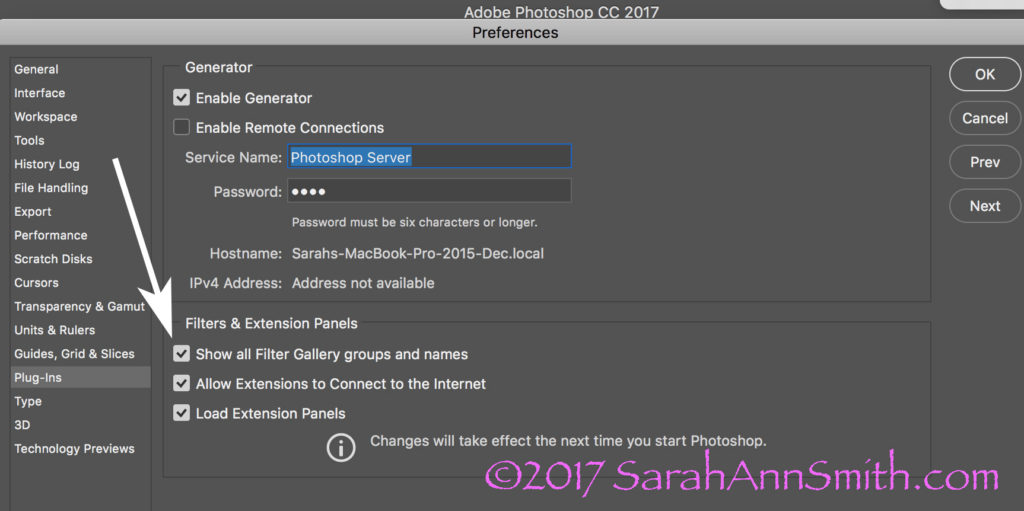
This window will pop up. The box at the bottom of the arrow will be blank. WHY Adobe? WHY? Check it and the wonder and joy of more filters will appear in your PS workspace.

Here’s a colorful photo I use in my Quilting the Garden workshops.  NOTICE the COLORS in the Foreground and Background boxes on the bottom left corner.
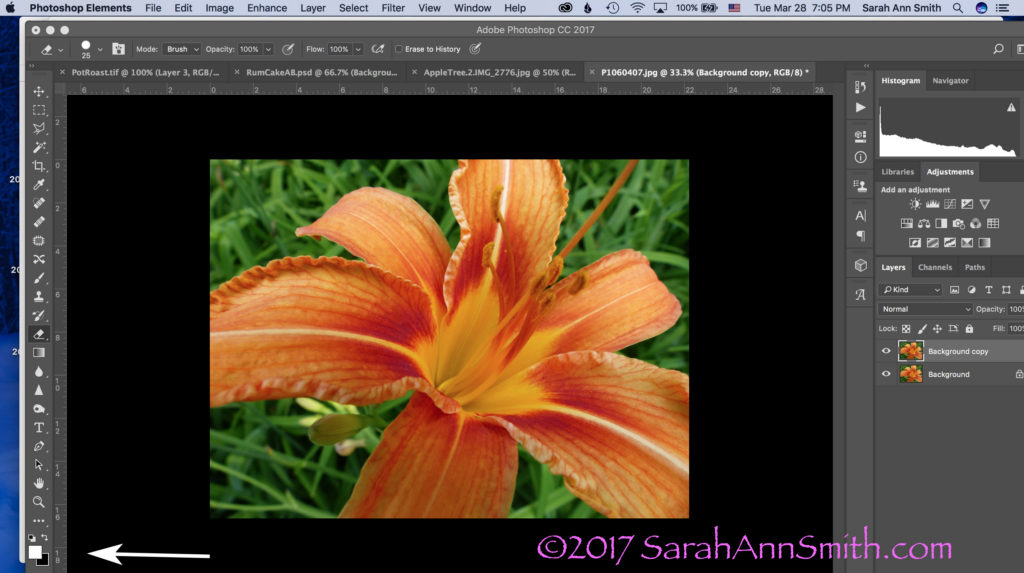
Let’s pretend I want to convert this image to black and white to create a Thermofax screen.  Take note of the little Foreground/Background boxes at the bottom left.  They are important.

Boxes are important!   The next step is to USE the Stamp tool.  Look across the top of your PS window.  Click on Filter, then Sketch, then Stamp.
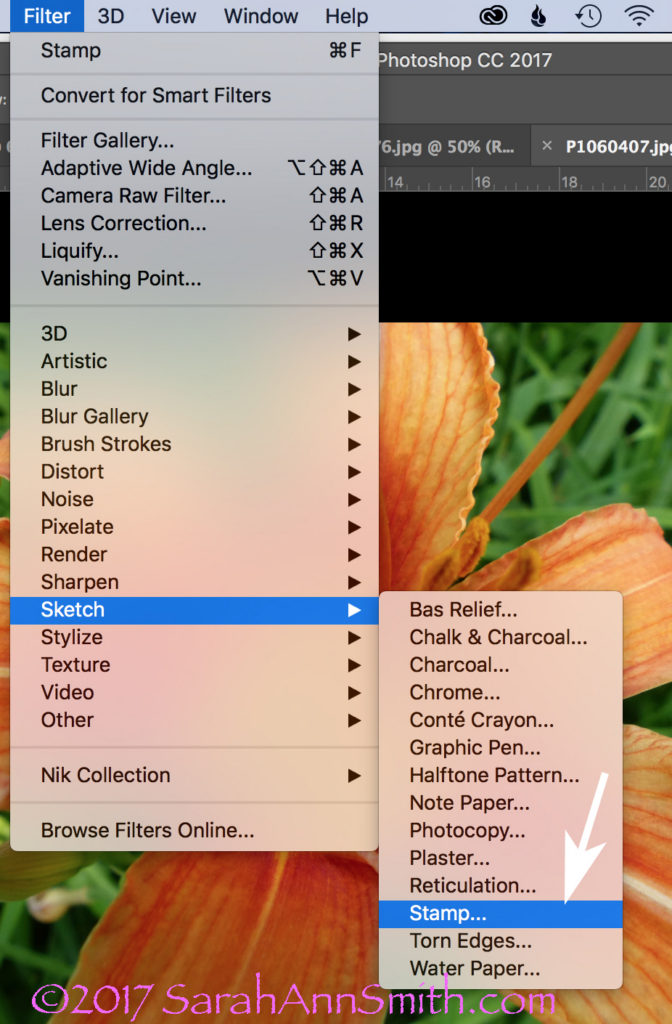
To use the Stamp tool, go to Filters (on the menu across the top), select Sketch, Then Stamp (see arrow).

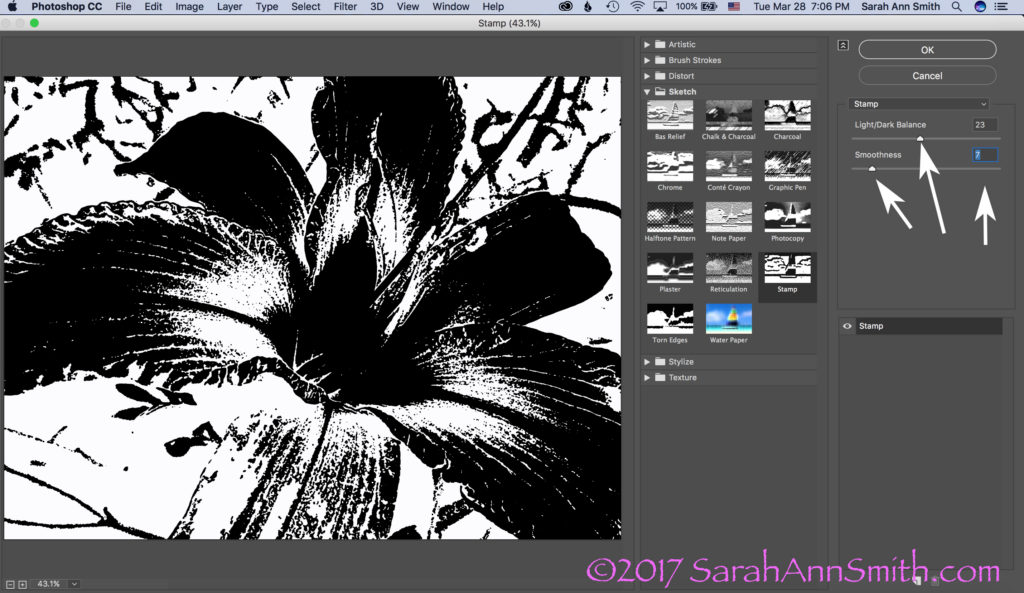
When you click on Stamp, the following window opens.  But I ended up with Grey and Black.  WHY?  It used to be black and WHITE, right?  So what was I messing up?
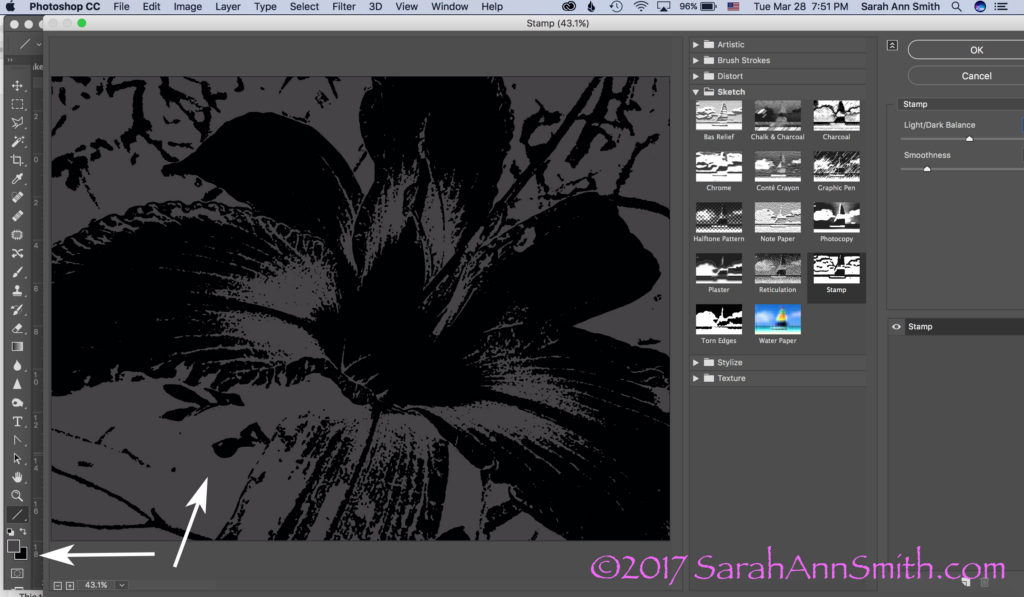
This was not what I had in mind. Then I had a lightbulb moment (who me? I know, rare, but it does happen sometimes). Remember those BOXES?

YEP…..the Foreground color, due to something I’d done not so long ago, was dark grey, not white.  Aha!  A glimmer of light (pun totally intended).  Groan.  Remember, Boxes are Important!  I switched the foreground color from dark gray (above) to WHITE.  And lookit what I got!

Drum roll……stamp is once again black and white!  Notice the arrows on the right:  use the sliders or the number boxes to adjust the level of black/white and the degree of detail.  Now isn’t it a whole lot easier to get to this point in a hurry, THEN fine tune with the eraser tool to clear out extraneous yuck?

Those arrows on the right point to fun things to play with to adjust the amount of black, white, detail, etc.  But the realization that the foreground/background colors could make a mess make me think….hmmmm……COLOR!  What would happen if….

BUT, one more tidbit about what you see in the window.  The one below looks like a lot of nothin’, right?  That’s because is it at 100 percent, which doesn’t fit.
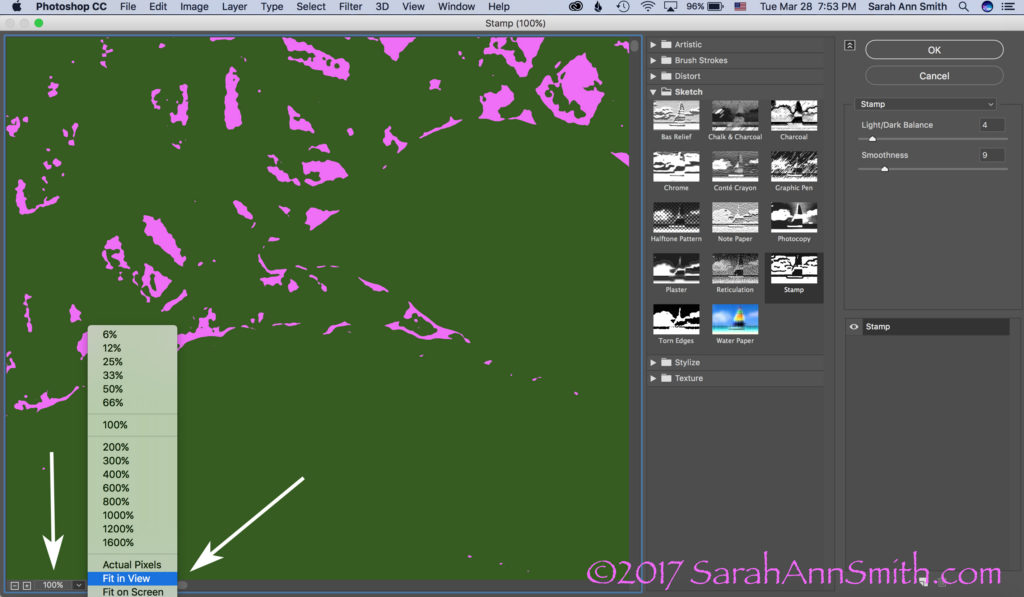
Then I realized I could play with COLOR. When you open this window, however, it opens at 100 percent. I prefer the “Fit In View” option, so check out the arrow once again.

If you click on the little down arrow to the right of 100%, you can switch it to Fit In View or whatever you like to use.  For my pea-brain, it’s a whole lot easier to figure out what I’m doing when I can see the entire picture, like this:
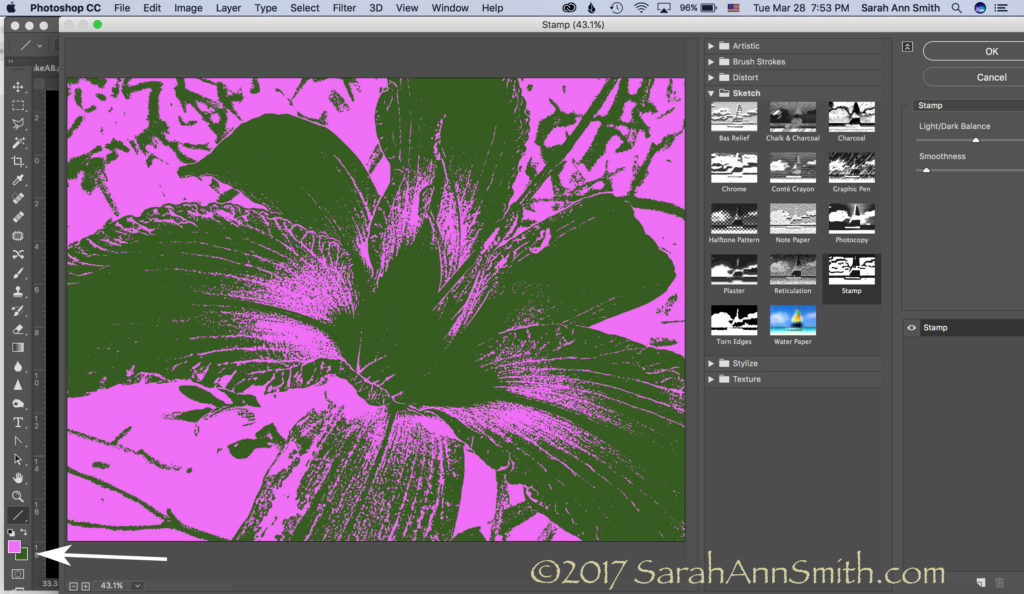
Then you can create a really bizarre two-tone hot pink and green image. Just what you always wanted, right? Not! But you can see the potential, right?

Let’s just say I am ridiculously happy.   I asked for help on FB today and got it…THANK YOU Lynn Krawczyk, Lyric Kinard and Leslie Tucker Jenison among others.   Then I — having learned this lesson before — googled around for online information, including the forum at Adobe, which is where I found the clue that the Sketch filters WERE in full PS.   But I didn’t know the terminology (like where to find the Line tool to create an arrow to illustrate these screen shots), so YouTube search box to the rescue.

SQUEEEEE!     I don’t need to use my antique PSE, I can use full PS and not have to move between the two, AND (best of all) I have my easy-peasy Stamp tool back!   Time to CELEBRATE!  Lynn, I may just have to fling some paint!  And now that I have written this up to share ASAP in thanks, I am going to celebrate, perhaps with chocolate! Or maybe Talenti.  Or some culinary Venn diagram that involves the intersection of Talenti, banana and chocolate.  SQUEEE!

And a PS, thanks Whiskers for asking the questions:  Hi Whiskers!  Yes, I will do a blogpost eventually on thermofax screens.   Not sure when, so the quick response is the Thermofax machine is the predecessor to today’s photocopier.  They were used in the 50s/60s in the office to copy stuff.  They are no longer made (consequently they cost a fortune, it has taken me a decade to save up and make the purchase, $1350! If you buy one be sure you get one that works with the mesh, not just the purple ditto masters!)…but folks have figured out if you use an image with carbon in the ink (laser printer, some inkjet printers, carbon ink, lead pencil) and you run it through the machine with a plastic-backed mesh, the plastic melts where there is carbon.  When you separate the two sheets (paper and plastic mesh) you end up with a screen.  Tape up the edges, then push the paint through.  I actually just taped a segment for Quilting Arts TV on this!
 

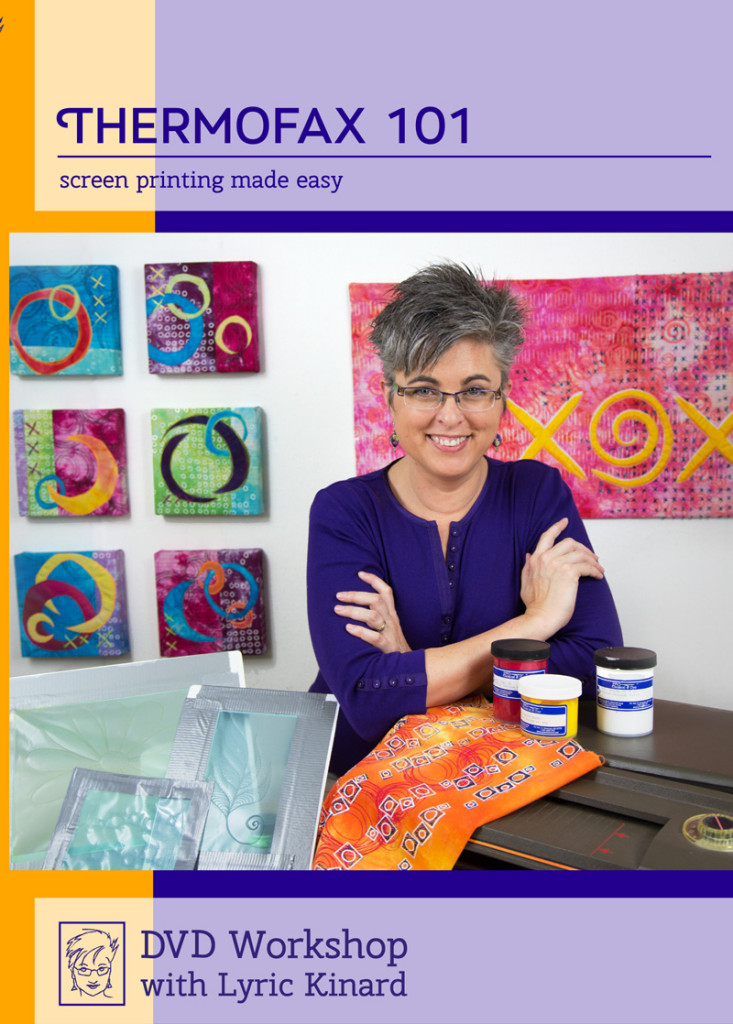
Thermofax 101: Lyric Kinard’s new DVD Workshop

Friday, May 15th, 2015

Don't know that I've ever seen #1 come up before! Well done!

Don’t know that I’ve ever seen #1 come up before! Well done!

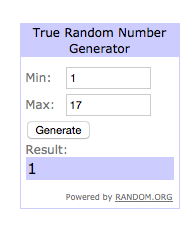
Update:  comments are now closed.  I used a random number generator and astonishingly, No. 1 came up!  So I will be contacting Susan to let her know.  Lyric will send the DVD out directly, as will I.

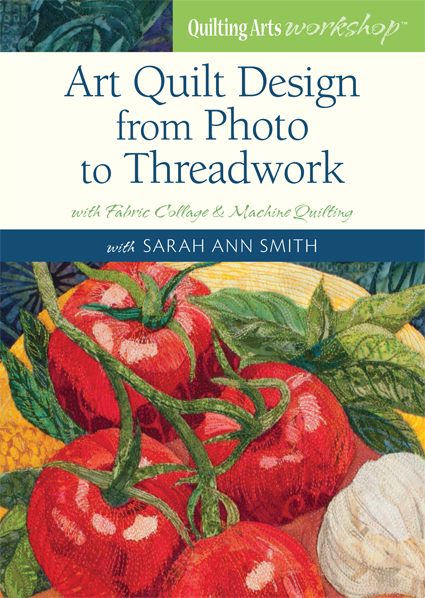
Well, you aren’t going to want to watch this once–you’ll want to watch it several times, at least!   I can’t believe how much Lyric has managed to pack into about 65 minutes of instruction on her new video workshop Thermofax 101:  screen printing made easy, from Lyric Art Publishing.  You can order it here, http://lyrickinard.com/2015/02/thermofax-101-instructional-dvd/ .  OR you can enter the giveaway–for both this DVD and my own Art Quilt Design: From Photo to Threadwork (here).  Read to the end to find out how.

Thermofax 101, Lyric Kinard's new DVD workshop, is totally worth getting.  I can't believe how much she packed in.  Plus, how can anyone not want to spend time with someone with enthusiam and a cute smile?

Thermofax 101, Lyric Kinard’s new DVD workshop, is totally worth getting. I can’t believe how much she packed in. Plus, how can anyone not want to spend time with someone with enthusiam and a cute smile?

I was thrilled when Lyric asked if I would like to be part of her bloghop.  Not only do I have fun running into her at various fun places like teaching at quilt shows around the country, in Houston, at Quilting Arts TV taping in Ohio, and admire her art (made while being an uber-busy mom) and teaching, I’m also getting more and more into my own surface design.  I tend to use surface design differently than many—-for most who are really “in” to it, the cloth is the end product.  For me, it is something that goes into my artwork as a supporting player, not the star of the show.  So I was curious to see the “hows” and how what she teaches would fit in with my somewhat different approach.   The answer is it’s a fabulous DVD!

I watched the video as soon as I got home from about 3 weeks of being on the road, and learned a lot on the first run-through.  But I was pretty obliterated by all that travel, so I figured I’d better watch it again:  my goodness gracious but there are more and more gems salted in throughout.

There are four segments:

1.  What’s a Thermofax, which tells you just that, explains how the machine works and how you prepare the screen for use, including advantages and disadvantages of both ways.

2.  Creating Imagery:  the key here is to play.  Only YOU can figure out what makes you happy, what makes you itch to get to the studio and create.  The best way to do that is to mess around.   And then Lyric gives you about a bazillion ideas.  For those really itching to get deep into how to create your imagery, this section may be frustratingly brief.  Honestly, that’s because you could have 100 hours of video, from 33 different instructors, and you’d barely scratch the surface (ahem….pun intended).

3.  Printing Techniques.  For the FIRST TIME I’ve seen someone explain WHY you want canvas/cloth on the top of a print surface, not plastic.  Makes total sense—-why has no one in all the books I have on printing EVER explained that simple, logical (once you’ve heard the explanation) fact?  It’s at about 21:20 in the video.  And I recommend chocolate pudding, re-purpose the dishwasher detergent.  You’ll get it if you see the video LOL!  Lyric also shows how to hold your squeegee (as well as explaining what kind of squeegee or stand-in object) to get the best print, including demo-ing to you can see from various angles.  Helpful!

Lyric talks about the kind of paint you want, and mentions her favorites, but wasn’t fond of Speedball or Versatex.  I agree on the Speedball, but quite like the Versatex.  To Lyric, she doesn’t care for the hand of the cloth.  However, I have liked it on the small pieces I have done.  It’s one of those “try it all (before buying a bunch of any one product) and see what you prefer” things!


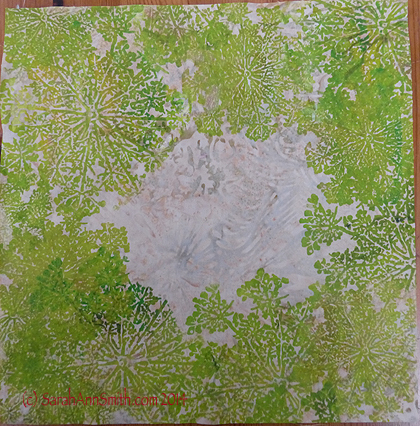
For the nest piece, I took some pale beige batik, my Queen Anne's Lace stencil and paint to create this cloth, which I love so much I can see making yardage of this to use!

For the nest piece, I took some pale beige batik, my Queen Anne’s Lace thermofax screen and paint to create this cloth, which I love so much I can see making yardage of this to use!  You can buy  Sarah’s Thermofax Screens at Fiber on a Whim at Fiber on a Whim.  To read more about my “nest” please see this blogpost.

4.  Designing Cloth.  Throughout the DVD Lyric salts in bits of wisdom about various elements and principles (E&P) of design.  I was SO clueless when I began art quilting.  I then got lucky and took a class at a local community college/extension service while living in Friday Harbor.  Since then I’ve looked hard at things, studied them, to internalize the “E&P” of design.  As you work with them, you get better so you don’t need to look so hard, but Lyric brings them up in an integrated manner that will help you have better results, sooner.  And she shares a tip I discovered the long way around:  if you have a yucky piece of cloth, or don’t like what you did, just add more layers.  After all, is it going to get worse?  No.  And it might well get better.

You also get a PDF on the disc with

  • a list of supplies,
  • where to get screens made in the US, Canada, Australia, England and Germany
  • info on suppliers of machines, screens, frames, textile paints and surface design supplies
  • footnotes for each chapter with internet links
  • plus Lyric has some helpful free tutorials on her website that will supplement the information on the DVD

I wish I had had this video when I started out.  Some videos about printing are Graduate Student level, and overwhelm you.  Some are so basic you could have gleaned all the good stuff from a four-page (with lots of large photos) article.   Lyric’s is correctly titled Thermofax 101 (so Lyric, will you do a 301 or 401 for us too?); it’s aimed at the newbie.  But those of us who have been doing this a bit can still learn plenty.  So I’m going to go play, then in a month or two view my copy again.

To win a copy of this DVD AND a copy of MY DVD,

my video workshop that takes you from your photo to a finished art quilt

my video workshop that takes you from your photo to a finished art quilt

leave a comment by 7 a.m. May 21st East Coast Time.  I’ll use a random number generator and whoever left that comment (please keep it to one comment per person, please) will win both copies.  Lyric will mail hers out directly, as will I.  International entries are OK!

Check out the other reviews on this bloghop:


May 14   Deborah Boschert    http://deborahsjournal.blogspot.com
May 13   Jamie Fingal http://JamieFingalDesigns.blogspot.com/  
May 12   Desiree Habicht  http://myclothesline.blogspot.com

May 11   Susan Brubaker Knapp  http://wwwbluemoonriver.blogspot.com
May 9    kathy york  http://aquamoonartquilts.blogspot.com
May 8    Carol Sloan  http://carolbsloan.blogspot.com

May 7    Liz Kettle  http://www.textileevolution.com/index.php/our-journey
May 6    Jane Davila  http://janedavila.blogspot.com
May 4    Linda Stokes  www.lindastokes-textileartist.com

May 2    Judy Coates Perez  http://www.judycoatesperez.com
May 1    Susan Price & Elizabeth Gibson  http://pgfiber2art.blogspot.com/
April 30  Judy Gula http://www.artisticartifacts.com/blog/

April 28   Sue Bleiweiss  http://www.suebleiweiss.com/blog/
April 27   Melanie Testa  http://melanietesta.com/blog/
April 25   Leslie Tucker Jennison  http://leslietuckerjenison.blogspot.com
April 24   Cheryl Rezendez  http://www.cherylrezendes.com


Thermofax screens galore!

Wednesday, October 8th, 2014

I promised I’d share more of the thermofax screens I have designed and that Fiber on a Whim is making and selling, so here they are.  You can order these online or buy them at International Quilt Festival and other shows where Fiber on a Whim has a booth.

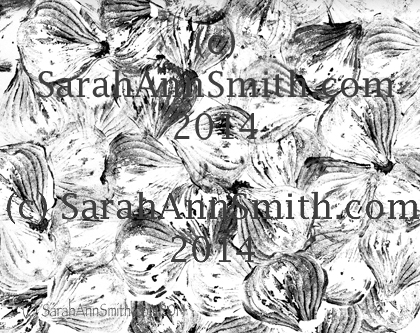
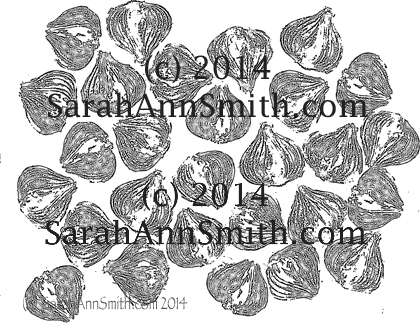
Onions is one of my favorite designs.  I used a small white onion to stamp, then fiddled with the print in photoshop to create this screen.  It makes a fantastic background print.

Onions is one of my favorite designs. I used a small white onion to stamp, then fiddled with the print in photoshop to create this screen. It makes a fantastic background print or part of a  layered piece of complex cloth.

I’m teaching two mini Whimsy-Classes in the Fiber on a Whim booth on the show floor at Quilt Festival, and we’ll be using the onion screen for oen of the two small projects in the classes.  For more information on this, visit here.  There is no advance sign up–come to the booth and the first 8 in line 15 minutes before the classes get in.  The modest $10 fee covers the kit fee–I provide everything you need.

The screens are so new I don’t even have some of them yet!

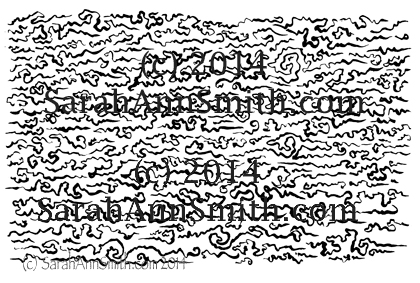
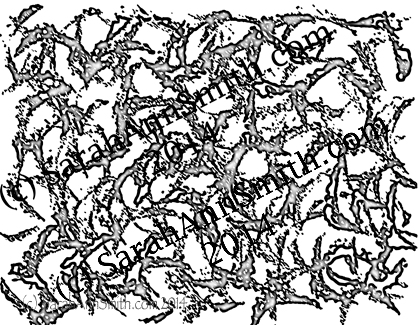
Squiggles thermofax screen by Sarah Ann Smith at FiberonaWhim.com

Squiggles thermofax screen by Sarah Ann Smith at FiberonaWhim.com 

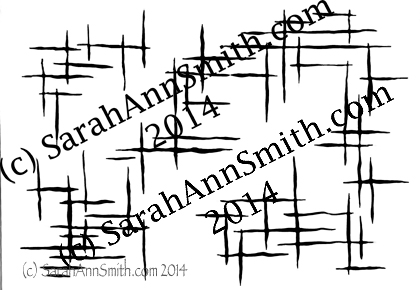
Woven, thermofax screen design.  Sometimes you just want a bit of something.  This is a full-size screen  so you can print as much or as little of the screen as you like.  With the somewhat irregular edges, it is easily overlapped.

Woven, thermofax screen design. Sometimes you just want a bit of something. This is a full-size screen so you can print as much or as little of the screen as you like. With the somewhat irregular edges, it is easily overlapped.

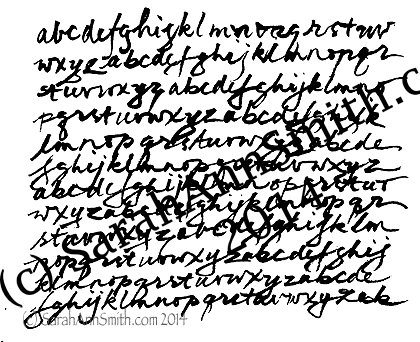
One of FoaW's best-selling thermofax screens is an old French ledger, so we thought we'd try an alphabet, hand-written by me in a brush pen.  Again, a good background design, which is what I was going for with most of my designs.

One of FoaW’s best-selling thermofax screens is an old French ledger, so we thought we’d try an alphabet, hand-written by me in a brush pen. Again, a good background design, which is what I was going for with most of my designs.

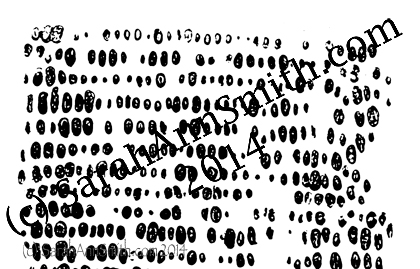
Another vegetable--this time celery!

Another vegetable–this time celery!

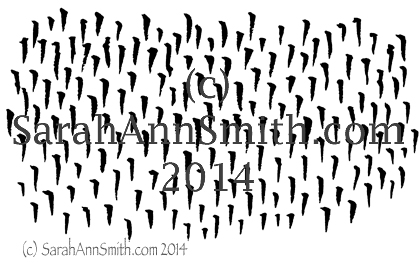
The dagger-drops screen is a smaller size because you can easily repeat it.  It will be fun to play with this, alternating the direction of the print 90 degrees or at diagonals or every which way.

The dagger-drops screen is a smaller size because you can easily repeat it. It will be fun to play with this, alternating the direction of the print 90 degrees or at diagonals or every which way.

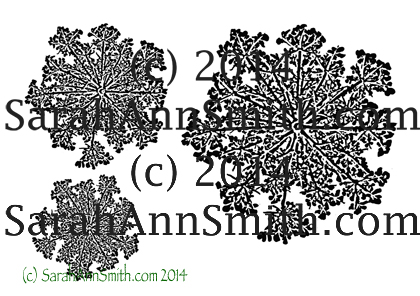
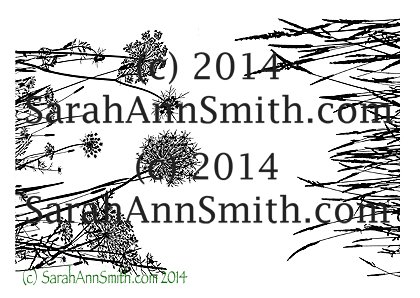
The Queen Anne's lace is from a photo I took, modified in photoshop elements, then scaled into three sizes.  We will use this in the mini Whimsy-Classes project you can see in this blogpost.

The Queen Anne’s lace is from a photo I took, modified in photoshop elements, then scaled into three sizes. We will use this in the mini Whimsy-Classes project you can see in this blogpost.

Another onion print, a full size (9x12 inch) screen, that I call Tossed Onions.

Another onion print, a full size (9×12 inch) screen, that I call Tossed Onions.

Grasses, a full size screen with two ends to use.  Kristin of FoaW requested this one--I had ordered it earlier for one of my own projects.

Grasses, a full size screen with two ends to use. Kristin of FoaW requested this one–I had ordered it earlier for one of my own projects.

And last but not least, another great background print design, corn!  Yep, I sacrificed an ear of corn on the cob for the sake of art.

And last but not least, another great background print design, corn! Yep, I sacrificed an ear of corn on the cob for the sake of art.

In a few days I’ll do a review of Lynn Krawczyk’s great new book, Intentional Printing.  It will give you TONS of ideas on how to use thermofax screens and other surface design techniques.  Stay tuned! Here’s a link to Lynn’s website in the meantime, and she’s a ton of fun and on Facebook here.

And just in case you don’t feel like scrolling to the top but want to see the website where the screens are sold, here’s the link one more time!  I can’t wait to go to Quilt Festival, but I’m also looking forward to returning to my studio and playing with paint and thermofax screens!