email Youtube

Home
Galleries
Blog
Workshops & Calendar
Store
Resources
About
Contact

A sneak preview…Start your Art – Lyric Kinard

November 1st, 2018

Art and quilt teacher and friend Lyric Kinard (website and Facebook and Instagram) delighted me recently when she asked if I’d like to be part of a bloghop to launch her new prompts deck of cards “Start Your Art”…of course!  The official bloghop is in about two weeks after International Quilt Festival, but I’ve had a chance to download the pdf and play a bit.
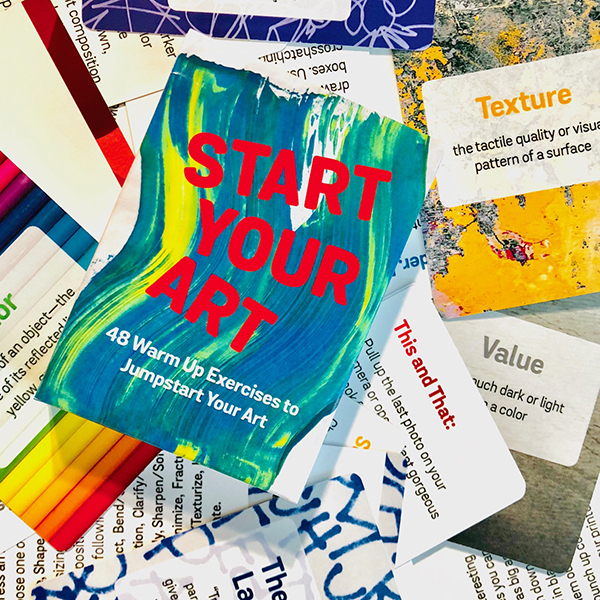
Hot off the press, Lyric Kinard’s Start Your Art deck of cards / prompts is available as an actual deck or a digital download. You can get the deck here at Lyric’s shop.

Then, not long ago, Laurie Russman, of neonkittyquilts on instagram and website, told me about the MegaPhoto app she uses to make “tweaked” photos.

Sitting waiting for my annual physical check-up, I decided to play–a prompt from Lyric’s deck plus MegaPhoto!  Lyric has some suggestions–like set a timer and keep it short–to get you started along with 48 exercises.  I hopped around the set randomly and selected one (and of course I forgot to write which prompt) that I could do on my phone while waiting.

I began with a frequently photographed location on my afternoon dog walks and used one of the MegaPhoto filters to get this image…all sorts of new ideas for quilts are funning (what a hoot, that was meant to be running, but I like the typo!) through my head.

To those of us who have been teaching ourselves art for a while, some of the prompts may be familiar, some are new, but I have to say I totally love having these on my phone where I can take advantage of those moments where you are somewhere without a book–a productive alternative to Facebook!  Even familiar prompts become new and are worth doing again. Then I tried another filter on the same photo–what a difference in mood!

Another filter in MegaPhoto –just look it up in your App Store. I believe there is a free version, but you can get rid of the ads and add a few extras for about $2.99.  

I tend to be pretty literal in my artwork, so many of Lyric’s prompts that require one to work in abstracts will be a good push for me.  This may be my favorite of my Mega Photo filters I used on this photo:

Love the prismatic, fish-eye look to this photo. I can see playing around with this type of composition and fracturing in an art quilt….maybe over winter? Or even…hmmm…printed onto cloth, then paint on the cloth, then quilt….hmmm….

See, that’s what happens with prompts:  they get the creative juices going.  They let you get out of your own way and try something that isn’t in your “usual wheel-house aka creative safe spot.”  I’ll do a proper review of the deck in mid-November when it’s my turn, but just wanted to let you know what I’m doing now that the boxes of stuff are shipped to Houston, it’s not yet time to pack clothes, and I’m noodling around with play time!

So I can heartily recommend Lyric’s Start Your Art.  I’ll play around with it more and check back with another review for the bloghop in mid-November.  Here’s the link again to this deck of cards:
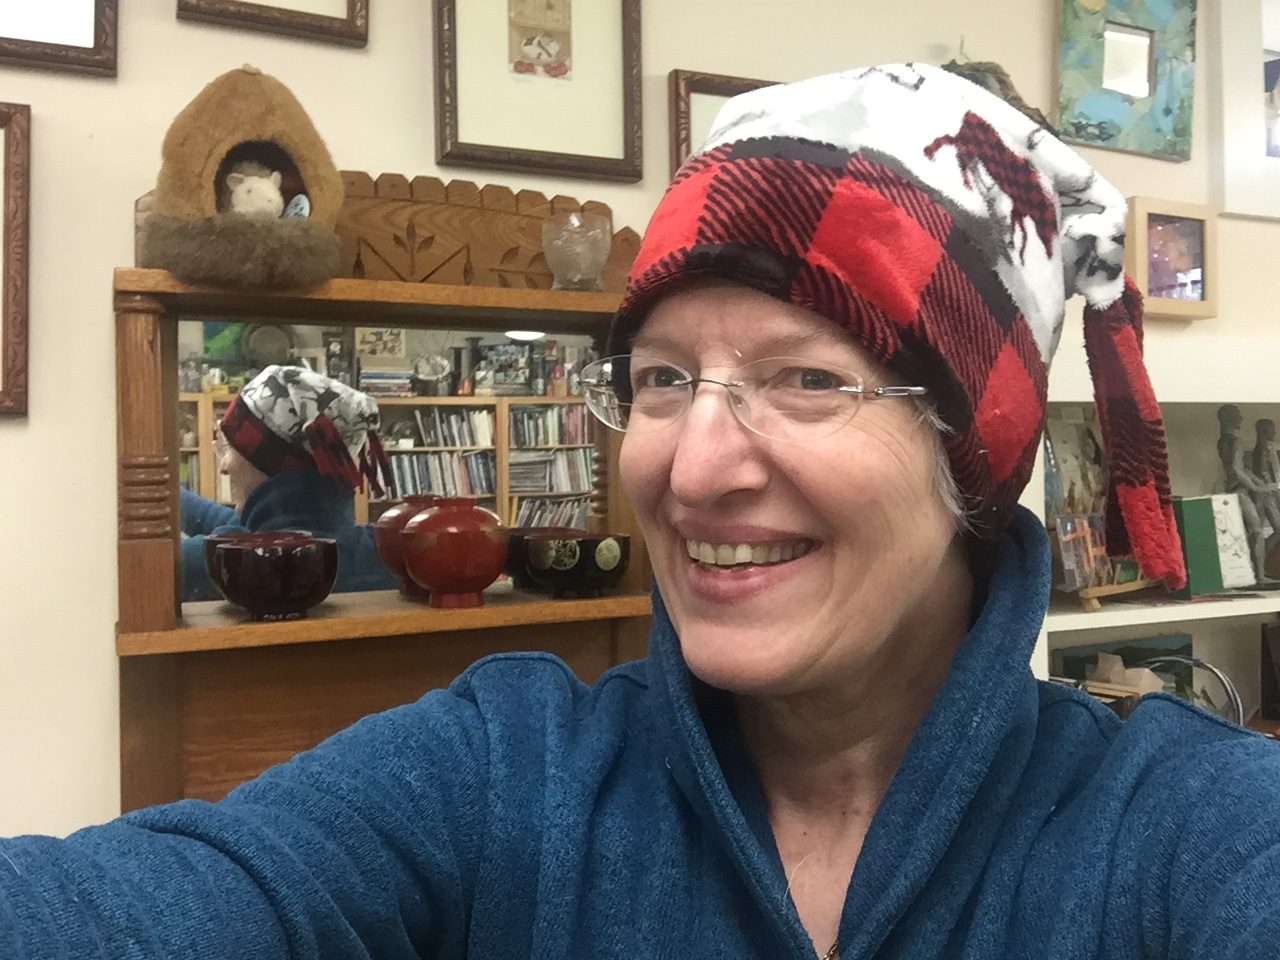
The last bits of fleece make an easy peasy hat!

November 1st, 2018

So I decided to use up the very last bits of my buffalo check fleece.  I began with 4 3/4 yards of the 58-60″ wide cloth.  The second photo shows the last bits!   These hats are SO FAST to make…including figuring out the best sewing sequence it took less than an hour for the first one.  If you wanted to make a half dozen, you could do that in an afternoon–quick and easy winter gifts!

How many selfies do you need to take to eliminate many chins or no chin? LOL! I love my soft hat!

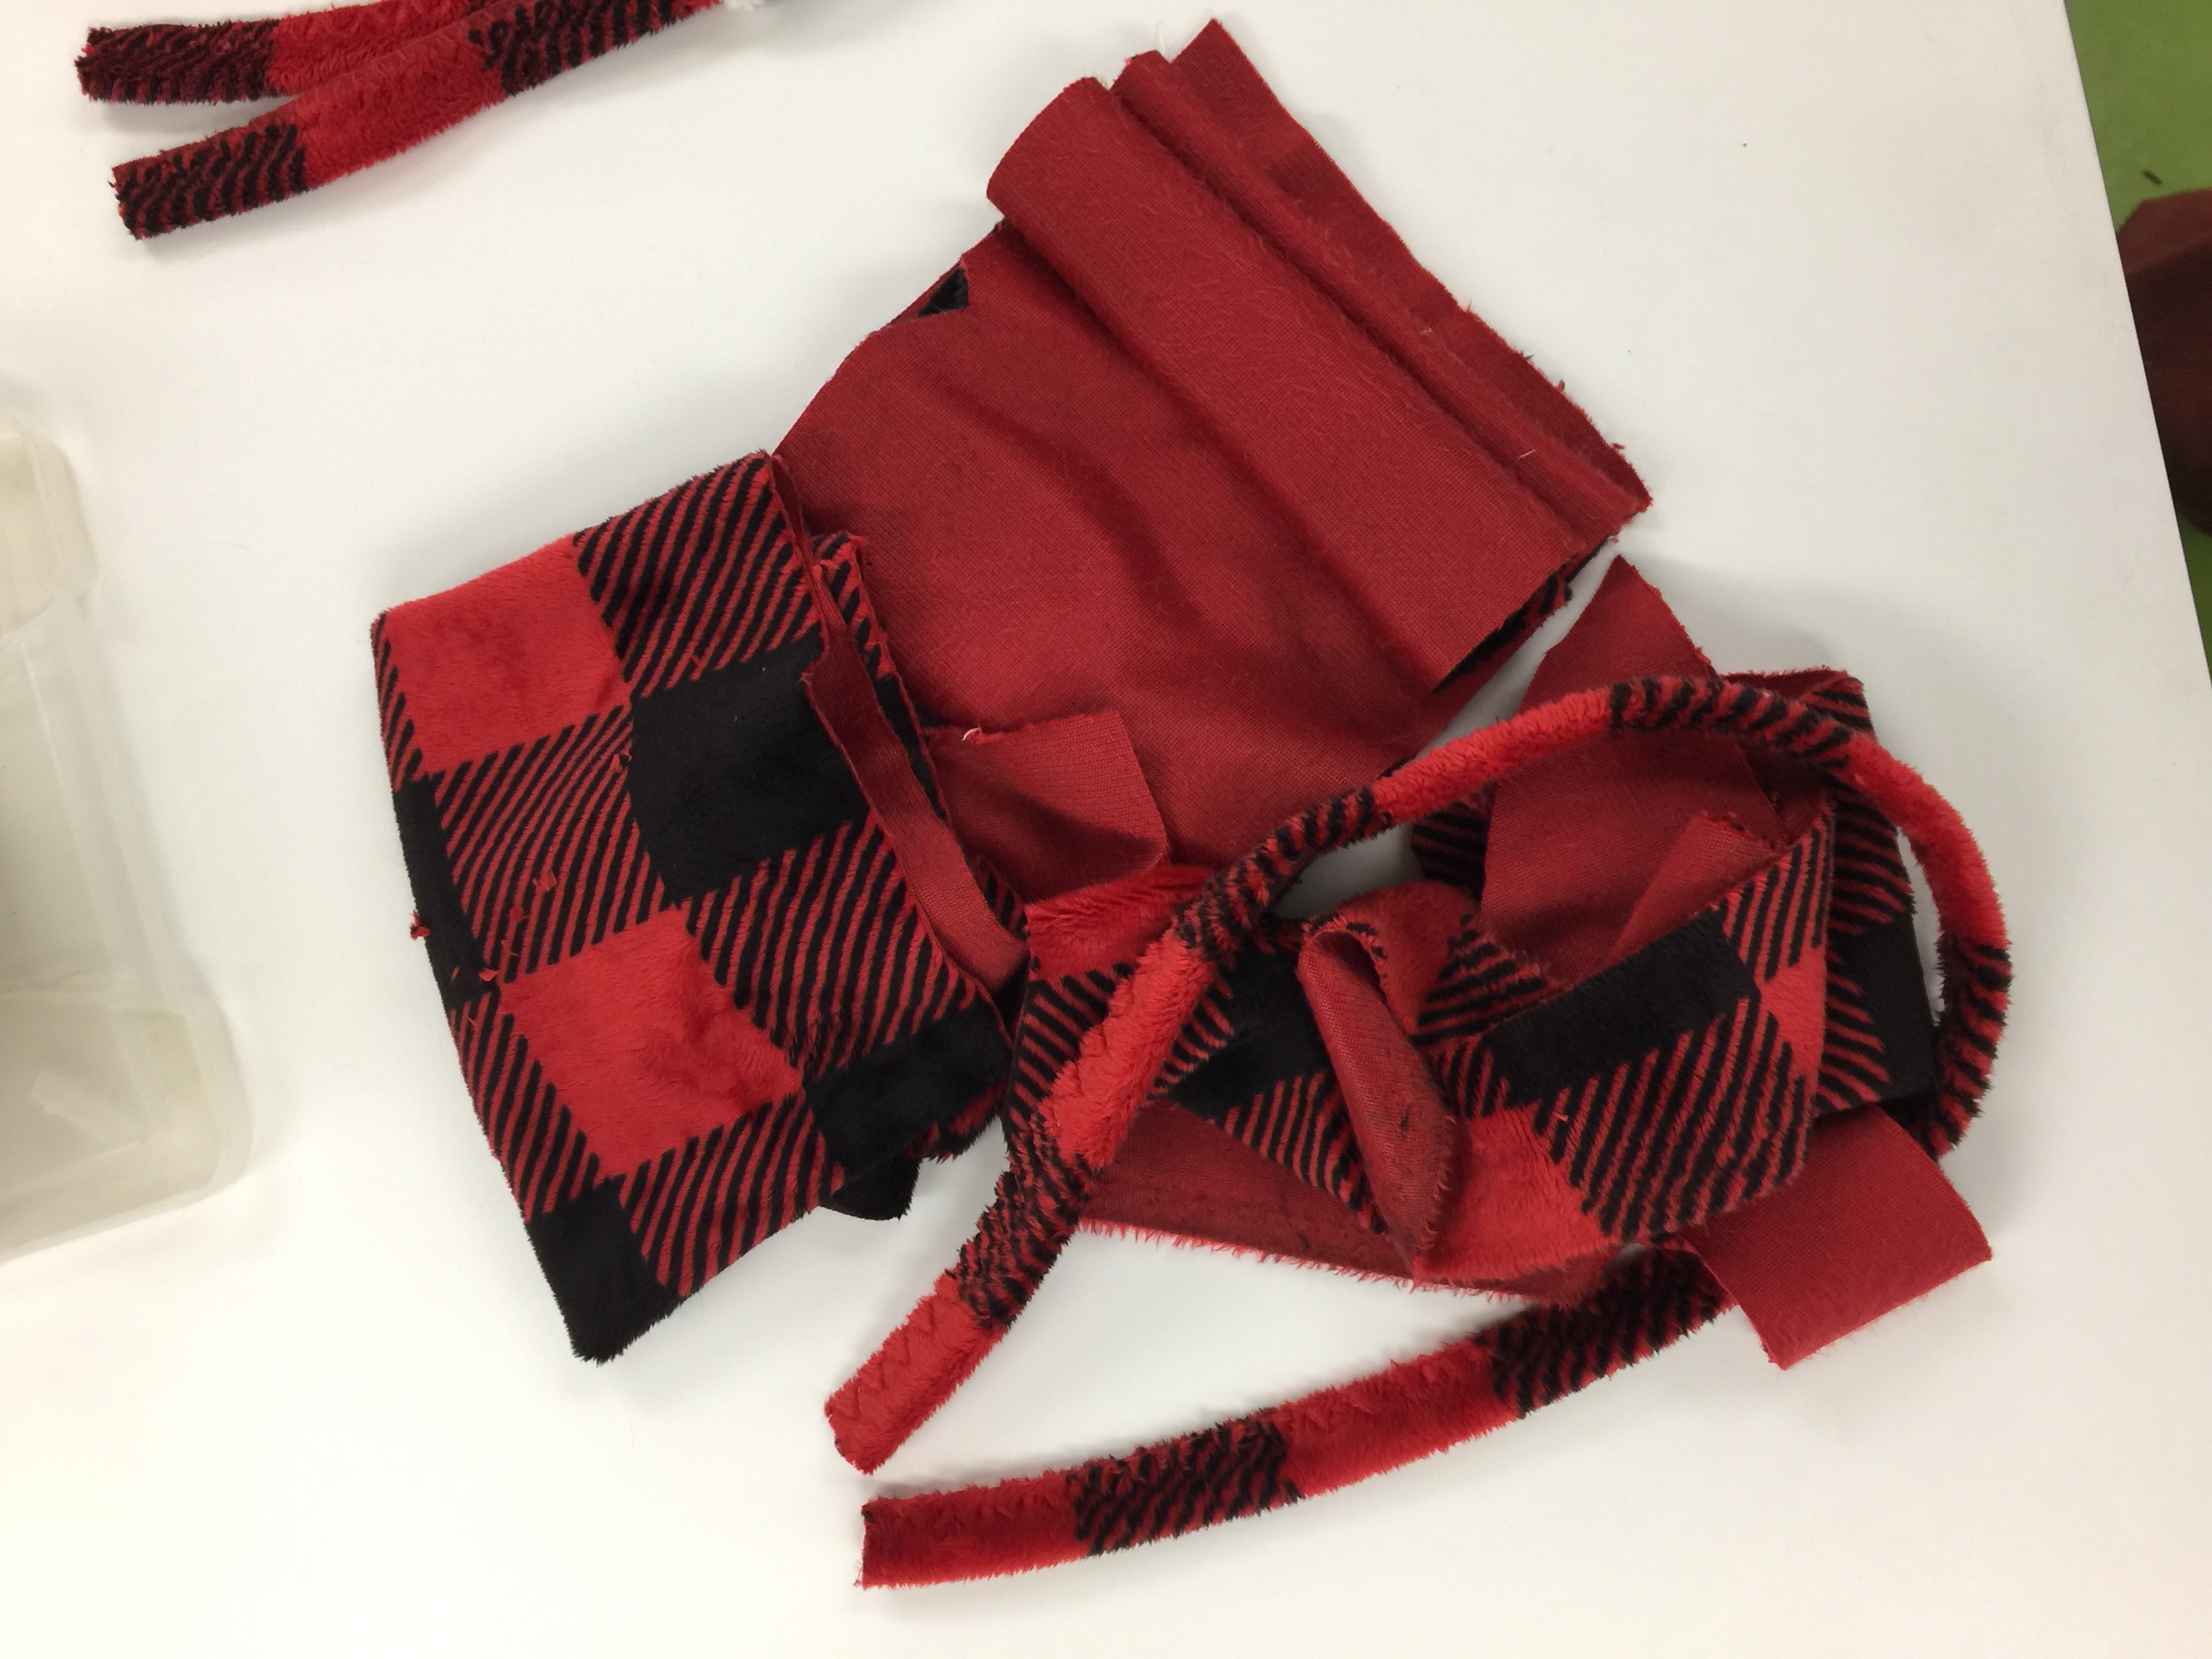
This is all that is left of 4.75 YARDS of fabric….that is 10,260 square inches. Under 200 left! I even made some tassles/trim out of the selvages!

This hat will be a free pattern soon–not sure yet if it will be here or at Shannon’s site, but you can make one of these in well under an hour from scraps.  Truly, I used maybe 10×25 for the white part, 5 x 25 for the bottom, and a bit more for the tassles/dangly bits.   I just sewed two tubes to fit my head, one of the white print, one of the buffalo plaid.  The white print is here at Fabric.com.

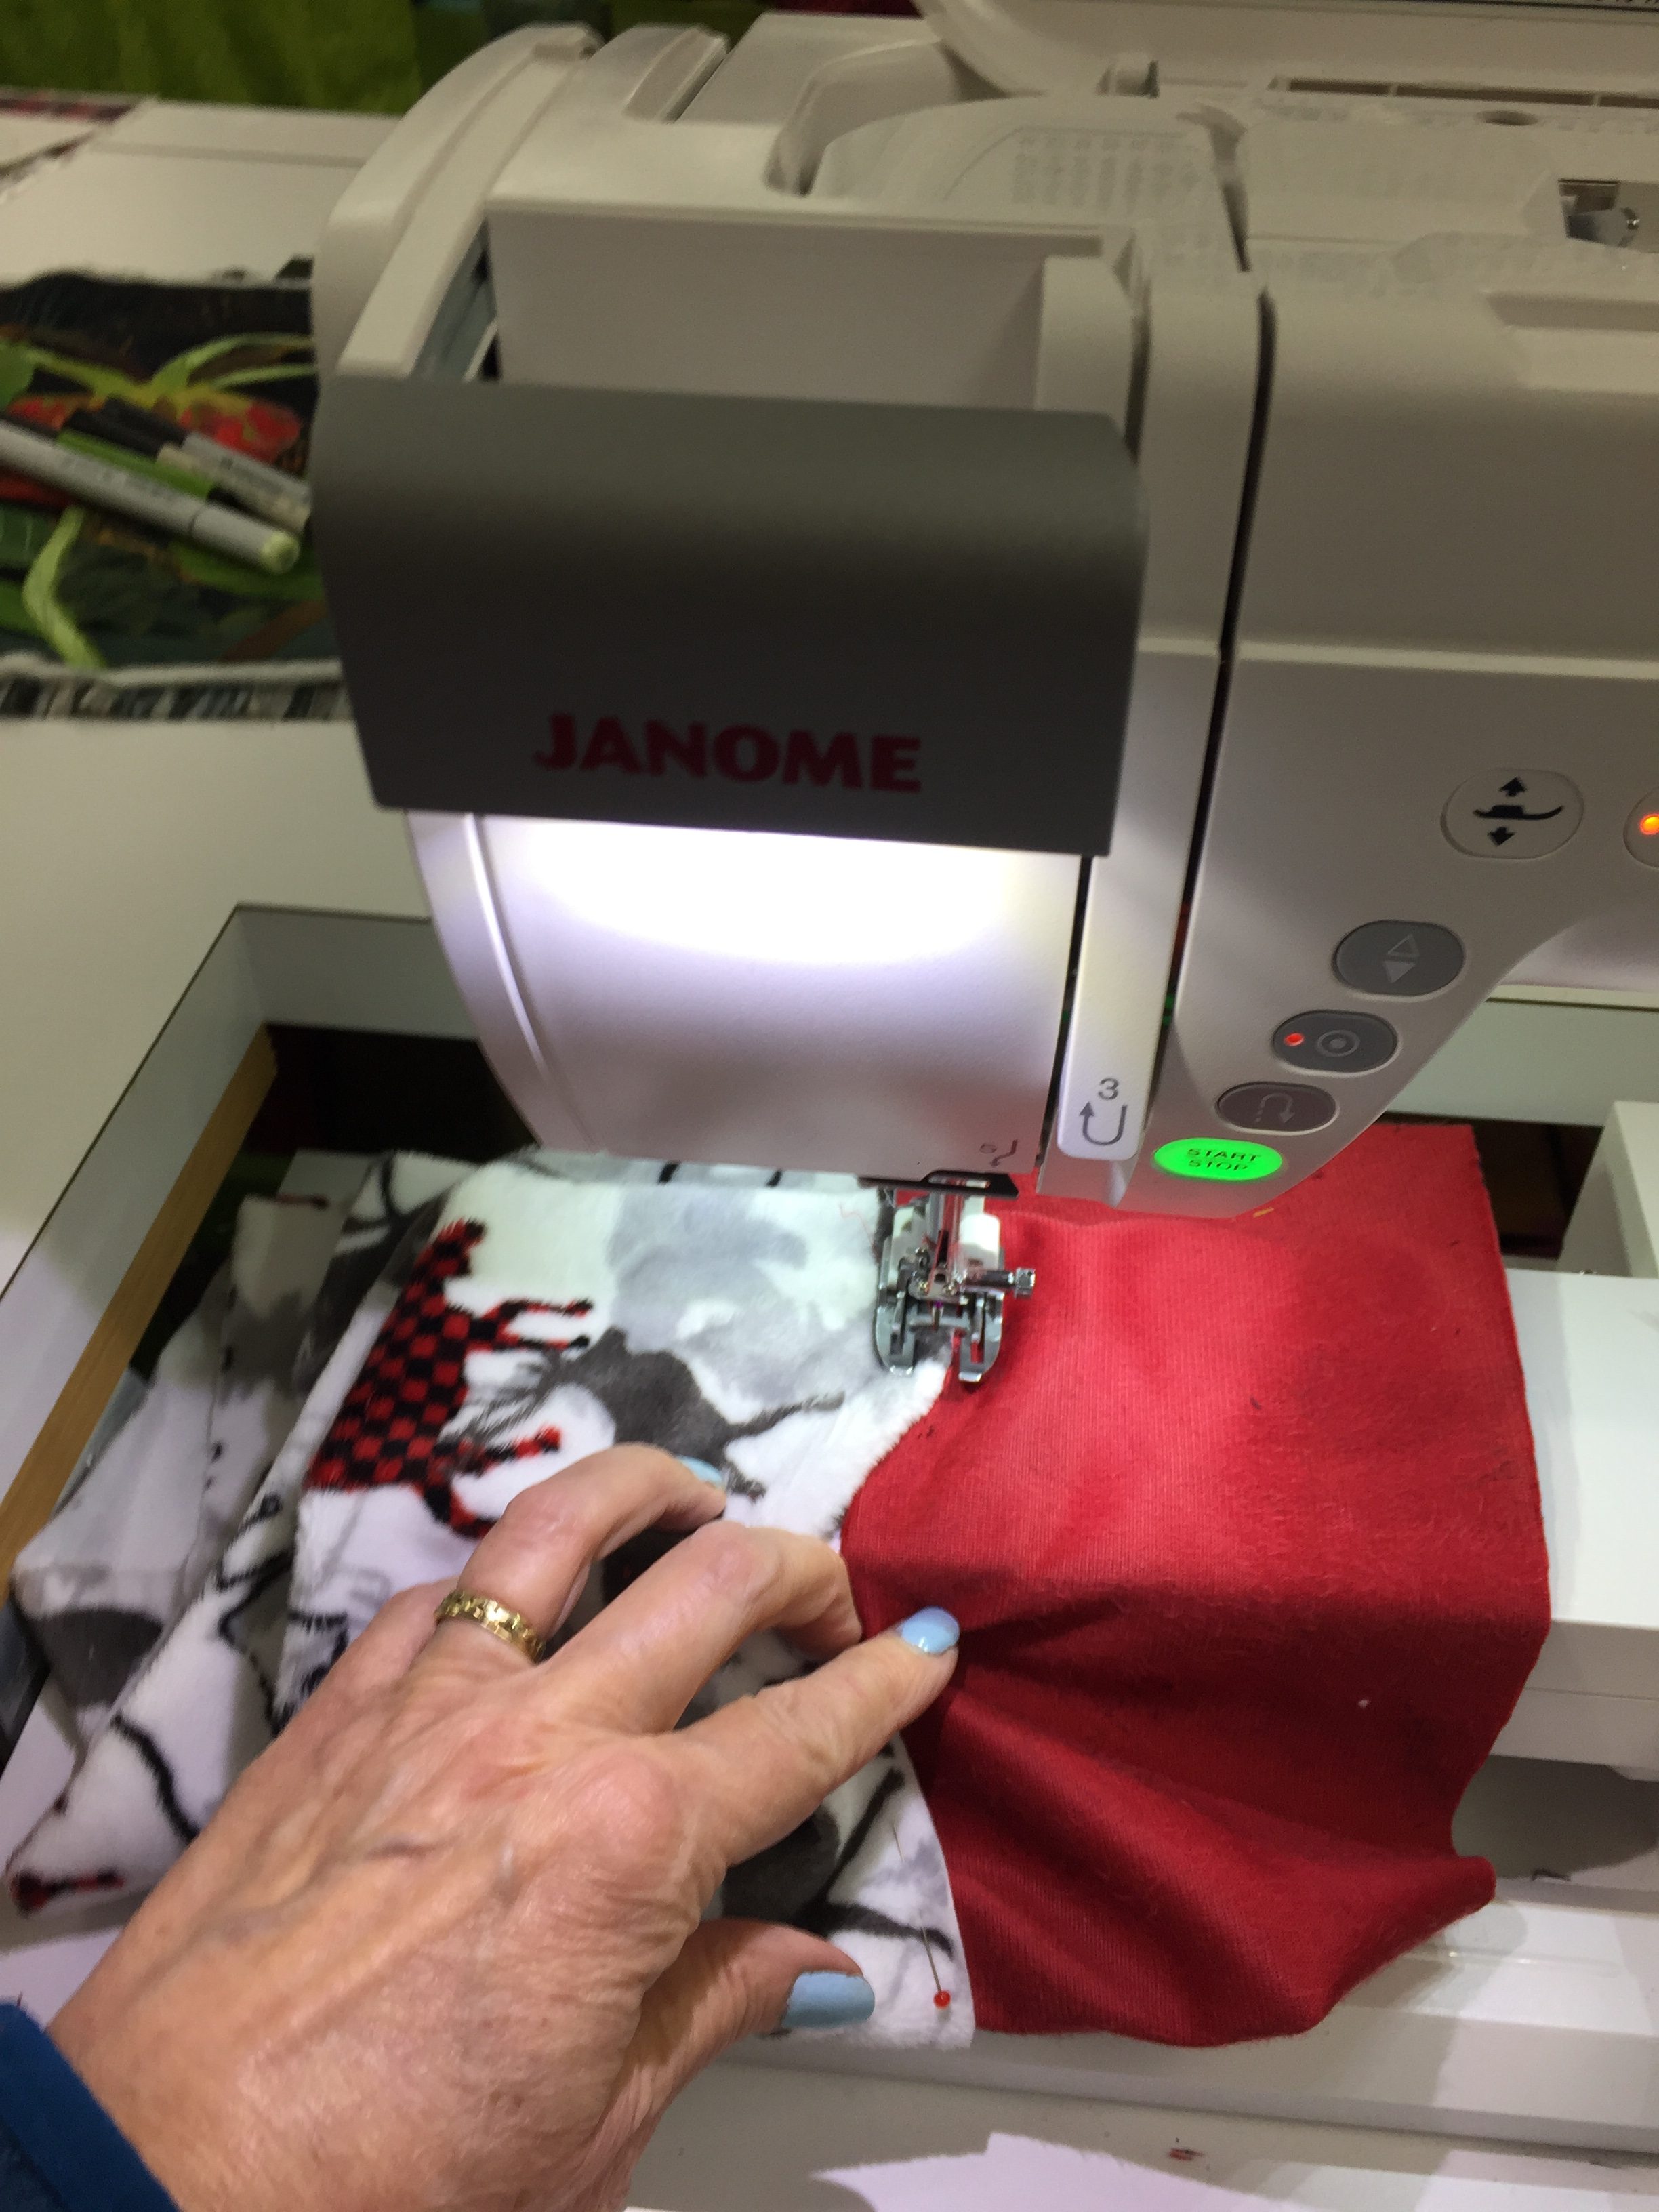
Because the fleece is thick, and because I wanted the soft part next to my forehead, I didn’t use a typical garment seam. Instead, I overlapped the two fabrics, wrong sides together, and sewed them with a serpentine stitch. I did this twice, on either side, so I would catch both edges of the overlap. My finger is pulling the two pieces apart so you can see the overlap.

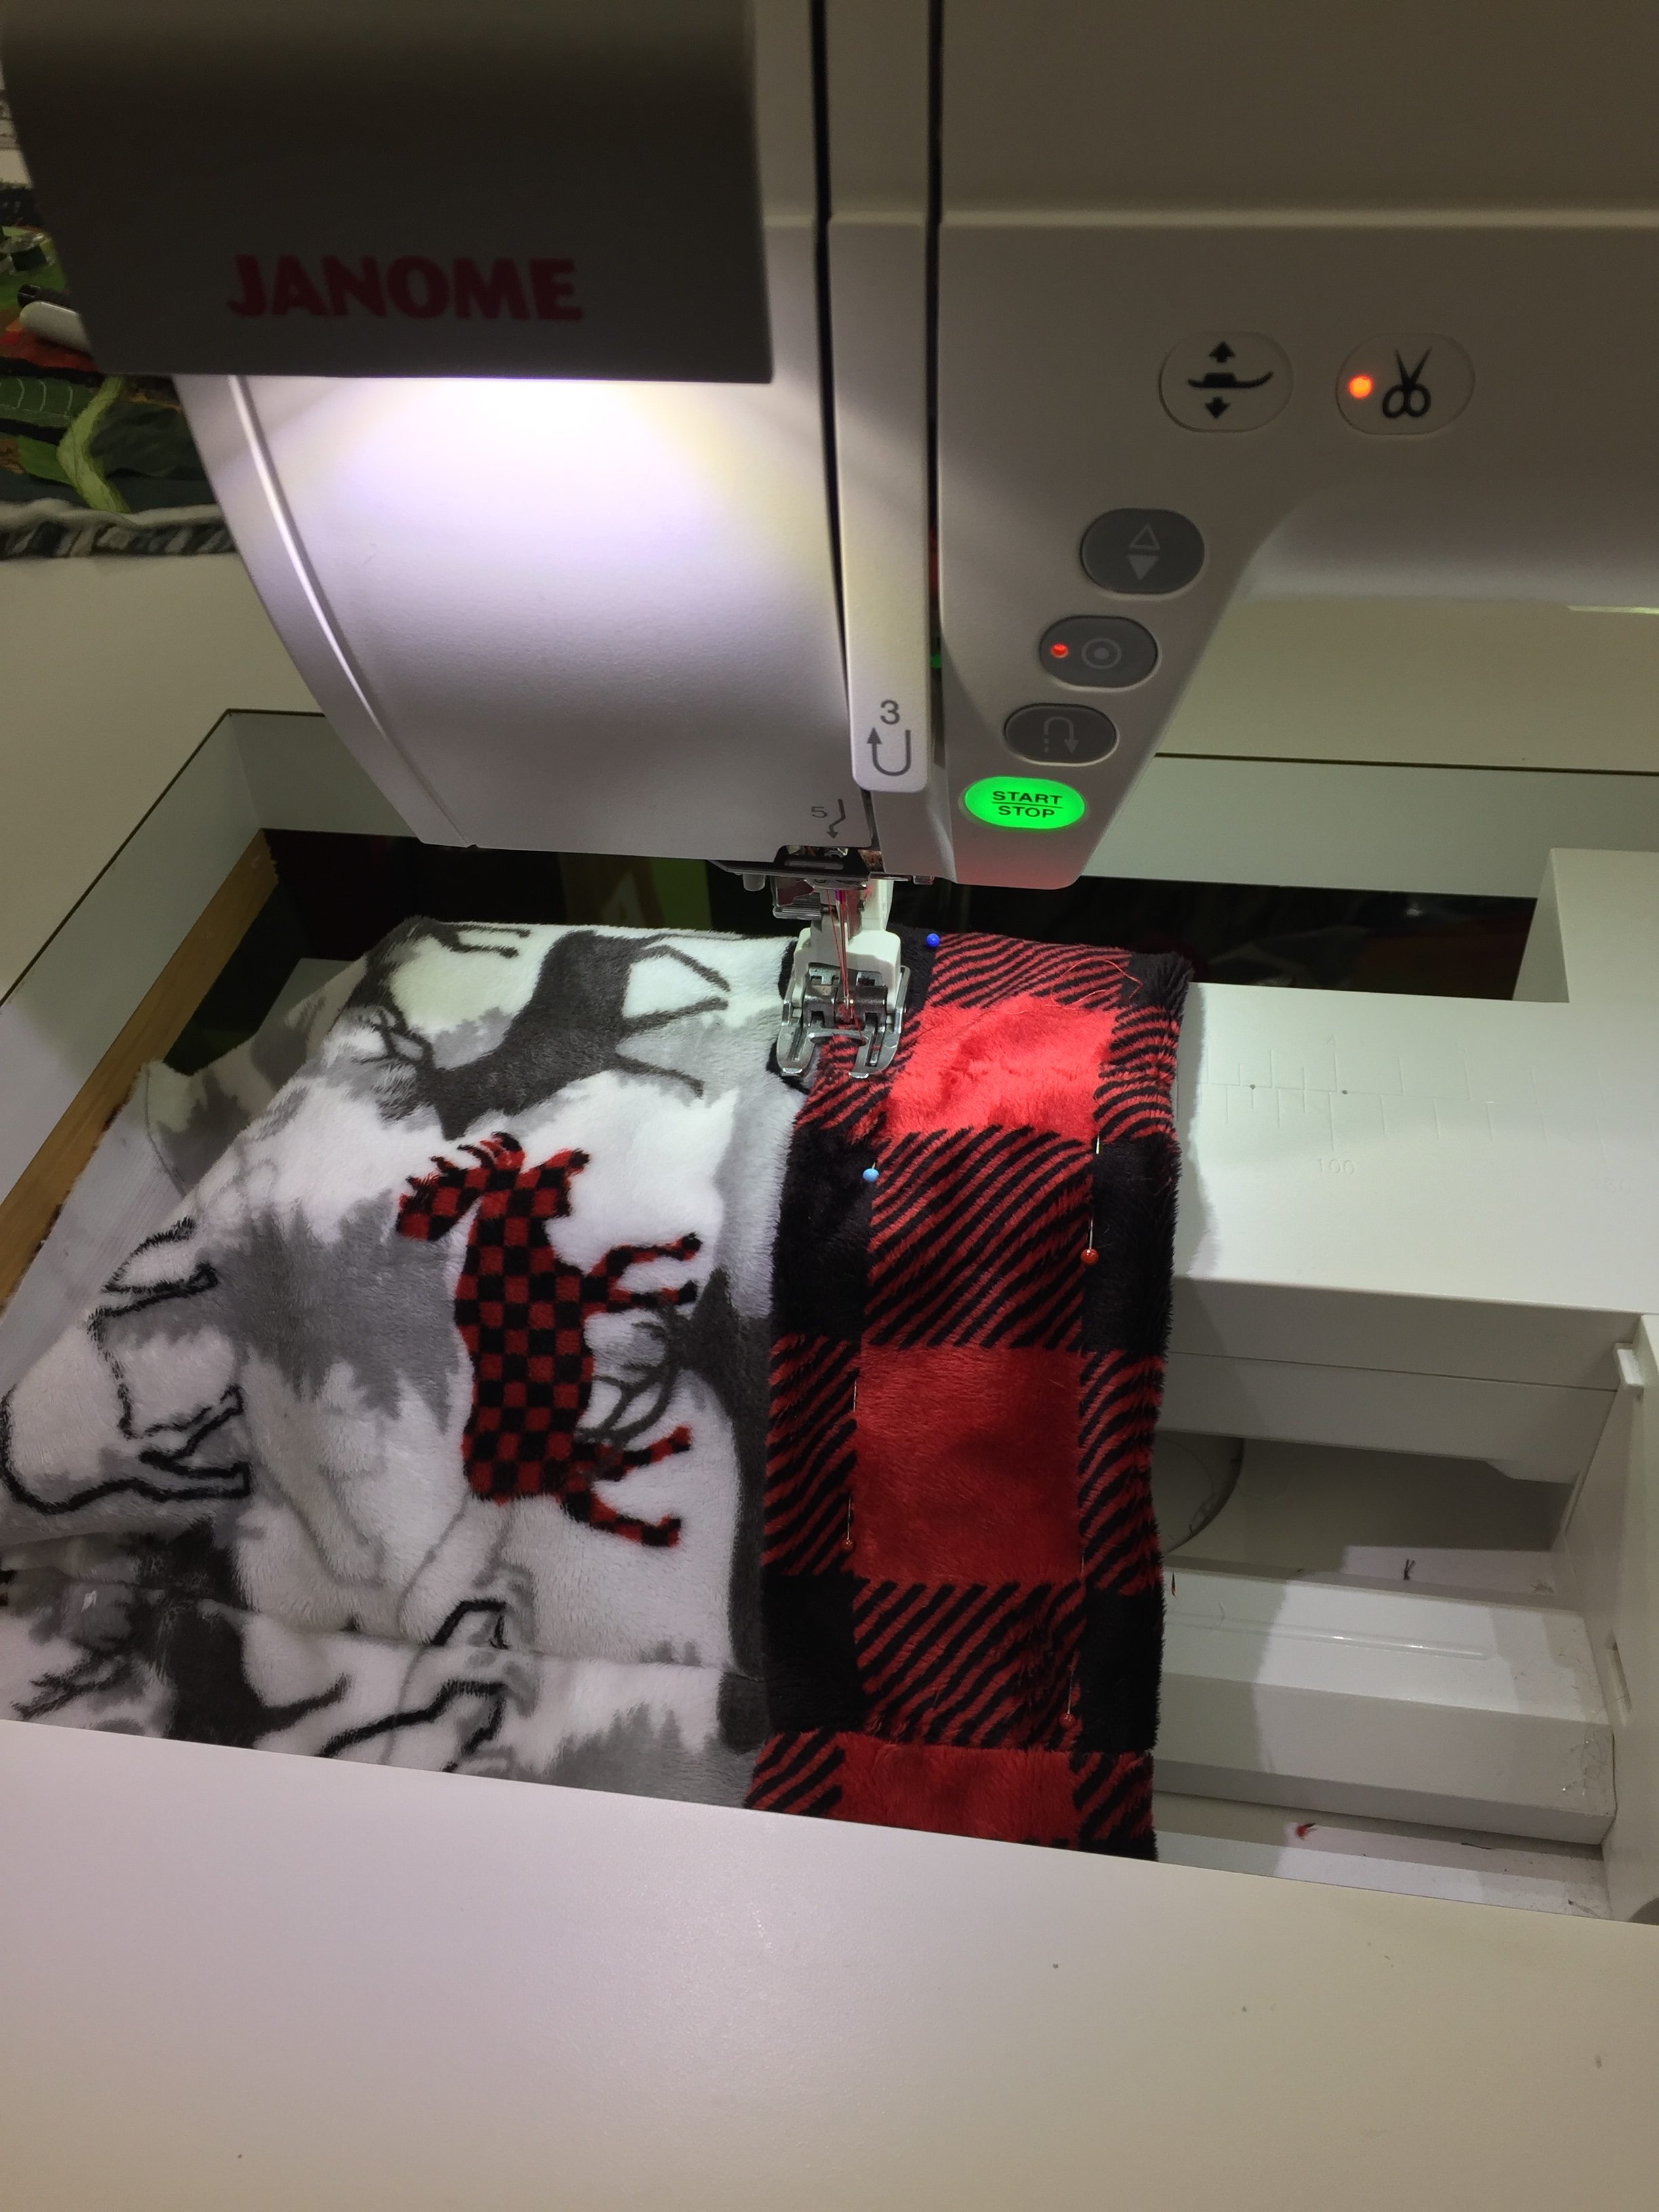
I then turned the plaid to the outside and brought it up above the seam that joins the top of the hat to the “cuff.”  I pinned the fabric at both edges so that I kept the amount of black that shows at the bottom even all the way around.  As I mentioned in my earlier posts about the throw and the jacket, the inside of Cuddle is slippery, so pin well. Because the fabric does not ravel, I didn’t need to turn under the upper edge of the plaid cuff.  I used the serpentine stitch to it down.

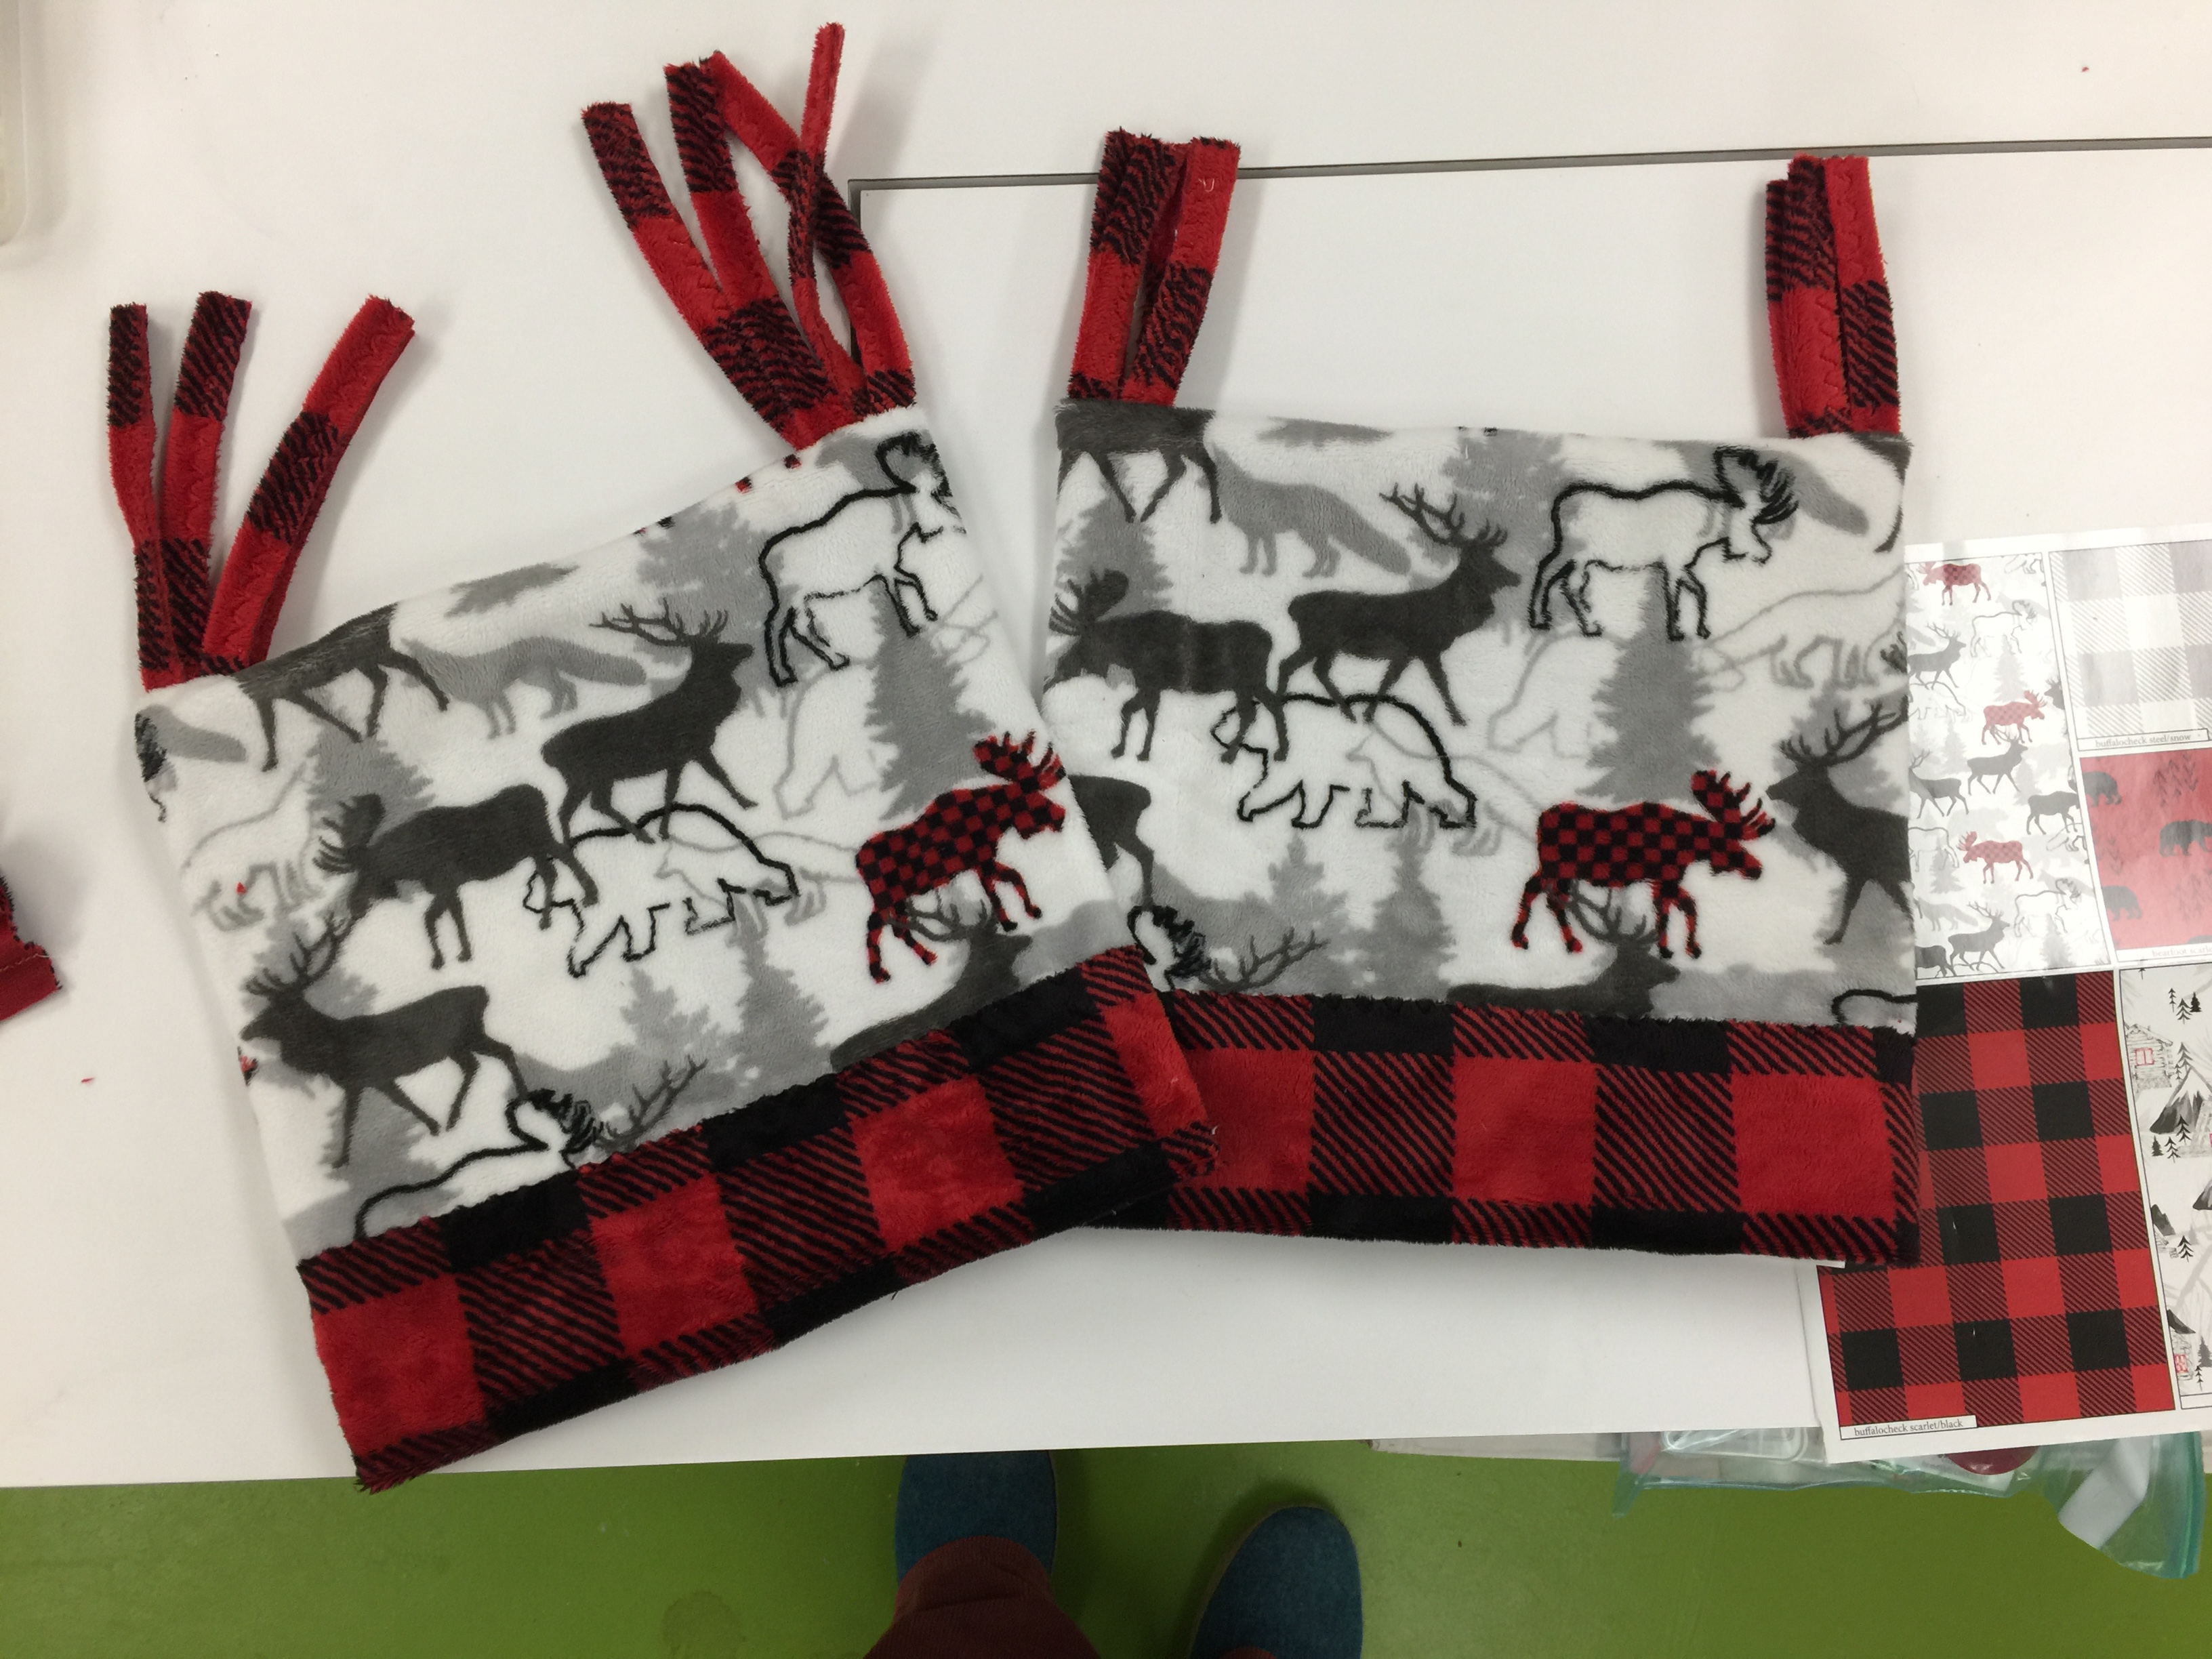
Finally, I made some dangly bits using the trimmed off selvages (they were about 1″ wide plus lengthwise grain of course):  fold in half wrong sides together and use serpentine stitch.  Cut to length, insert two, each folded in half, at either end of the seam at the top of the hat, and sew the final seam.  Because of the bulk from the dangly bits, I found it far easier to sew from the center to the ends, lock off the stitch and repeat for the other side.

Two hats…I mean I used up EVERY LAST BIT of scraps! One hat for me, one to send to Shannon for them to use as they wish!  Talk about a quick and easy Christmas gift!


THANK YOU Shannon Fabrics for this wonderful fabric and an October full of fun, fast and easy fleece projects.   I look forward to making more…I’ve got some Christmas gifts already made which I can’t share due to friends looking at my blog, and another big length of fleece to use on a snuggle quilt for winter!

Fleece Buffalo Jacket/coat!

October 30th, 2018

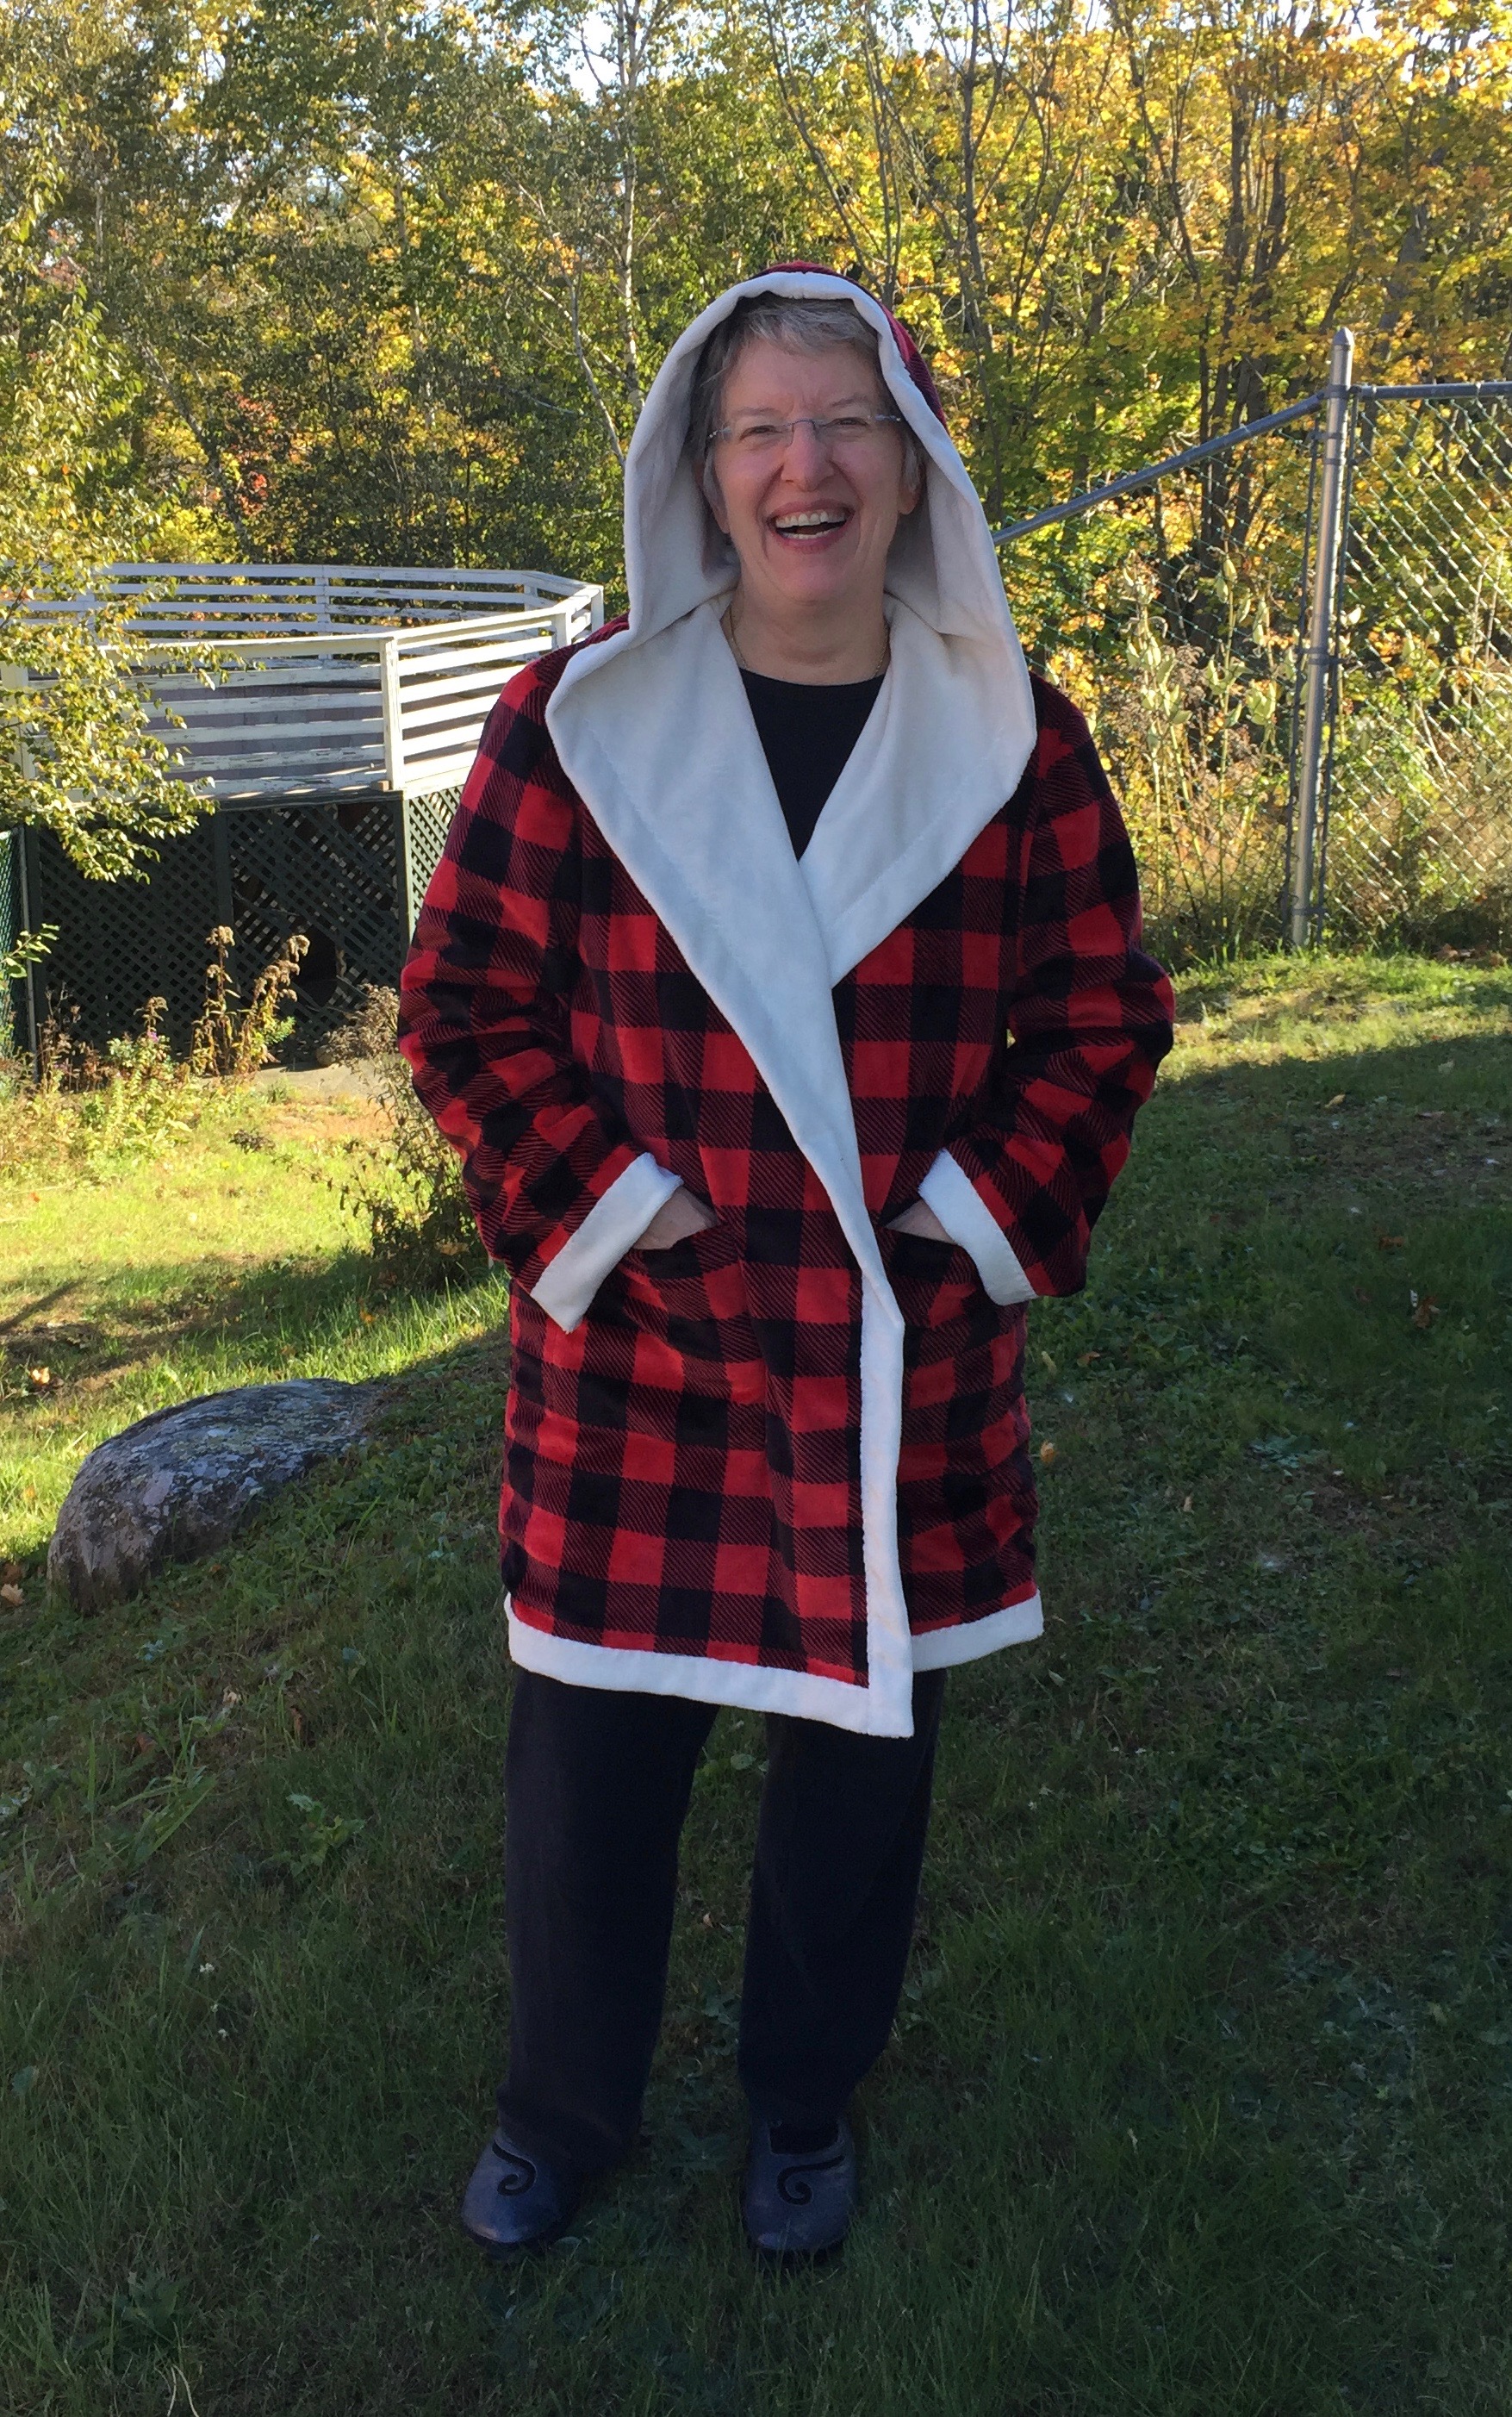
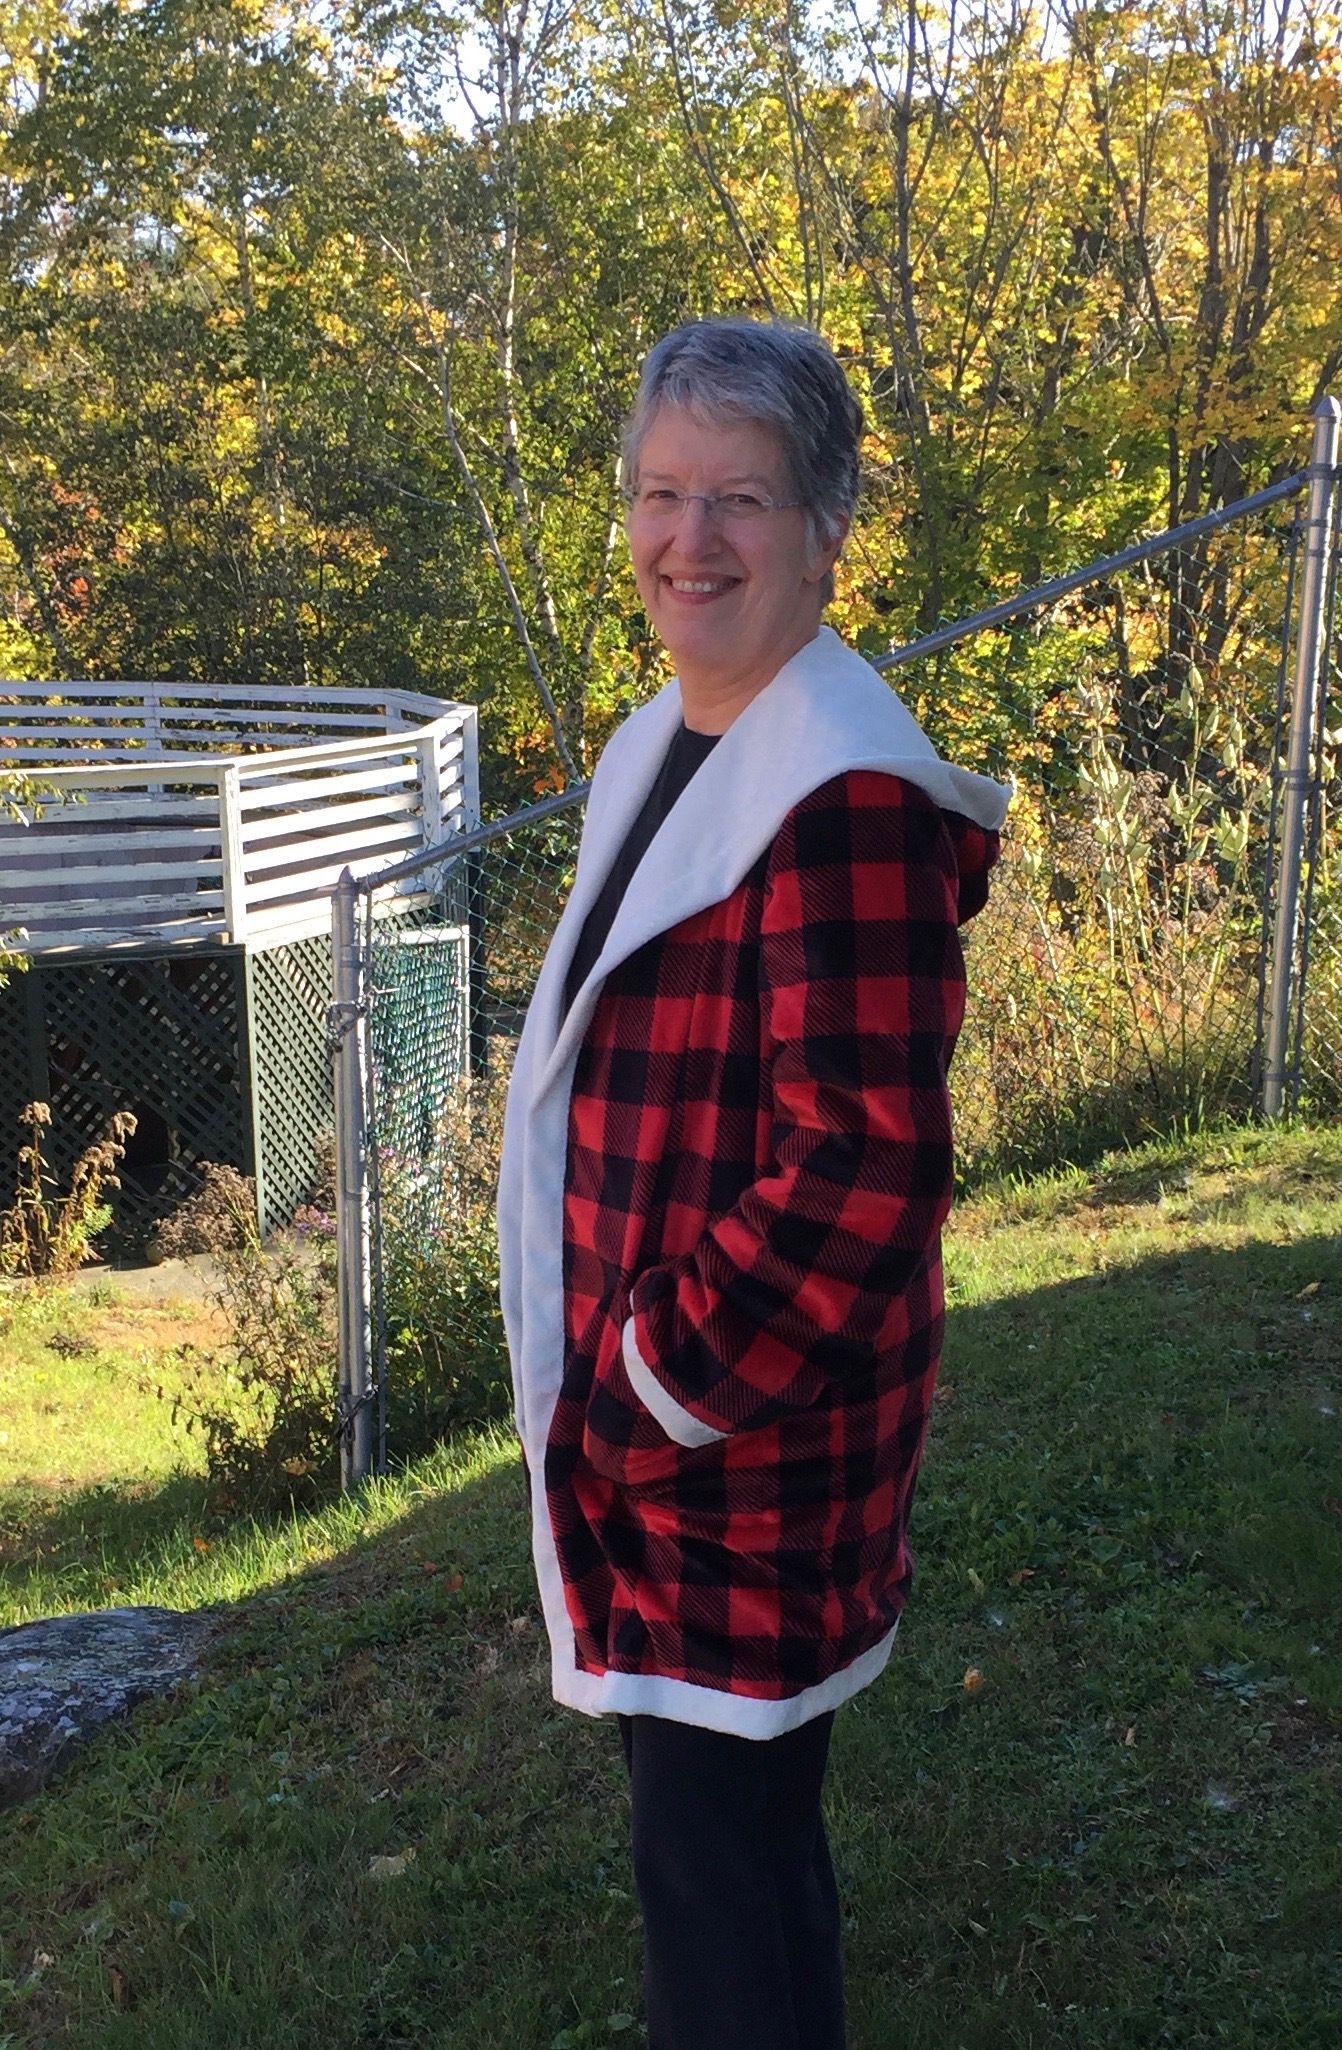
Hi everyone…preparations for teaching at International Quilt Festival Houston are nearly done, so I can return to somewhat regularly sporadic blogging!   In addition to that snuggly lap robe/blanket in Cuddle fabric, I also recently made a hooded jacket using two layers of fleece and a Simplicity pattern.

Cuddle-y two-layer fleece jacket–I may not want to take this off this winter!

As I’ve; mentioned in earlier posts, I totally fell in love with Shannon Cuddle fabric at the Janome Education Summit this past May. Here’s a link to the buffalo check (temporarily out of stock as of October 30) Shannon scarlet and black Cuddle.

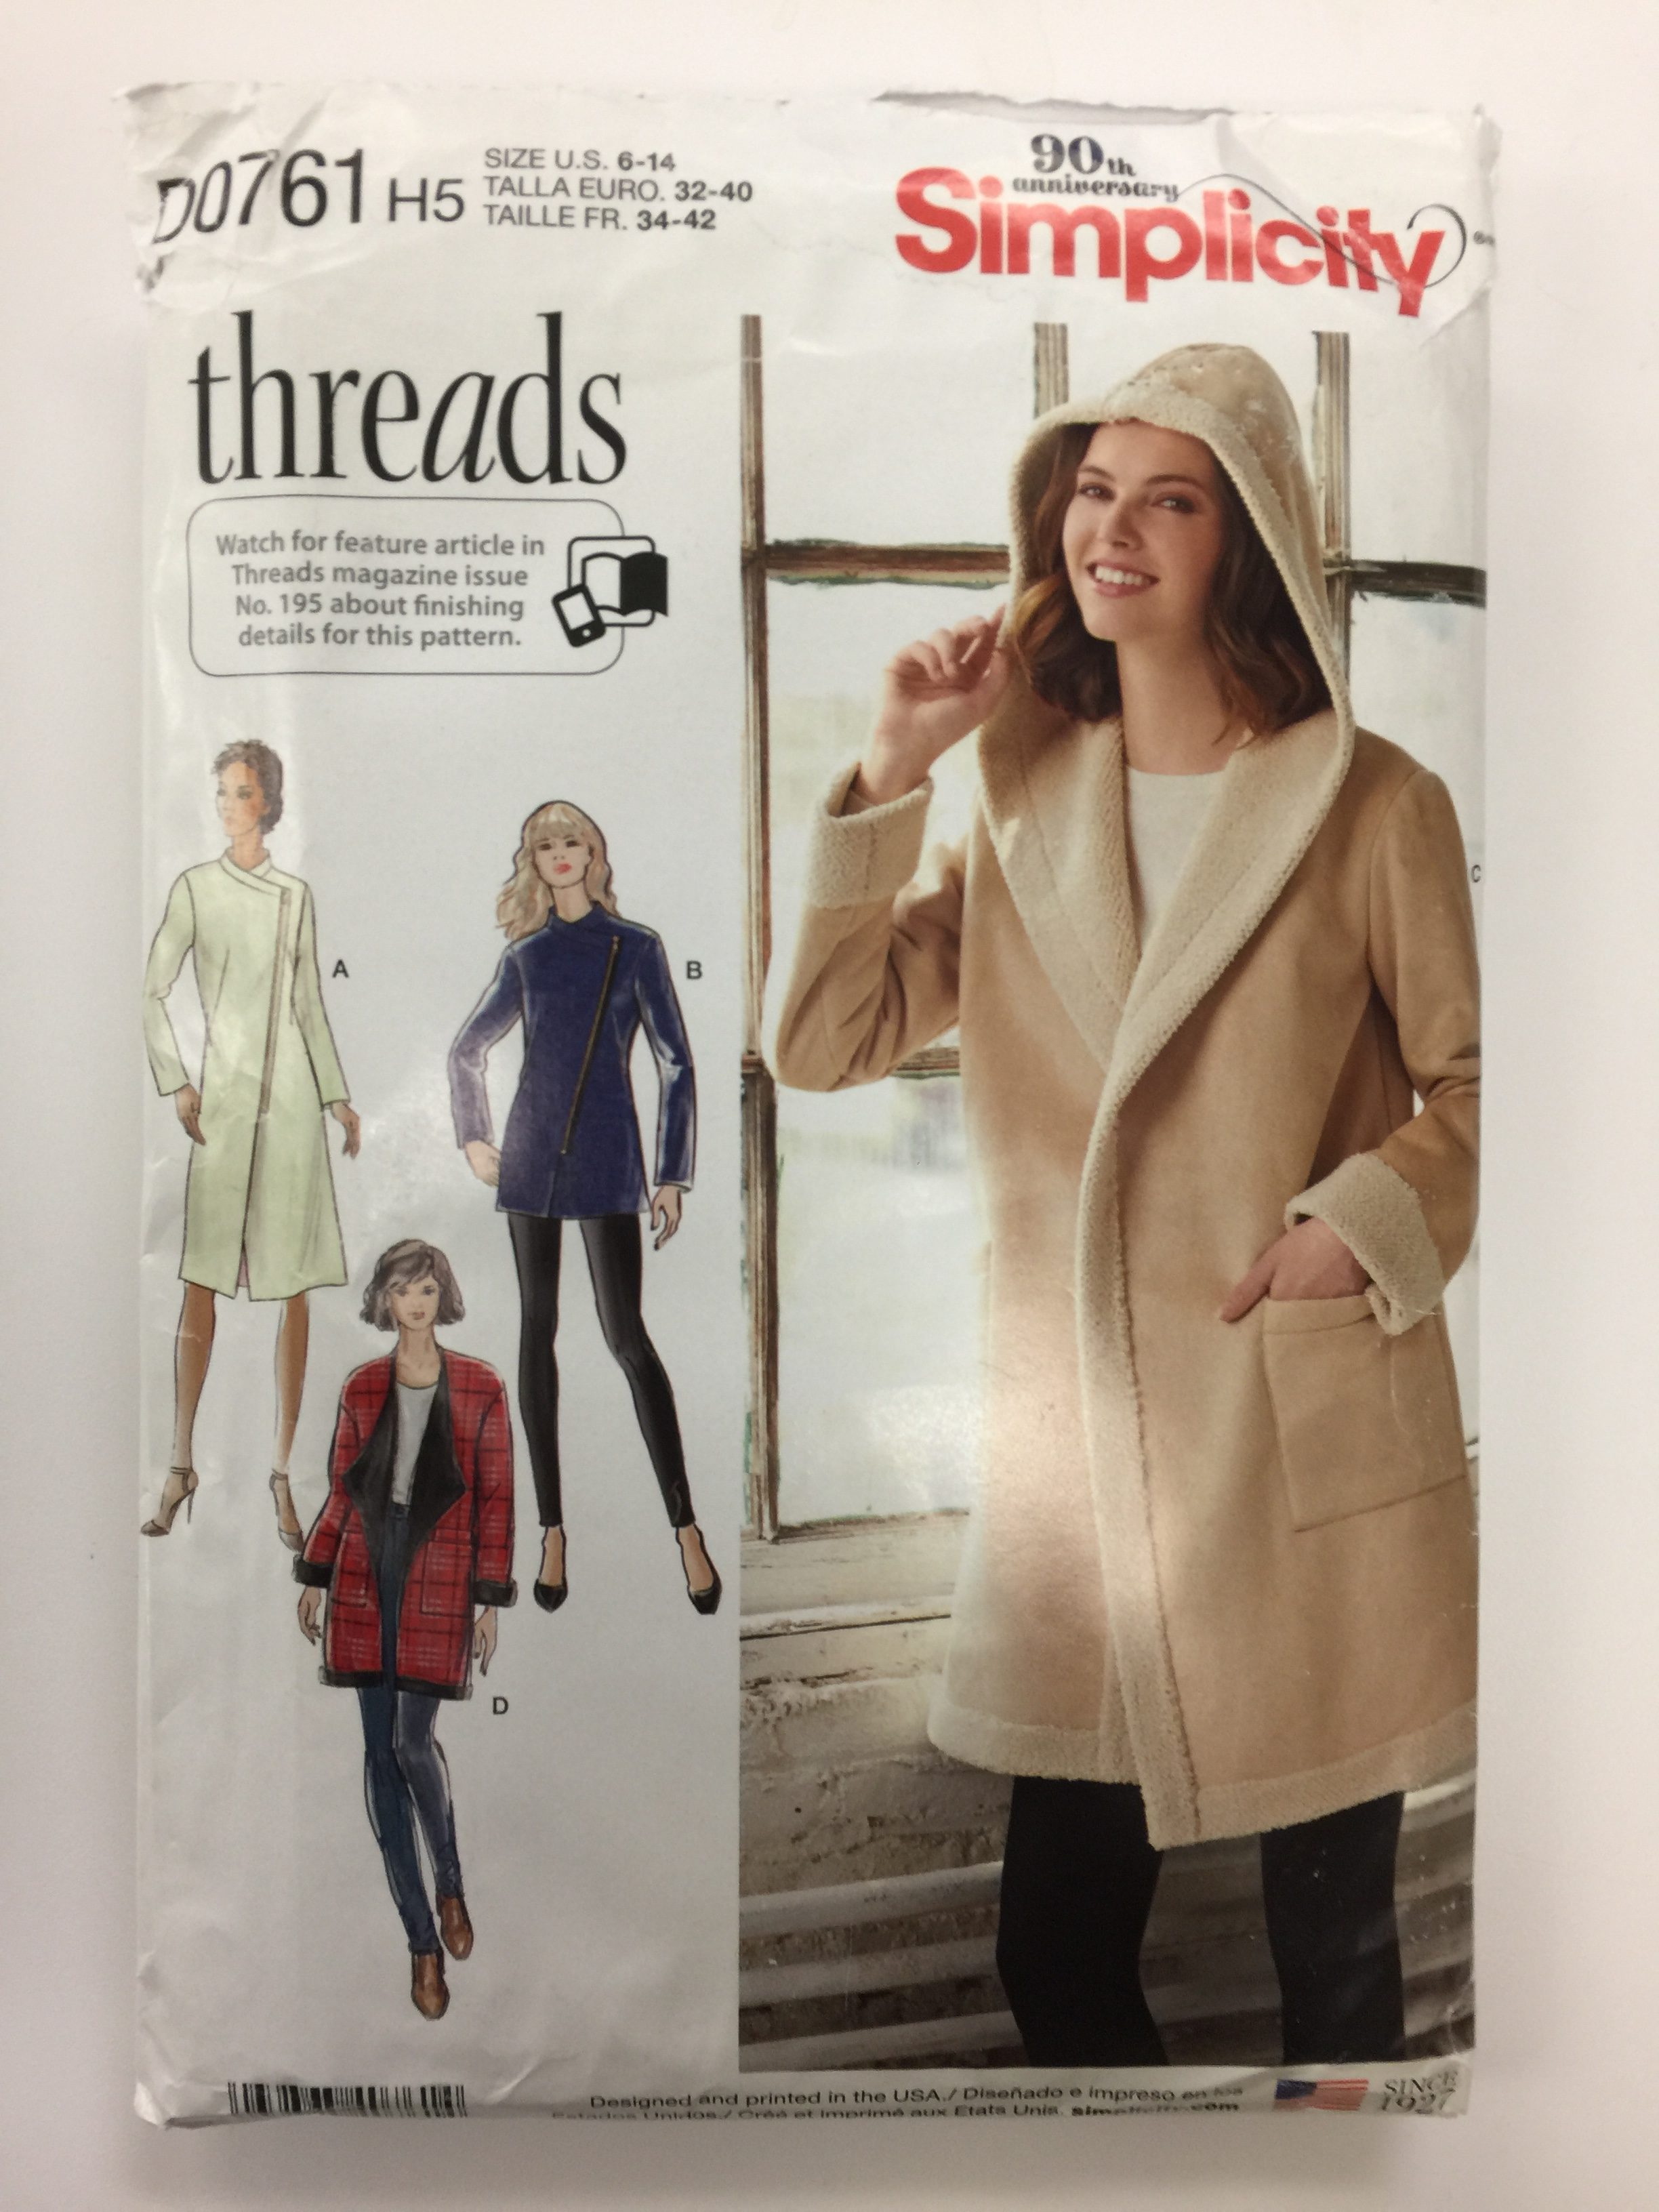
Here’s the pattern I used, Simplicity D0761. I purchased 2 3/4 yards of both the ivory cuddle and the buffalo check. I would recommend an extra quarter yard of the check if you plan to match the plaid as I did at sides and sleeves.  The pattern is cool because the hood is cut with the fronts as one big piece.  The only fiddly part in the entire thing was the shoulder-back neck-shoulder seam, and even that worked a charm with careful pinning.   A confident beginner could probably tackle this.  

The pattern is designed for a two-sided fleece such as the sherpa/suede.  Instead, I made two jackets.  I cut the outer jacket perhaps 1/8″ larger than the pattern and sewed it with a 1/2″ seam allowance, not the standard 5/8″.  I sewed the ivory inner jacket at accurate size and with a generous 5/8″ seam allowance.  This allowed the fluffy Cuddle to fit inside.   HOWEVER, the back side of the Cuddle is slippery.  If I were to make this again, I think I would cut my fabric pieces slightly oversized, sew them together as if quilting (wrong sides together) along the black stripe, THEN trim to final size and sew it as if it were ONE fabric.  Currently, even though I tacked the coat at the neckline, it has a propensity to wiggle and sometimes bubble at the hem.

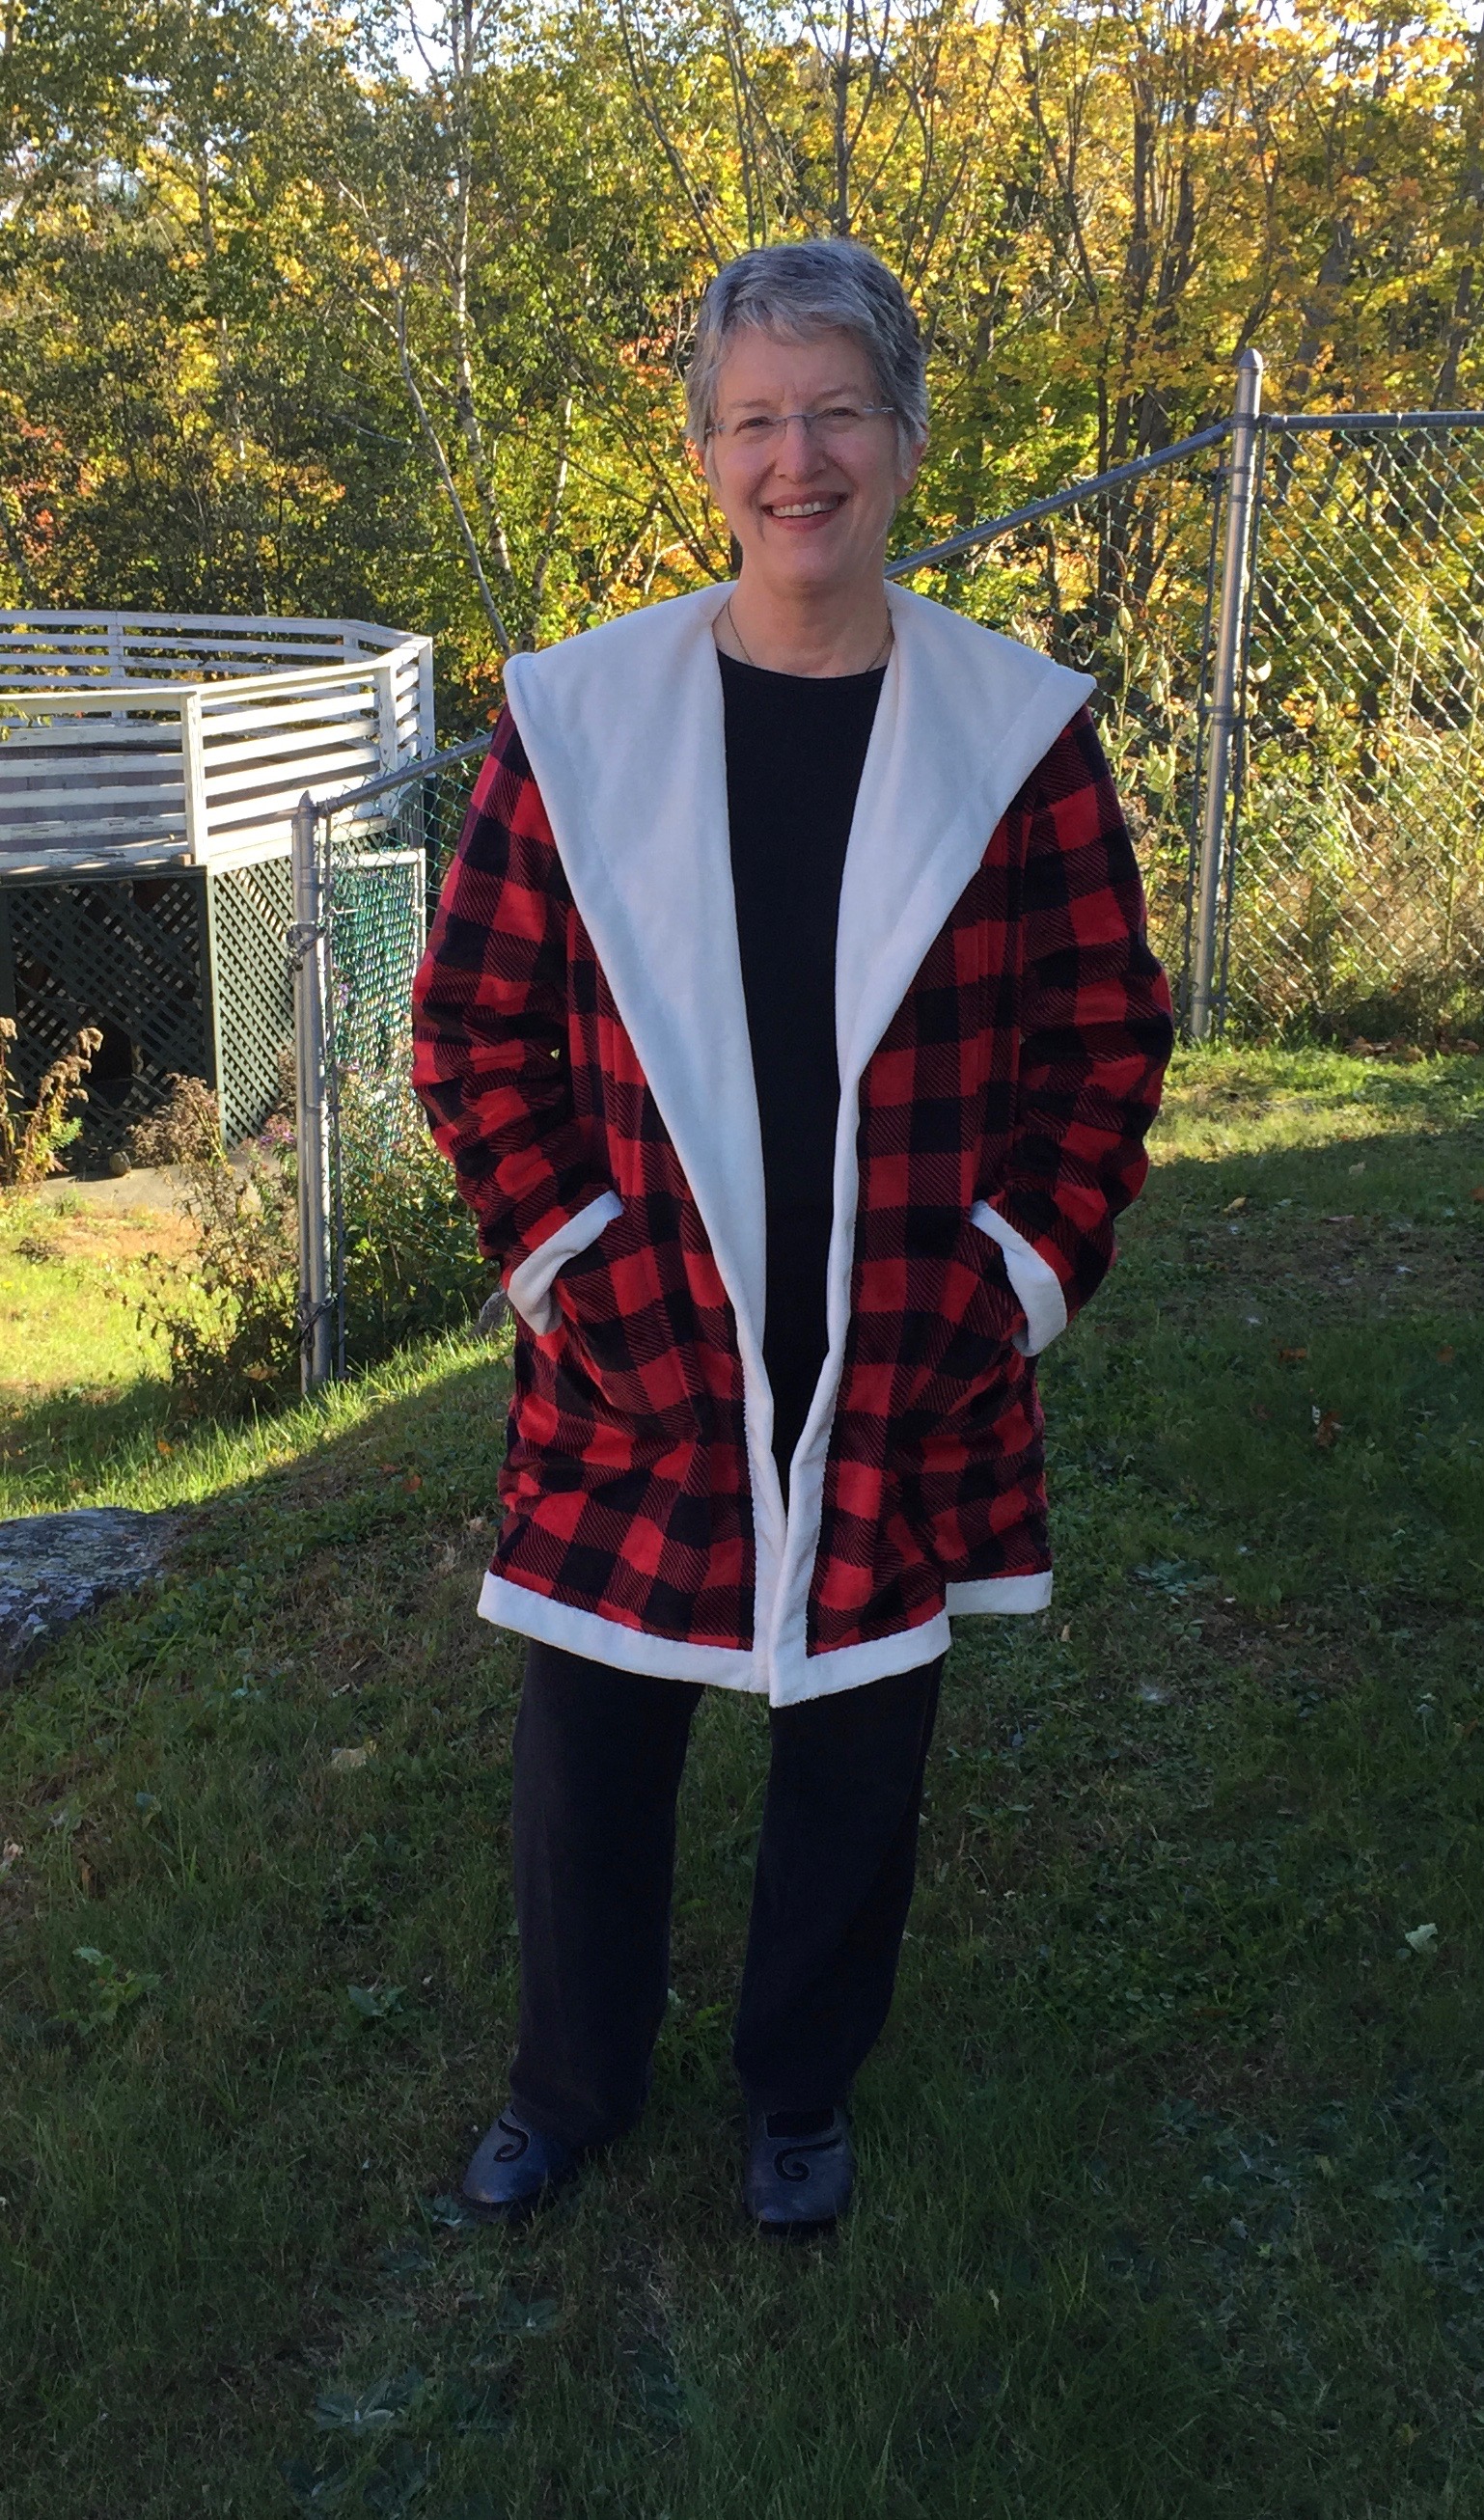
Hood down and open. 

The pattern doesn’t have a closure, but I have some black toggles on faux-leather and may use one.

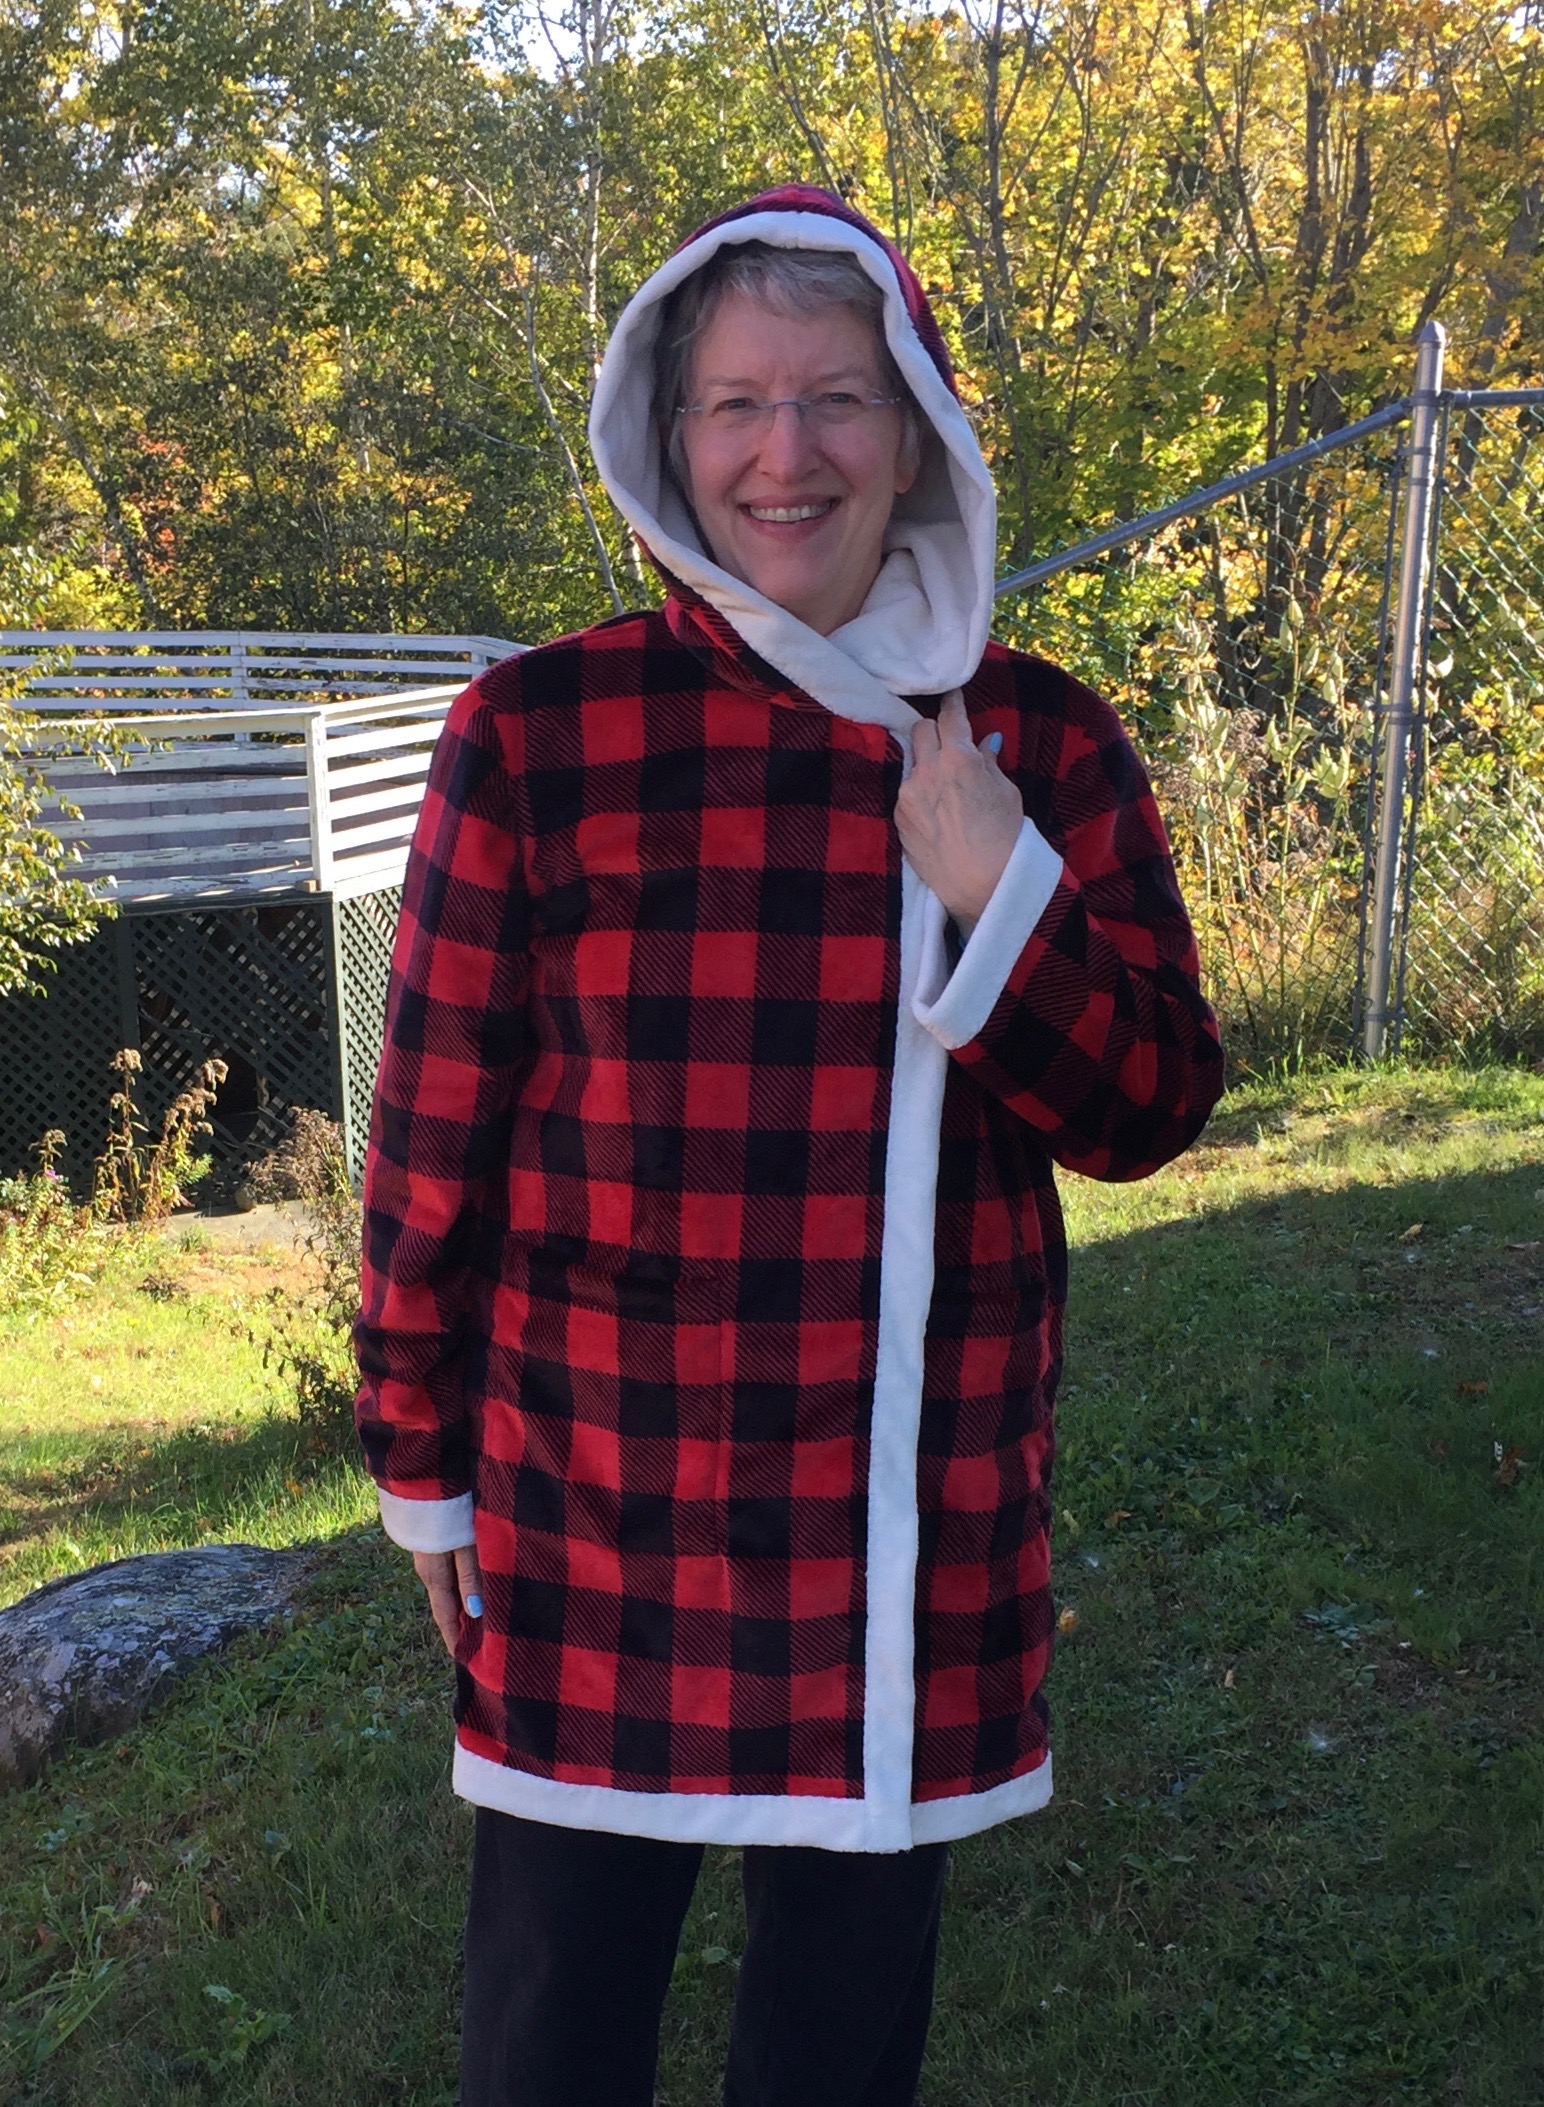
And a side view showing the hood.

Thanks as always to Janome America…sewing this on my Janome 9400 was a DREAM.  I used the acufeed foot for pretty much everything and the serpentine or lightning stitches.  I used the lightning (a type of zigzag) for seams at 10 width and 3.0 length, which accommodates any stretching.  I used the serpentine on all the turned-over white bits.  Since the Cuddle does NOT RAVEL at ALL, you don’t need to turn under the edges so the serpentine was perfect and it hides in the pile of the fabric.

I’ll repeat the tip I gave before on the blanket:  minky type fabrics are known for shedding fluff.  To minimize the mess, cut from the back side (with a scalpel type cutter if you have one–I don’t so I just used scissors; I also cut from the front to stay on the lines!).  Carefully put everything including the scraps into a plastic bag, carry it to your dryer, and set it on air dry for maybe 5 minutes.  The fluff ends up in the lint filter, so remember to empty it out and perhaps use a damp cloth to wipe out any stray bits.  This reduces the shedding by about 90 percent!


Why I love vultures!

October 22nd, 2018

The Vulture is Landing!

When we lived in Camden, I learned to love vultures.  At some point in March, they would arrive, heralding spring.   Eventually I learned that they ride the thermals, which carry the scent of supper up to them.  If it isn’t warm enough, not enough scent.   So that means when they arrive, winter is indeed ENDING.   Also, they are FUNNY–they may be a bit on the ugly side, but gosh they are just comical.  They are gregarious, live in tight family groups (the ones that roosted at the end of our driveway numbered around 30!), are large, squabble like most families, and when you hear them flap in the pitch dark when you are walking the dog late at night they sound REALLY REALLY BIG!  But they are just under-appreciated (anyone else ever felt that way?).

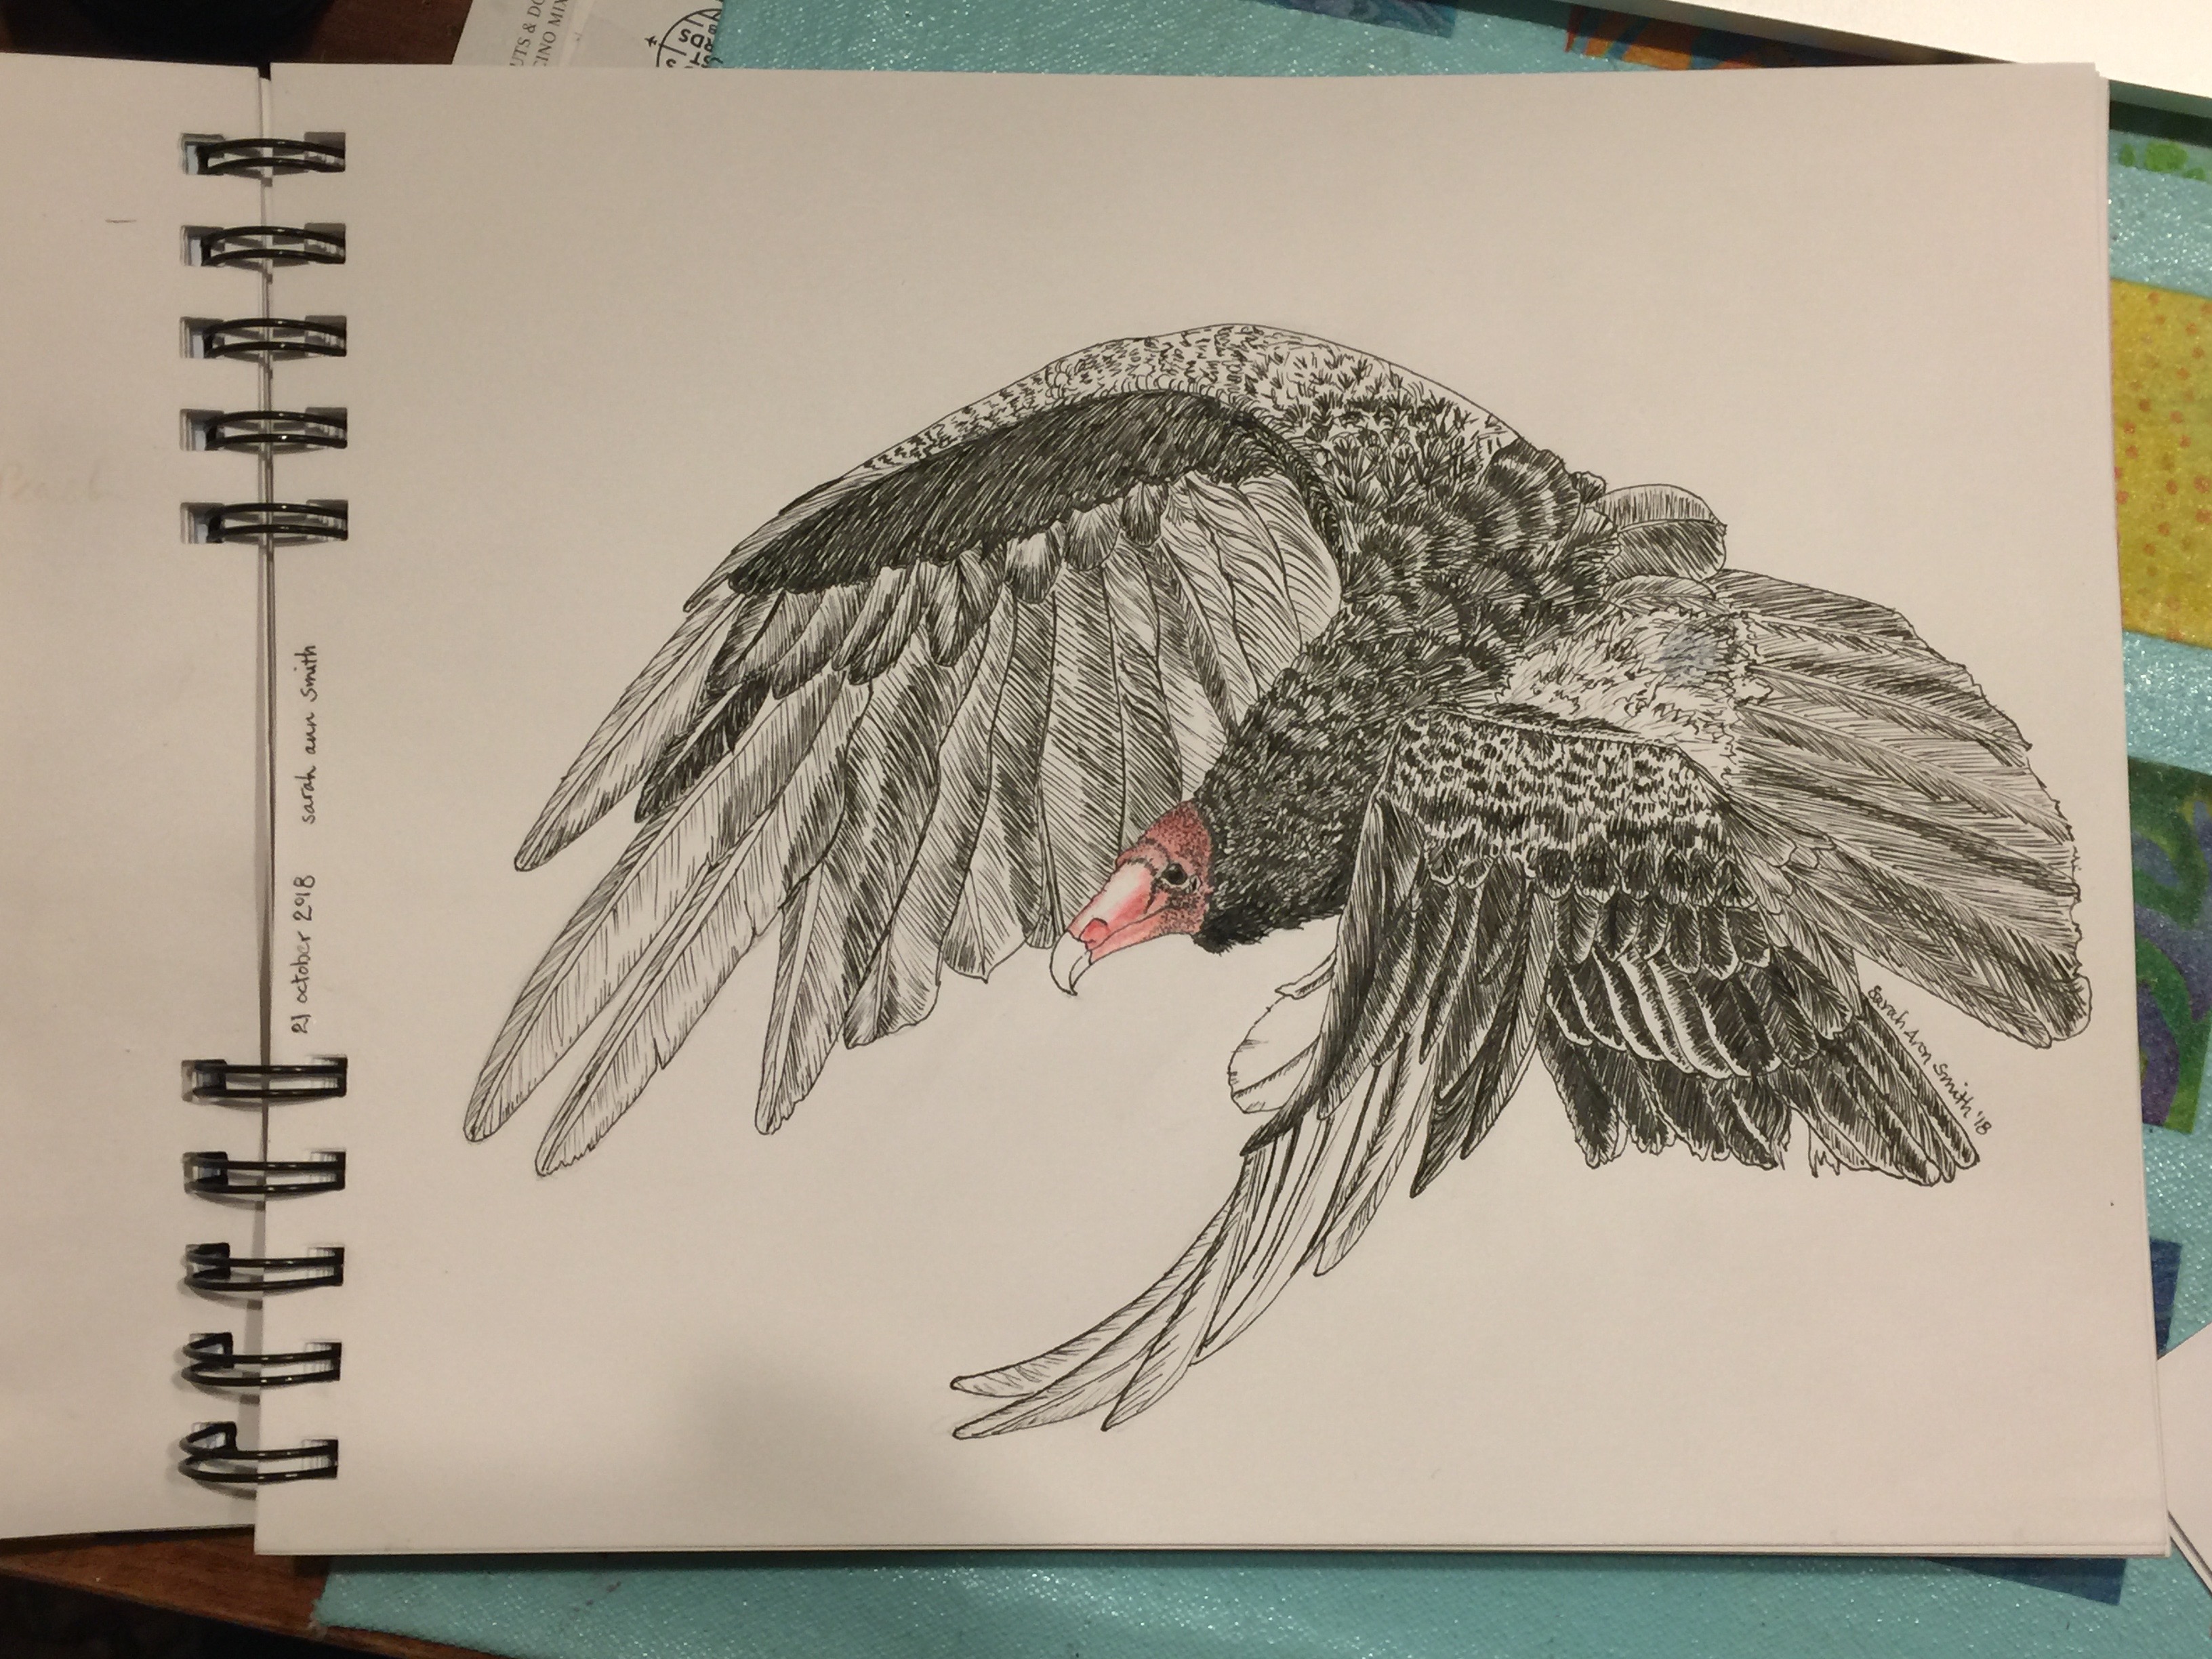
So for this weeks Journey Through the Natural Year lesson–well ok, the lesson from two weeks ago, I’m behind–I decided to NOT do the pileated woodpecker teacher Val Webb selected and see if I could do a passable job on something else dark with a red head, my much-adored funny vultures.  I’m rather pleased–I can now see a couple small areas where I didn’t get it quite right:  beak a tad too long, curve on the upper wing needs a couple of bends in it, but I am really pleased.  Well, I was until the blotch.

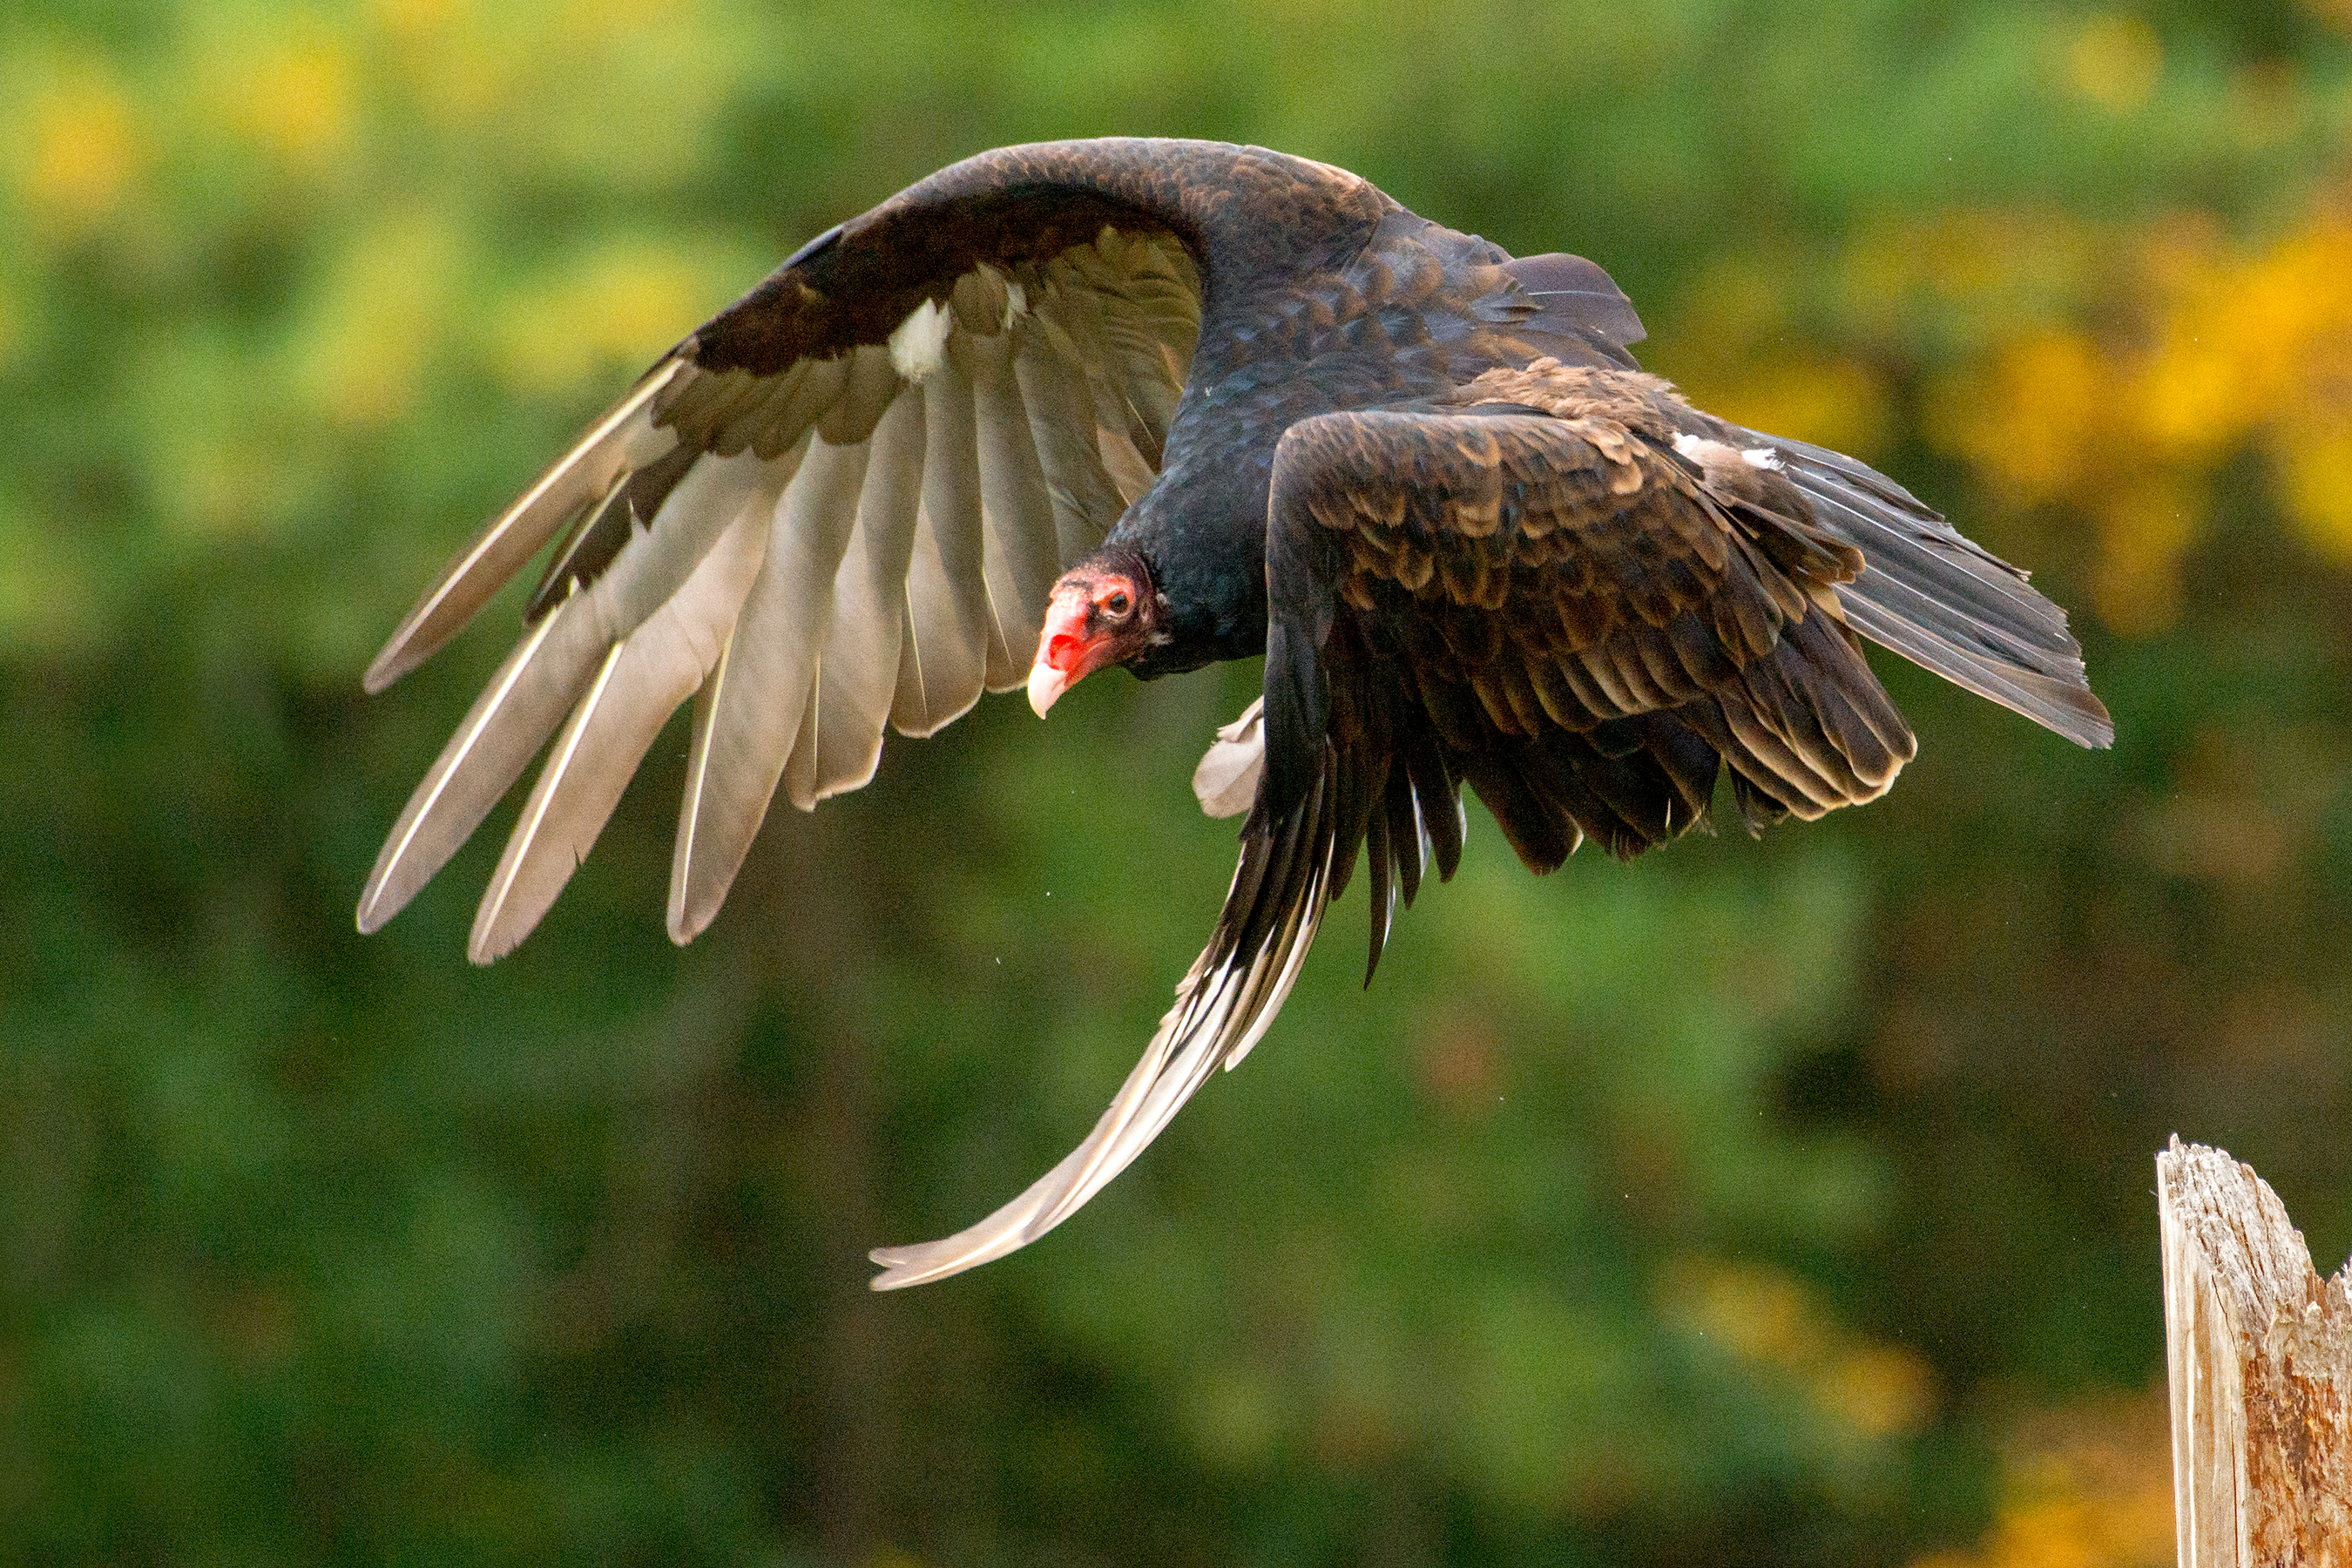
I used this photo, which is part of the WikiCommons meaning I can use it as long as I give credit–Thanks Peter K. Burian! https://commons.wikimedia.org/wiki/File:Eastern_Turkey_Vulture_in_flight,_Canada.jpg#/media/File:Eastern_Turkey_Vulture_in_flight,_Canada.jpg
turkey vulture By Peter K Burian – Own work, CC BY-SA 4.0, https://commons.wikimedia.org/w/index.php?curid=63275338

Here is the sequence…and the remedy to the blotch:

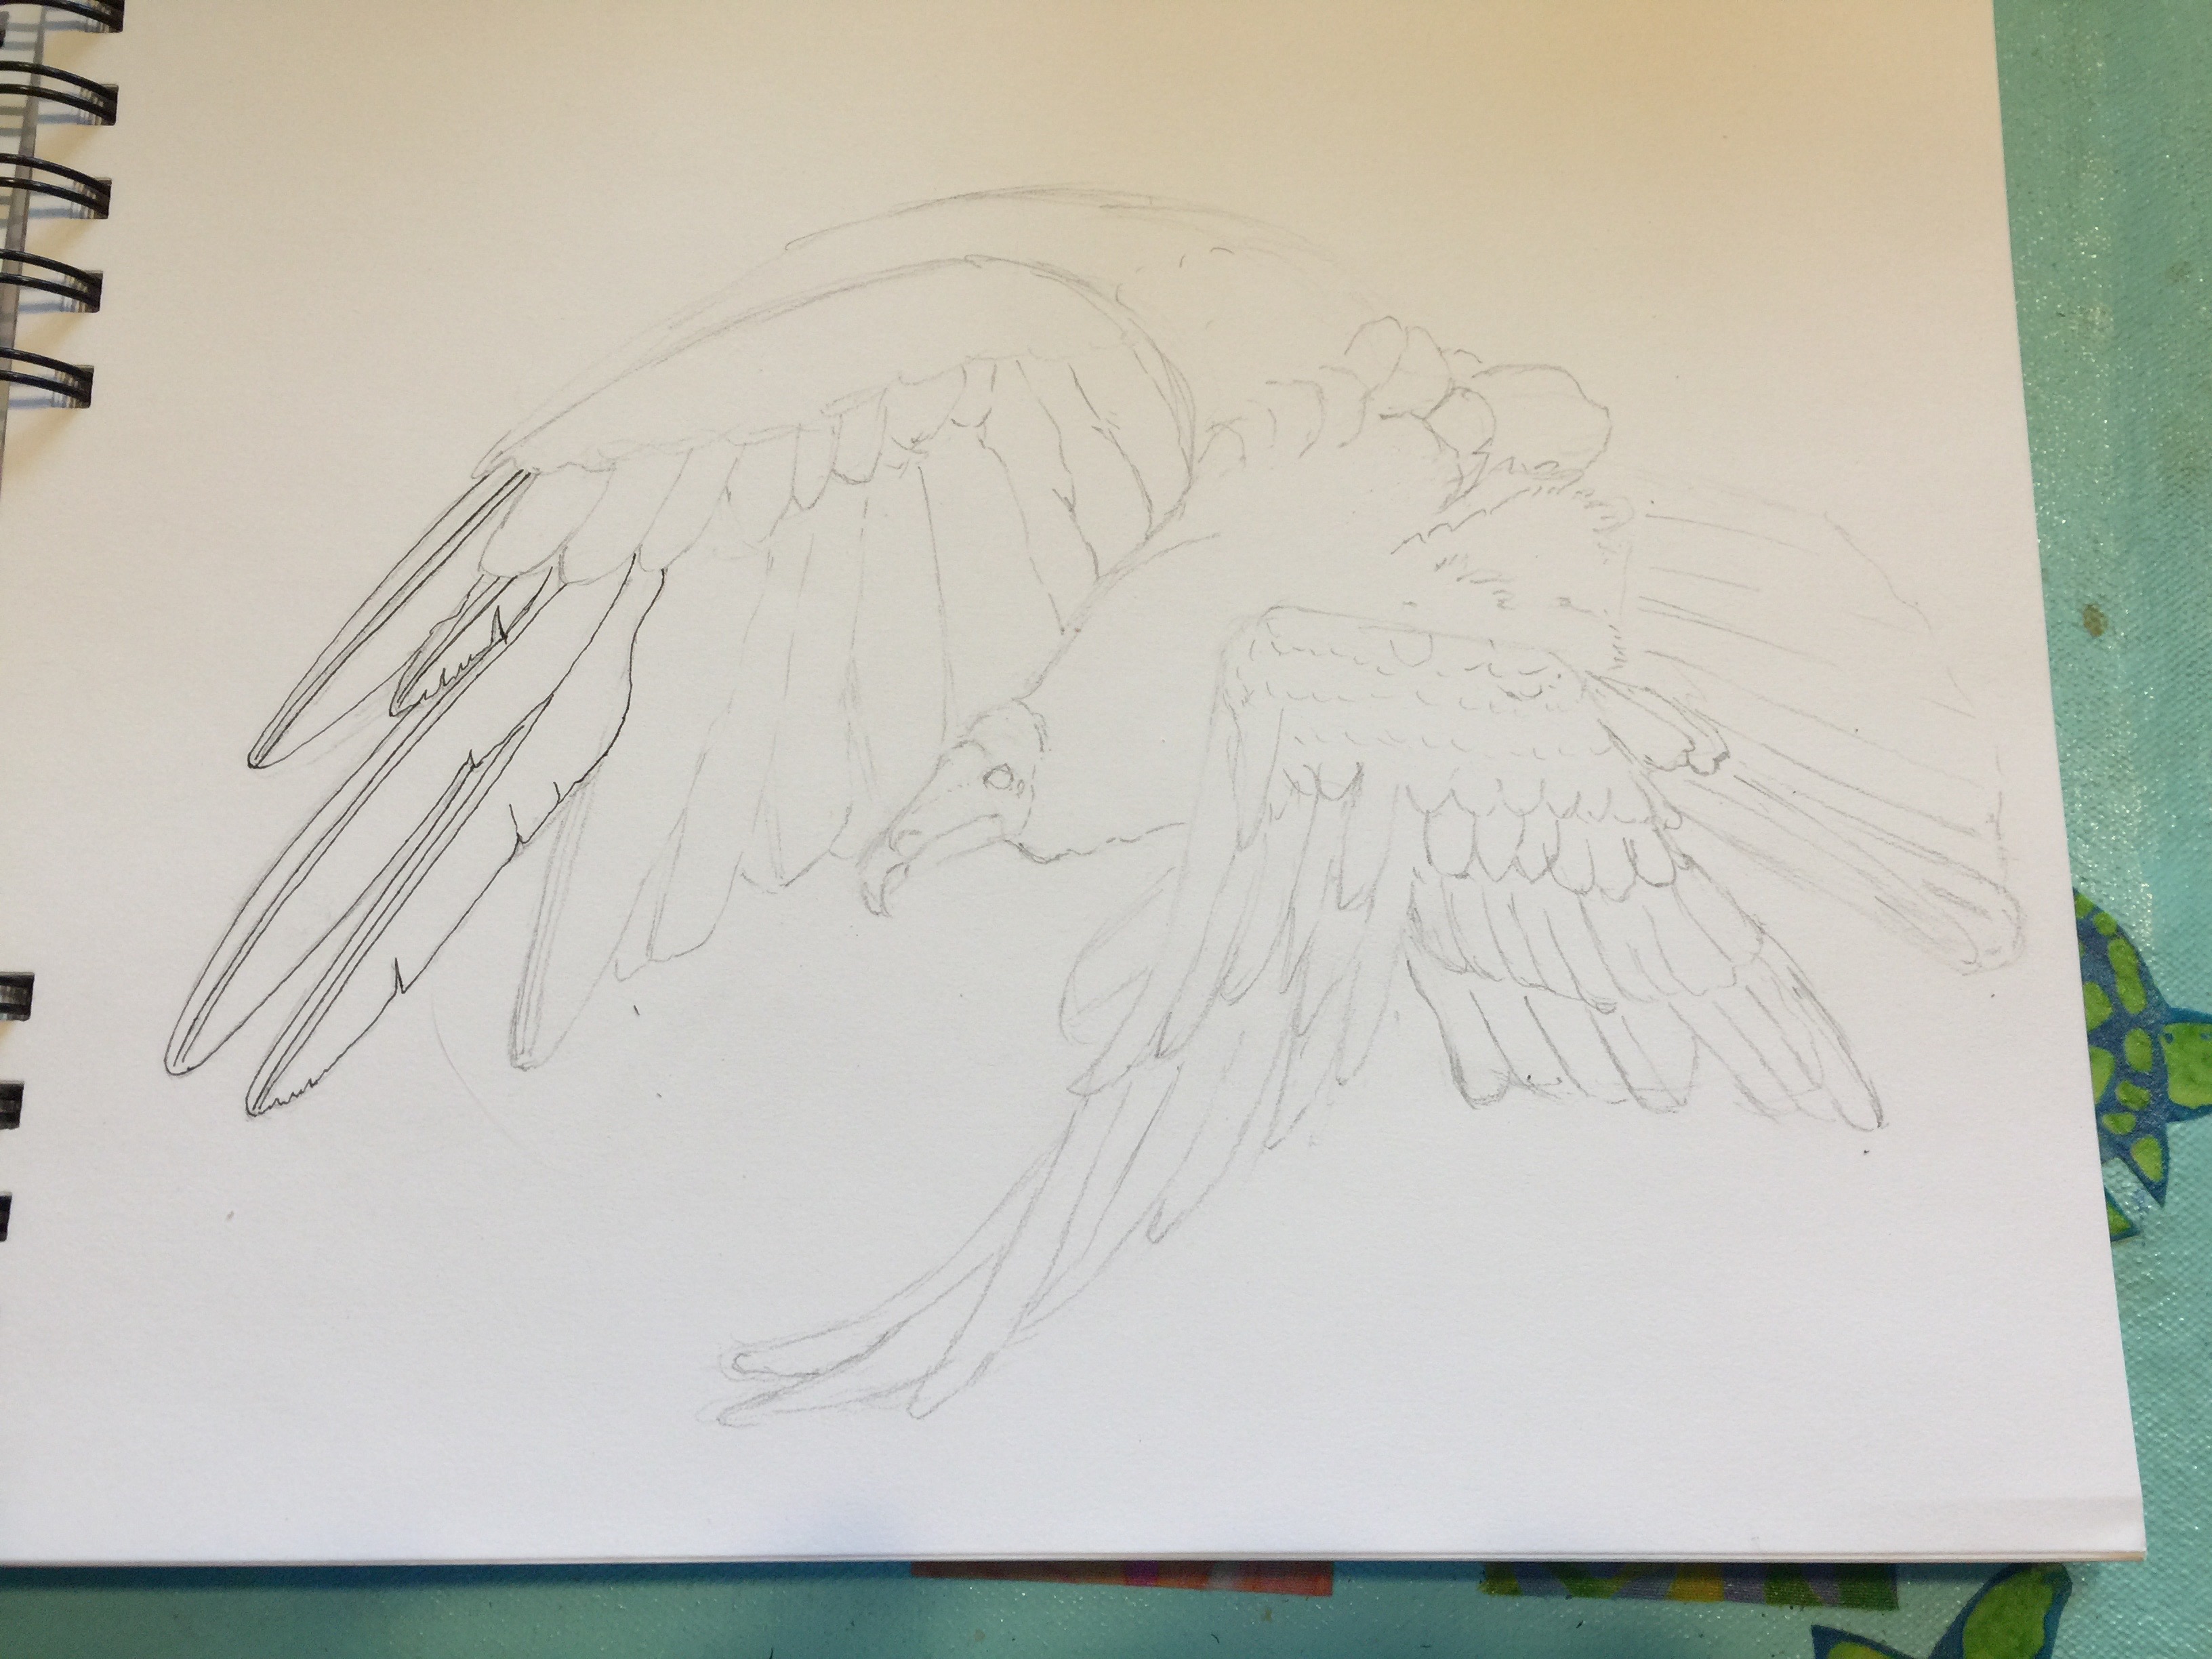
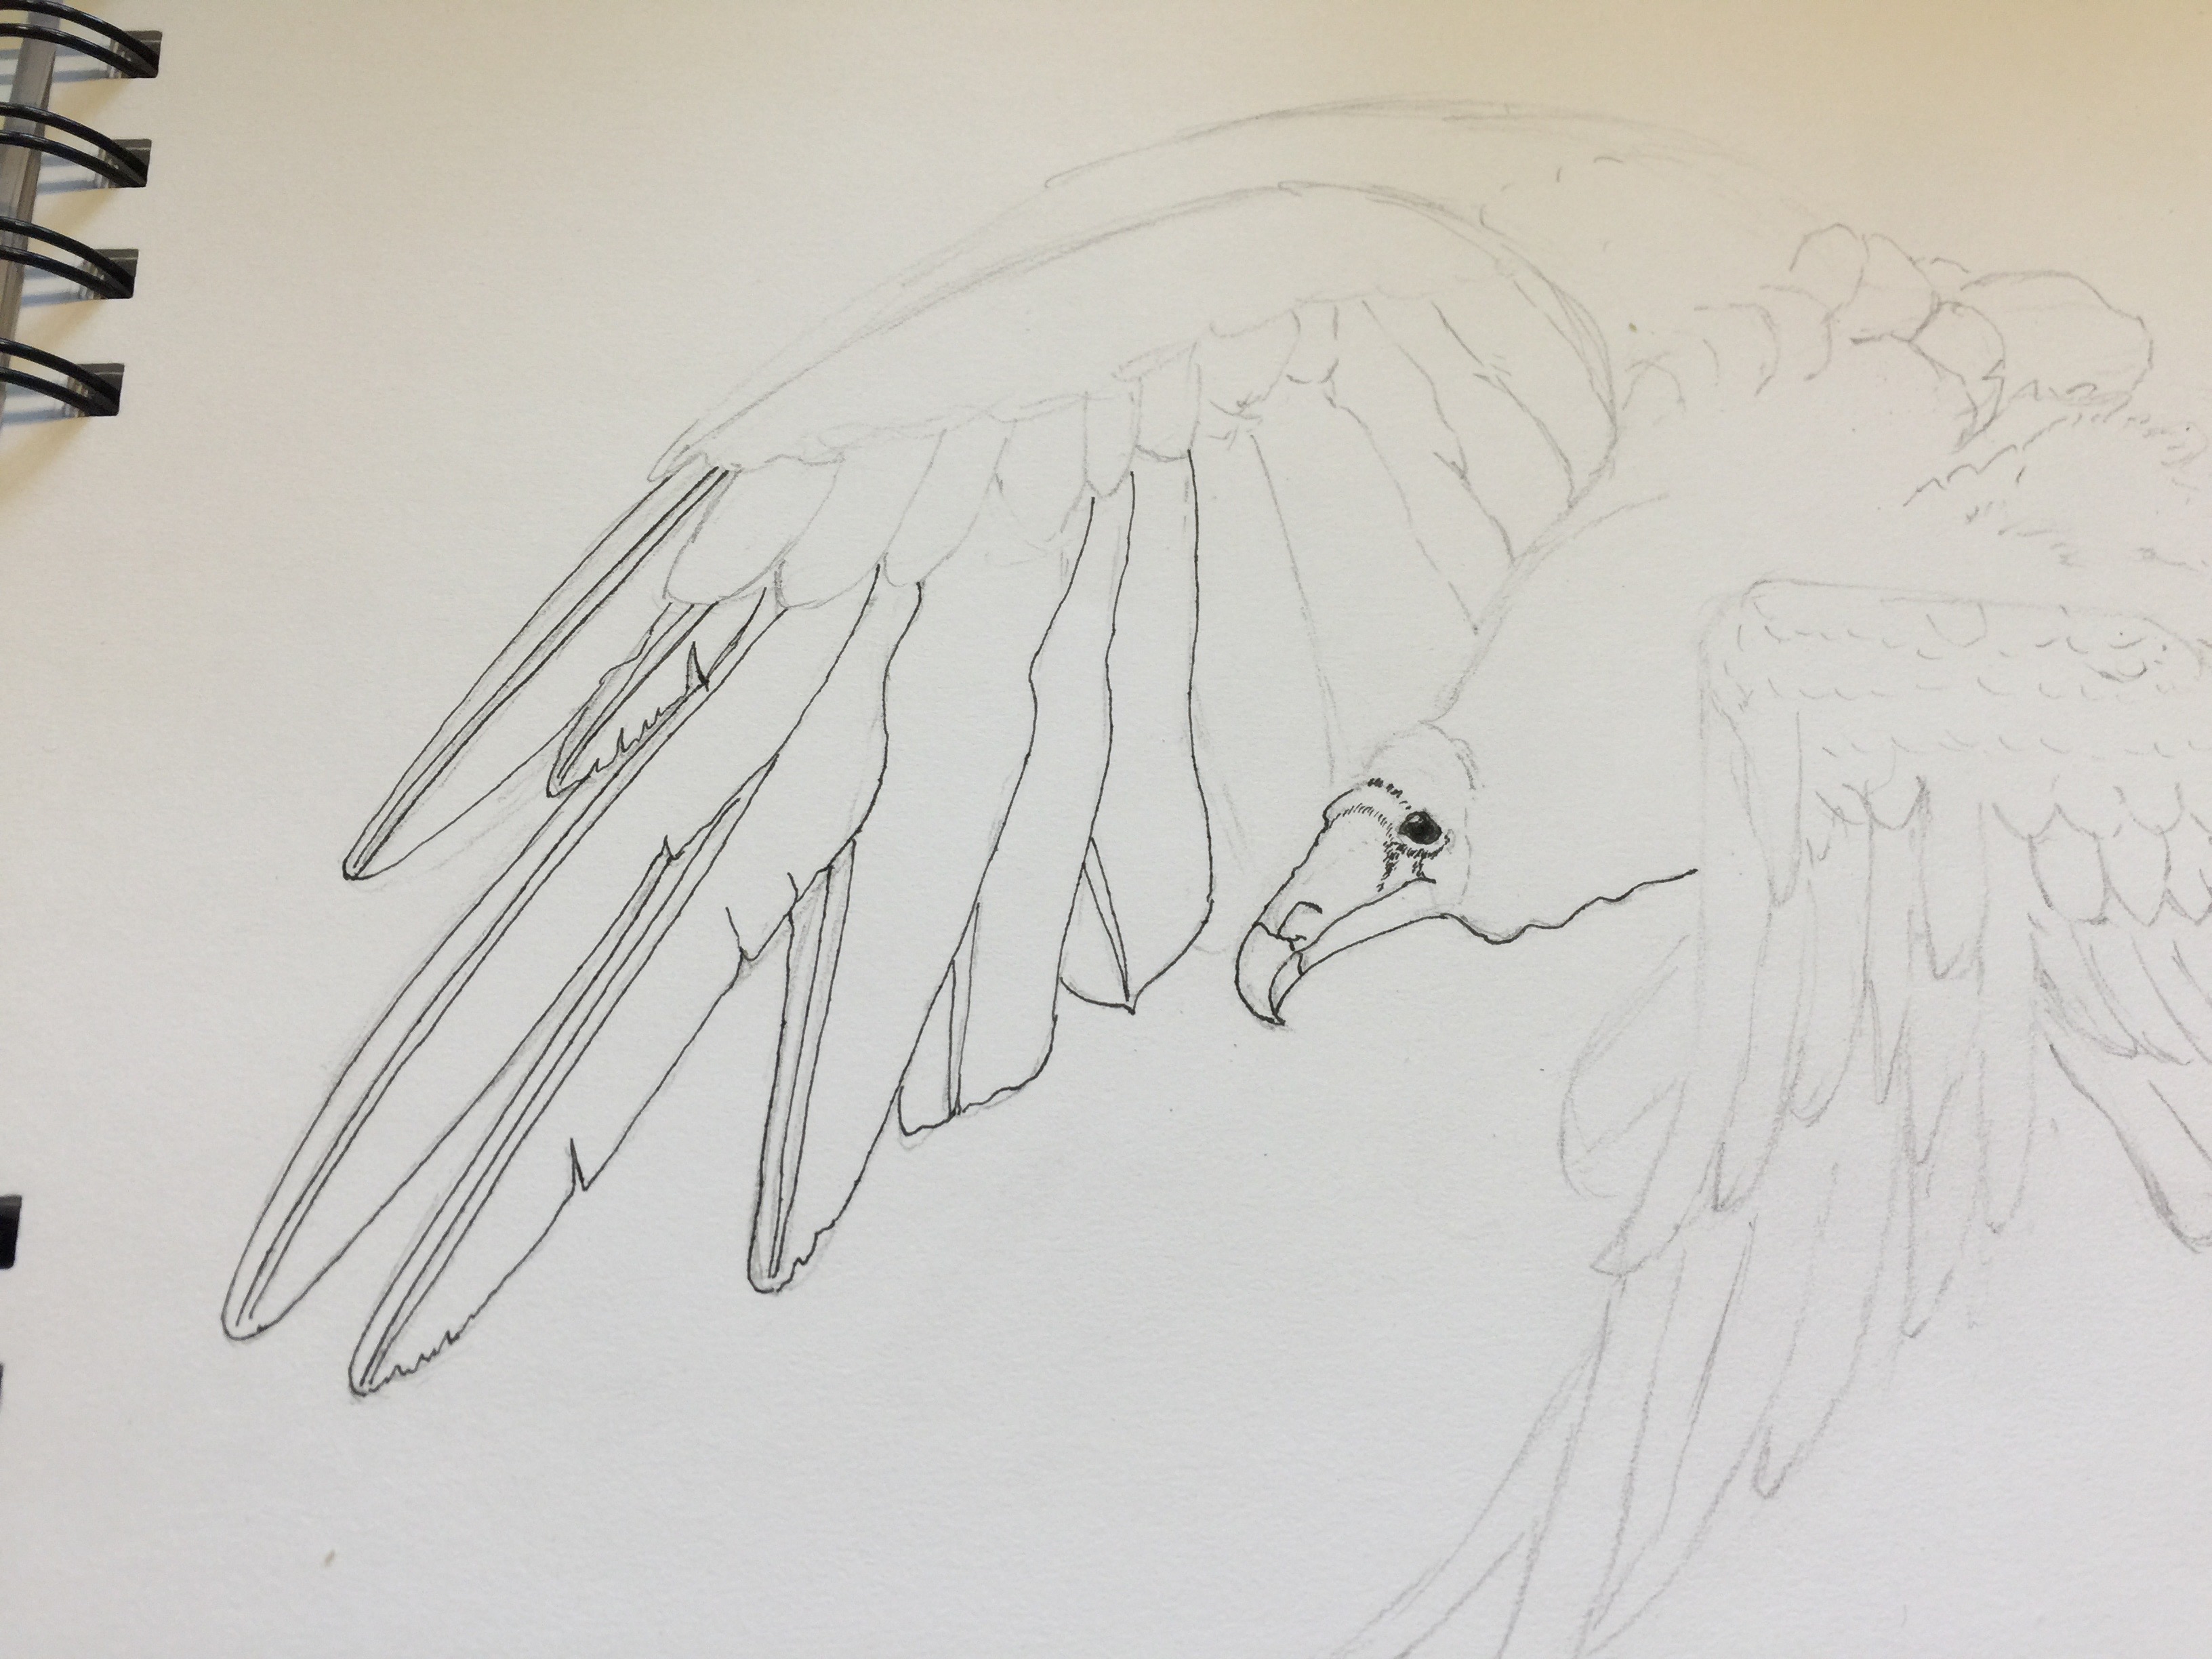
Step one: pencil things in. I am sketching in a Daler-Rowney dry media sketchbook that has paper that I really dislike. It is good for pencil and not a whole lot more!

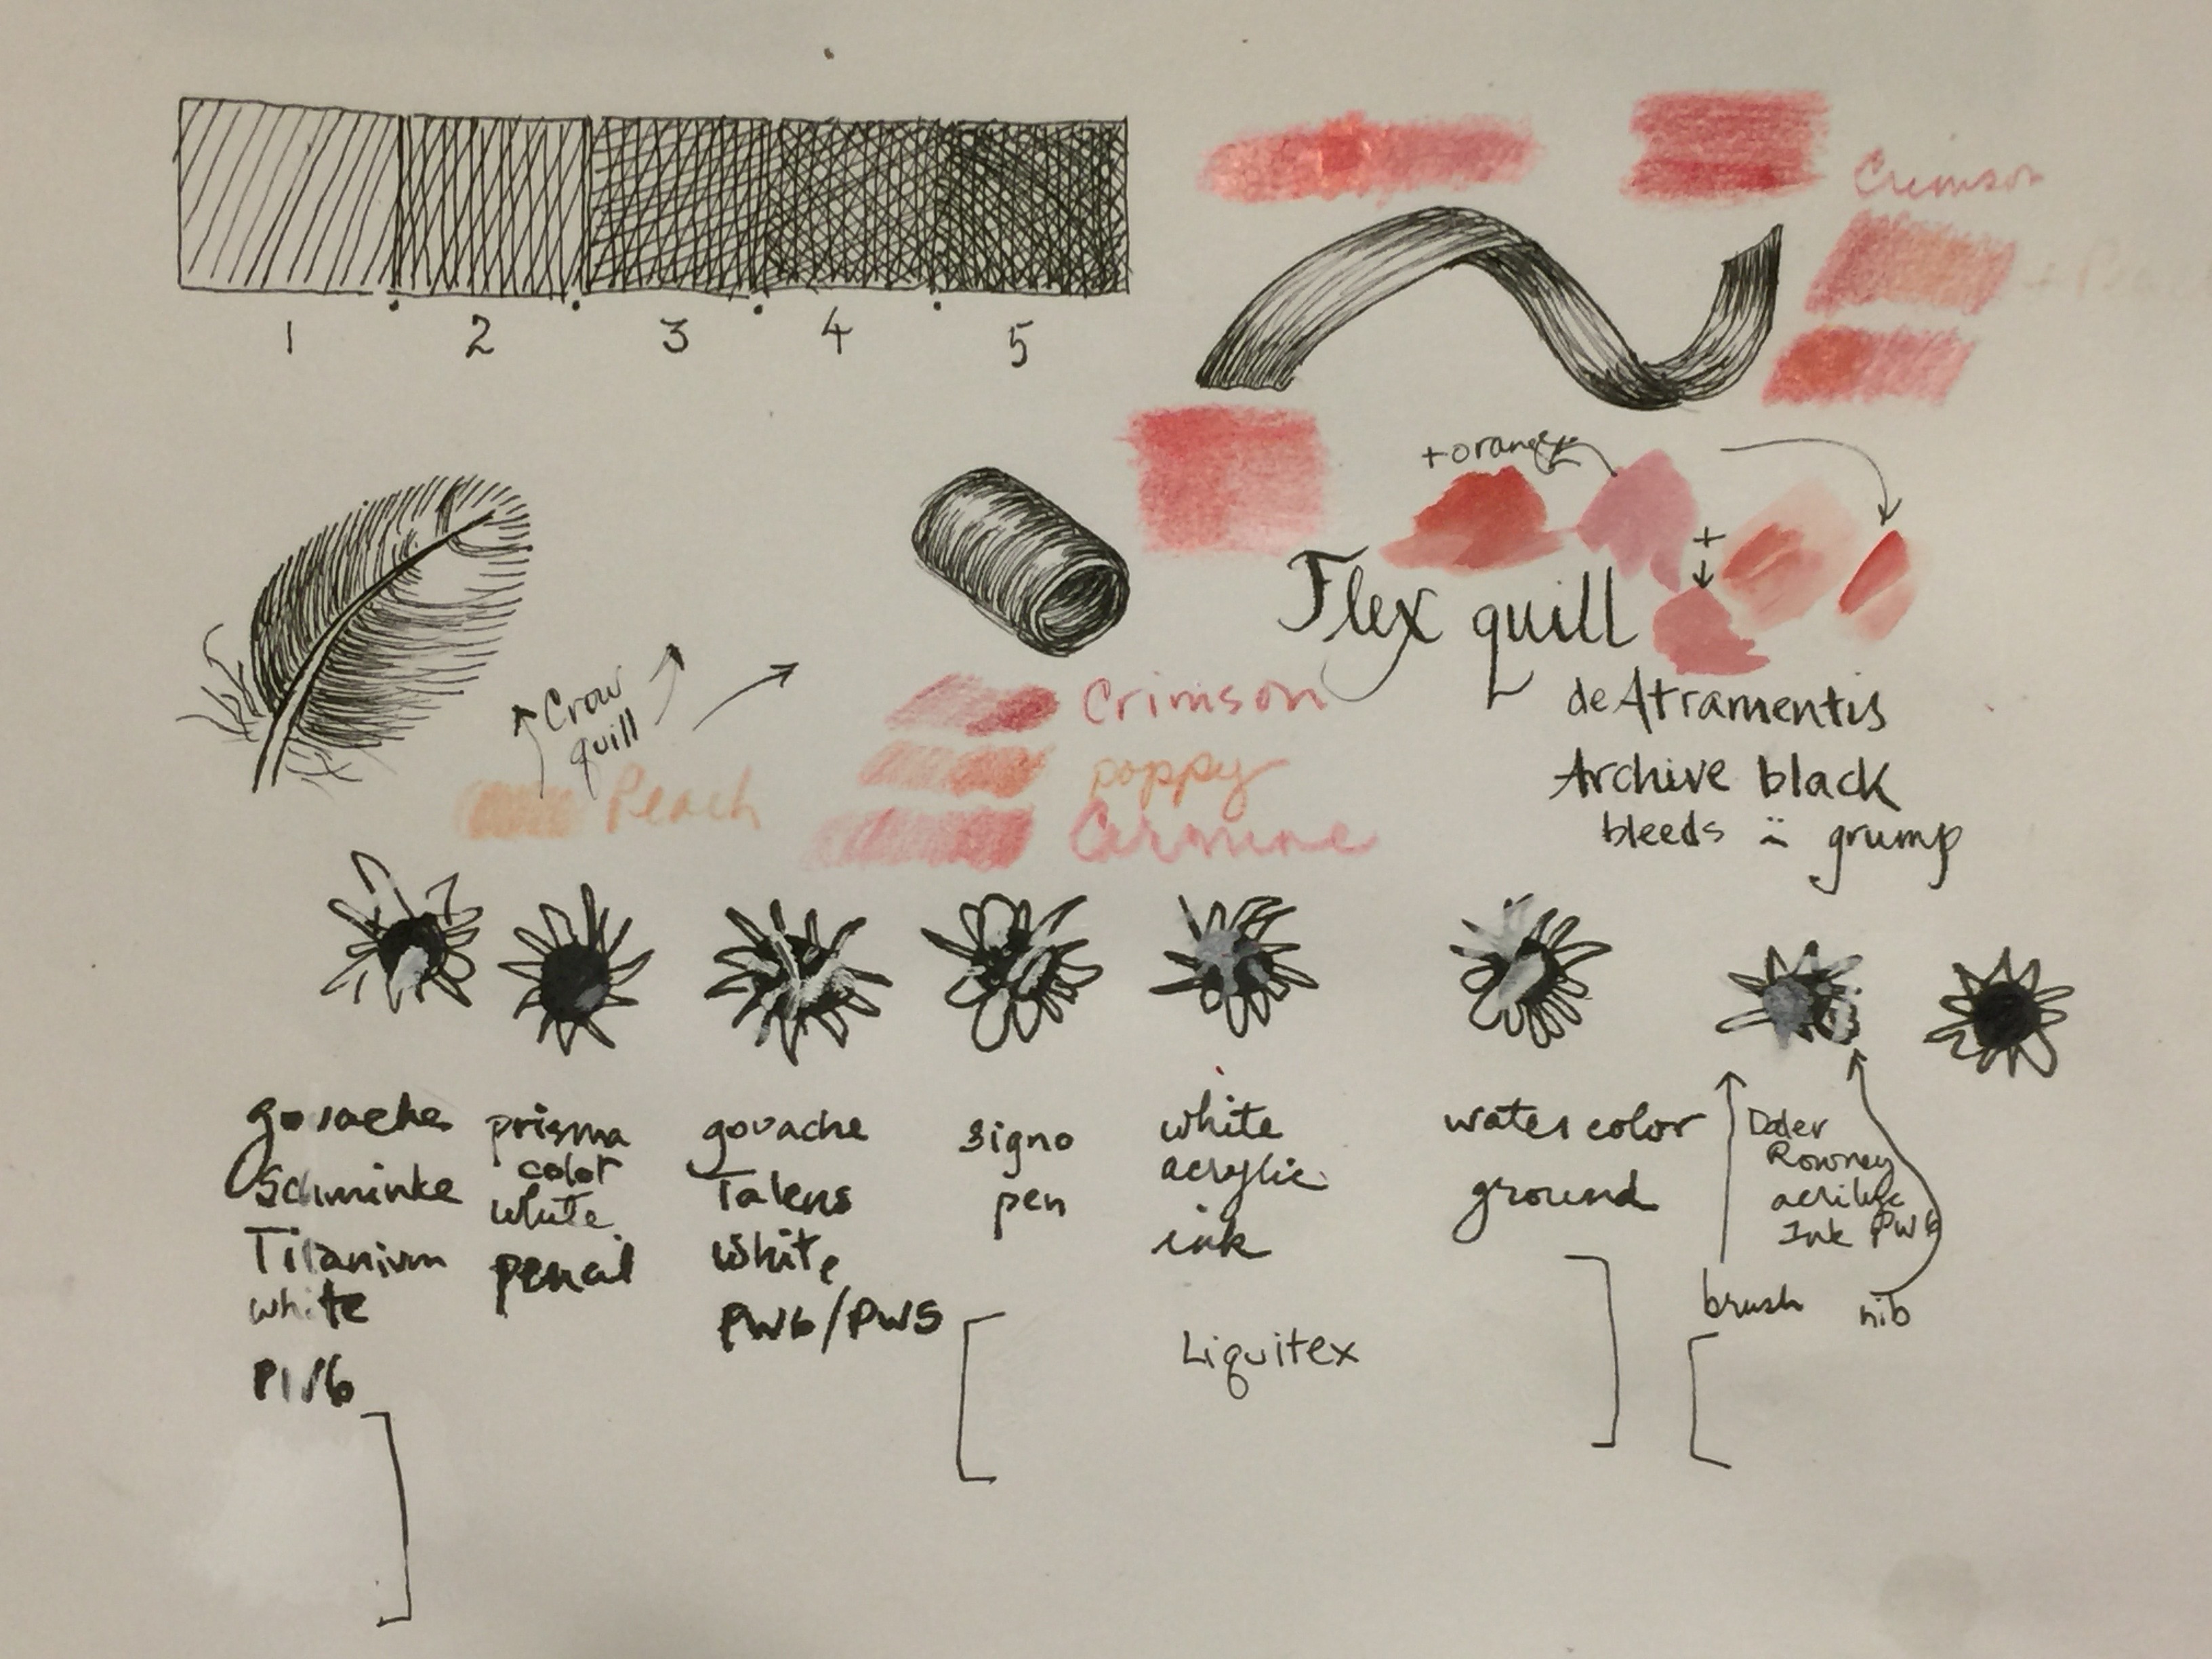
Getting the face and eye in helps so much. I used a crow quill dip pen and deAtramentis Archive Black Ink.

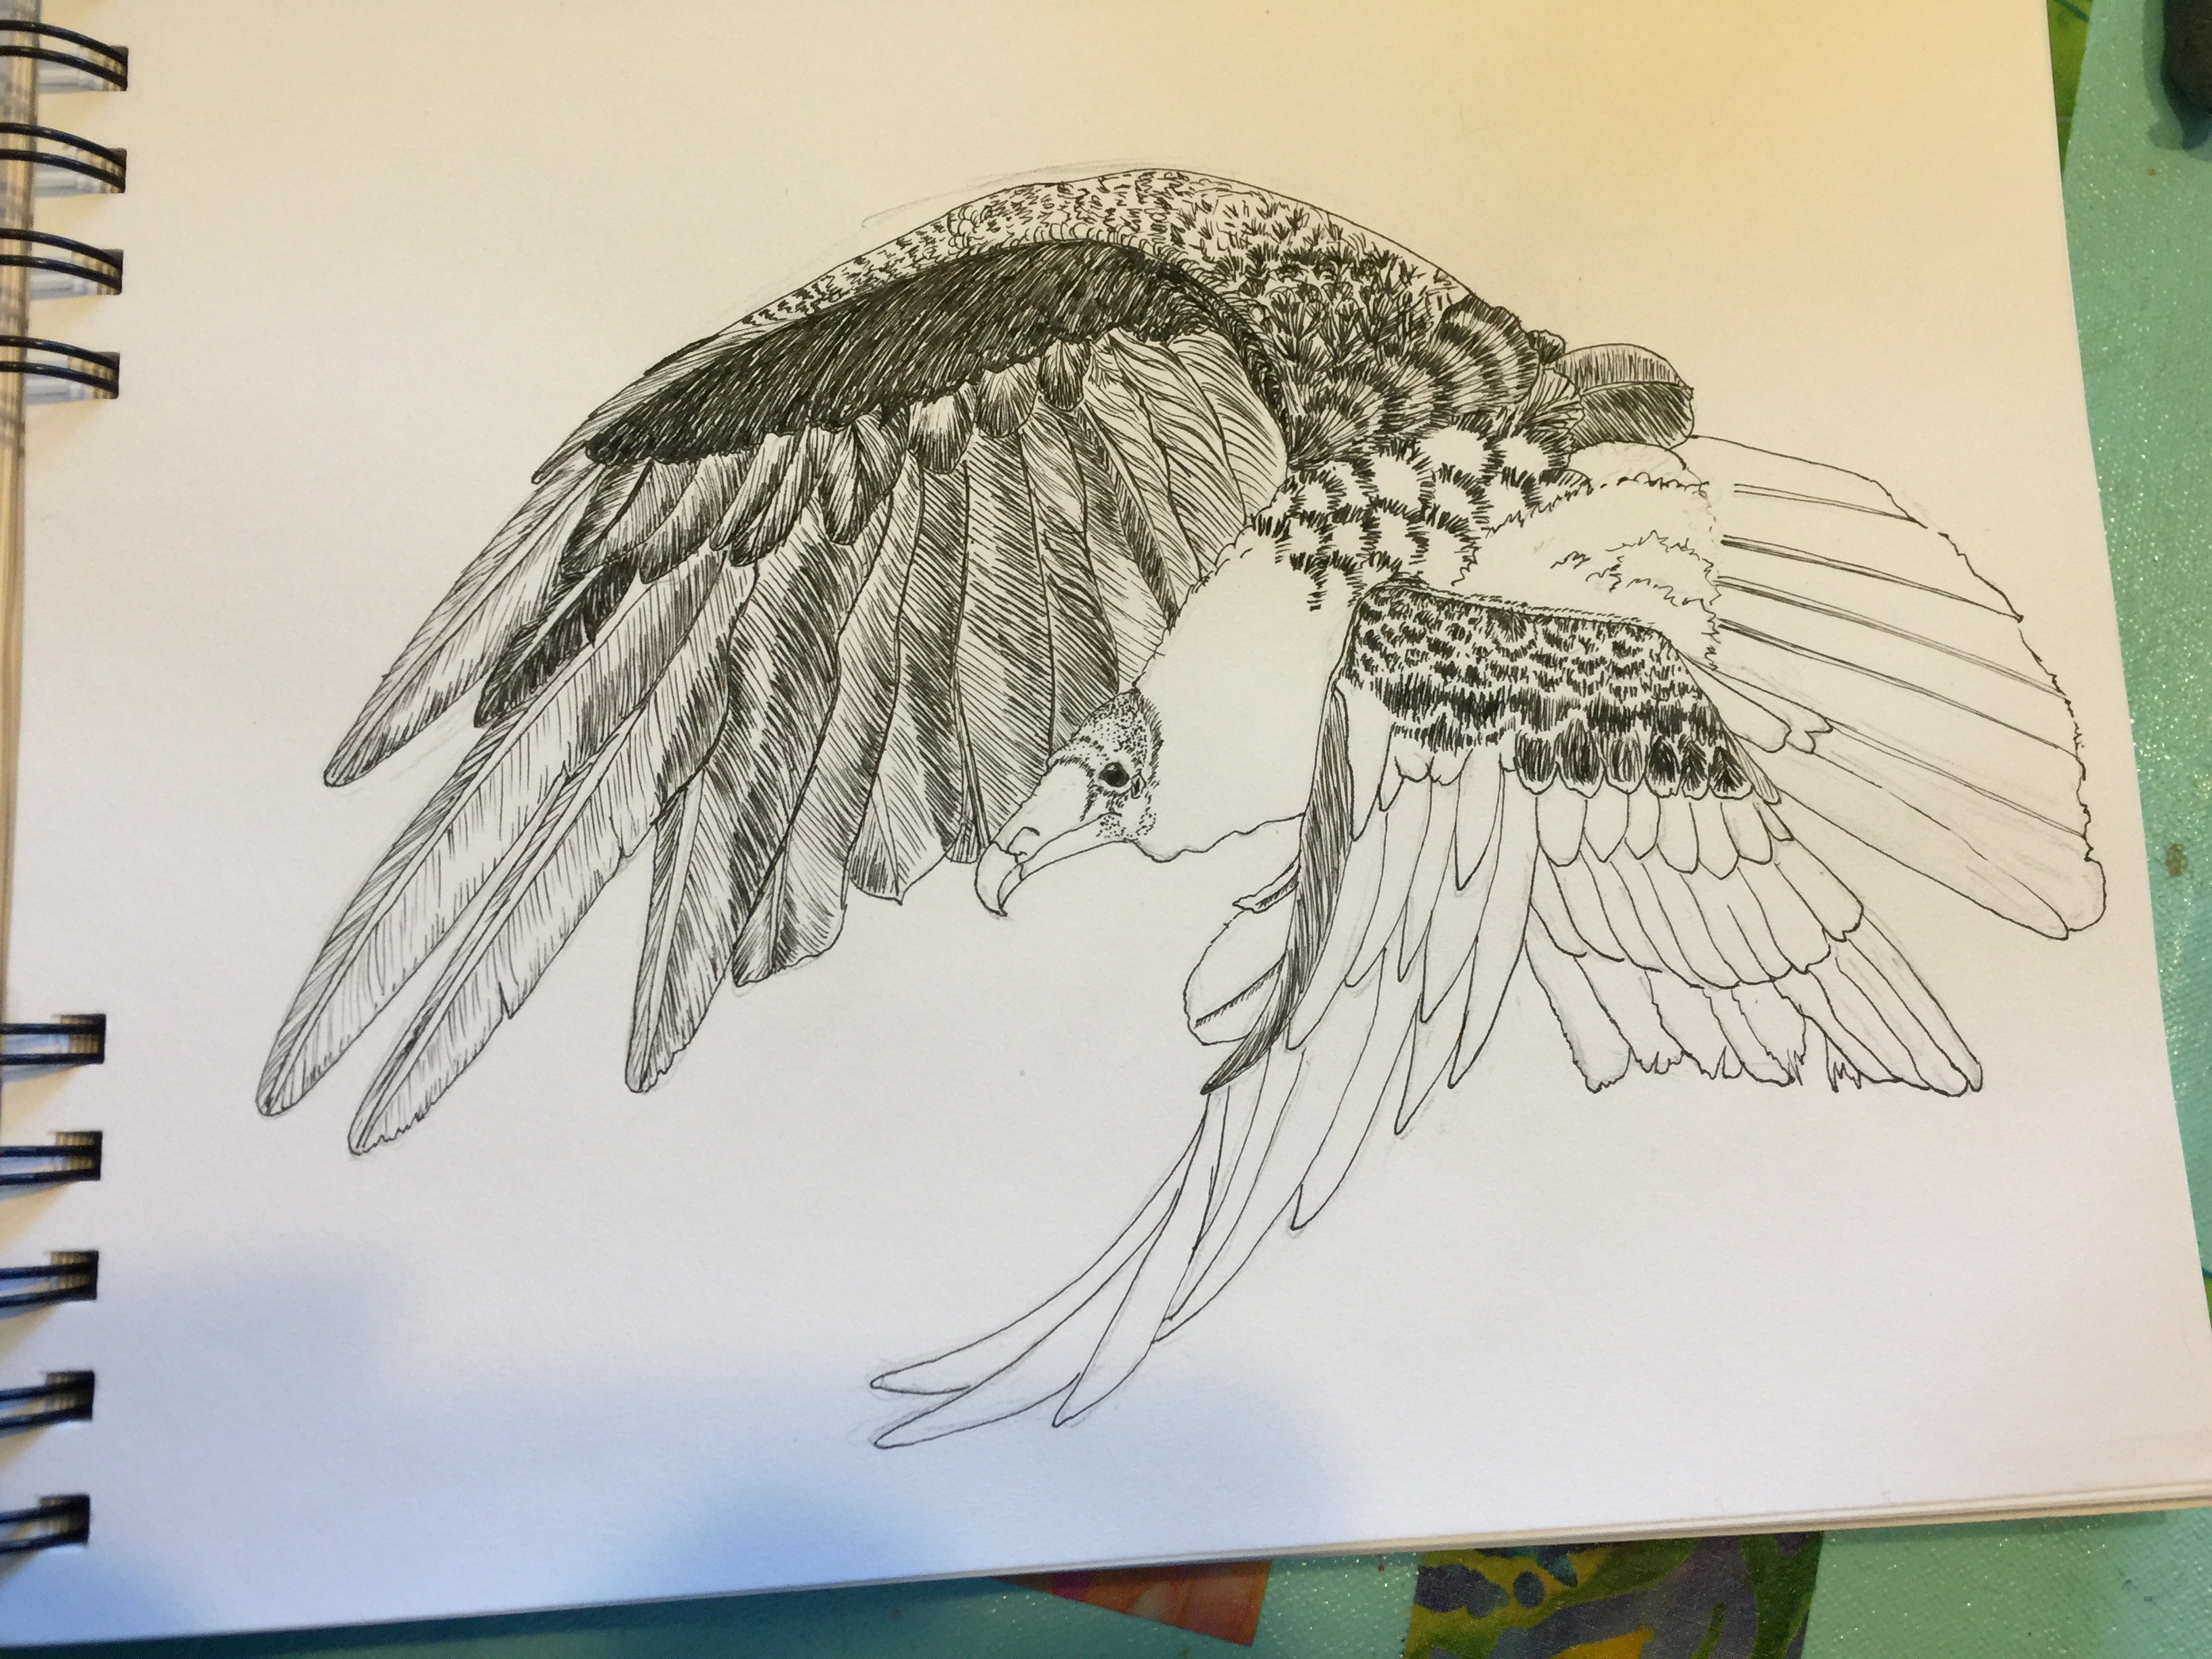
Progress. You kinda get lost in the feathers, but I’m pretty pleased with the shadowing through the long wing tips and the value changes.

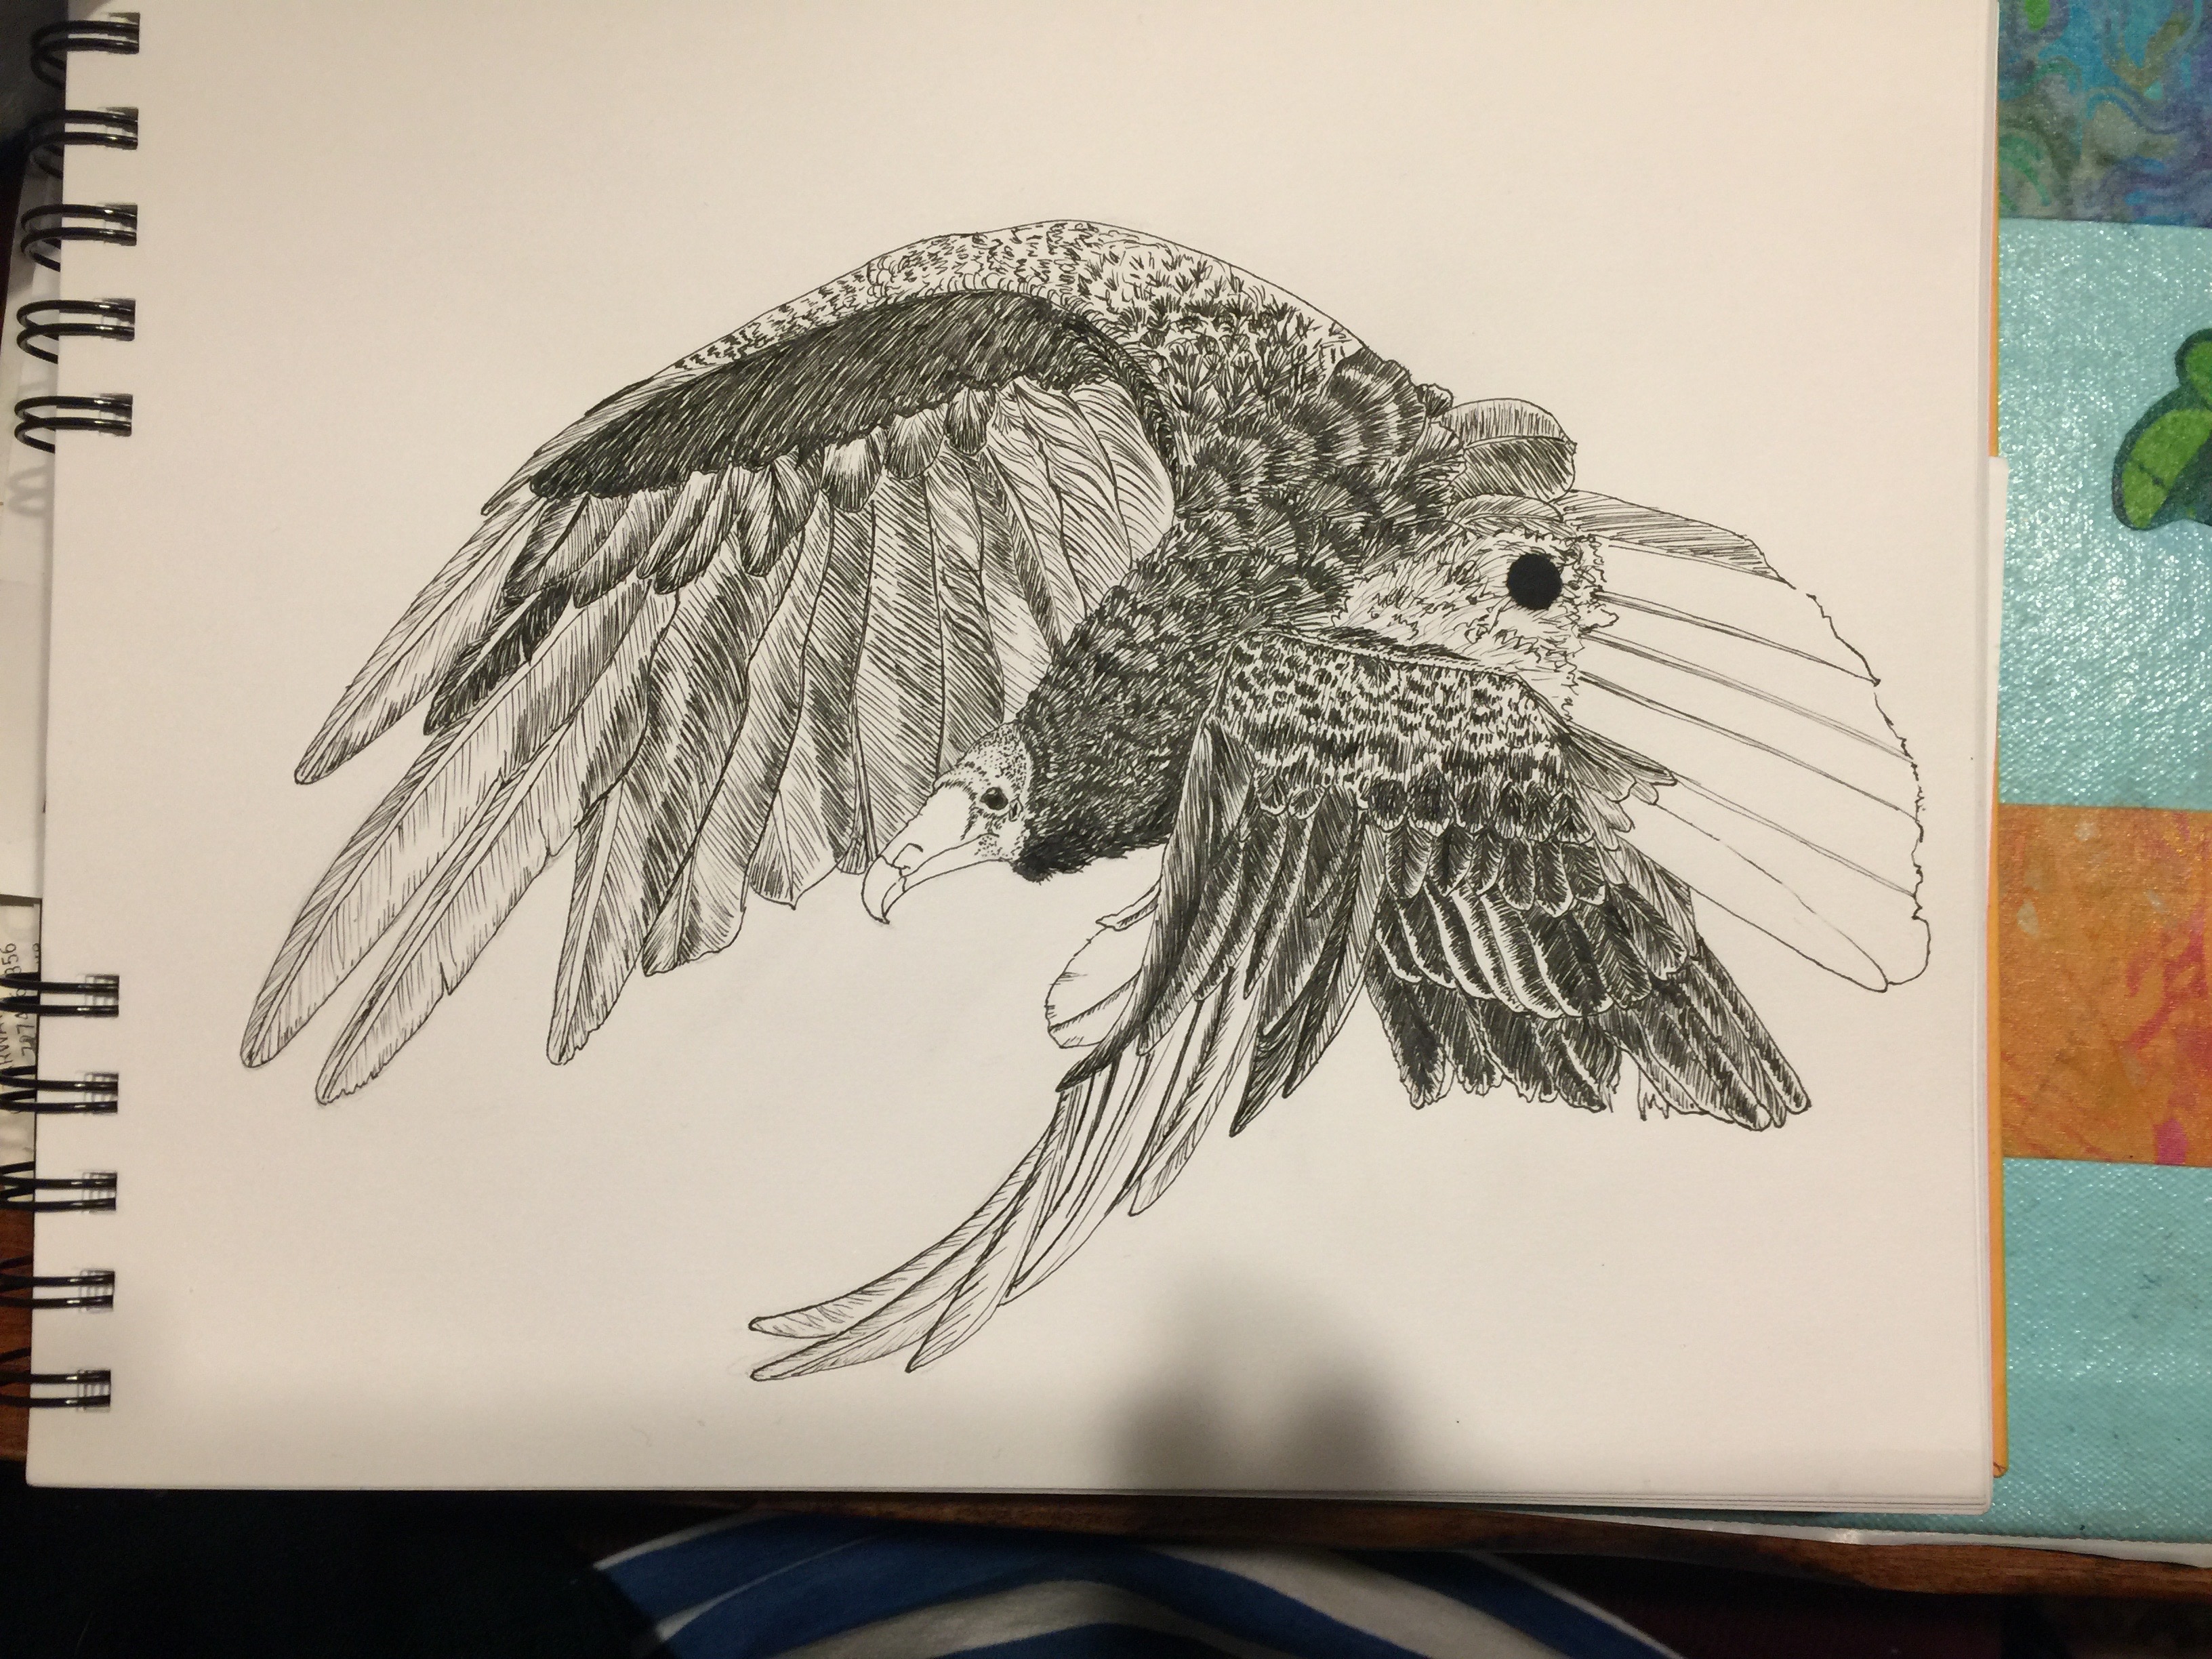
Then karma smacked me upside the face: BLOT. After 4+ hours of work, a BLOT. And with this miserable paper NO chance of scraping etc. I was so proud of what I’d managed to do. But I kept going. And asked sketching friends and teacher Val Webb for possible solutions.

SOB!   I got lots of good suggestions, and (gee imagine that) had pretty much all of the suggested art supplies.  The only thing I didn’t try was Val’s suggestion to use gel medium to glue down a piece of paper over the blotch, because this paper is so awful I knew it would have been futile.

Finished, with blot.

Being an impatient sort and loving my Signo Uniball white pen, I added some of that and it helped…a LOT.  That and other suggestions I received were

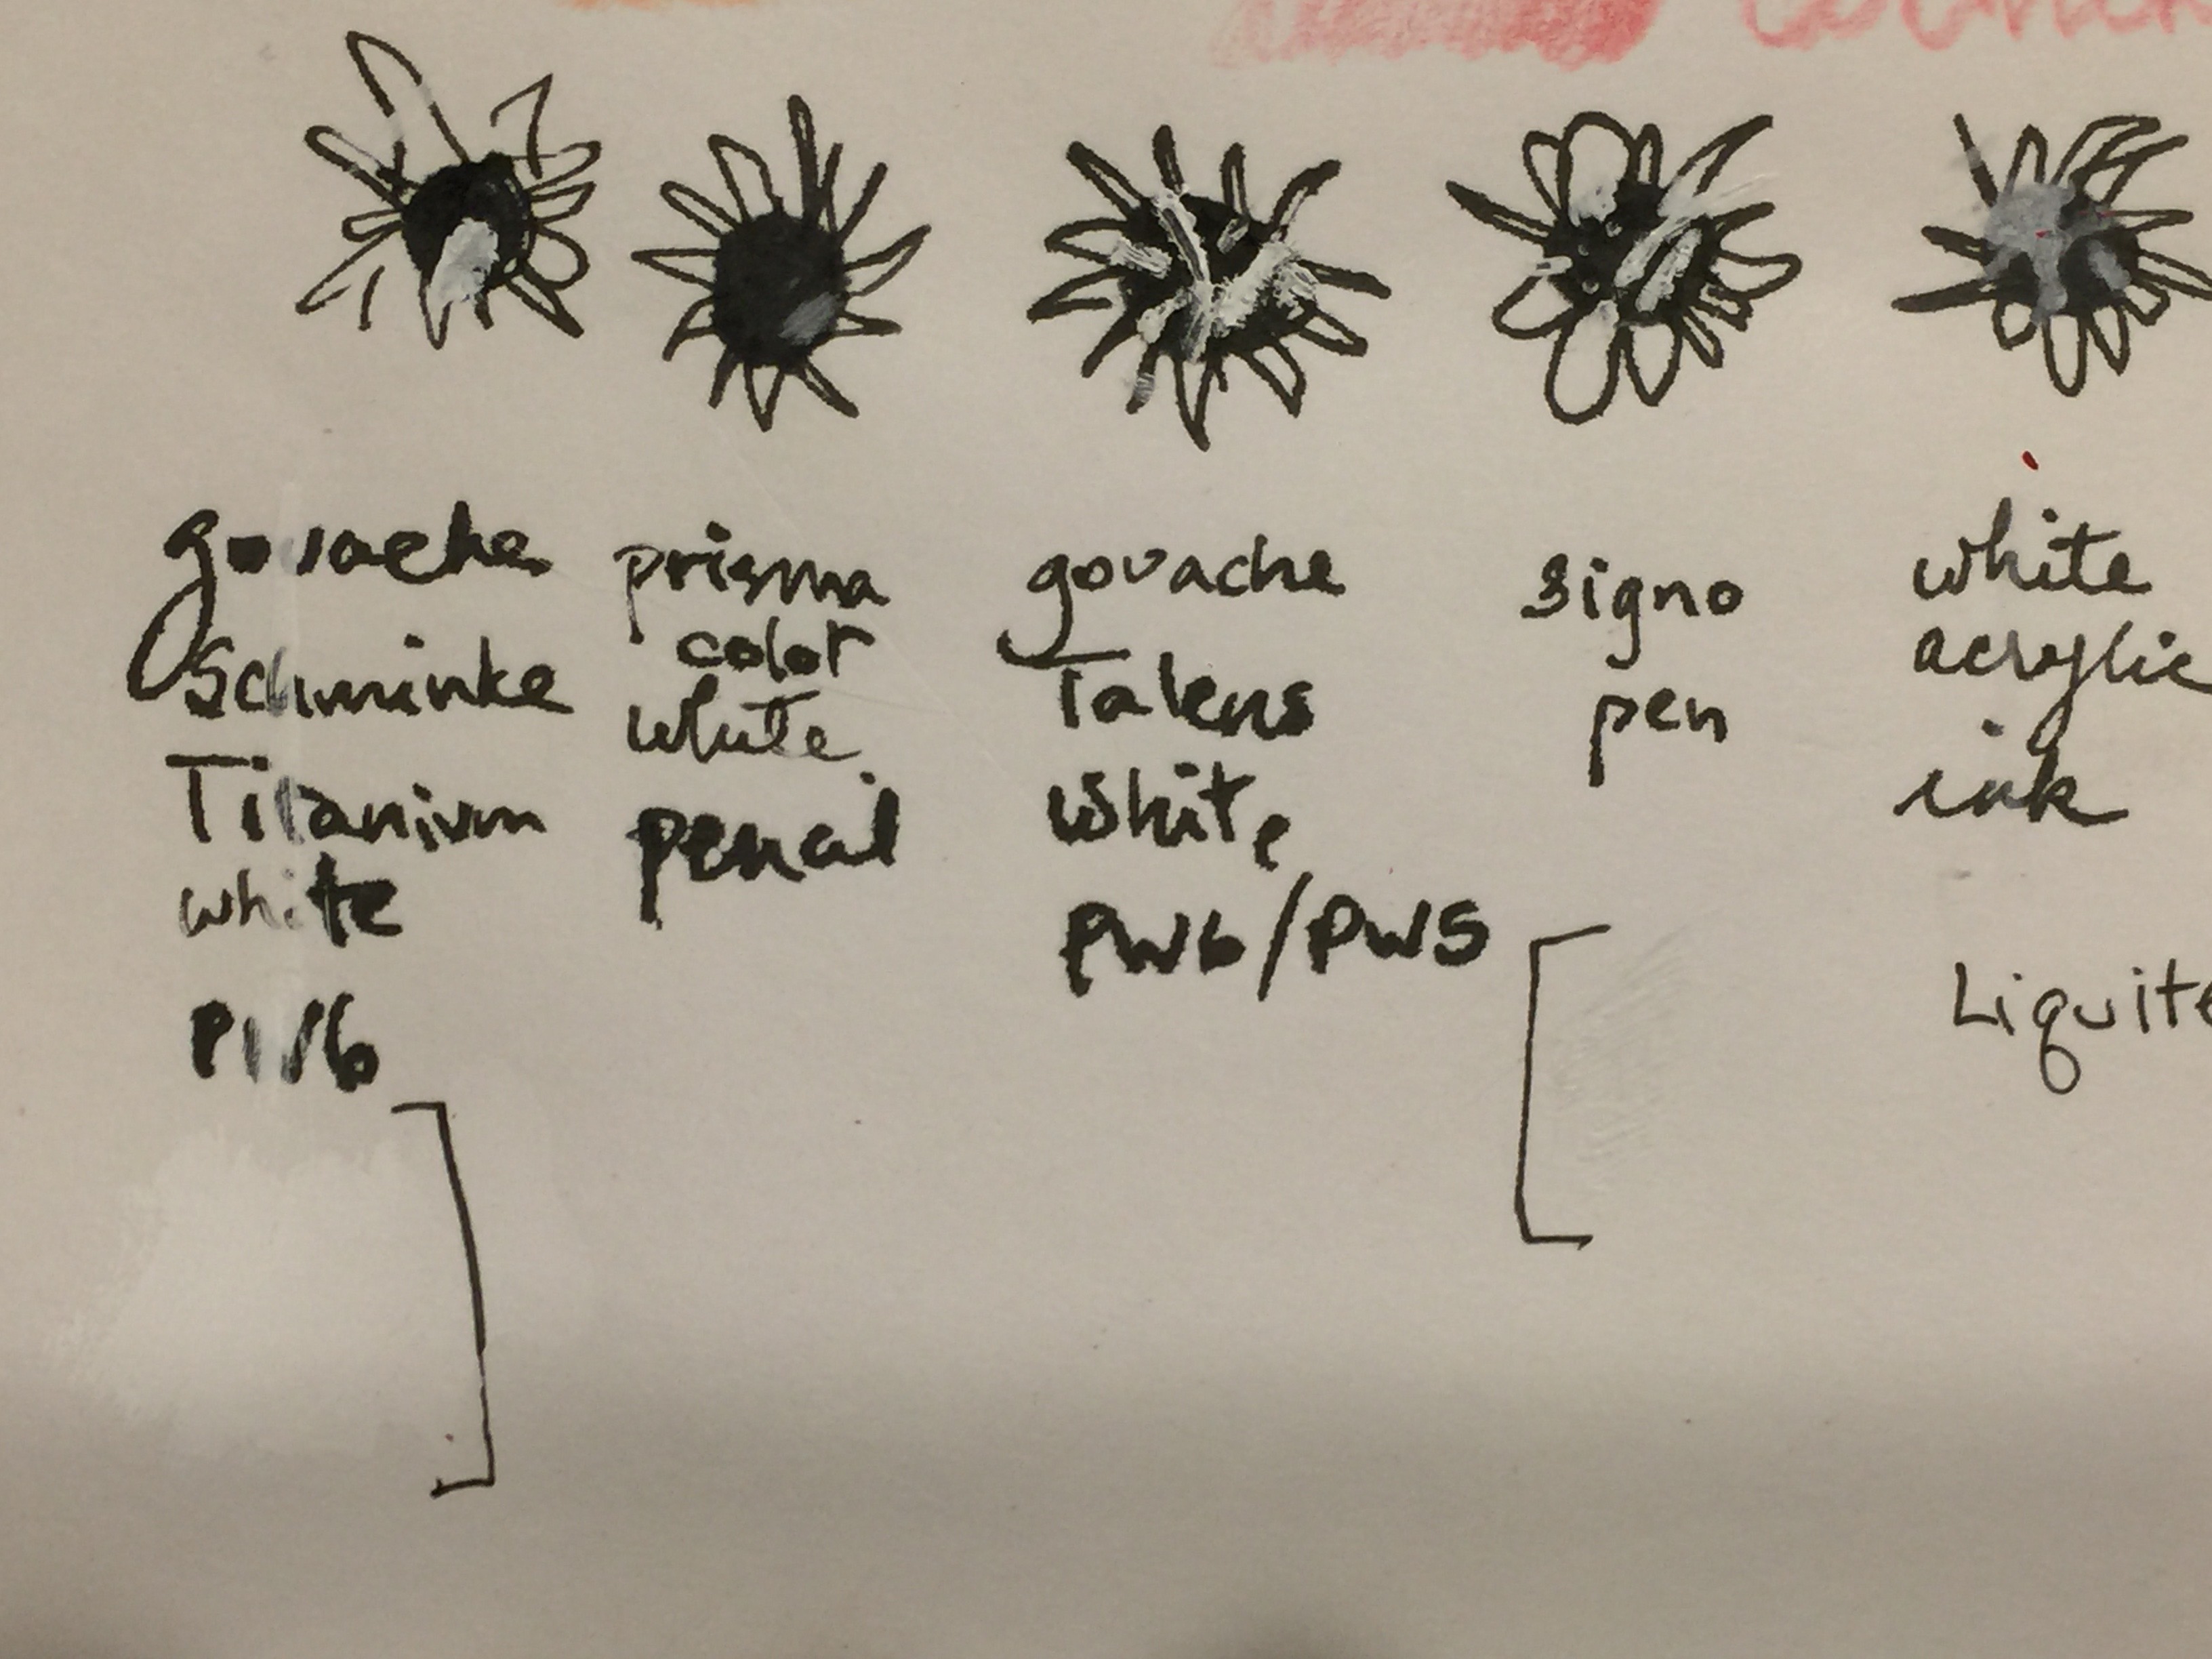
  • Gouache (tried both Talens white and Schminke Titanium White, the Schminke worked better)
  • Prismacolor white pencil (too weak)
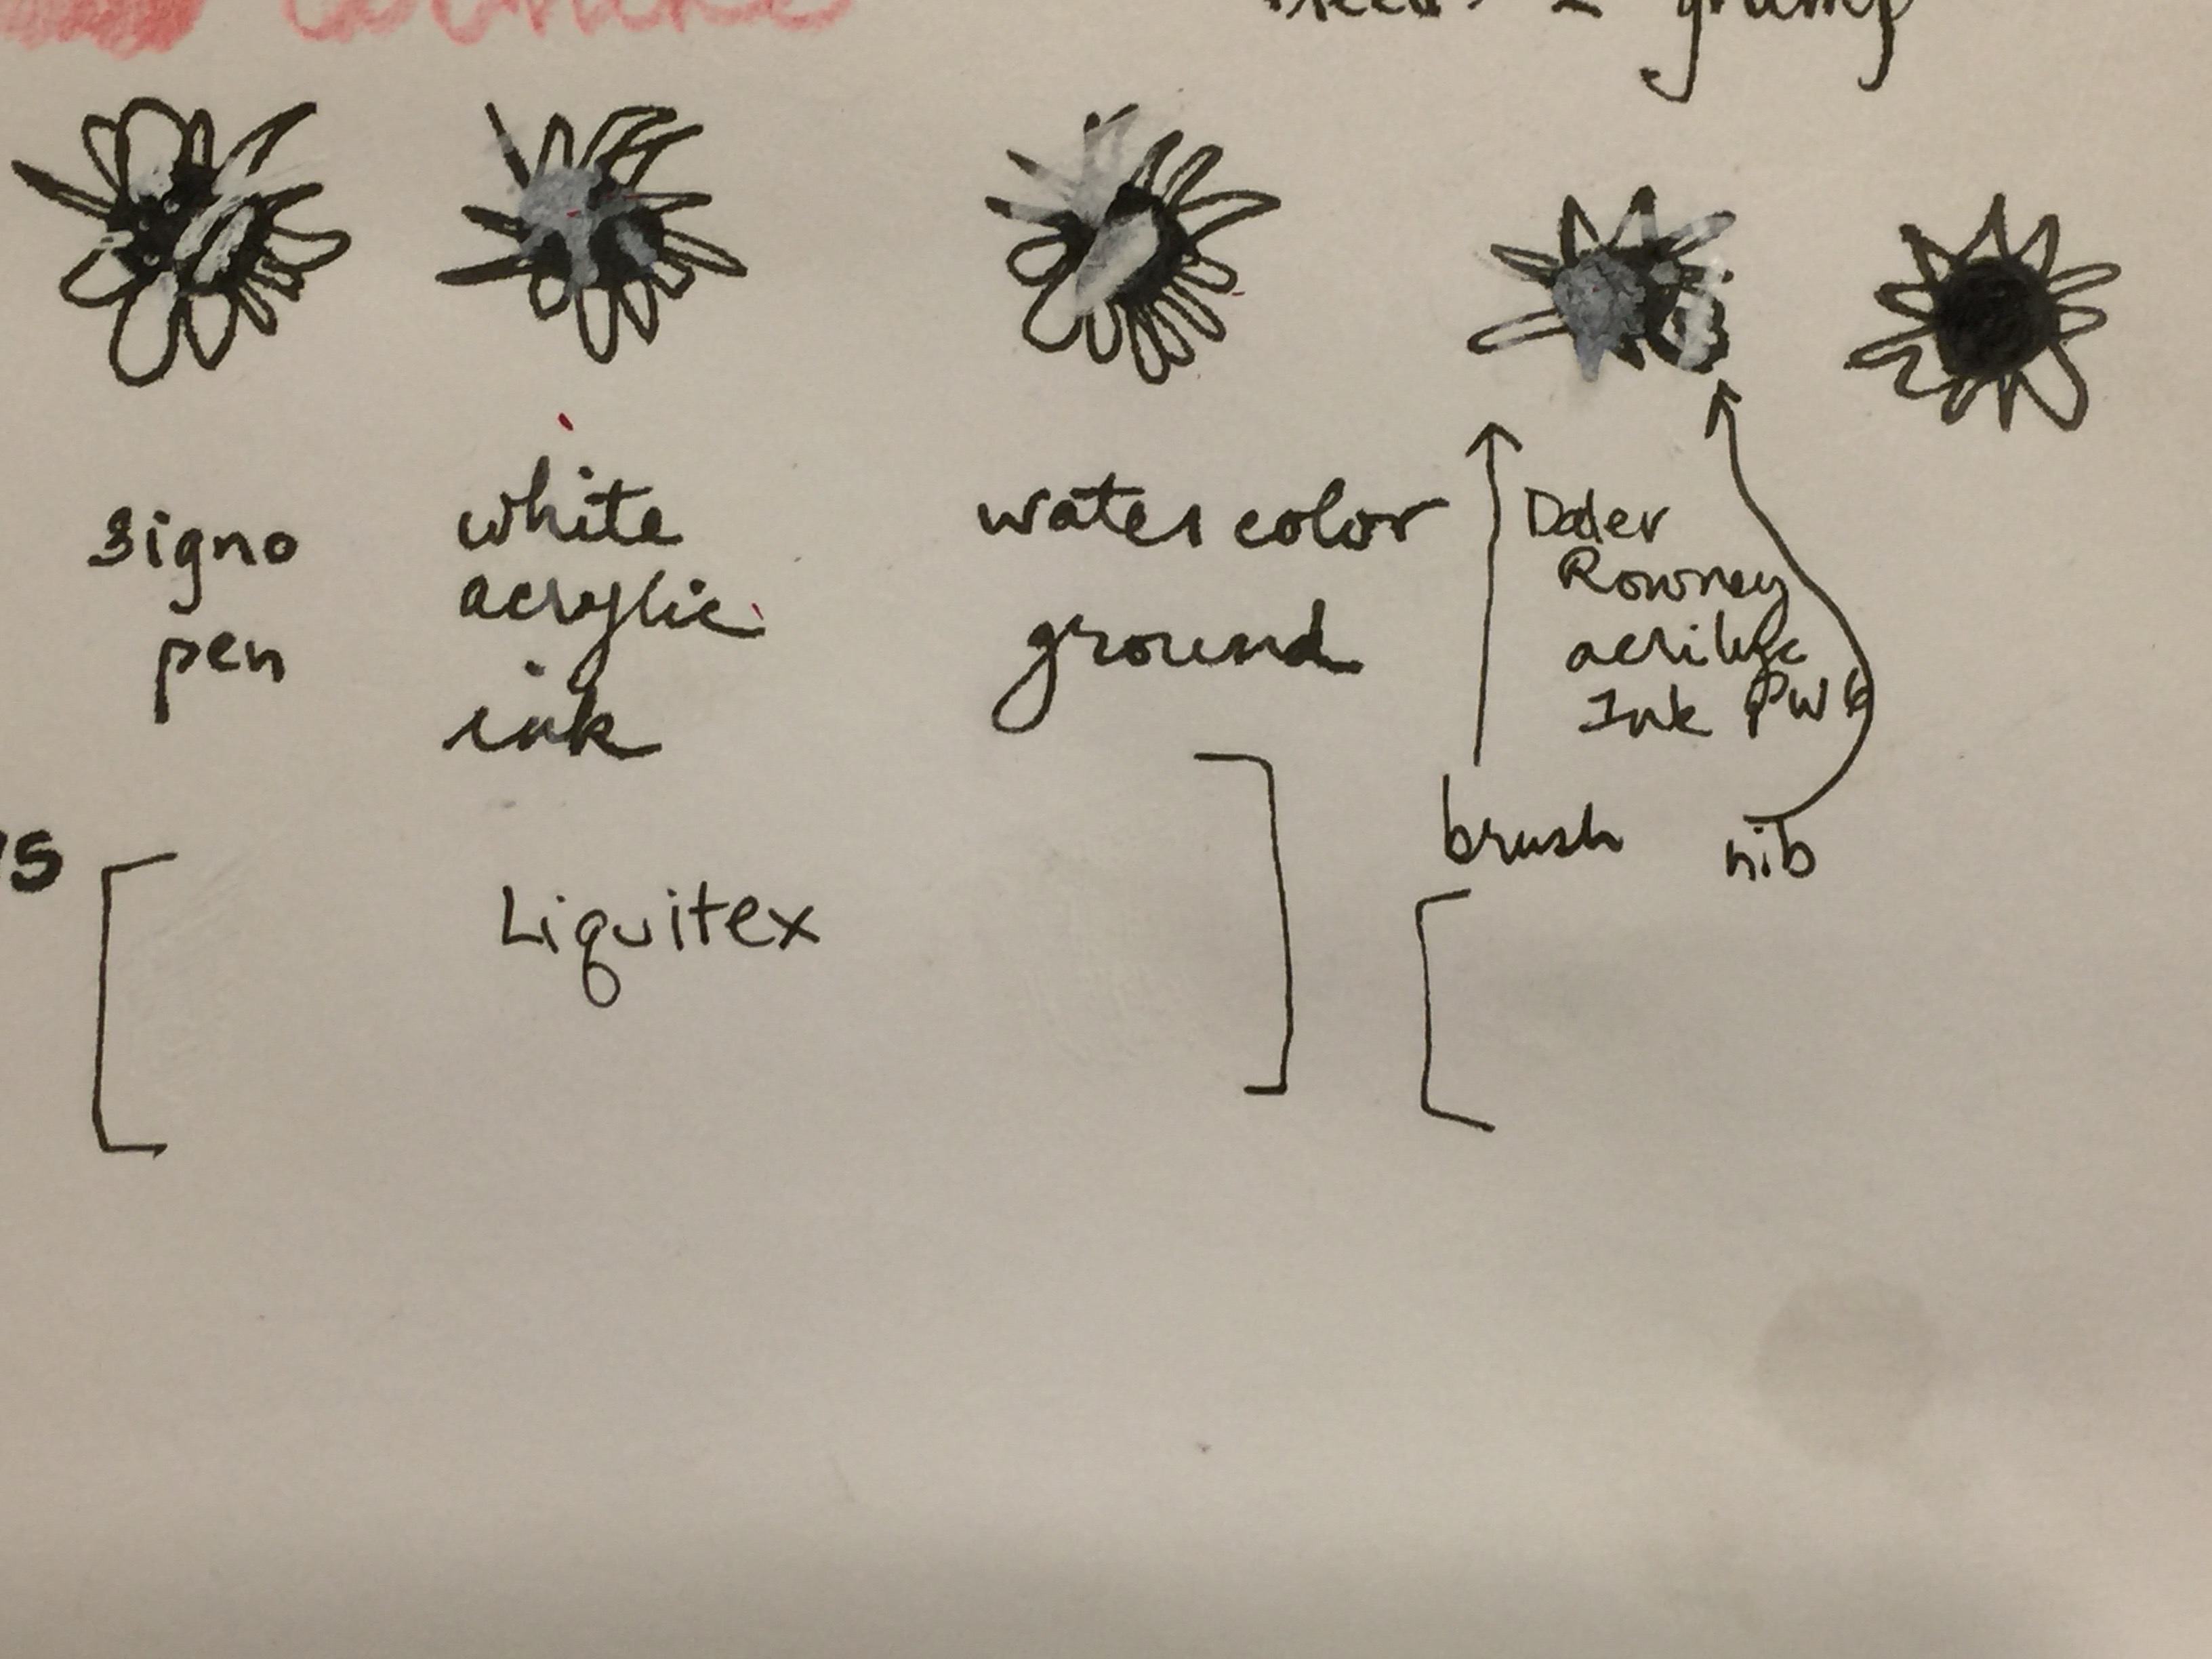
  • Signo pen (worked perhaps best, but is tricky to manage as it is a rollerball and sometimes leaves a track or blank space in the center of a line)
  • Watercolor ground
  • Acrylic ink in white–had both Liquitex and Daler Rowney; applied with both dip pen and brush

My test-drive page. The colors are from watercolor–this paper precluded using it–and colored pencil. I ended up using a combination of the Carmine and Crimson and a colorless blender.

The left side, close up. I made a blot of ink, then some squiggles to approximate where I blotched on the vulture.

The right side. Definitely like the way the Signo pen worked, and also the Daler Rowney FW acrylic ink…look at the right side where I dotted it on with a dip pen. The one on the far right is my untouched for comparison.

Observations:

–Both the white gouaches and the Daniel Smith watercolor ground looked yellower than the bright white paper when wet, but when dry that tint disappeared.  In fact, the Schminke titanium, which seemed to work the best of the two, is even brighter white than the paper–a tiny drop of something to match the color of the paper would make it work.

–The Signo pen worked best, but you kinda need to add it in dots because the pen itself can “railroad” meaning you get edges of white and not much in the center due to the rollerball tip.  However, a couple coats worked well.

–The Daler Rowney FW acrylic ink worked better than the Liquitex Ink! .  It took a couple coats, but it could be a viable option.

I’d like to try a controlled test of my favorites, the Signo pen, Schminke Titanium White gouache, and the Daler Rowney FW white acrylic ink, on a few watercolor papers to see how it looks AND what happens if you then ink or watercolor OVER the “fix.”

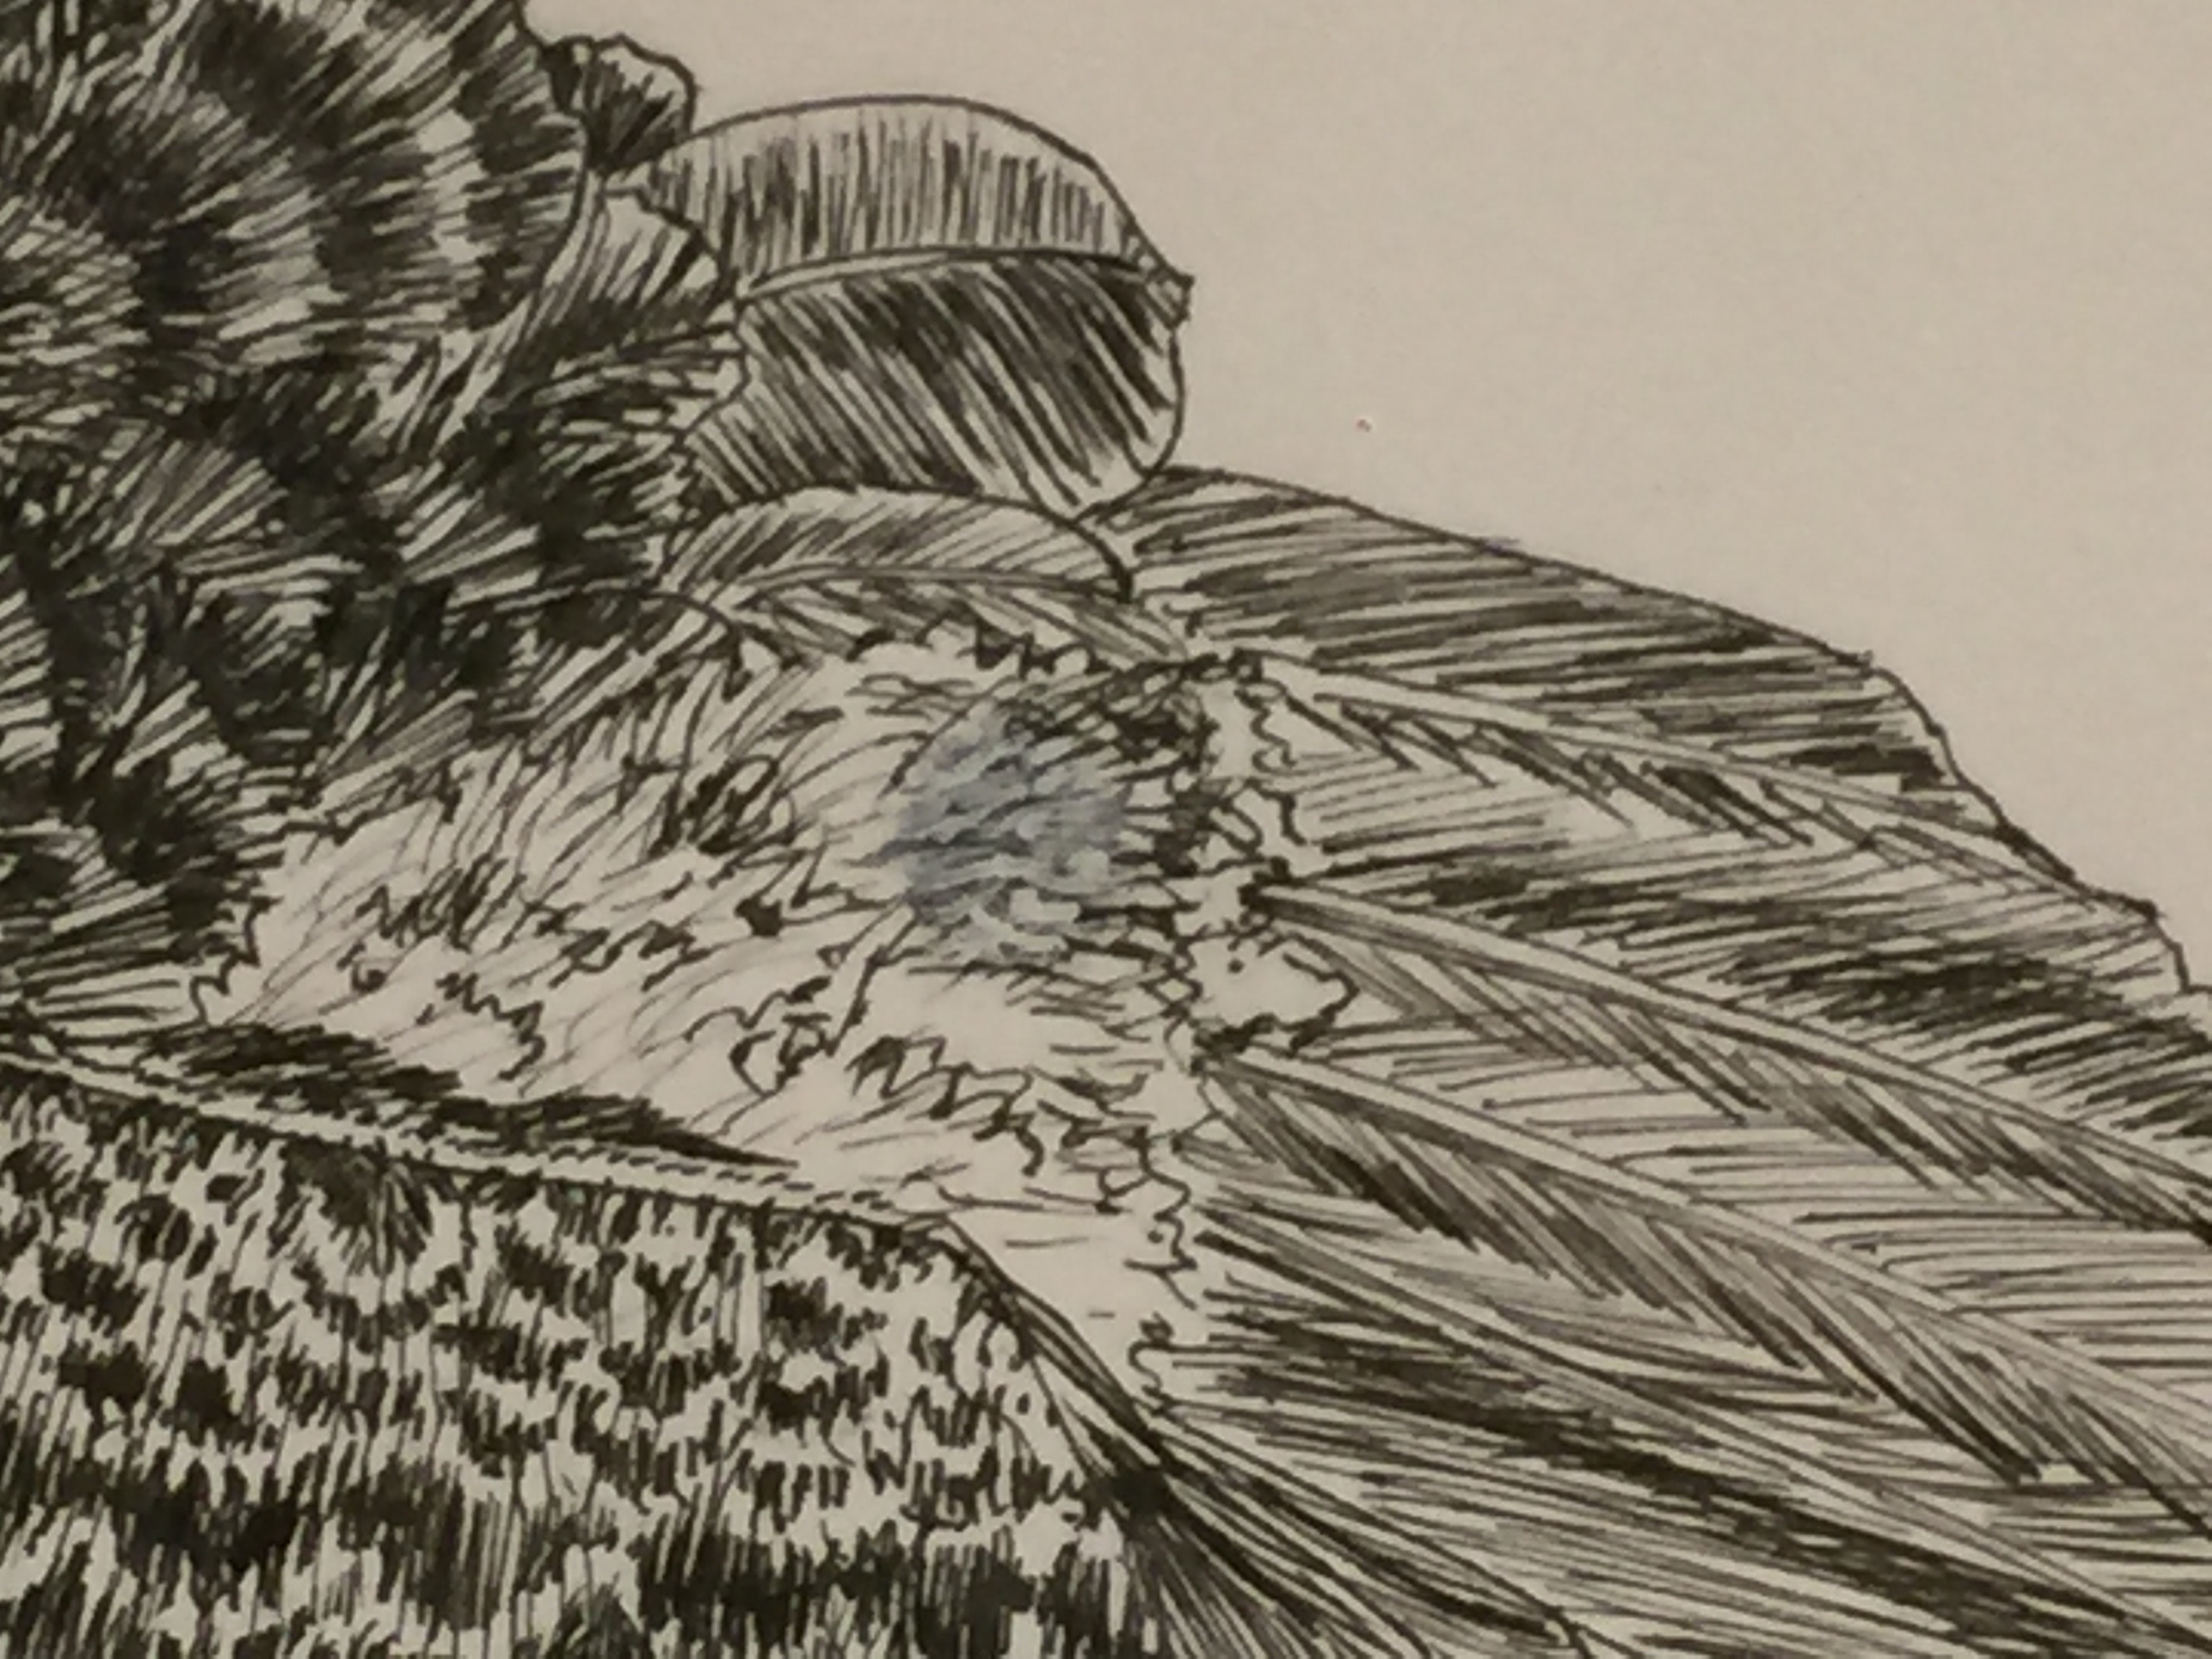
Here’s the offending splotch after touch up with both Signo and the Acrylic Ink in white:

The splotch is visible on close inspection, but really I’m delighted with the result.

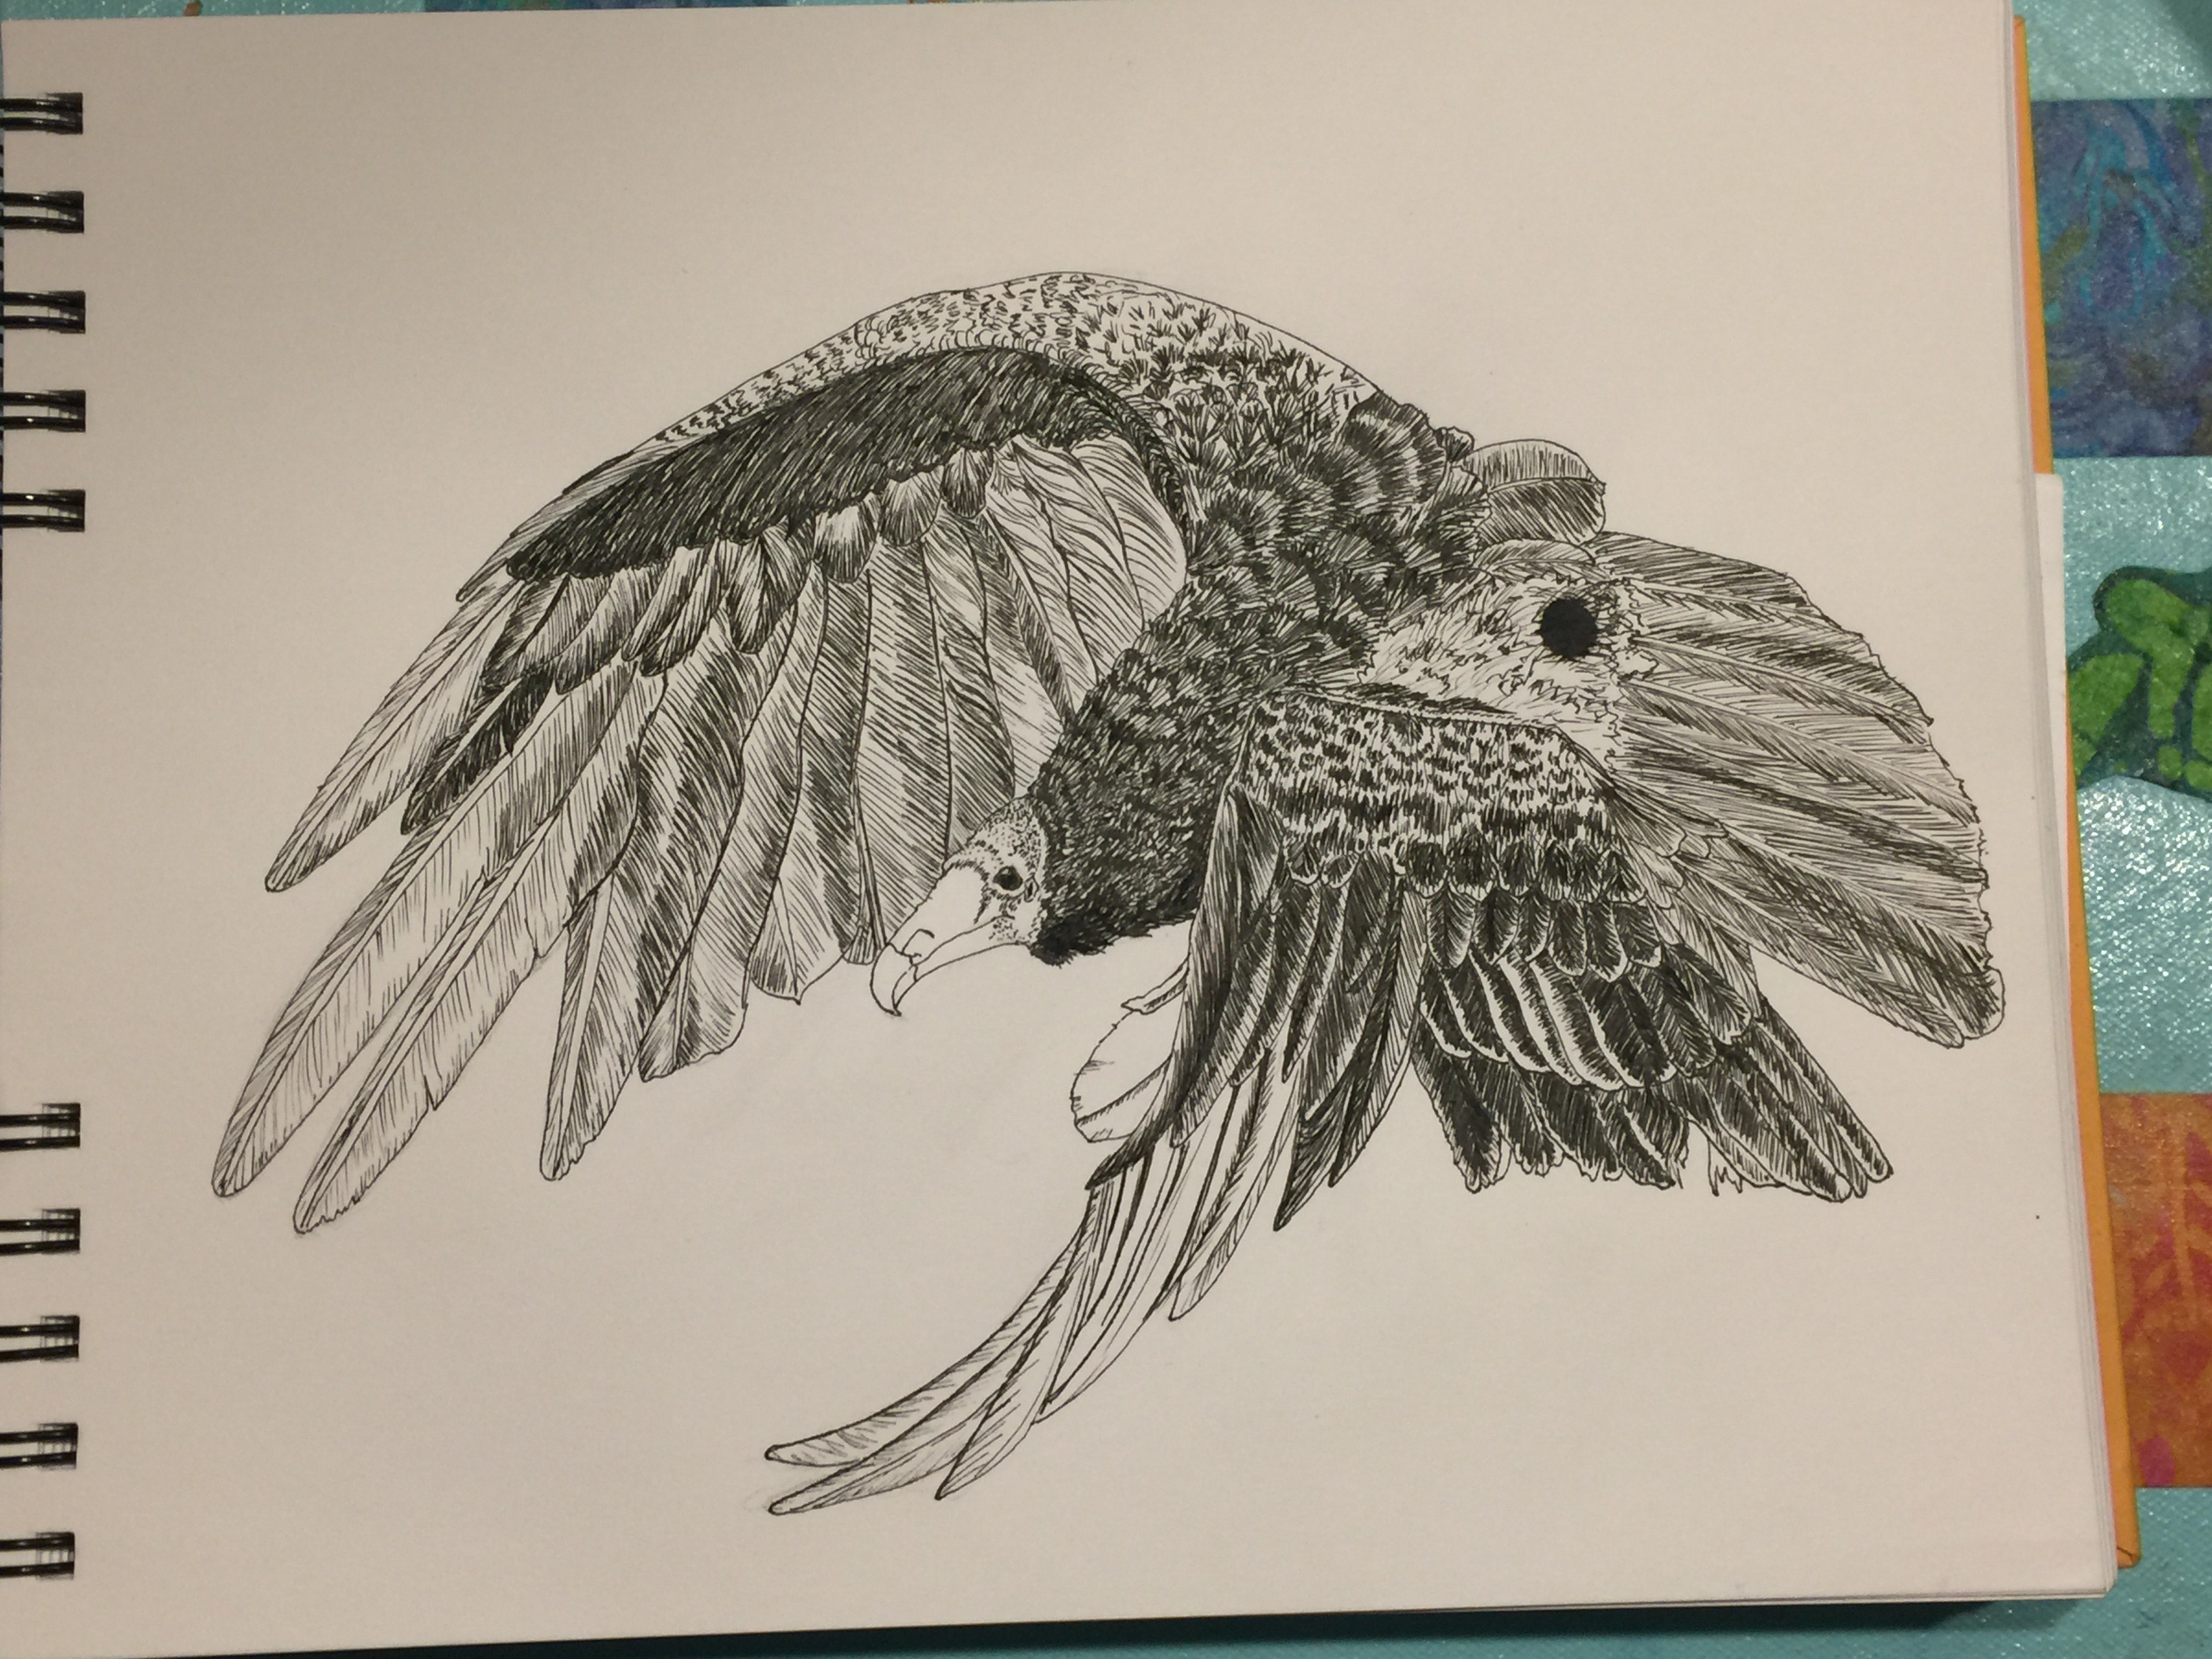
And once again, here’s the final result–not bad at all!   I’ve always said that the difference between a beginner and the advanced/pro is knowing how to fix your mistakes.  I’m moving out of beginner range!

The Vulture is Landing!


Call me a Shannon Cuddle fan!

October 14th, 2018

A heavenly combination: my studio, my Janome 9400 and Shannon Fabrics cuddle fabric–I’m ready for winter!  This fabric is so soft you just want to pet it, snuggle under it, and not give it away as a gift!

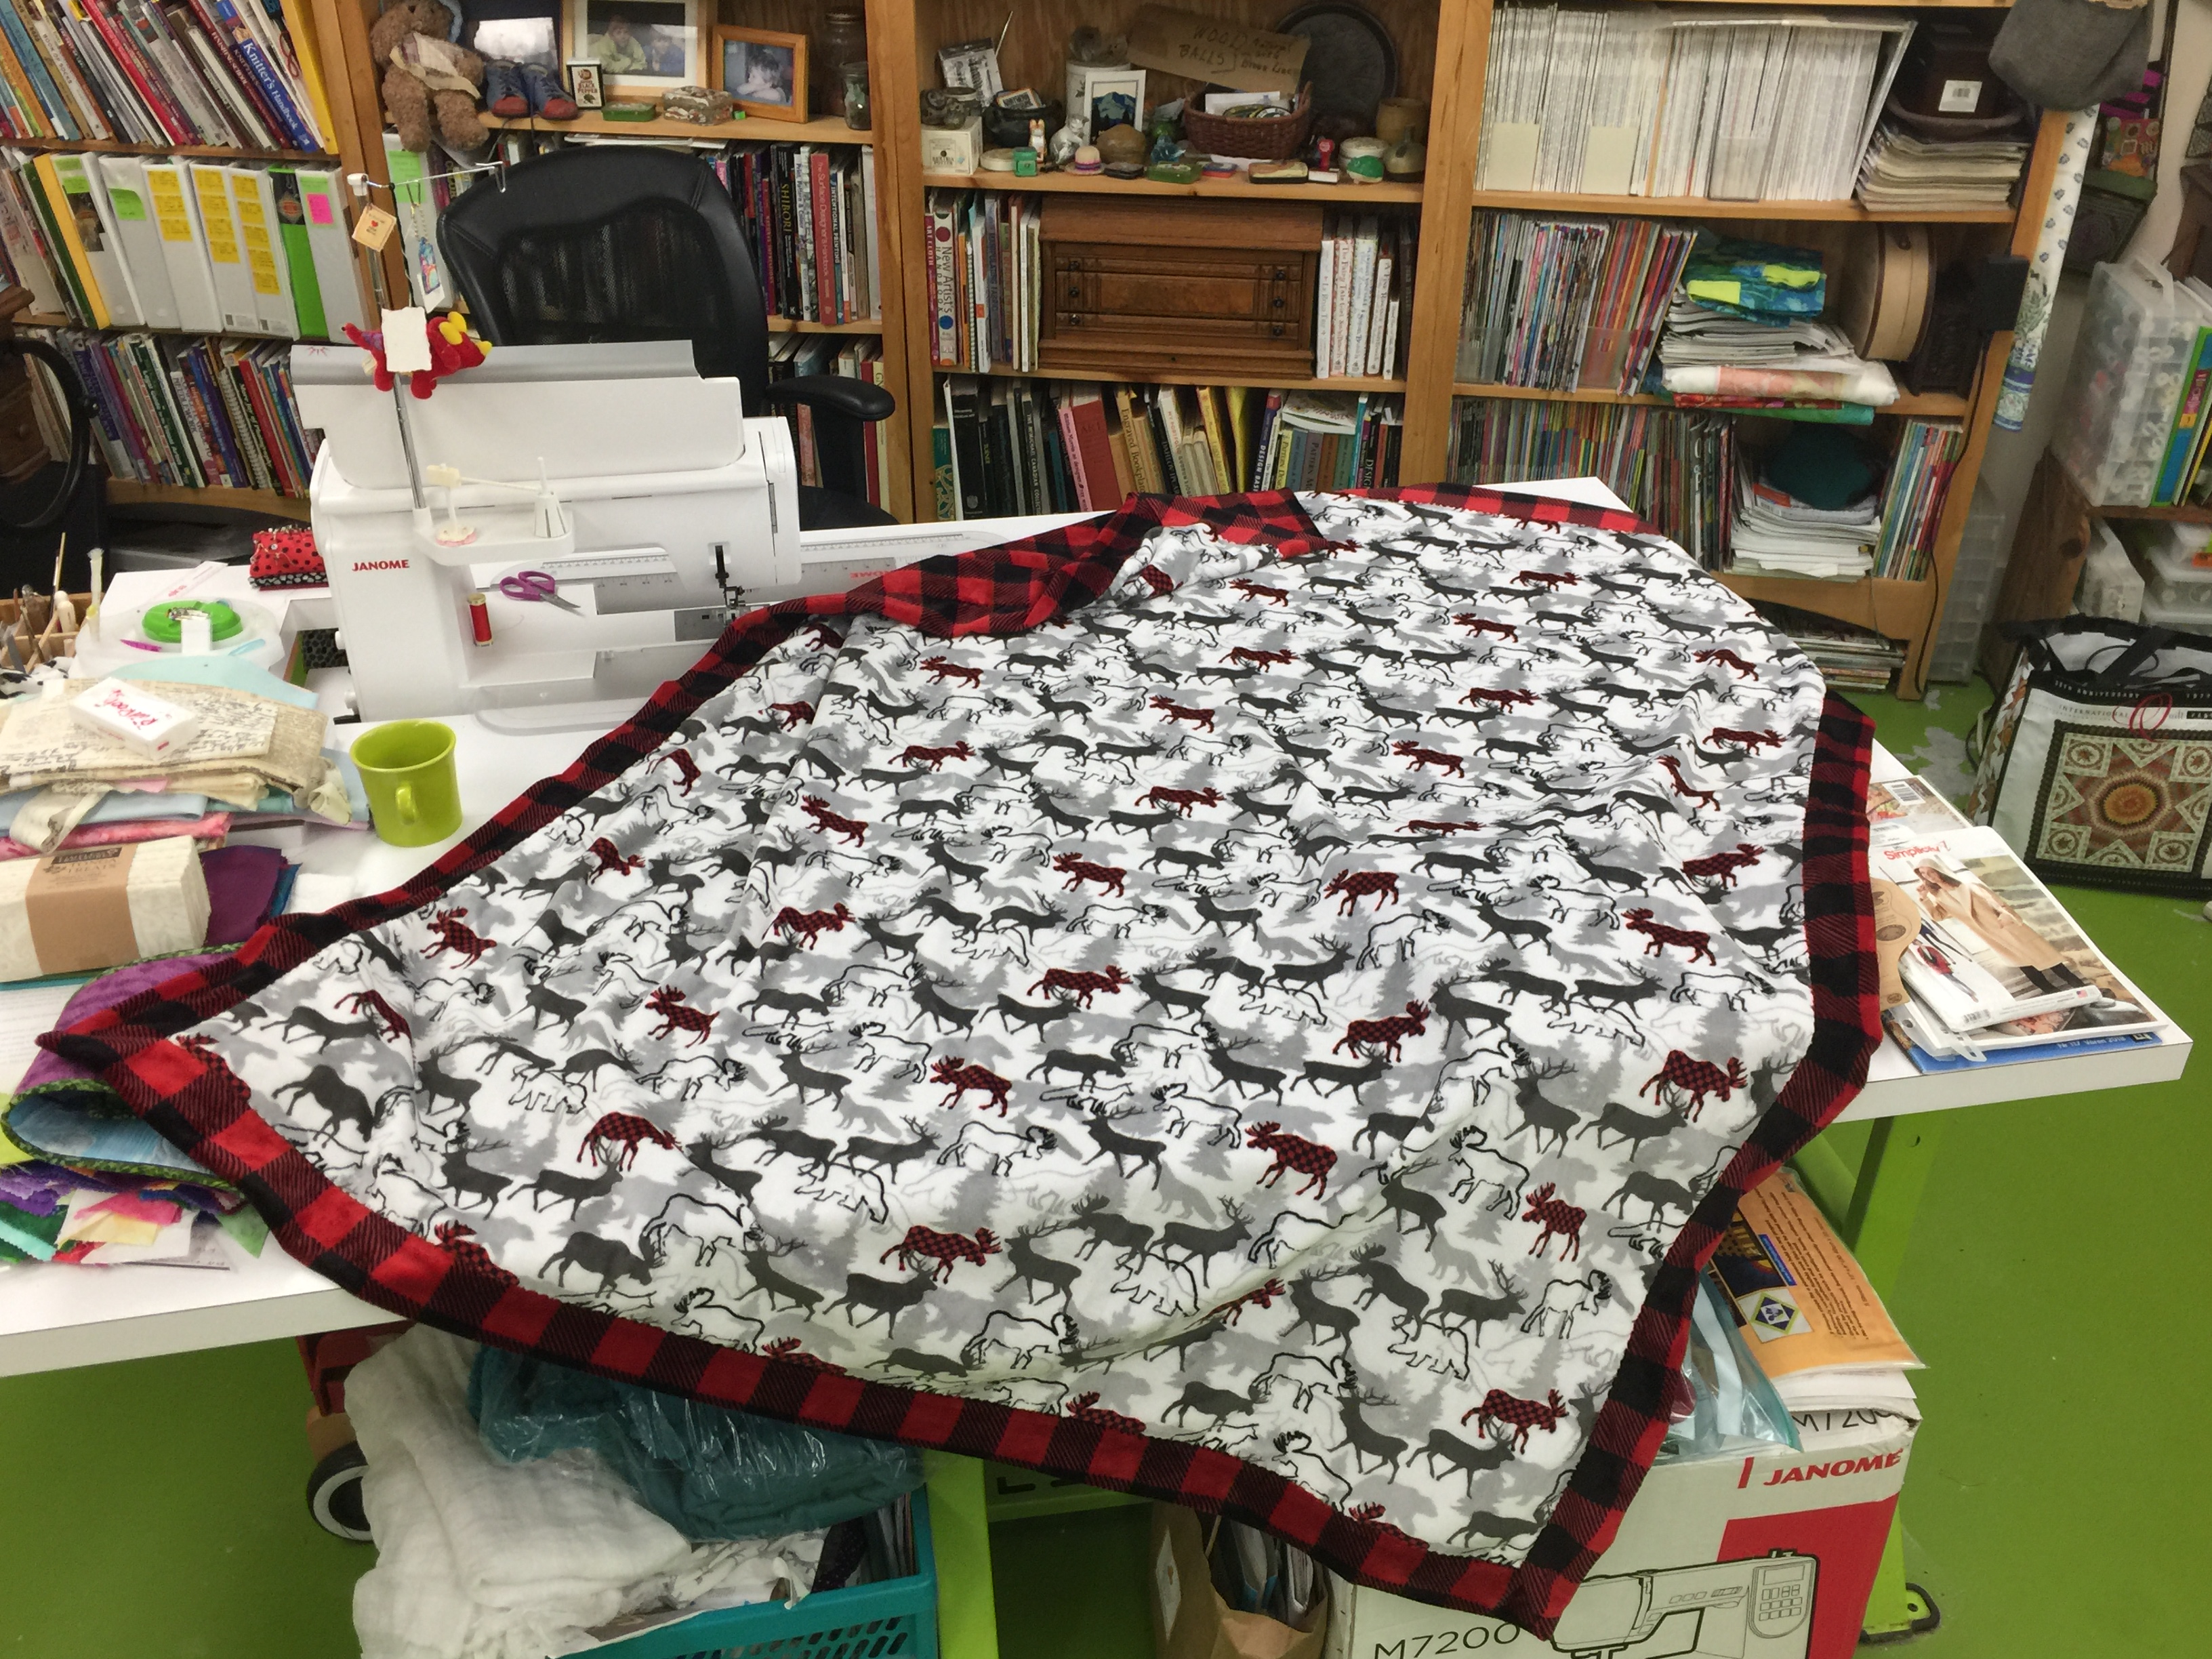
Last May, Janome America had its first ever Janome Education Summit, and one of the presenters was Shannon Fabrics.  From the kit they provided, I made the lovely summery top in this blogpost.  But they also shared samples of their fabrics, including these two.  True confession:  I have this Elmer Fudd-esque love affair with red and black buffalo check.  When I got home from the Janome event, I searched for the cuddle buffalo check on the internet wanting to buy multiple yards of it it but couldn’t find it anywhere, so contacted the presenter from Shannon Fabrics, who told me it wasn’t available until summer for the new fall season.  I ordered some other Shannon Cuddle and Luxe Fur from Fabric.com (still waiting to make that up, stay tuned in December).  Mid summer I still couldn’t find it, so I wrote to her again, and she SENT ME a big box to make not one but TWO projects.   This throw is SO fast and easy and it would make an awesome holiday gift. Literally, I made it in a short afternoon!

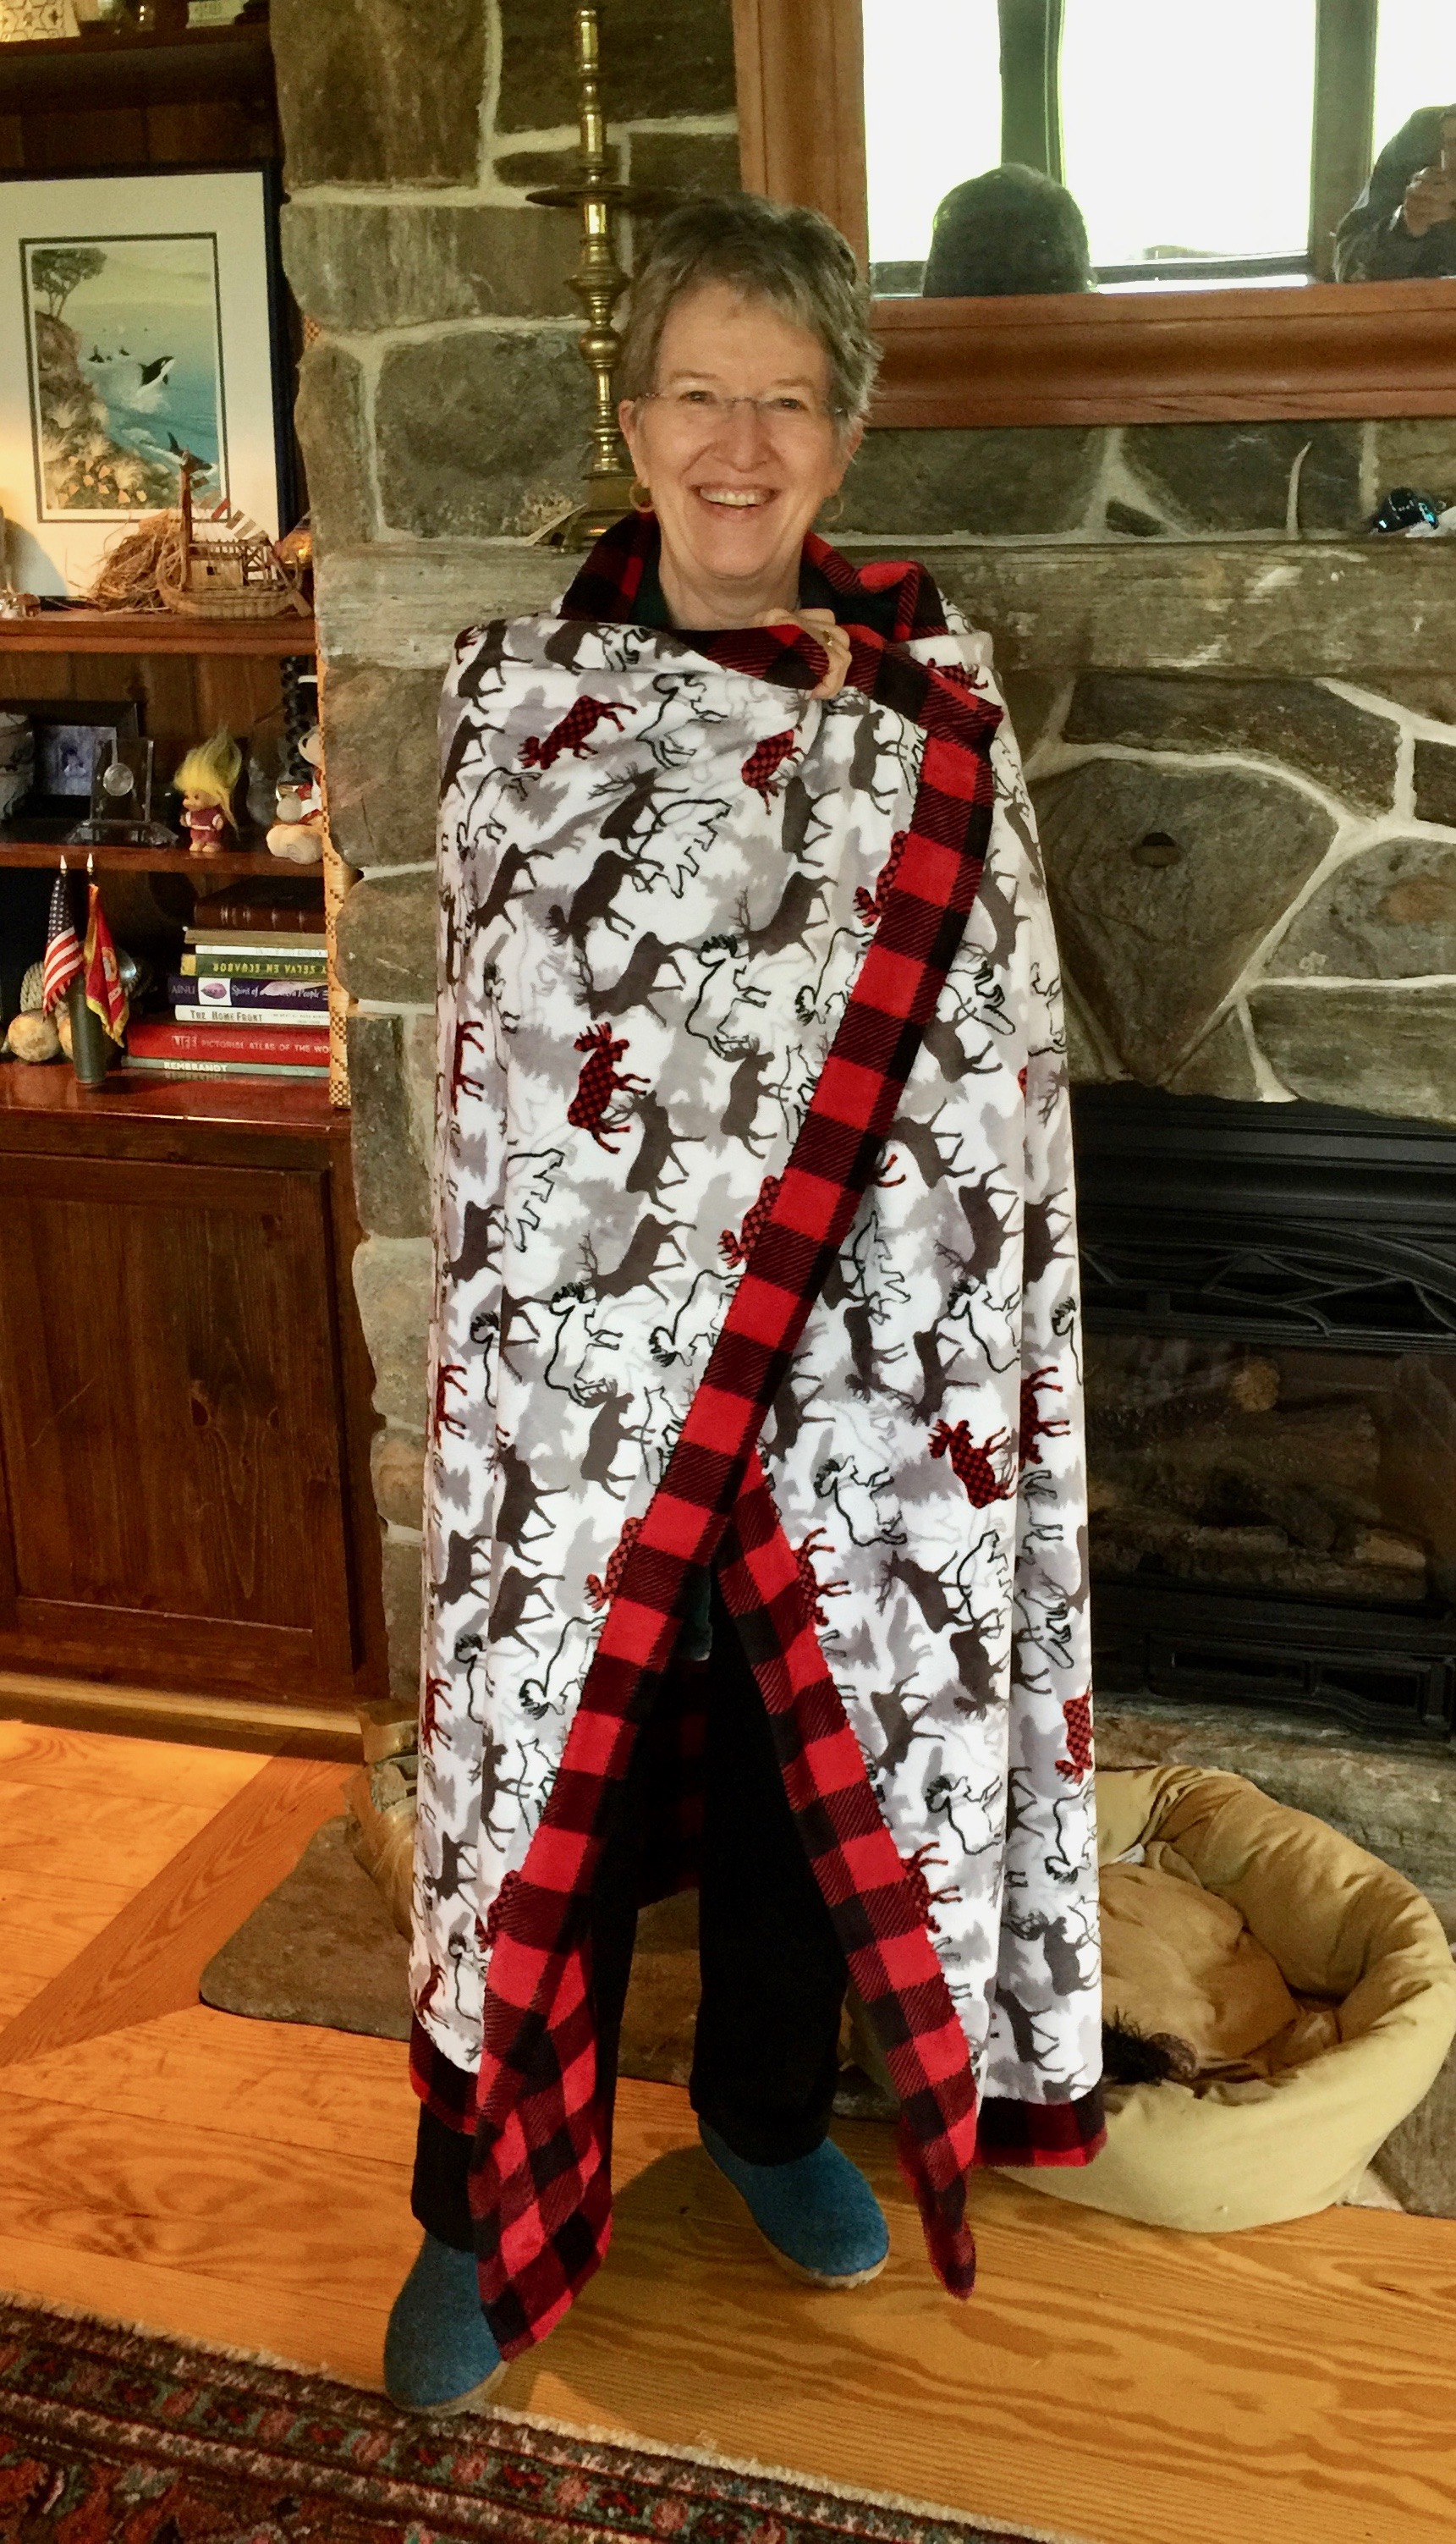
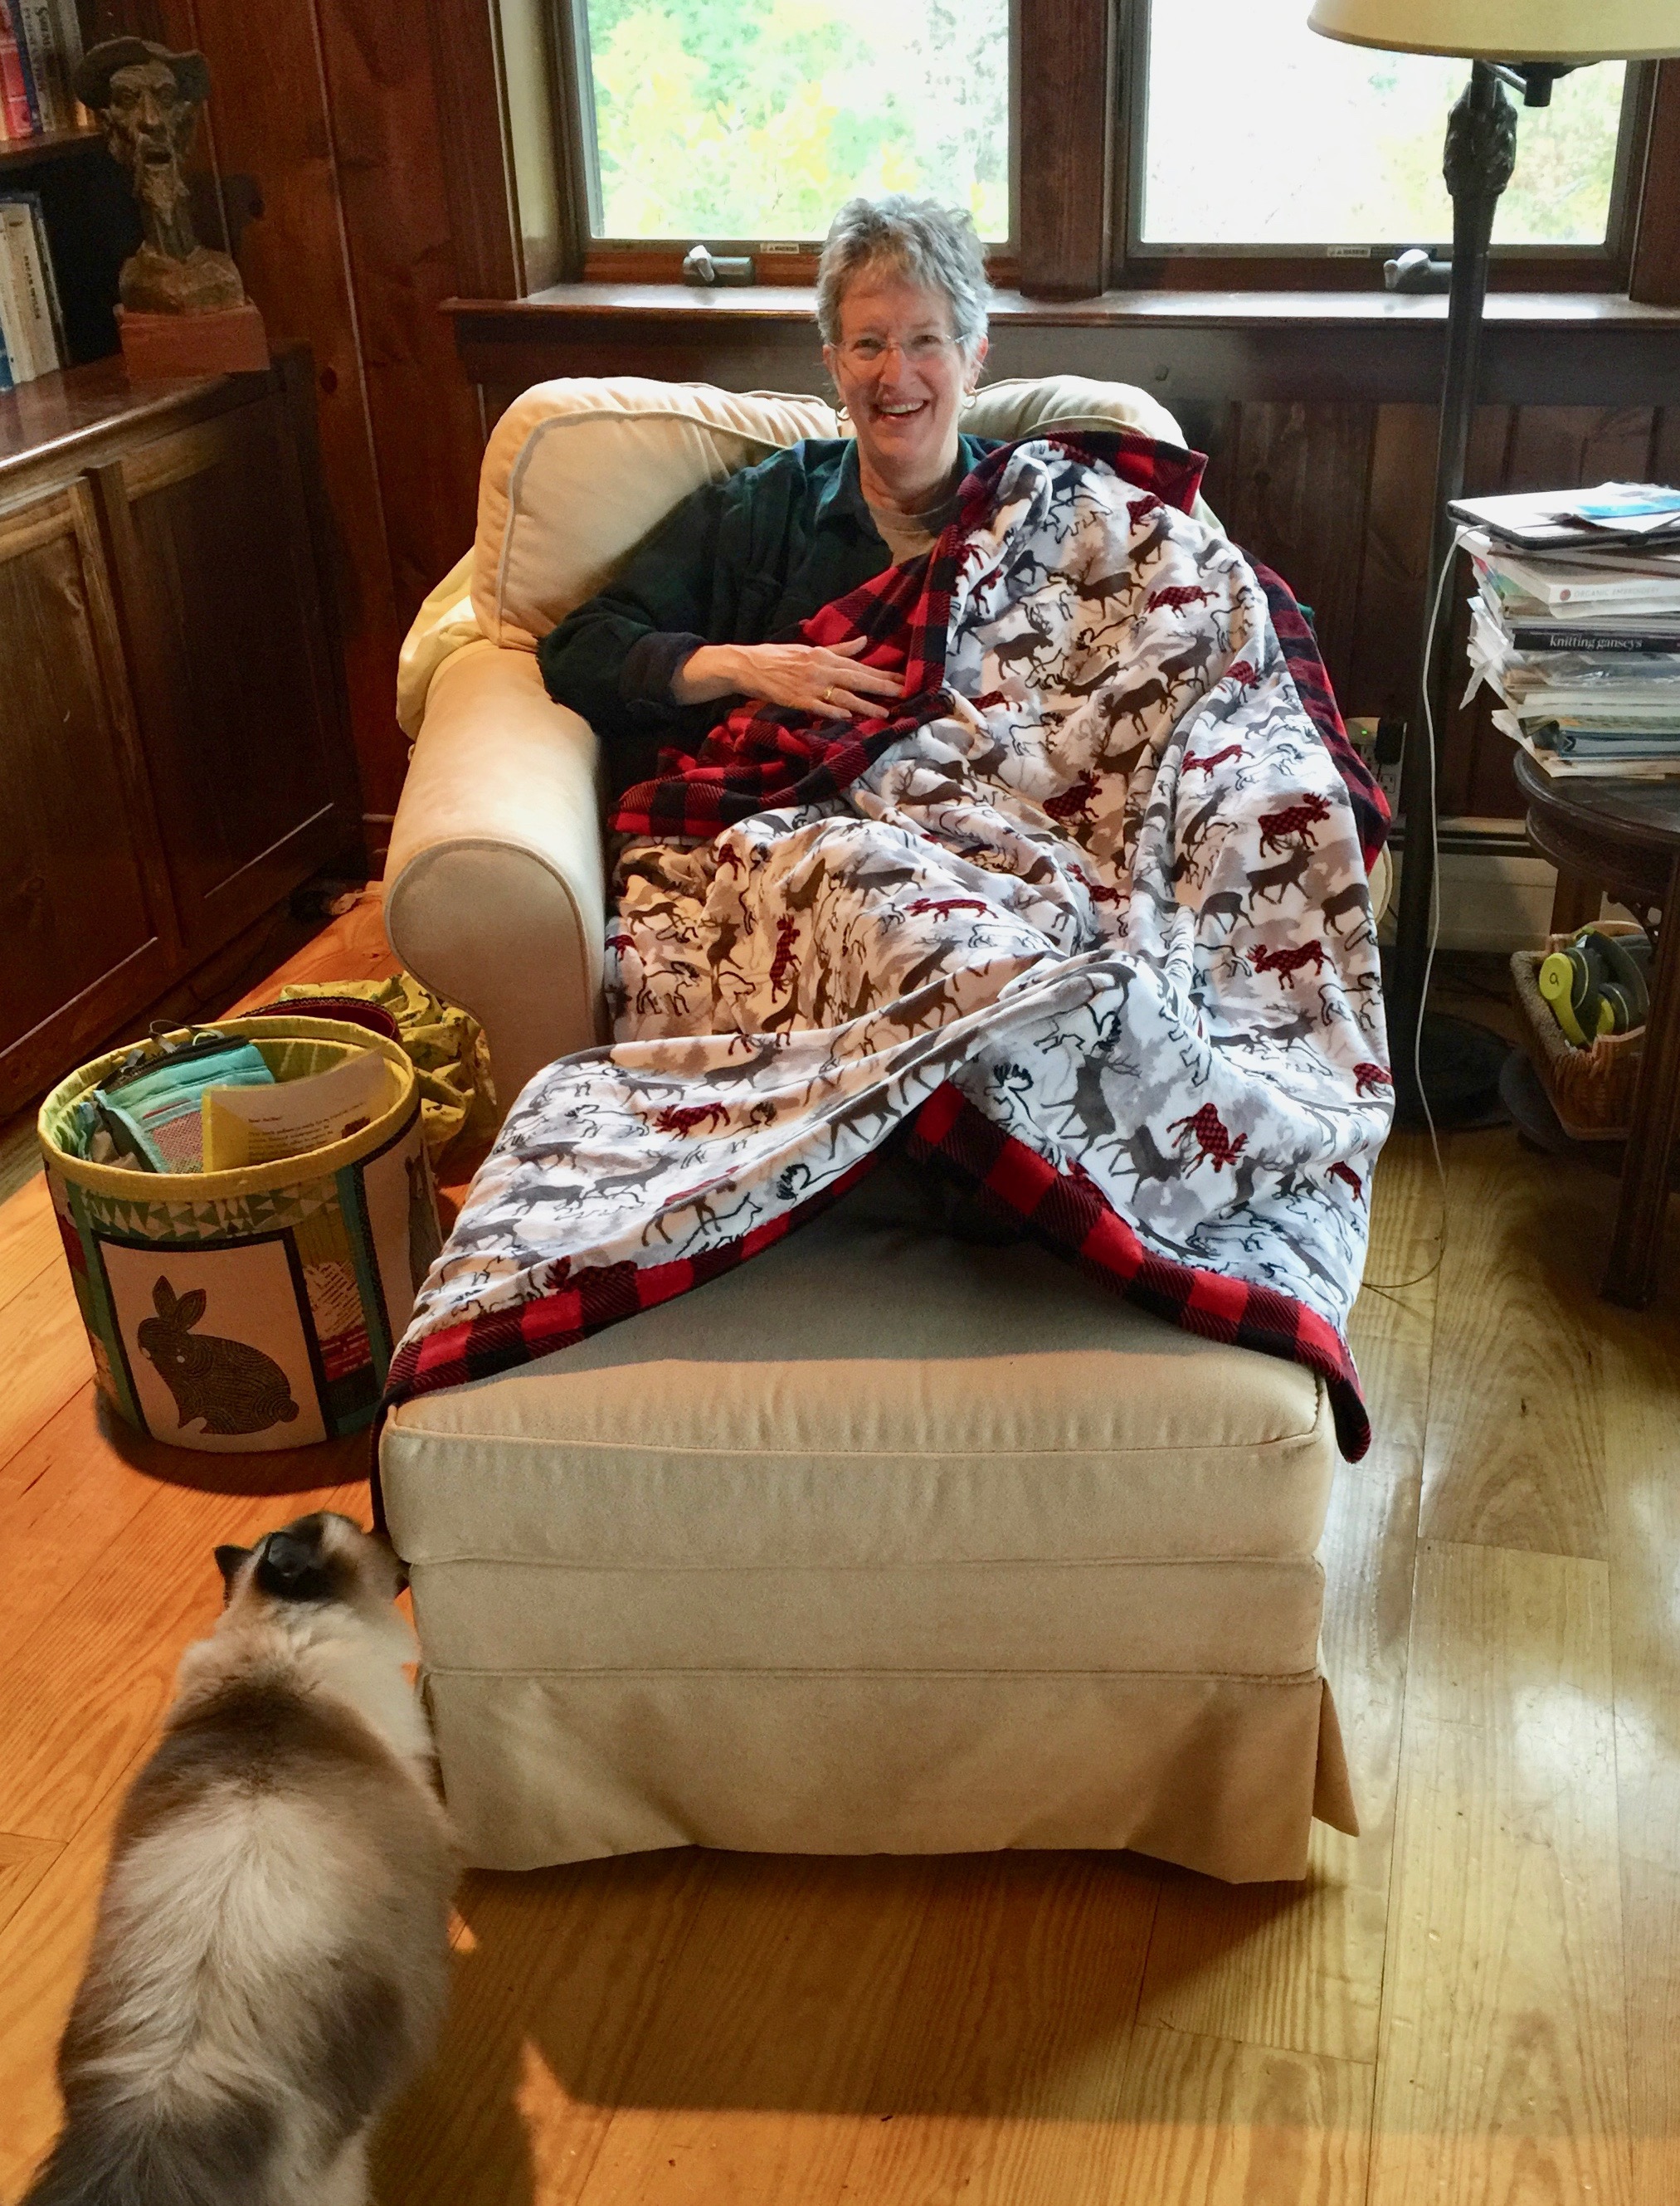
Me by the fireplace, wrapped in my jumbo throw. This is big enough for two people on a sofa. Or one person a cat and a pug in a chair. Ahem (photo below).

 Here’s what and how:

The two fabrics pictured are available at Fabric.com here/minky buffalo check and here/Studio minky forest park, both in the scarlet color way.  It is also available in a blue version, and there is a lovely silvery gray and white buffalo check too.  I used two yards of each, but had a little of the print leftover–gonna make a hat out of that!  You’ll also need some thread–color doesn’t really matter as it disappears into the pile, but I did use red. If I had found the Shannon free pattern and video (keep reading) I would have ordered 2 1/3 yards of the check since you need a little extra to wrap.  Instead, I trimmed down my white print to work.

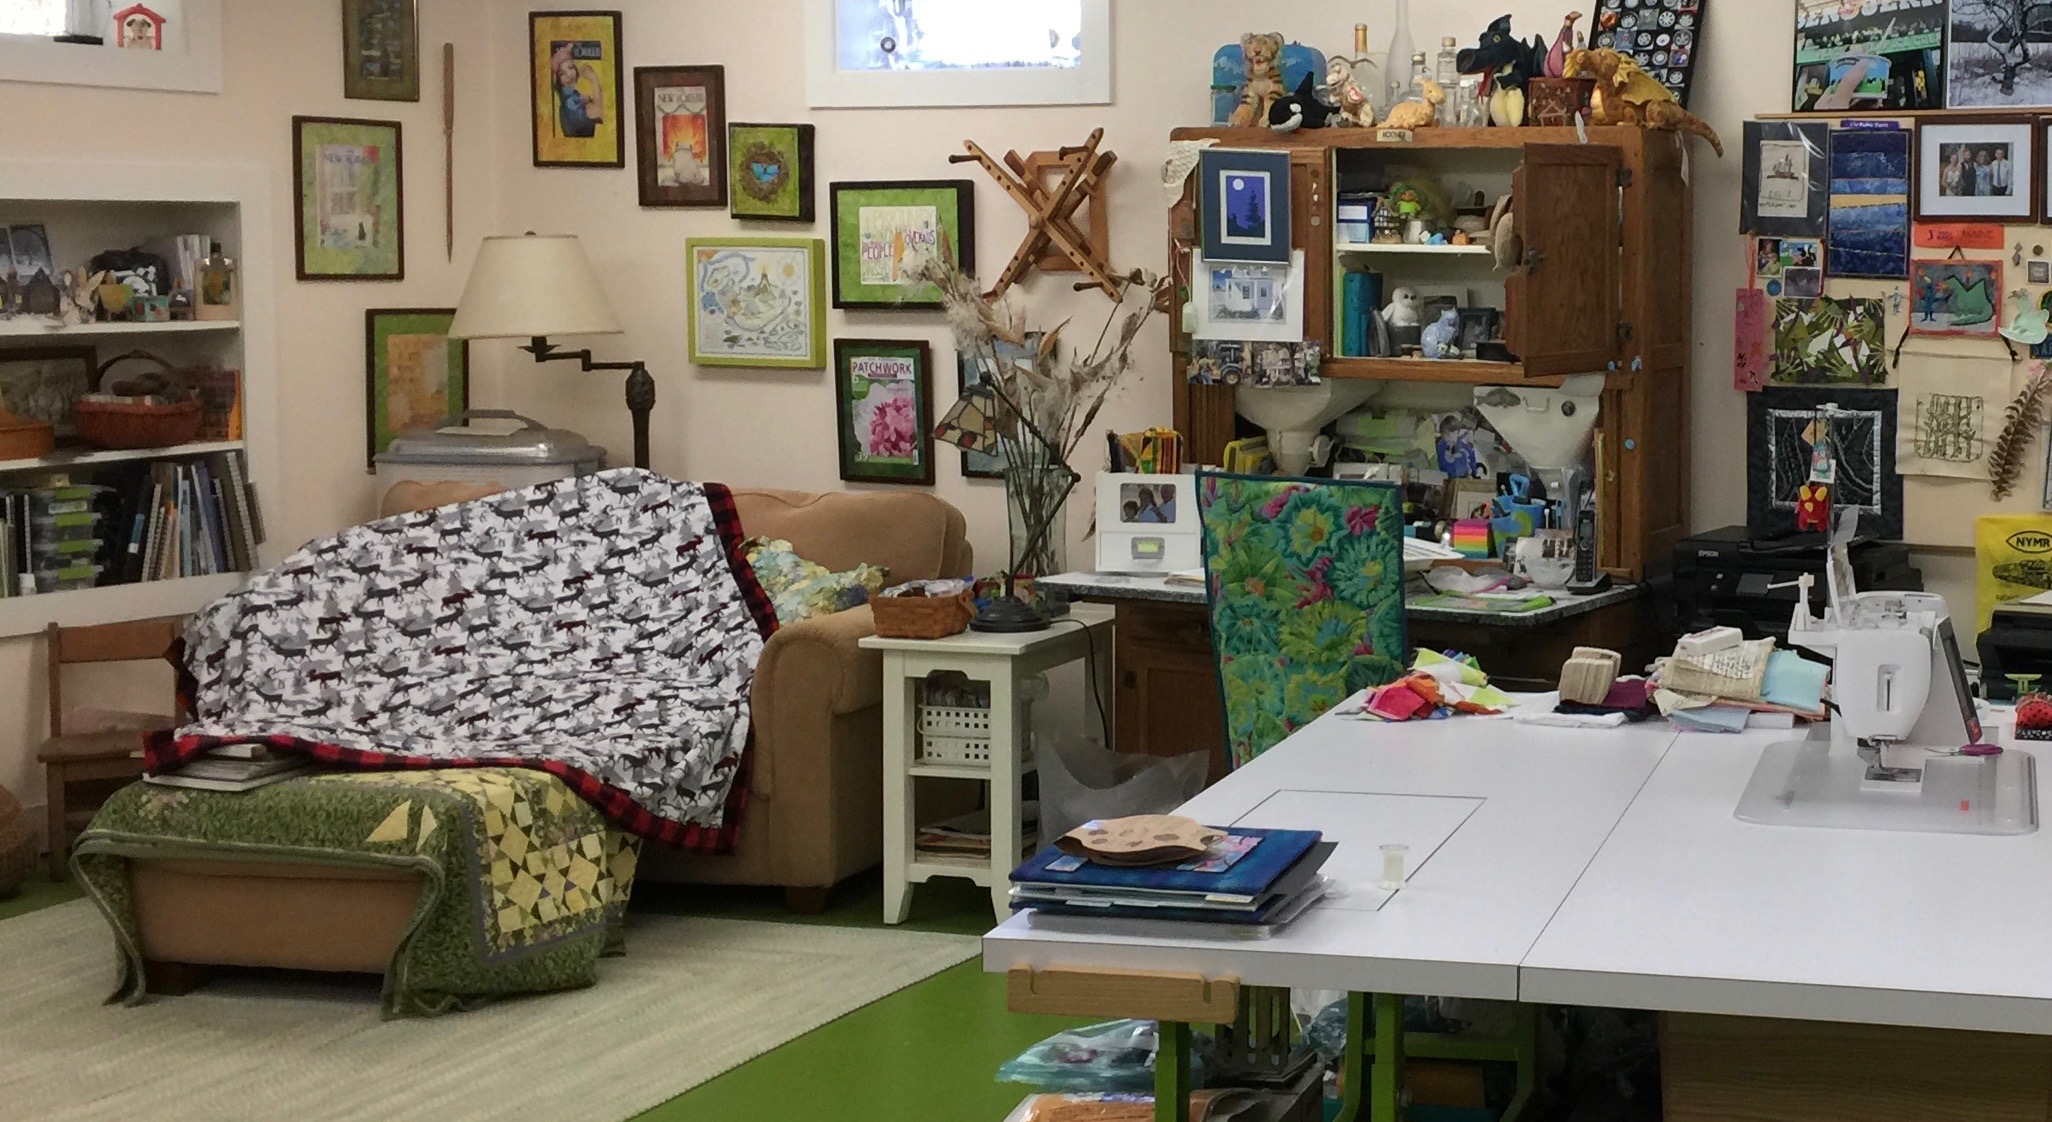
A blogpost with lots of pictures is better. Here is the throw on the love seat / reading zone in my basement studio. You can see how large it is!

TIPS and HINTS for working with Cuddle, Minky and Luxe Fur:

  1.  The BEST tip for minimizing lint came from Ellen of Shannon Fabrics in May:  you know you when you cut Minky and similar fabrics you end up with little bits of fluff EVERYwhere forever?  Not any more!   First, especially with the long fur-like fabrics (in my upcoming December project), cut your fleece from the back cutting only through the knit backing.  This minimizes the snipped bits of fluff.  You can also do as I did with the regular pile cuddle (what I used here) and use a rotary cutter.  Then scoop up ALL the pieces (including leftovers if you keep them for small projects later), perhaps into a basket or large plastic bag, and take them to your DRYER.  Yes, the clothes dryer.  Tumble on no-heat for about ten minutes, then CLEAN THE LINT FILTER. About 80+ percent of that fluff will end up in the lint filter and not all over your sewing space and house.  OMG it really worked!
  2. There is no stretch on the lengthwise grain.  At all.  If you make a garment (my next project) make sure you keep grainline in mind when fitting the garment.
  3. The fabric DOES NOT RAVEL.  At ALL.  That means you don’t have to turn under edges!!!!!!  That means these projects are FAST!
  4. Stitch length:  The fleece will hide your stitches.  That means it will be challenging if you decide you need to remove any of the stitches, so pin carefully to avoid ripping out!   Also, it is good to use a slightly longer stitch length.  I used a 3.0.
  5. Best stitch for seams on knits: For garments, using a zigzag or “lightning” zigzag will at a 1.0 width will look like a straight stitch seam from the outside, but adds a little bit of flexibility and therefore helps avoid popping stitches in the seam.

Shannon Fabrics has many free patterns available.  I used this one for my throw, a youTube video called Cuddle Self-Binding Blanket from Shannon and FleeceFun.com.  I hadn’t found this video when I requested my fabric.  If I had, I would have ordered 2 1/3 yard of the buffalo check and 2 yards of the forest park print and had a slightly larger (better!) throw.  WATCH the video before you order fabric…it is only 7 minutes long and will help you.

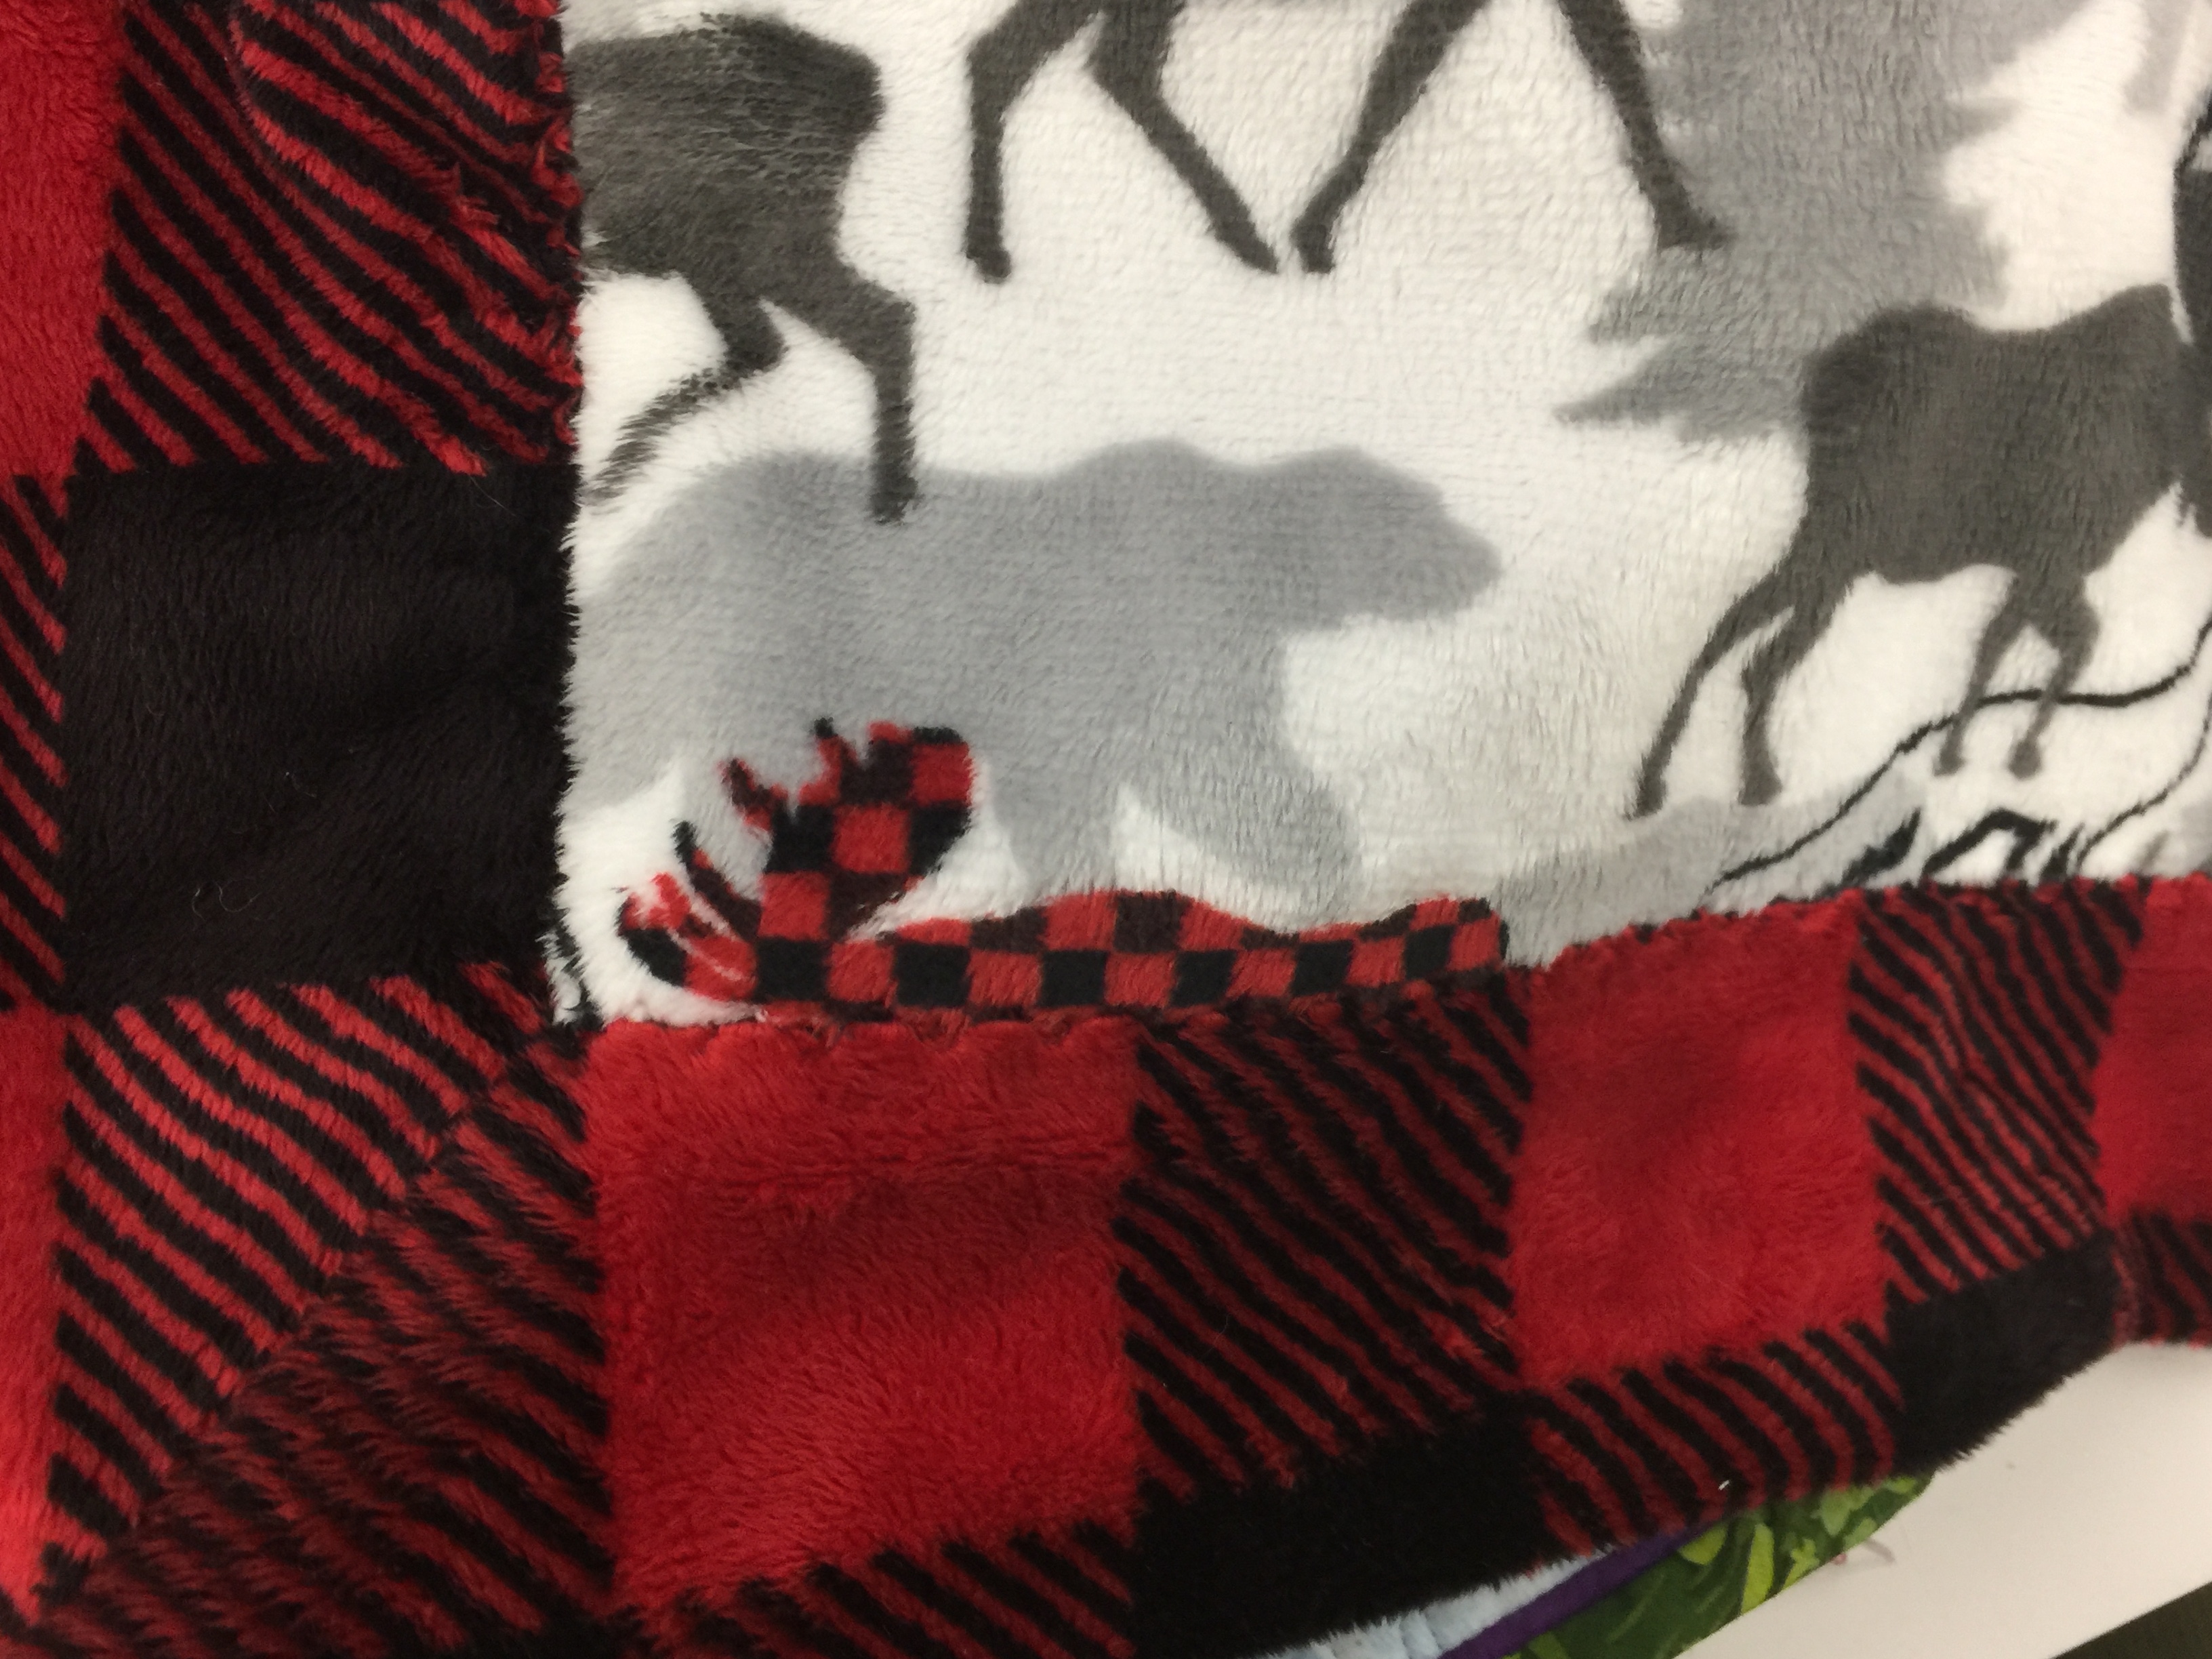
I used a serpentine stitch on my Janome 9400, an “S” shaped stitch to sew down the edges. You could also use a blanket stitch or a 3-step zigzag (the one that takes three stitches in one direction, then three stitches the other way).  I mean, you can’t even SEE the stitches.

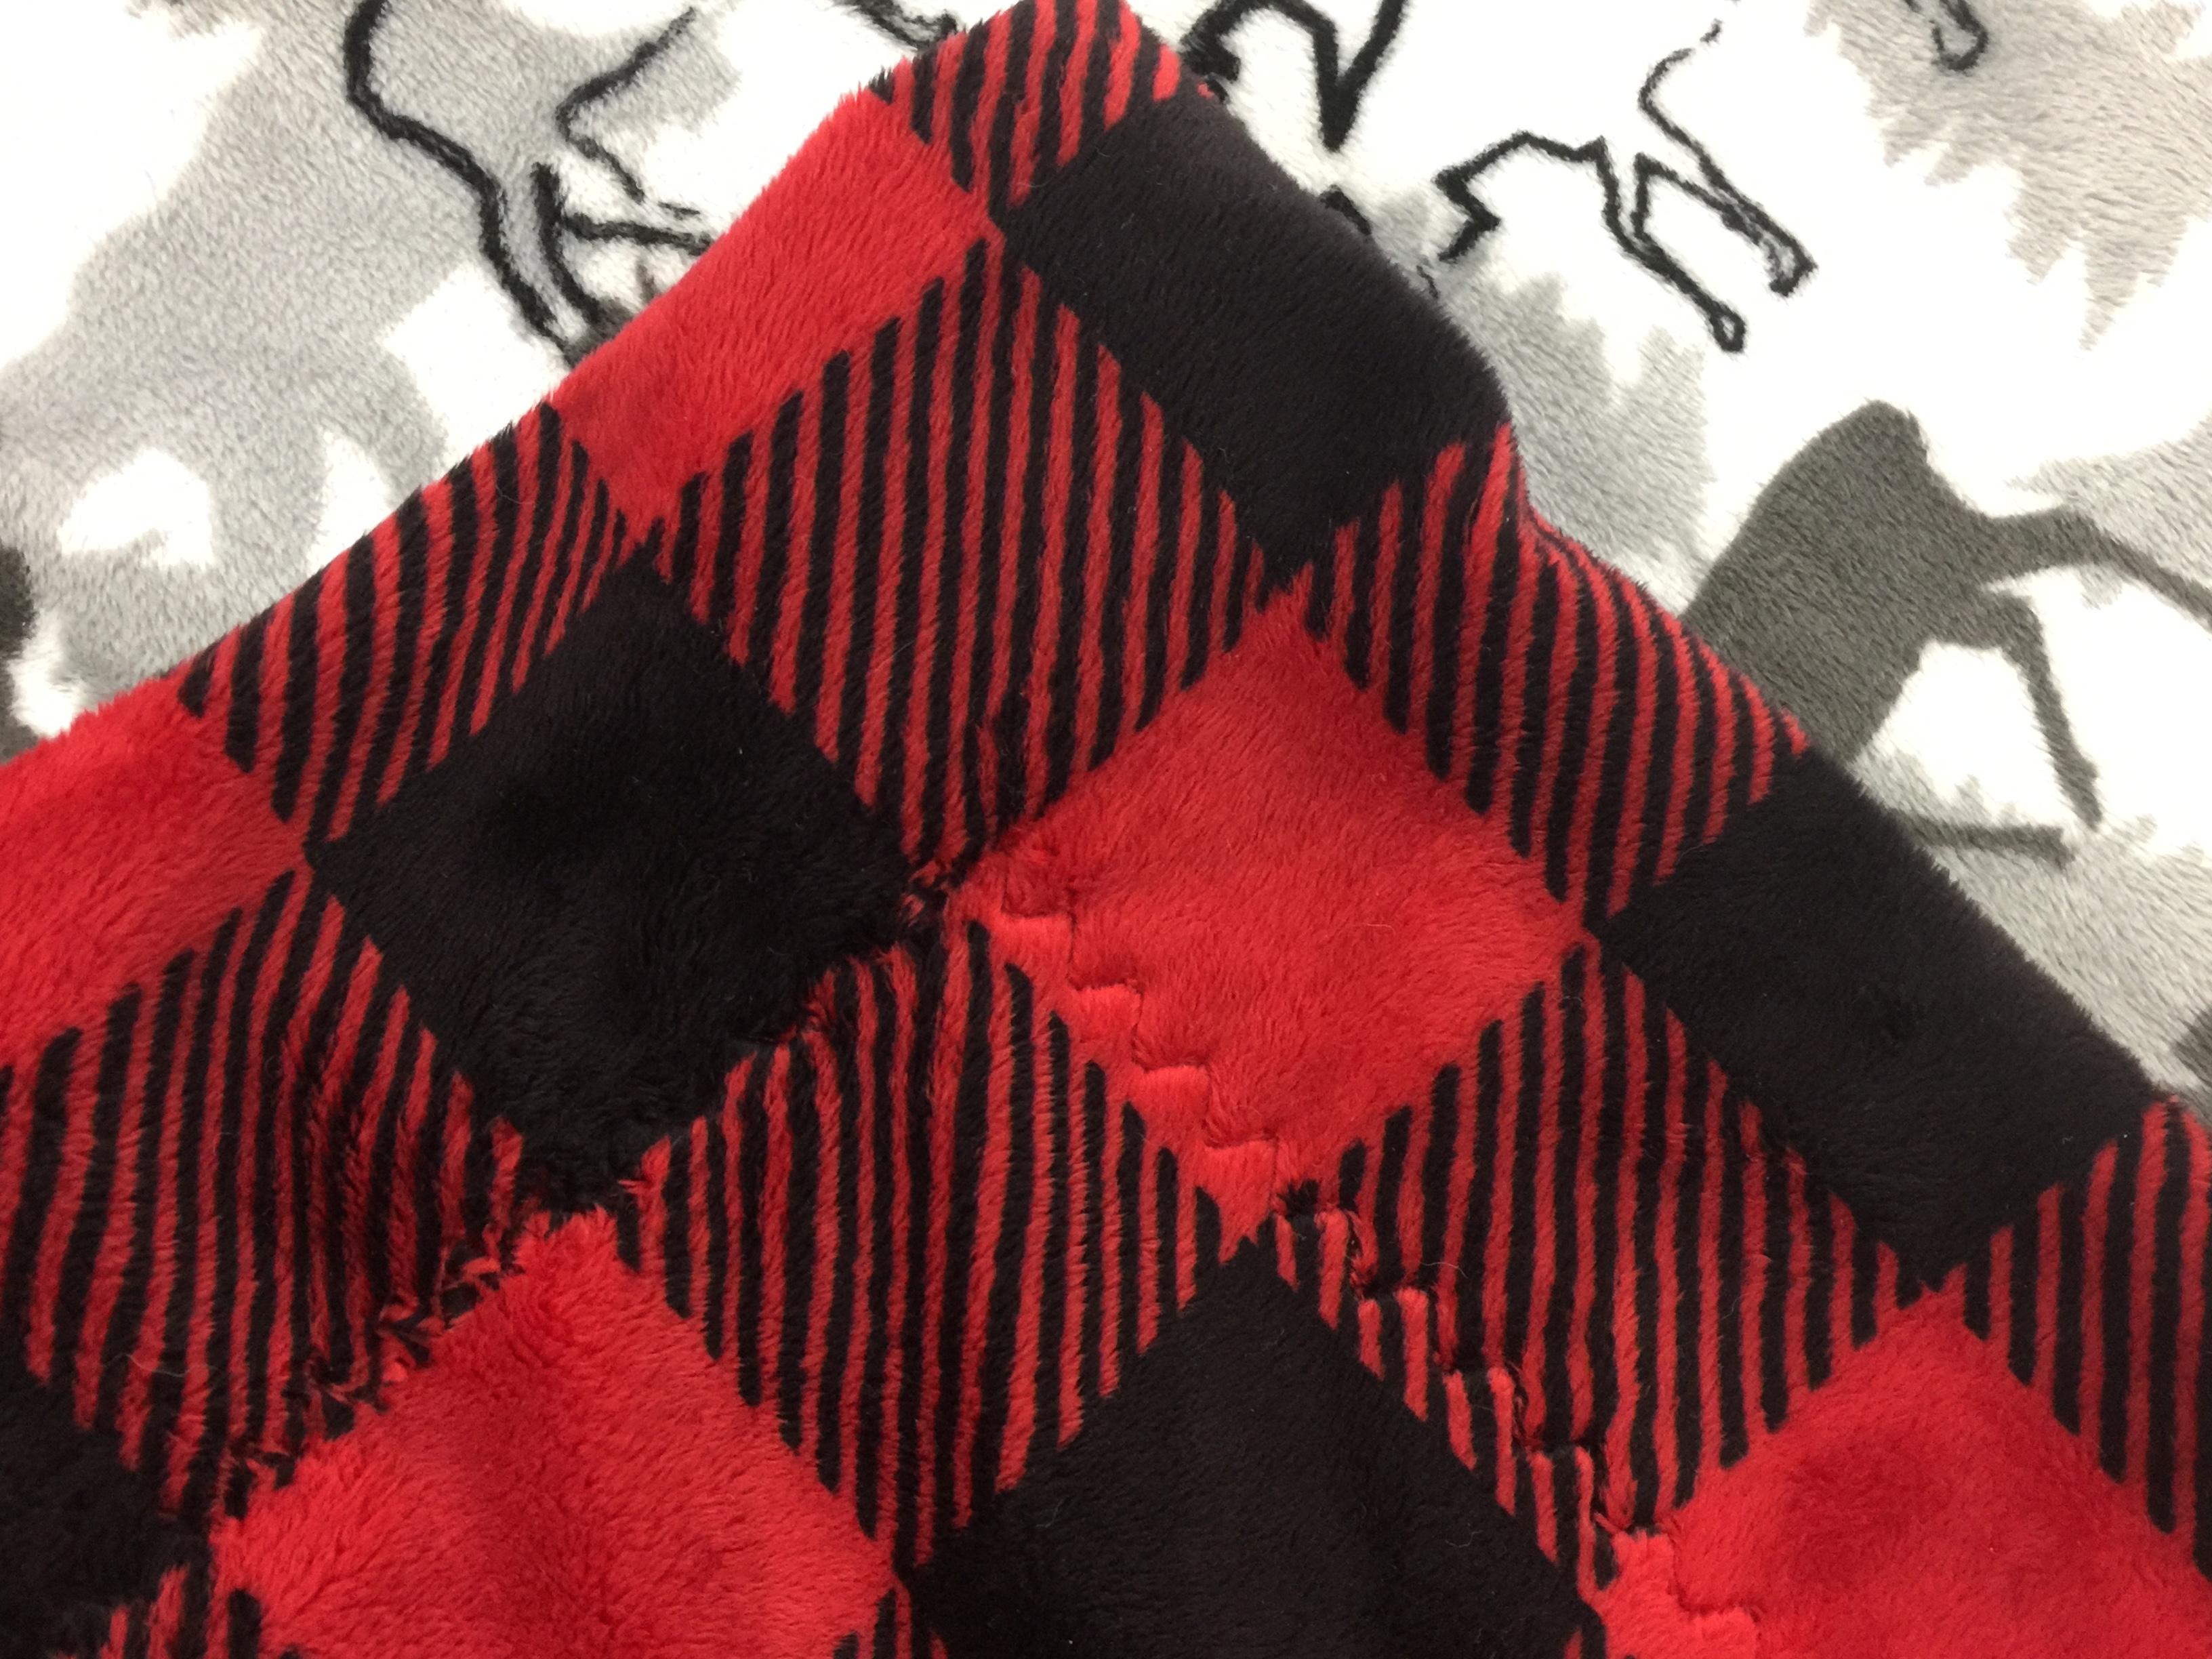
Here’s what the serpentine stitch looks like from the back. I used red thread and you can’t even SEE the red on the black square!

I have been a Janome Fan-Girl for 15+years now.  I am now a Shannon Fan-Girl too! I’m finishing up a winter jacket with more of the buffalo check and a cream cuddle fleece lining, and will share something else that will be a gift for Christmas–perhaps in late November which is plenty of time for you to whip up a few of them in time for holiday giving.  Or keeping.  Ahem!

This is what I expect to look like most evenings in winter: in my chair in the living room, me and pug under the throw, cat checking things out, ready to make a dent in my pile of reading!

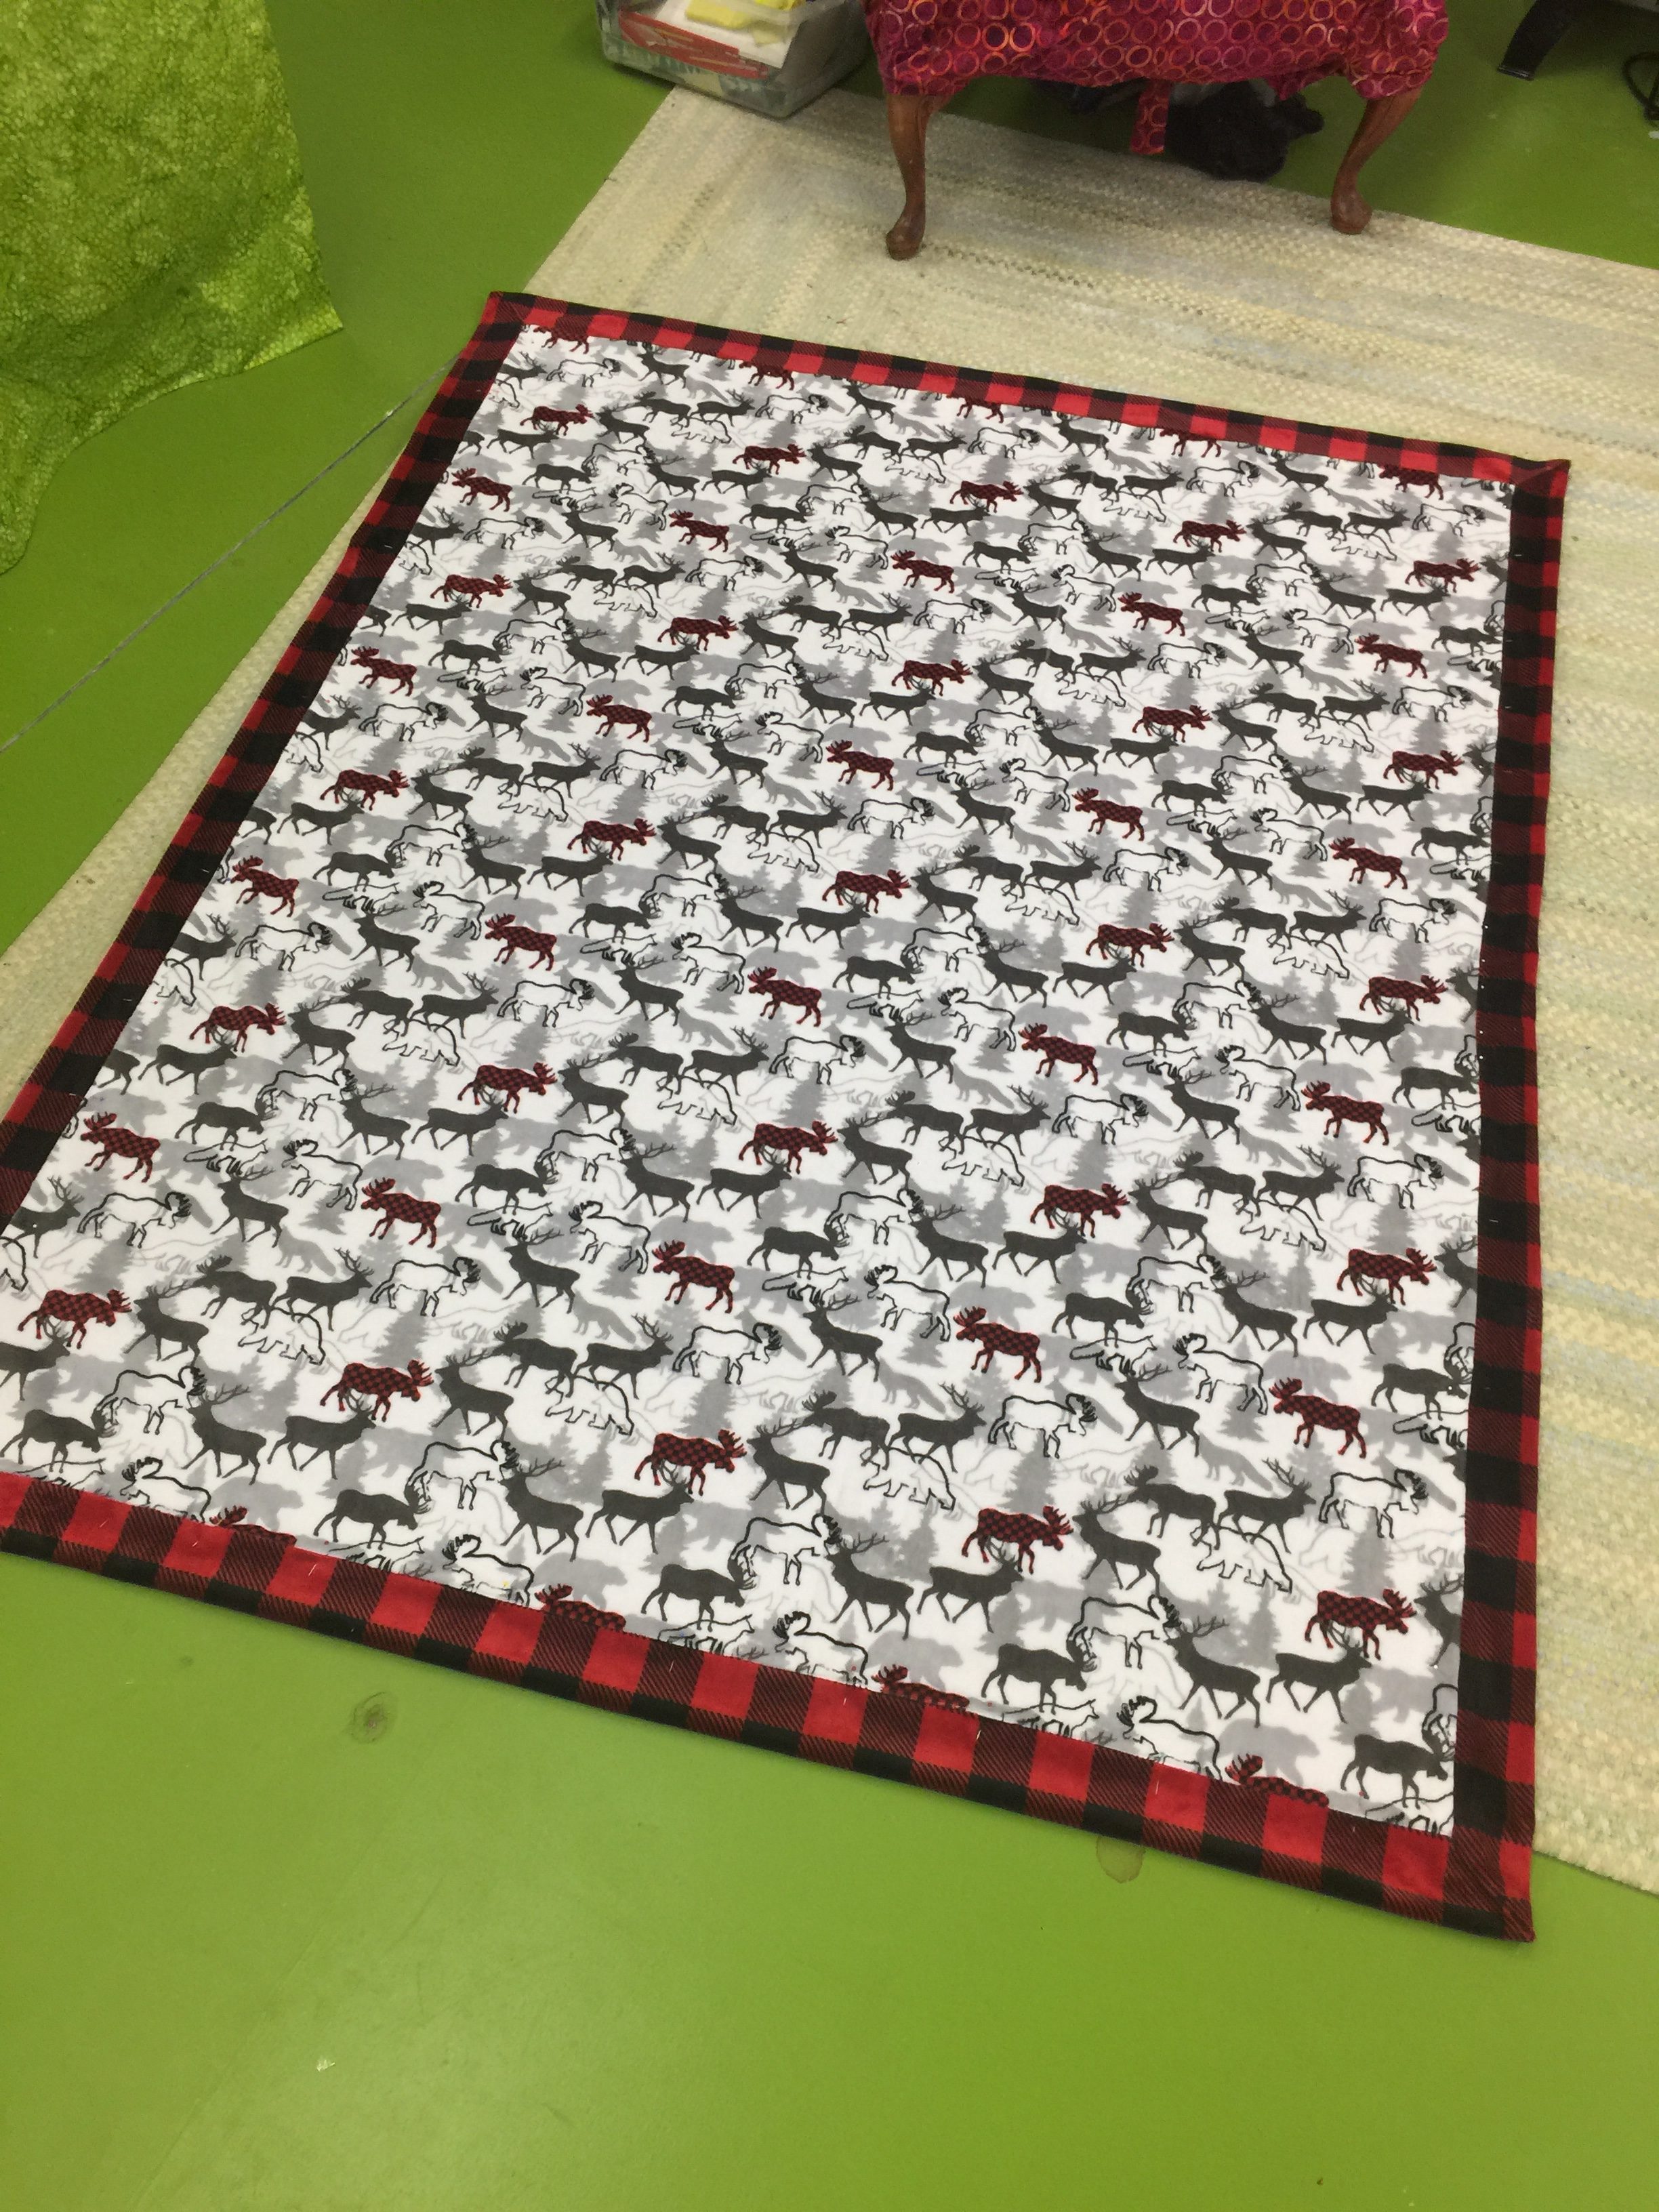
And because it is boring, this photo is last, but it shows the throw out flat.

THANK YOU SHANNON FABRICS for this fabric which I was totally prepared to order!   I have purchased more of their fabrics own my own and know I will be using it again.  If they ever make their “Spa” line in some bold colors (not pastel, not purple) I am so gonna make a bathrobe…..in the meantime, I have more snuggle quilts and gifts to make to keep me plenty busy.  And as always, Thank You Janome America for making the best machines EVER!

laid out flat on my studio floor (cement painted green!)…big, warm, SOFT. And did I mention, SOFT!