email Youtube

Home
Galleries
Blog
Workshops & Calendar
Store
Resources
About
Contact

Archive for the ‘Uncategorized’ Category

Plaid Top Tutorial: Lesson 7-Hong Kong Finish Seams
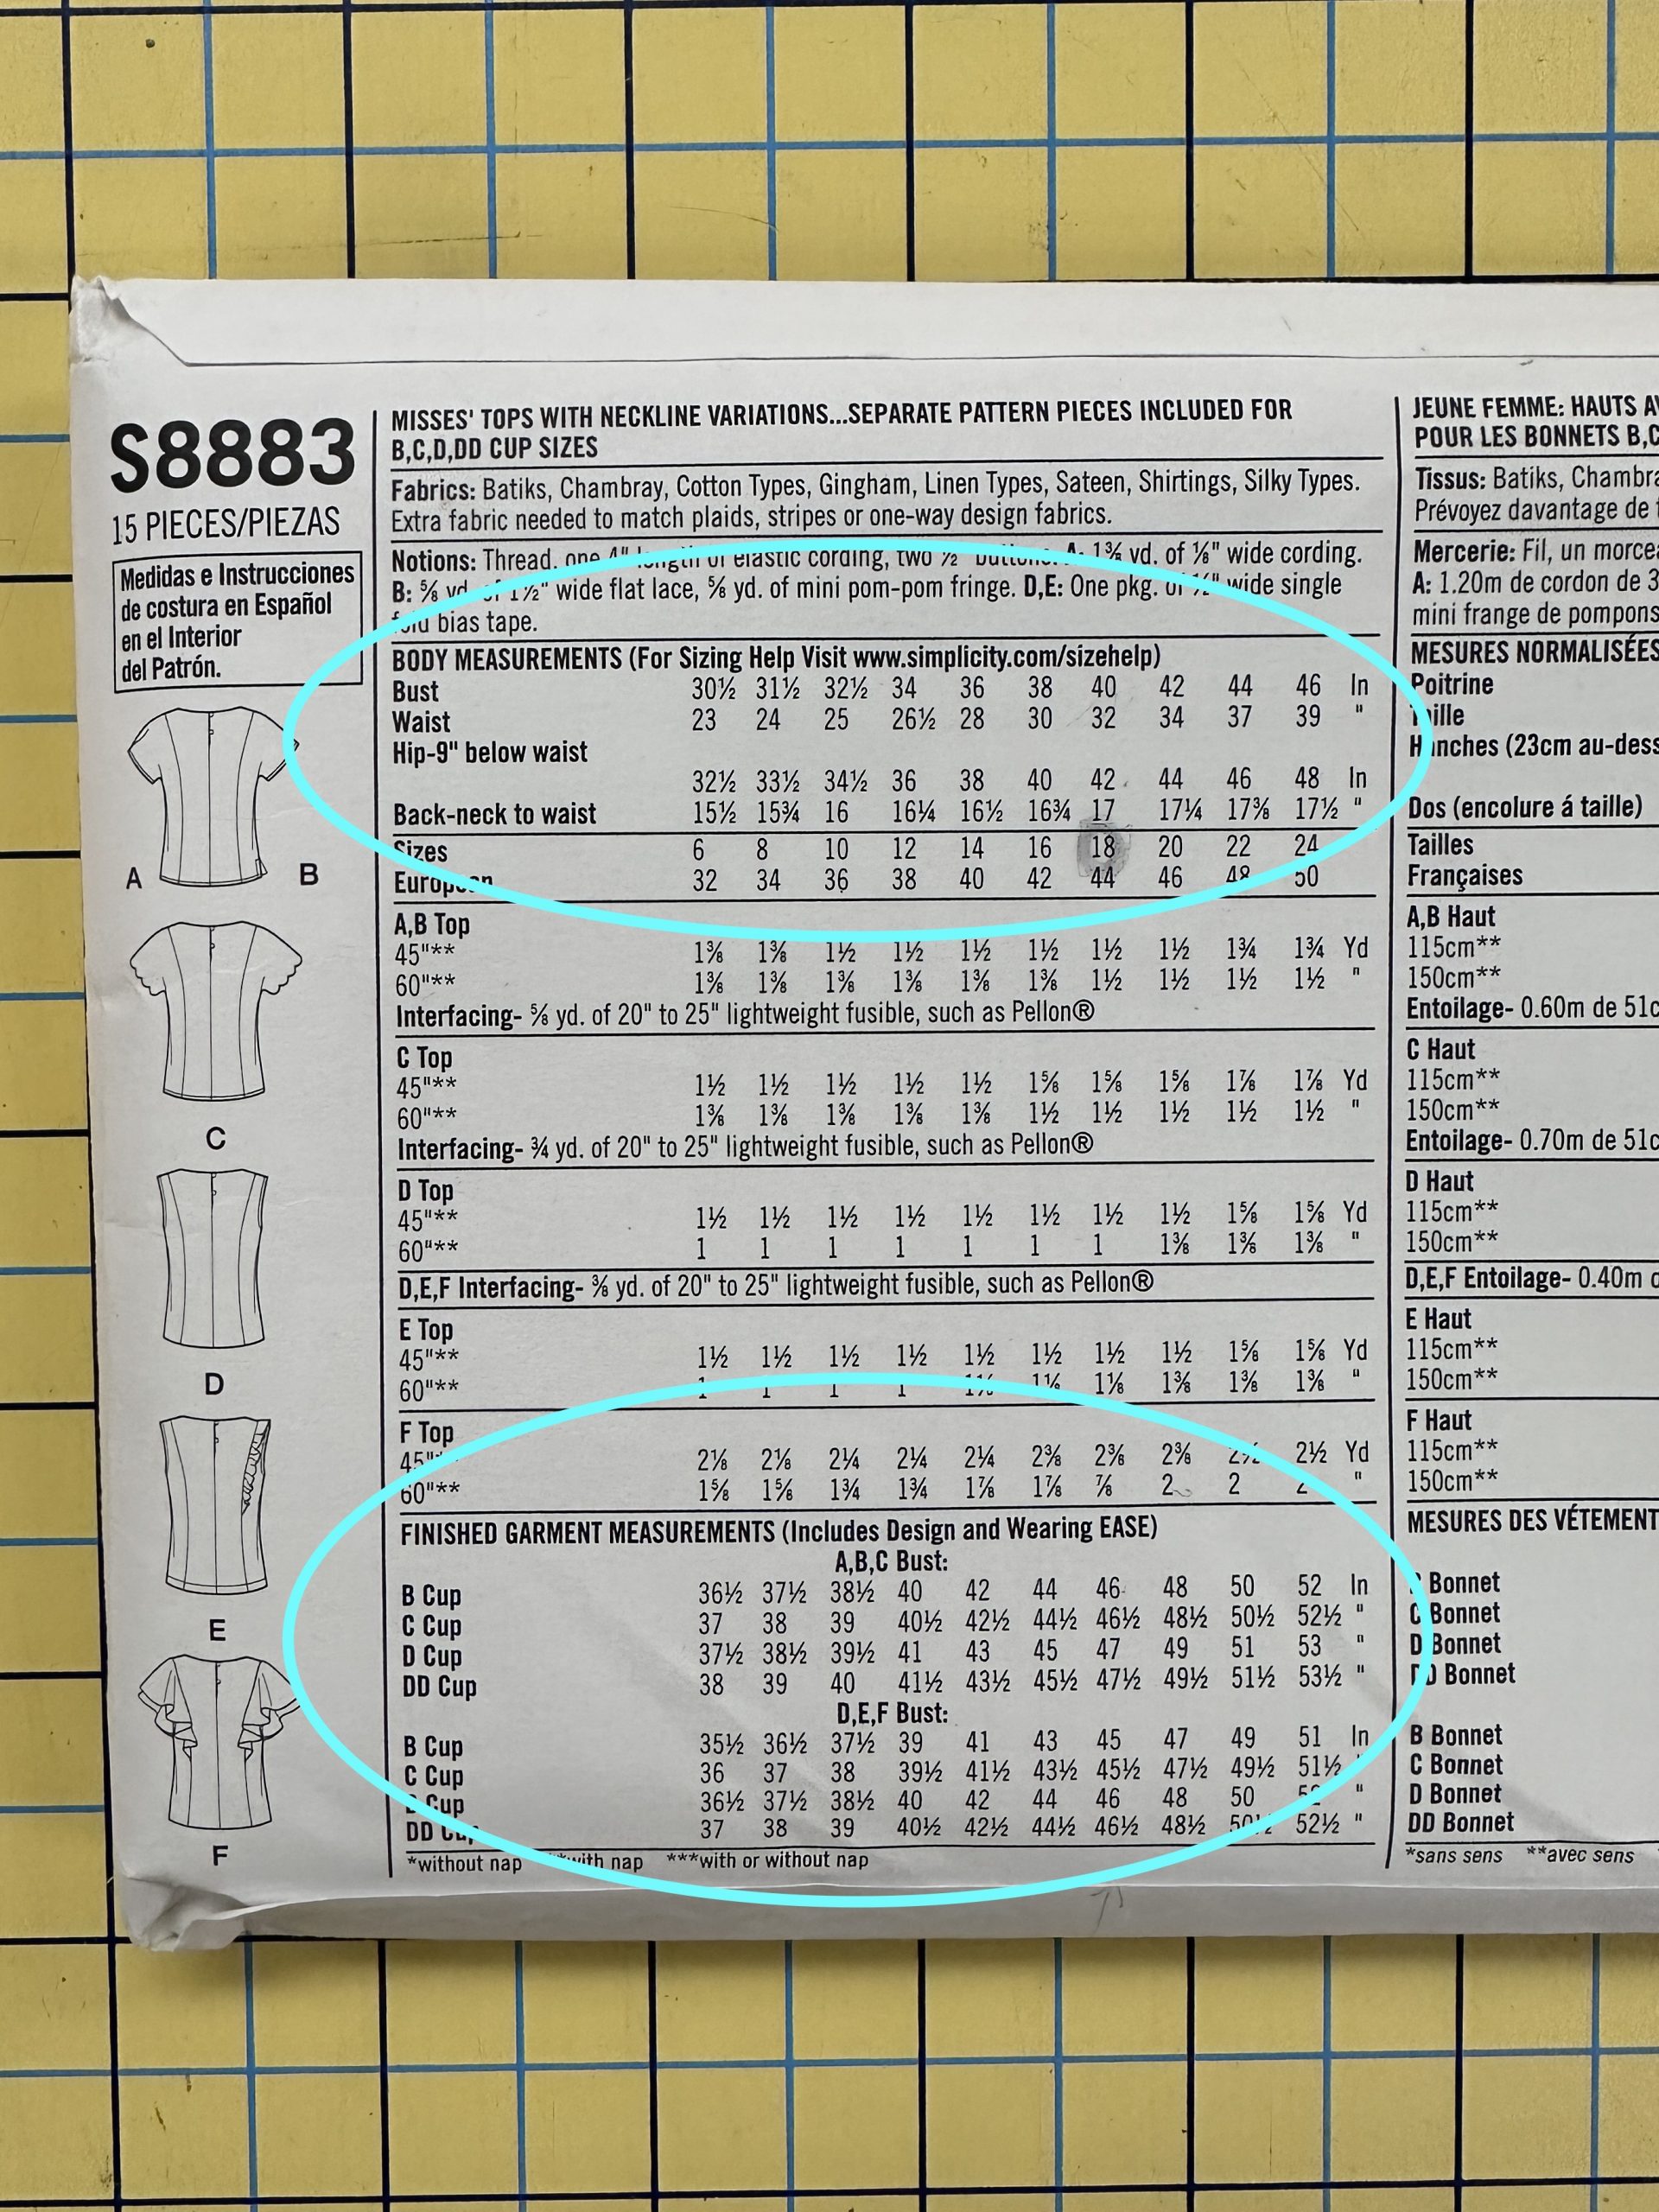
Friday, March 10th, 2023

Hong Kong seams are a thing of beauty–a little extra work but a secret delight!  So even though I didn’t use them in this plaid top, I’m including them with all the seam lessons in this series of technique posts.  I did use them on both my Simplicity S8883  top, full blogpost here, and the Brumby Skirt.   I also used this finish on a jacket I made for my daughter-in-law some years ago that I swear I wish she could wear inside out LOL!

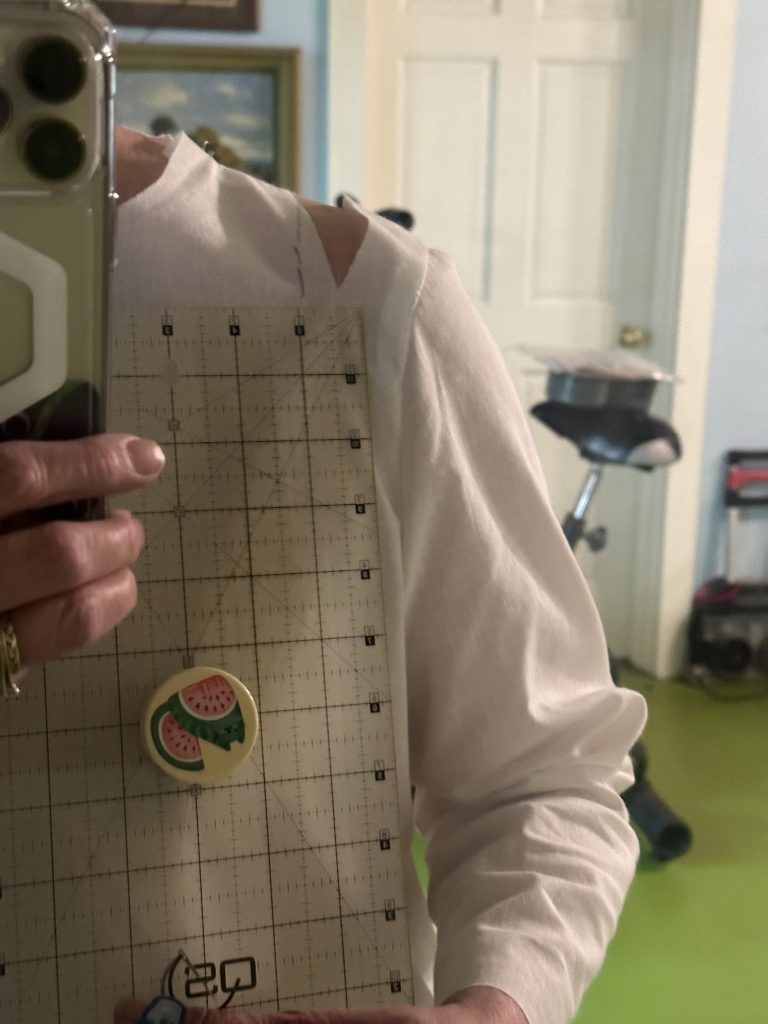
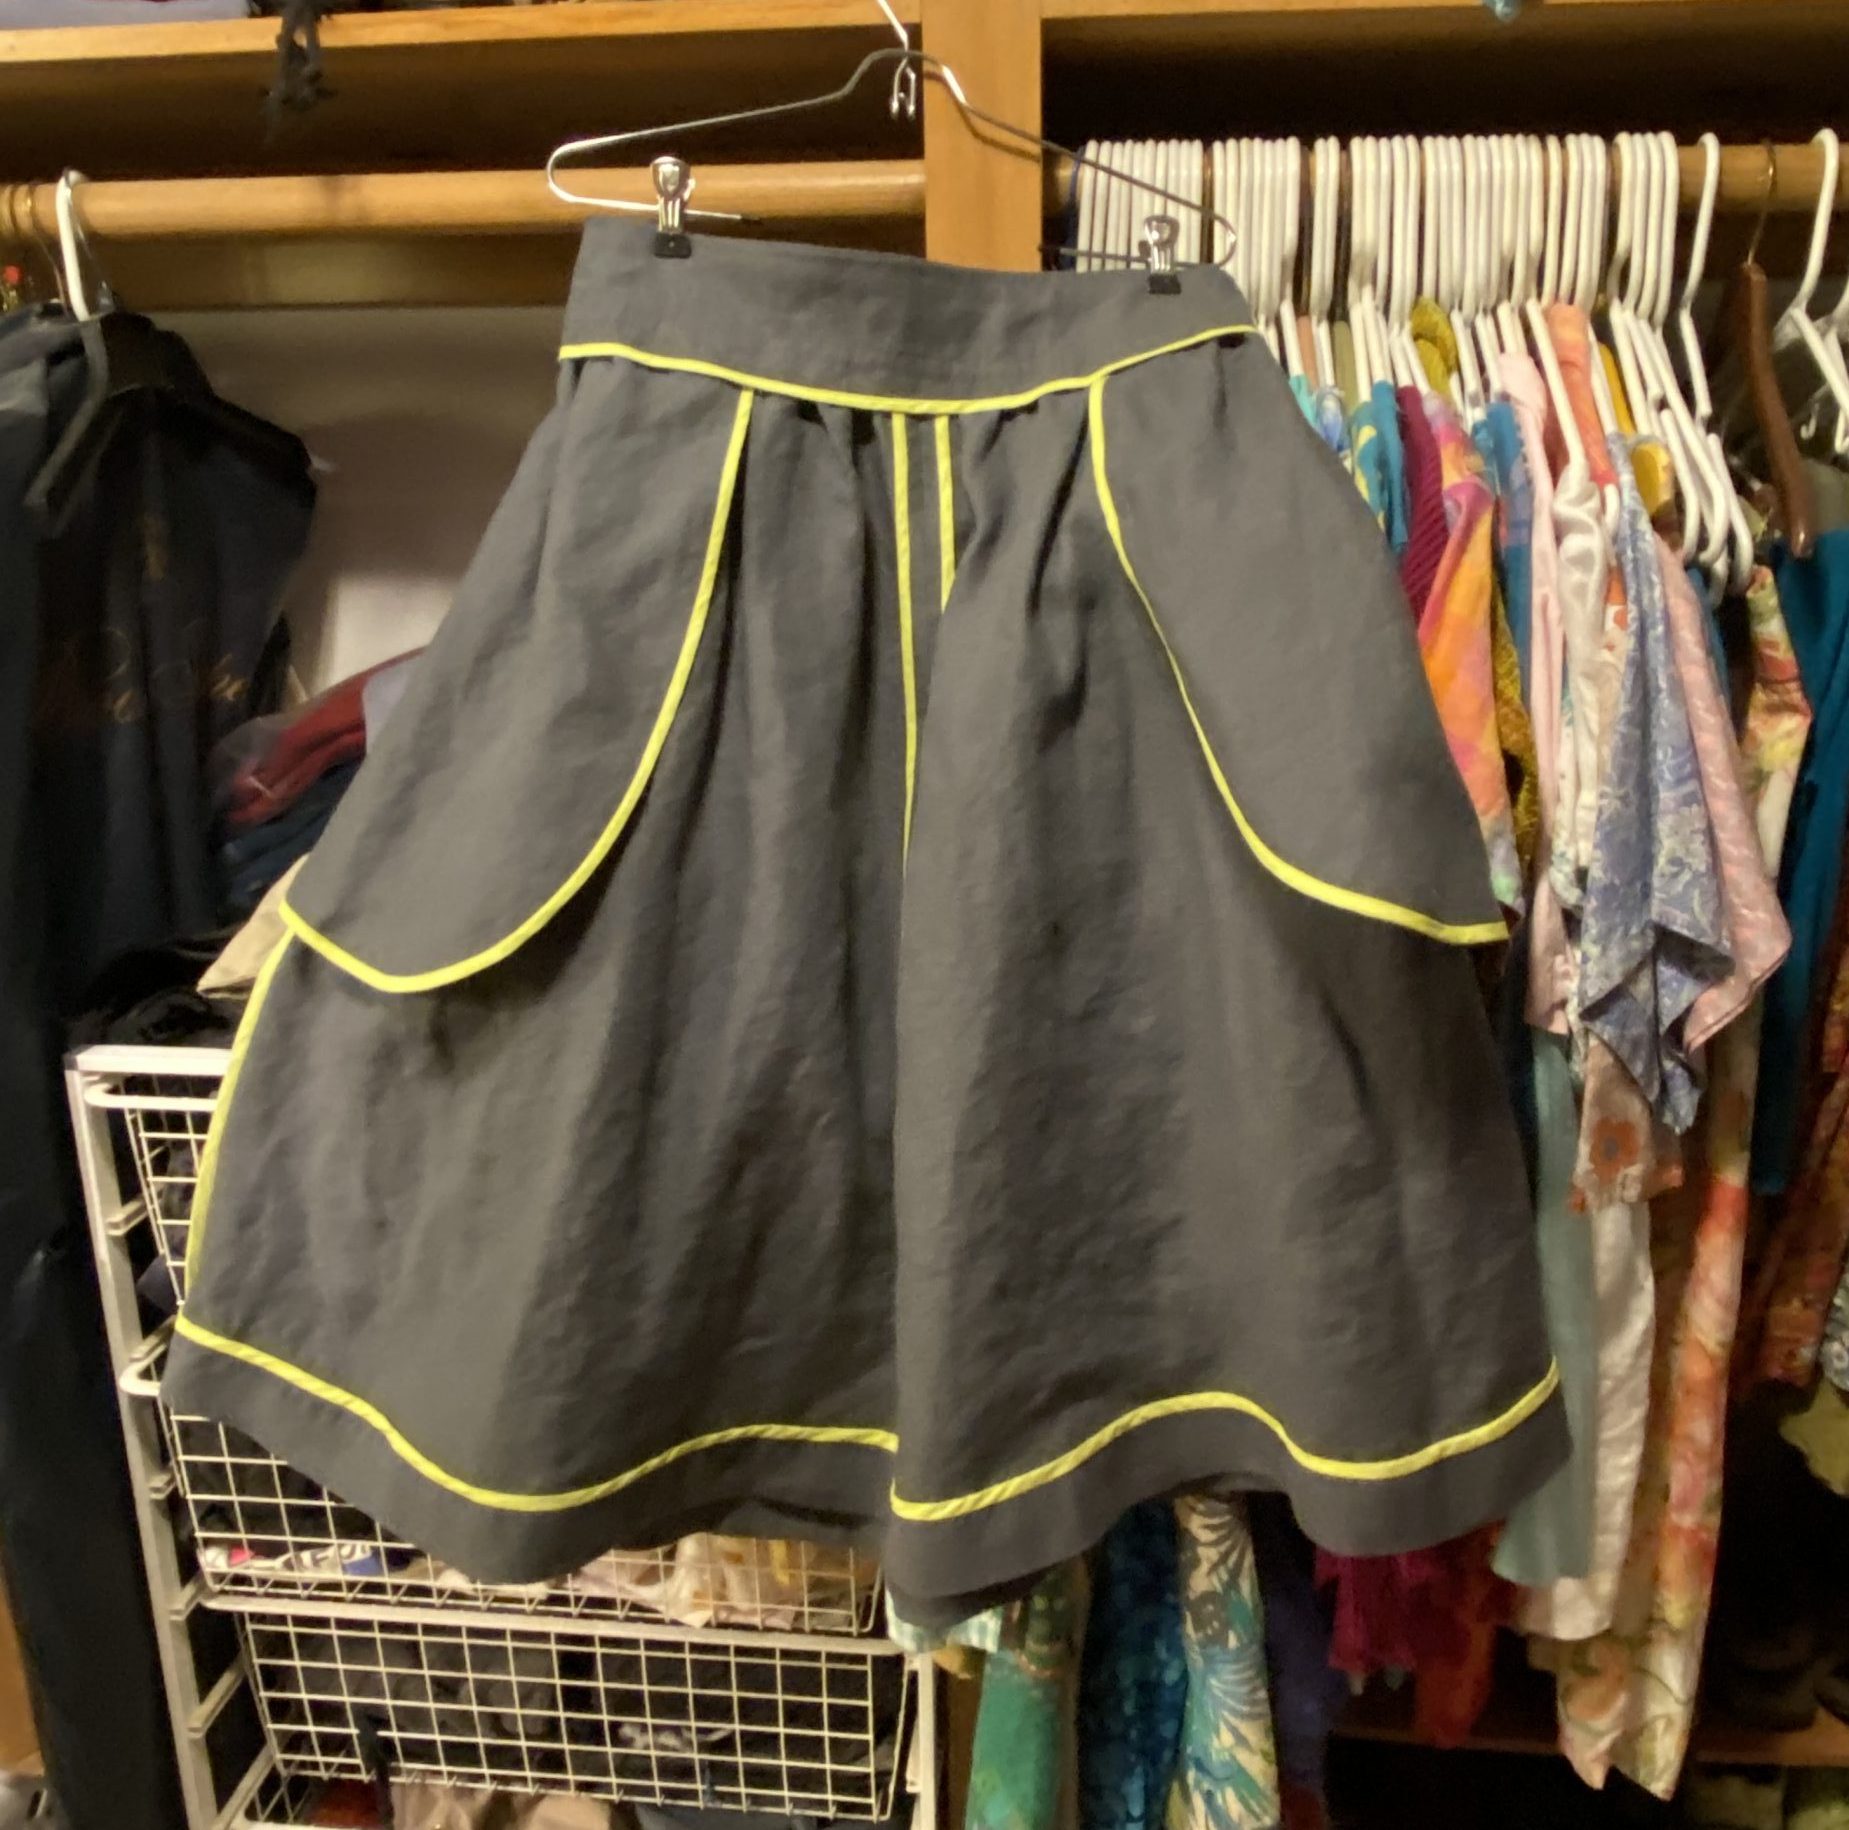
That lime green on the shoulder and princess seams is a Hong Kong finish.

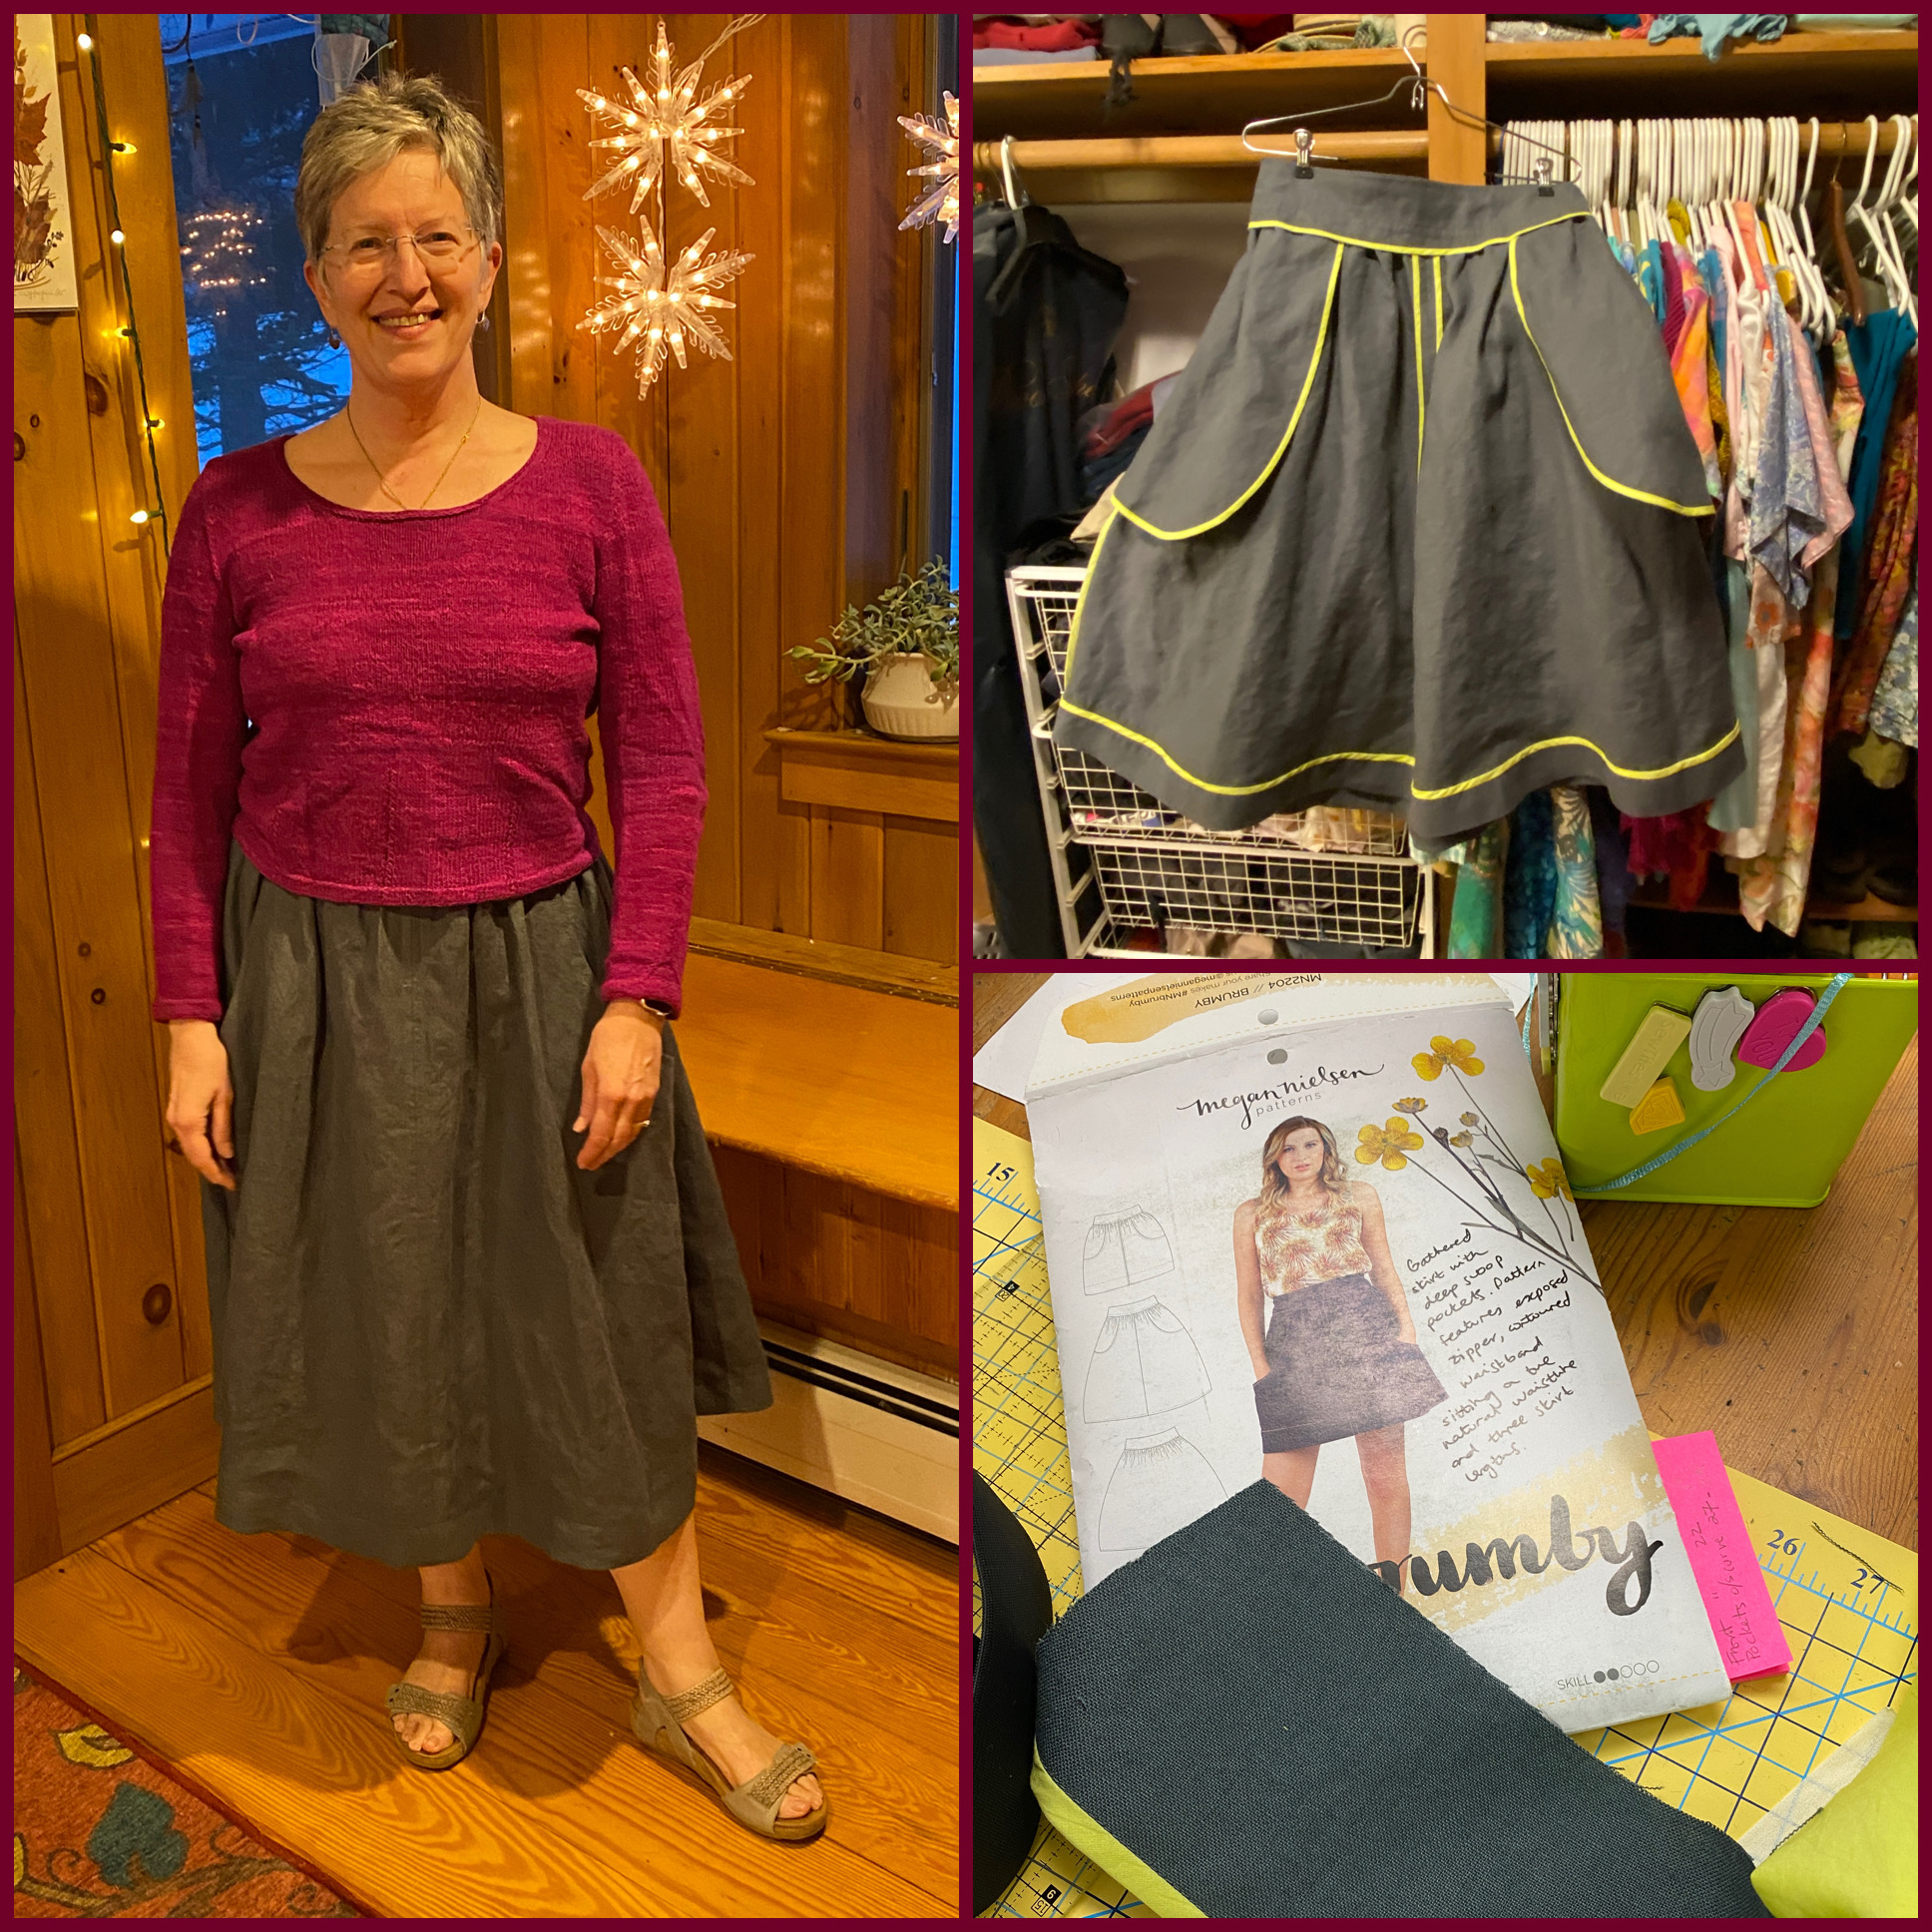
And the Brumby Skirt from Megan Nielsen, inside out! Same lime green (I bought several yards of it, a cotton lawn) for Hong Kong finishes. Such a pretty Pop!

Please note:  I am affiliated with Janome as a Janome Artisan and am compensated.  However, my reviews are honest and I would say what I say whether affiliated or not.  I’ve also chosen to be affiliated with Janome since 2003 (!!!) because their machines are so good and they are so responsive to the interests and needs of their customers.


And here is one of my all time favorite in my life insides of a garment, the jacket for Ashley:

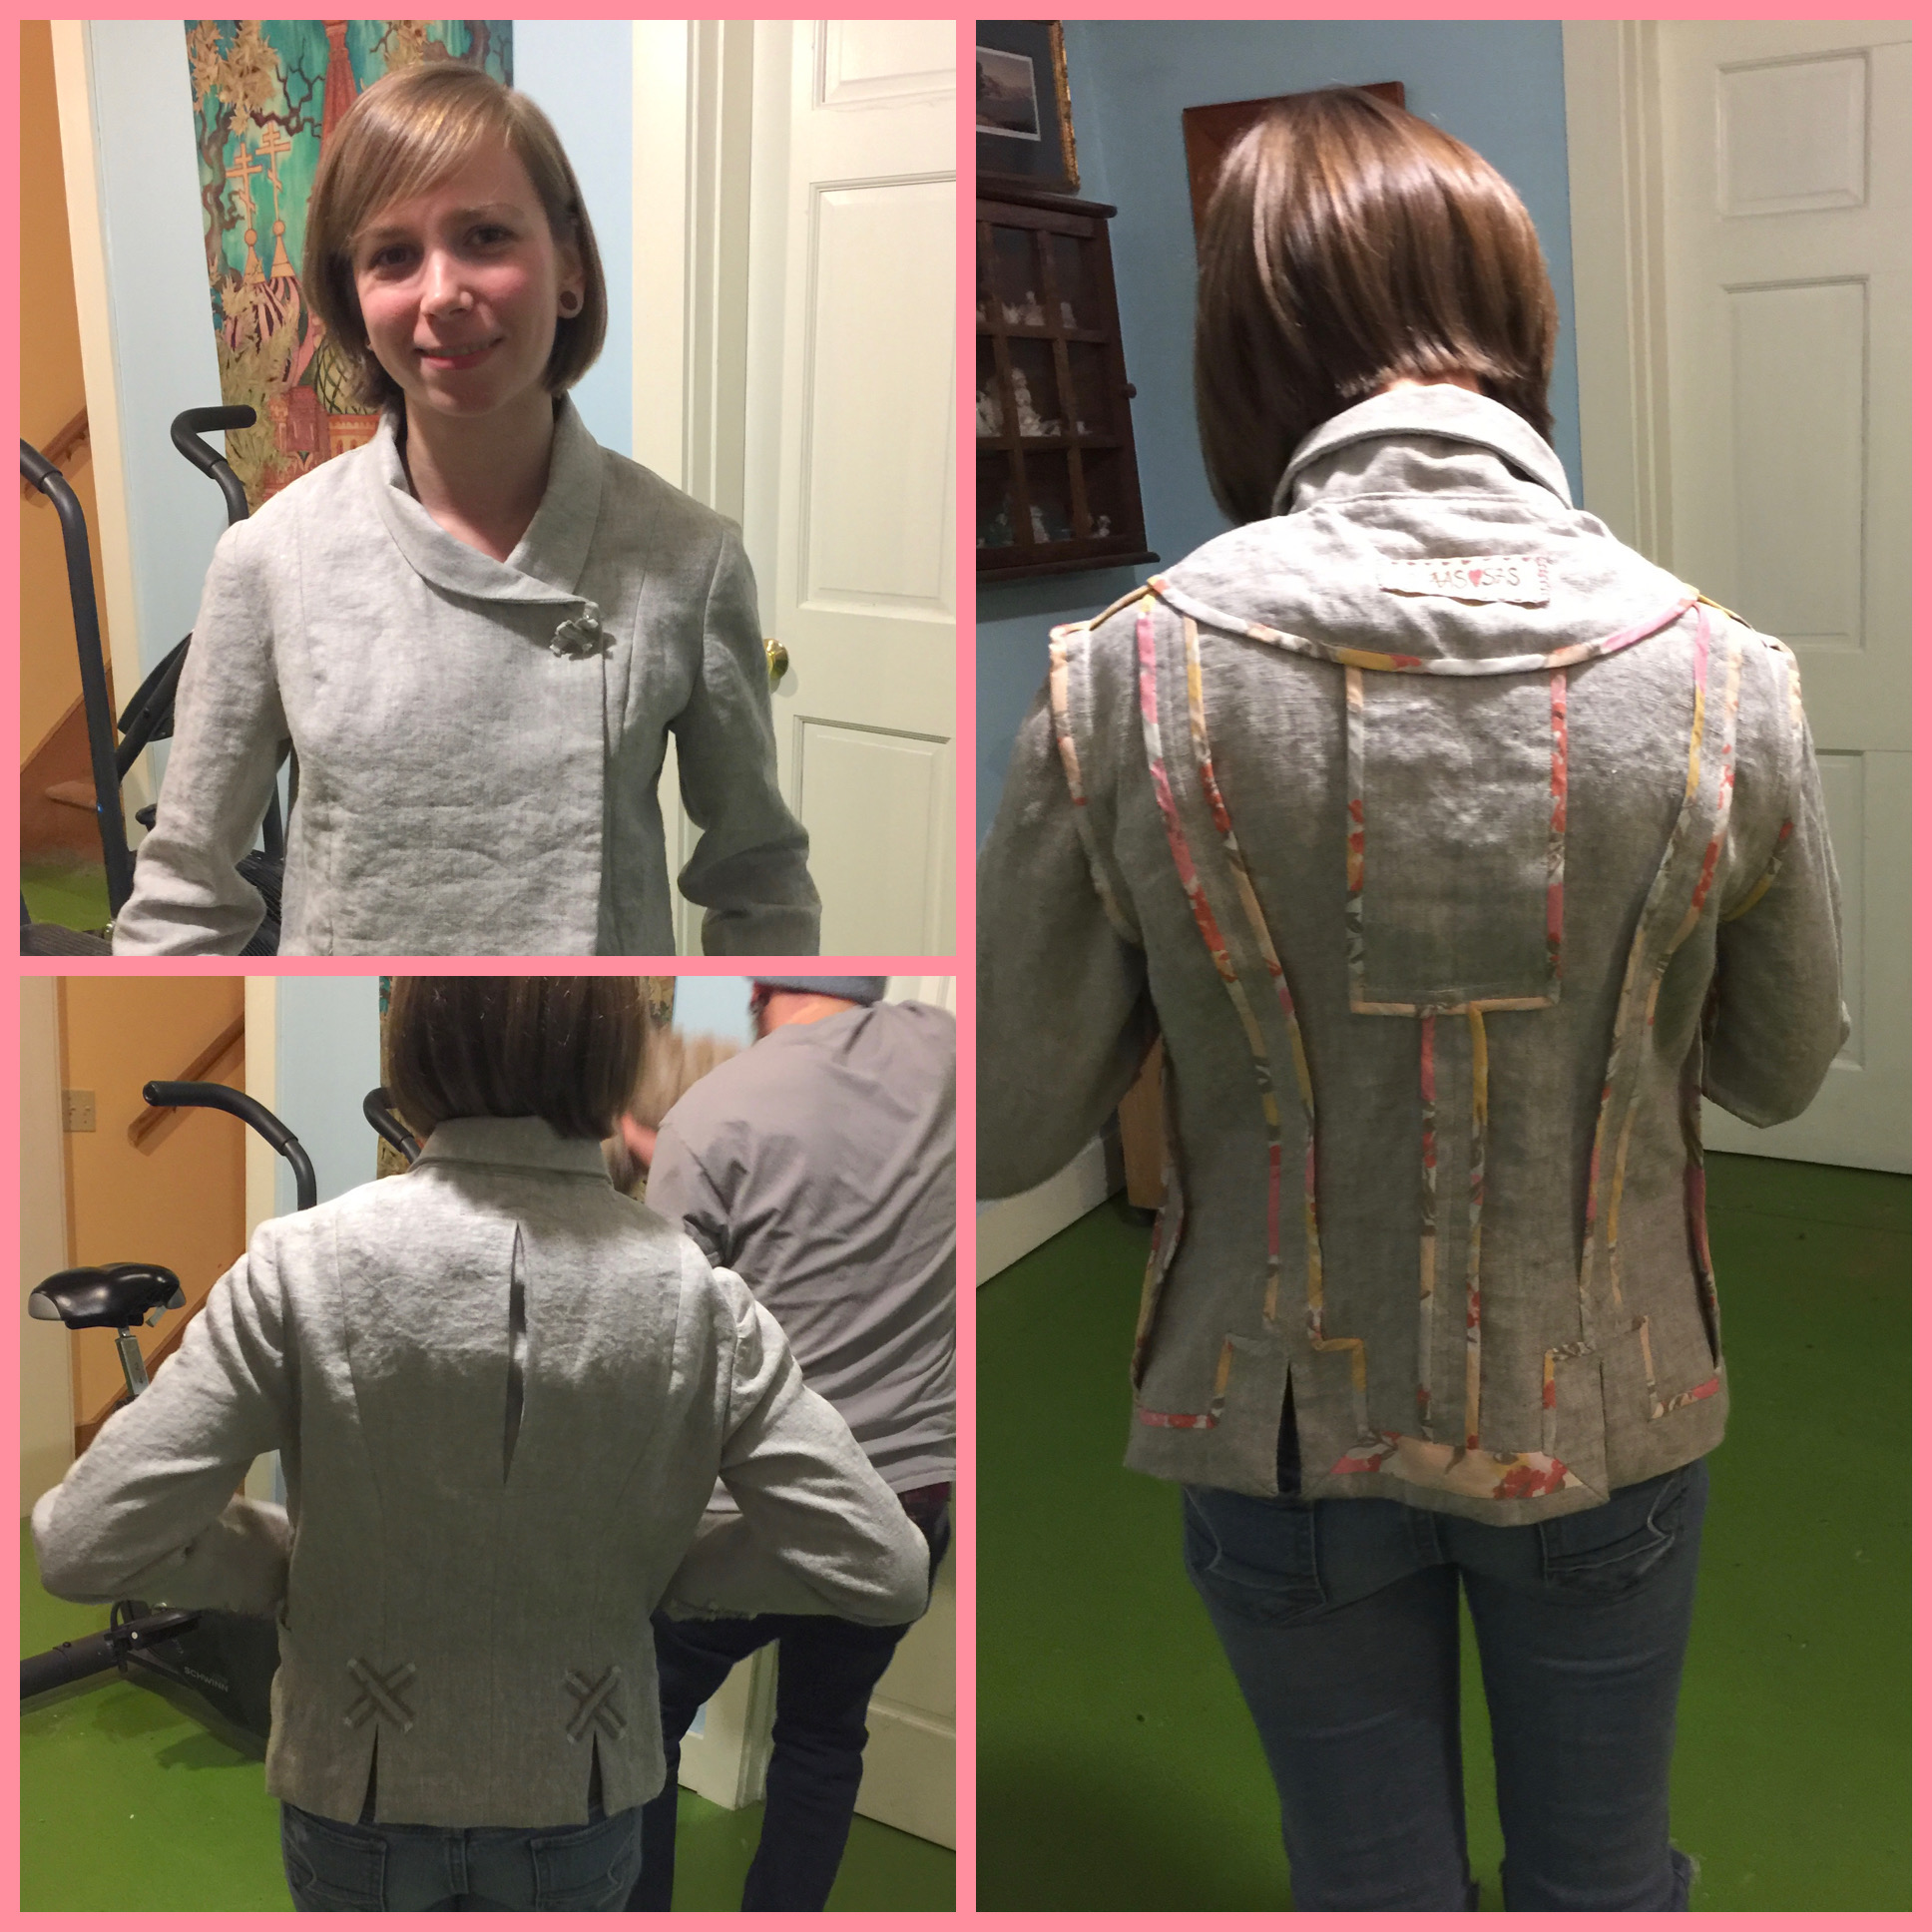
Top left:  front.  Bottom left, back.  Right side:  all those beautifully finished seams.  I had gone looking for a lightweight fabric and found the print and thought Oh YES!  This is a heavily modified pattern…changed it from hip length single breasted to double breasted jacket, Peter Pan collar changed to roll collar, added vents at the bottom rear, a box pleat for movement / ease in the center back…you get the picture.

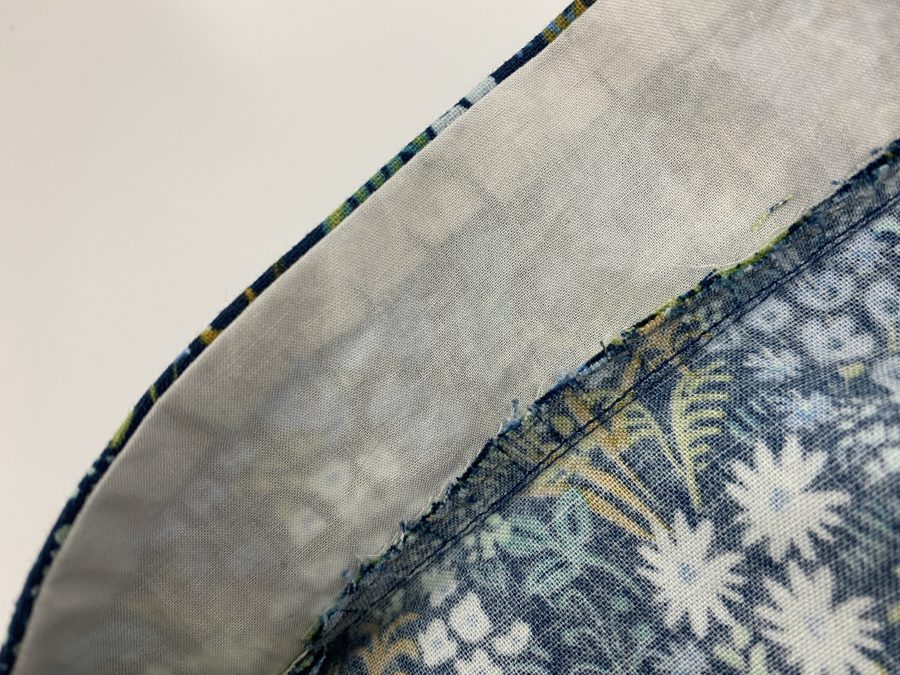
But aren’t these seams pretty?????   So here is how you do it.  This process is VERY similar to putting a binding on a quilt for those of you who know how to do that, except that the back side–the one between the seam allowance and the body of the garment, is a raw edge and is not turned under.  This minimizes bulk. Because it is cut on the bias it doesn’t pose a fraying problem!

    1. We will assume a 5/8″ seam allowance.

    2. To cover 1/4″ on the side of the seam allowance that you see, you will cut a strip on the bias that is about 1″ wide.

    3.  Choose a very lightweight fabric that is not bulky.  Cotton lawn is an excellent choice — it is significantly lighter in weight than quilting cottons, handles well, and is soft against the skin.  You can choose to match colors or, as I did, pick something zingy and pretty! You could also use a super soft jersey knit, and decades ago they used to sell nylon tricot (ick!  felt like plastic) in strips for just this purpose. For garments that won’t be laundered you could also use a fine silk. ***Be sure to pre-shrink / pre-wash any fabric just as you did with your main garment fabric.  You don’t want it to shrink after you’ve completed the garment and have it distort things.

4. Sew the bias to the seam allowance with a 1/4″ seam allowance.  Be careful not to stretch the bias strip.  Trim the ends even with the end of the seam.  If part of the seam will be covered by a hem, and therefore enclosed, you only need to extend the finish to the point where the bottom 1/4 – 1/2 inch will be covered.

5. Press the bias away from the seam.

6. Gently fold the bias around the seam allowance so it snugs up against the raw edge.  Pin or glue-stick in place.

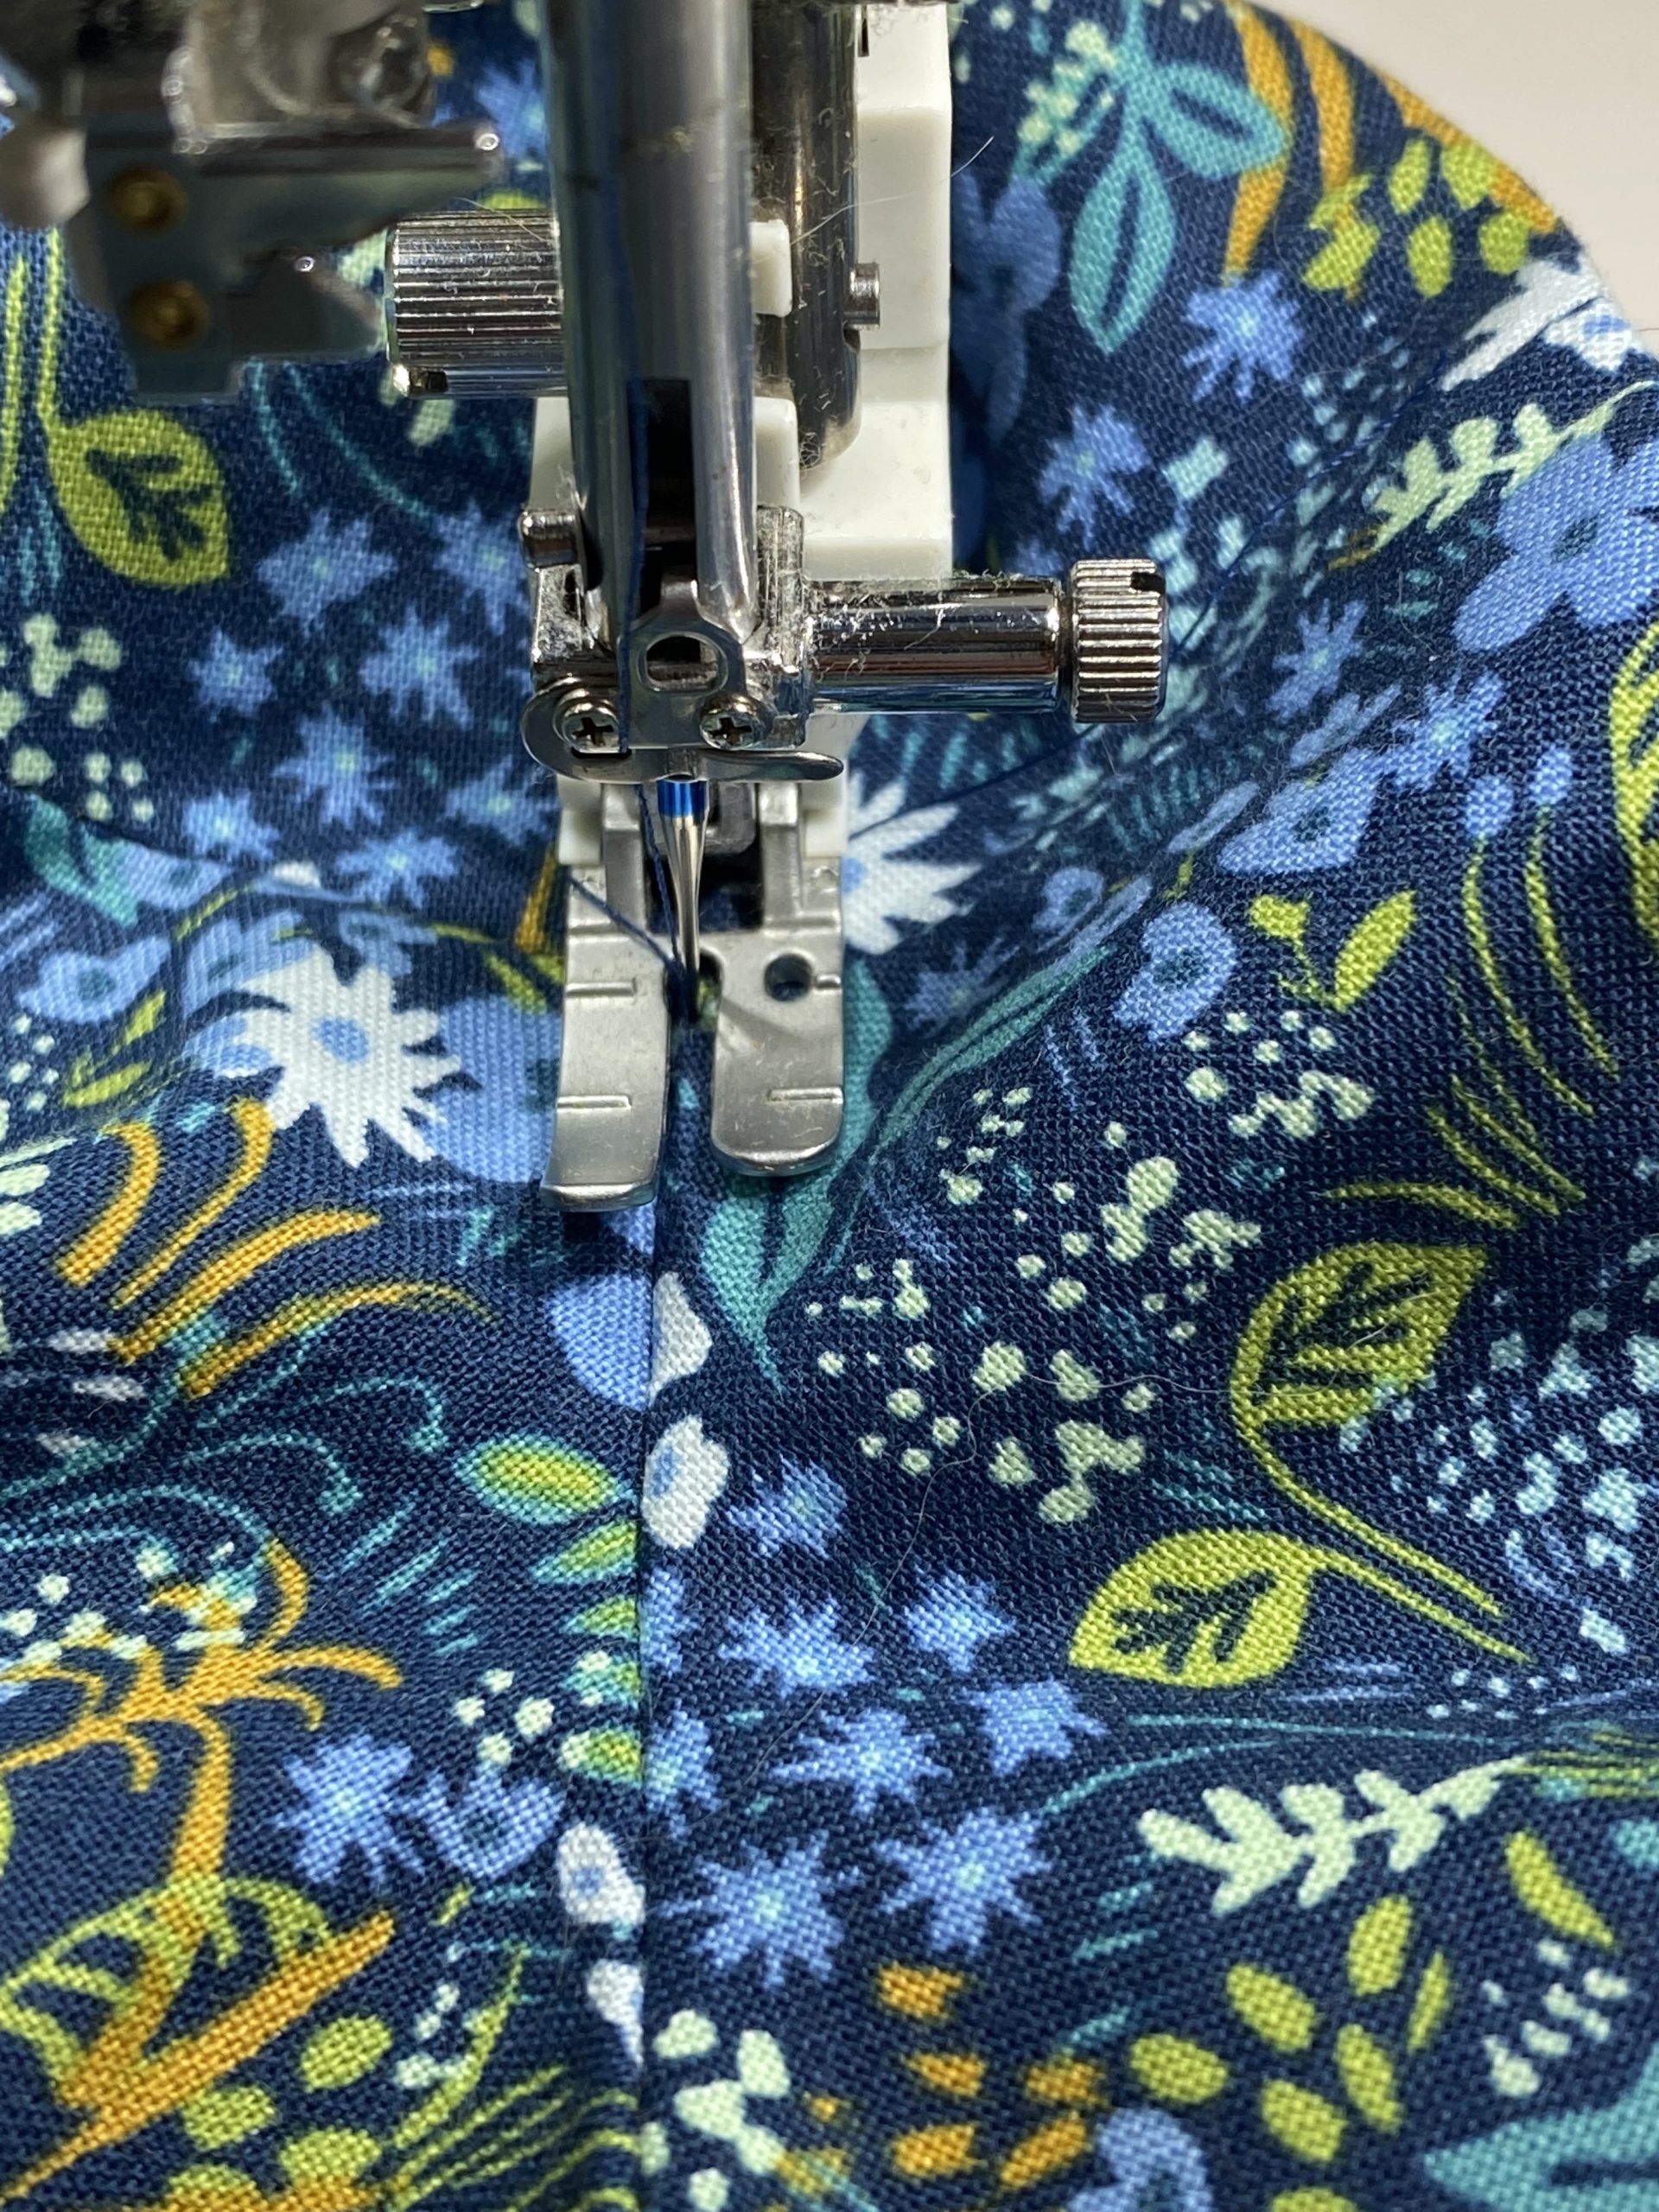
7. Stitch in the ditch with a thread to match the fashion fabric to secure the finish.  If you have cut your strips at 1″, about a scant 1/4″ will extend from the ditch-stitching towards the seam.  You can leave it or trim it down to 1/8″.

8. Press, and stand back and enjoy the beauty.

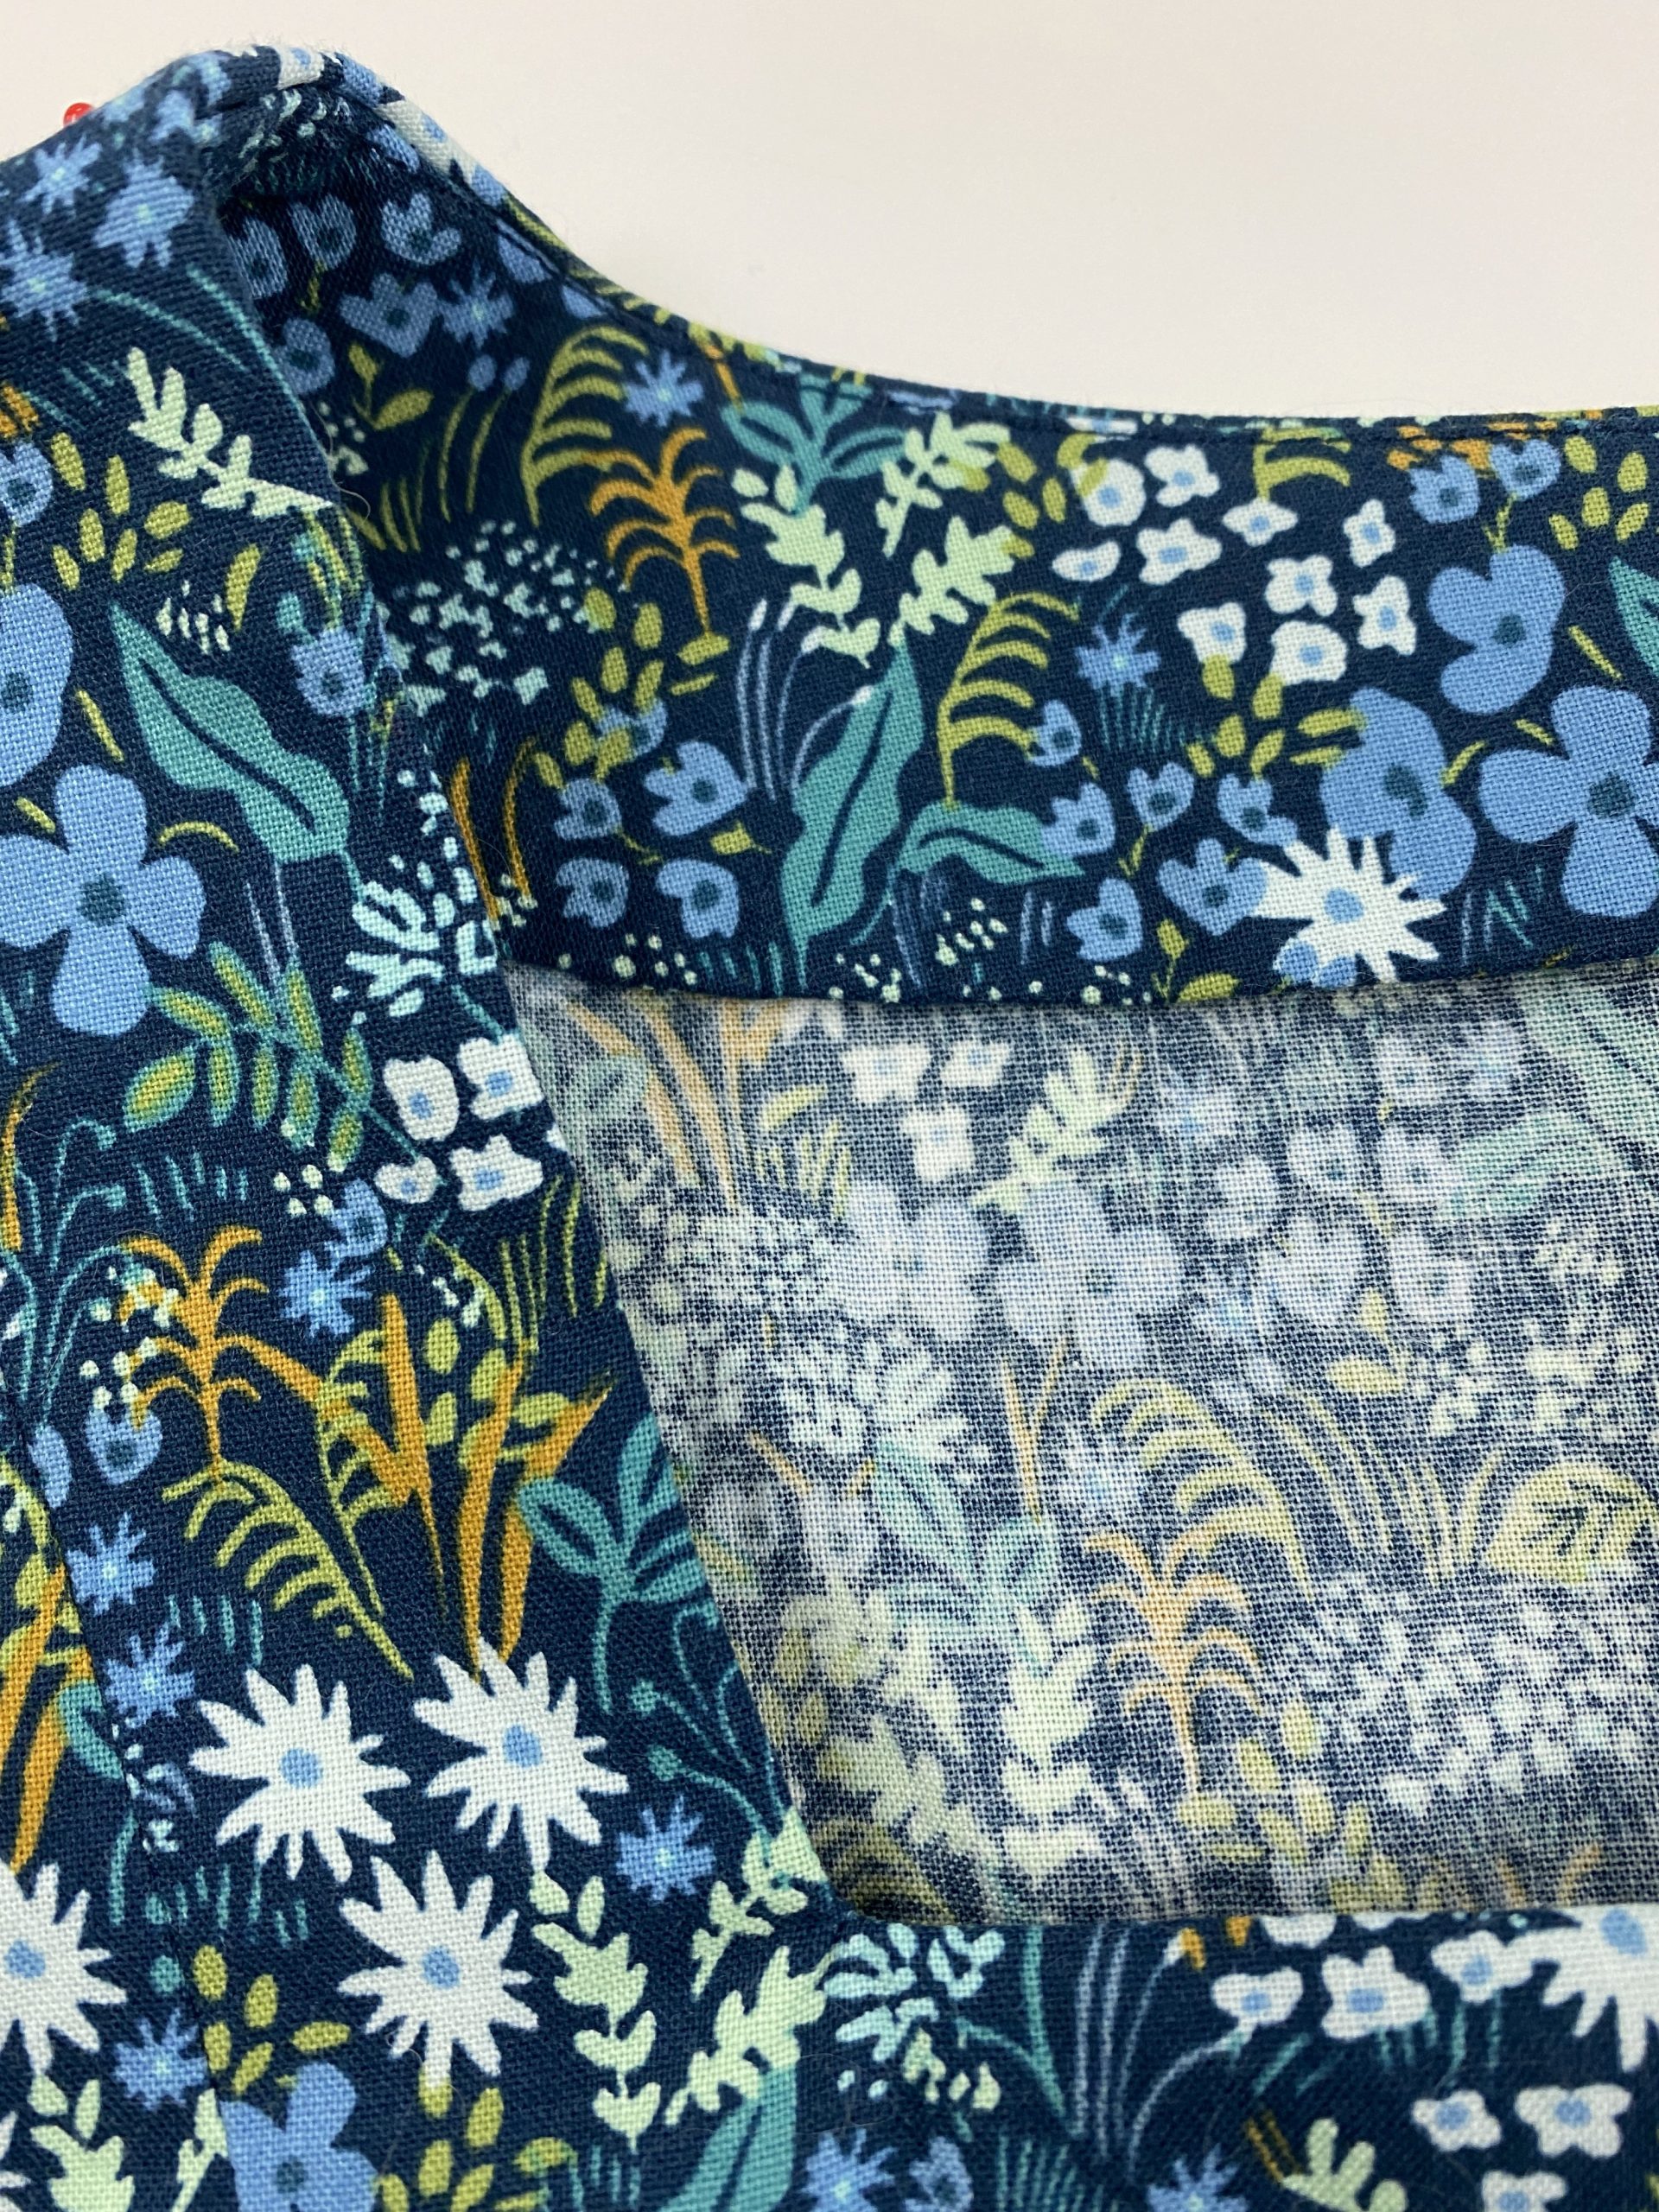
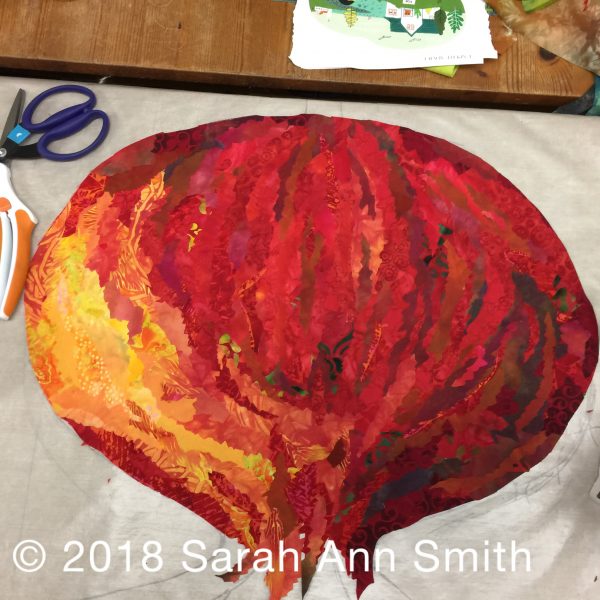
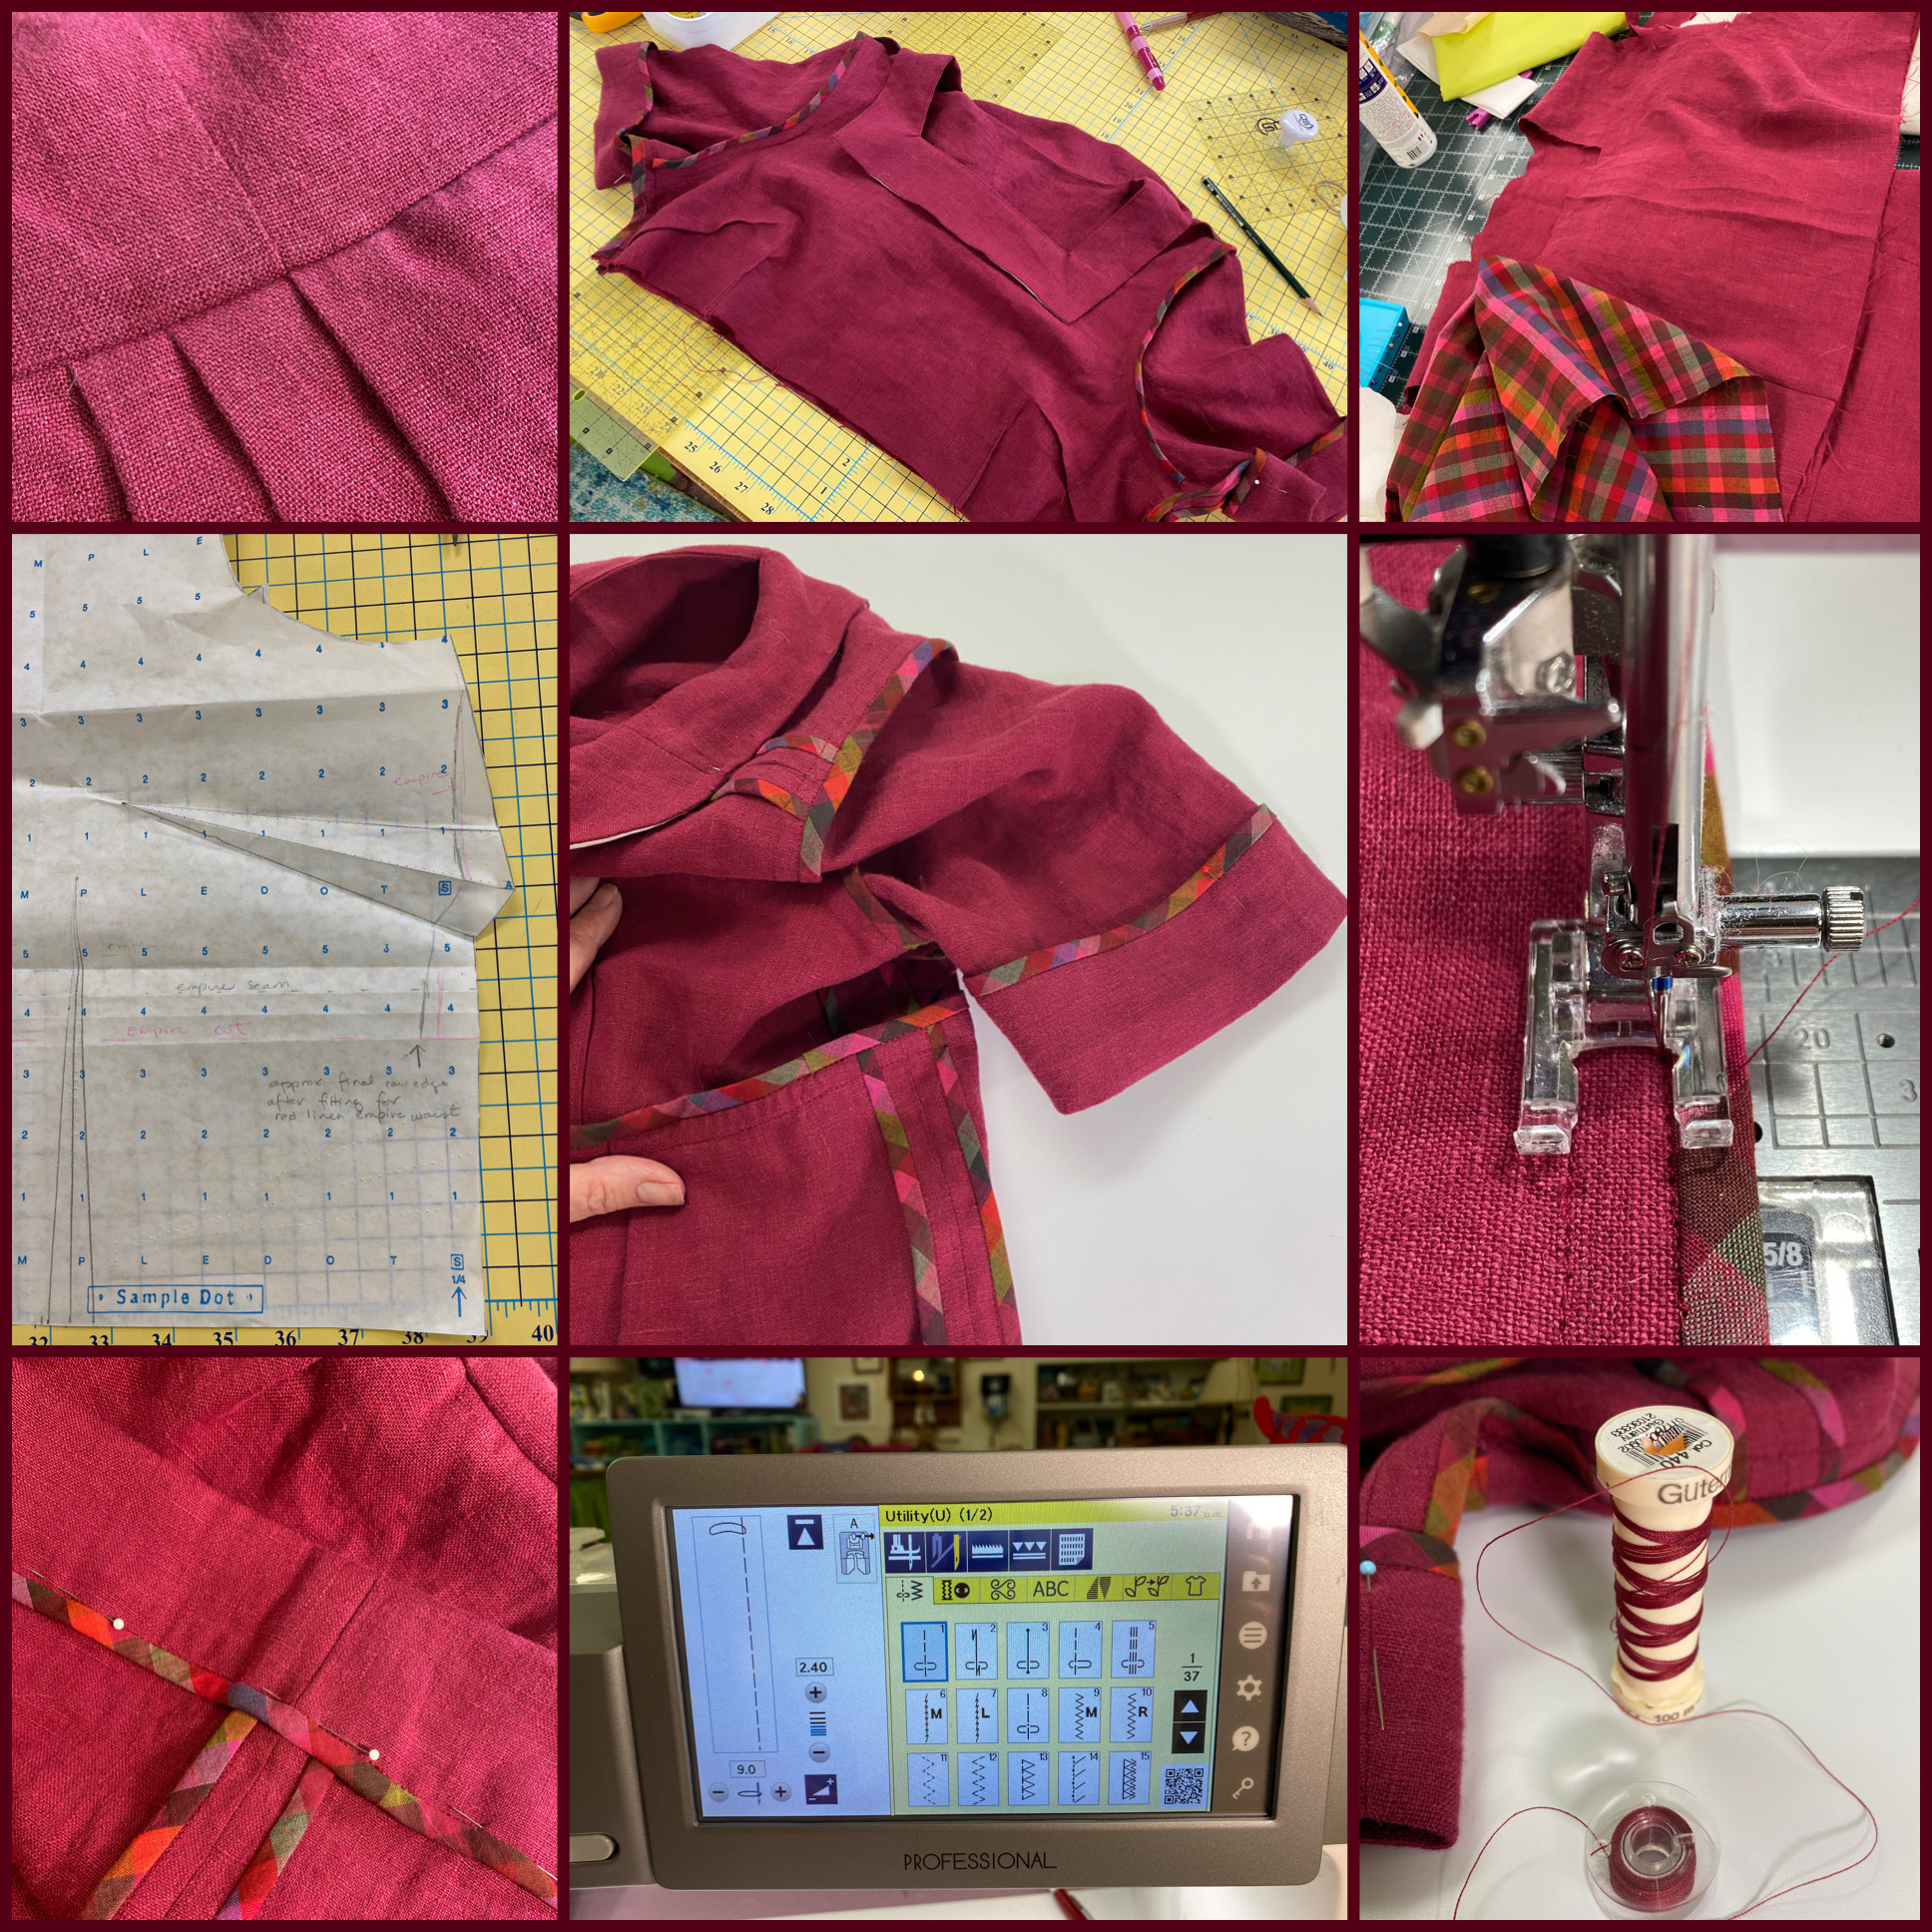
The first lesson / project for Garment Maker’s Question Time is a shift dress (with or without a waistline seam), something that I would Never, EVER wear.  And I already knew how to do an invisible zipper.  So I bought a pattern for a fitted dress with a waist seam, center back zip and very short sleeves.  I did the muslin / toile (the fitting garment where you figure out your needed alterations) as a dress, then totally hacked the dress into a square (not rounded) neck, longer sleeves, moved the waistline up to empire height, eliminated the center back seam since I could get into the top without a zip because of my modifications, and converted gathers into pleats.  I LOVE this linen (from Fabrics-Store.com linens, I used the IL-19 Softened in Beet) and found the perfect Kaffe Fassett shot cotton plaid (heavier than lawn but lighter than quilting cotton) to be the Hong Kong Finishes.  I like it so much I may use the leftover linen and find some more of the plaid and make a tank with the plaid visible!

Here’s a collage of the construction process.  Apparently I posted about this on social media (circa February 2021) but never did blog about it! oooops.  I am sure I also put it in my newsletter–if you’d like to receive the monthly newsletter, sign up at the bottom of every page or in the right sidebar on my blog!

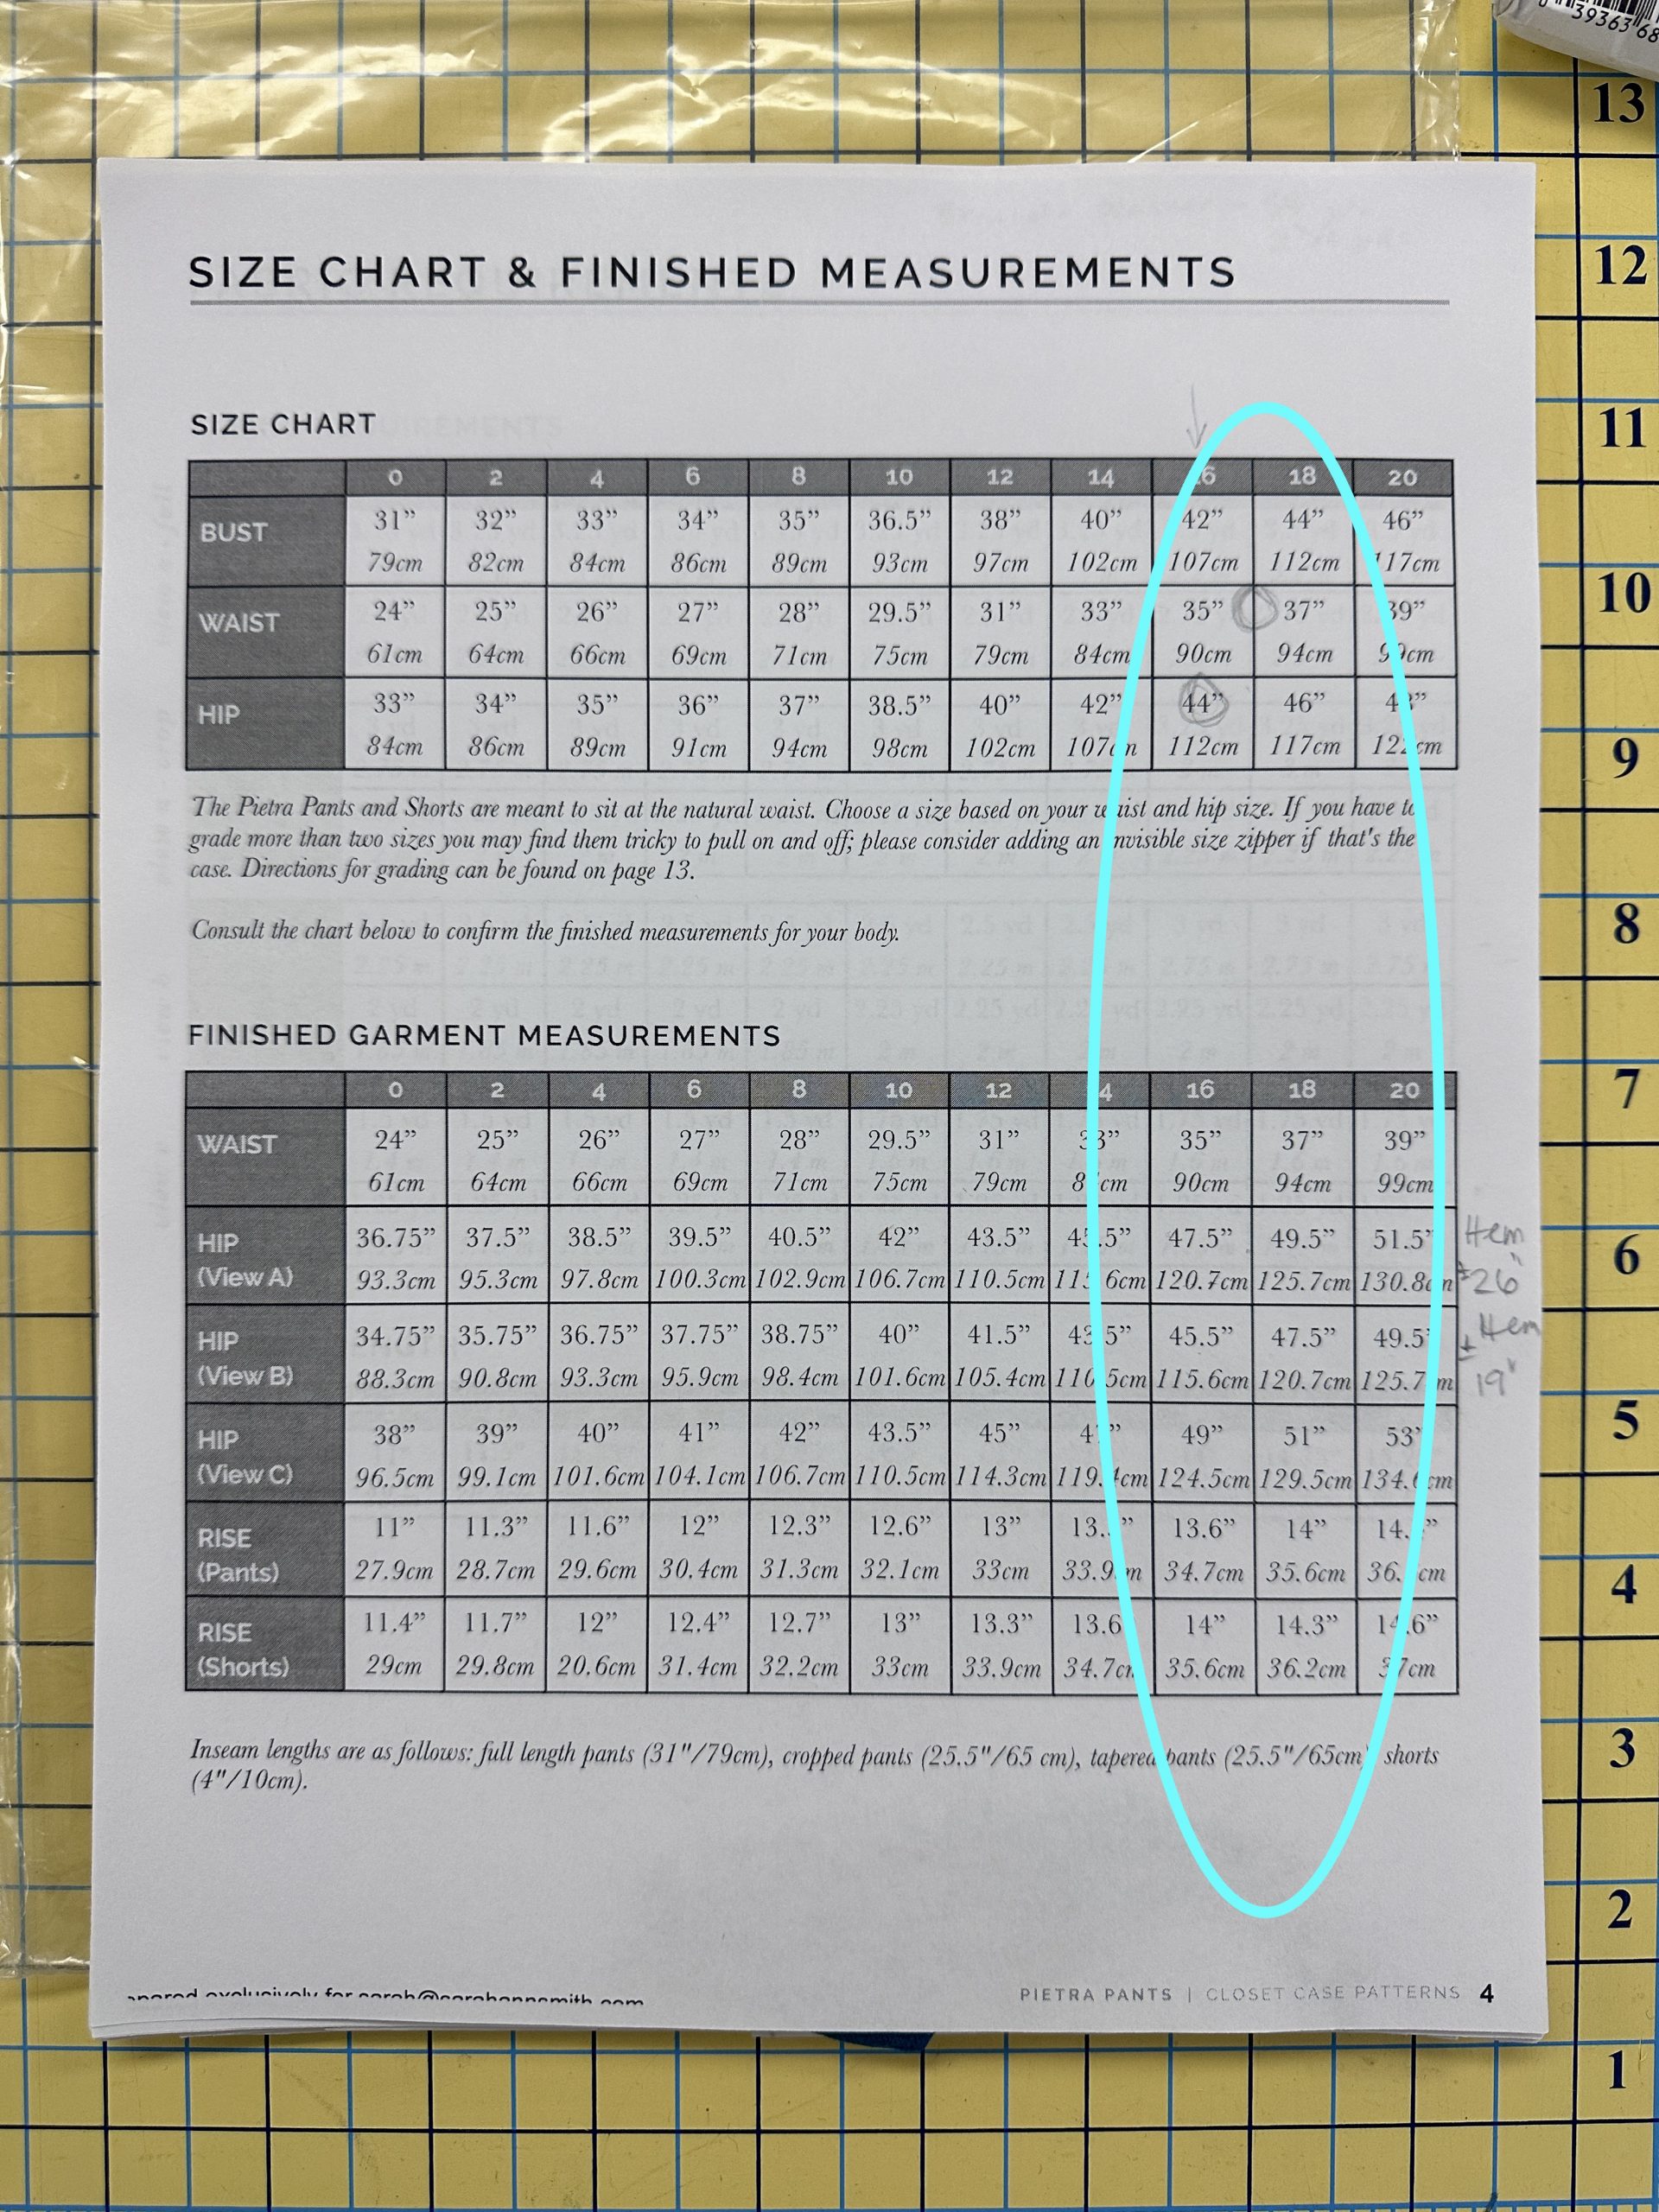
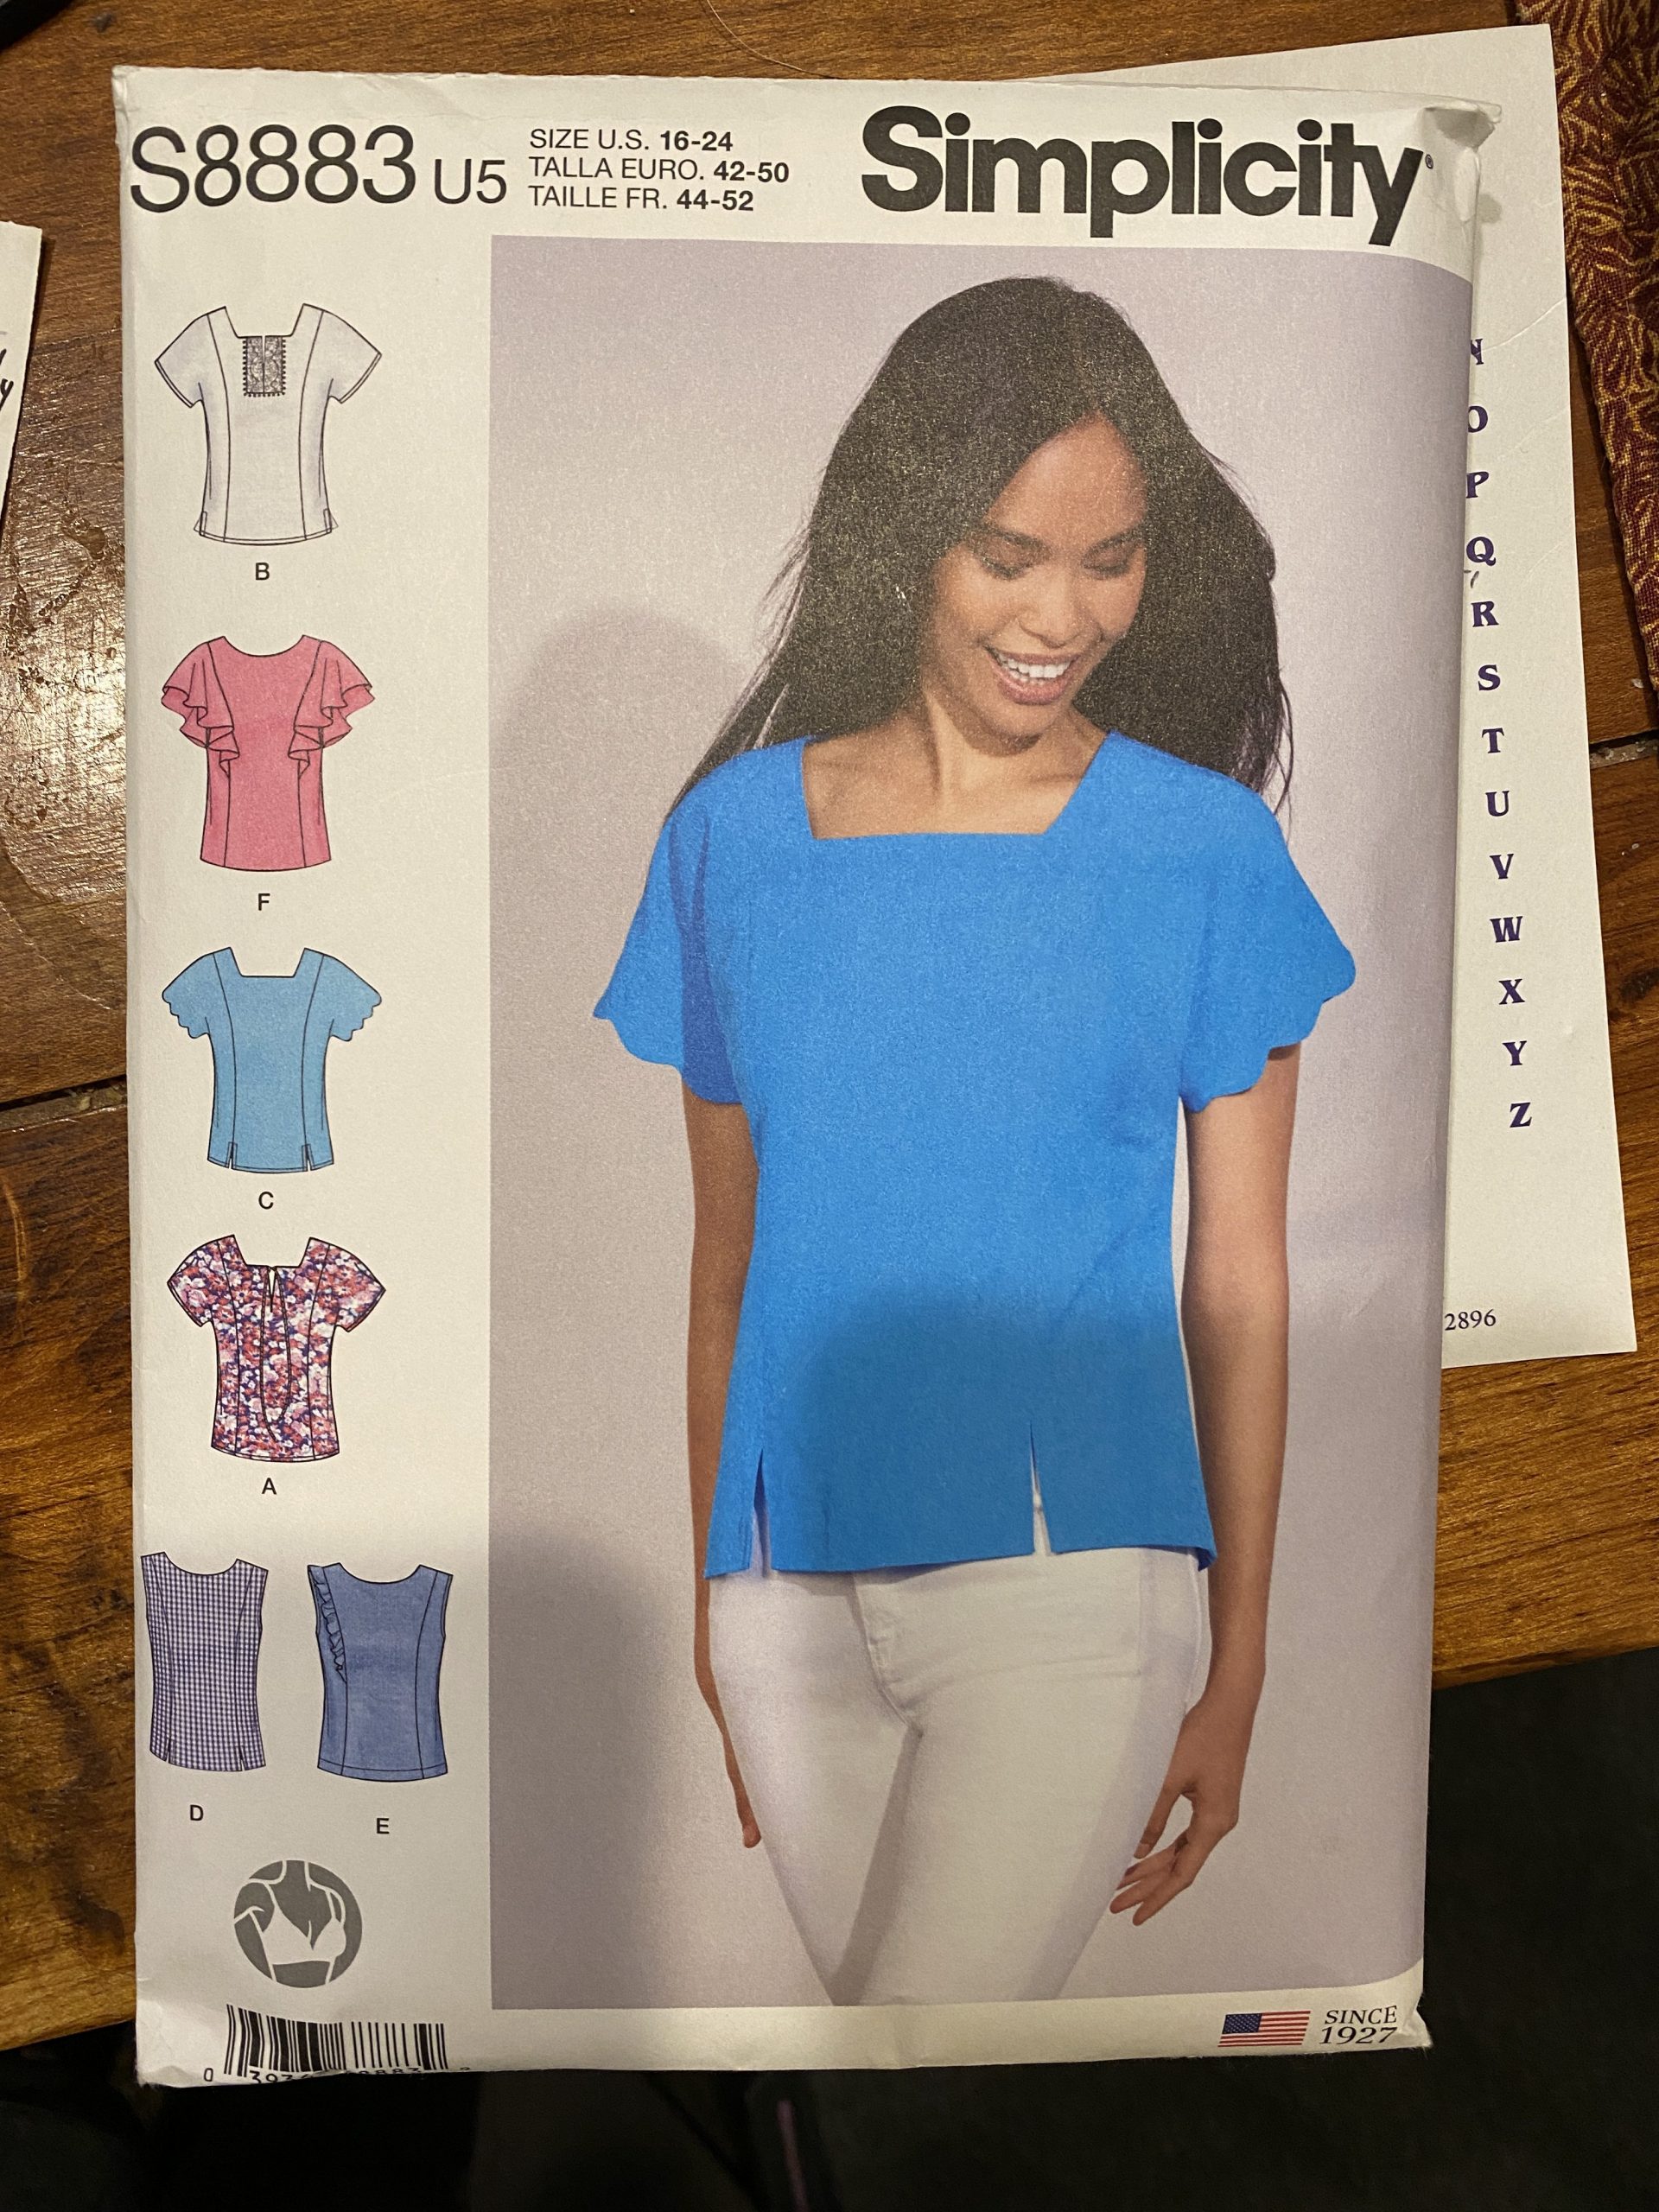
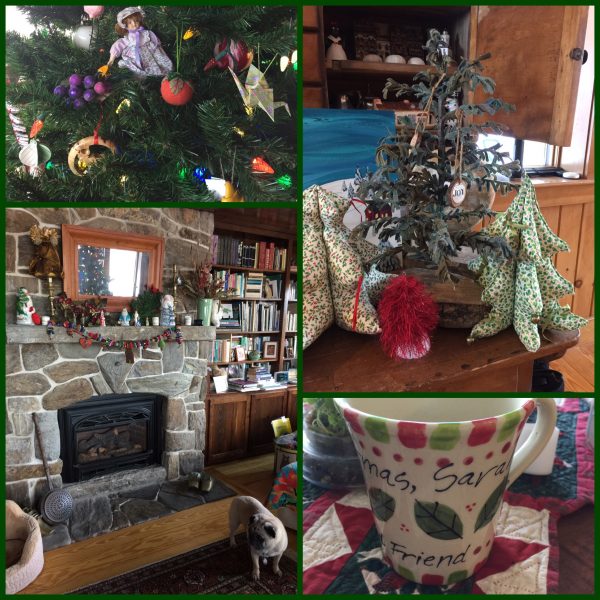
Here’s another collage that shows the Brumby skirt (I SO want to make one in denim like the pattern, but at a length suitable to my age and legs!), the inside and the pattern cover.  AND, just this week I bought the denim–100 percent cotton denim no less.  Now, to finish Eli’s quilt so I can get some garment making done!

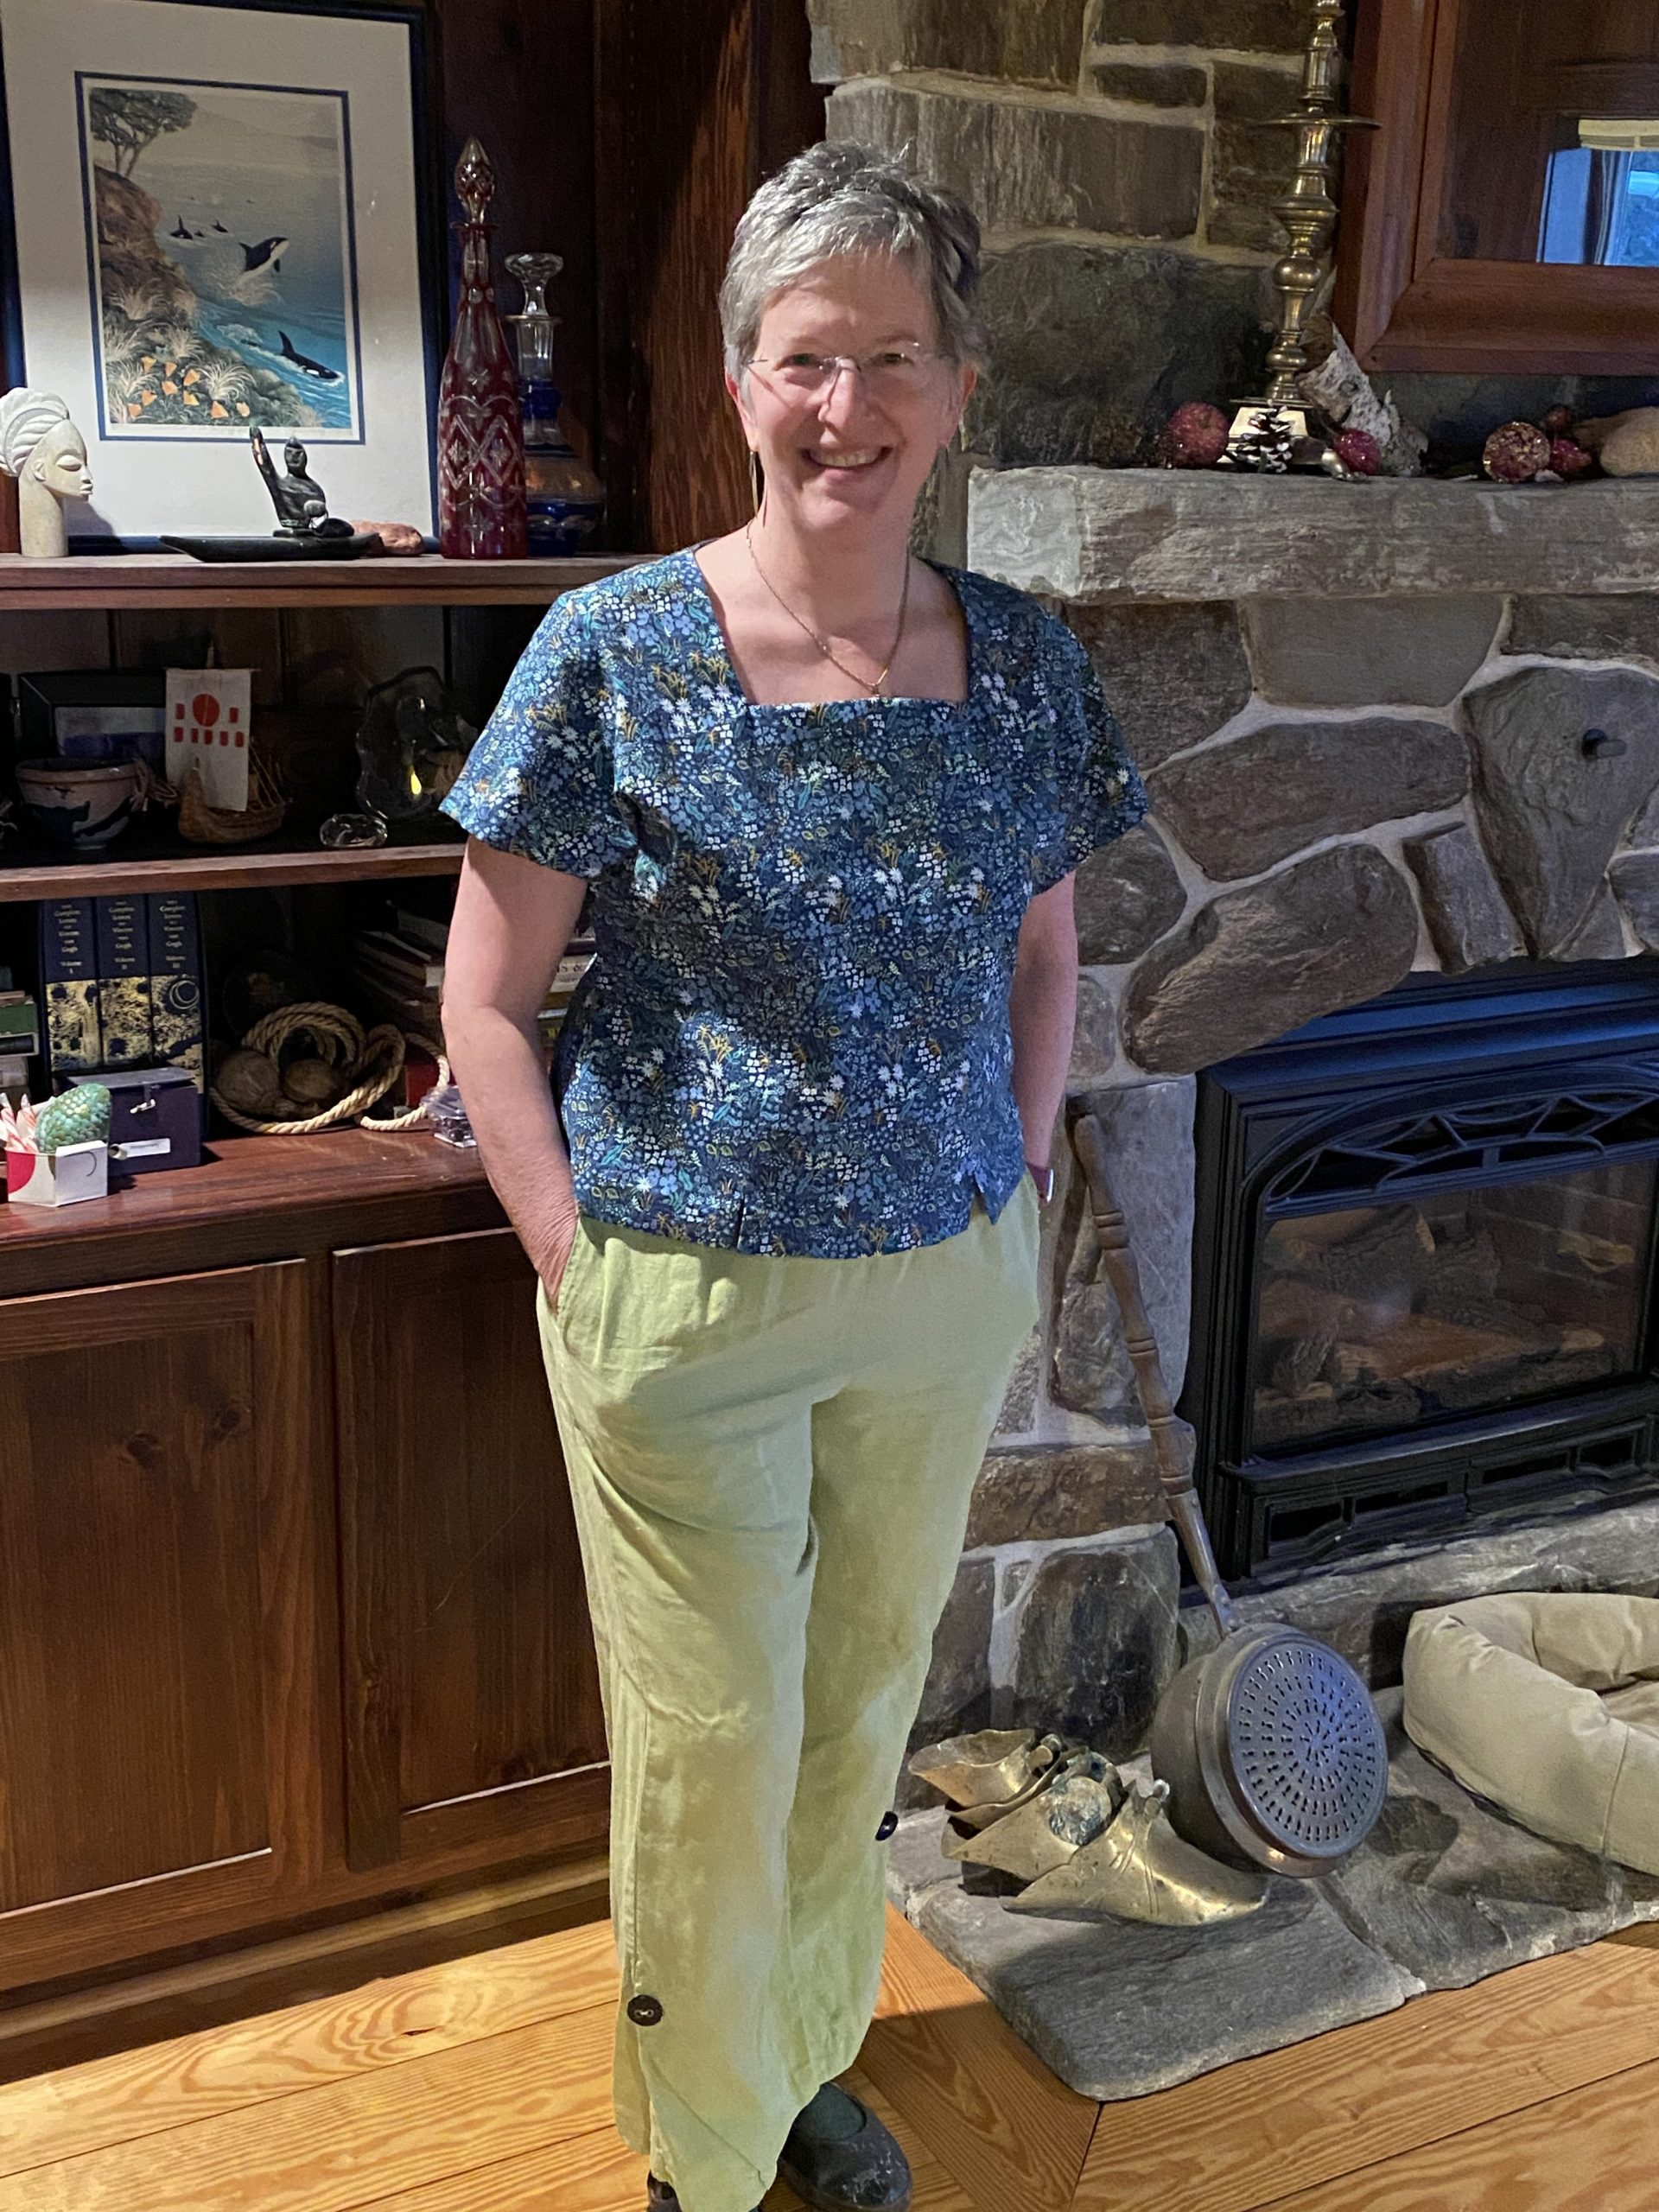
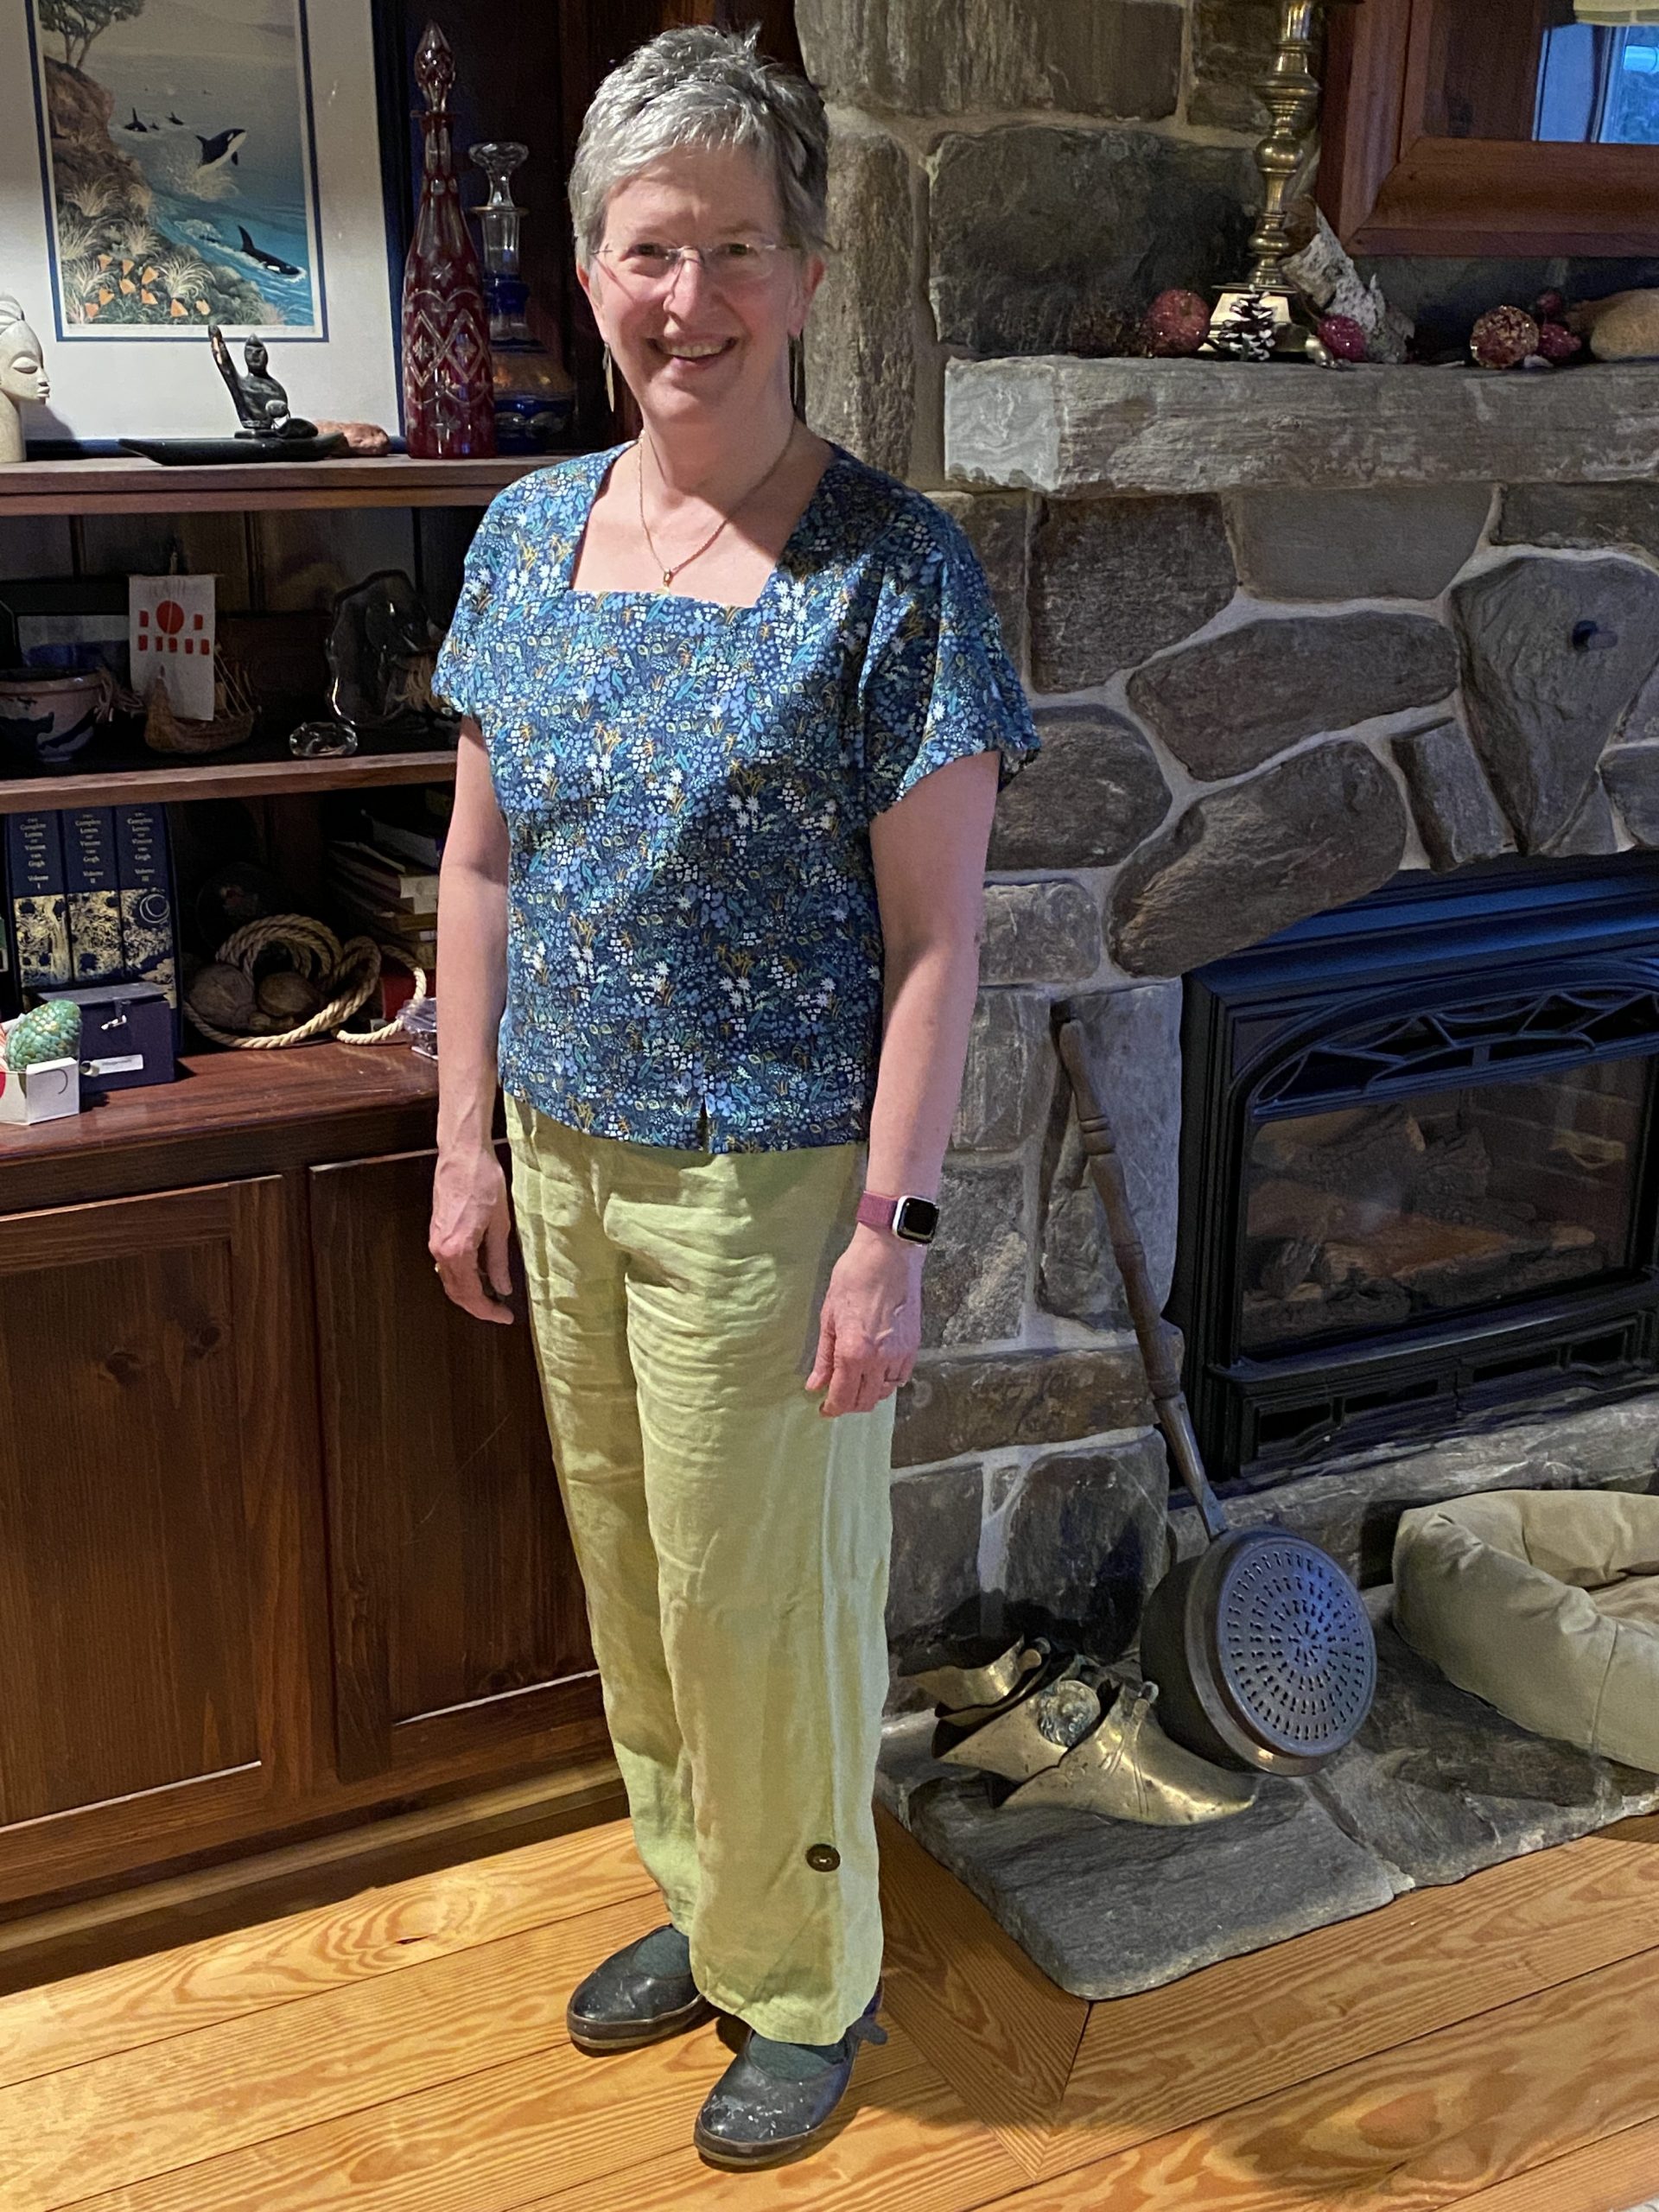
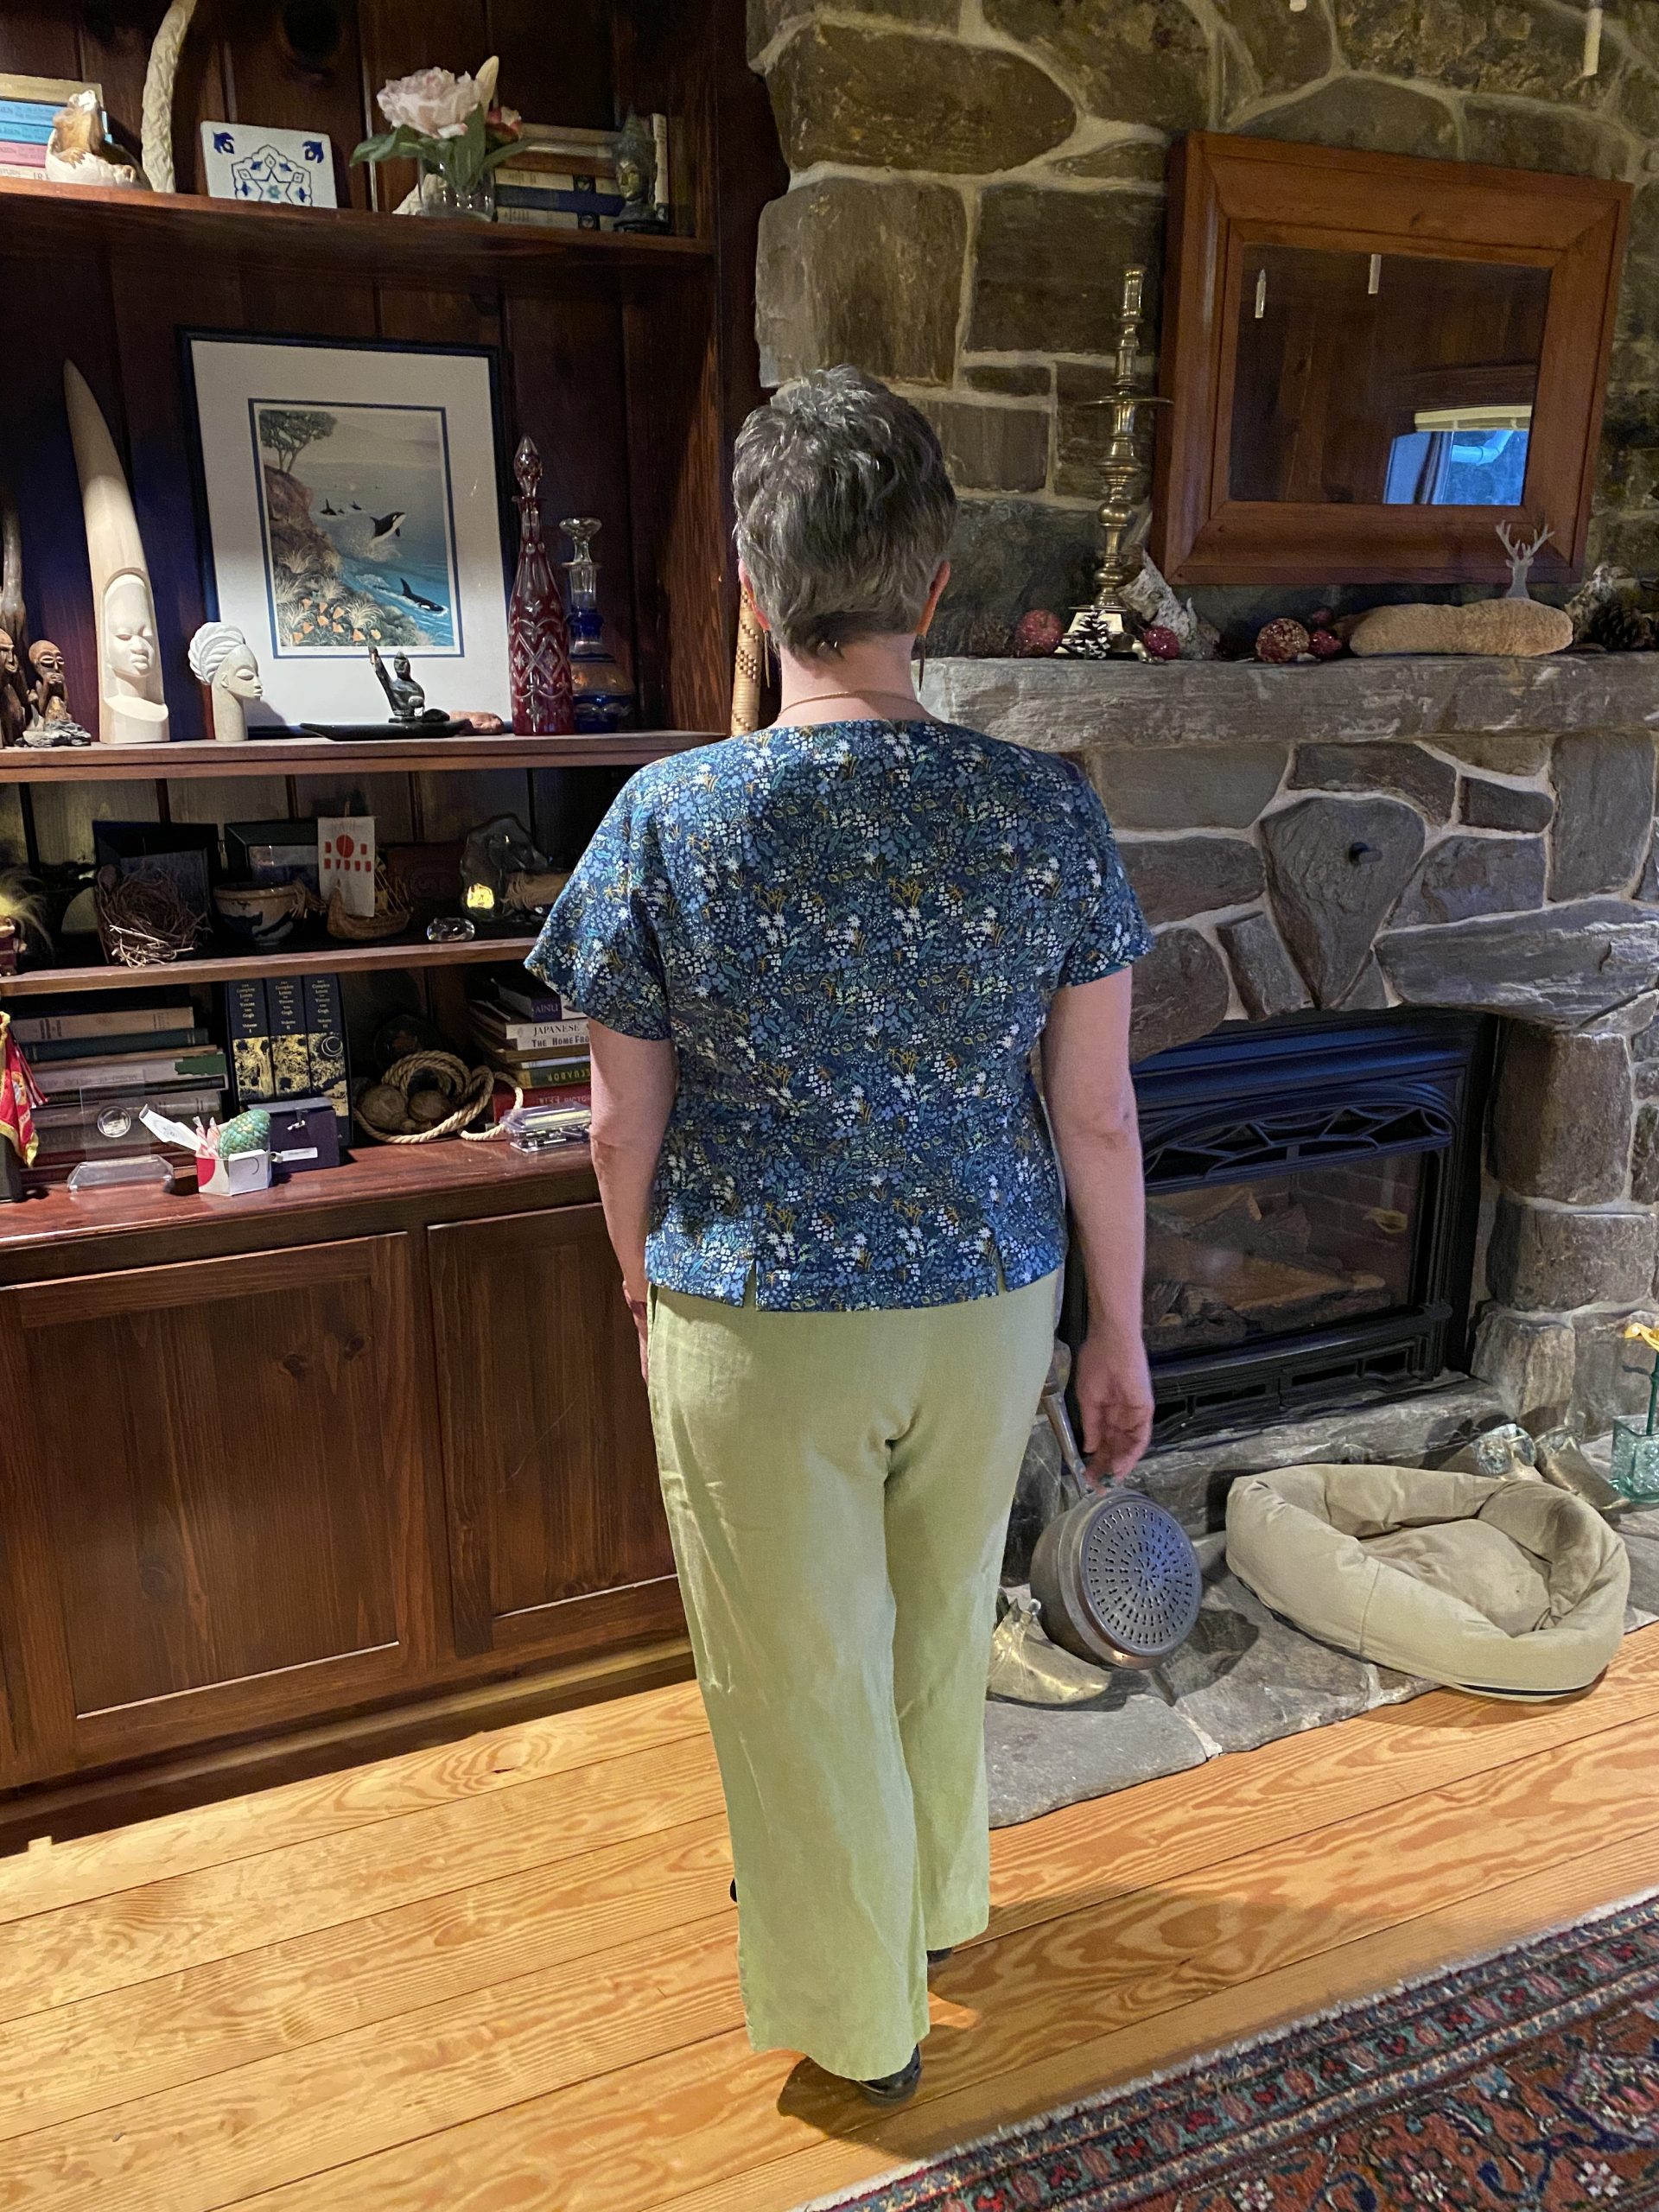
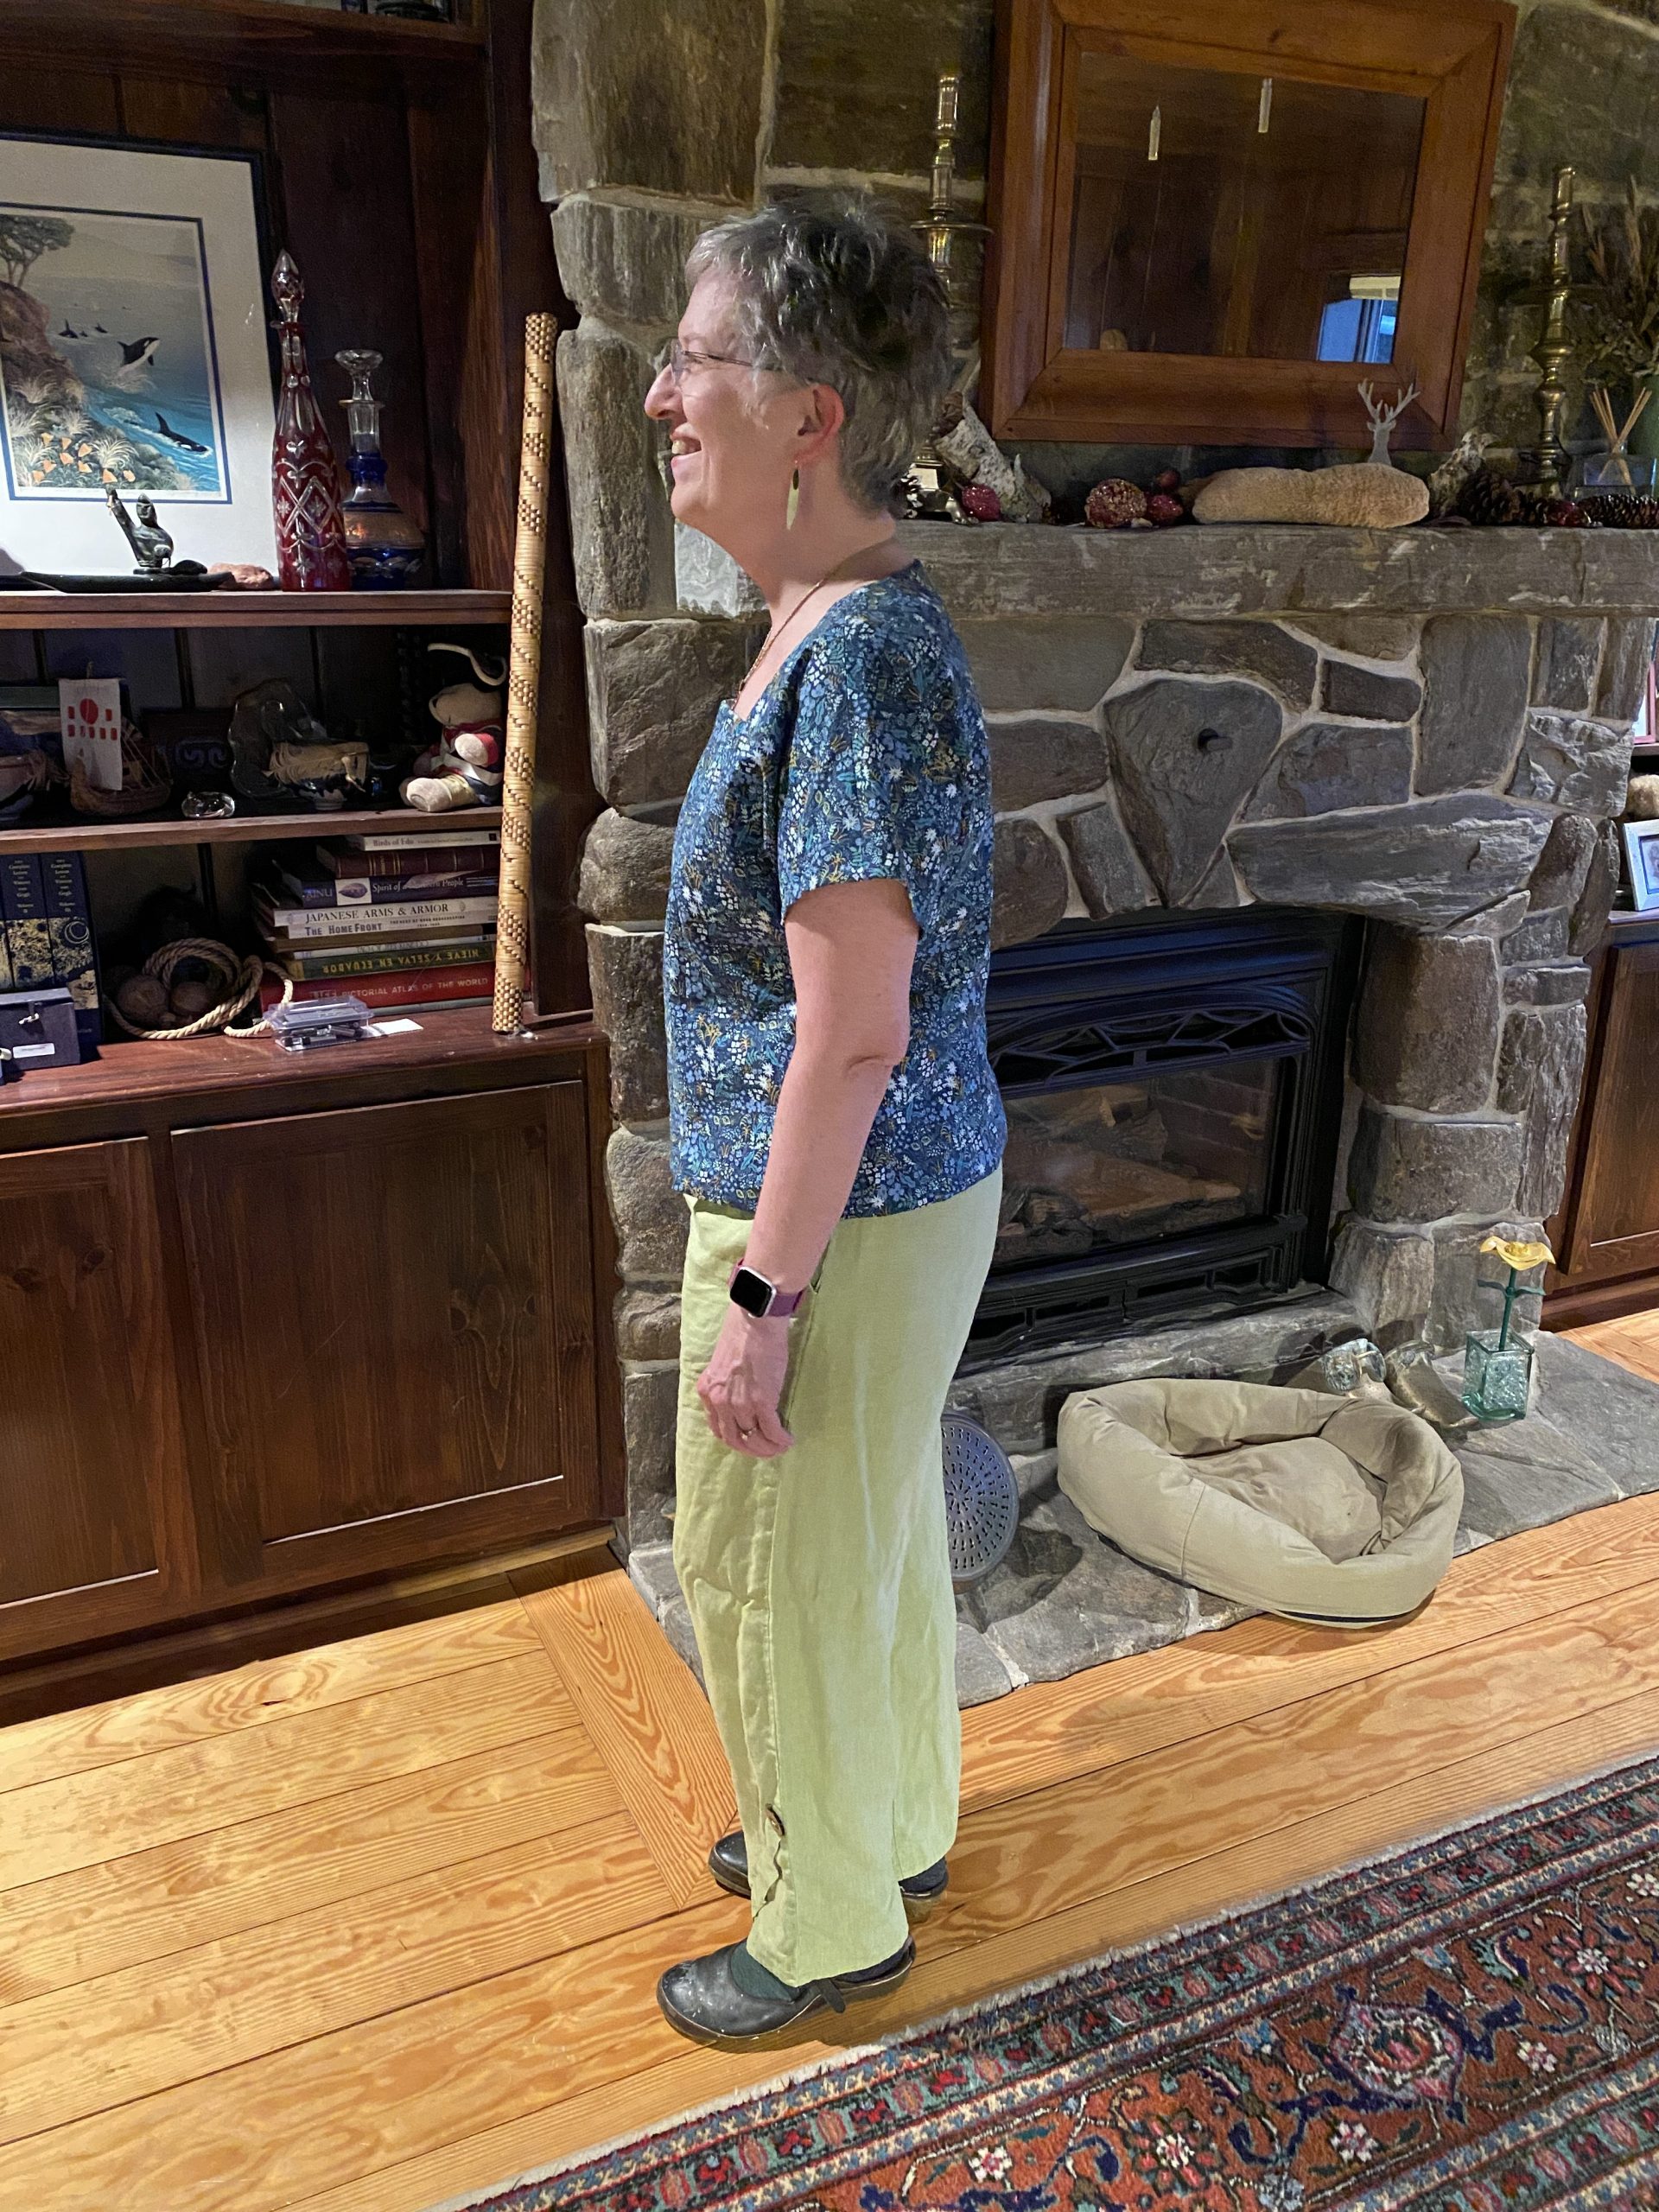
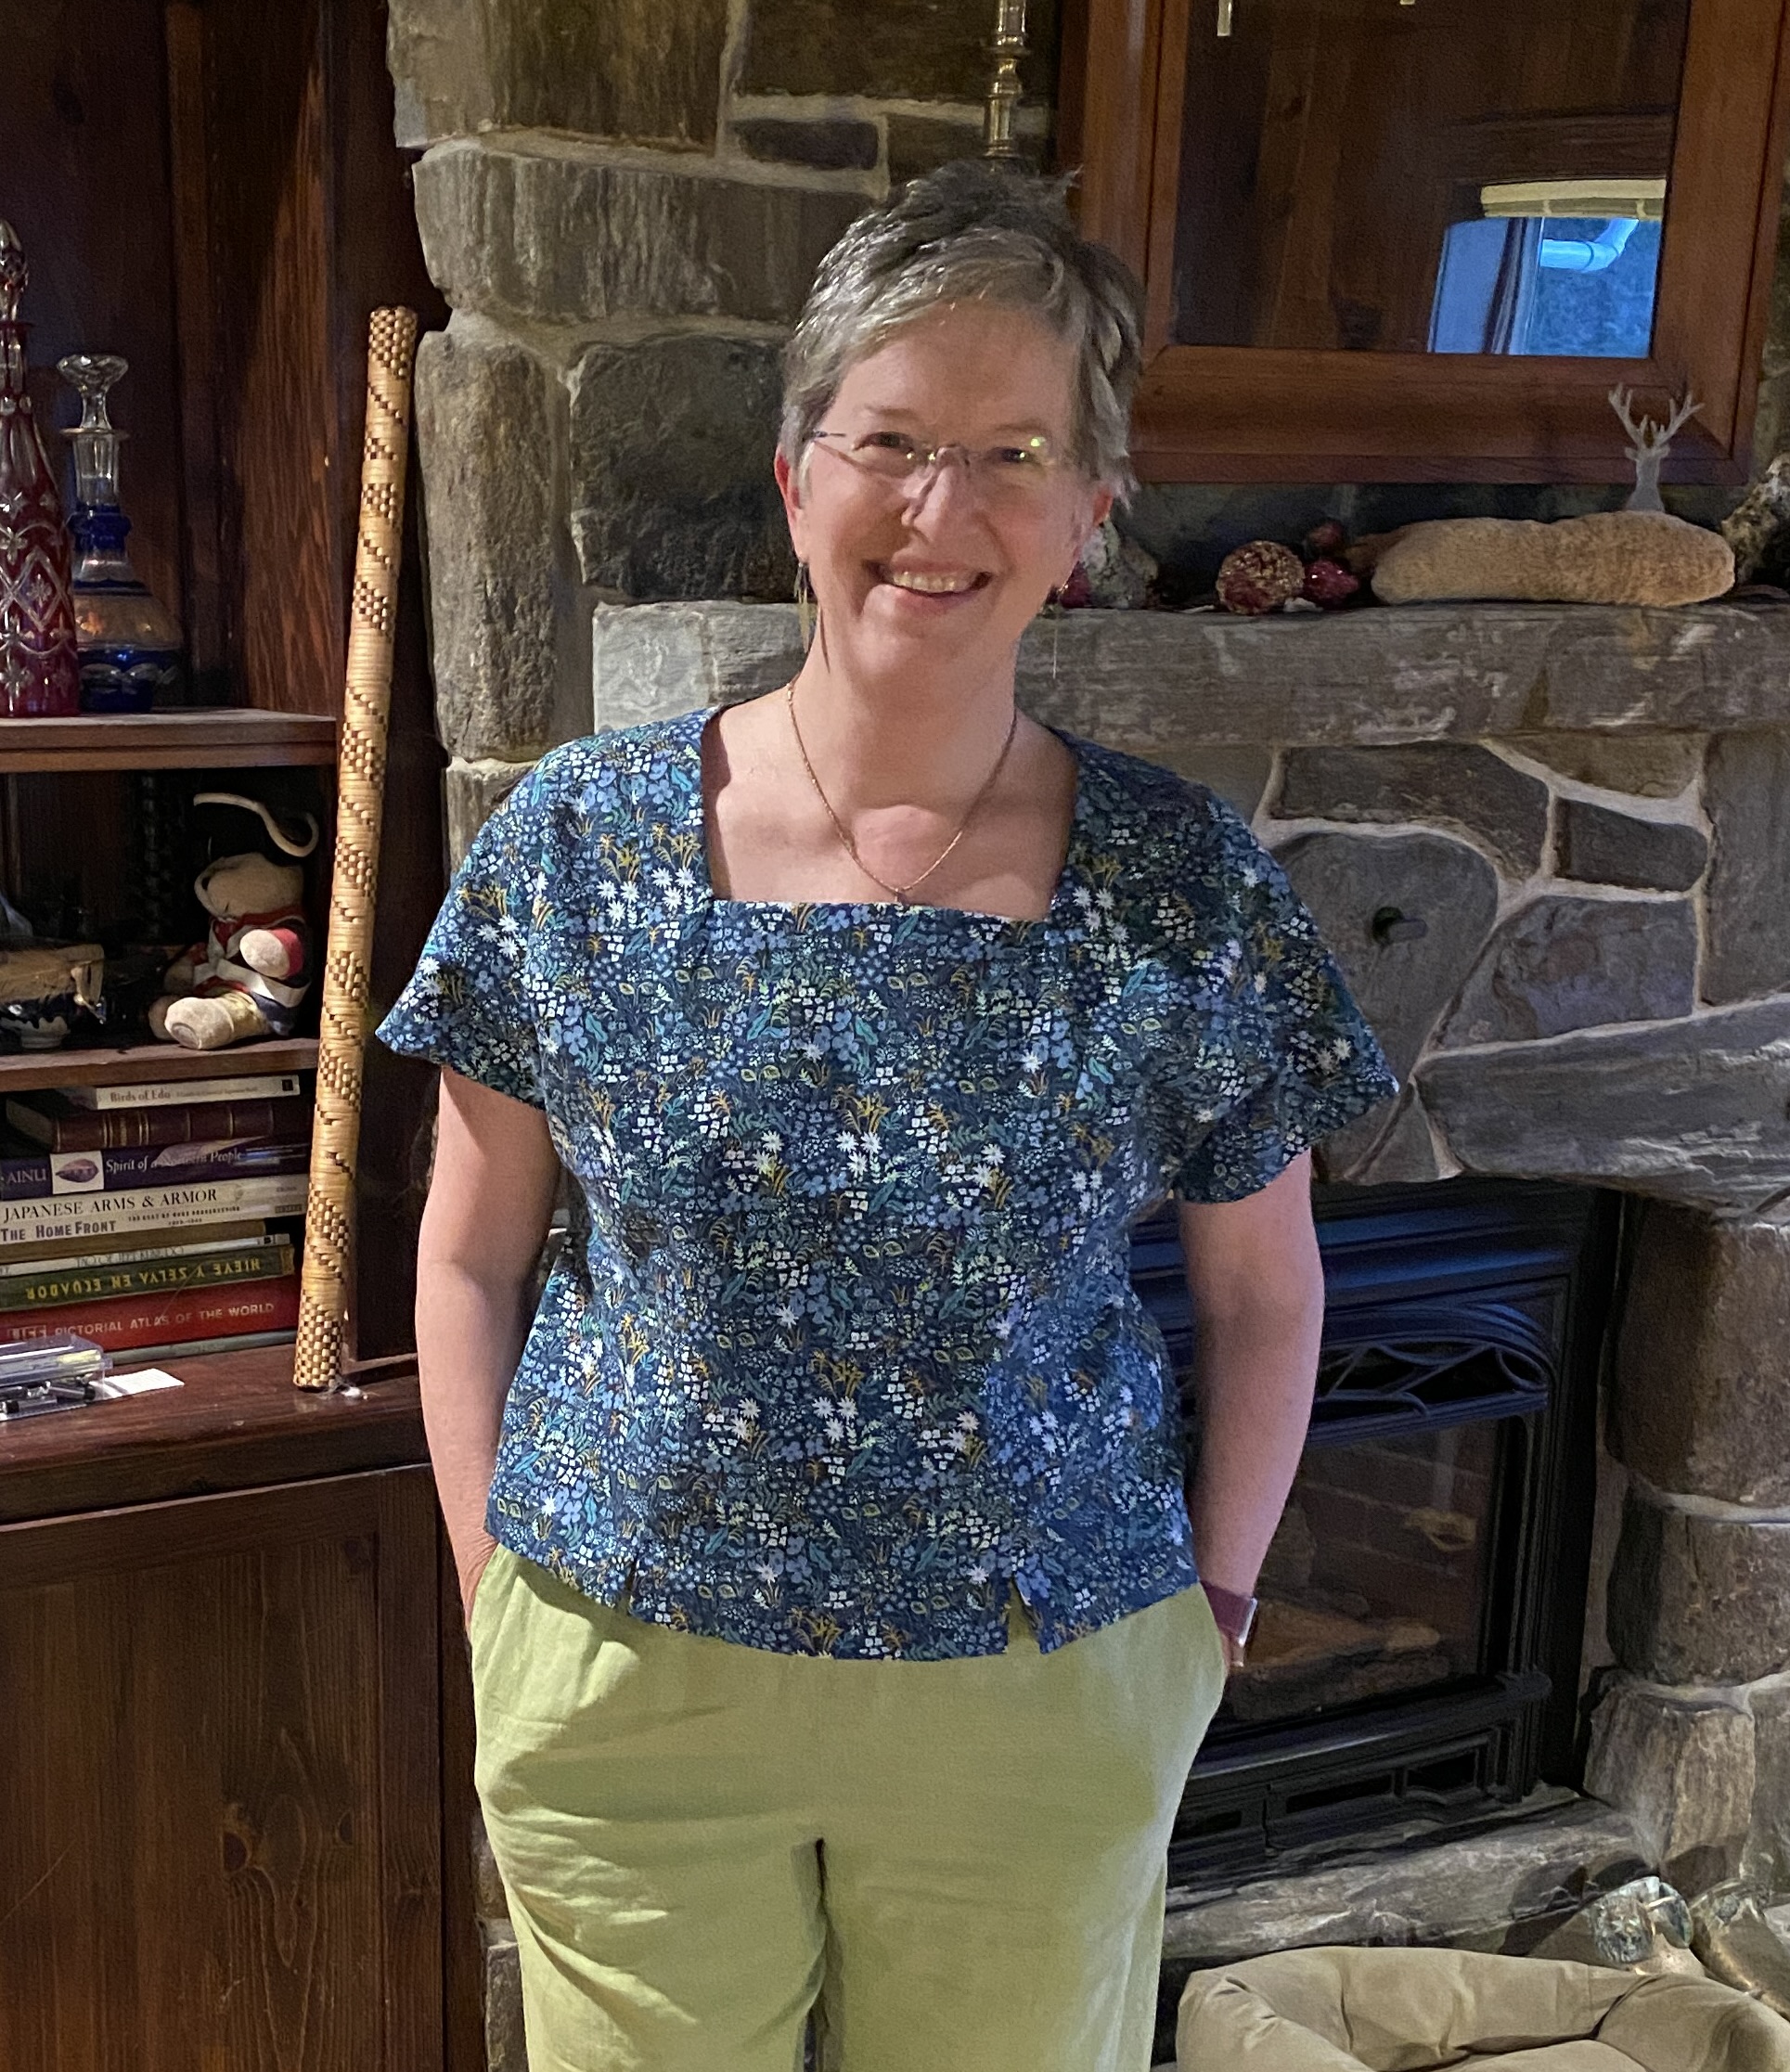
Last but not least, here’s the right side of the Simplicity S8883 top.  You can’t see that it has princess seams–this is one of the patterns that actually has cup sizes built into the pattern—wonderful!  It is made from a Rifle Paper Co. print (a quilting cotton) and I just love wearing it!

So that’s a wrap up and samples of Hong Kong finish.  I think I will do my denim Brumby with this finish…stay tuned!

Here are the links to all the posts in this series of lessons, techniques that can be applied to virtually any garment and many home dec projects.   Let me know what you’d like to learn and see here on the blog.  Cheers and thanks, Sarah

Lesson 1:   Choosing a Pattern and Starting Tips

Lesson 2:   Making a Muslin, Fitting and Sleeves

Lesson 3:   Matching Plaids, Cutting out Your Garment Pieces

Lesson 4:  Overcast Seams, just like Serged Seams

Lesson 5:   French Seams

Lesson 6:  Lapped and Flat-felled Seams

Lesson 7:  Hong Kong Finish for Seams

Lesson 8:  Lined Patch Pocket Tutorial

Lesson 9:  Hems and Scarf

Plaid Top Tutorial: Lesson 1-Choosing a pattern and starting tips

Friday, February 17th, 2023
Flannel Plaid top and scarf

I thought it would be fun to teach some basic garment sewing techniques using a simple “T” top in woven fabric as the platform, tossing in a few special lessons along the way. This isn’t a class in how to make a blouse–rather it is a way to teach several techniques that are useful in garment making and home dec across the board.  There will be 9 posts total that will publish on Tuesday and Friday through March 21. As they go live, I will update a list at the bottom of each post that has links to all the other lessons. Today, I’ll cover:

1. What to look for in a pattern
2. Figuring out what fits you by looking in your closet
3. Wearing Ease
4. Pre-shrinking!
and a tease….be sure to look at the photos at the very end!

Future posts will touch on

–alterations including length, shoulders and bust adjustments (full and small)

–Matching plaids when cutting
–fine seam finishes including
     *Overcast
     *French seams
     *Flat-felled and lapped
     *Hong Kong finish–not used on the top but good to know
and a bit on when to use each


–Lined Patch Pockets, getting a smooth curve, presser foot tricks

–a bonus Infinity Scarf and wrap up

Please note:  I am affiliated with Janome as a Janome Artisan and am compensated.  However, my reviews are honest and I would say what I say whether affiliated or not.  I’ve also chosen to be affiliated with Janome since 2003 (!!!) because their machines are so good and they are so responsive to the interests and needs of their customers.  
100 Acts of Sewing, Dress No. 2
Pattern back

A dear friend loves this very popular pattern and has made it many times. It is a simple “T” shape and is supposed to be geared to beginners with simple shaping and few pieces. By making it shorter, you can have a top or a dress from one pattern, and the size range is good for almost all bodies. Or so it would appear. All I can say is that I am so sorry I cannot recommend it. At ALL. I’ll show you why.

Pattern layout. I knew there was a problem as soon as I saw the sleeves were cut on a fold with no shaping of the sleeve cap. It got worse when I discovered the front and back of the dress are exactly the same shape, with no allowance for a bust, even a small one!

As you can see from the cutting diagram on the left, it has a simple flared silhouette with a front, a back, a pocket and two sleeves. Easy peasy, right? WRONG. Here’s why: Registration marks are found on most patterns–I had thought they were on all but I was mistaken because there are none on this one. You see, notches make it EASIER for you to match what goes where and properly align your pieces. Registration dots do the same thing–there is usually a dot somewhere at the top of the sleeve cap which you align with the shoulder seam to position the sleeve so it will fit the body. Lengthen/shorten lines tell you where to do just that, because after all we aren’t all the same: some folks have long torsos, others are short-waisted, and arms–our arms are all sorts of different proportions. AND, there are NO DARTS. Can you imagine an A-cup and a DD-cup trying to fit into the same tent shape? Yeah. As someone I once heard say, one-size-fits-all means looks good on no one.

I am guessing the reason the designer had for omitting these essential marks was to not intimidate the beginner. Unfortunately, all that will happen is the newbie will make something that doesn’t fit any which way and will think they are the problem, when in fact the pattern is doing them a disservice. Like I said, I really wanted to love this pattern and use it as one that you could buy. Don’t. Please keep reading!


Since my bust measures 39″ the Size Medium is too small. I figured with my broad shoulders, the Large, to fit a 41″ bust would be good. WRONG.

You’ll want to measure your full bust, around the widest point of your bust line; wear a snug camisole so that you are measuring your body not bulky clothes as well . Then you want to measure the high bust, which is around the torso above the bust, kind of up under the armpits. If you have a large cup size, you will want to choose a pattern that will fit your shoulders, then do a full bust adjustment. Luckily, many of the independent designers now design for full bust–I have to skip those lines or down-scale the fronts so they don’t look concave and sag on me. The major companies tend to design for a B-cup, but some have started offering patterns for various cup sizes–smart!

Make a drawing! + photo of measuring a blouse

Then there are sizes. In this pattern, I opted for size Large since my bust measures 39″ and I have broad shoulders. The Medium would have been too small. a Many patterns from the traditional Big-4 companies, Simplicity, McCall’s, Butterick and Vogue, are based on sizes that DO NOT correspond to off the shelf. I am usually two sizes larger in one of these patterns than in ready to wear. Not to mention that my ready to wear, depending on the company, ranges in size from Small to Extra Large. I’m not exaggerating…we all know sizes are all over the place.

The key is to measure yourself AND measure a garment you have that fits you comfortably and looks good. Then compare those measurements to the information on the pattern. You can usually find two measurements: the size of the body and the size of the finished garment. The difference is wearing ease (see below). 

This is the back of Simplicity S8883. I was elated to discover it had cutting lines for various cup sizes. I still had to decrease to an A cup, but with the various cutting lines it was easy to see what I needed to alter. It shows, for a 40″ bust, a B Cup top would measure 46″, which is fairly roomy.

The Pietra Pants pattern is an Indy pattern design, and as with many of them, comes with lots of detailed information. I am between a size 16 and 18.  All that ice cream has made my waist a bit bigger.  It is also WONDERFUL that it includes the rise–the measurement of the crotch seam from front to back.  No more camel toe (those pants that pull and and cut into you in a very unattractive way)!  It also reveals the difference in wearing ease in the 3 views of the pants/shorts.  This helps you compare to something you have that fits (or doesn’t), so you can adjust accordingly.

Then, measure across a blouse (make sure you compare like items, so if you are making something with woven cloth, measure a garment with woven, not knit, fabric) at the bust line. That will have anywhere from zero to 4 or more inches extra. This is called wearing ease. Some of us like very fitted, body skimming clothes, while others (like me) prefer things a bit looser or even very loose. Fitted garments tend to have 0-2″ ease, while semi-fitted are 2-4″, and roomy is even larger. If you have a flowy top that measures 52″ over a 44″ full bust, that is 8 full inches difference. Knowing that amount of easy will help you choose a pattern that will you give you the results you want! There is also something called negative ease, found in knit garments.  If you want a form-fitting garment, it will be cut 0-2 inches smaller than the finished size, then the stretch in the fabric will make it fit you snugly and show off your beautiful curves.  

Pre-shrinking fabric: This is always a debate among quilters, but for garments there is no question. If you intend to wash or clean your garment, you MUST pre-shrink! Don’t do all that work, finish the garment, love it, then have it turn one or two sizes too small after you clean it. Even woolens that will be dry cleaned need a bit of a steam press! Since most of us wear things we wash and dry (hang dry or in the dryer) at home, treat the fabric you have purchased the way you will the finished garment. If working with tricky fabrics like rayon or silk, do some self–education on the internet about how to handle them. For now I’m going to talk only about this cotton flannel top.

I’ll explain the what and why in my next post, but for now, just LOOK at this! The Dress No. 2 was made for a 41″ bust. There is indeed enough room for a bust larger than my 39″, but the shoulders were TWO FULL INCHES TOO NARROW!

The muslin doesn’t fit any which way. And those sleeves are supposed to be LONG sleeves. On whom? They stop 2 inches above my wrists, and that is unhemmed!

Remember what I said about size, and picking Large for this top. Thankfully I made a muslin, above–
Above, the top as made per the pattern in a practice muslin to gauge the fit; I used super-cheap white cotton whose purchase price was, I think, $1 a yard which tells you how cheap it is. The shoulder seams are WAY in from the actual shoulder point, causing the shirt to pull up and strangle my armpits (yes, I DO have broad shoulders but this is crazy), which then causes the center front to ripple, not to mention feels uncomfortable. The way to figure out what needs to be done is to slice open where it is too tight. I marked the spots with a pen, took off the muslin, sliced, and put it back on. The next photo shows a gap of just one an INCH on just one shoulder!

If I had measured the pattern piece before I started cutting (smacking self upside the head) and compared it to an existing top that fits, I would have realized the problem and been able to take remedial action. But no matter what, doing a practice muslin saves money and effort in the long run. More in the next post on how I fixed it.

By slicing the too-tight top, I can see how much needs to be added to the pattern.  And how did I learn to make these miraculous adjustments?  …read the next paragraph! 

I will share fitting in the next post (on Tuesday, February 21, 2023), but they key is this:  In late 2021, I signed up for a fabulous set of 12 monthly lessons from Philippa Naylor, who is known for her prize winning quilts with immaculate construction and her wardrobe.  With significant experience working in professional garment making and patterning, she offers Garment Makers Question Time (GMQT) an online workshop with new lessons that build upon the previous ones.  The value for price, $15 a month, is simply phenomenal–I’m not affiliated in any way other than being a very pleased student.  Participants range from people who have never made a single garment to some of us who have been sewing for 50 years.  The amazing thing is that we are ALL happy and learning.  In my series of lessons here, I am sharing things I have learned over the years, not replicating what she has taught.  But I can heartily recommend GMQT–if you want to make garments that fit and are well made, this is the workshop that finally helped the alteration process click for me.  One key is to get someone (pay someone who does alterations if need be) to measure your body accurately–that’s what I did at a local fabric shop that has a teacher who gives semi-private lessons.  Again, that is Garment Makers Question Time.  Truly, I can’t say enough good things about the whole series! Look for more garments this year once my travel teaching is done!

Here are the links to all the posts in this series of lessons, techniques that can be applied to virtually any garment and many home dec projects.   Let me know what you’d like to learn and see here on the blog.  Cheers and thanks, Sarah

Lesson 1:   Choosing a Pattern and Starting Tips

Lesson 2:   Making a Muslin, Fitting and Sleeves

Lesson 3:   Matching Plaids, Cutting out Your Garment Pieces

Lesson 4:  Overcast Seams, just like Serged Seams

Lesson 5:   French Seams

Lesson 6:  Lapped and Flat-felled Seams

Lesson 7:  Hong Kong Finish for Seams

Lesson 8:  Lined Patch Pocket Tutorial

Lesson 9:  Hems and Scarf


A return to my garment-making roots!

Friday, February 25th, 2022
Princess seam top, Simplicity S8333 (pattern currently available), commercially purchased linen pants. Made on my beloved Janome M7 Continental, aka Albus the 2nd (after Albus Dumbledlore, the greatest wizard that ever lived)

It appears months have evaporated since I last wrote–at least I am keeping up with my newsletter! On a lark, and in my endless quest to always be learning and improving my sewing, I signed up for Garment Makers Question Time with Philippa Naylor. A little over a year ago I took a 2-hour online piecing workshop with her that was brilliant; even after decades of quilting I learned stuff. Since I’ve also started sewing clothes again, I decided to sign up–it is only $150 for a full year and let me tell you the value you get for the HOURS of detailed instruction each month is amazing. Students range from total newbies to garment making and sewing to those like me with decades of experiencing and we are ALL benefitting! Wish you could see what total newbies have accomplished in both fit and construction.

I made view C without the scallops on the sleeves and slightly altered the depth of the neckline. The white is inexpensive fabric for dyeing… I will likely un-sew the basting then dye the fabric for piecing and quilts. Especially in the bottom right photo above, notice that the upper bodice, above the full bust, is too roomy–the neckline folds out and lots of excess near the arms. Read on….this is why you make a toile/muslin/practice piece!

A “toile” is a sample garment made to refine the fit since patterns are made to an average shape and measurements and, let’s be honest here, NO ONE is exactly that fit. The first month in GMQT is to make an A-line dress. I have never worn one in my life and never will….but…. I made a simple dress with bodice and gathered skirt (that’s coming in next month’s newsletter–use the sign up box on the right of this page or at the bottom of the other pages on my website to subscribe).

While waiting for the fabric I wanted to use for the more fitted project (a delightfully soft linen from online), I came across this pattern on sale at Simplicity online. I LOVE square neck tops, and thought the practice of fitting a princess seam top would be useful. I bought some Rifle Paper Co. fabric at Fiddlehead Artisan Supply in Belfast, Maine, then worked up the muslin or toile (above right). The pattern is multi size so I can grade from one size to the next as needed. I have a broad back, and broad, square shoulders, so using what I learned from the not-yet-made-dress toile, I knew how to adjust for the shoulders so it was quick and easy. This pattern is the first I’ve ever bought which offers B, C, D and DD cup sizes. That meant I took the B and decreased (sigh).

I learned that to get the ideal bust fit in addition to full bust and high bust, you measure from the apex of the bust to the neck, to the shoulder and to the belly button. That means you can triangulate (measure) on the flat pattern piece and get the apex of the bust in EXACTLY the correct spot for a perfect fit. With a princess seam, the adjustment is so much easier than the slice-and-pivot stuff on a darted bodice: you just adjust the curve and seam depth on the side front piece (in my case trim away)! I left the bodice center front intact and didn’t change the design lines at all–the fitting was done from the side piece. Finally, I lowered the base of the square neckline about 5/8-3/4 of an inch. With those changes, the excess fullness in the first toile fitting above is eliminated.

I’ve always used fusible interfacing, but chose to try Philippa’s method of using cotton lawn, a soft, finely woven, lightweight cotton instead. You cut the cotton “interfacing” the same size as the facing, then sew right sides together on the bottom edge and turn right side out. No awkward 1/4″ to turn under–a perfect, smooth, lined facing that supports the neckline softly–probably better than fusible, and certainly nicer look and feel. In this image I have clipped the curves so the seam will lie flat. You can also see two lines of stitching and the understitching line.
The bodice is to the left, the facing and seam allowances to the right of the seamline in the photo above. Using my 1/4″ Acufeed HP foot and the single stitch HP throat plate, I ran the inside left edge of the foot next to the seam, which yields a perfect parallel line of “understitching” which is the line of sewing that secures the seam allowance to the facing. This process helps prevent the facing from trying to roll back outward and produces a beautiful flat facing.
Ta DAAAA! Look at that nice, flat facing, sharp inner corner, tidy understitching and smooth clean facing edge thanks to the interfacing as lining.
I used the Hong Kong finish, which is a first cousin to a single layer quilt binding, on the shoulder and princess seams. It is trickier to manage (nearly impossible) on the “J” curve of the side seam which extends to the cut-on short sleeves, where I just overcast the raw seam edges. I used a voile, a cotton every so slightly lighter than cotton lawn, for this finish. You cut a 1″ bias strip, sew it to the top of the seam allowance, wrap to the back, and then stitch in the ditch. The back side of the Hong Kong finish is a single flat layer, not double like a quilt binding, which reduces thickness. Because of the bias cut and tight weave, no worries about fraying, plus that side is hidden under the pressed-open seam allowance. I used the 1/4″ foot with the guide/flange on it for applying the bright lime green.

Also, here’s a link to a Facebook post with a brief video showing me using the M overcast edge foot on the Janome to finish the side seams.

To make this even more fun–see the sleeveless version in the pattern? I was watching Call the Midwives and in that episode Trixie was wearing that EXACT blouse style! What a hoot! And Fiddlehead (my favorite store!) has GINGHAM–it’s back! Hmmmmm…….

Now that it is snowing again… six inches expected… all I have to do is wait for warm weather!

Int’l Quilt Market Part 2

Saturday, November 16th, 2019

So I actually did see things besides the productive visit in the Michael Miller booth (previous post). The Martha Negley quilt and fabrics were across the avenue in the Free Spirit booth:

I had so much fun tootling about and was delighted to see that Martha Negley fabrics are again available…she is one of my favorite designers.
In the Free Spirit booth. I also saw this amazing quilt across from the Martha Negley display:
Calico Horses by Lorraine Turner has all sorts of cool stuff including wool roving and yarn as well as regular cottons. Free Spirit booth.
The feel of the scissors in this booth were amazing quality for price. Based in Toronto, Canada, I think this young couple is just adorable! Here’s to their success! And yes, I bought a pair of scissors for me. https://shopldh.com I put them in contact with SAQA (Studio Art Quilt Associates) which is looking for vendors for the conference in Toronto in March.
They even have a few kitchen items (not all on their website yet). I bought the wood-handled poultry shears for Joshua’s birthday. Even if he just hangs them on the wall they are beautiful, but they work. AND the two on the right separate easily for cleaning kitchen yuck!
Denise Burkitt’s fabric for Free Spirit made my heart soar! I just fell in love with everything about it. She is a fabric dyer, so I totally swooned over the original pieces and the phenomenal printing that captures the hand of the artist in the cloth. WANT! And want to channel her muse when I’m next in the dye studio.
Alas, my photo of Denise is blurry. She made a shirt out of some of her fabric — it is her own design but I’d love to find a pattern like it, the collar is so flattering and versatile (wear long sleeve underneath in winter). And I’m really loving what Free Spirit is selling!
Tula Pink is always amazing, with a beautiful booth. (this is a visitor in the booth, not Tula)
In Tula Pink’s booth: I WANT THIS. I have been thinking of re-doing our cushions for the porch rockers and settee. I’m now thinking pieced!
I wore my Vogue 9112 dress made from a fabric by Brandon Mabley that I have hoarded for years…I love it! Well, as I’m walking market who do I see taking a bit of a short rest in the Kaffe Fassett booth but Kaffe Fassett, Brandon Mabley and Liza Prior Lucy. So as I walk by I say loudly “Hey Brandon” and point to my dress. He came out immediately and we got this selfie even though he said he is usually reluctant to do them…thank you!

So that is part 2… I think I’ll save the rest for a third and final post about Market. And no, I didn’t really get to see many of the quilts at all–I was having way too much fun doing Market!

Jiminy Christmas!

Sunday, December 16th, 2018

Happy winter folks!  Egads….time whizzing by, change in the behind the scenes stuff on my website so trying to write a blogpost is totally unlike what it has been for 14 years…. I’m lost!   Don’t even know how to add a photo.  Well, it has been busy as usual what with massive house cleaning, getting ready for the holidays and all that.  I’m also starting a newsletter, so there is a new sign  up button on my home page and, if I can figure out how, I’ll put it in here, too. 

 Here is a snapshot of the house so far..Eli came home from college last night so we can finally finish trimming the tree this weekend.  We are due to get snow tonight and tomorrow, but after a cold and wintry November it is warming up in December so I don’t think we’ll have a White Christmas (but I’ve already watched the movie for the season!).

So it looks like I added a photo, now what…gosh I hate when things change so radically!   Trying to decipher MailChimp has been hard enough for the morning.  So here’s a quick peek at what I’m doing in the studio:

The start of a rose hip……

What are some of your favorite holiday traditions?  When I grew up we made candy and delivered it as gifts, but haven’t done that in decades.  In the interest of fitting into my clothes, I am restraining myself.  But I love remembering who gave me various ornaments or where we went that year.

Here’s an ornament made by my friend Deborah Boschert, an angel that was on a gift from my cousin Anne sometime in the mid 60s (for anyone from southern California, probably it came from Pic N Save!), a spider web in glass from my first tour in the Foreign Service in Toronto (and miraculously not broken despite traveling around the world for umpteen years) and my two beautiful Lalique discs, at the top of the tree out of pet danger.

and here is an attempt at a pop-up sign up for my monthly (or maybe every other month) newsletter…I’ll fine tune formatting another day, ahem. now, I need to figure out a logo!  Give me suggestions LOL! PS–scroll down, I can’t figure out why so much blank space.

Subscribe to my newsletter

* indicates required
Email Format