email Youtube

Home
Galleries
Blog
Workshops & Calendar
Store
Resources
About
Contact

Archive for the ‘Fleece’ Category

Christmas Bag tutorial and fine finishing tips

Sunday, December 22nd, 2019
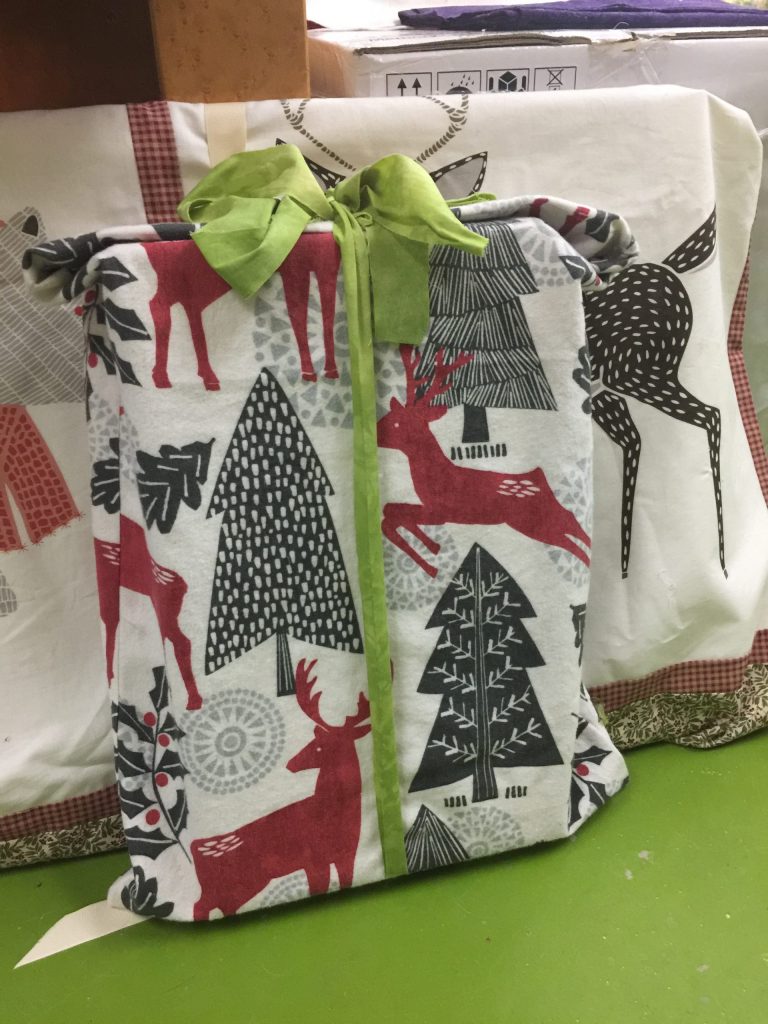
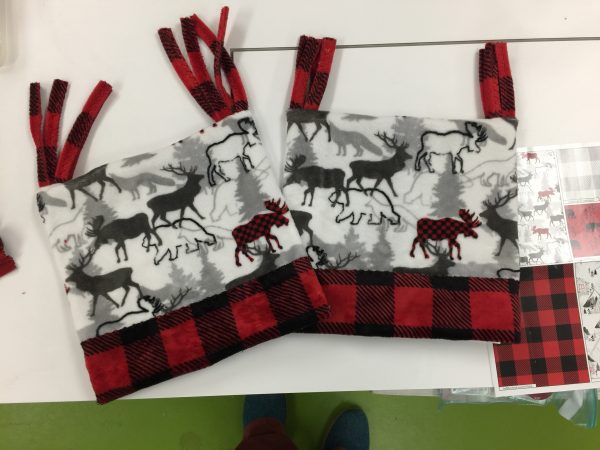
A quick Gift Bag Tutorial–took about half an hour even *with* being fussy! Used leftover flannel, and a trimmed off bit of fabric from a quilt back or edge as the ribbon! Read on….

Sometimes it is possible to whip up a quick something just before Christmas…I’ll have to back-to-back posts (I hope) about sewing for the holidays that include this tutorial on zipping up a quick gift bag and, next, the wonderful York Pinafore pattern from Helen’s Closet patterns.
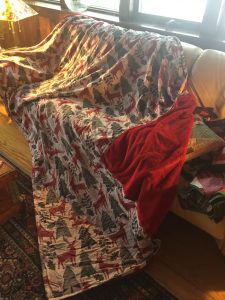
Last year Shannon Fabrics sent me a number of different fabrics including Cuddle and Luxe, fleece and faux fur type of fabrics. They sent a vast amount of this soft and silky red (available at Fabrics.com). I’m not positive which color way it was, but it was similar to this one. I finally purchased a flannel sheet, queen size, to make a throw that is big enough for two to snuggle or to use as a cover on a twin bed! It is more than a tad wrinkled here because it has been in recent use…it’s winter in Maine! Thank you Shannon Fabrics!

I needed the Queen Sized sheet so it would be long enough for the red Luxe that is so silky soft. That meant I had quite a bit leftover…so I thought I’d make a garment (next post). Once that was made, I still had leftovers so I whipped up two gift bags and thought I’d share it as a tutorial.

Tutorial:

  1. Cut two rectangles of fabric or one very wide rectangle. Place right sides together.
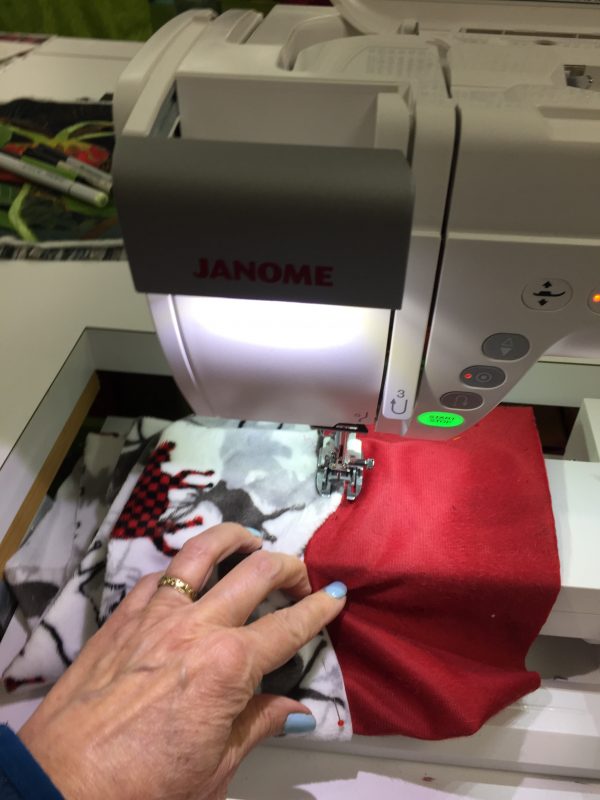
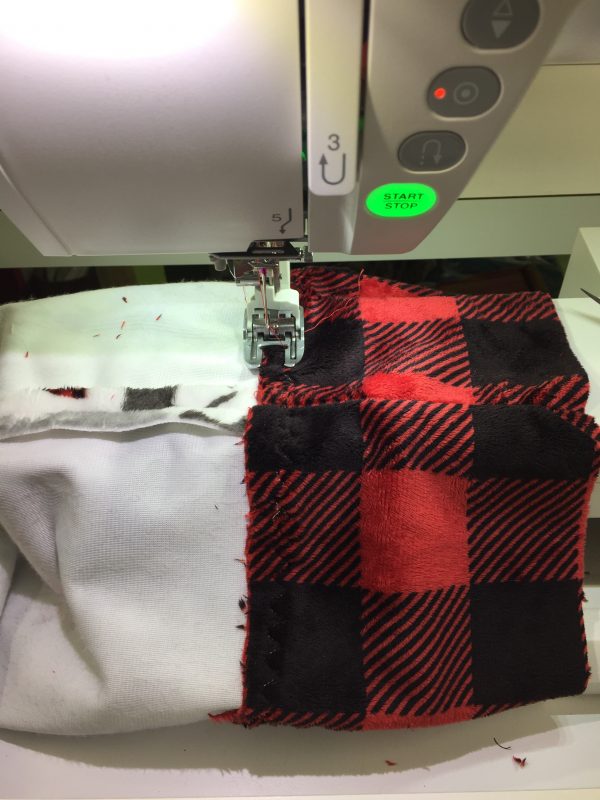
  2. Clean finish edges. You can use an overcast stitch as I did (photo below) or use a french seam (google it, or I’ll do a tutorial eventually of some basic things every sewist should know). Using the Janome’s “M” overcast foot gave results as good as a serger.
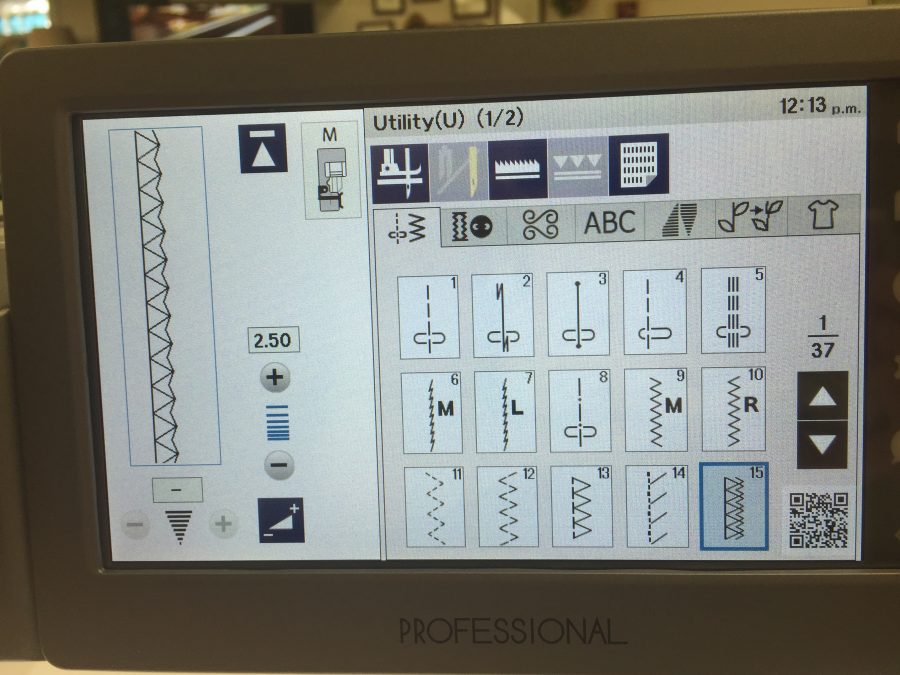
Janome America sent me the amazing new M7 Continental sewing machine (several blogposts in the new year…phenomenal machine!). I used the zigzag overcast stitch and the M foot which comes with the machine to clean finish the edges of the bag.

3. Sew a simple straight seam just inside the overcast edges. Sometimes the contents of gift bags can be heavy, and especially with soft and stretchy flannel, I felt a little extra stitching was a Good Thing.
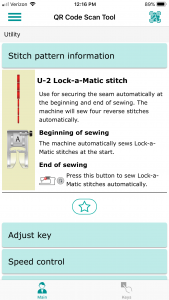
I’d never used the Lock-a-Matic stitch before because I learned to sew when we were lucky to have a simple zigzag on a machine and not all the bells and whistles.
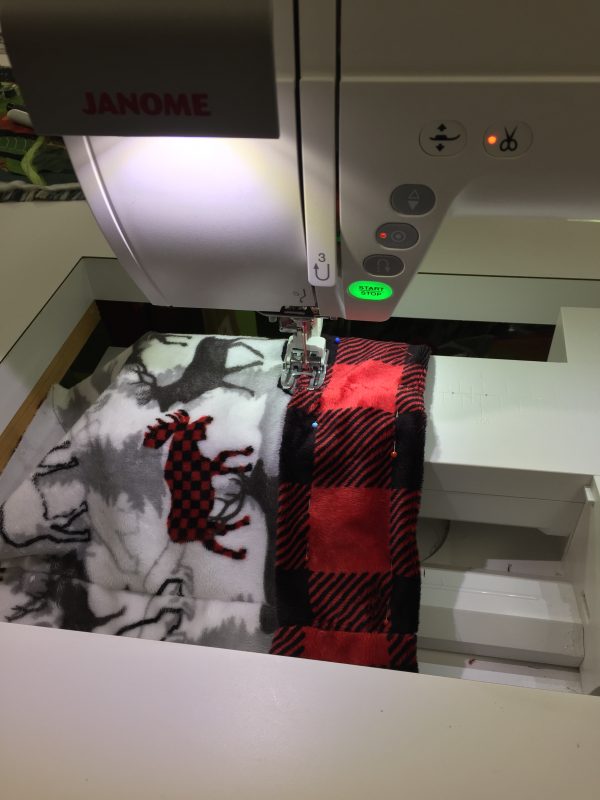
Janome has designed the AcuSpark software. In the previous photo that QR code I pointed out: use your phone to scan and it will pull up a screen with helpful information. Here, I’ve got the one for the Lock-a-Matic Stitch!

Having started sewing when dinosaurs roamed the earth and you were lucky if your machine did anything besides a straight stitch forward and back, I am so used to just doing the lockstitch or backstitch myself that I likely will keep doing that, but this stitch automatically does a securing backstitch at the start of a seam and, when you press the back arrow, at the end. I had been concerned that it might sew a lockstitch when you pause in the middle of a long seam to re-position your hands, but it doesn’t, which is good!

4. Turn your bag right side out.
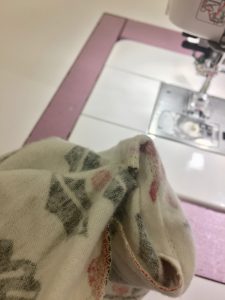
Once your seams are finished, turn the bag right side out. I like to fold the corners so that both seam allowances are to one side. My hand is inside and I’m pinching the corner together. Then keeping hold of the seam allowances, turn.
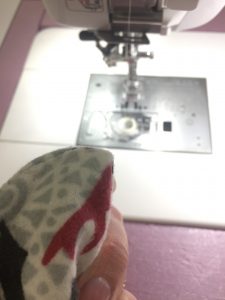
Pretty good corner, and I haven’t even eased it out yet!

5. At the ironing board, use a point turner to coax the corners out to perfect.
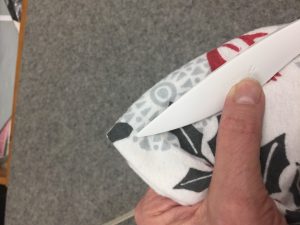
I have several point turners. This is one I bought just this year. Make by Clover, it is beautifully smooth, and has a Hera Marker (sharp edge for marking lines on cloth) on the other end. It is longer than most point turners, curved to fit the hand nicely, and I like it better than any others I have tried.
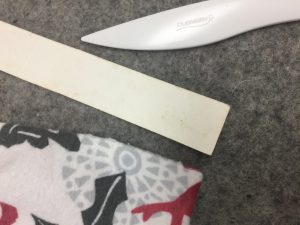
Lookit how perfect that corner is! Square as can be! I created this method for corners when doing custom home dec work for an interior designer. Some of the upholstery fabrics were so thick that I was afraid if I clipped the corner, the old school way to deal with bulk, the fabric would unravel and ruin the project, and the fabric was crazy expensive. This is secure and gets even better results.

6. Hem the open end. The interior designer I worked for taught me about using poster board (or tag board or an old manila folder) to make templates for turning hems. When making curtains, the extra weight of a doubled hem helped them hang well. I called it the turn-turn hem, since you turn up two full hem-depths.
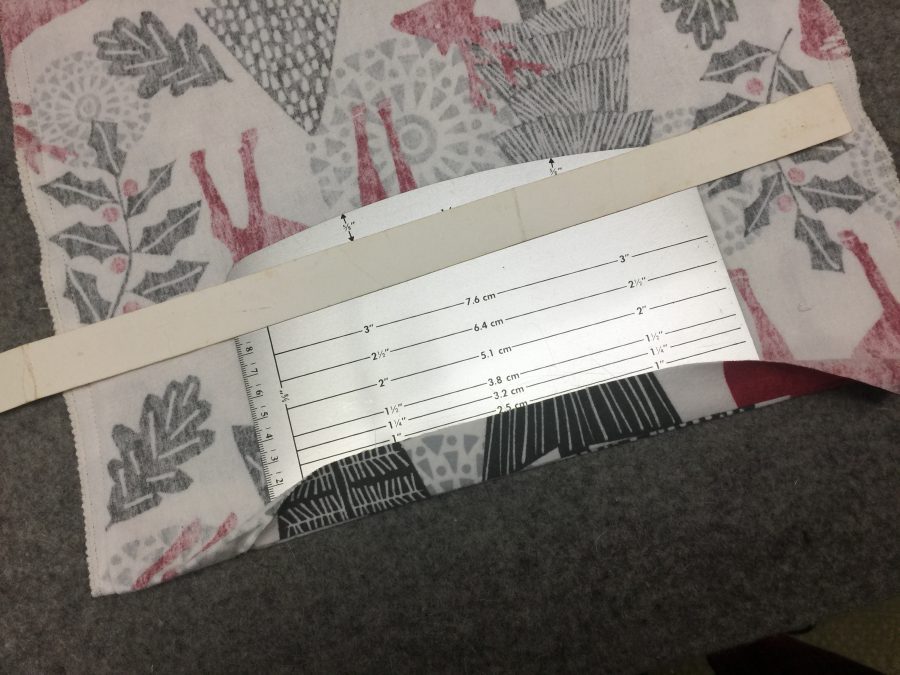
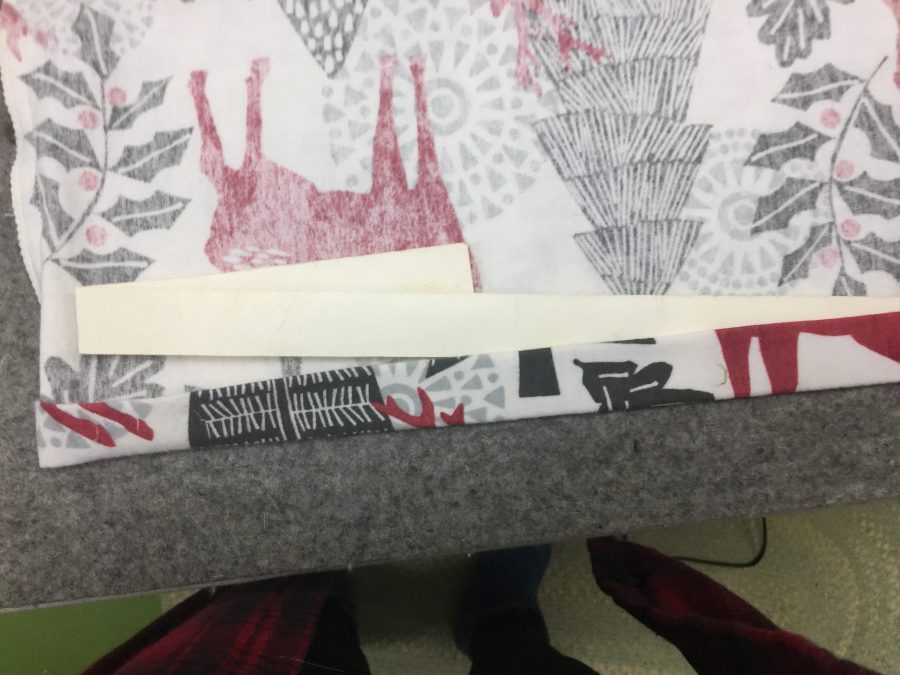
This is the first turn. I’m showing the poster board 1″ wide strip I have used –I am not exaggerating same piece of paper– for over 17 years. Place your fabric right side down on the ironing surface. Fold the hem up over the poster board, lightly snugging the board into the fold with your fingers. Press. Steam is fine–use it all the time and the poster board is still in great shape. You can also use the Dritz EzyHem tool, available everywhere. The metal is nice because it gets hot which helps set the crease, but it is short, maybe 6-7 inches. The poster board is fabulous for things like curtains and custom sheets because you can get a really long run done all at once without wobbles.
Then you turn the hem up again. Usually I keep the poster board inside the first turn and just roll it up, but for photo purposes I wanted to show you that it is the same idea.

7. Press your seams to one side. Using a seam roll –in this case a piece of cheap stair handle from the big box DIY store. Dressmaking suppliers sell beautiful hardwood (maple usually) seam rolls for Lotsa Bucks. This pine stair rail handle was a few dollars for 24 inches. Sits flat on the ironing surface and does the trick.
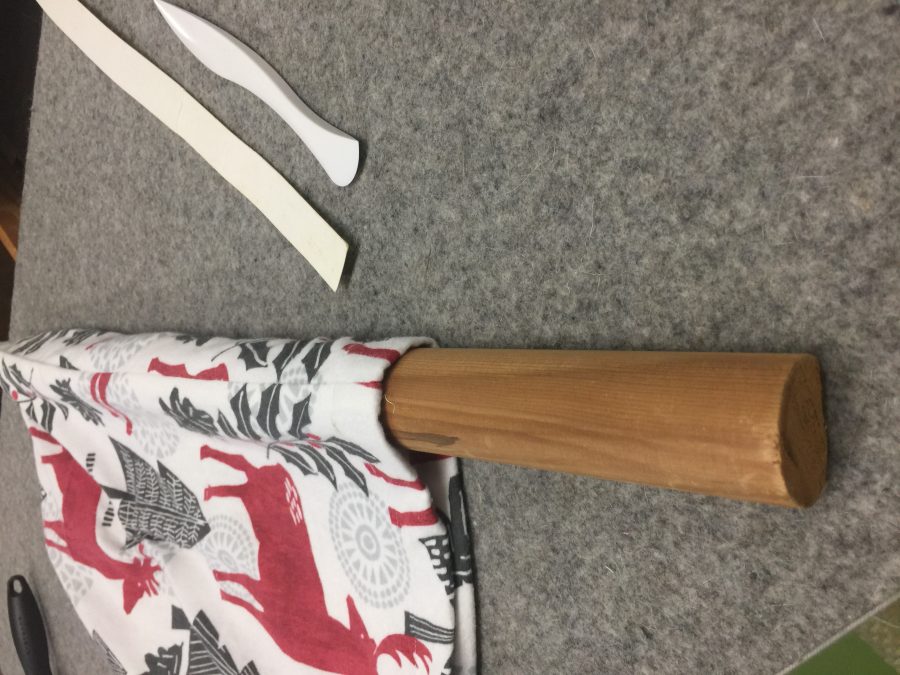
You can see the flat end of the stair-rail-as-pressing-dowel. I’ve got the seam centered on the top and have pressed the first part of it. This set up is perfect when you don’t want the edges of the seam allowance to show through to the front of your fabric.

8. Give your bag a final press, tuck the goodies inside, and tie shut. I think, having found that strip of green, that instead of buying ribbon I might “make” some from leftover bias bindings (unfinished on the edges) or making some straps (turn seam allowances under, sew folded edges together) to use as ties for future years. Here’s that original photo again:

Someone has a special surprise inside!

Int’l Quilt Market Part 1, a sale and a win!

Thursday, November 14th, 2019

So much has happened in the past 2 1/2 weeks: International Quilt Market, International Quilt Festival, and a whopper of a cold, a lovely weekend with my older son and DIL, and some home improvements. So I’ll start at the beginning…with one detour: I sold a quilt at Festival after all! I’ll post on that in a few days (I shared on FB), but first let’s start with Market. And read to the end for the big surprise!

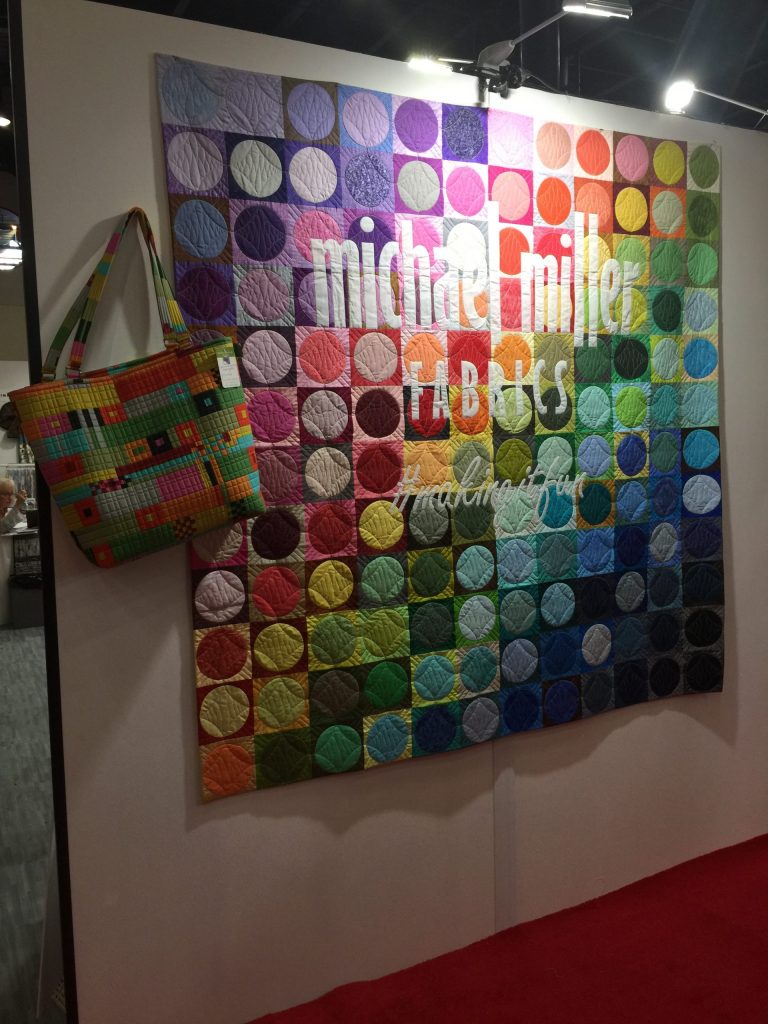
I arrived on Sunday of Quilt Market–usually I fly in on Tuesday or Monday and begin teaching the next day. It was wonderful–so much less stress about finding my boxes of stuff shipped and making sure everything was there and organized for each day of classes! Then, following my roommate’s example, I planned to see all the quilts BEFORE Festival when I wasn’t tired from teaching. Well…instead I got sidetracked by the lure of Market. I had SO MUCH FUN visiting the booths. One of the first was Michael Miller Fabrics.

While in the booth, I was mulling over how to bump up attendance for a workshop, and have finally conceded that I have to offer half day classes with complete kits. I have always loved the hand of the Michael Miller Cotton Couture solids, so I was brainstorming in the booth. Since it was late on Monday, the final day of Market, it was quiet and two staffers came to chat. I asked about purchasing fabric wholesale to use in kits, which led to a wonderful and productive conversation.

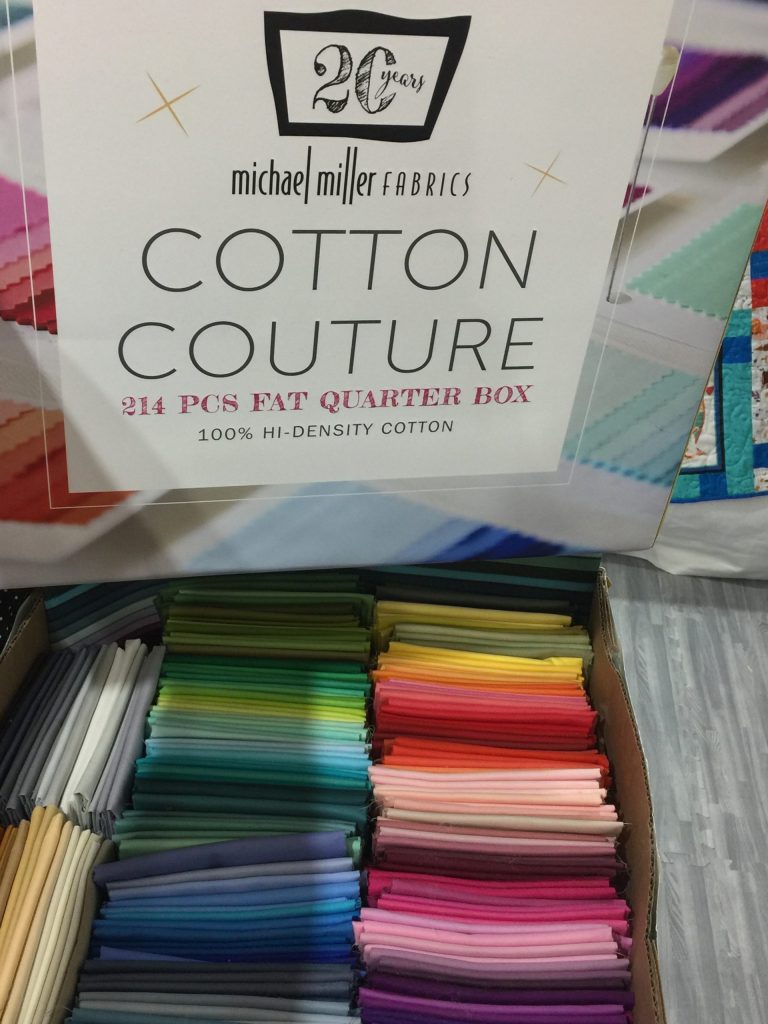
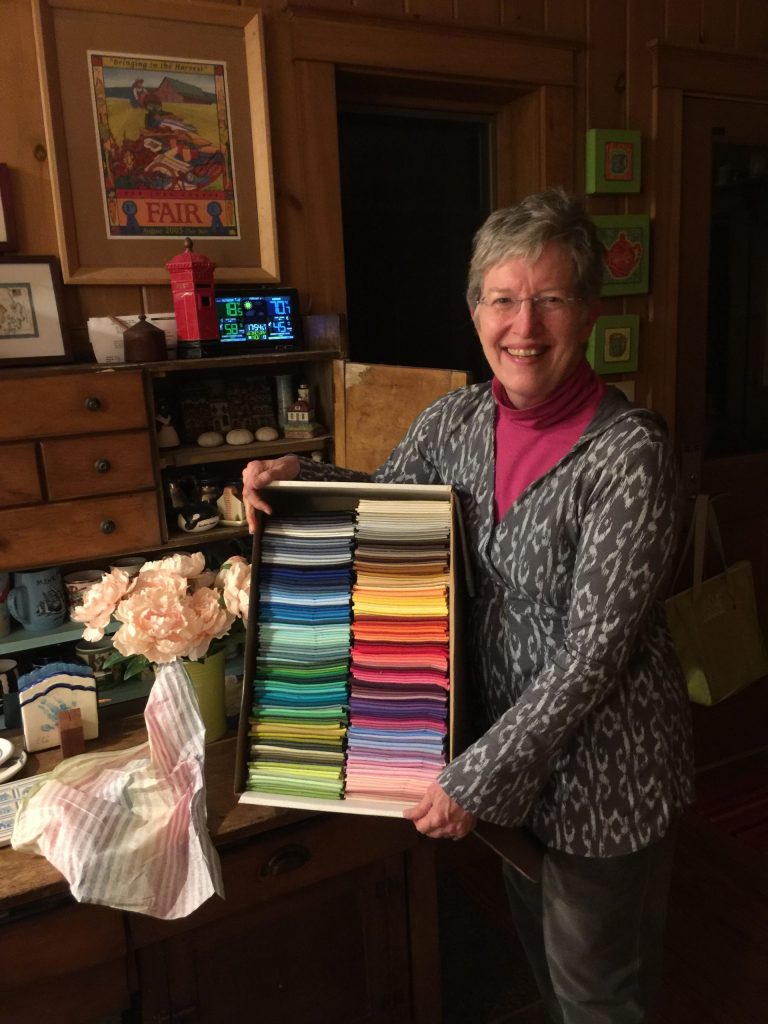
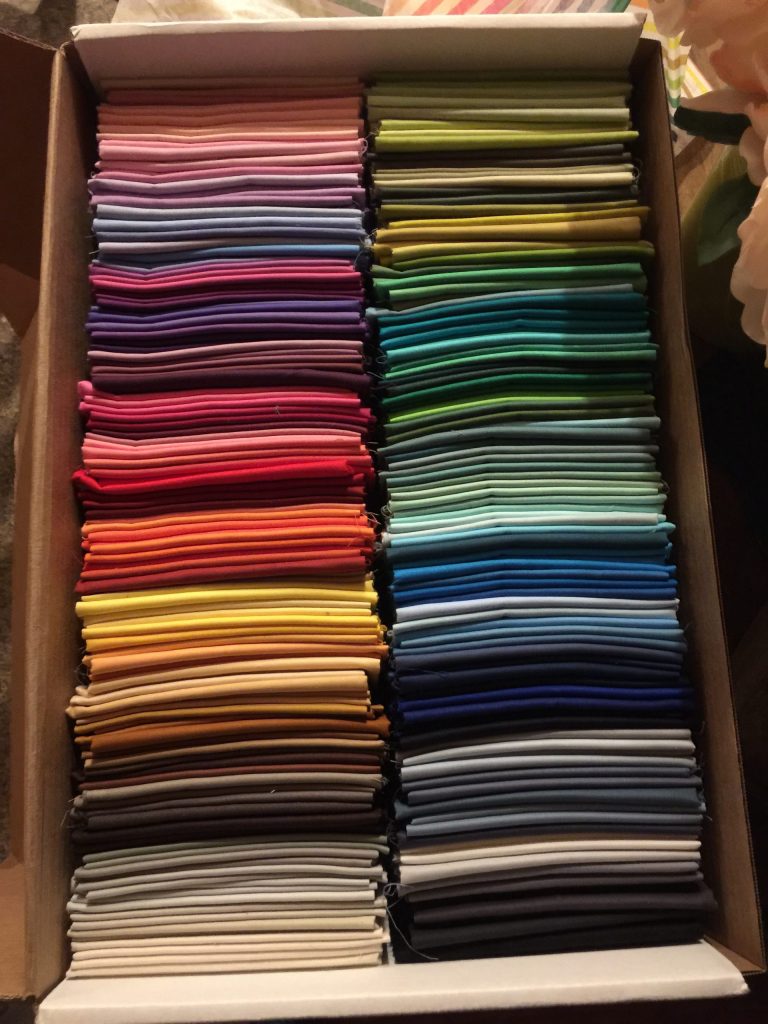
First I spotted this eye candy…don’t you just want to dive in face first? It is a box of one fat quarter of all 214 — yes TWO HUNDRED FOURTEEN — of the Cotton Couture colors. And they were having a giveaway…fill out the form, and if you got all the answers in the quiz (fun stuff about Michael Miller Fabrics) the winner would be drawn from those with correct answers. Of course I filled it out with what I already knew…I googled up their website and found some answers I didn’t know, and with paper in hand, asked a staffer if I could ask Michael’s favorite dessert–luckily I had guessed the correct answer. Turned it in, and moved on.
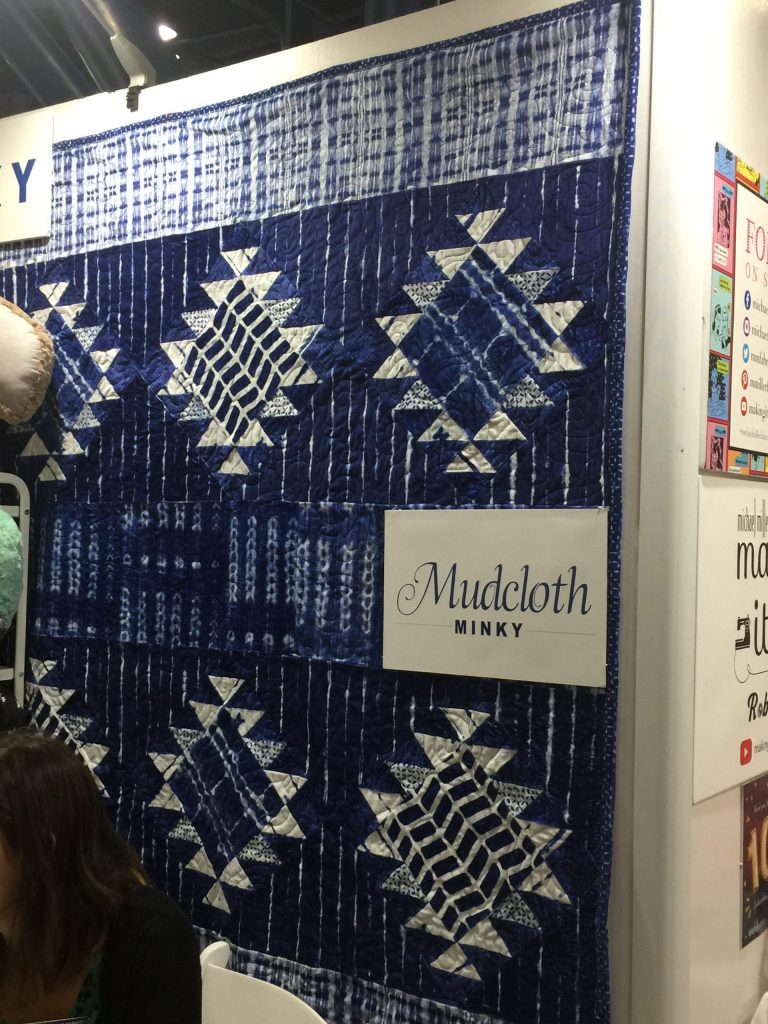
Can you believe this is that glorious soft Minky fabric???? I had to walk up to 12 inches away and indeed it is…looks like indigo shibori on cotton! I so want some of this…I need an alternative to my wintry sofa throws. I’d make a top, quilt it on the thinnest cotton, the back with this and bind. LOVE IT!
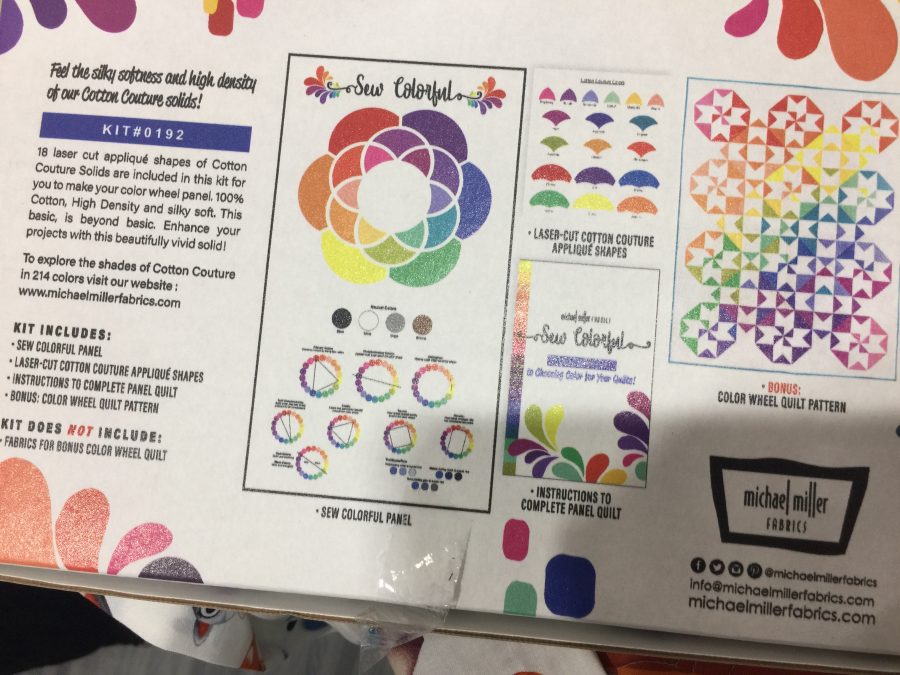
They also had this really cool teaching tool for new quilters to learn color. I don’t teach that sort of class, locally or on the road, but it’s a brilliant idea for a shop.

Can you tell I spent a lot of time in the booth…today’s post will be all Michael Miller, then I’ll do another about the rest of Market soon!

The quilting on Modern Quilts enchants me–perhaps what I like best about this fresh approach to quilting. Not to mention these are SO my colors. And yes, I am a member of Mt. Battie Modern Quilt Guild and the MQG itself!

Well, after I got home, and spent several days first doing bookkeeping (ugh ugh UGH and may I say UGH) and then feeling sick….I got laryngitis on about Tuesday on my first class day. By Weds. I was feeling worse. By Thursday I could barely squeak—ladies in the audience at the Machine Quilting Forum were dropping cough drops on my table! Then it morphed into a sinus infection. I soldiered on through my last class Saturday, but was honestly glad it has lightly attended. I wouldn’t have had the energy for a full 24 and it was a FUN group of students as it was. So when I got home, I went into chair-potato/get well mode.

Then I got an email from Michael Miller: I WON THE 214 FAT QUARTERS!!!!!! They arrived about two days ago. I mean, first I sell a quilt and THEN I WIN THESE????!!!!! I need to go buy a lottery ticket.

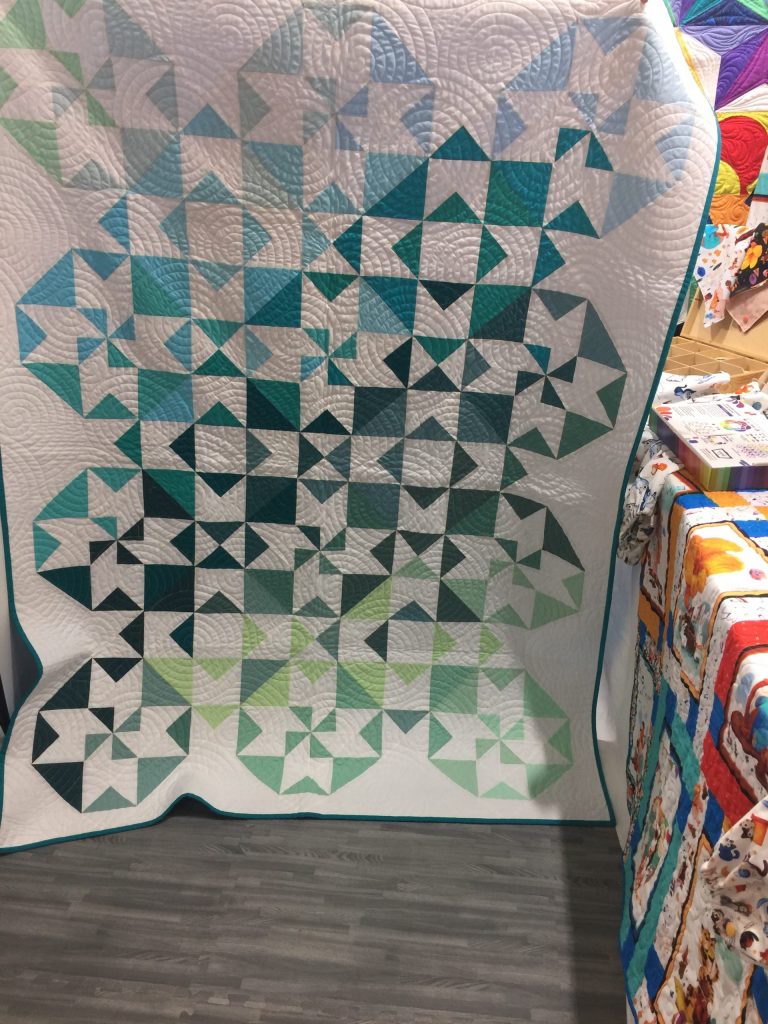
Yes, I am HAPPY! I just can’t believe it…I never EVER win stuff…so what a boon! And yes, there is a quilt coming! 214 fat quarters…over 53 yards!!!!!!!!
THANK YOU to Michael Miller Fabrics…you ROCK. I am so thrilled to have this bounty. I’m already planning a quilt called 214…and one that isn’t too complex, one where I can have FUN and get it done and revel in color!

This post has gone on long enough, so I’ll break here and carry on with the REST of International Quilt Market in my next post. But yes, Thank you to Michael Miller–stay tuned for what I do with these!

Free and quick Shannon Cuddle Fleece Hat pattern!

Saturday, December 1st, 2018

Hi everyone…is anyone else madly trying to figure out what to do for Christmas gifts?  Here’s a FREE pattern by me, with major thanks to Shannon Fabrics for the Cuddle fleece.  Literally you can make a couple of these in an hour or so–give yourself three hours and a yard and you can make half a dozen in production-line mode!

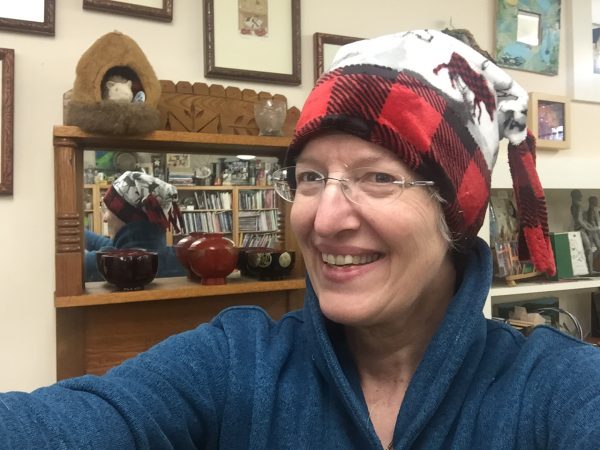
How many selfies do you need to take to eliminate many chins or no chin? LOL! I love my soft hat!

And here is what the hat looks like, flat:

Two hats…I mean I used up EVERY LAST BIT of scraps! One hat for me, one to send to Shannon for them to use as they wish!

Here’s the pattern in PDF form…and typed out below:

Shannon Fabrics Cuddle Hat in an Hour

You’ll need:

¼ yard (about 8 ½ lengthwise grain by 22-23 inches) fleece for main fabric

5” by 22-23 inches for contrast

Scraps or yarn for hat tassels

How to:

  •  Measure your head around the forehead:  ______ + 1 “ =  ________  cutting width

Tip: In my case, my head measures 22 ½”.  I found that I wanted my hat to be snug so it would stay on in the wind, so I used a larger seam allowance.  My hat **finishes** at 21 ½” or one inch smaller than my head circumference. Depending on what you find comfortable, you may find that a cutting width exactly the same as your head circumference is just perfect.   

  • Cut main body fleece 8 ½” high by cutting width.  Make certain that the lengthwise (not-stretchy) grainline runs vertically and that the stretchy cross-grain is what goes around your head!
  • Cut hat band fleece 4 ½” by cutting width (if folding under) or 3 ½” by cutting width (if using raw edge).

Option:  vary the width of your band depending on how warm you want it to be and the pattern (if any) of your fleece.  My main fabric is not fuzzy on the inside and I wanted soft, so I have 1 ¼” of the red checked fleece on the inside and about  1” folded under on the outside edge so that there are two layers of fleece to keep my ears warm on a windy winter’s day.

  • Pin seam and test the fit: now is the time make adjustments to snug it up if needed.
  • Sew seams on hat body and hat band using a narrow zigzag, about 1.0 width and 3.0 length.
  • Pin the seams open.
  • Place the hat band and hat body WRONG sides together, matching the seams and overlapping about ½”. Stitch with a serpentine (wavy multi-stitch), 3-step zigzag or narrow zigzag to secure each raw edge.  You will sew two lines of stitching, one on each side of the overlap.
  • Because the fleece is thick, and because I wanted the soft part next to my forehead, I didn’t use a typical garment seam. Instead, I overlapped the two fabrics, wrong sides together, and sewed them with a serpentine stitch. I did this twice, on either side, so I would catch both edges of the overlap.

Sewing the other side of the band

I then turned the plaid to the outside and brought it up above the seam that joins the top of the hat to the “cuff.”

  • Turn the hat band to the outside of the hat body and turn up.  If you are making a thicker band, turn under about an inch; if you are not making a thicker band, simply fold up.  Pin the edge in place; carefully put on the hat.  If you want a narrower contrasting band, now is the time to trim or fold under more.
  • Sew the top edge of the contrasting band using the serpentine  / 3-step zigzag / narrow zigzag stitch.

Optional:  make some tassels. I used a 1” strip of fleece from the selvedge (leftover from another project) and folded it in half wrong-sides together and sewed with the serpentine stitch.  Cut into 9-11” (or thereabouts) lengths.  I opted for four strips which I then folded in half. 

  • Turn the hat inside out. Centering the seamline in the center back, pin right sides together.
  • If using tassels, tuck them into the seam at the corners so that the folded edge is even with the raw edge of the seam.  I placed two at each corner.
  • Sew the seam using a narrow zigzag.

Tip:  sew from the center to the outside edge, pivot at the end and sew back to the center about ½.”  Repeat from the center to the other end.  This is easier than sewing all the way across beginning at the bulky outside edge.

  • Turn right side out and wear with joy!


The last bits of fleece make an easy peasy hat!

Thursday, November 1st, 2018

So I decided to use up the very last bits of my buffalo check fleece.  I began with 4 3/4 yards of the 58-60″ wide cloth.  The second photo shows the last bits!   These hats are SO FAST to make…including figuring out the best sewing sequence it took less than an hour for the first one.  If you wanted to make a half dozen, you could do that in an afternoon–quick and easy winter gifts!

How many selfies do you need to take to eliminate many chins or no chin? LOL! I love my soft hat!

This is all that is left of 4.75 YARDS of fabric….that is 10,260 square inches. Under 200 left! I even made some tassles/trim out of the selvages!

This hat will be a free pattern soon–not sure yet if it will be here or at Shannon’s site, but you can make one of these in well under an hour from scraps.  Truly, I used maybe 10×25 for the white part, 5 x 25 for the bottom, and a bit more for the tassles/dangly bits.   I just sewed two tubes to fit my head, one of the white print, one of the buffalo plaid.  The white print is here at Fabric.com.

Because the fleece is thick, and because I wanted the soft part next to my forehead, I didn’t use a typical garment seam. Instead, I overlapped the two fabrics, wrong sides together, and sewed them with a serpentine stitch. I did this twice, on either side, so I would catch both edges of the overlap. My finger is pulling the two pieces apart so you can see the overlap.

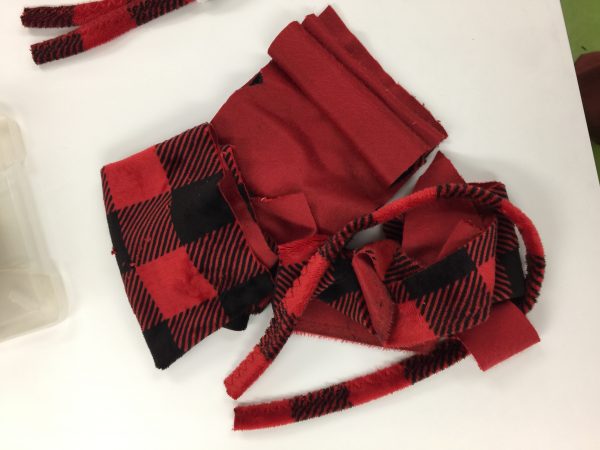
I then turned the plaid to the outside and brought it up above the seam that joins the top of the hat to the “cuff.”  I pinned the fabric at both edges so that I kept the amount of black that shows at the bottom even all the way around.  As I mentioned in my earlier posts about the throw and the jacket, the inside of Cuddle is slippery, so pin well. Because the fabric does not ravel, I didn’t need to turn under the upper edge of the plaid cuff.  I used the serpentine stitch to it down.

Finally, I made some dangly bits using the trimmed off selvages (they were about 1″ wide plus lengthwise grain of course):  fold in half wrong sides together and use serpentine stitch.  Cut to length, insert two, each folded in half, at either end of the seam at the top of the hat, and sew the final seam.  Because of the bulk from the dangly bits, I found it far easier to sew from the center to the ends, lock off the stitch and repeat for the other side.

Two hats…I mean I used up EVERY LAST BIT of scraps! One hat for me, one to send to Shannon for them to use as they wish!  Talk about a quick and easy Christmas gift!


THANK YOU Shannon Fabrics for this wonderful fabric and an October full of fun, fast and easy fleece projects.   I look forward to making more…I’ve got some Christmas gifts already made which I can’t share due to friends looking at my blog, and another big length of fleece to use on a snuggle quilt for winter!

Call me a Shannon Cuddle fan!

Sunday, October 14th, 2018

A heavenly combination: my studio, my Janome 9400 and Shannon Fabrics cuddle fabric–I’m ready for winter!  This fabric is so soft you just want to pet it, snuggle under it, and not give it away as a gift!

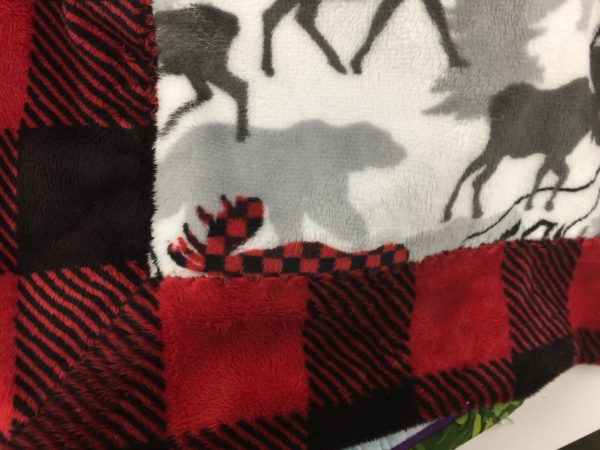
Last May, Janome America had its first ever Janome Education Summit, and one of the presenters was Shannon Fabrics.  From the kit they provided, I made the lovely summery top in this blogpost.  But they also shared samples of their fabrics, including these two.  True confession:  I have this Elmer Fudd-esque love affair with red and black buffalo check.  When I got home from the Janome event, I searched for the cuddle buffalo check on the internet wanting to buy multiple yards of it it but couldn’t find it anywhere, so contacted the presenter from Shannon Fabrics, who told me it wasn’t available until summer for the new fall season.  I ordered some other Shannon Cuddle and Luxe Fur from Fabric.com (still waiting to make that up, stay tuned in December).  Mid summer I still couldn’t find it, so I wrote to her again, and she SENT ME a big box to make not one but TWO projects.   This throw is SO fast and easy and it would make an awesome holiday gift. Literally, I made it in a short afternoon!

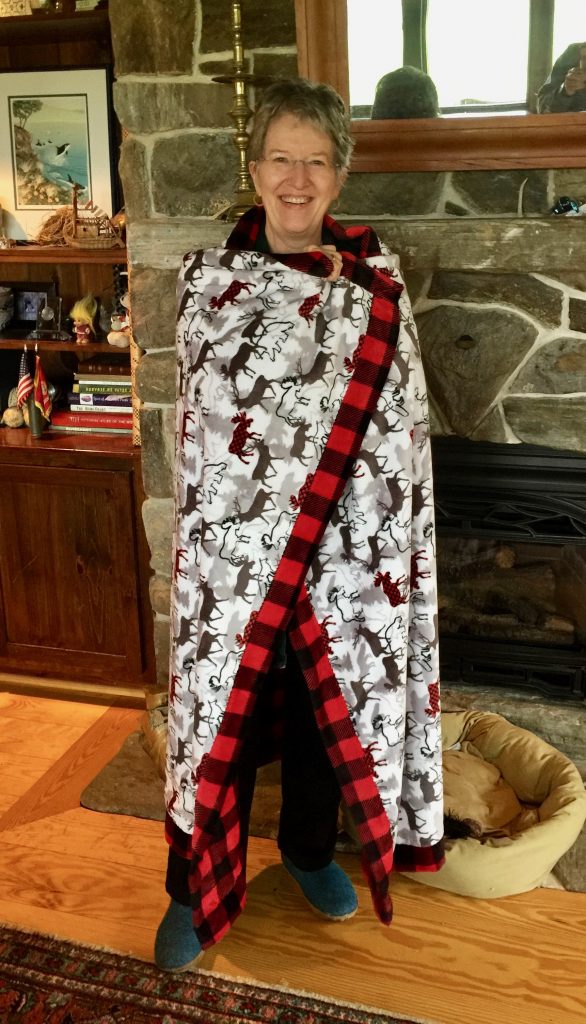
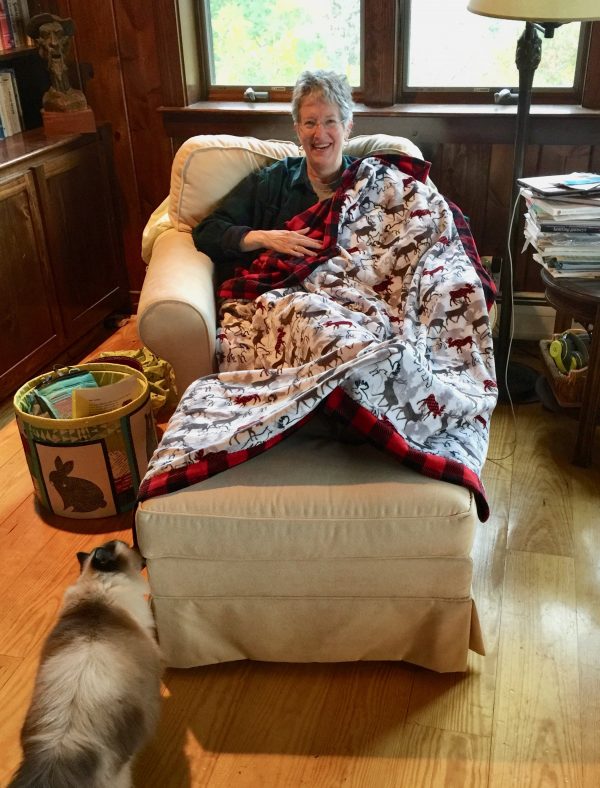
Me by the fireplace, wrapped in my jumbo throw. This is big enough for two people on a sofa. Or one person a cat and a pug in a chair. Ahem (photo below).

 Here’s what and how:

The two fabrics pictured are available at Fabric.com here/minky buffalo check and here/Studio minky forest park, both in the scarlet color way.  It is also available in a blue version, and there is a lovely silvery gray and white buffalo check too.  I used two yards of each, but had a little of the print leftover–gonna make a hat out of that!  You’ll also need some thread–color doesn’t really matter as it disappears into the pile, but I did use red. If I had found the Shannon free pattern and video (keep reading) I would have ordered 2 1/3 yards of the check since you need a little extra to wrap.  Instead, I trimmed down my white print to work.

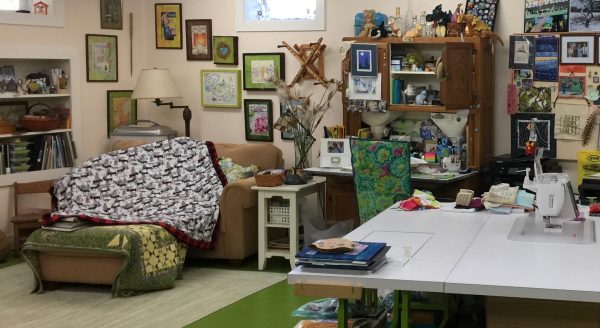
A blogpost with lots of pictures is better. Here is the throw on the love seat / reading zone in my basement studio. You can see how large it is!

TIPS and HINTS for working with Cuddle, Minky and Luxe Fur:

  1.  The BEST tip for minimizing lint came from Ellen of Shannon Fabrics in May:  you know you when you cut Minky and similar fabrics you end up with little bits of fluff EVERYwhere forever?  Not any more!   First, especially with the long fur-like fabrics (in my upcoming December project), cut your fleece from the back cutting only through the knit backing.  This minimizes the snipped bits of fluff.  You can also do as I did with the regular pile cuddle (what I used here) and use a rotary cutter.  Then scoop up ALL the pieces (including leftovers if you keep them for small projects later), perhaps into a basket or large plastic bag, and take them to your DRYER.  Yes, the clothes dryer.  Tumble on no-heat for about ten minutes, then CLEAN THE LINT FILTER. About 80+ percent of that fluff will end up in the lint filter and not all over your sewing space and house.  OMG it really worked!
  2. There is no stretch on the lengthwise grain.  At all.  If you make a garment (my next project) make sure you keep grainline in mind when fitting the garment.
  3. The fabric DOES NOT RAVEL.  At ALL.  That means you don’t have to turn under edges!!!!!!  That means these projects are FAST!
  4. Stitch length:  The fleece will hide your stitches.  That means it will be challenging if you decide you need to remove any of the stitches, so pin carefully to avoid ripping out!   Also, it is good to use a slightly longer stitch length.  I used a 3.0.
  5. Best stitch for seams on knits: For garments, using a zigzag or “lightning” zigzag will at a 1.0 width will look like a straight stitch seam from the outside, but adds a little bit of flexibility and therefore helps avoid popping stitches in the seam.

Shannon Fabrics has many free patterns available.  I used this one for my throw, a youTube video called Cuddle Self-Binding Blanket from Shannon and FleeceFun.com.  I hadn’t found this video when I requested my fabric.  If I had, I would have ordered 2 1/3 yard of the buffalo check and 2 yards of the forest park print and had a slightly larger (better!) throw.  WATCH the video before you order fabric…it is only 7 minutes long and will help you.

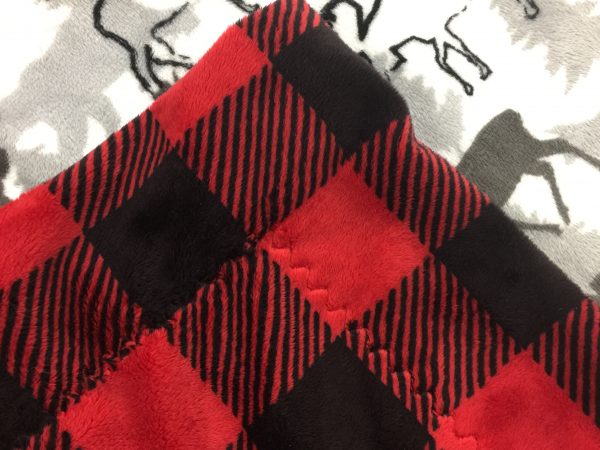
I used a serpentine stitch on my Janome 9400, an “S” shaped stitch to sew down the edges. You could also use a blanket stitch or a 3-step zigzag (the one that takes three stitches in one direction, then three stitches the other way).  I mean, you can’t even SEE the stitches.

Here’s what the serpentine stitch looks like from the back. I used red thread and you can’t even SEE the red on the black square!

I have been a Janome Fan-Girl for 15+years now.  I am now a Shannon Fan-Girl too! I’m finishing up a winter jacket with more of the buffalo check and a cream cuddle fleece lining, and will share something else that will be a gift for Christmas–perhaps in late November which is plenty of time for you to whip up a few of them in time for holiday giving.  Or keeping.  Ahem!

This is what I expect to look like most evenings in winter: in my chair in the living room, me and pug under the throw, cat checking things out, ready to make a dent in my pile of reading!

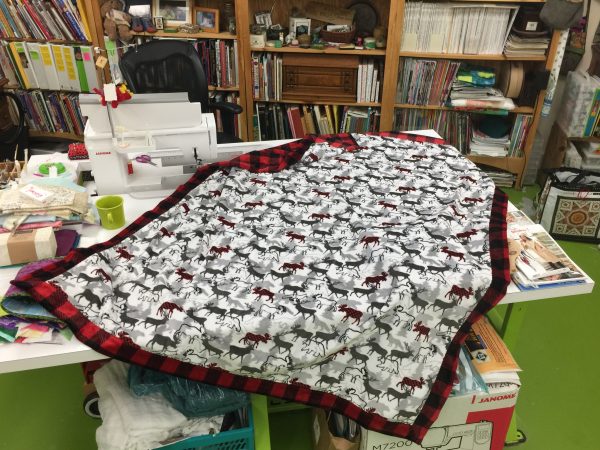
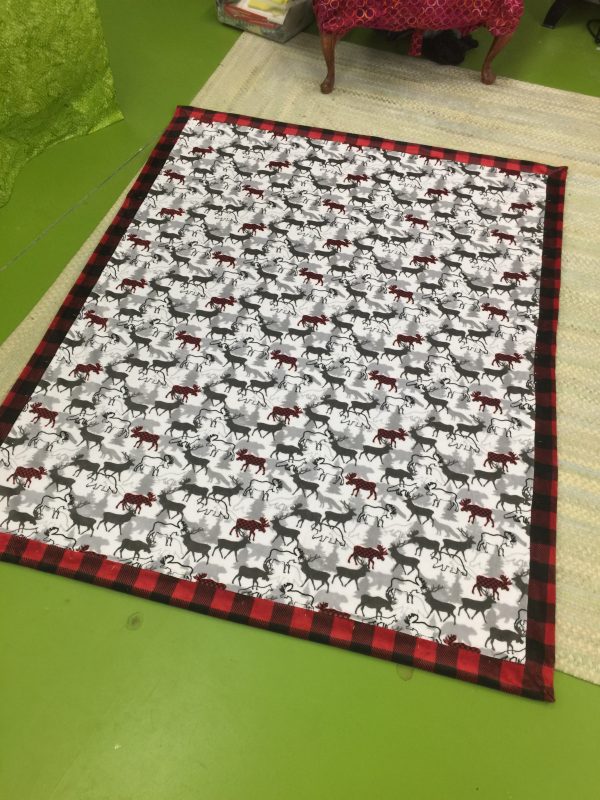
And because it is boring, this photo is last, but it shows the throw out flat.

THANK YOU SHANNON FABRICS for this fabric which I was totally prepared to order!   I have purchased more of their fabrics own my own and know I will be using it again.  If they ever make their “Spa” line in some bold colors (not pastel, not purple) I am so gonna make a bathrobe…..in the meantime, I have more snuggle quilts and gifts to make to keep me plenty busy.  And as always, Thank You Janome America for making the best machines EVER!

laid out flat on my studio floor (cement painted green!)…big, warm, SOFT. And did I mention, SOFT!