Making Ann Tilley’s Magic Pants
Friday, November 7th, 2025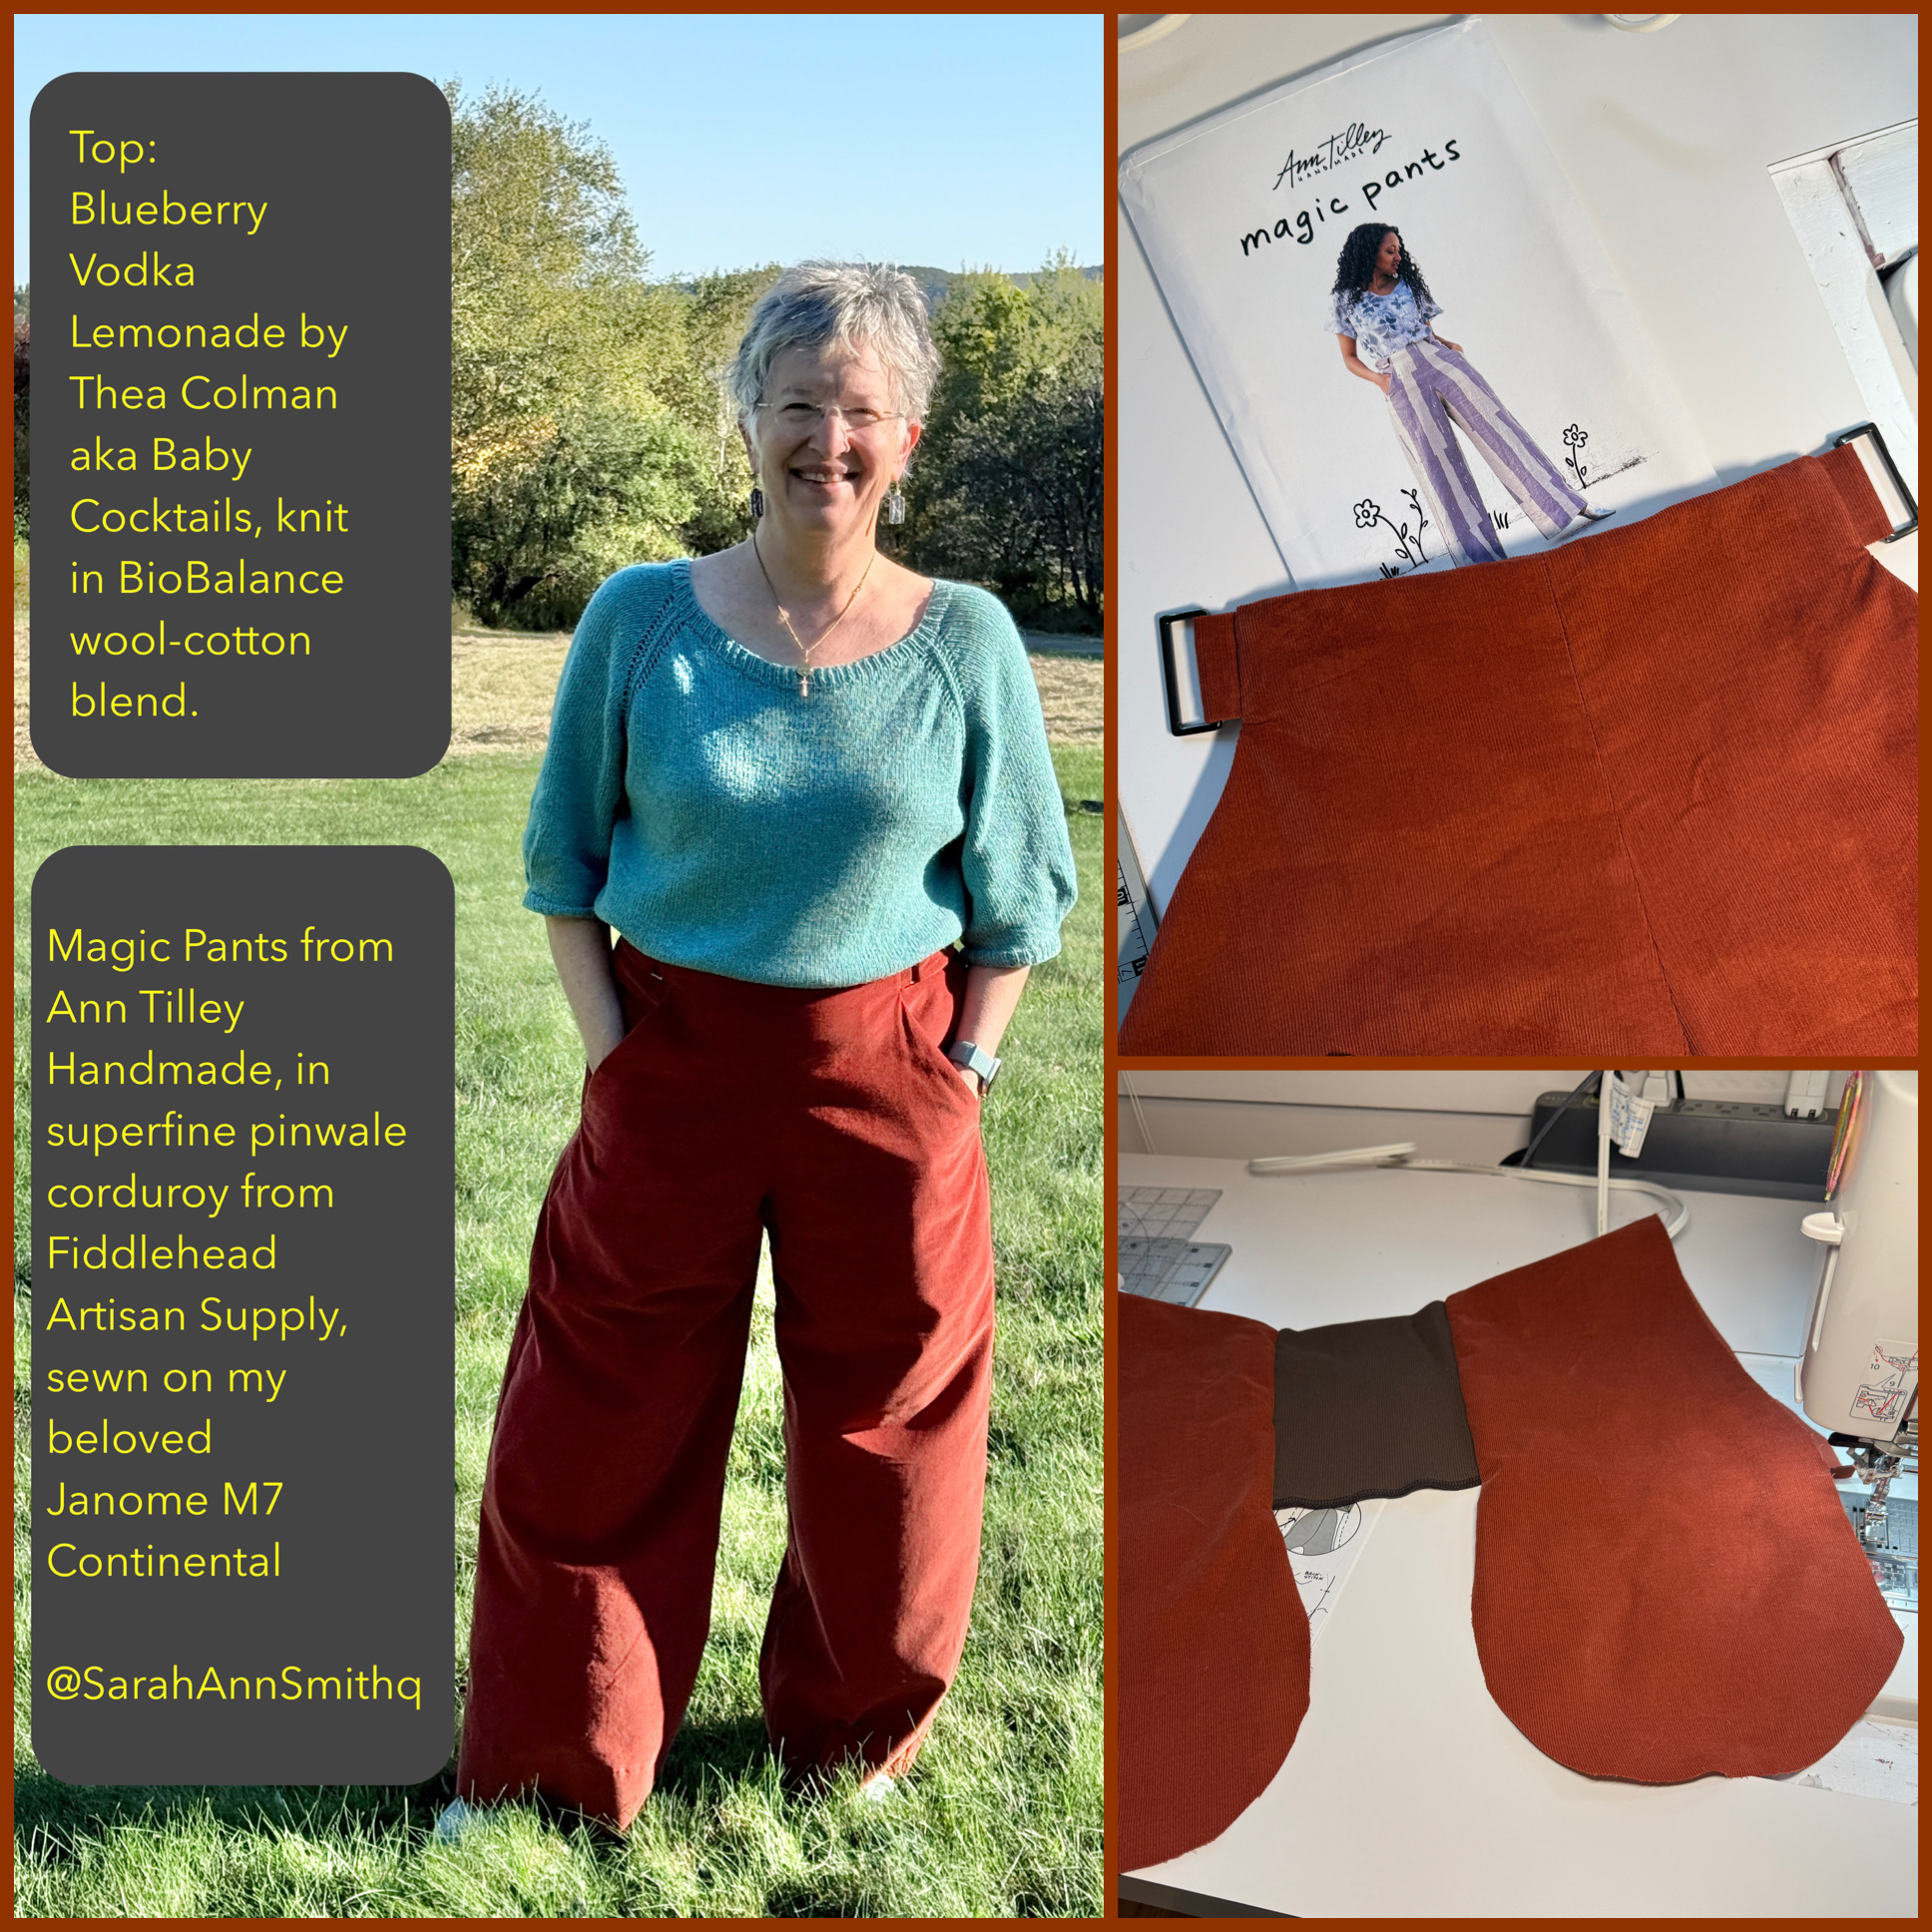
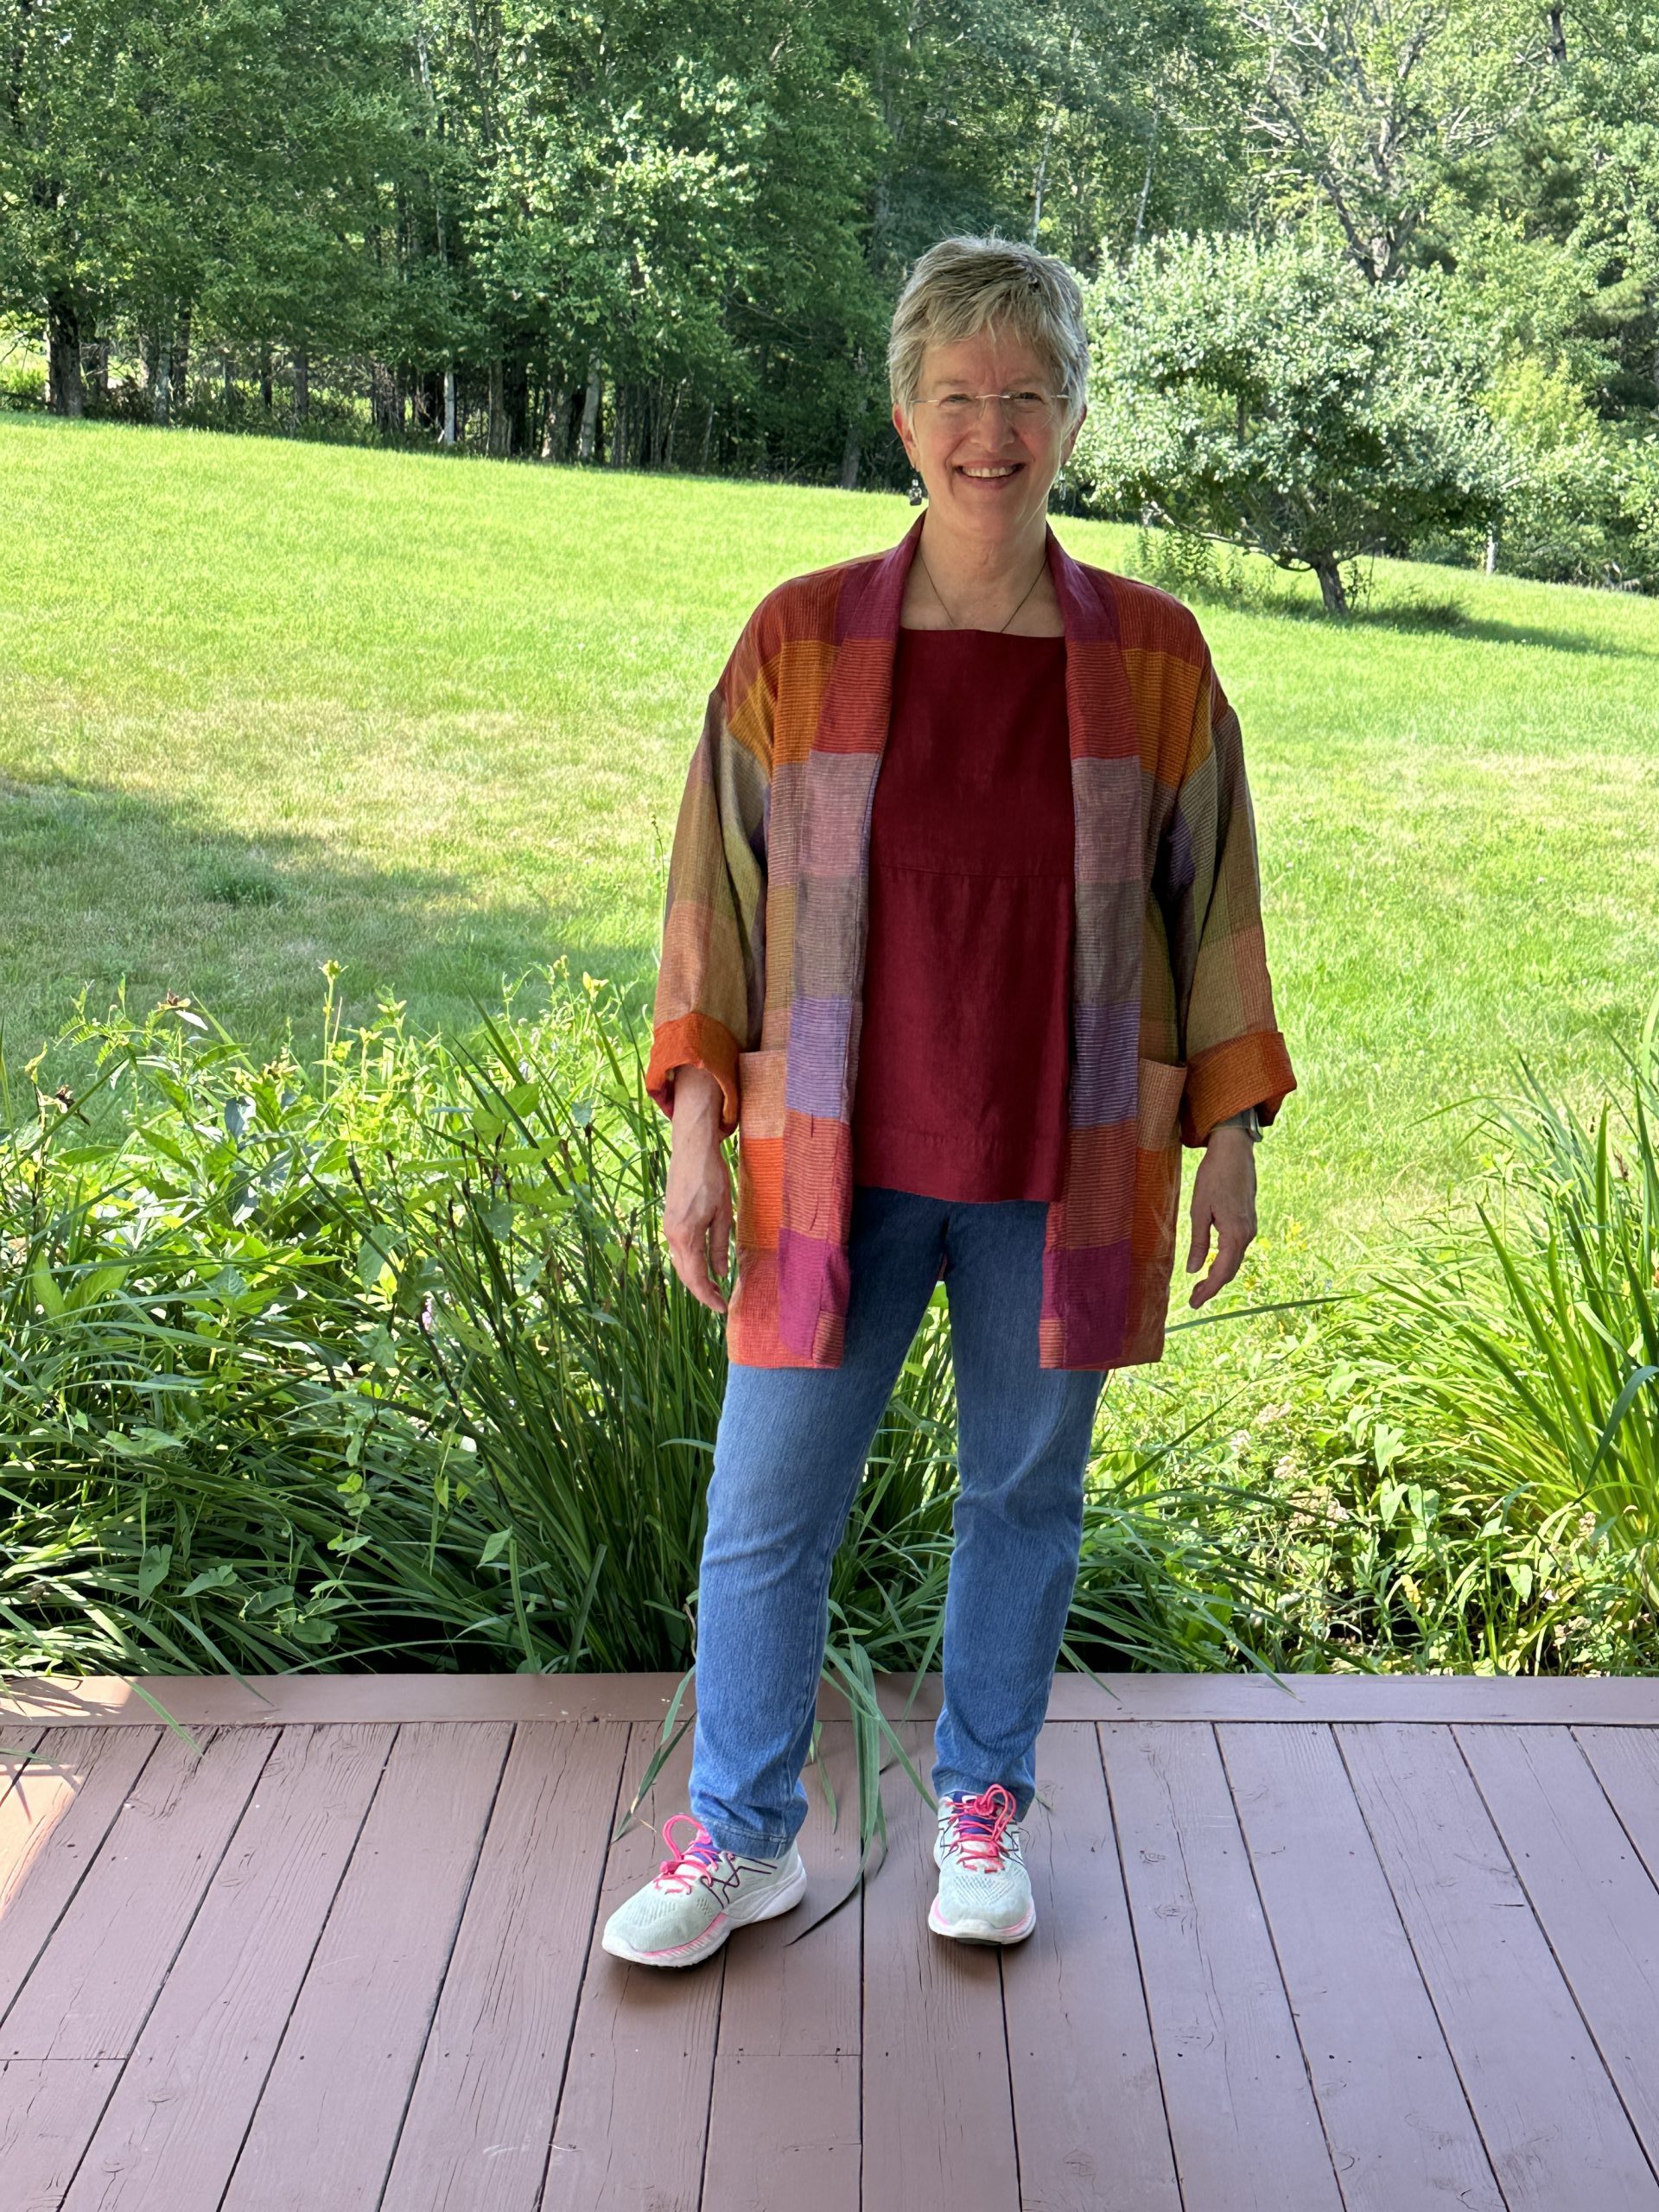
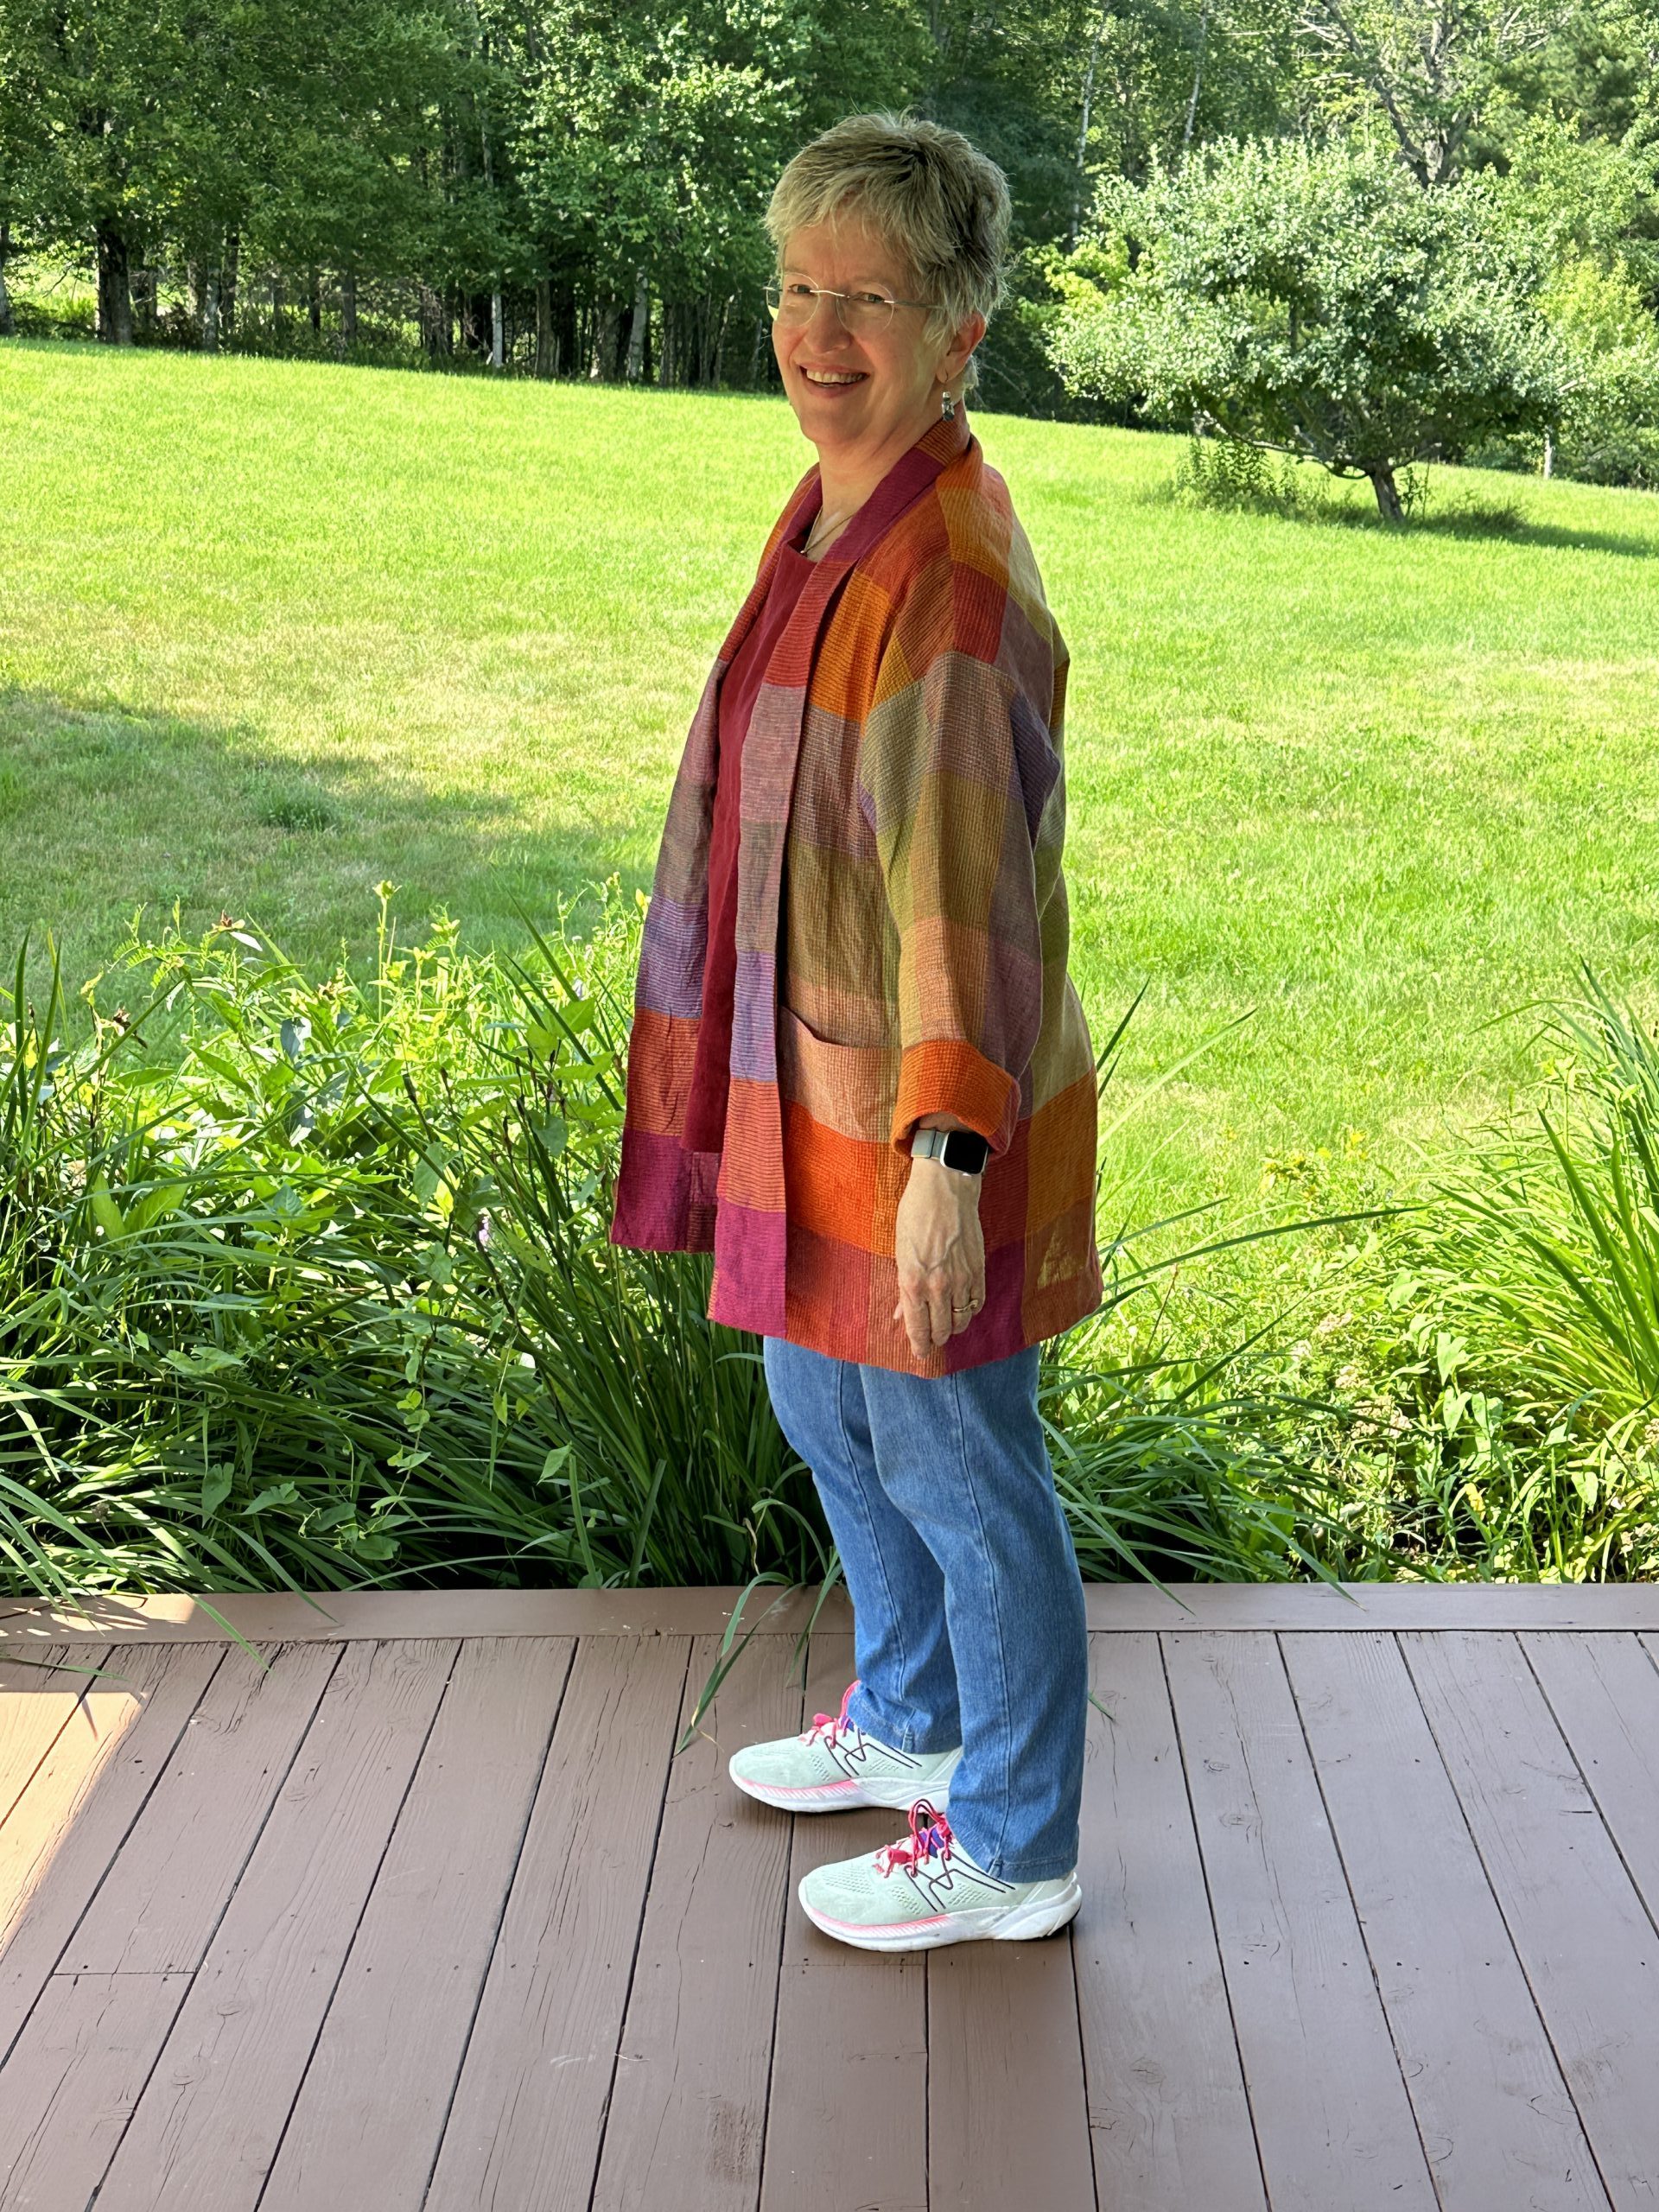
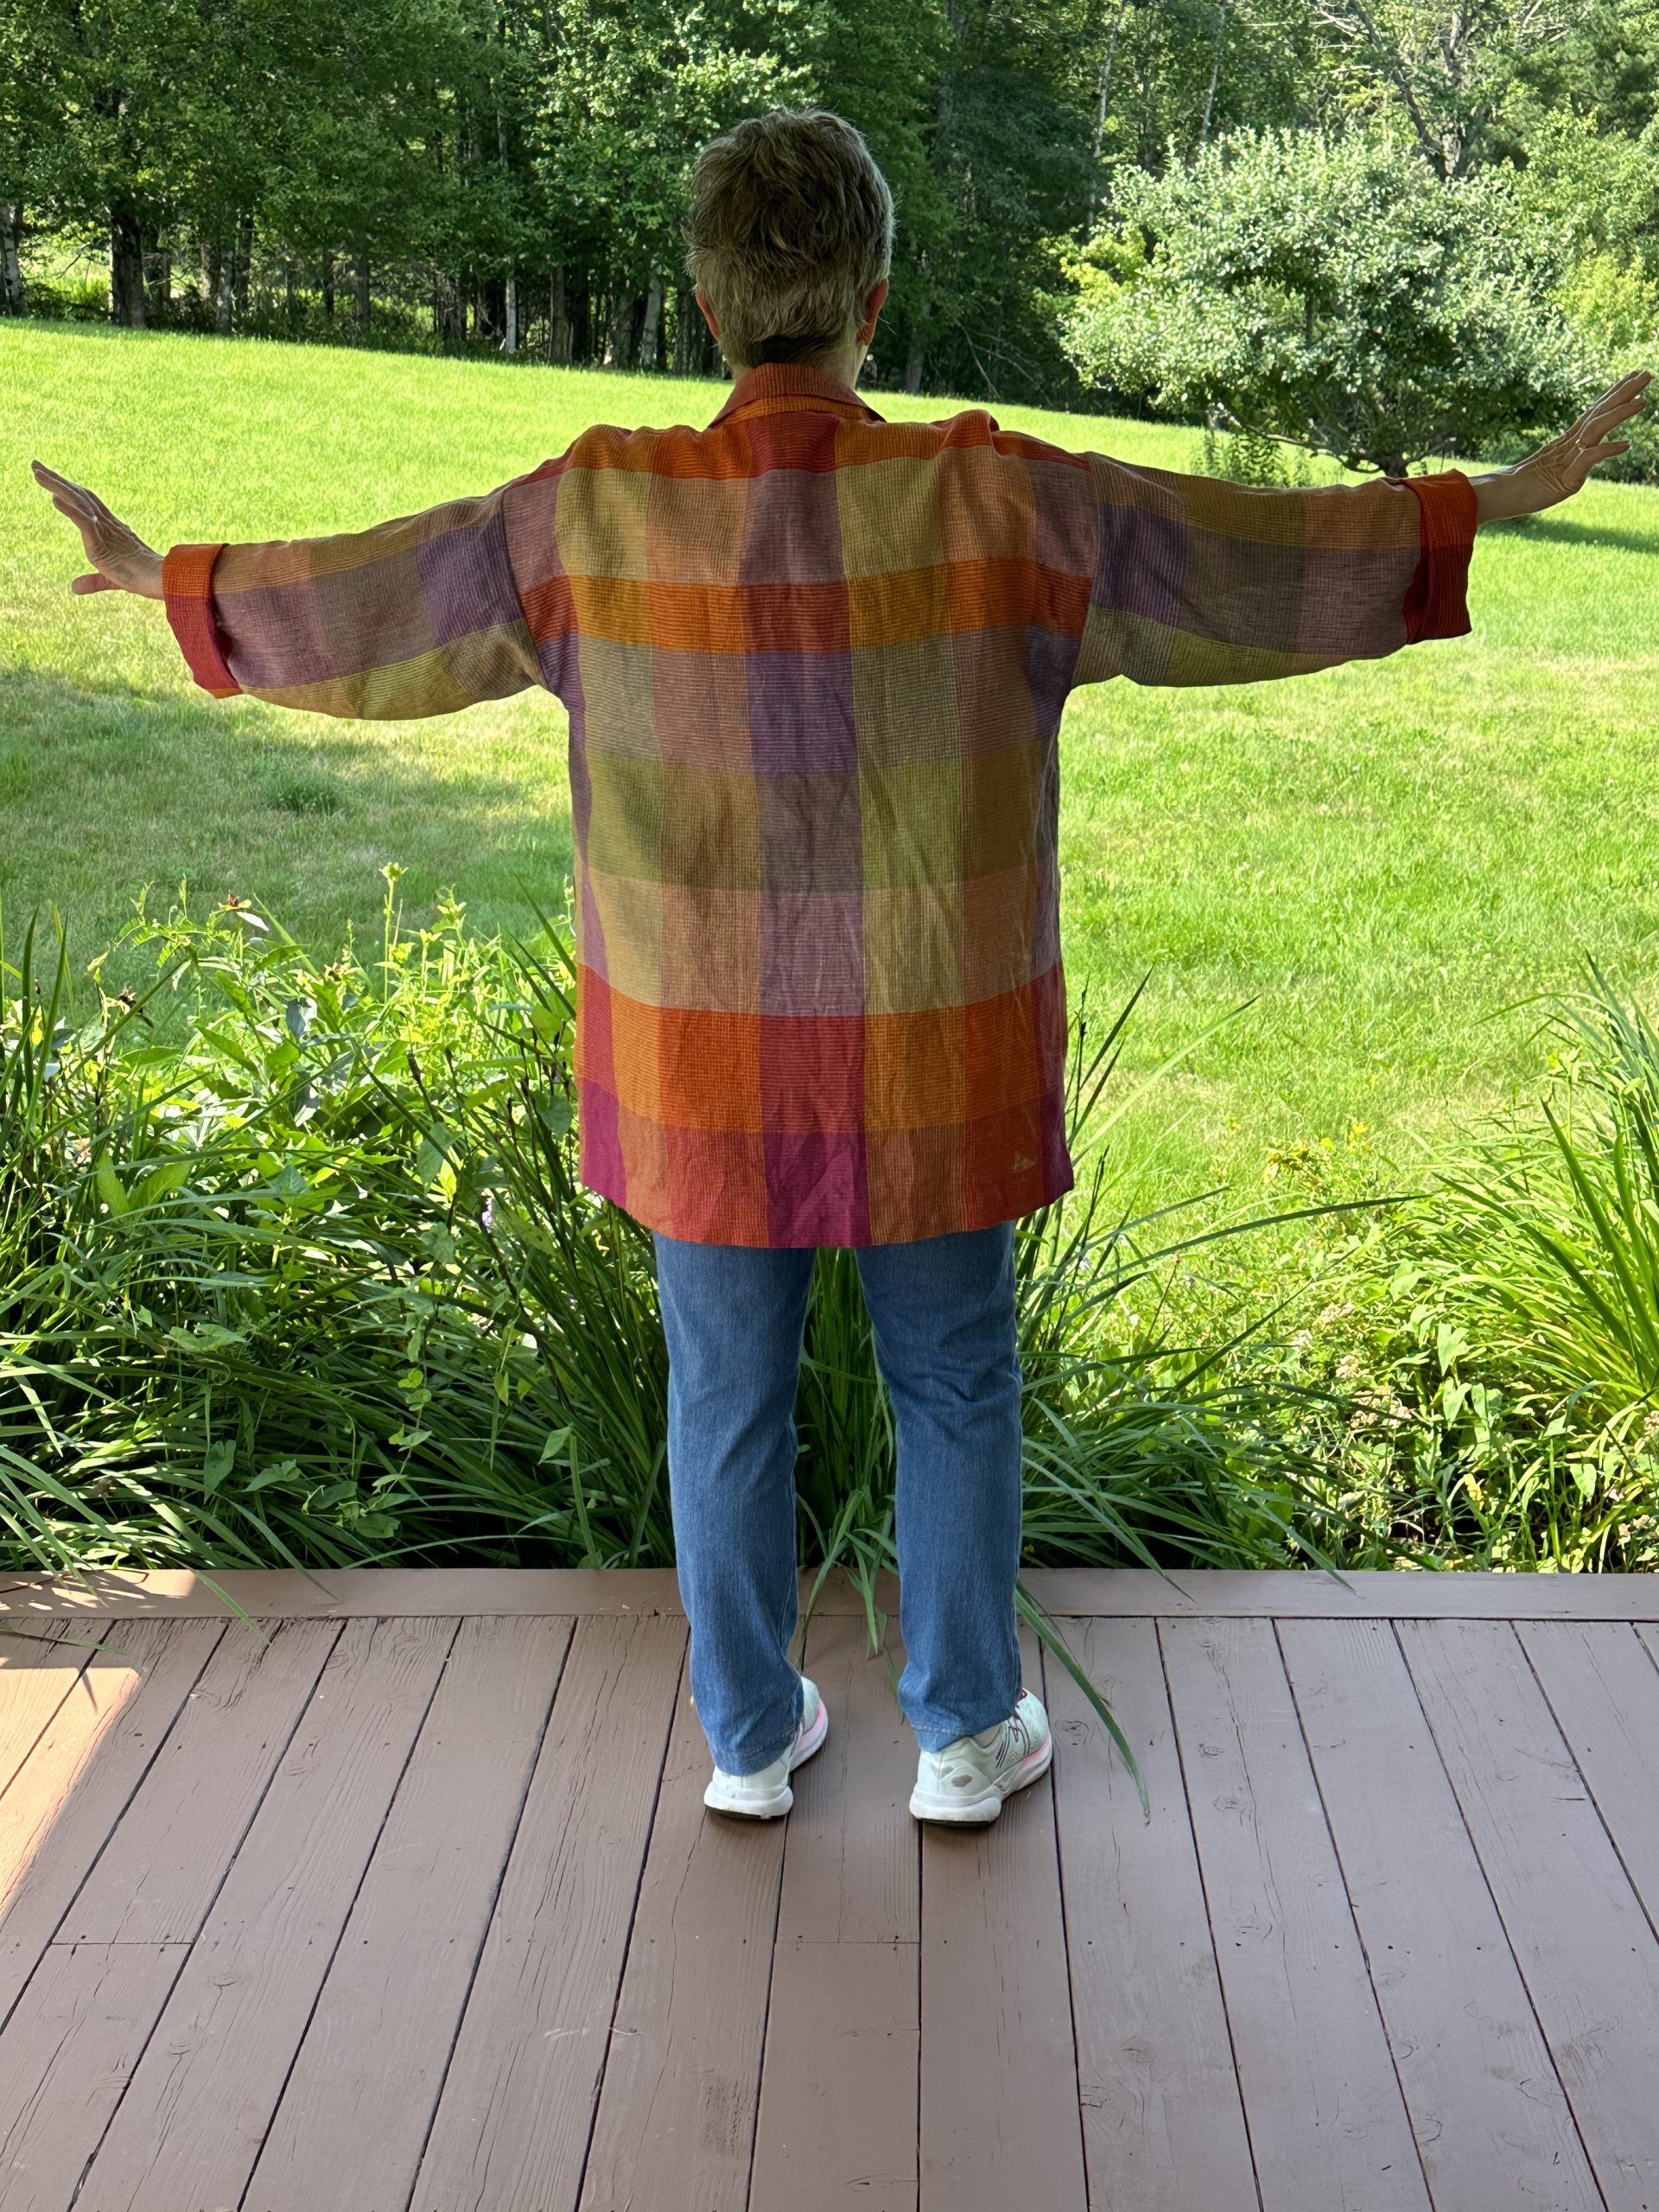
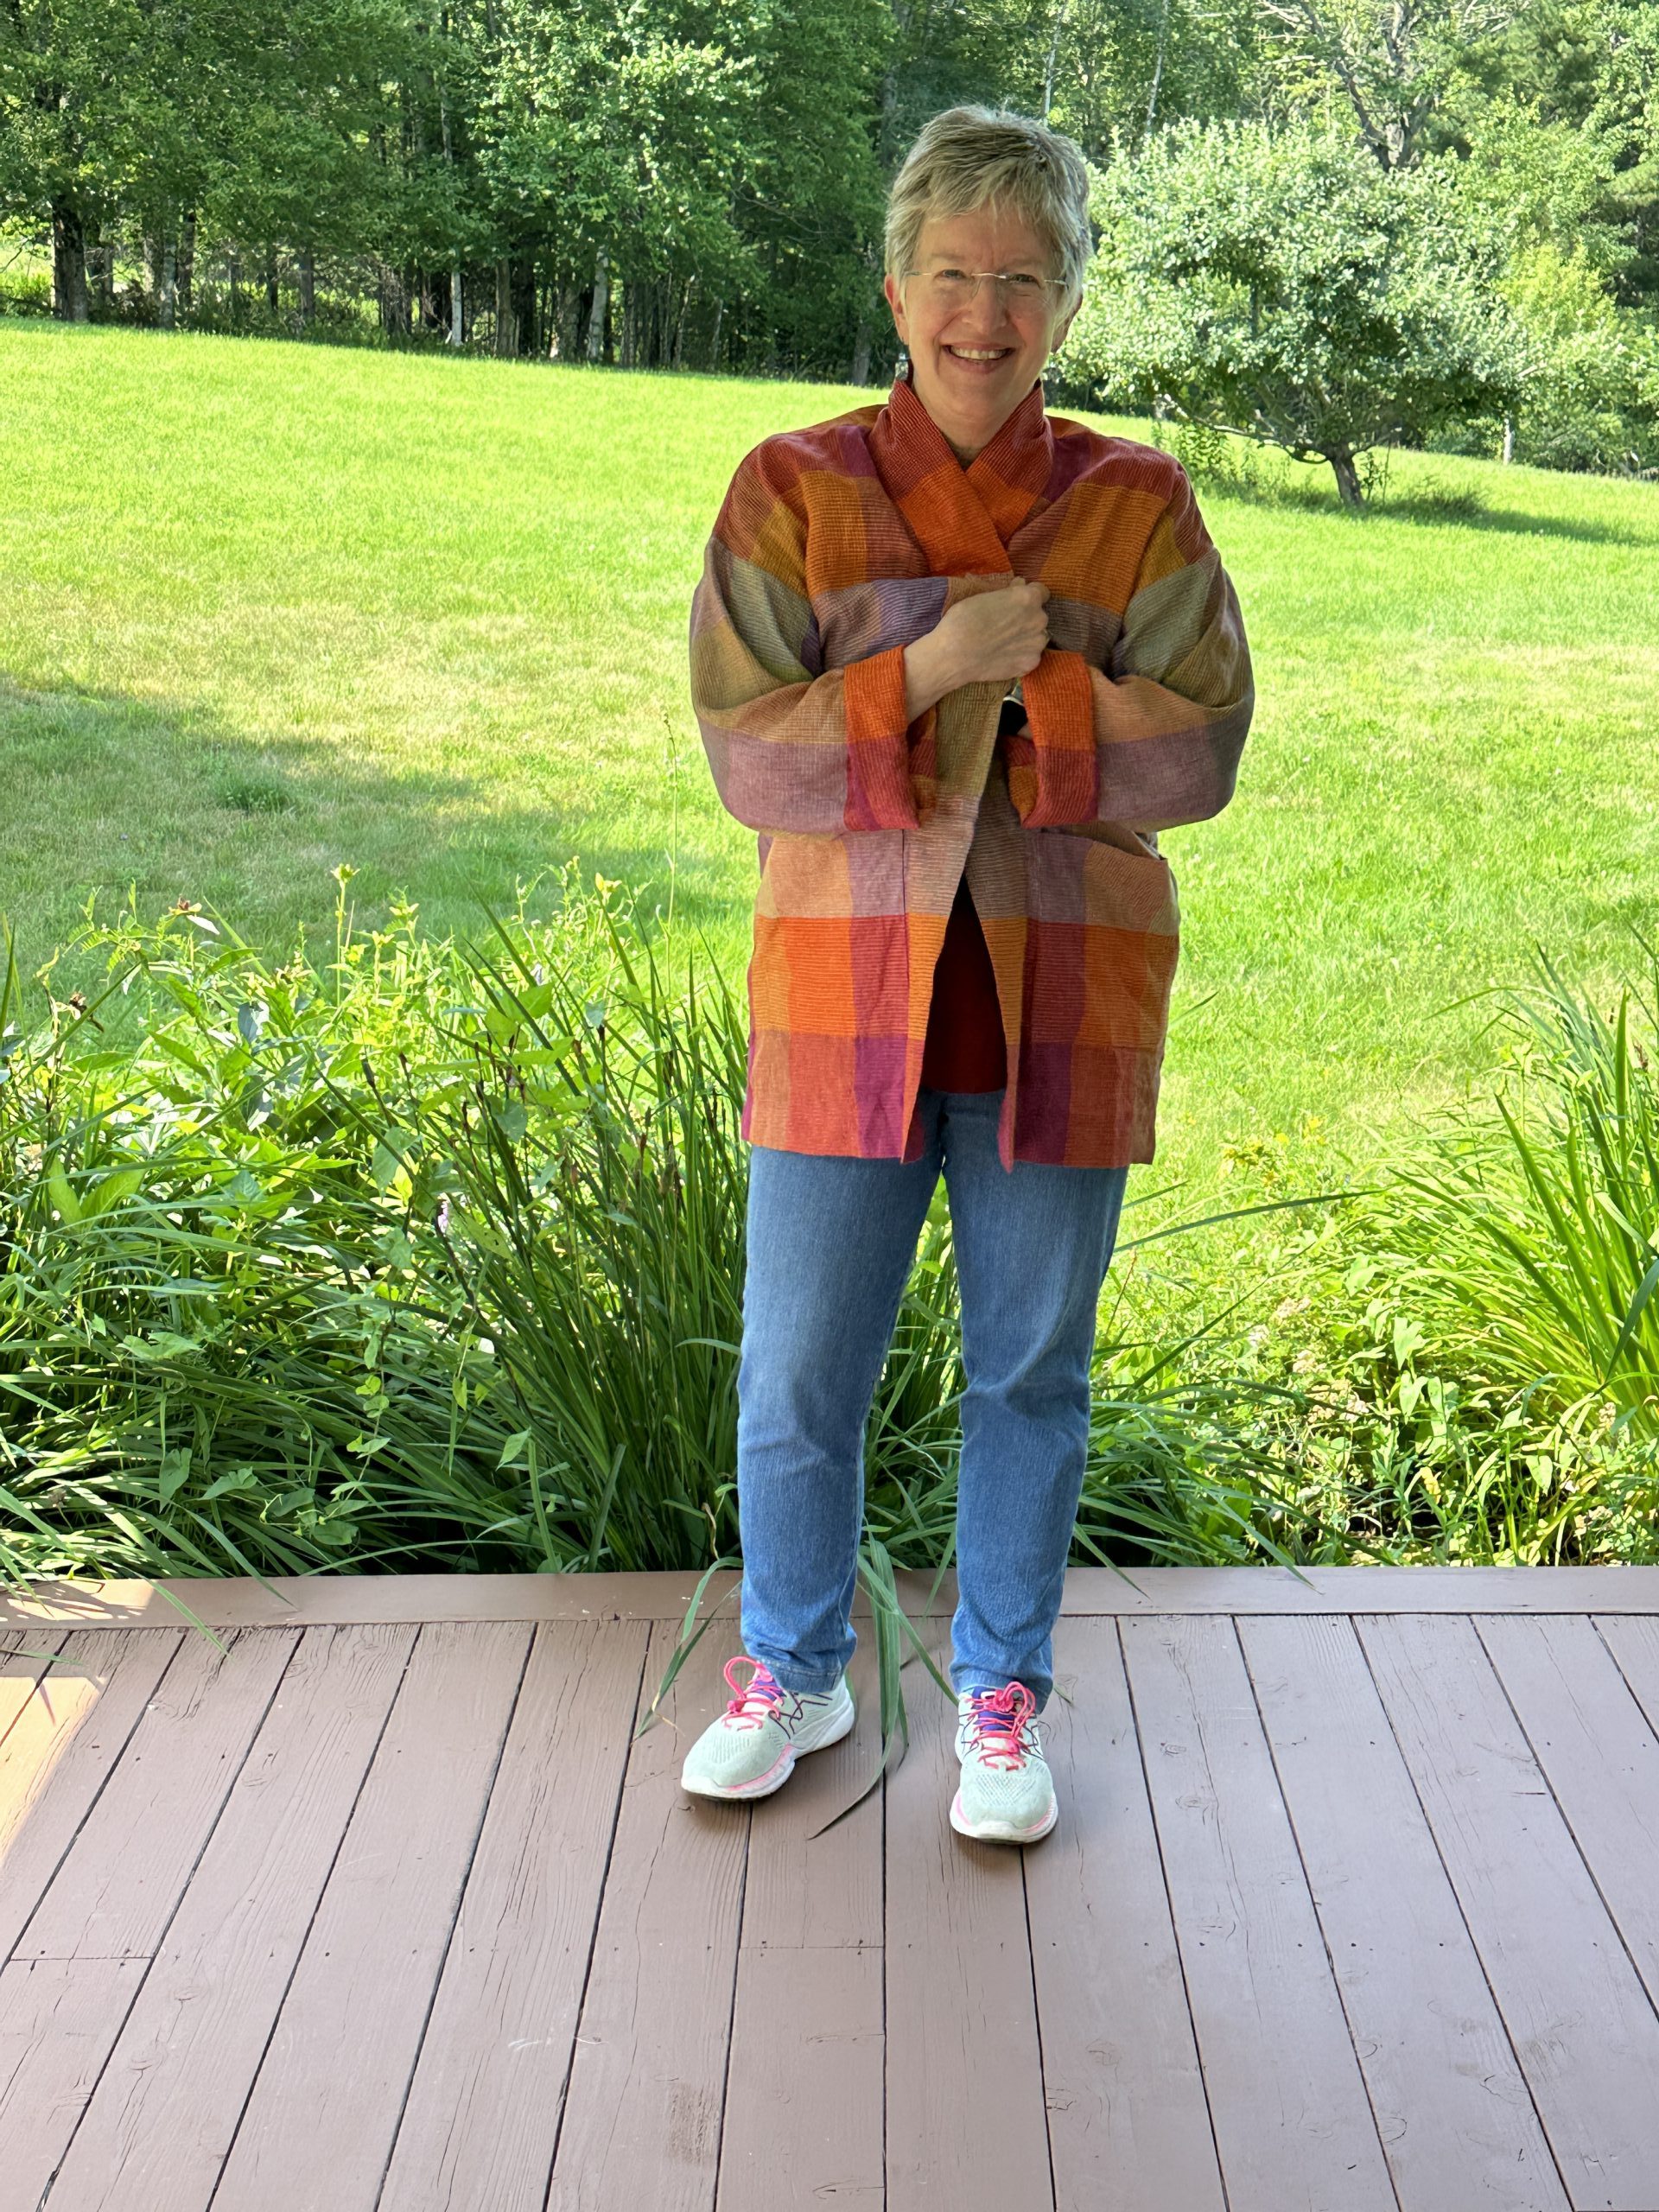
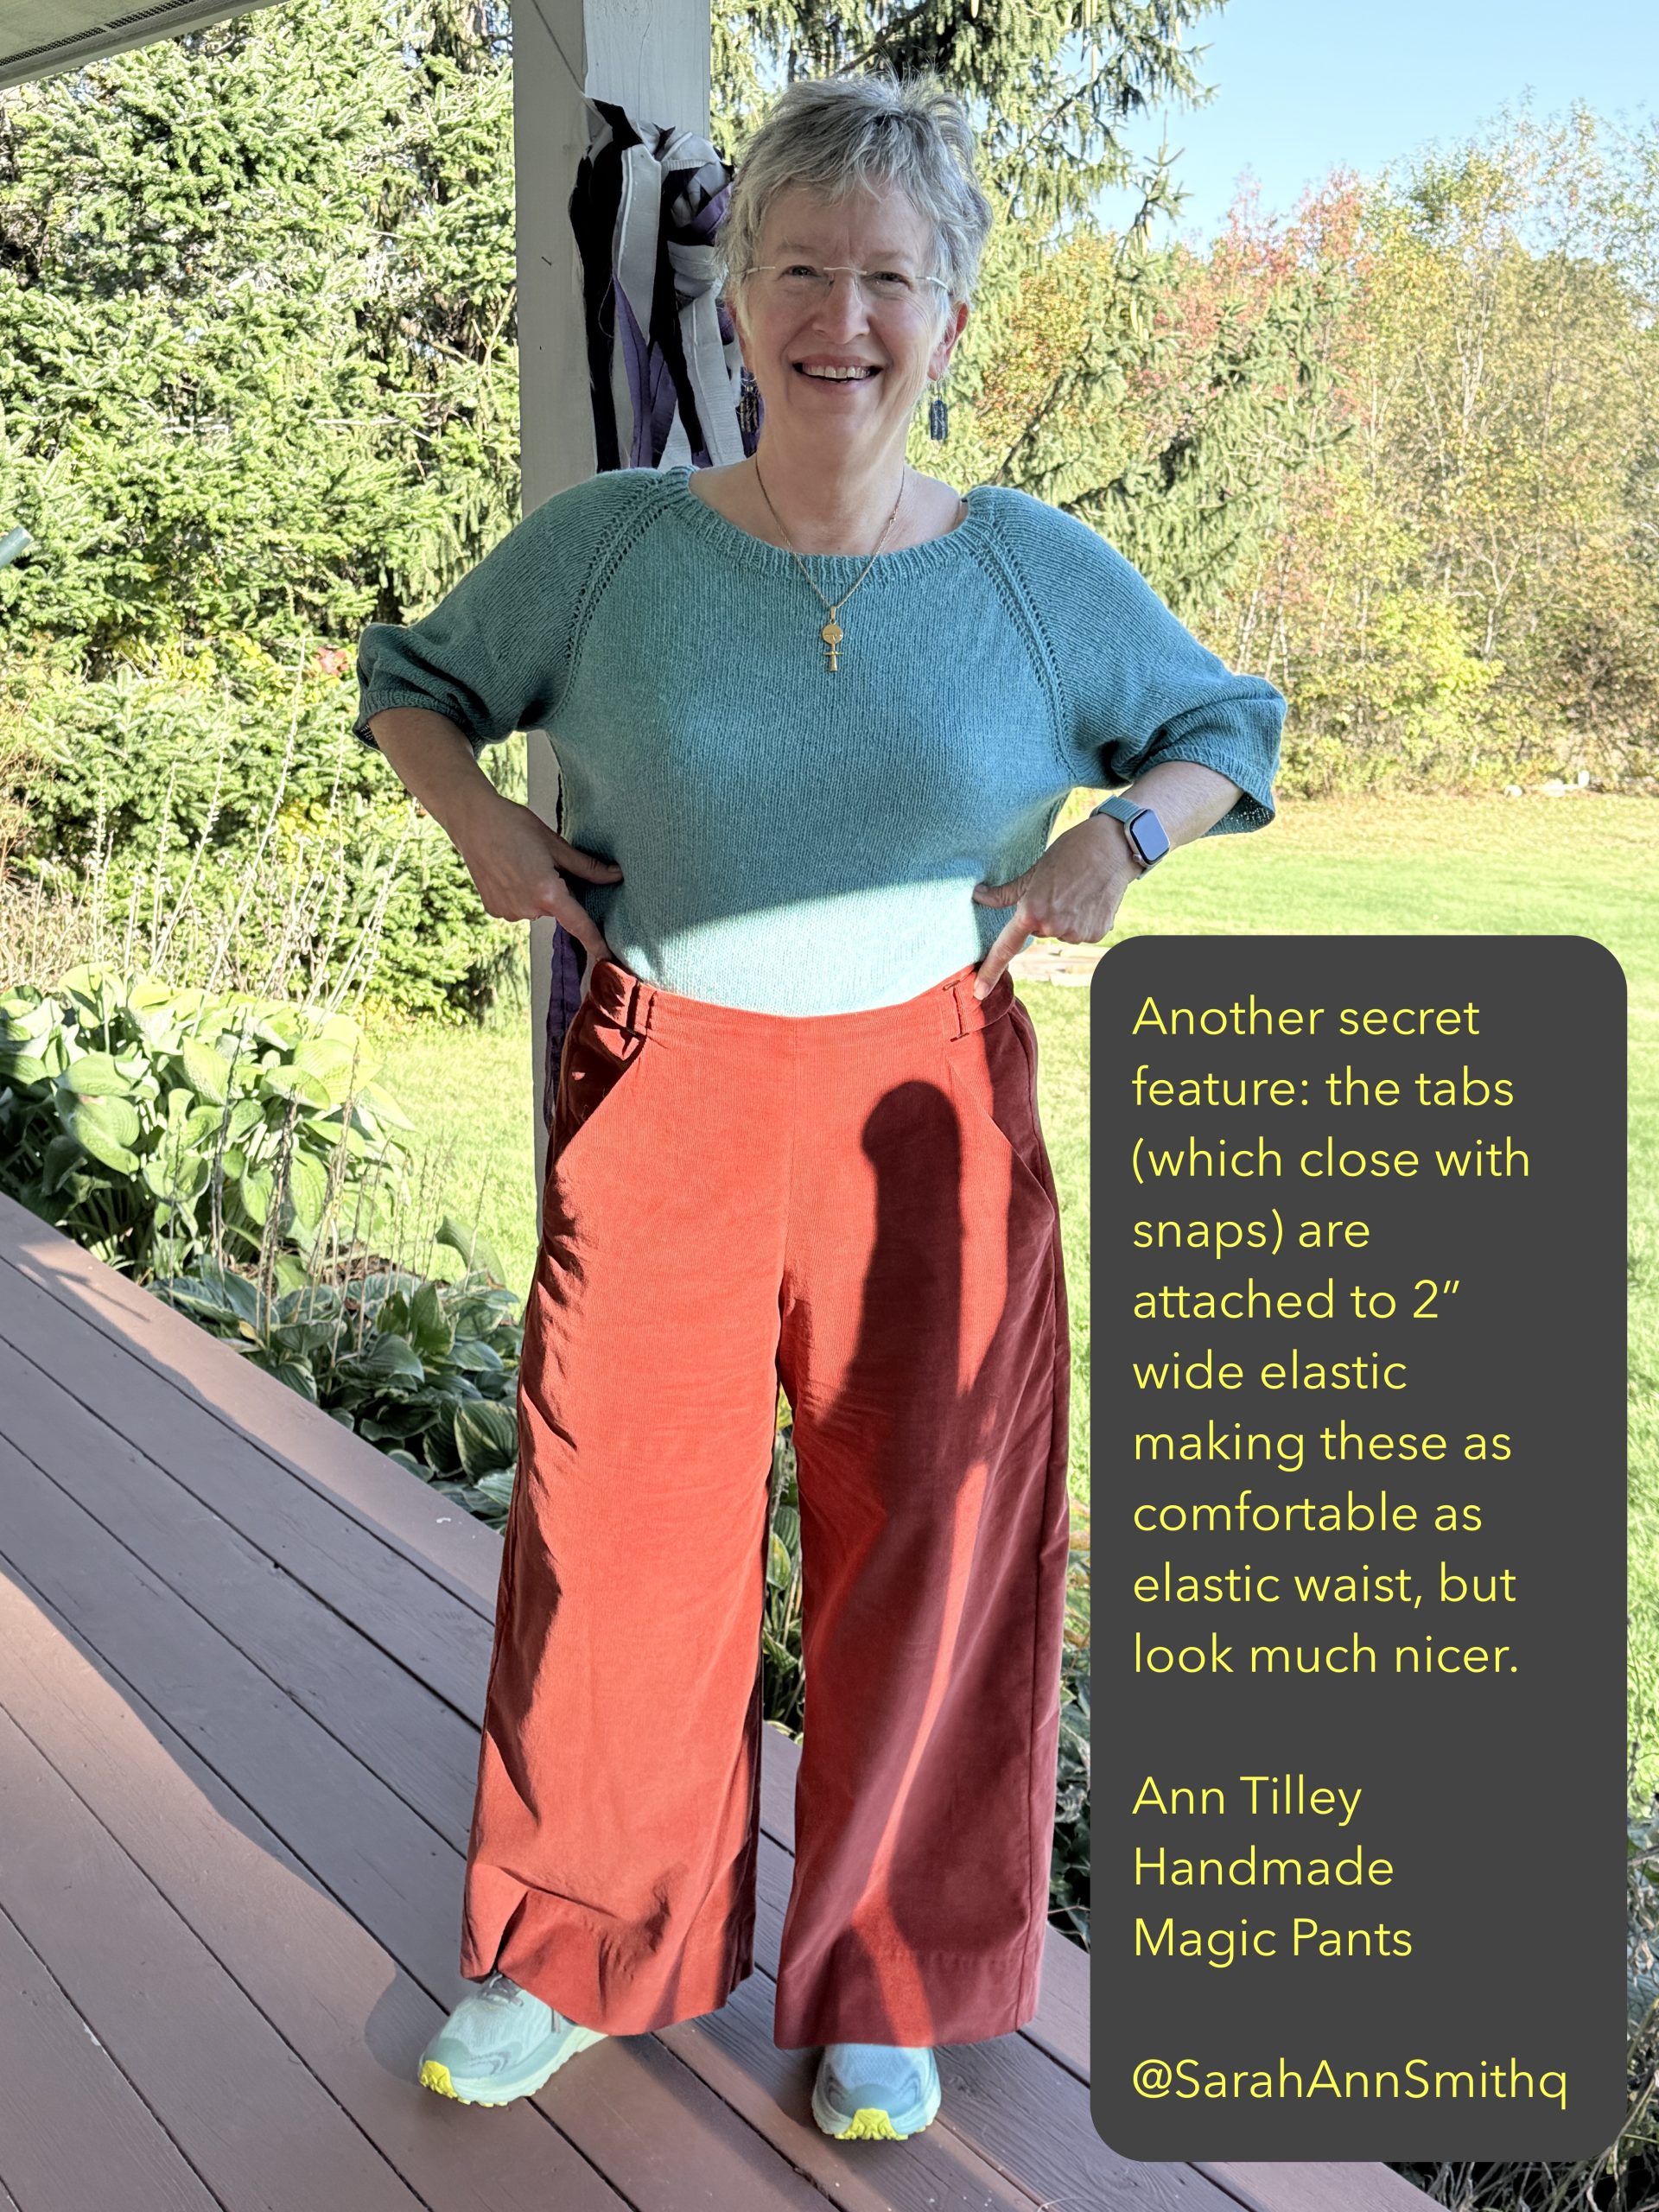
I’m not sure what trail of cookie crumbs led me to Ann Tilley’s Magic Pants, but OMG they are! After I gave birth to our older son, over 30 years ago, I decided that elastic waist pants are pretty much essential. As the years wore on, I abandoned any other style for 90 percent of my pants wardrobe. But sometimes you want to look nicer yet still feel comfortable–these do that amazingly well. So when it came time for my Autumn Janome Artisan project, I knew **exactly** what I would make! I had purchased the supersoft pinwale corduroy for a skirt based on one I bought and loved in high school, but finally admitted to myself I almost never wear skirts, and certainly not in winter in Maine. Luckily, I had **just** enough–like maybe 1″ of extra yardage.
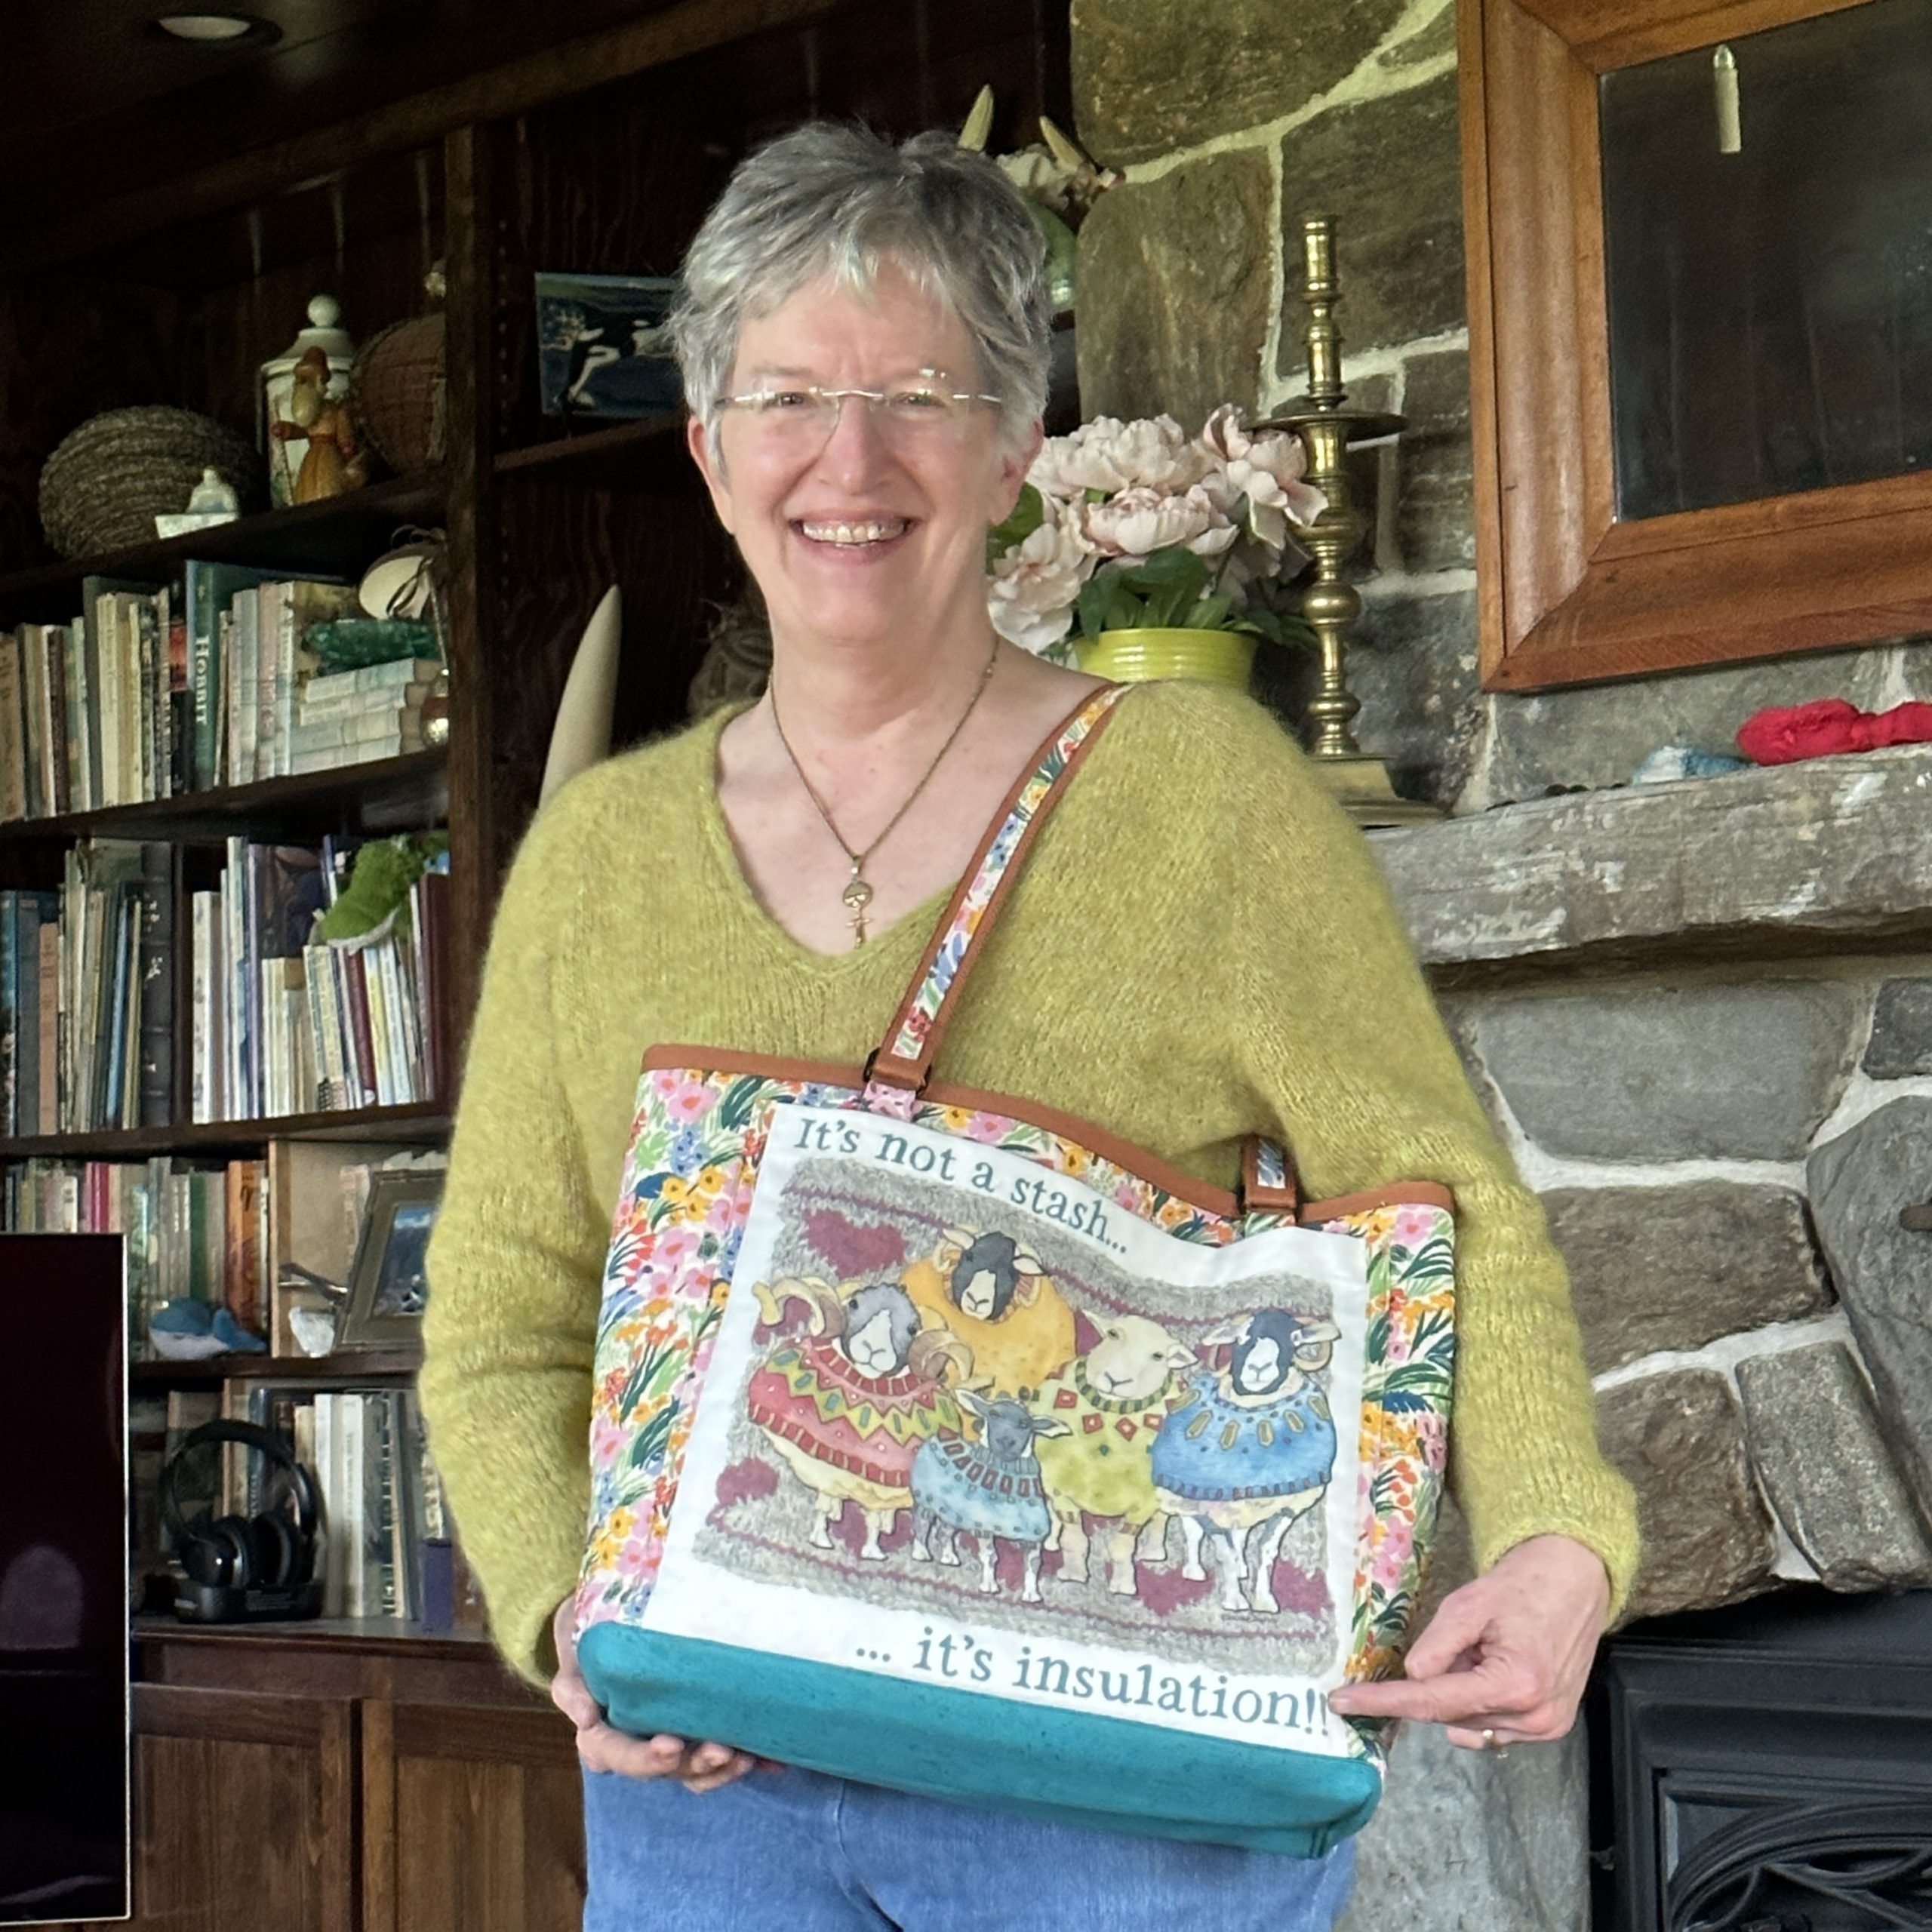
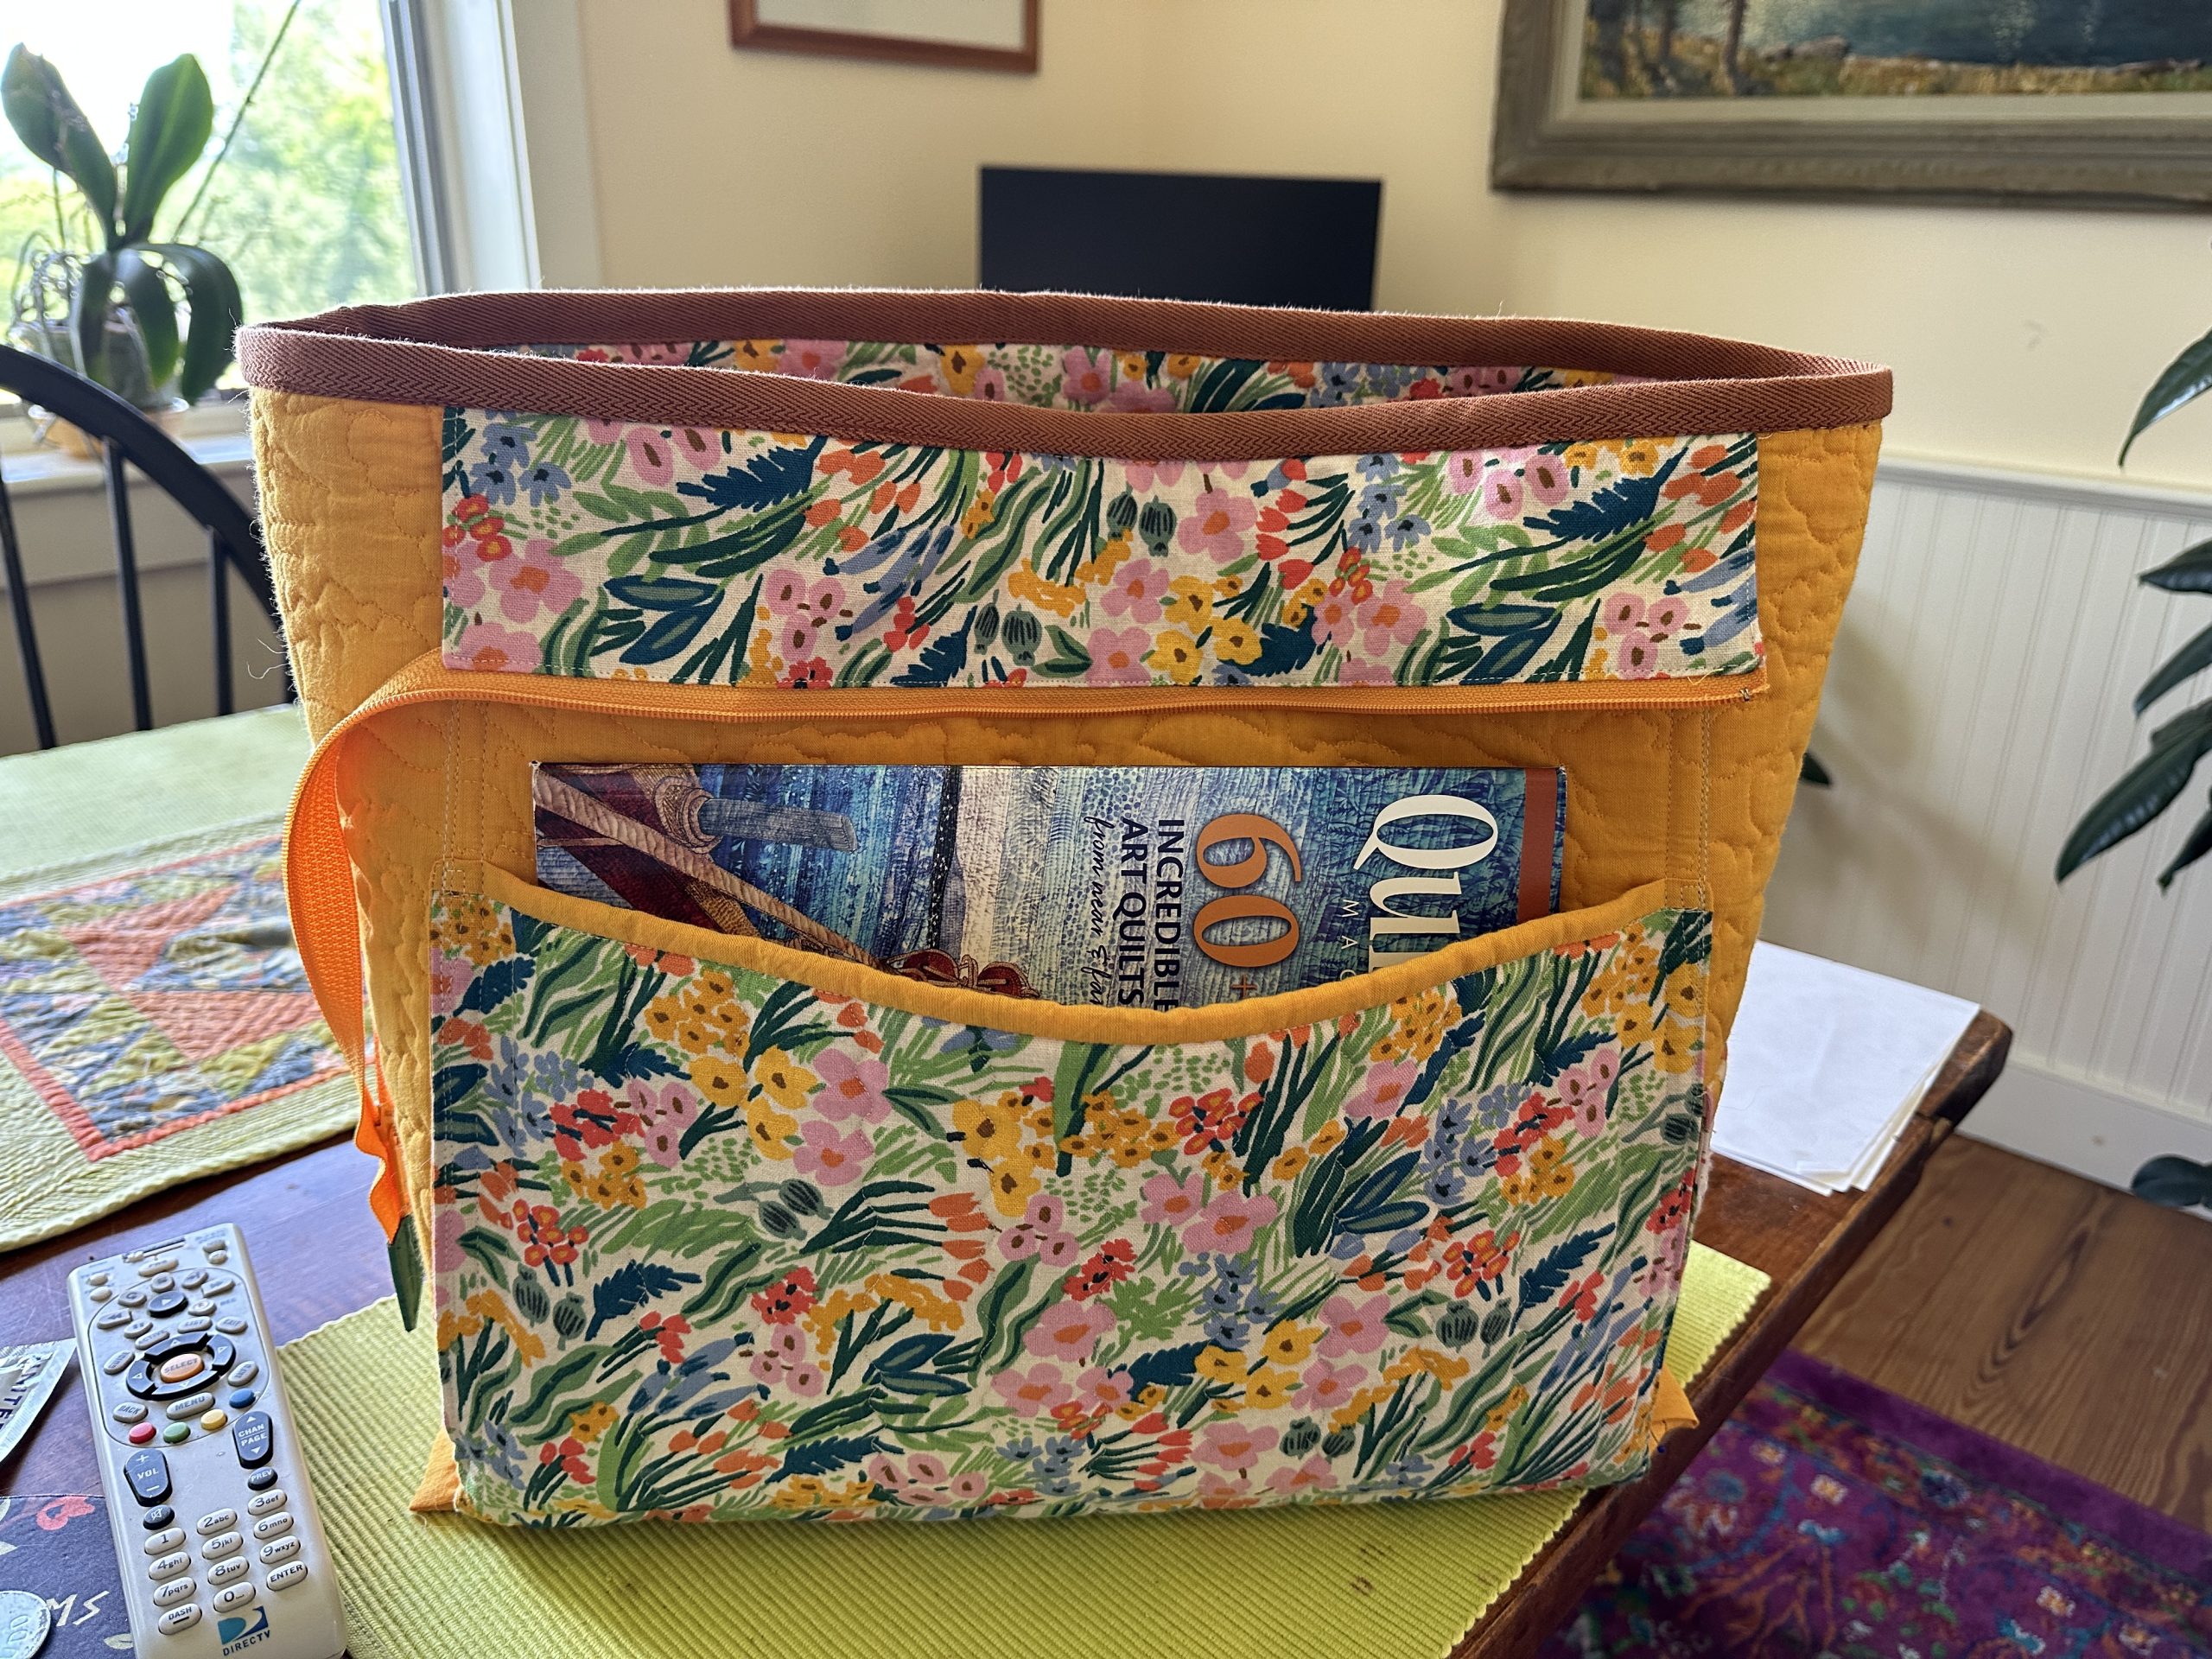
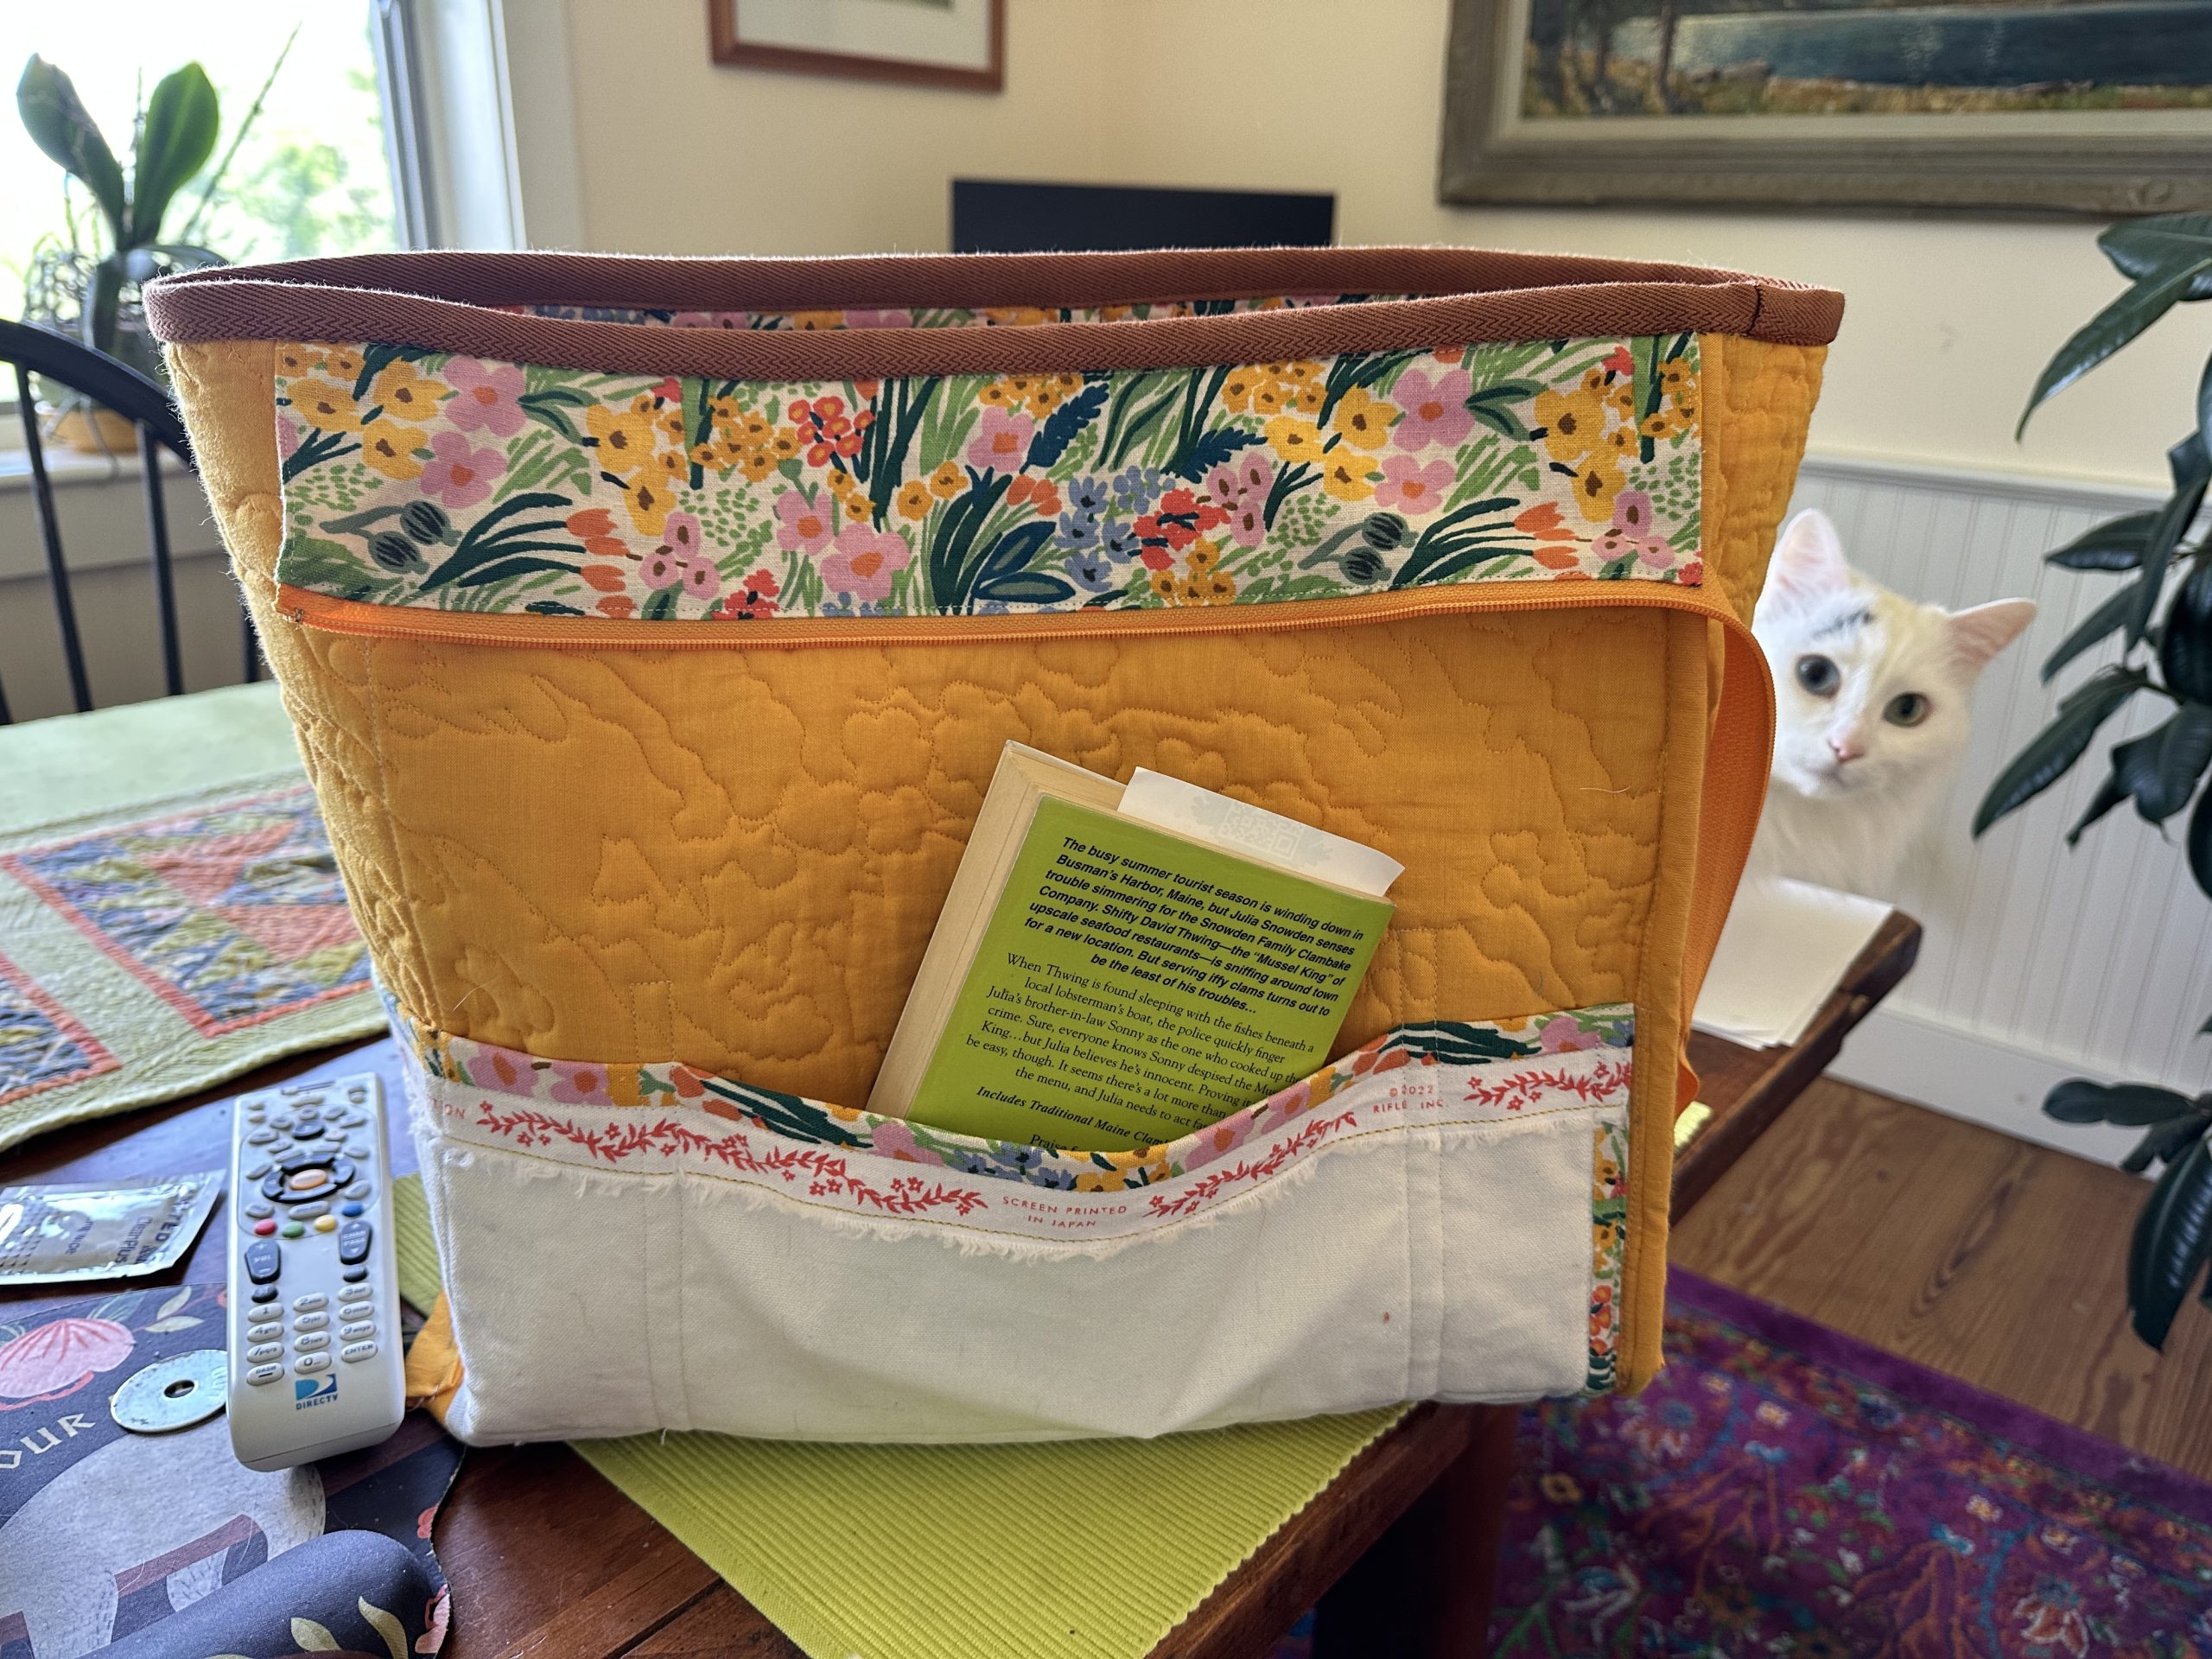
First, some full photos so you have the big picture (bad pun intended):

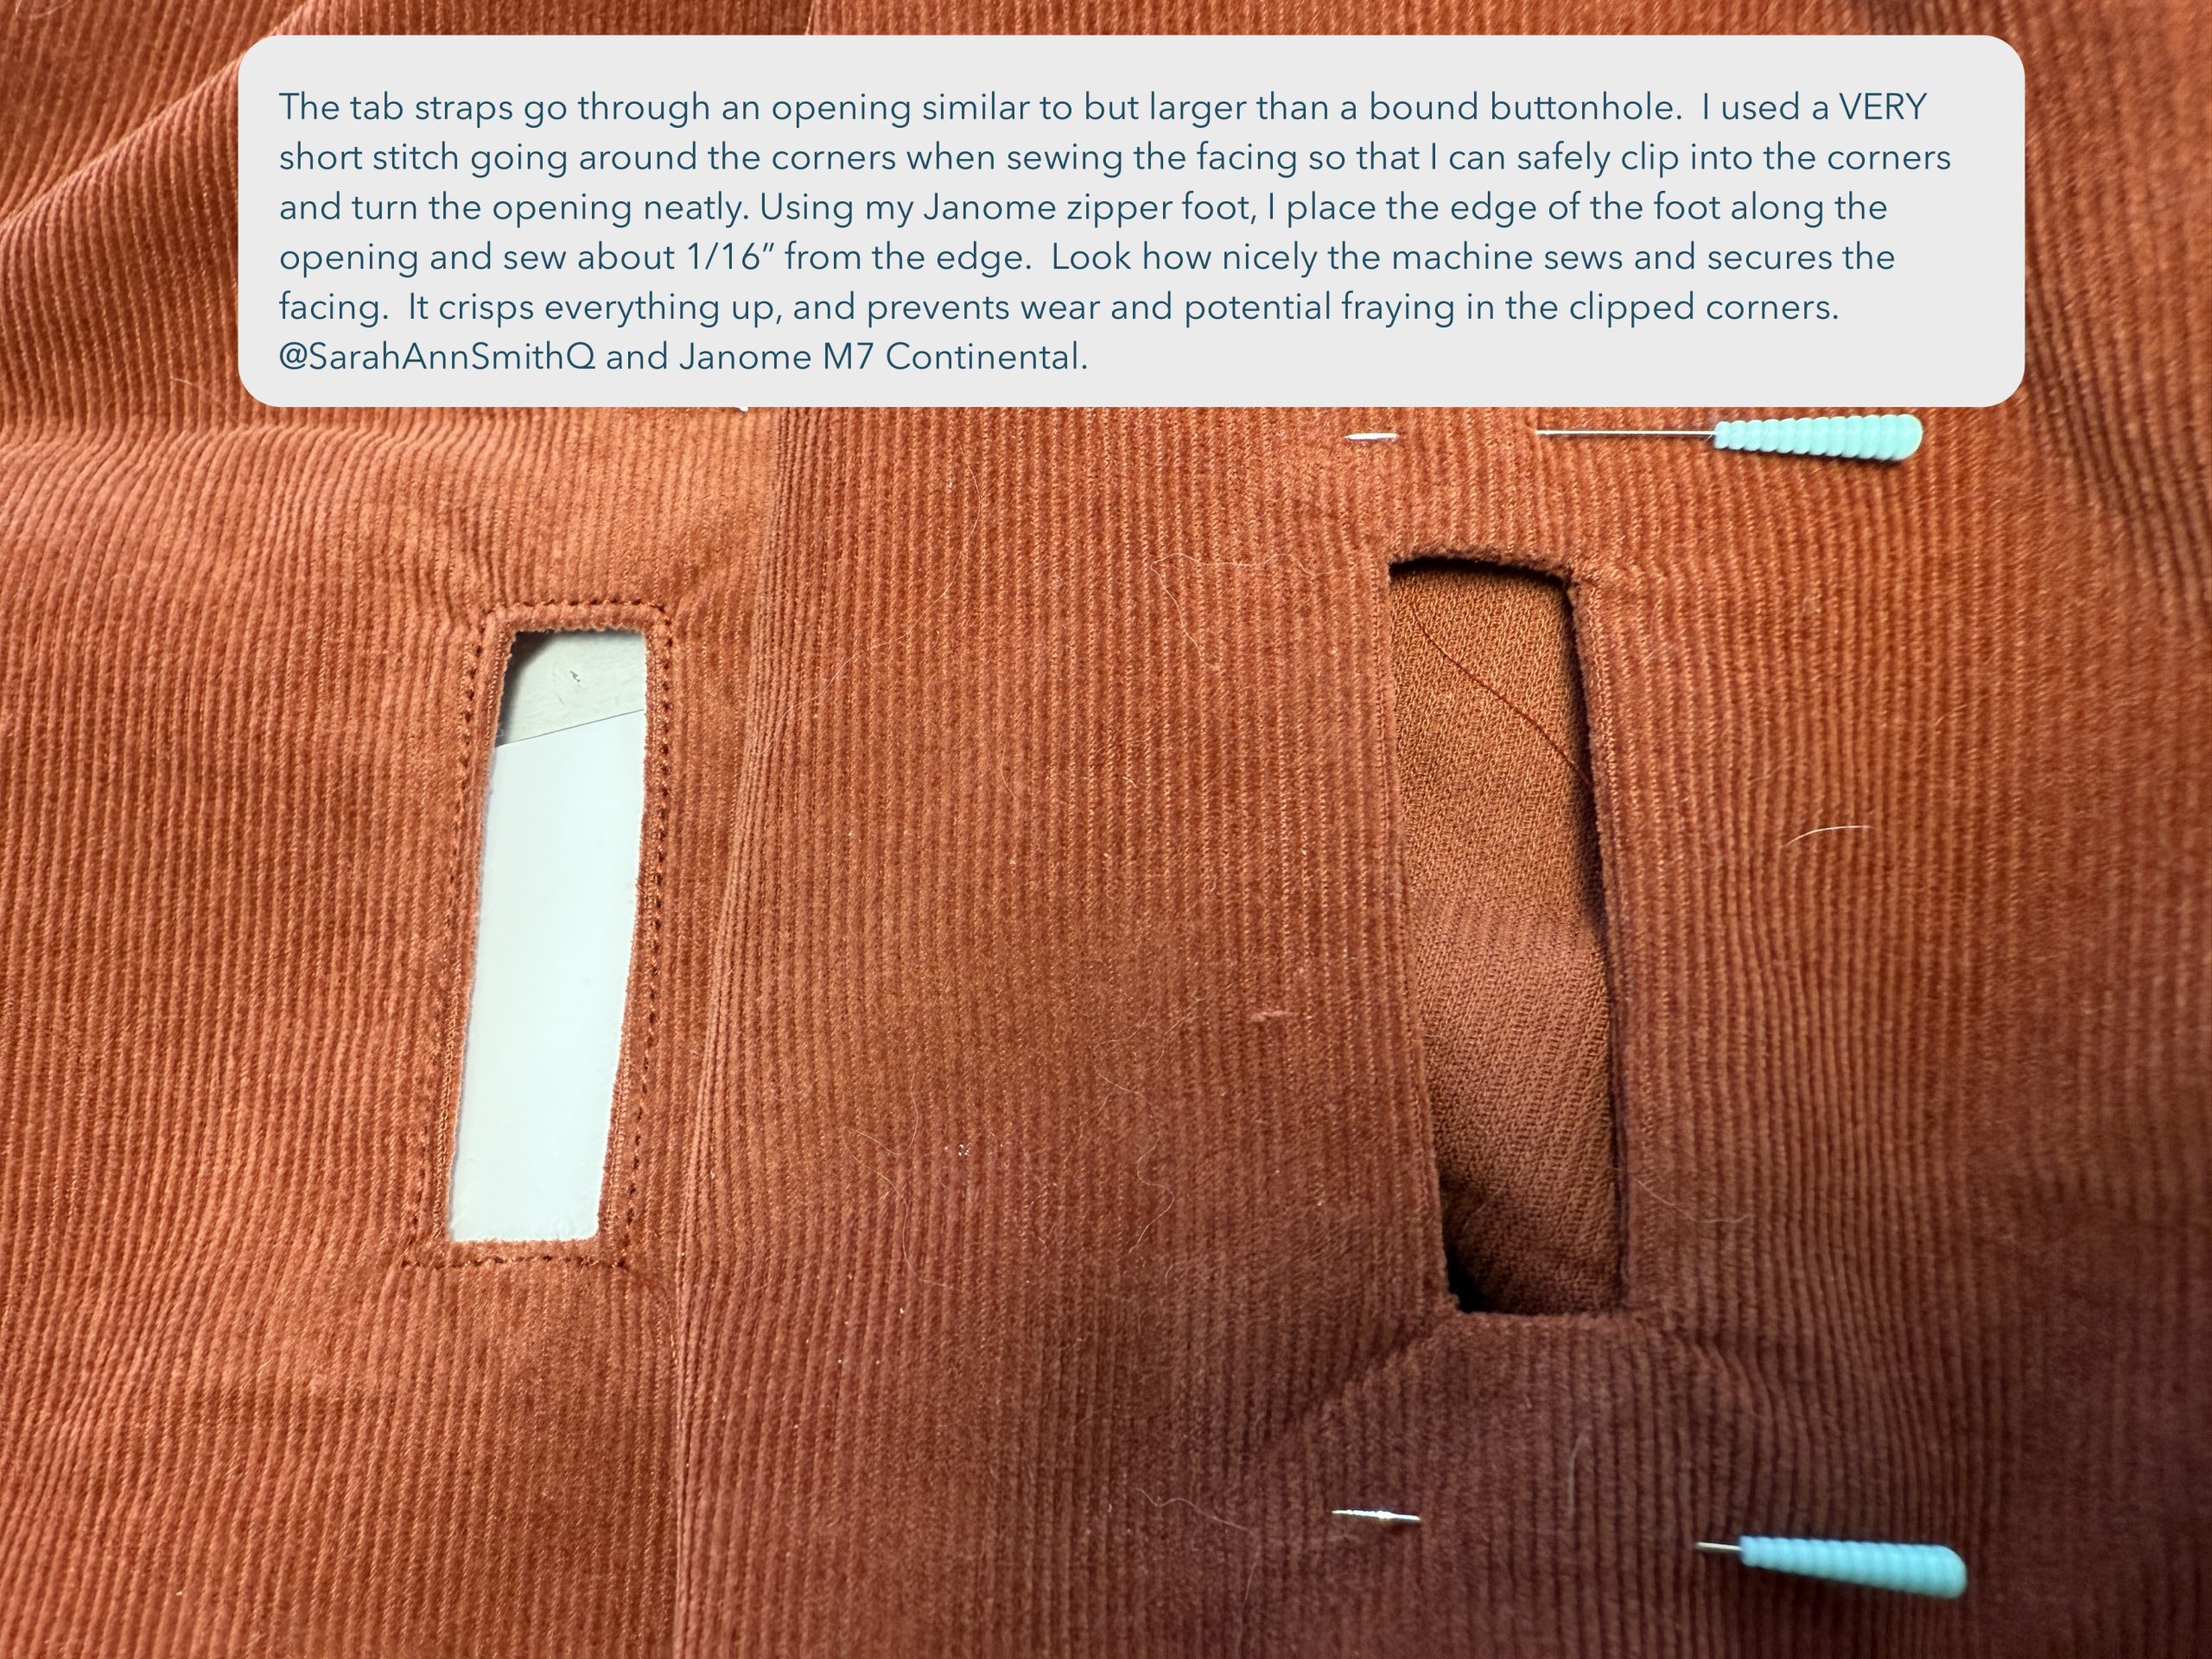
This will be a long post as I plan to document the entire construction process in one go. I’ve also created a video and posted to my YouTube channel, here, to supplement the photos, but really the photos tell you so much! So let’s get started: we’ll follow the construction sequence in the pattern, starting with the slots (sorta giant buttonholes) on the back where the side tabs move from outside to inside the garment.
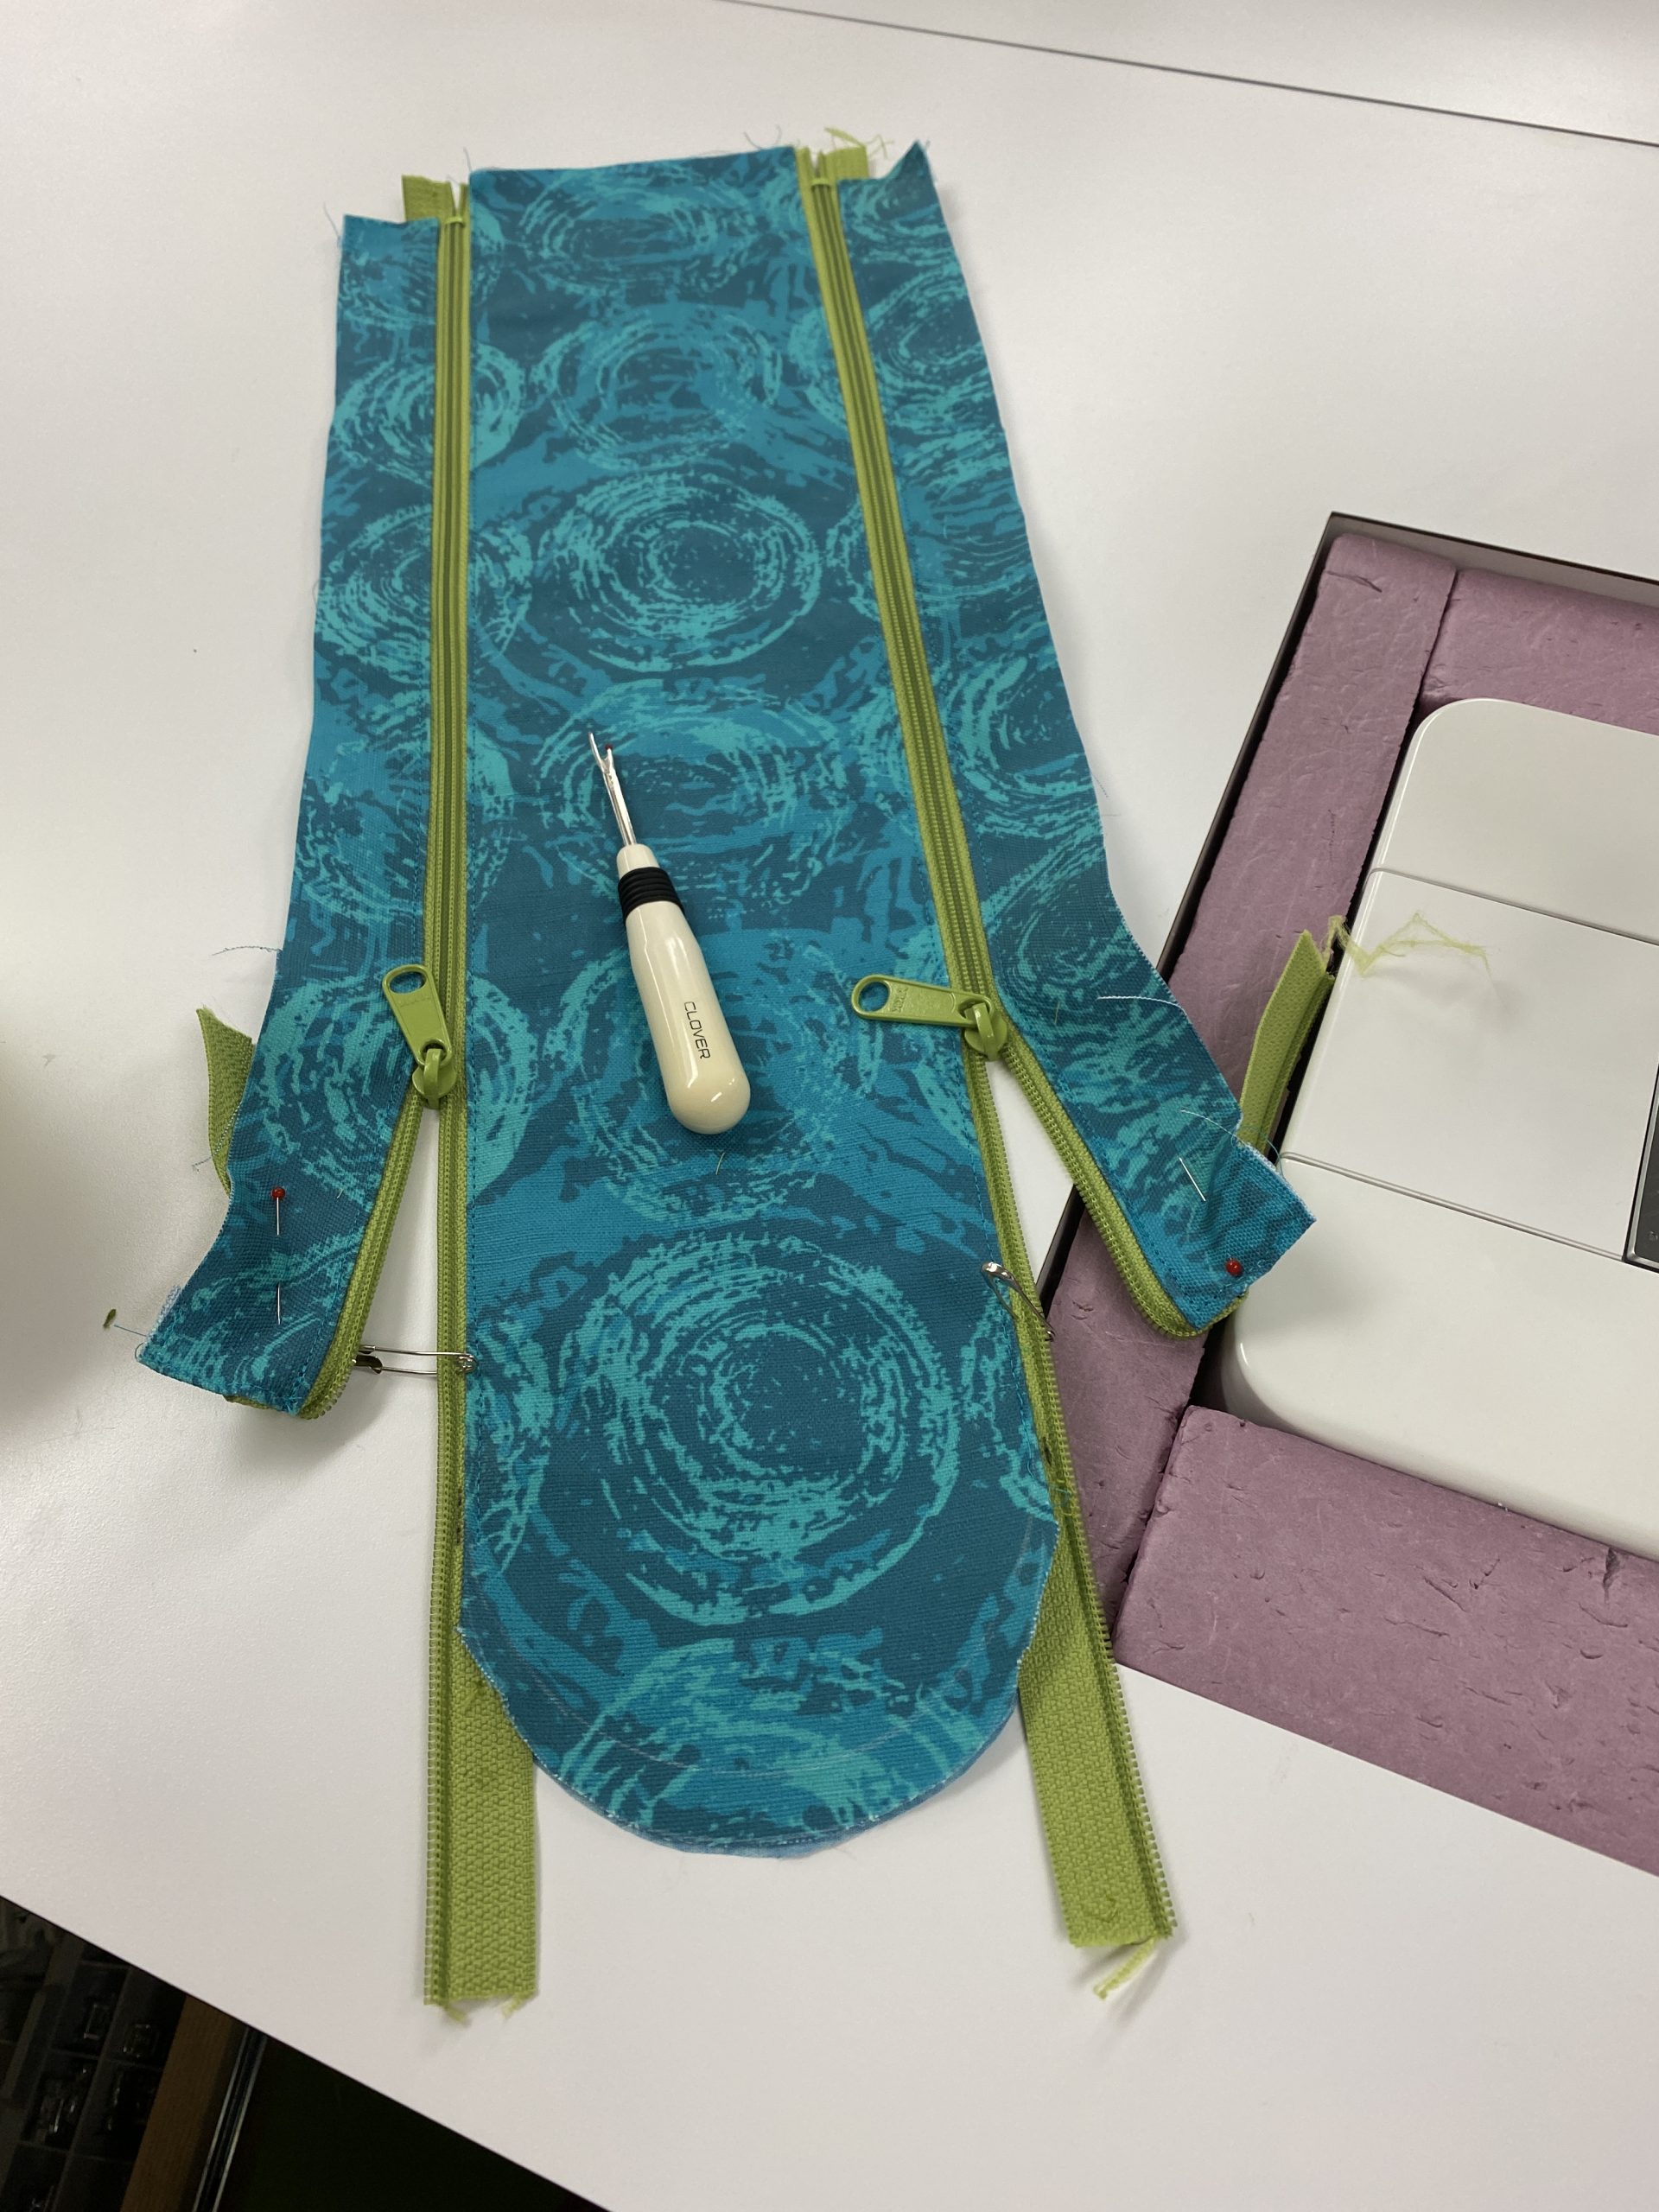
Tab Openings:
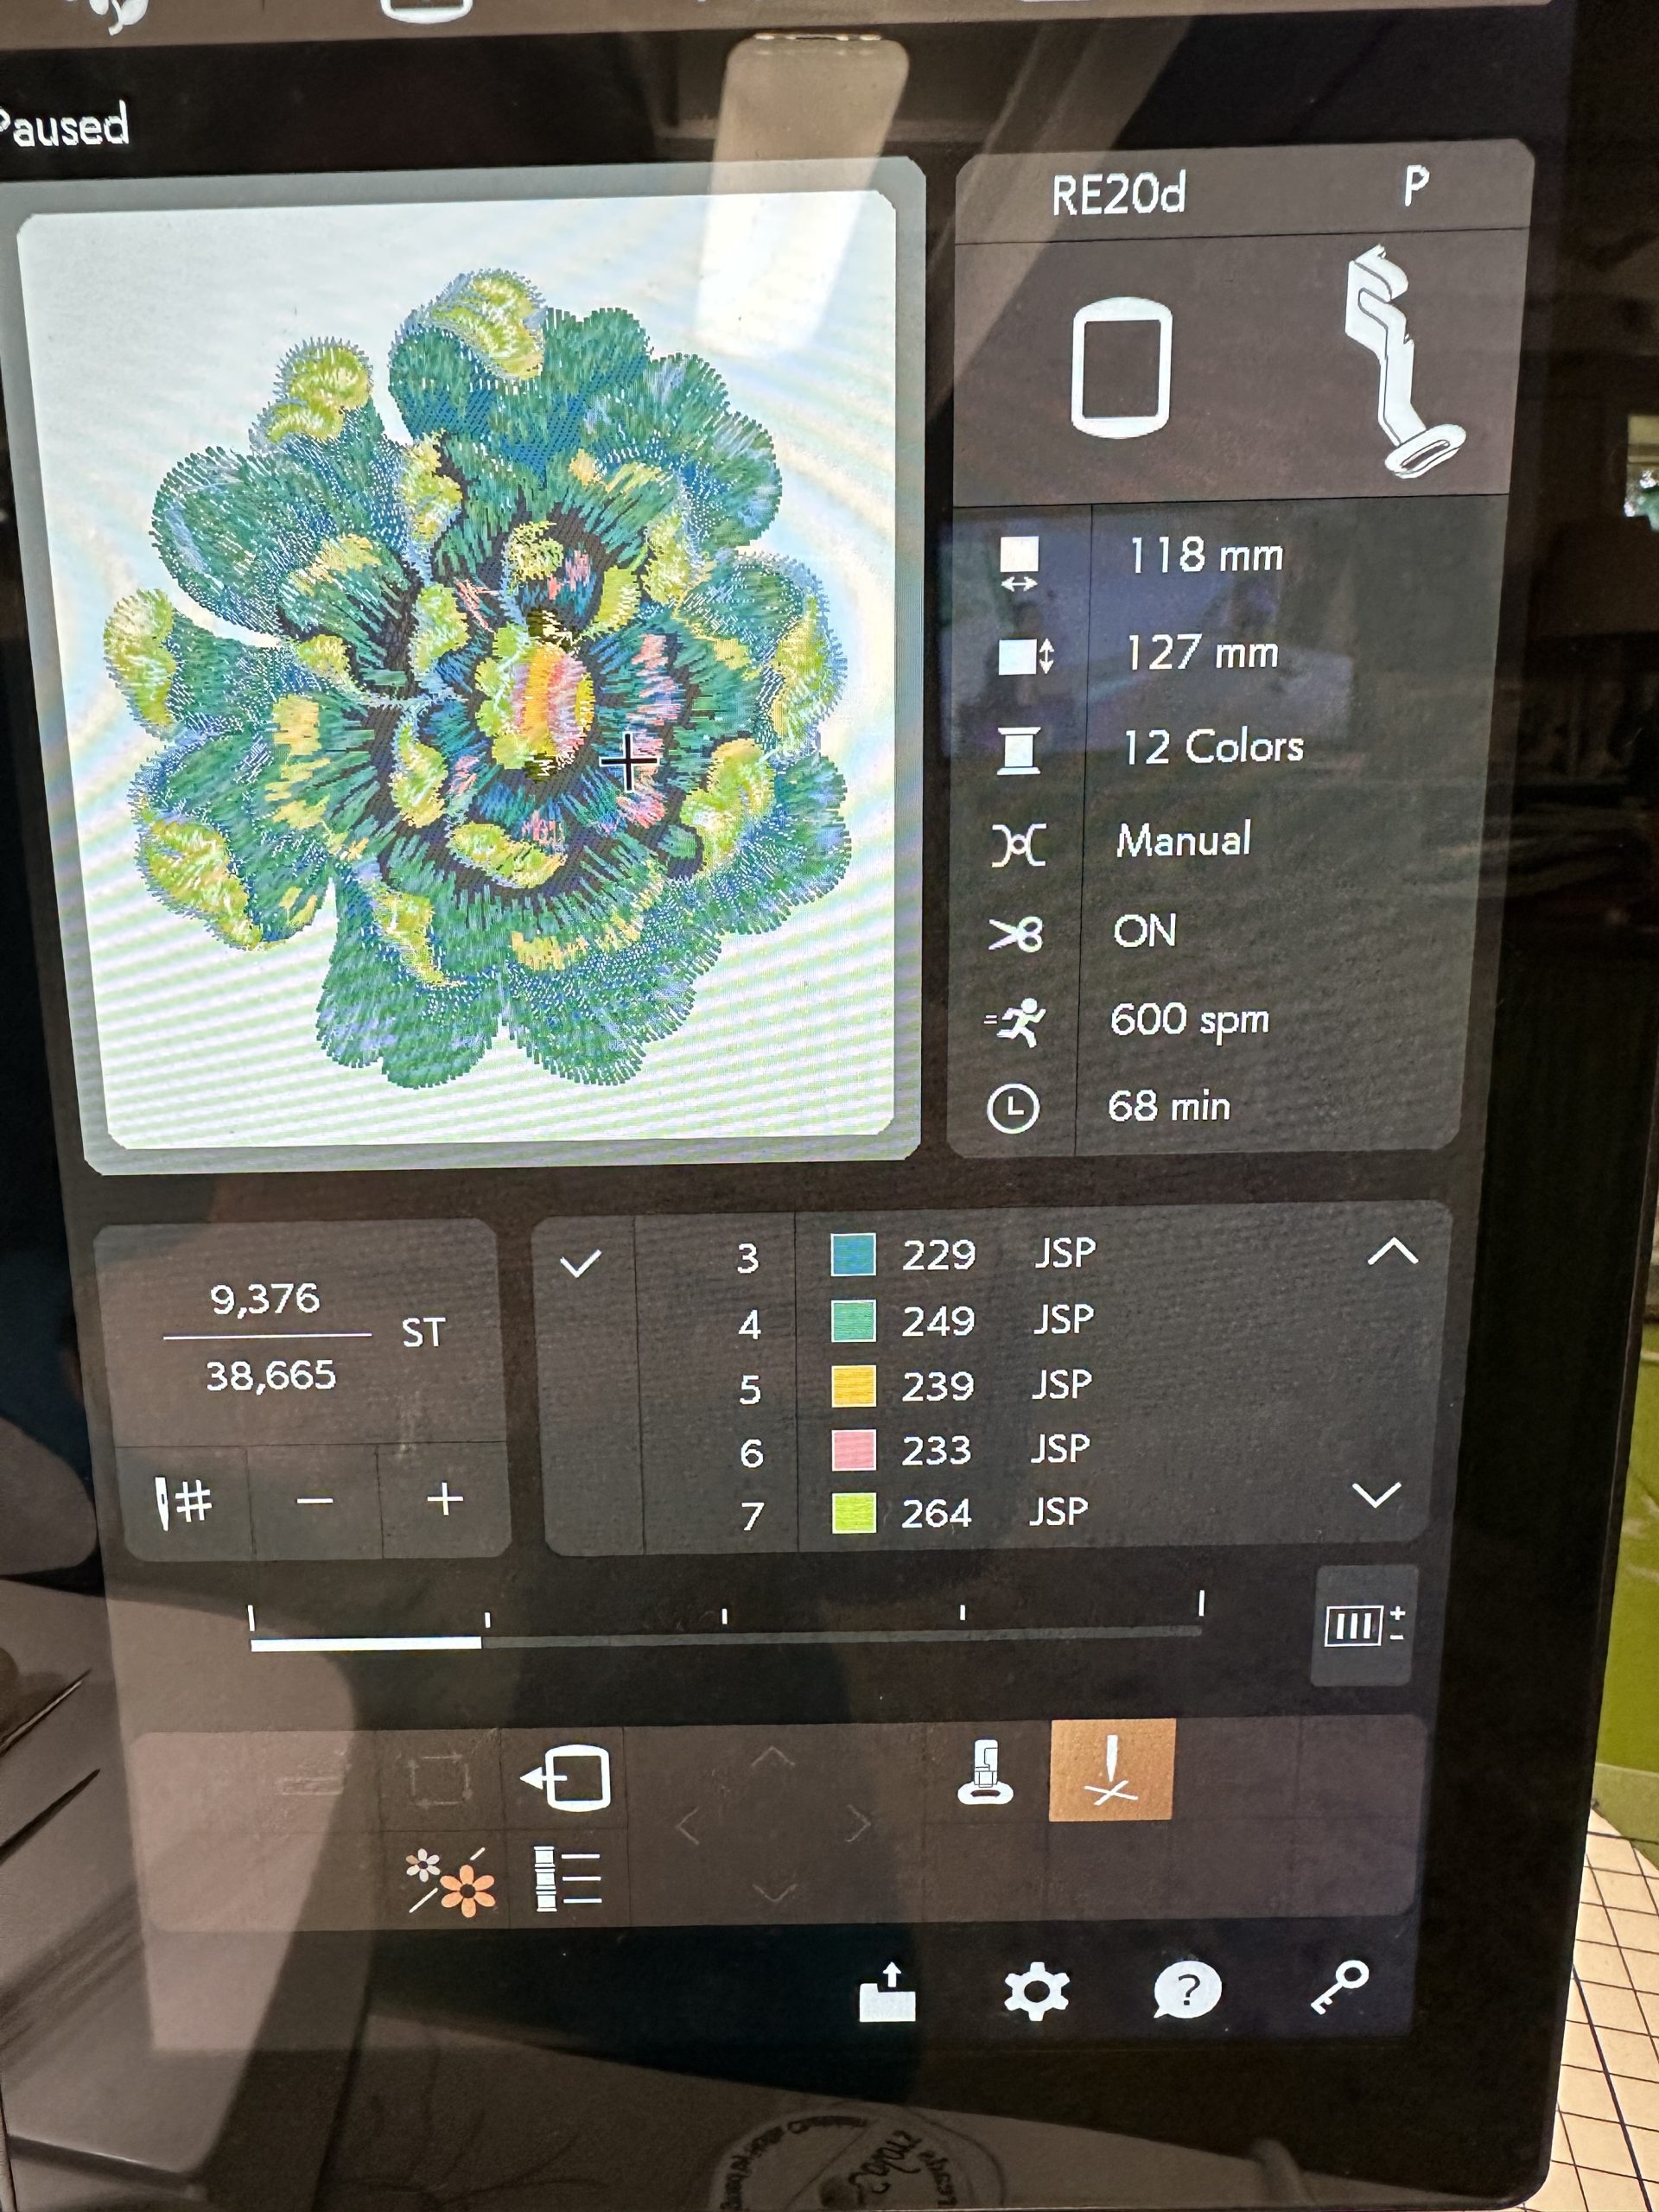
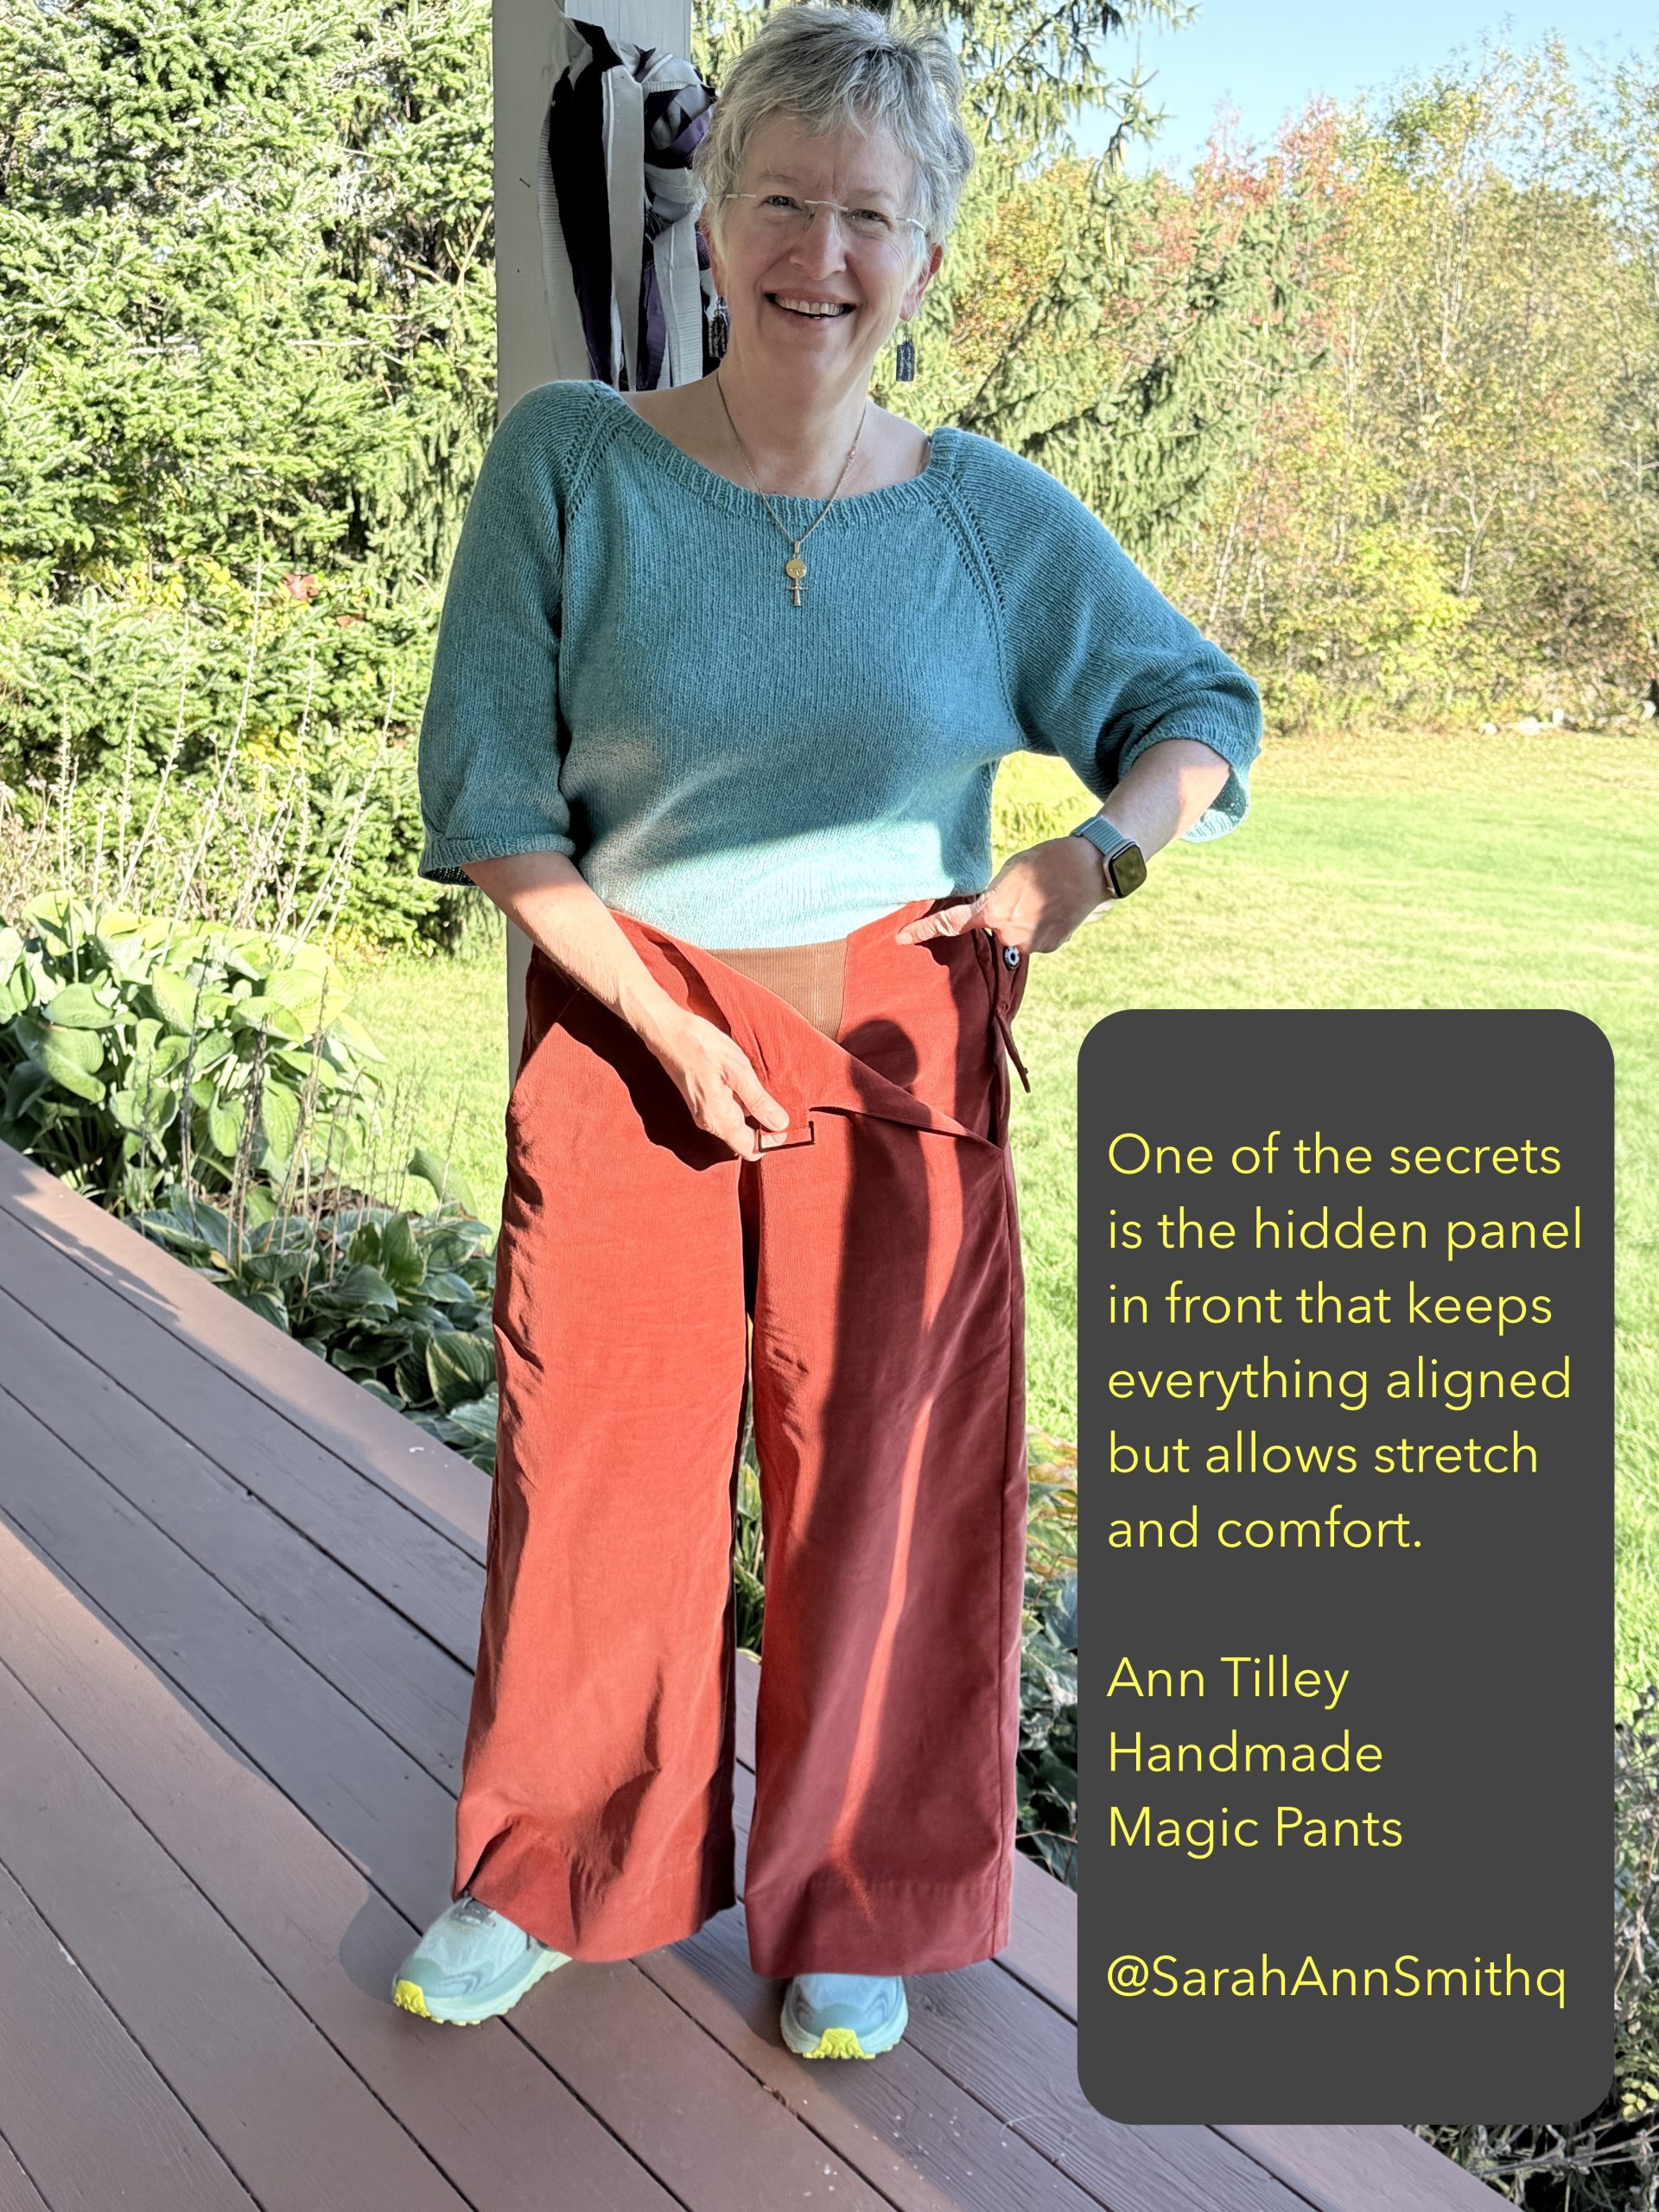
The stretchy panel in the center front:
This is half of the genius part of comfortable, plus it stabilizes the pockets to make a neat and tidy front opening.
For me, the only mind-bending part of the process was which pocket pieces went where since I’ve never seen pants constructed like this. I’ve learned to trust that the pattern designer knows what they are doing, and Ann Tilley did (of course!). Then I follow the directions (imagine that?!) step by step. We’ve all seen pants with slash/diagonal pockets and the long piece that goes behind the opening. There is a trapezoid that goes *behind* this piece and the two encase the ribbed fabric panel that stretches but is hidden behind what I think of as the “sailor pants flap” in front. With the side straps unsnapped (I’ll get to the straps/tabs and snaps on Day 3 and Day 4 which offer additional wearing ease+good looks), there is ample room to get these pants on and off. The result of this brilliant design is slacks that look nicer than elastic waists, but are just as comfortable.
The ribbed panel is hidden behind the front sailor flap, which in turn is held in place by two tabs with snaps. (See next section)

The Magic Pants pattern is available at AnnTilleyHandmade.com . I couldn’t find ribbed fabric easily, so I went to one of the big box stores and bought two XXL ribbed tank tops (more fabric) to cut up and use for these and future Magic Pants. I think I’d love to make these in a linen blend (Essex!) or linen print next summer like the version on the pattern cover.
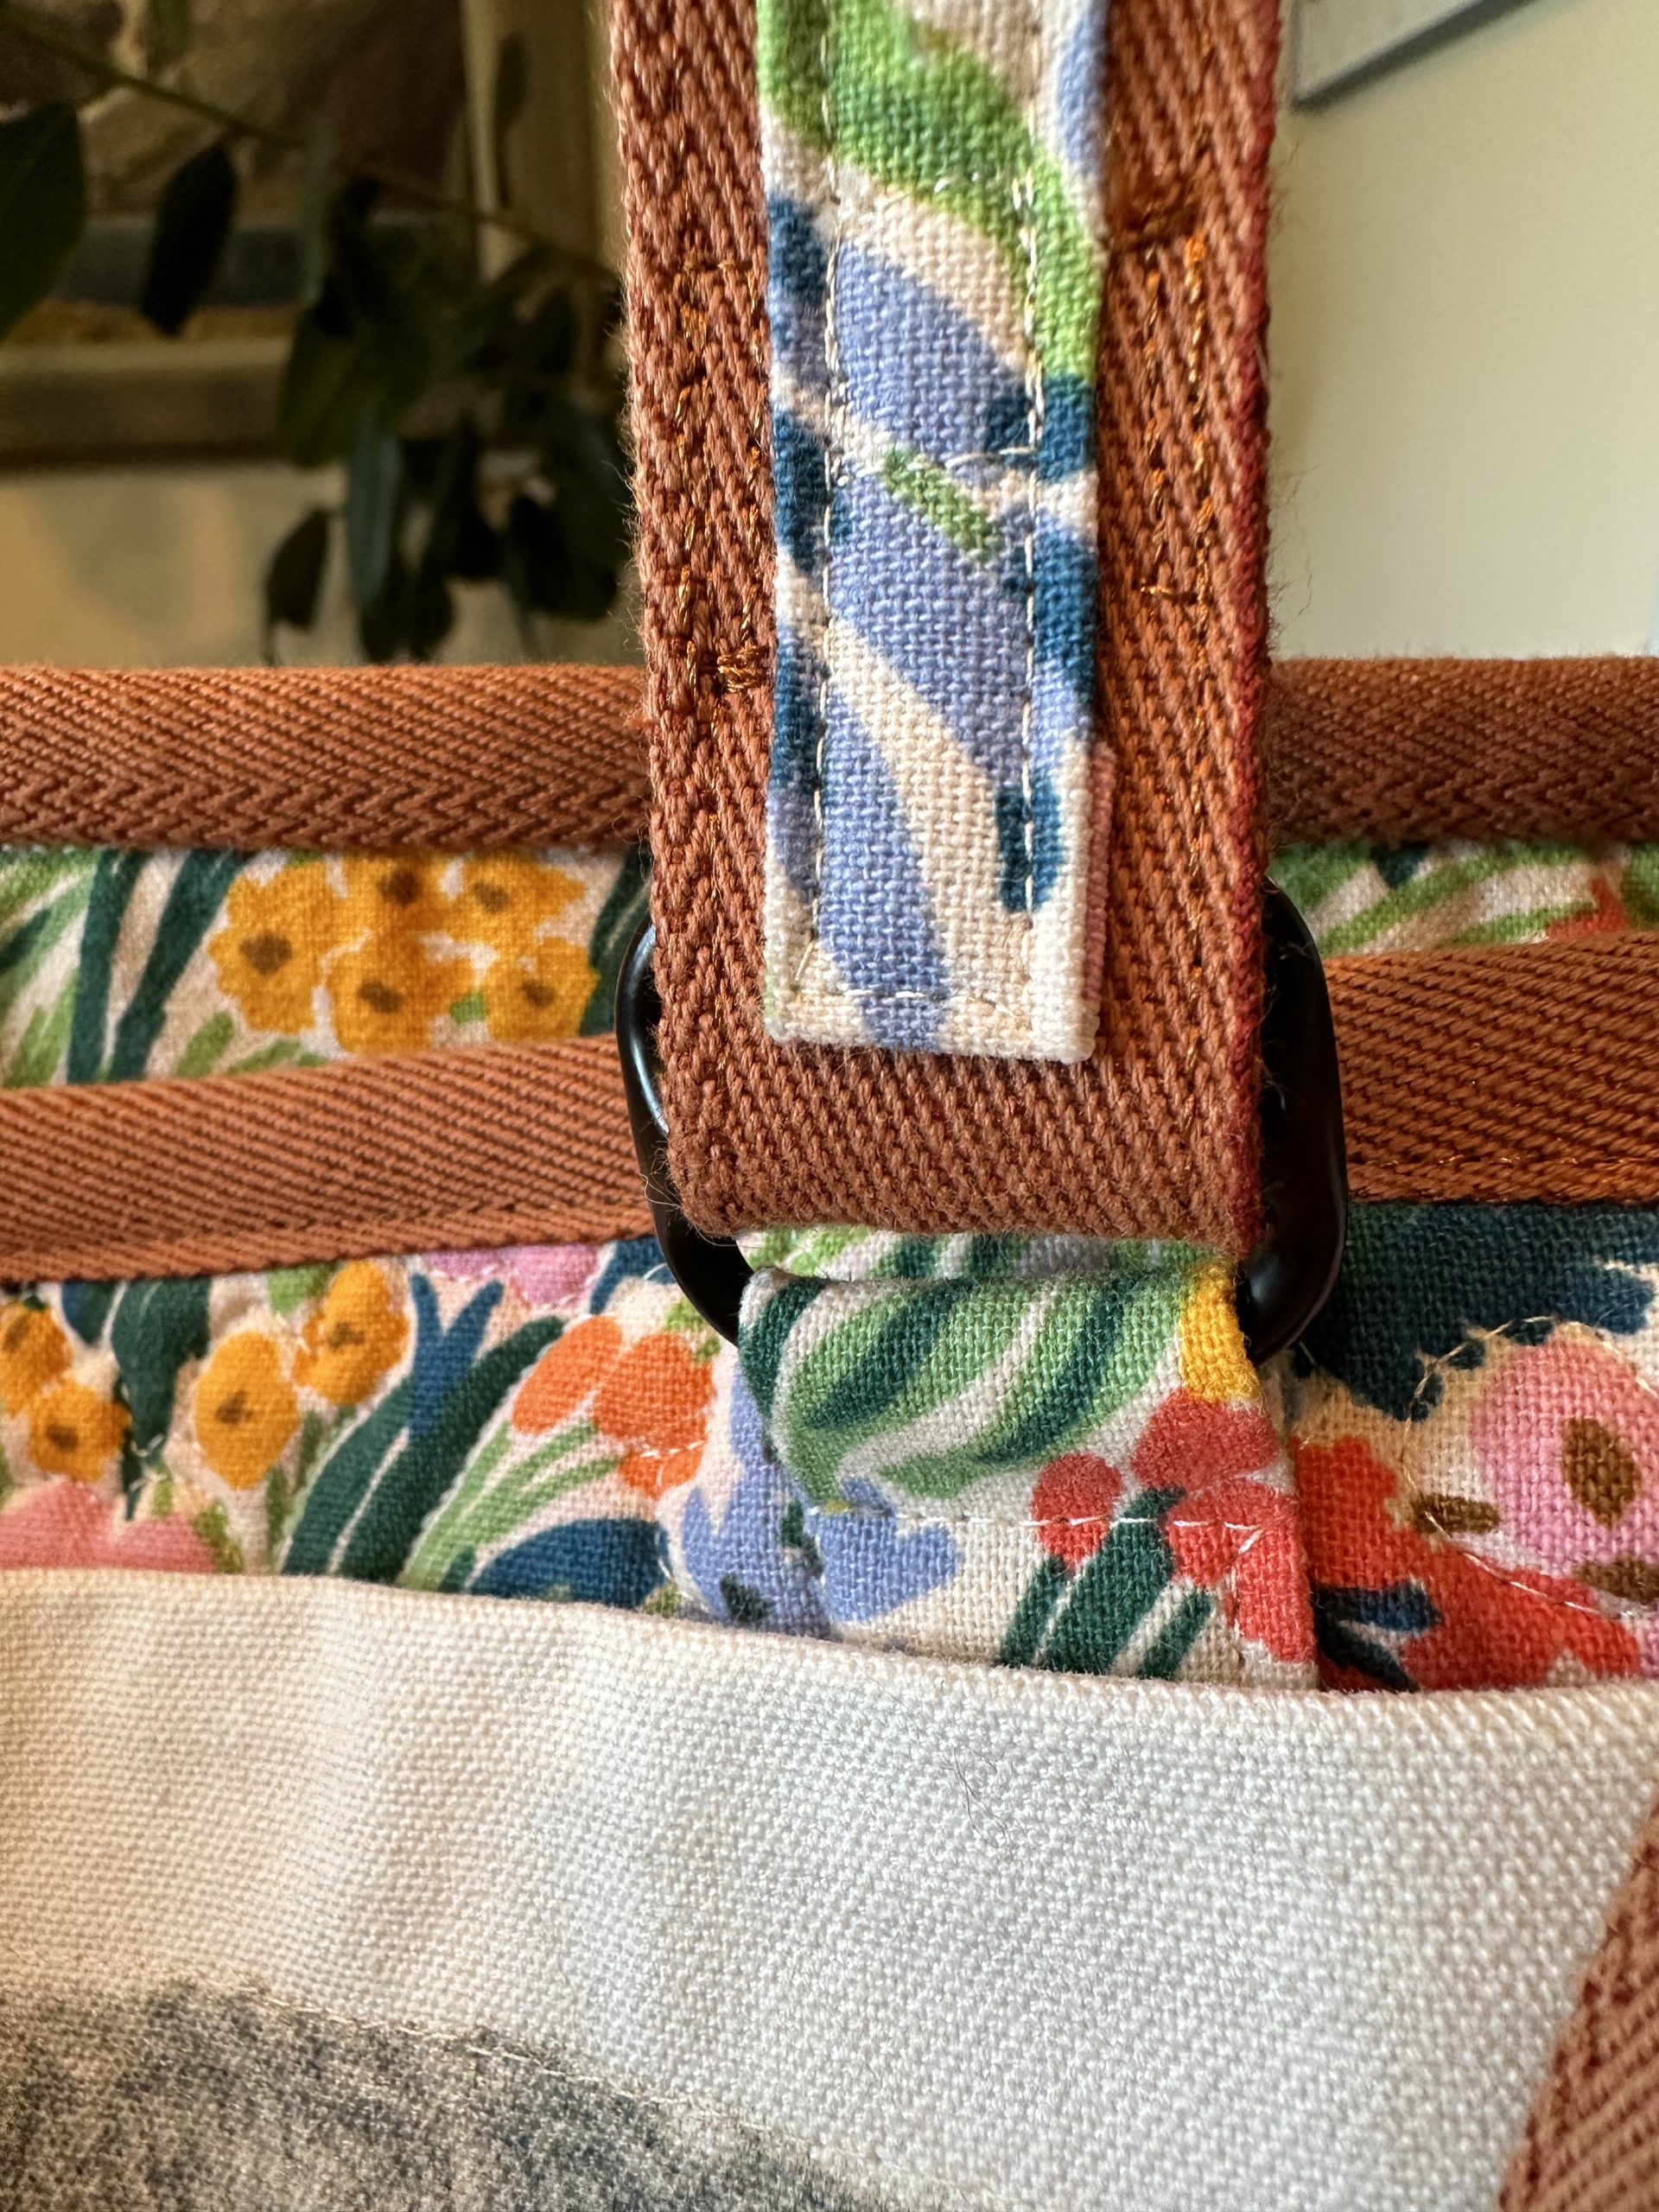
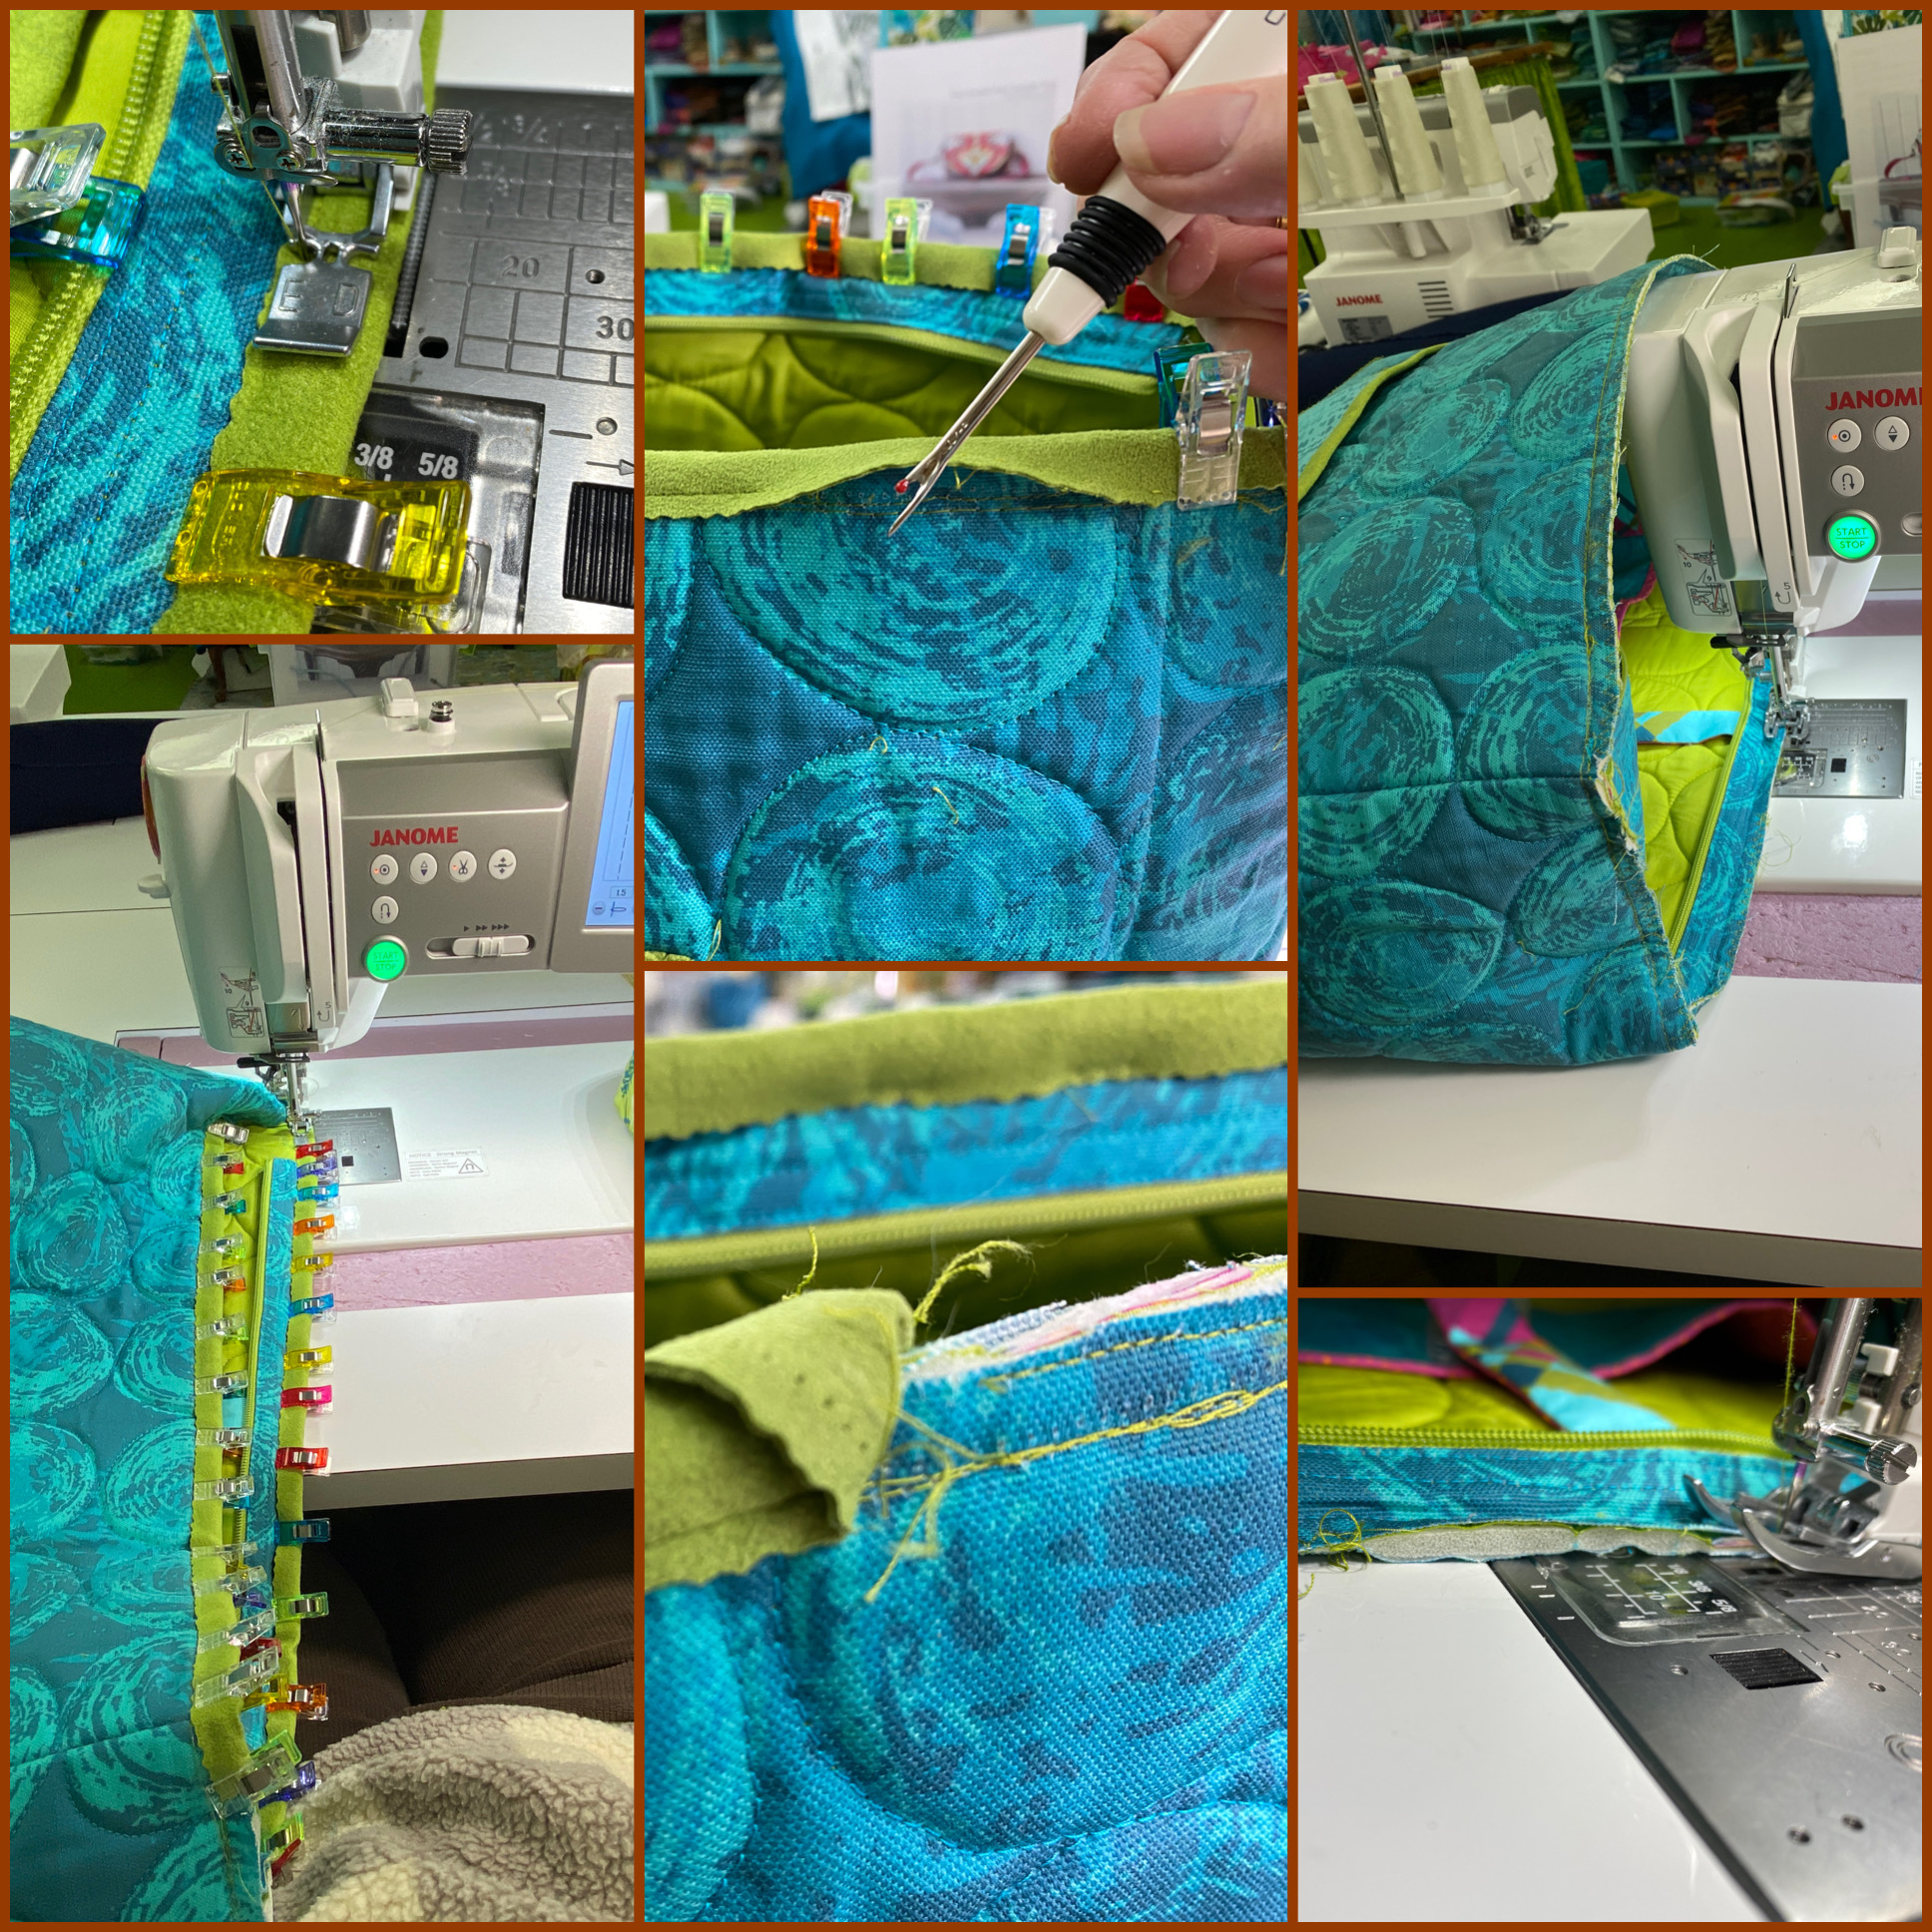
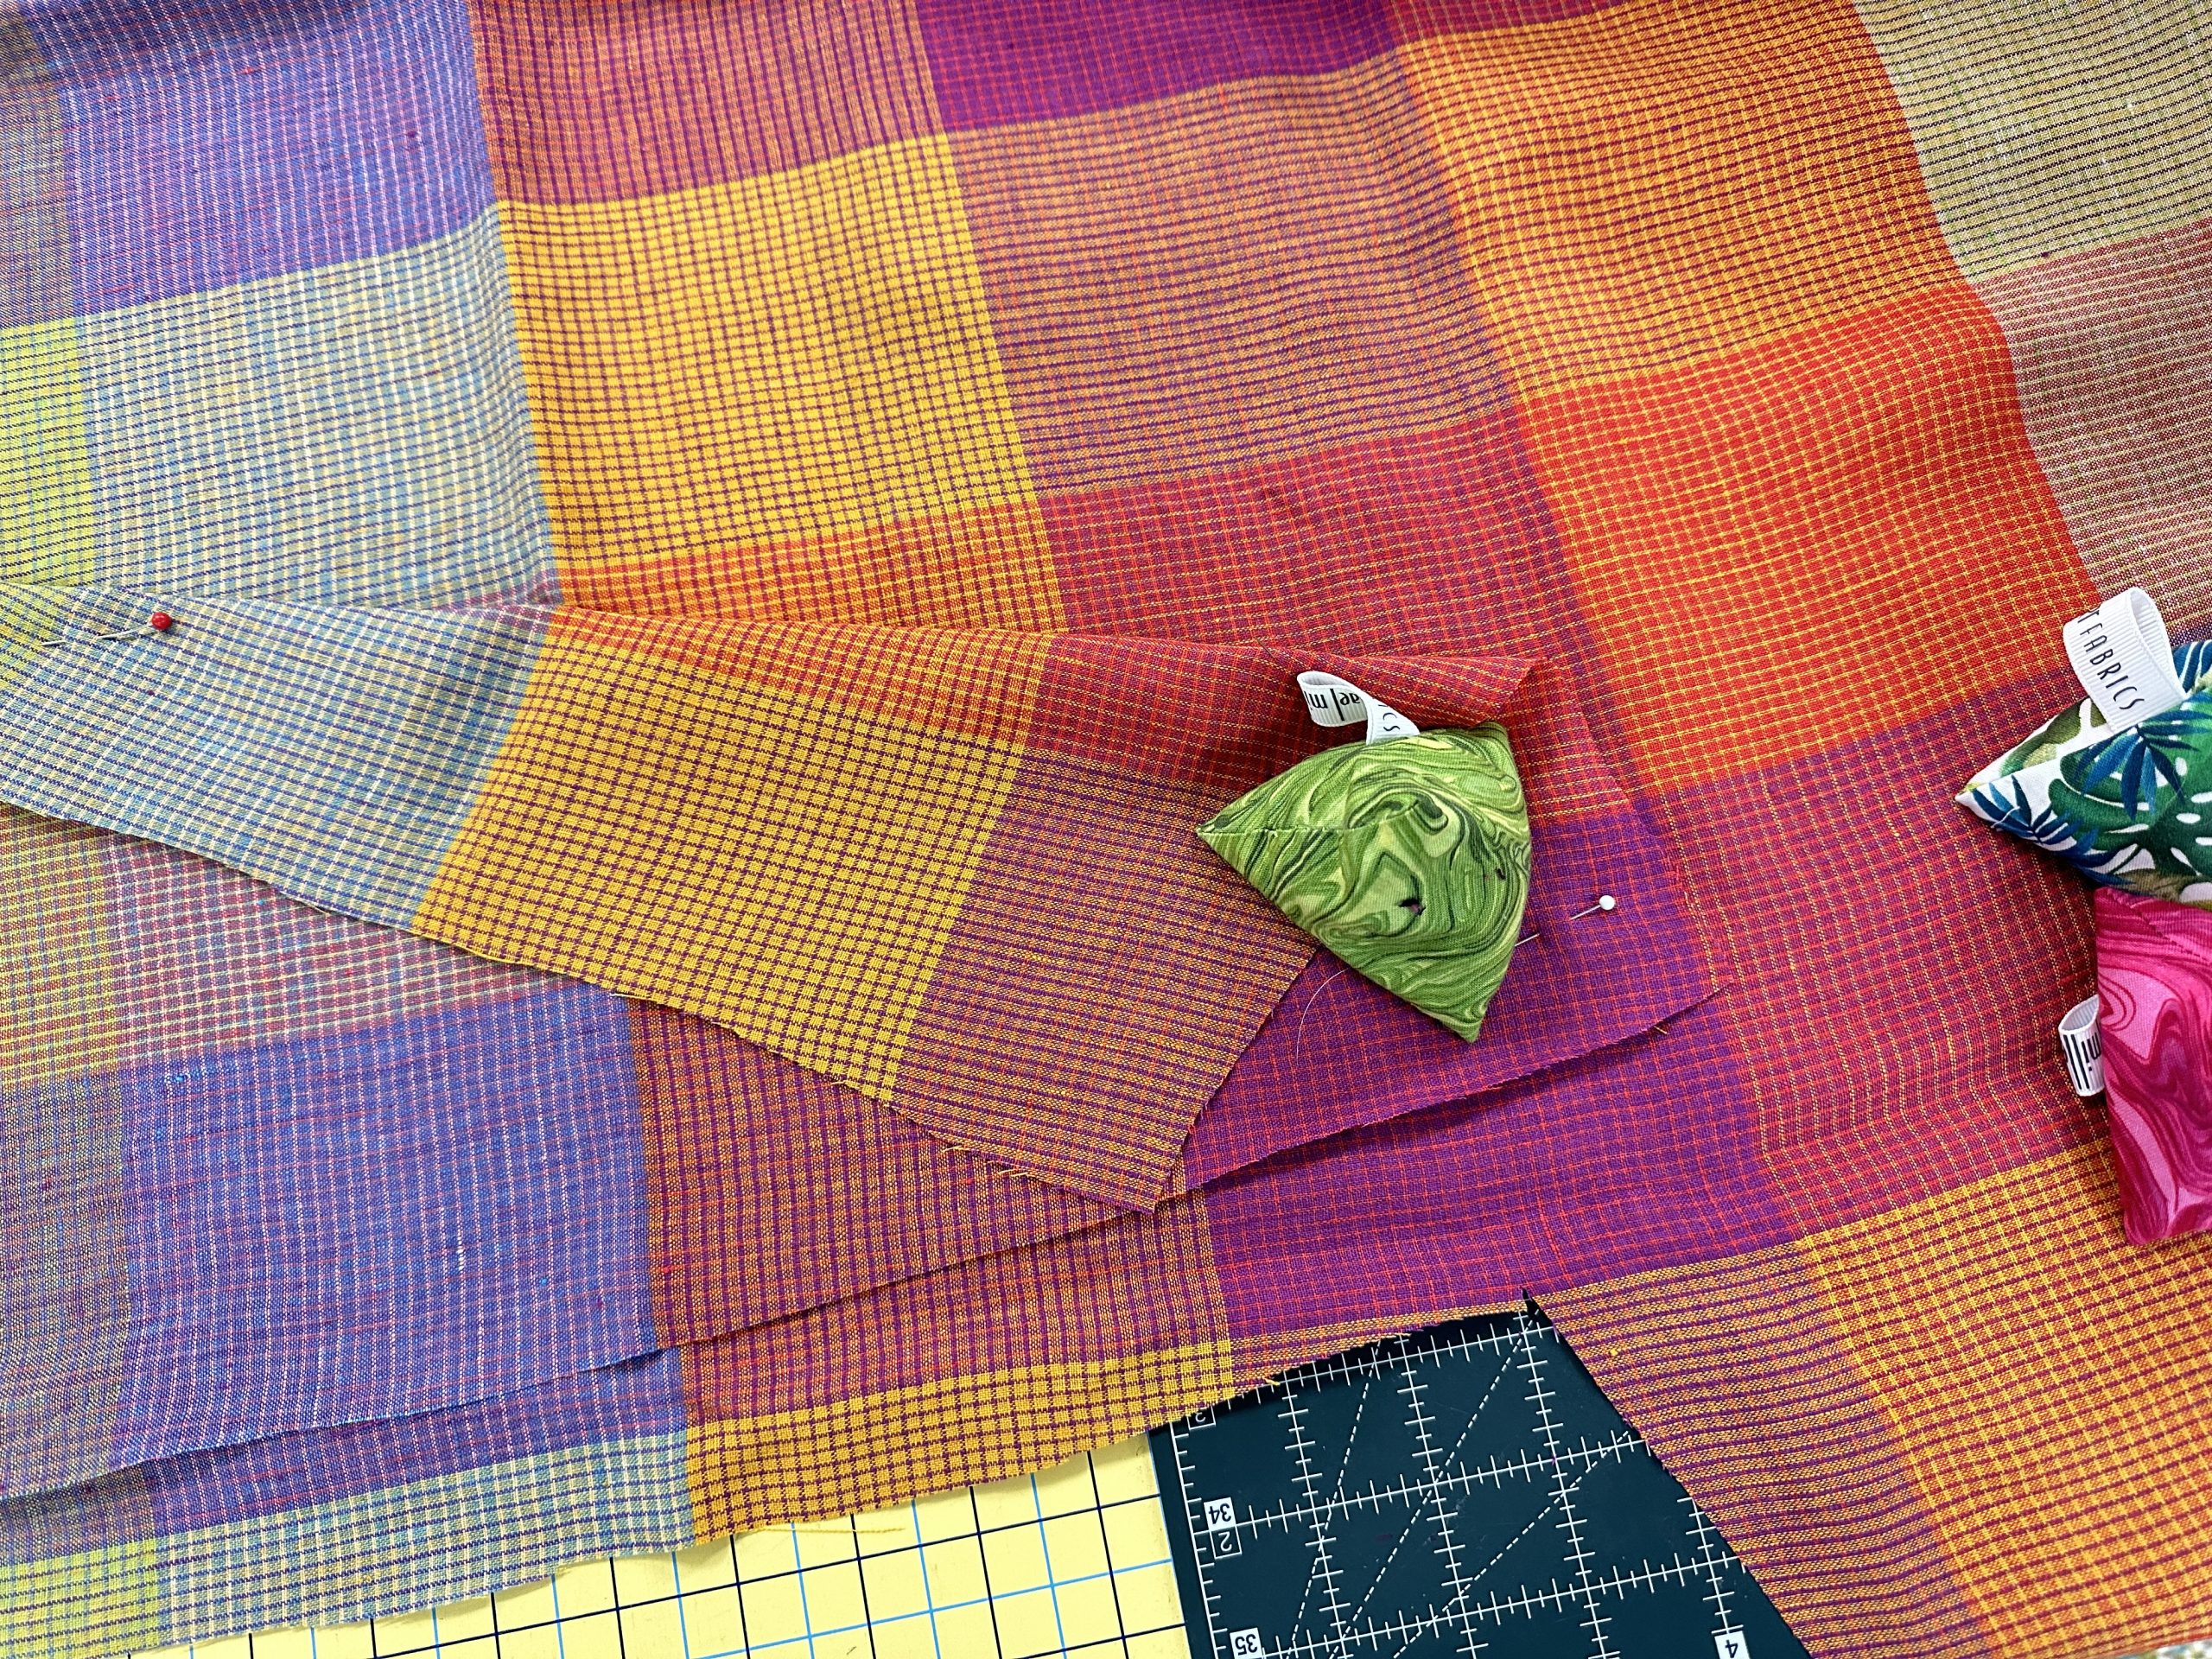
Making the tabs:
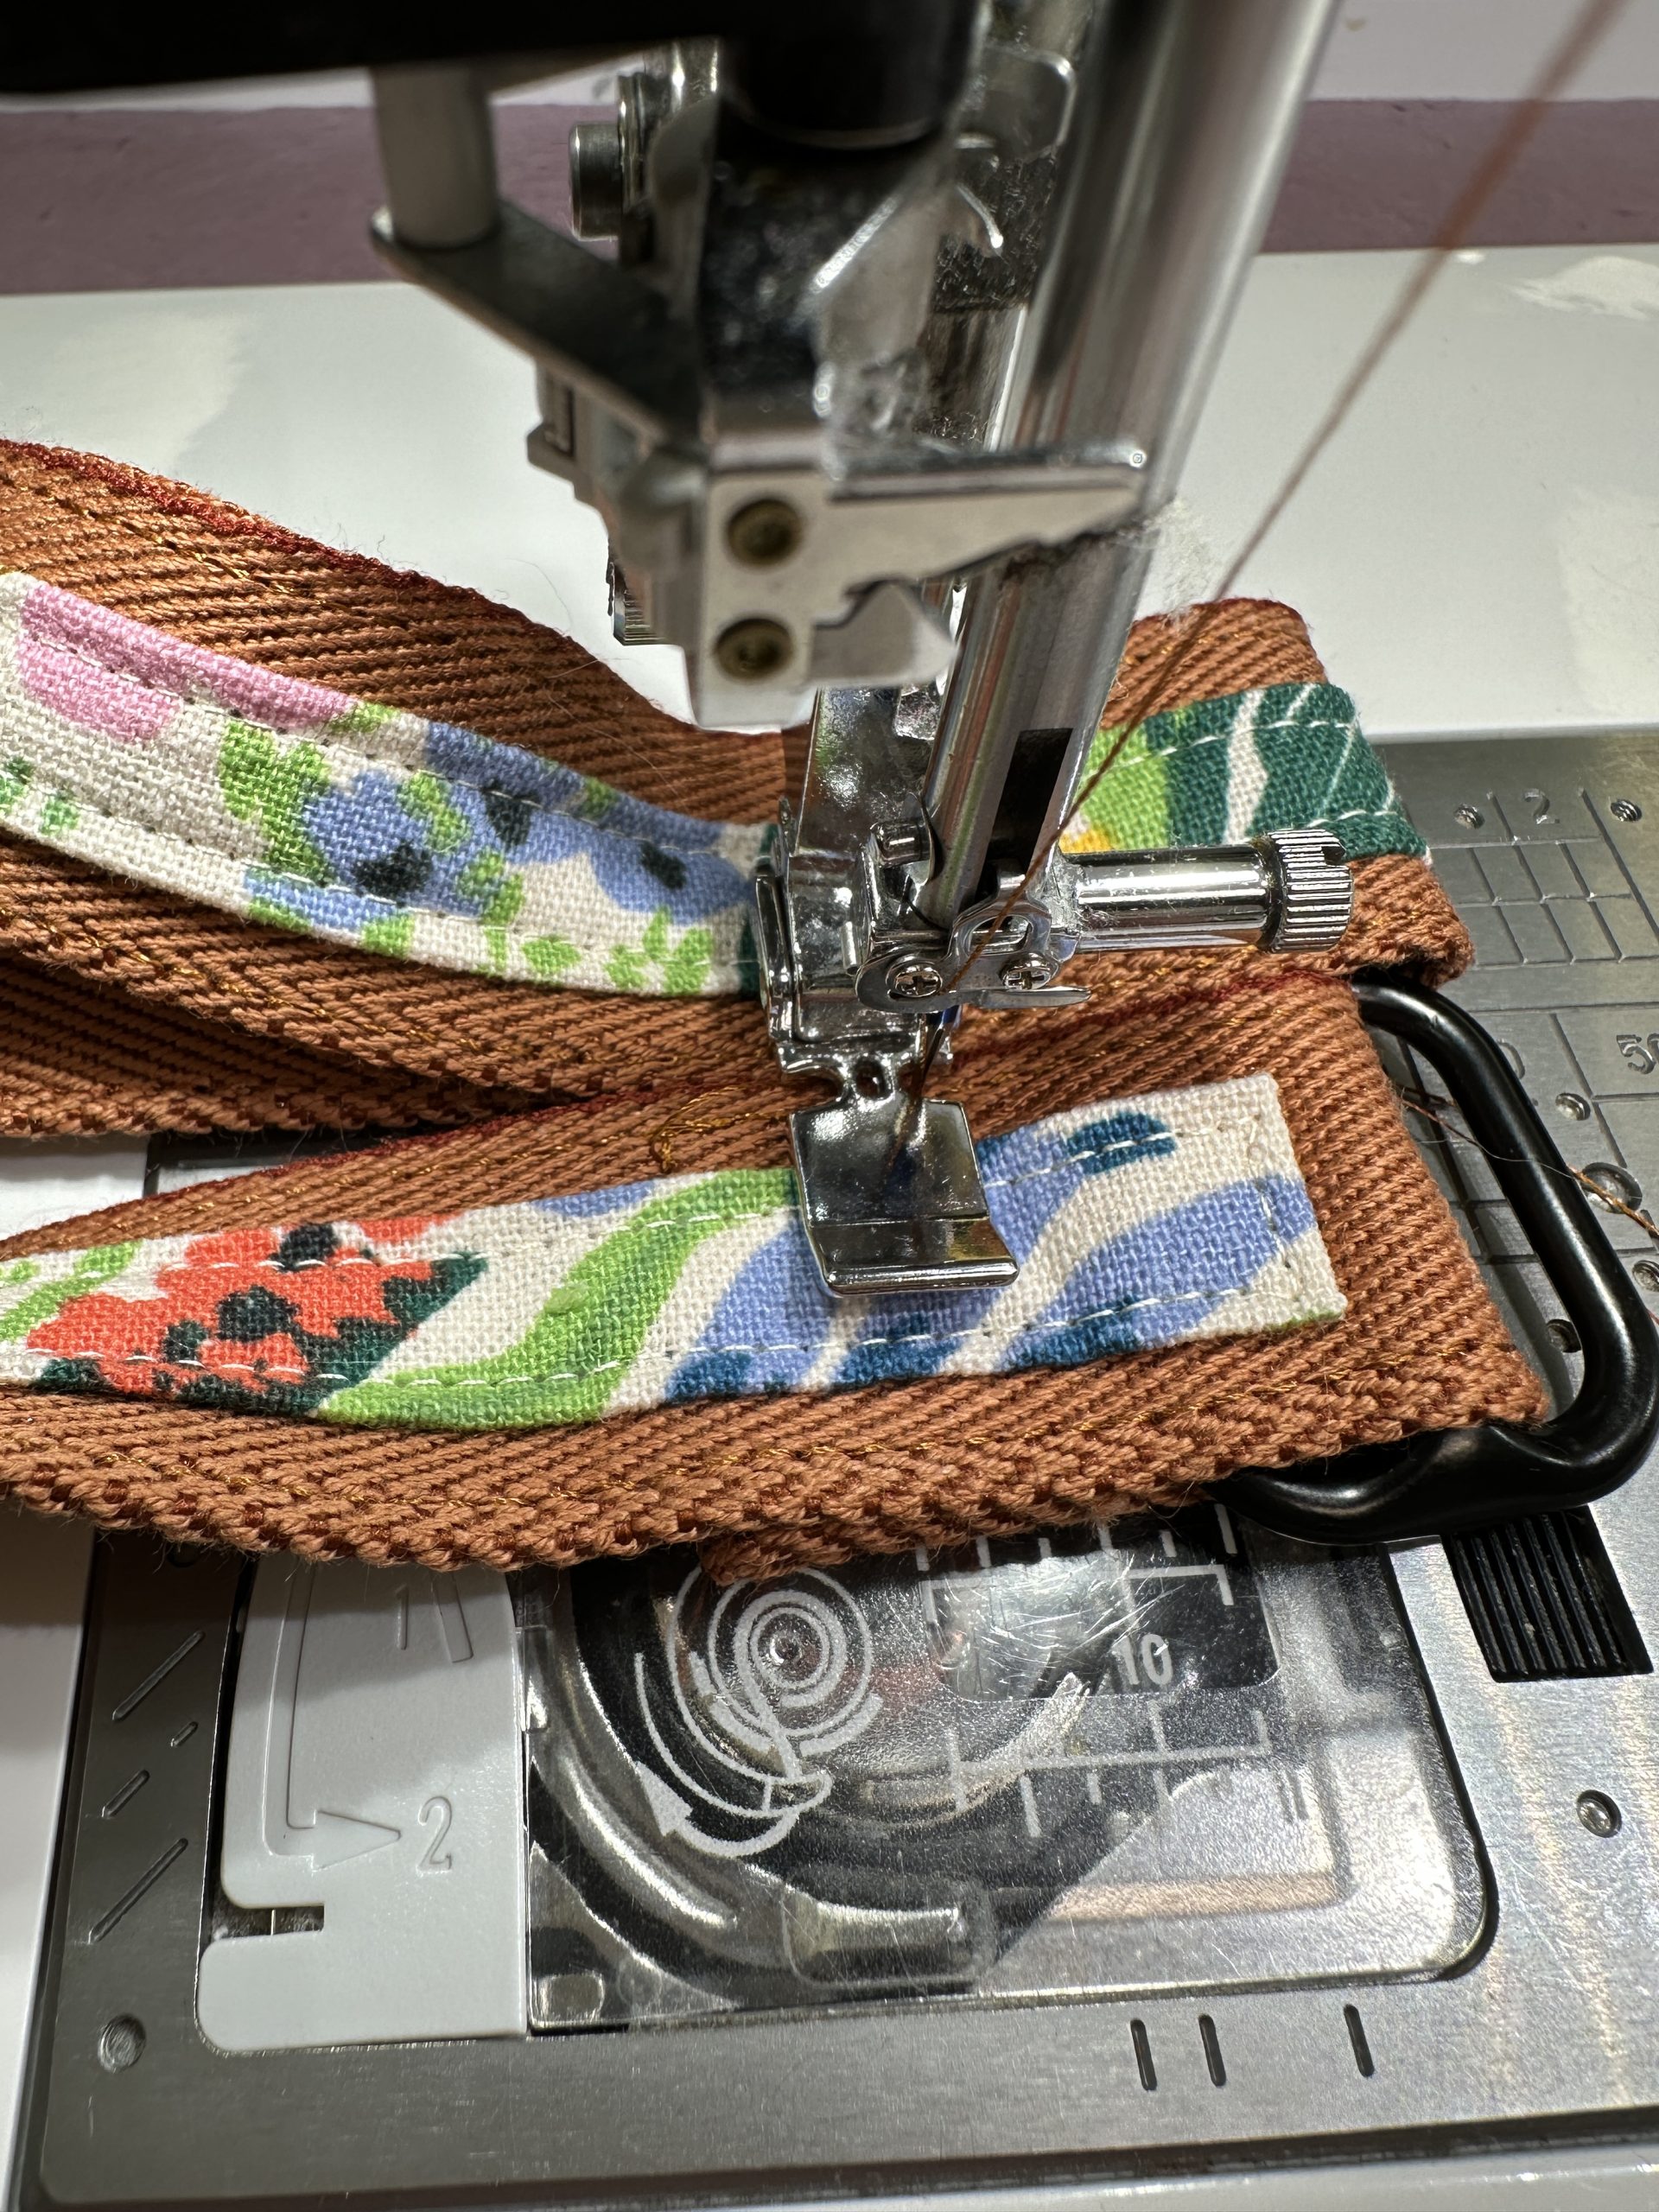
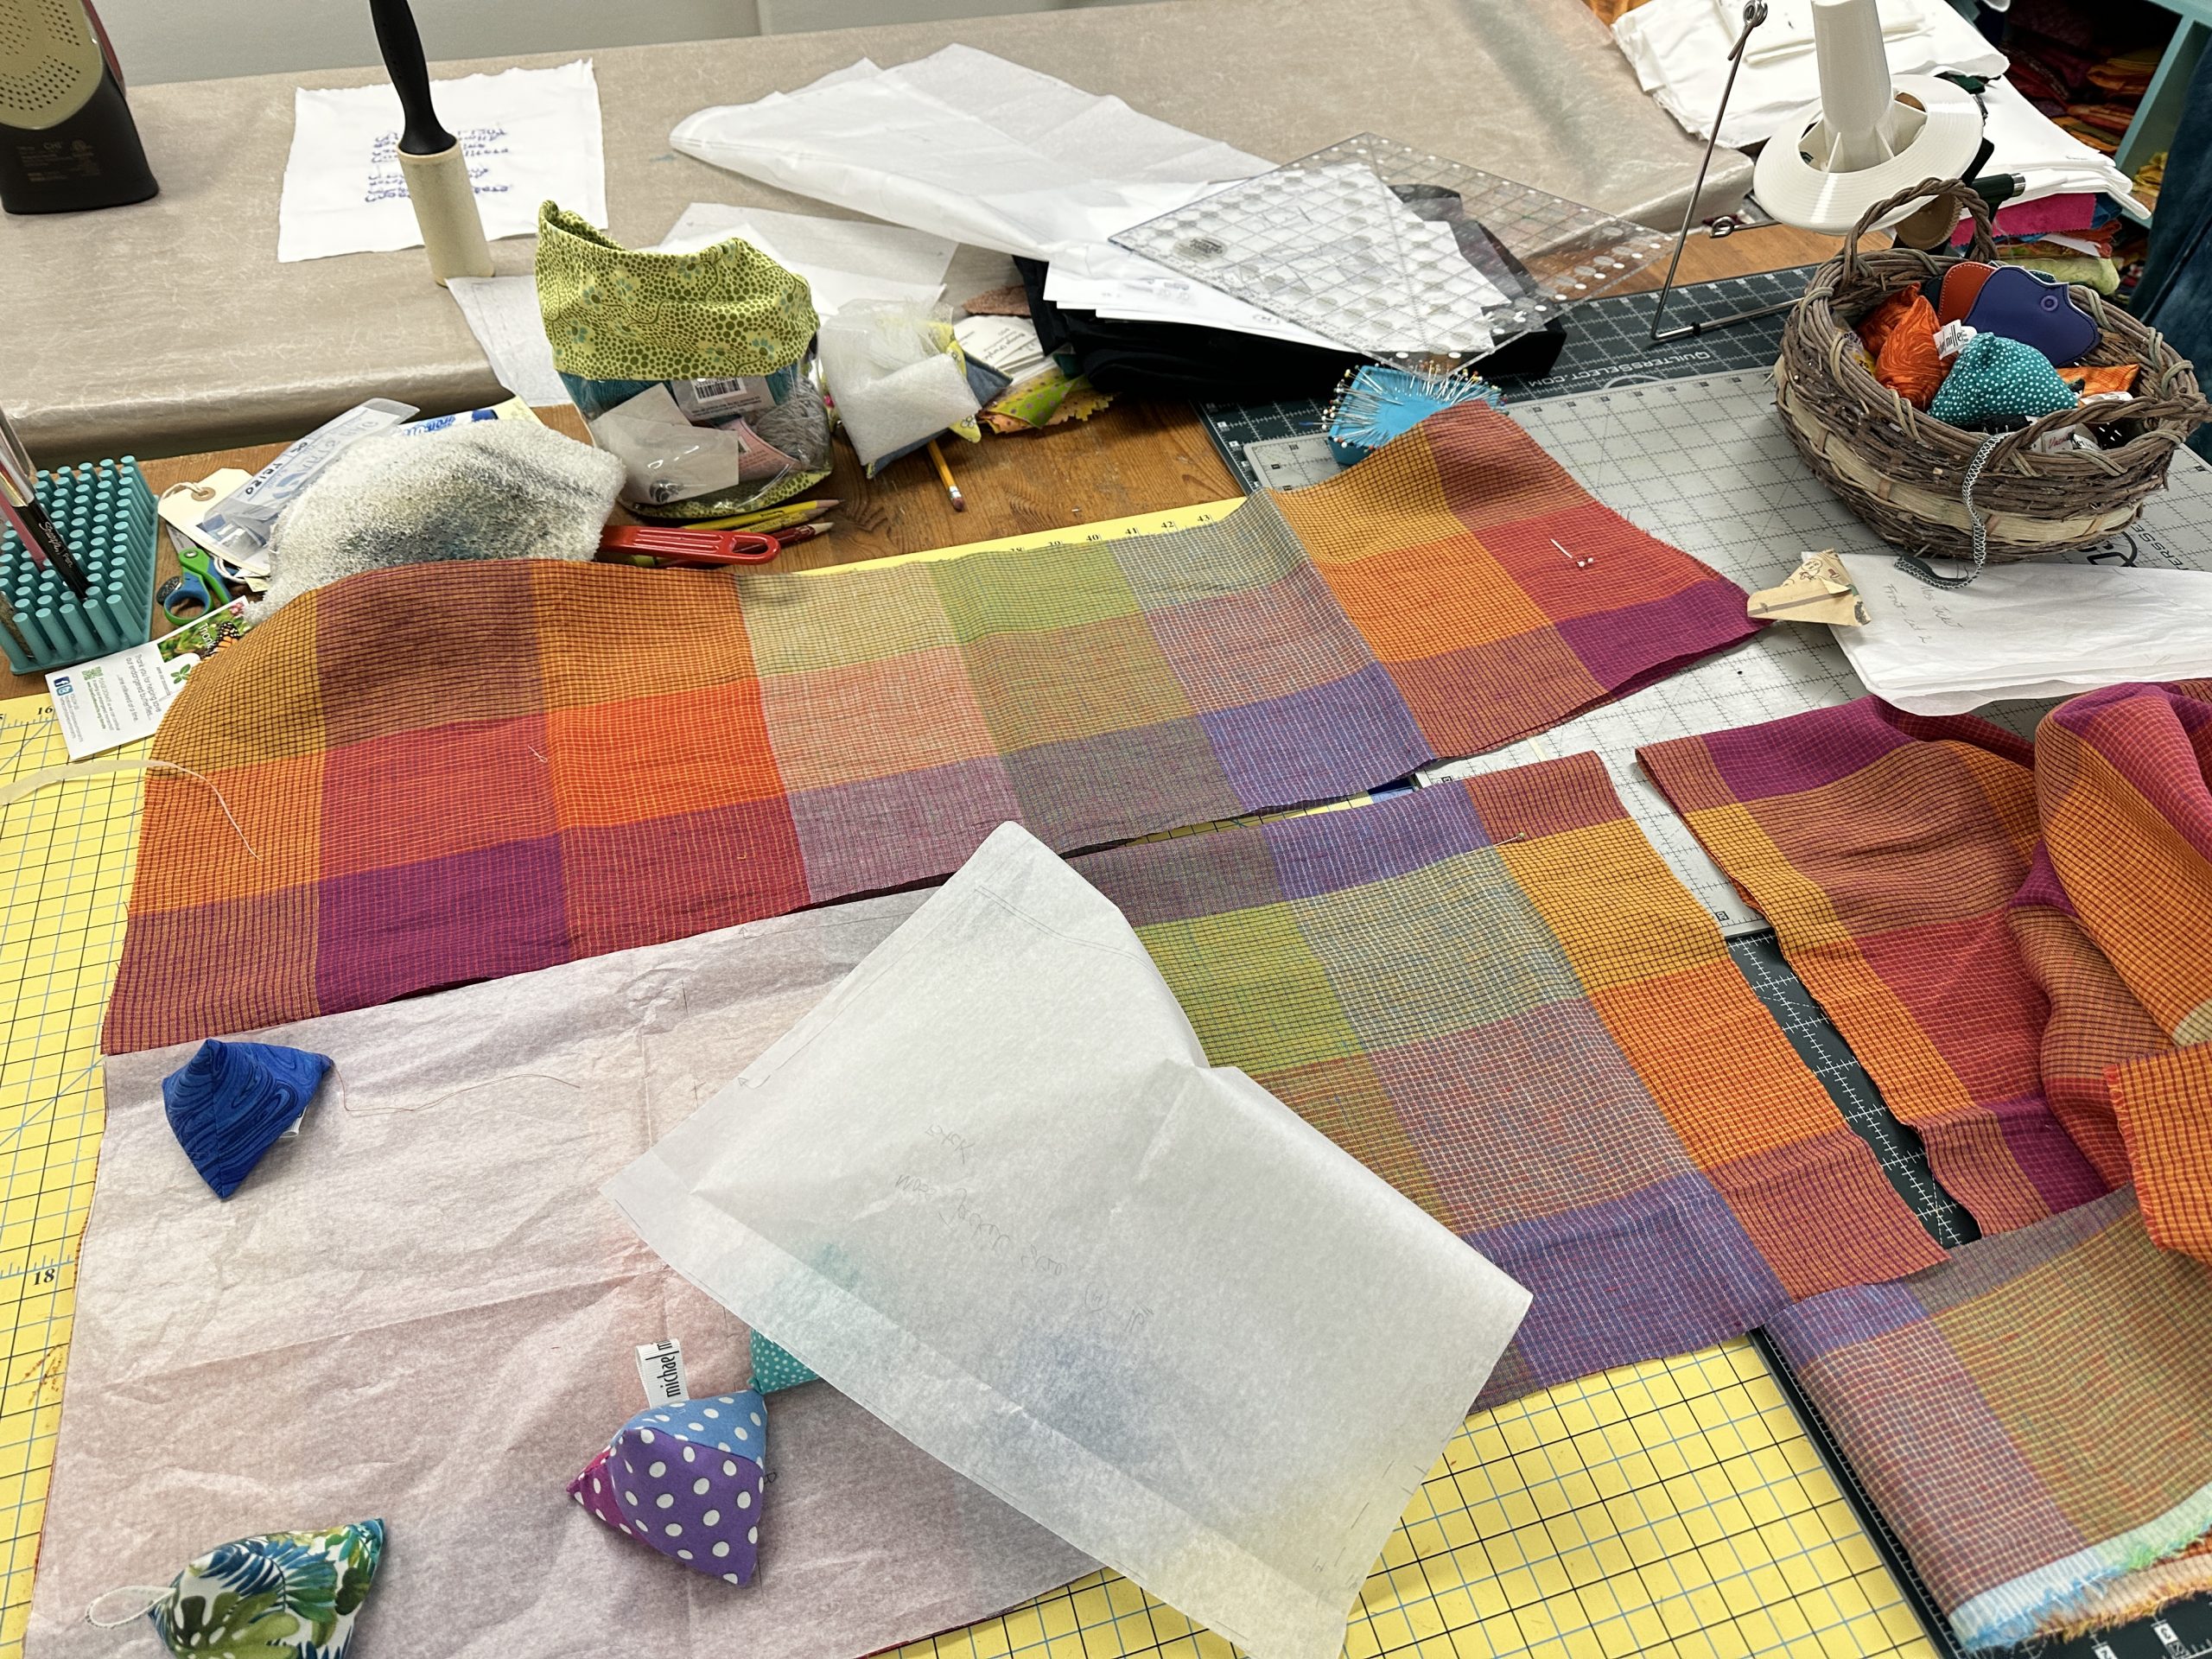
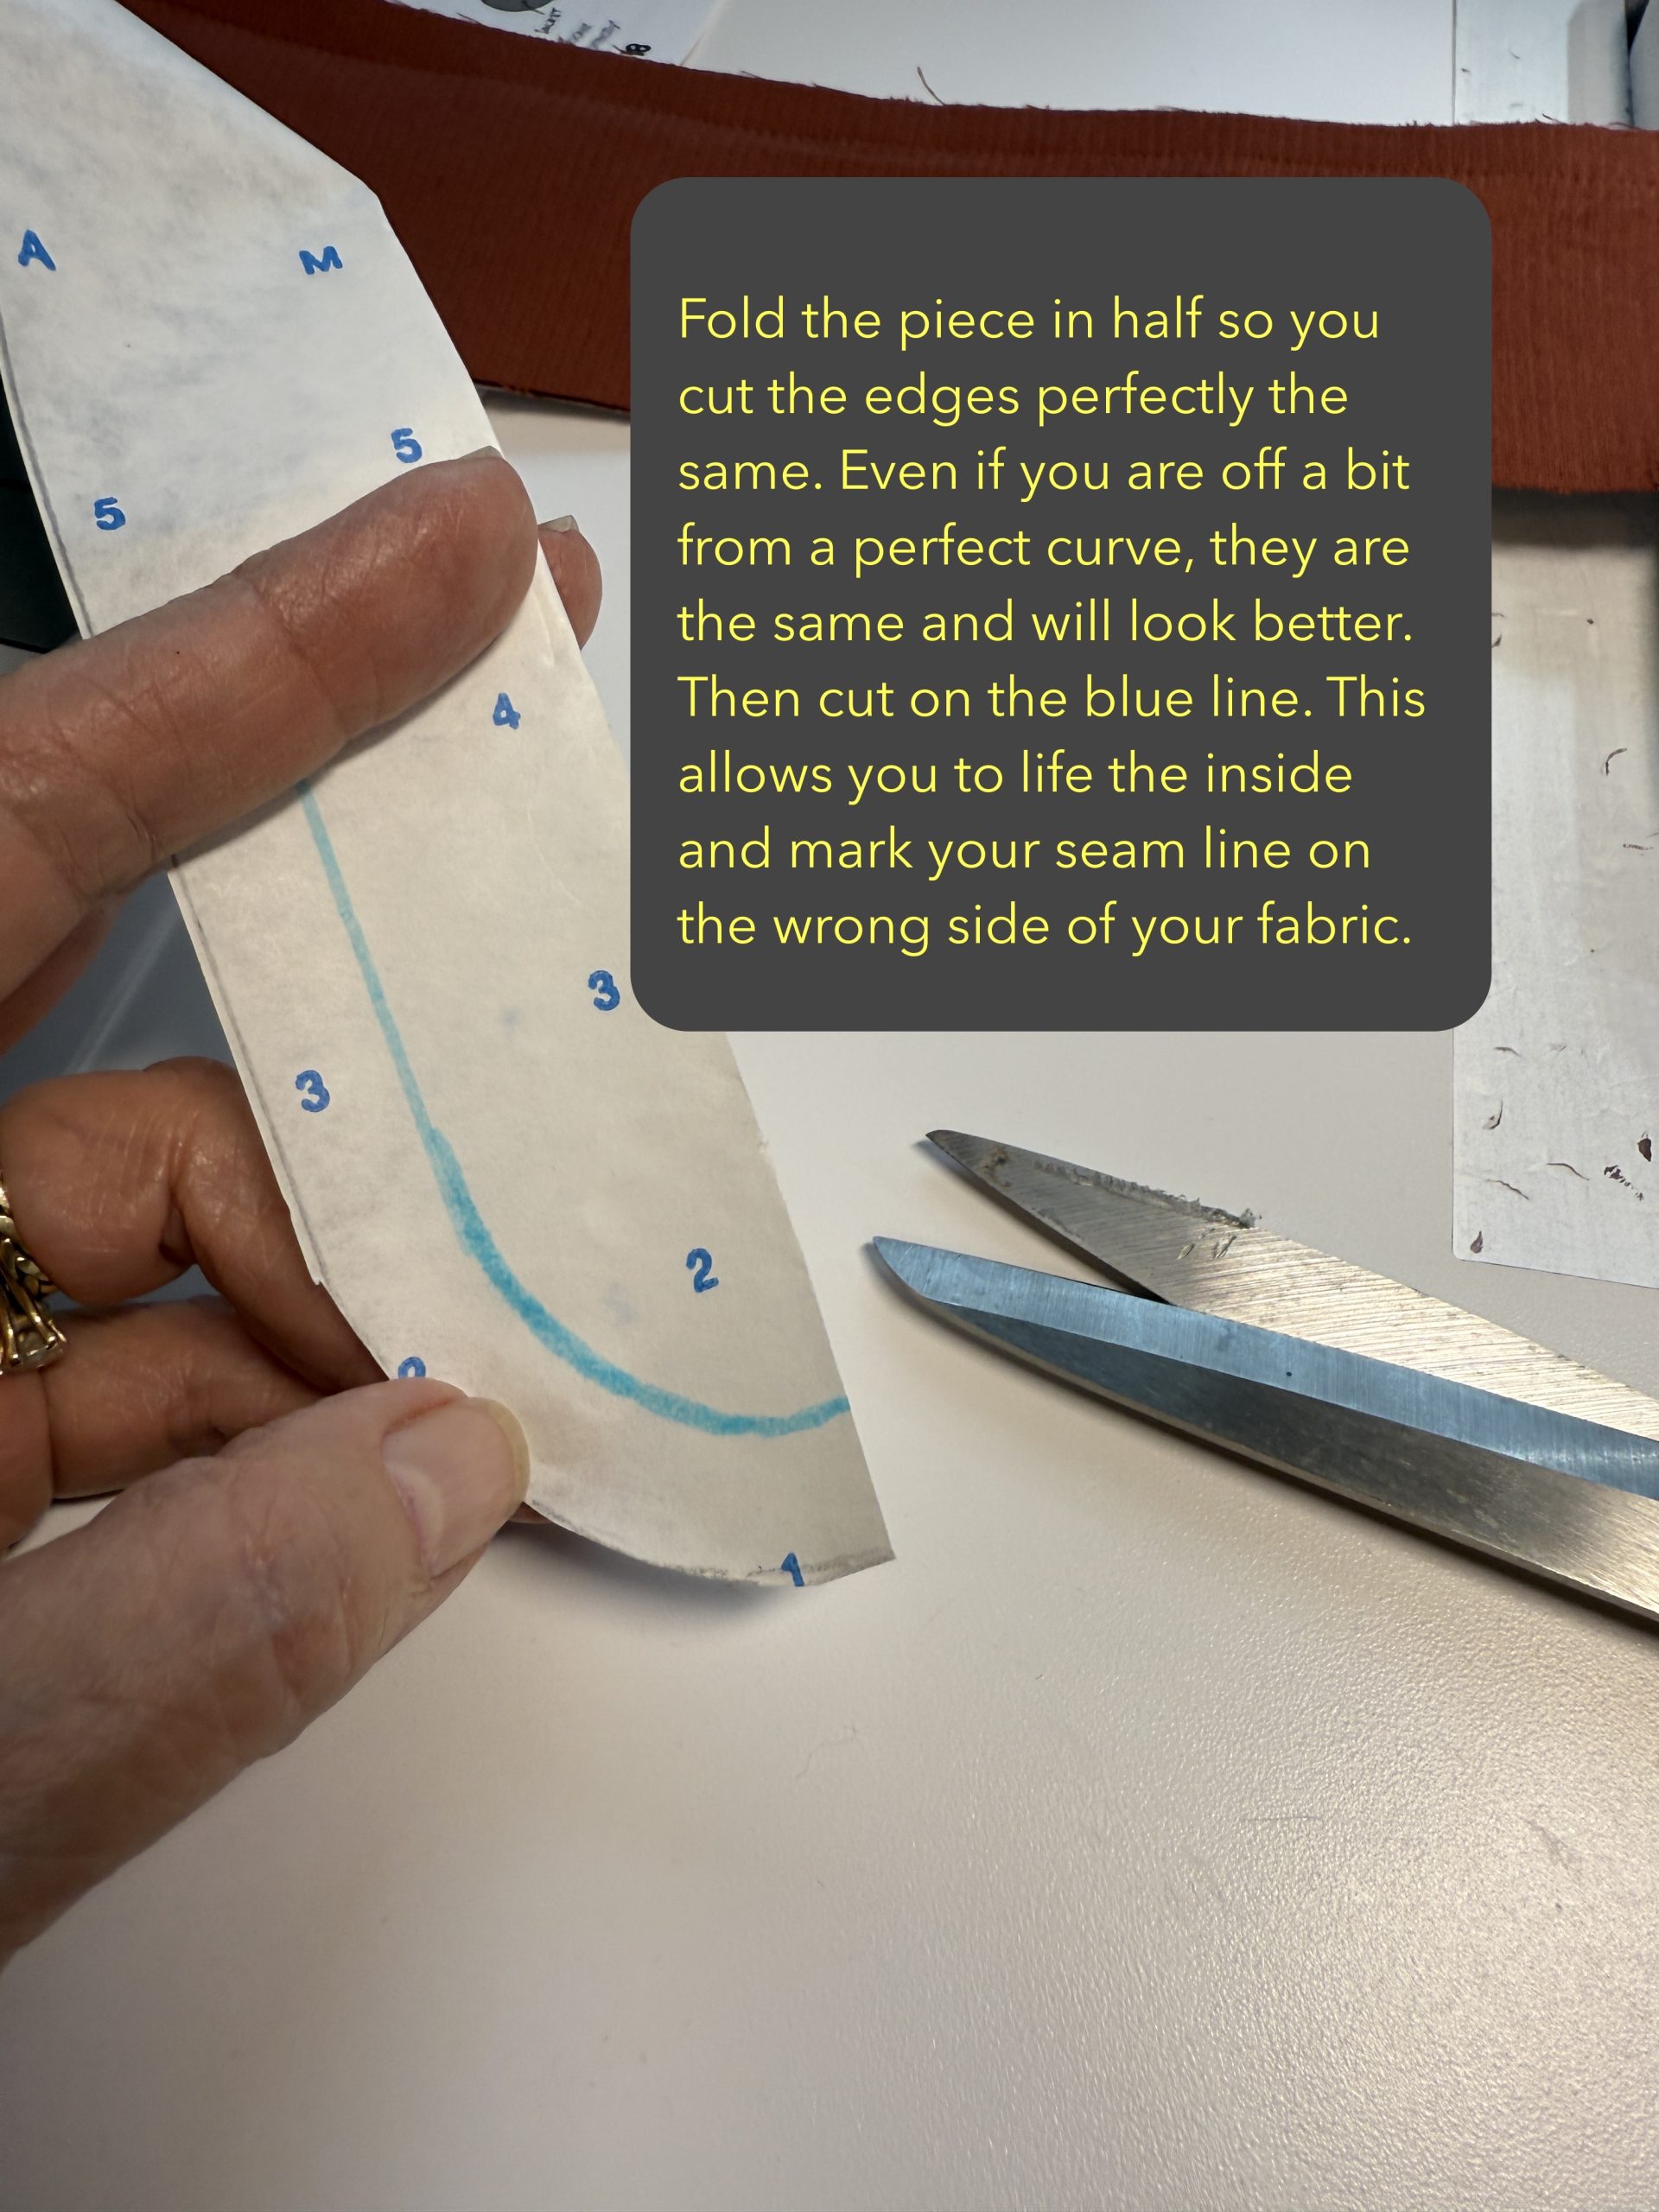
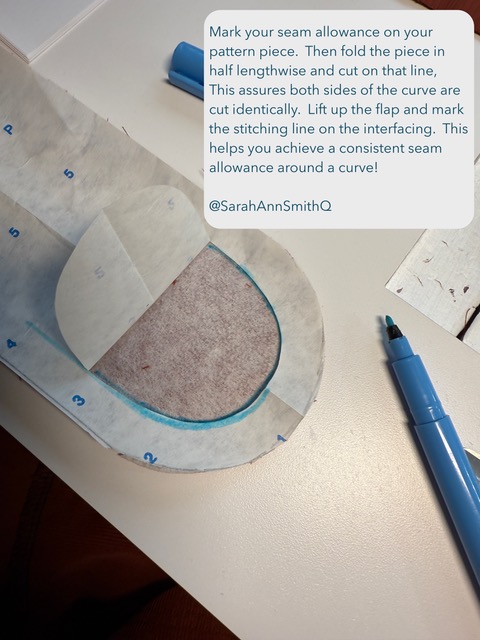
Using the Janome’s pivot feature which automatically puts the needle down and the presser foot up when you stop make turning a perfect curve easy on these tabs! I am precision impaired, so I still remember a lesson from sewing class when I was about 14. My garment had a placket on the front with curved end which I couldn’t sew neatly. My teacher was frustrated with my inaccuracy and finally cut a template from card stock for me to use as a sewing guide. I modified that approach here. I use pattern paper to trace off the garment pieces from large AO printed sheets, then cut out the garment from my tracings (modified for fit).
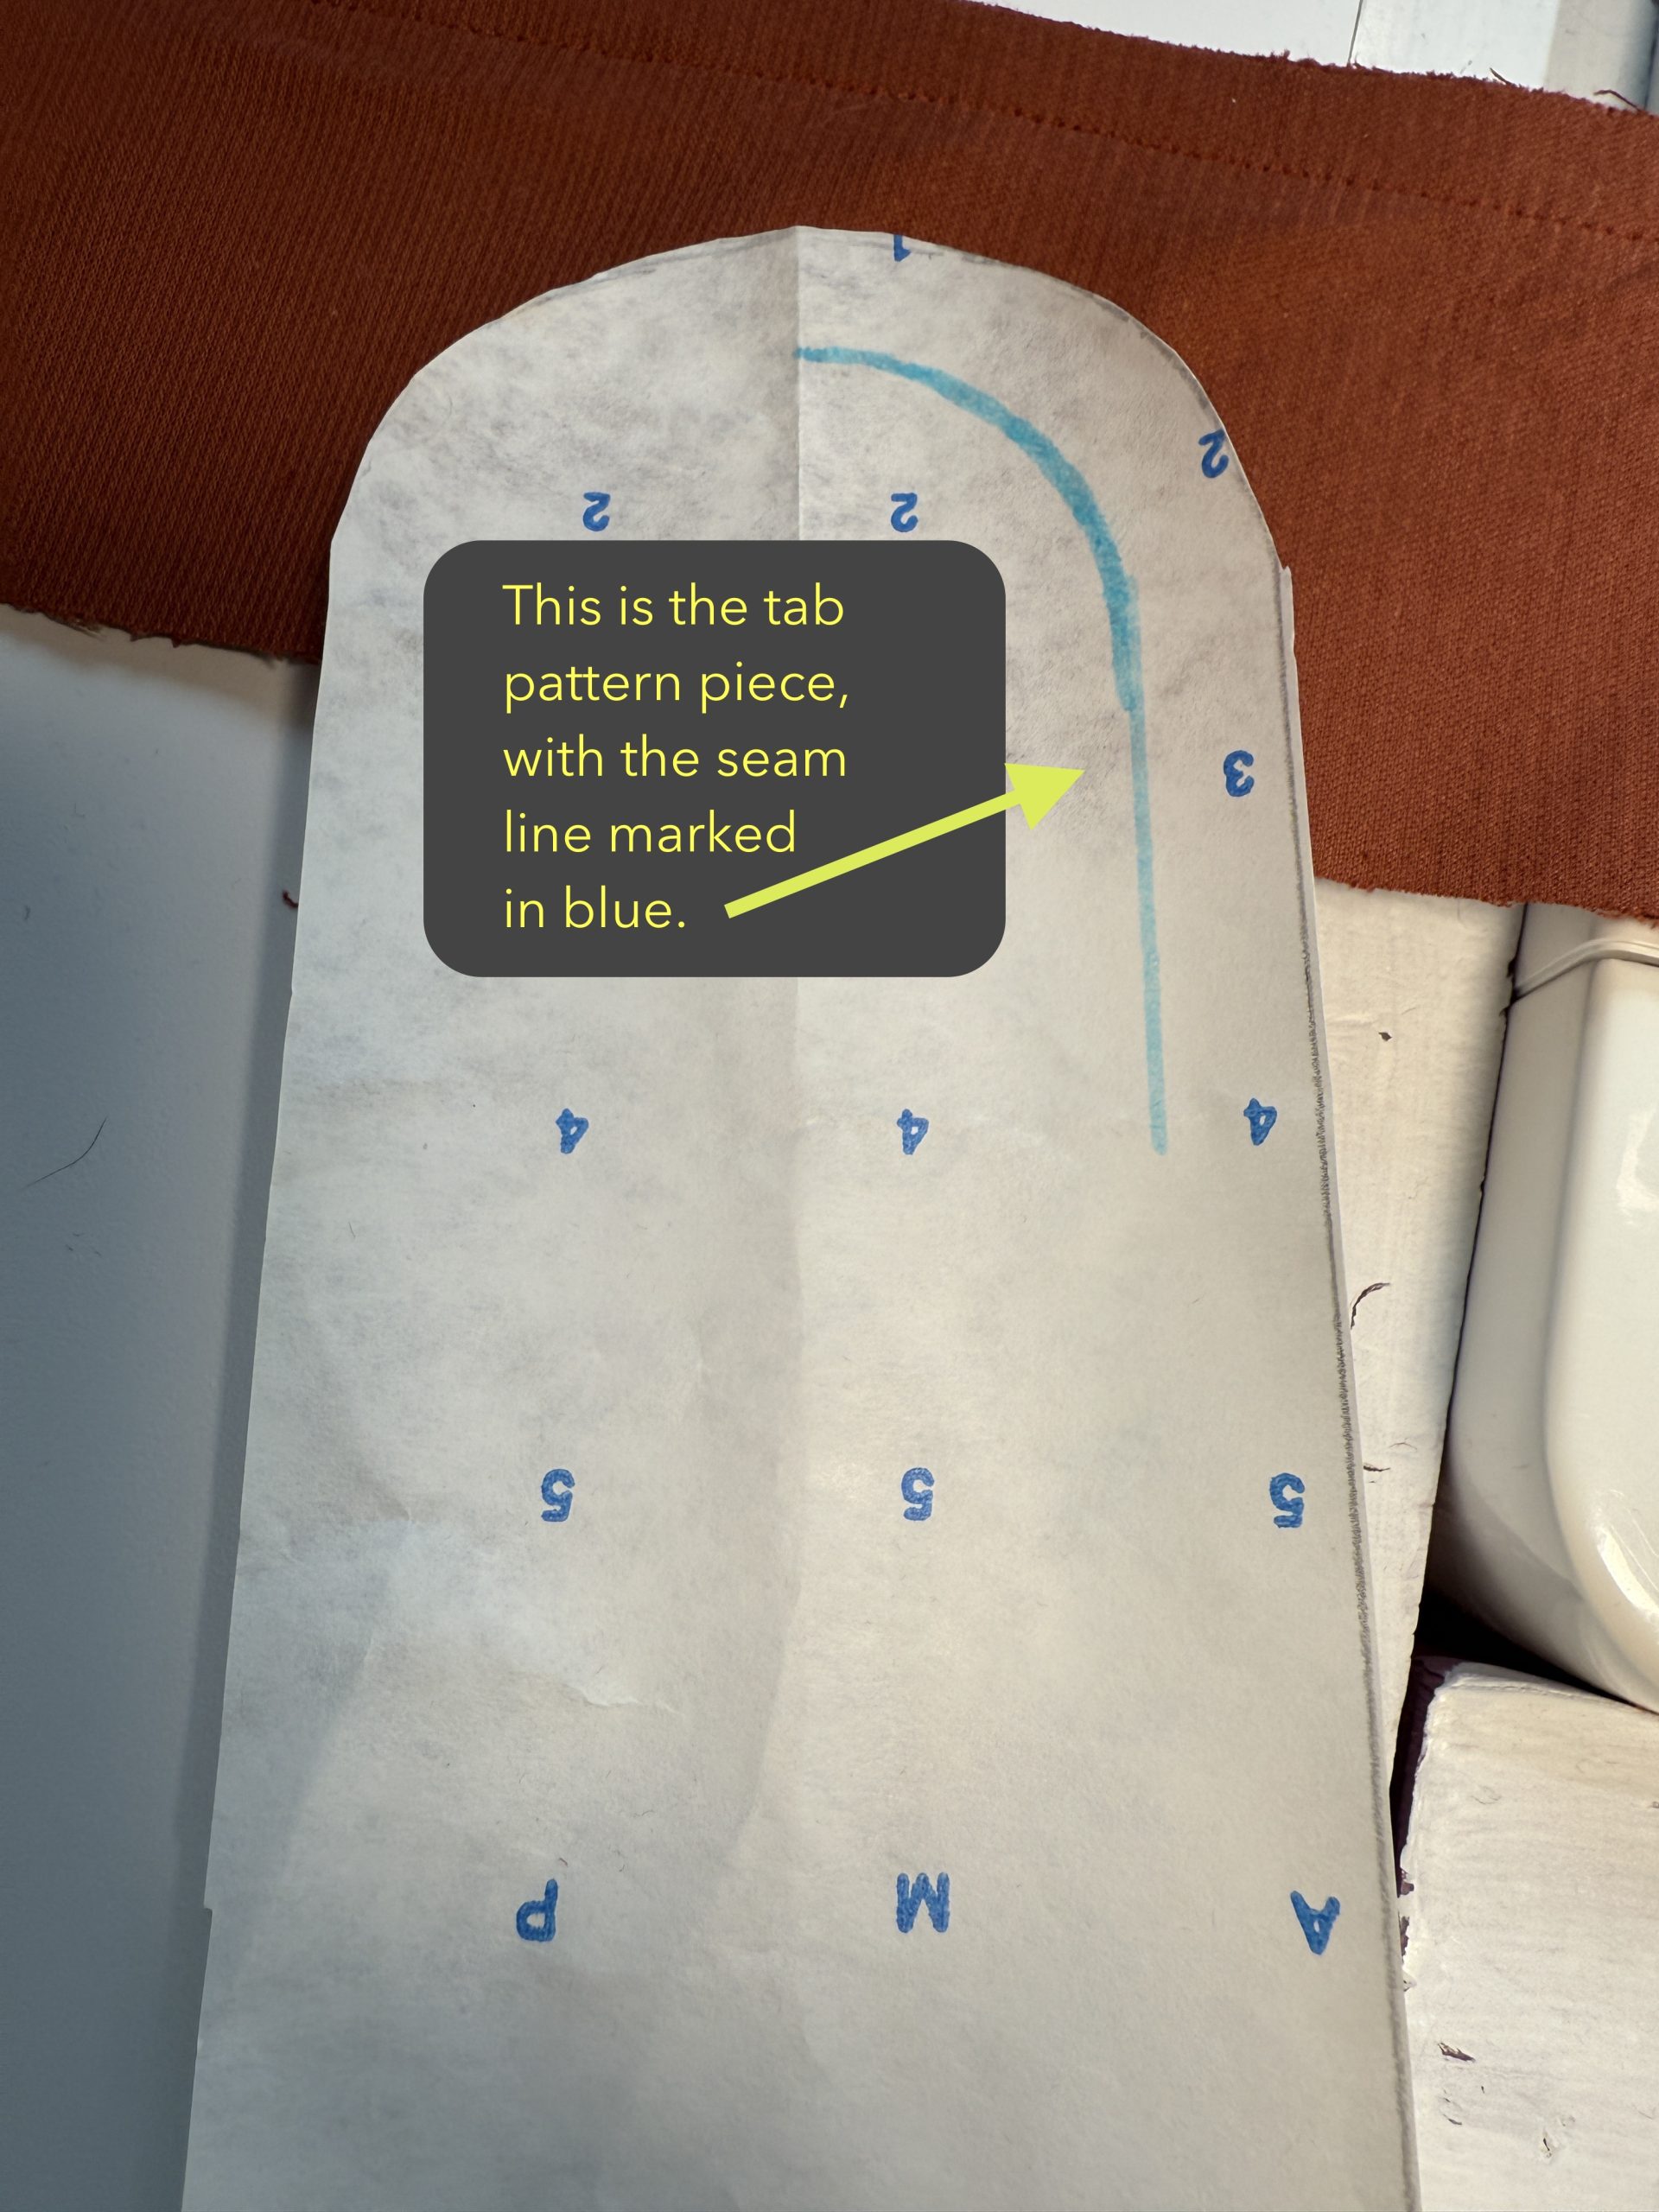
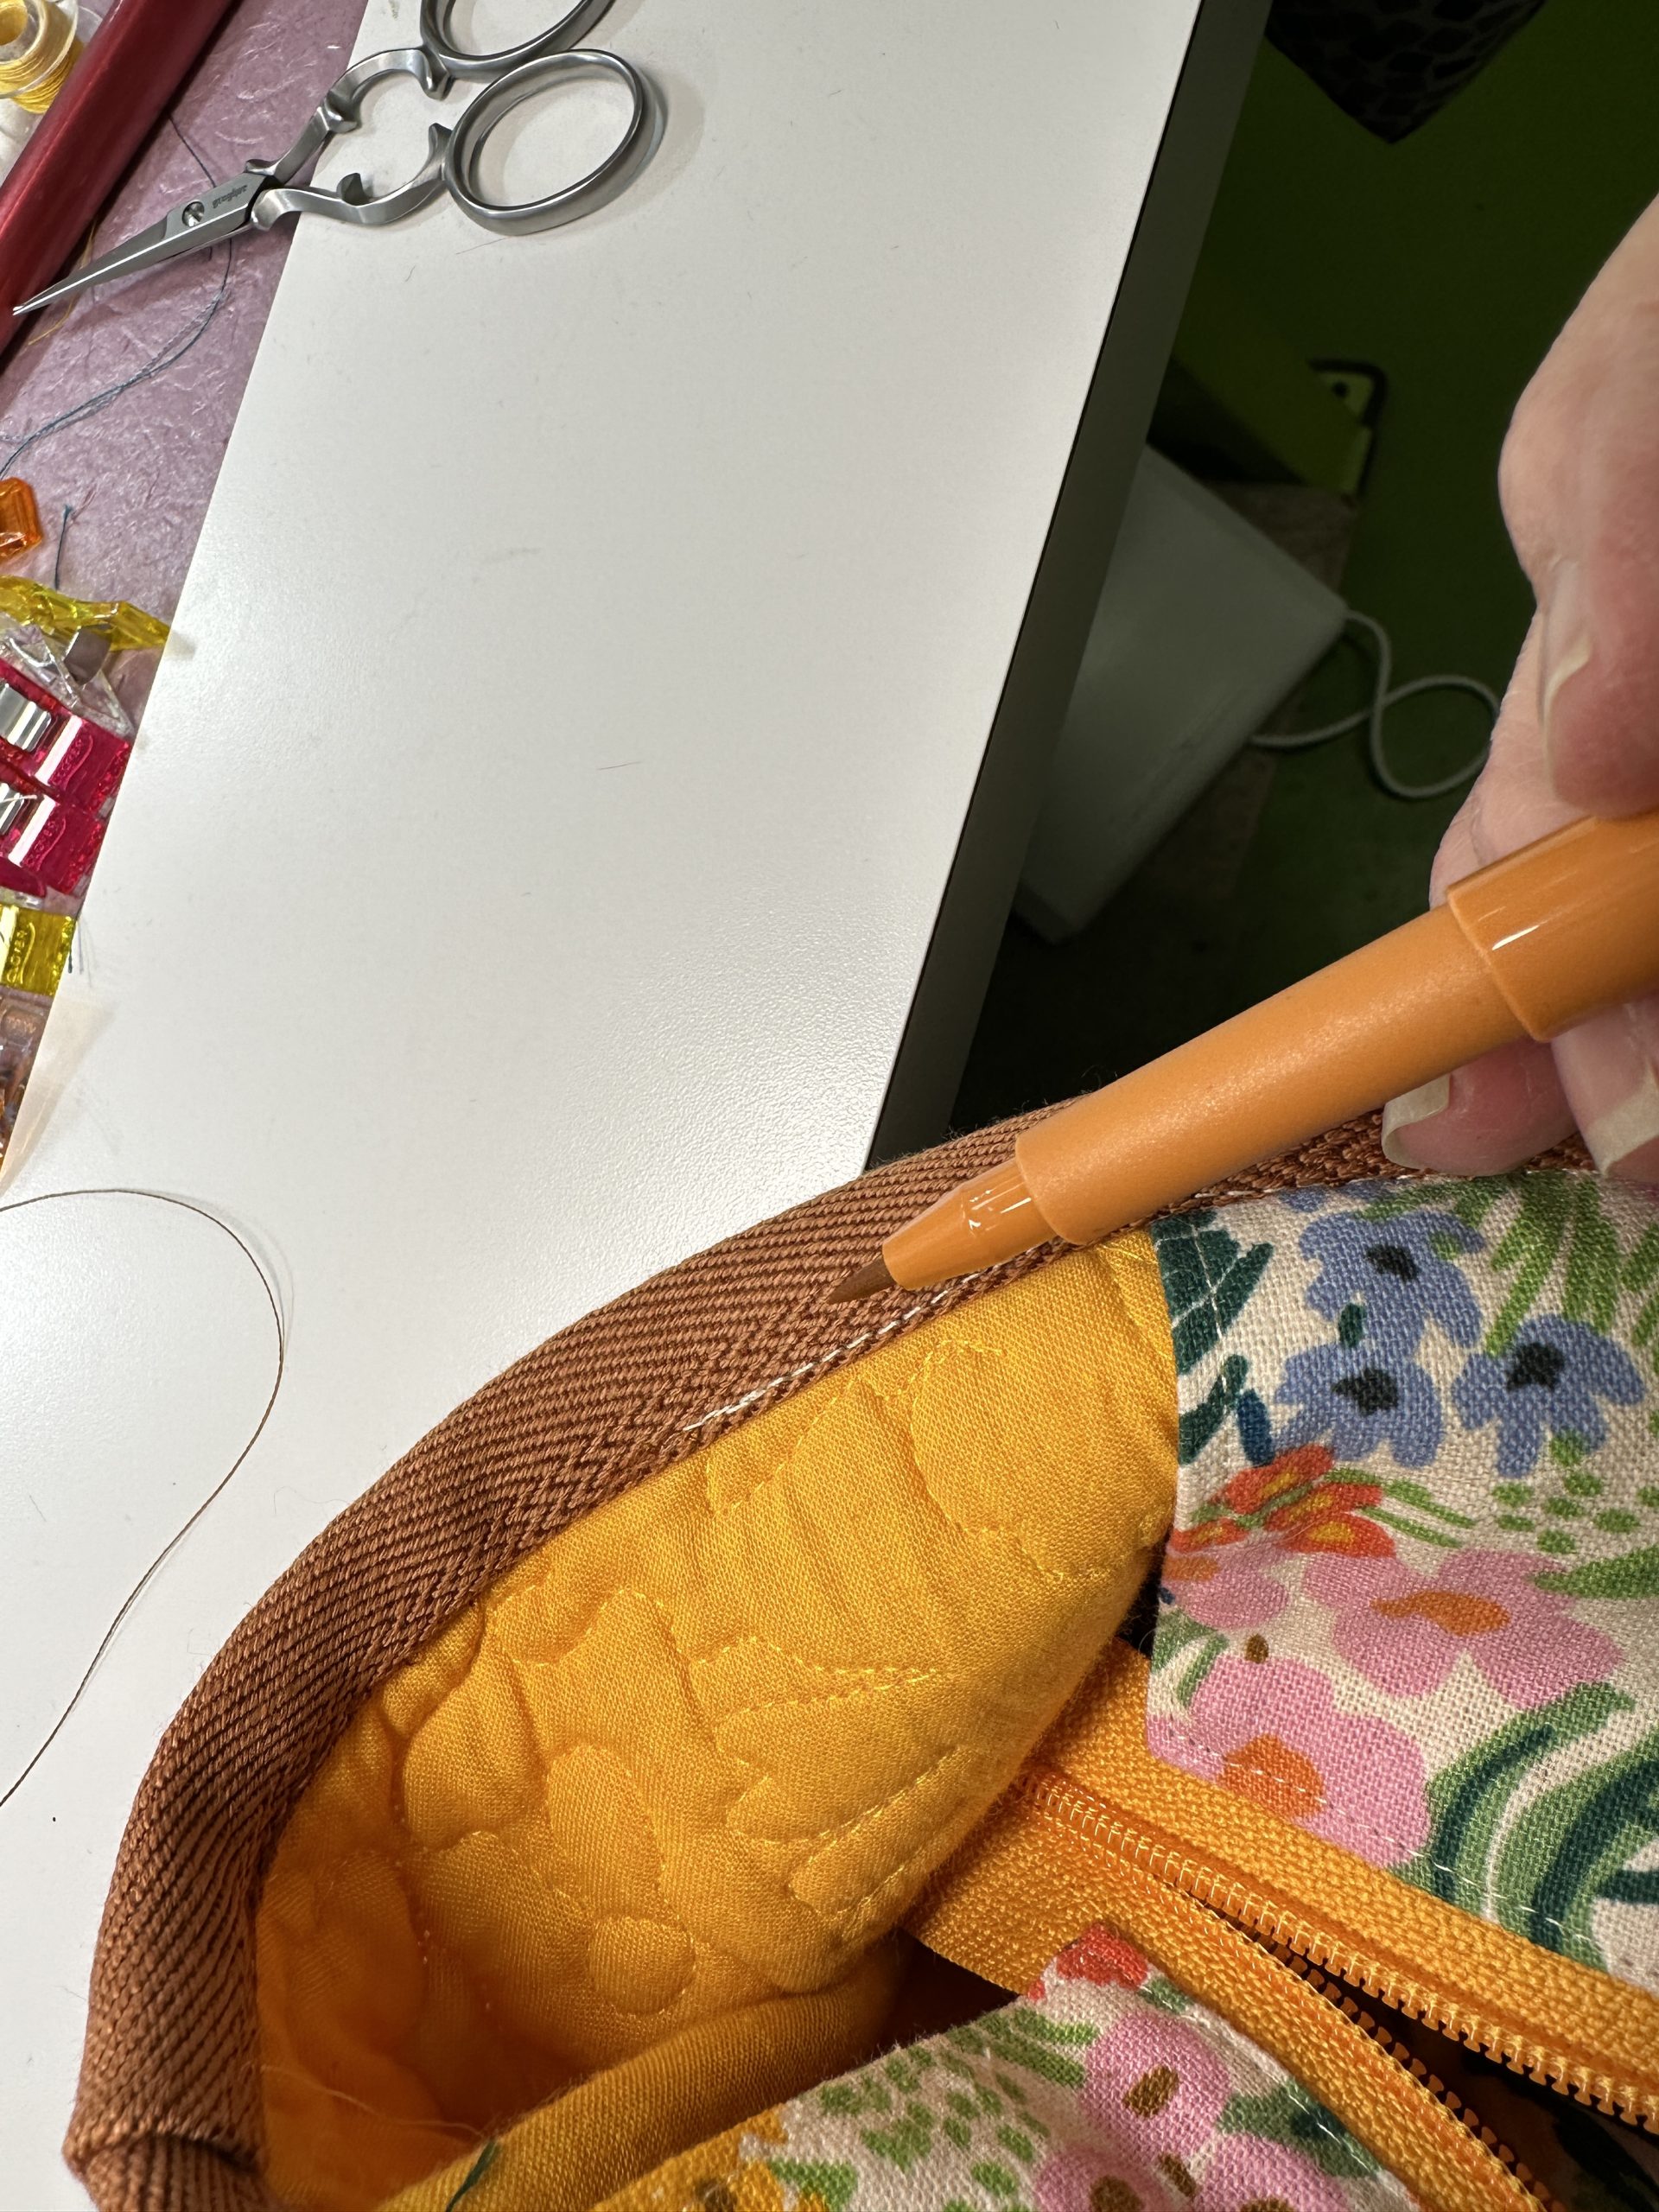
For the tabs on the sides, I marked the 1/2″ seam allowance (the Magic Pants uses a 1/2″ instead of 5/8″ seam allowance) with blue pen. Then I folded the piece lengthwise and cut on the blue line, which gave me identical curves on the end. I pulled the center paper up and used the pattern piece as a template to mark the seam allowance.
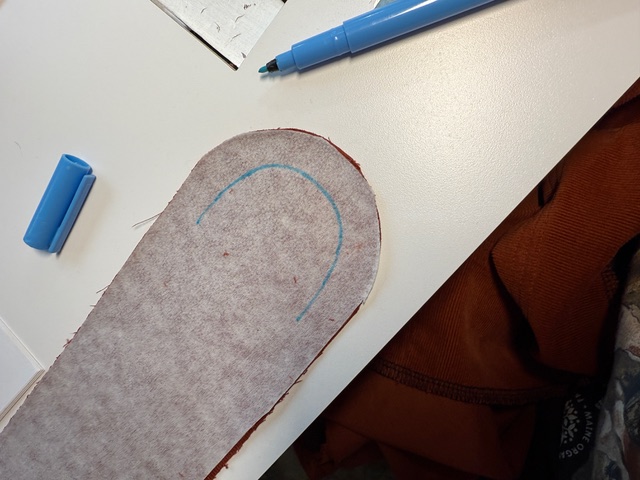
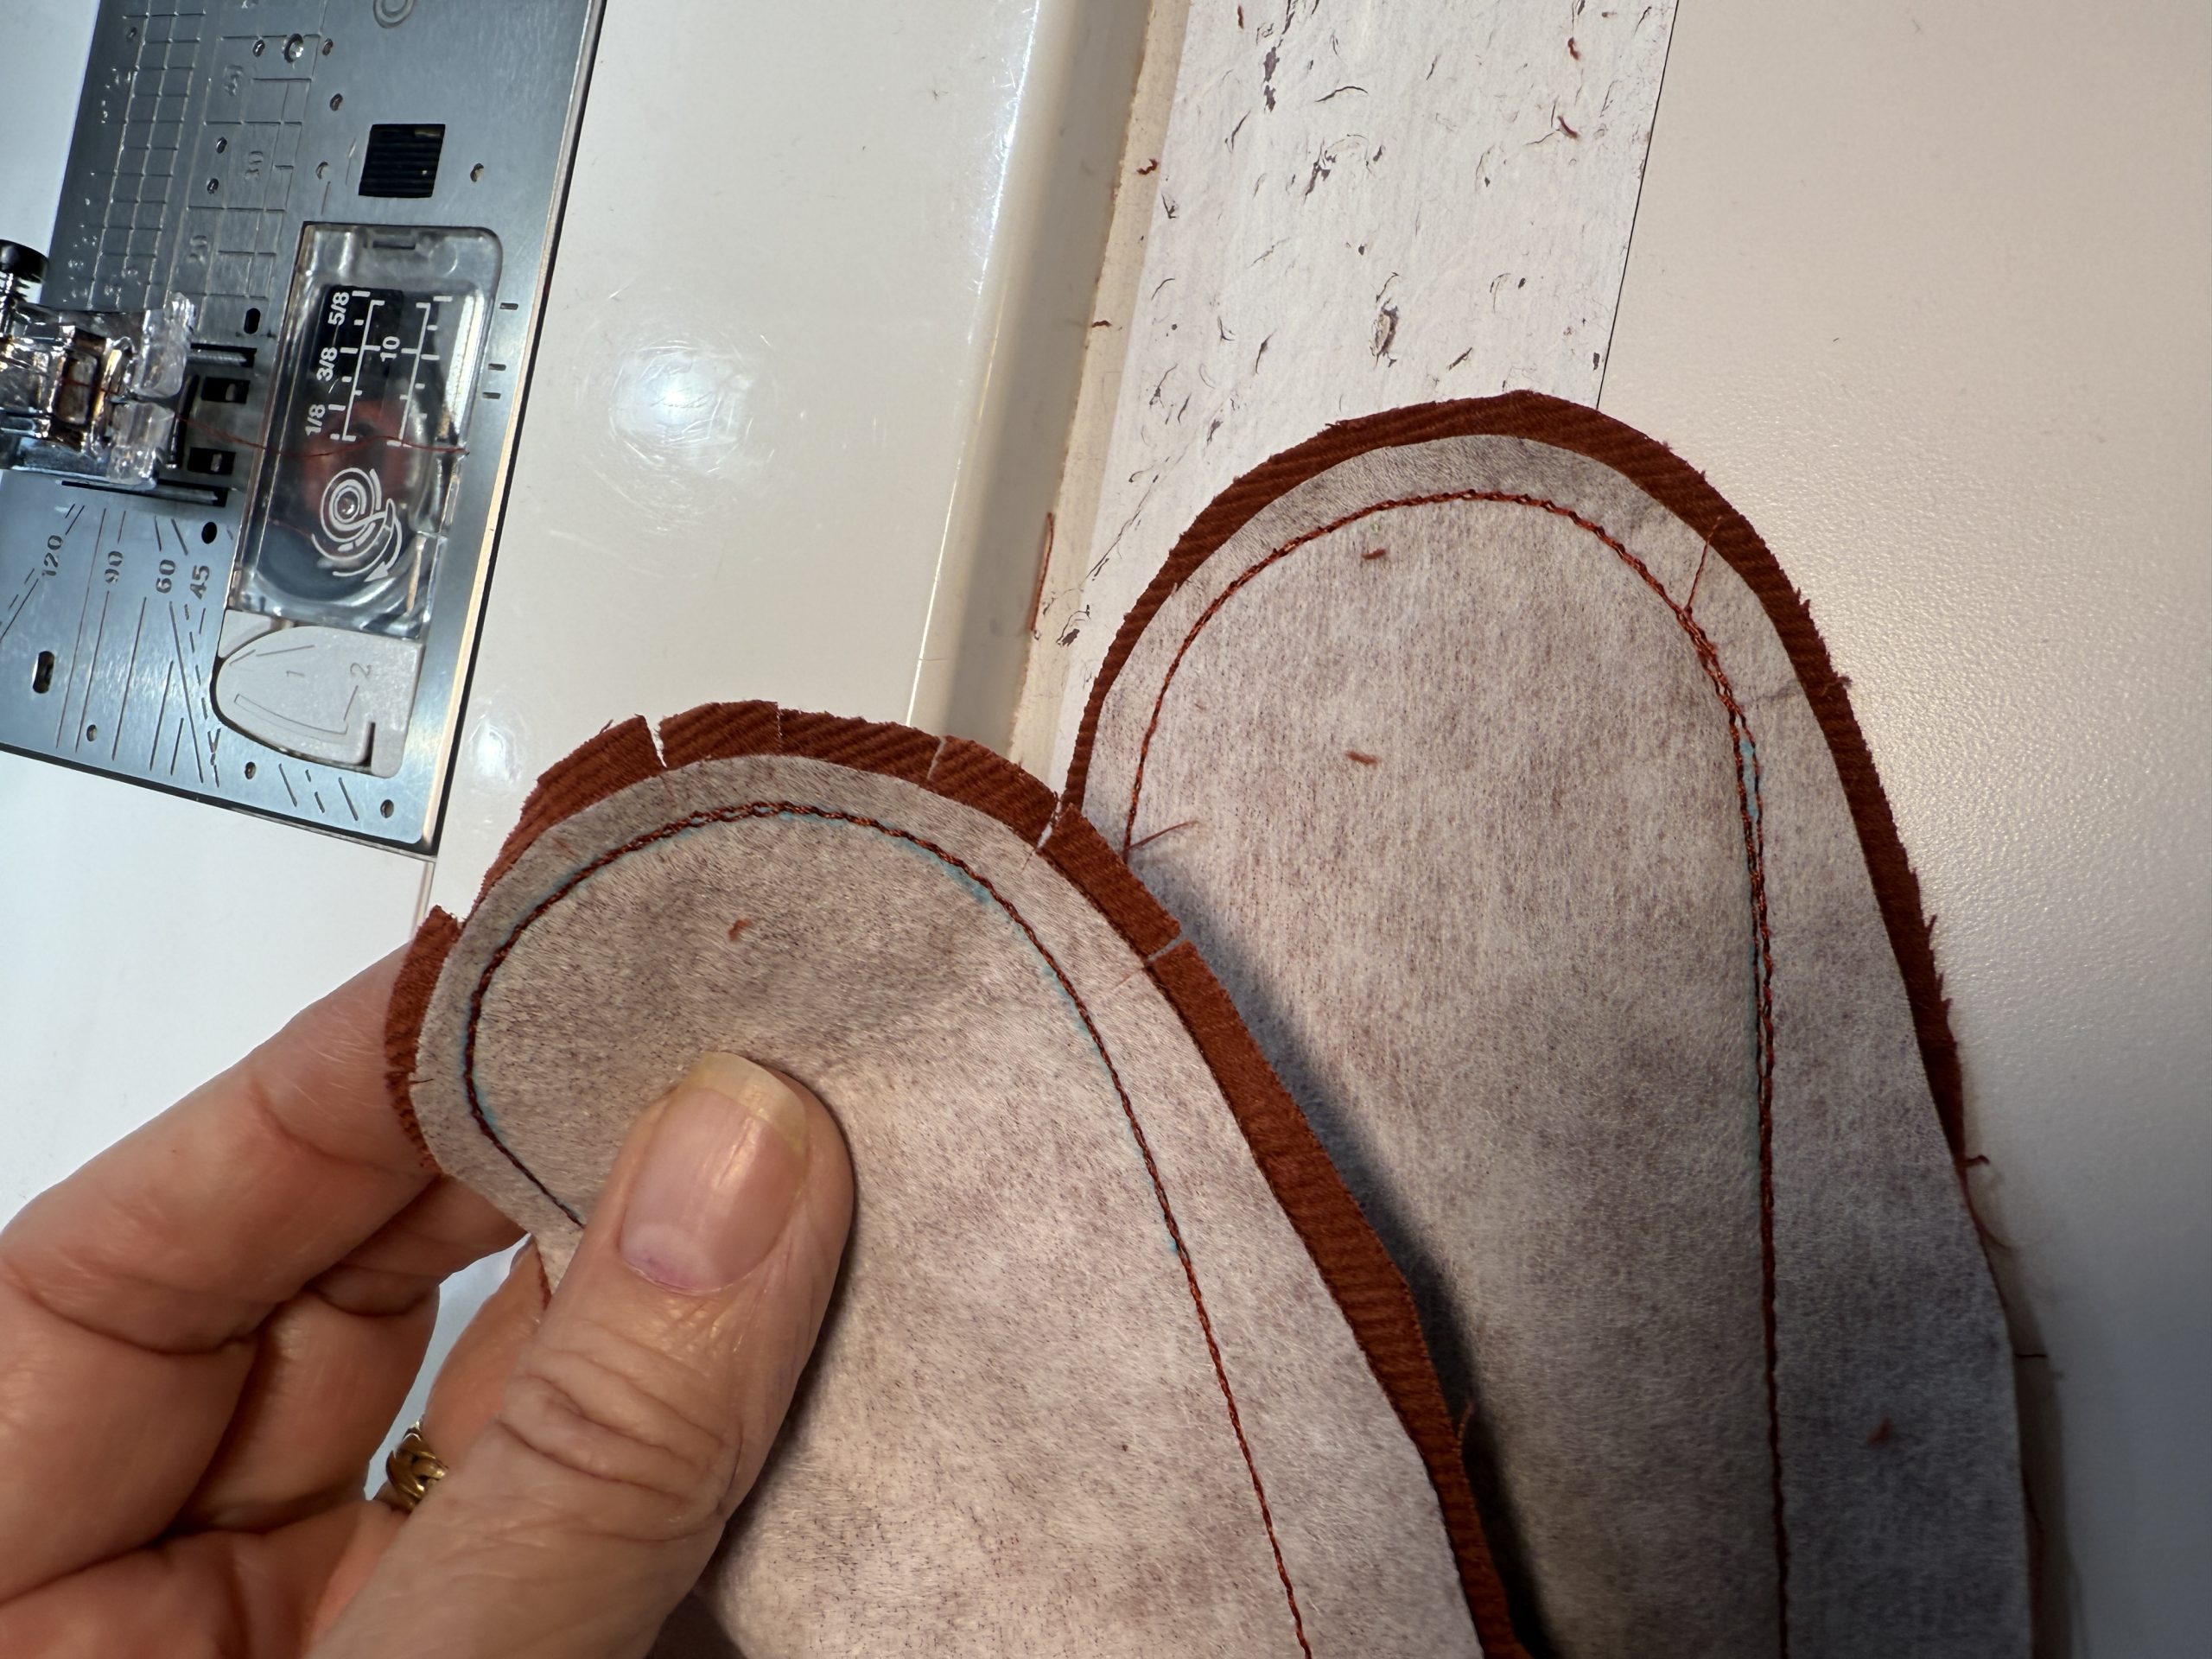
Next I engaged the pivot function and, for the first tab, I sewed with the interfaced side down and the plain side up. That led to some rippling of the fine wale corduroy, so on the second tab, I marked the interfacing side and put the plain fabric on the bottom. That worked better! Then I graded the seam with the widest seam allowance toward the outside and also clipped the curves to avoid bunching once the tab was turned right side out.

And here is a short video of filming the first tab, also on my YouTube channel under “shorts”:
On the second tab, I put the interfaced side UP, and that was smoother sewing; here’s another video of that side:
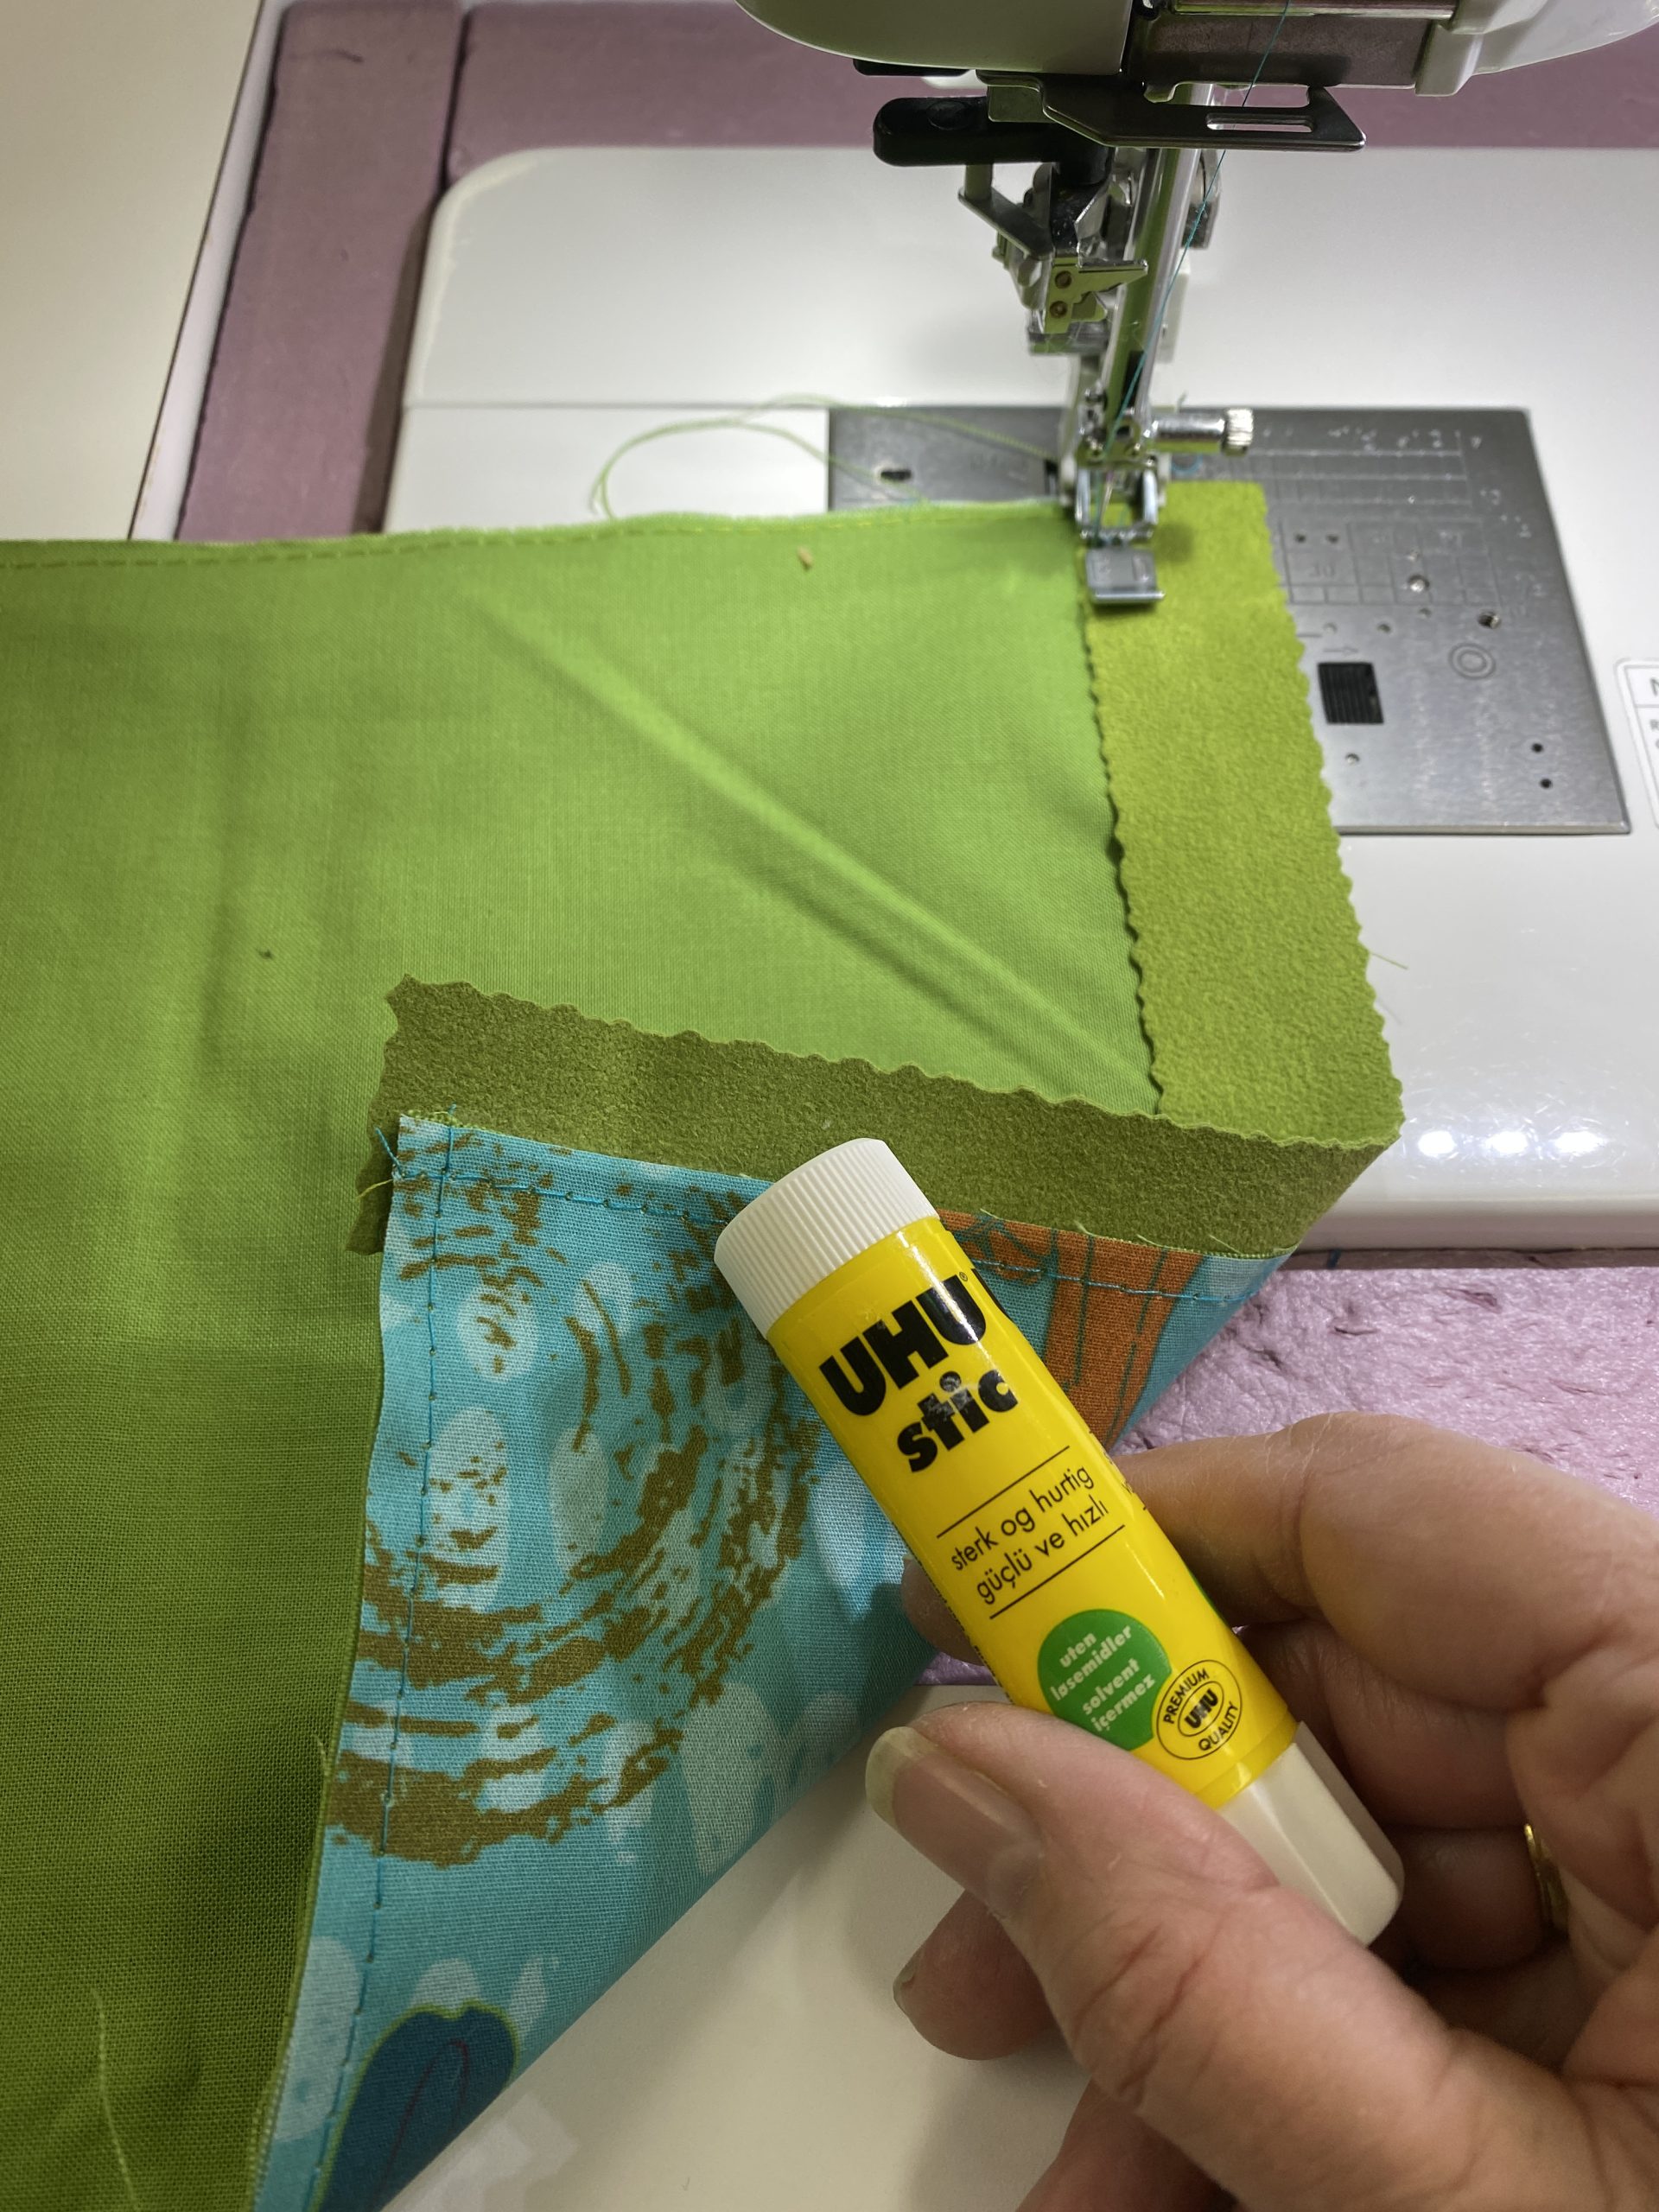
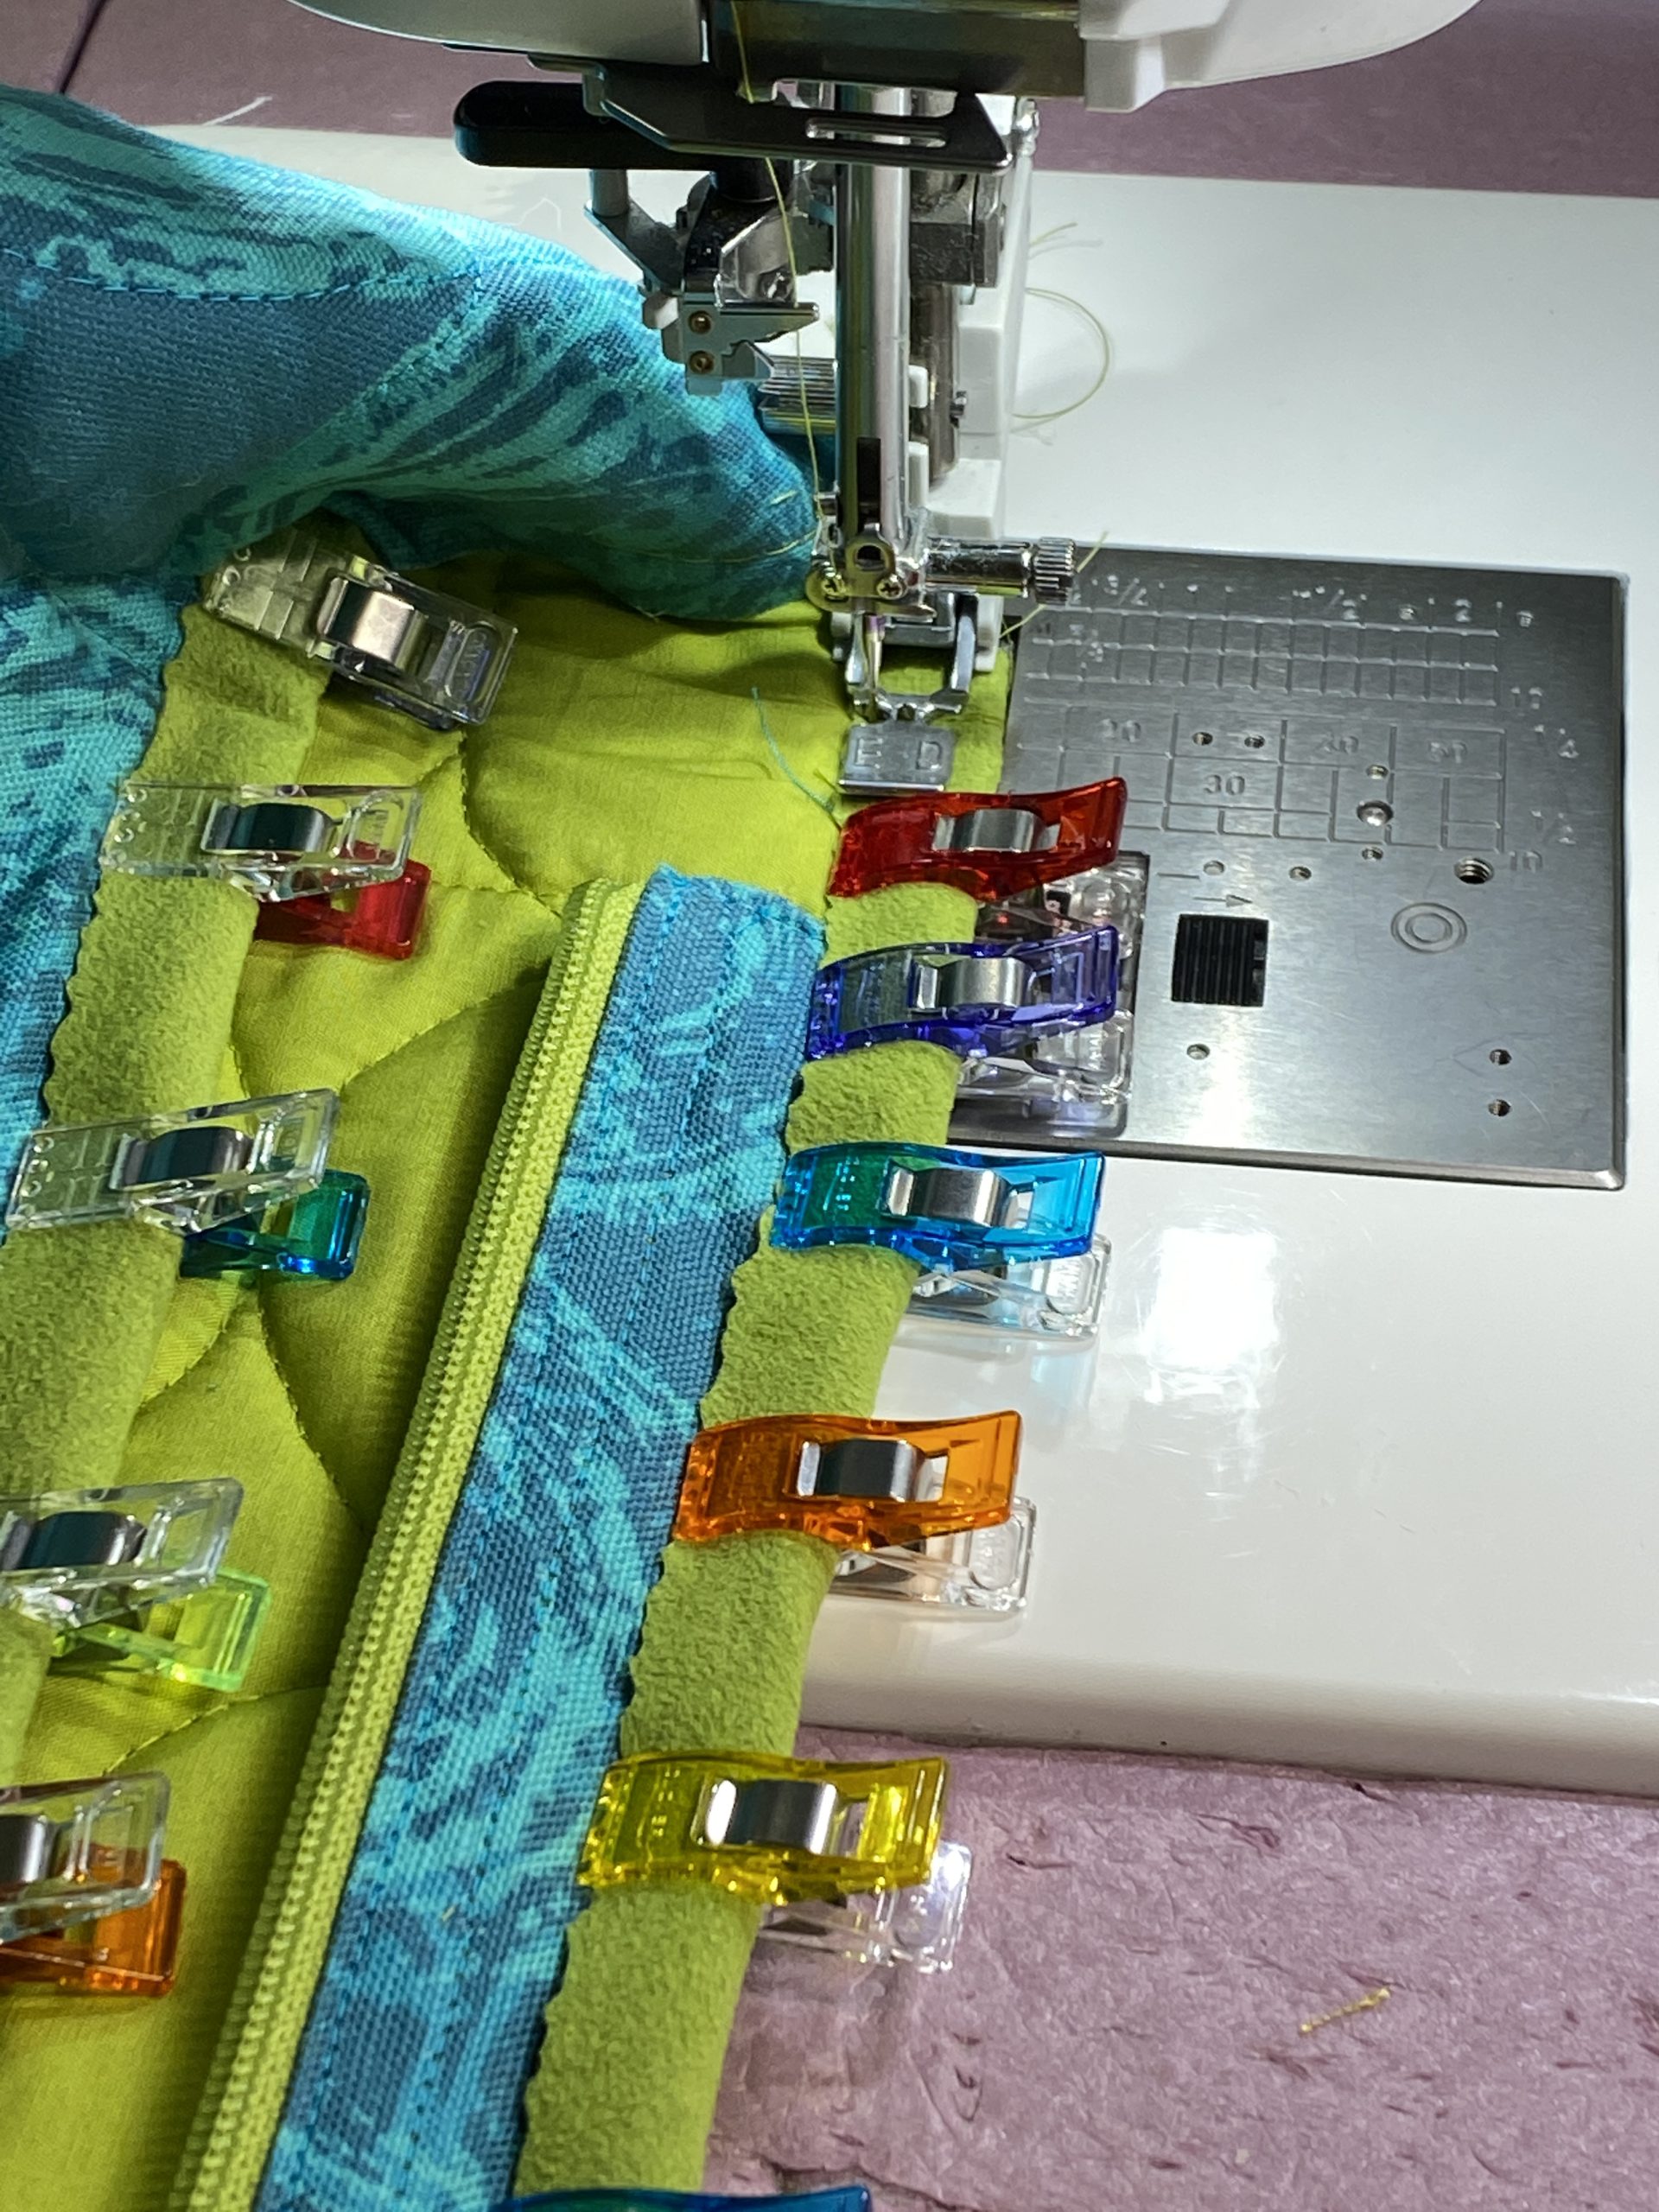
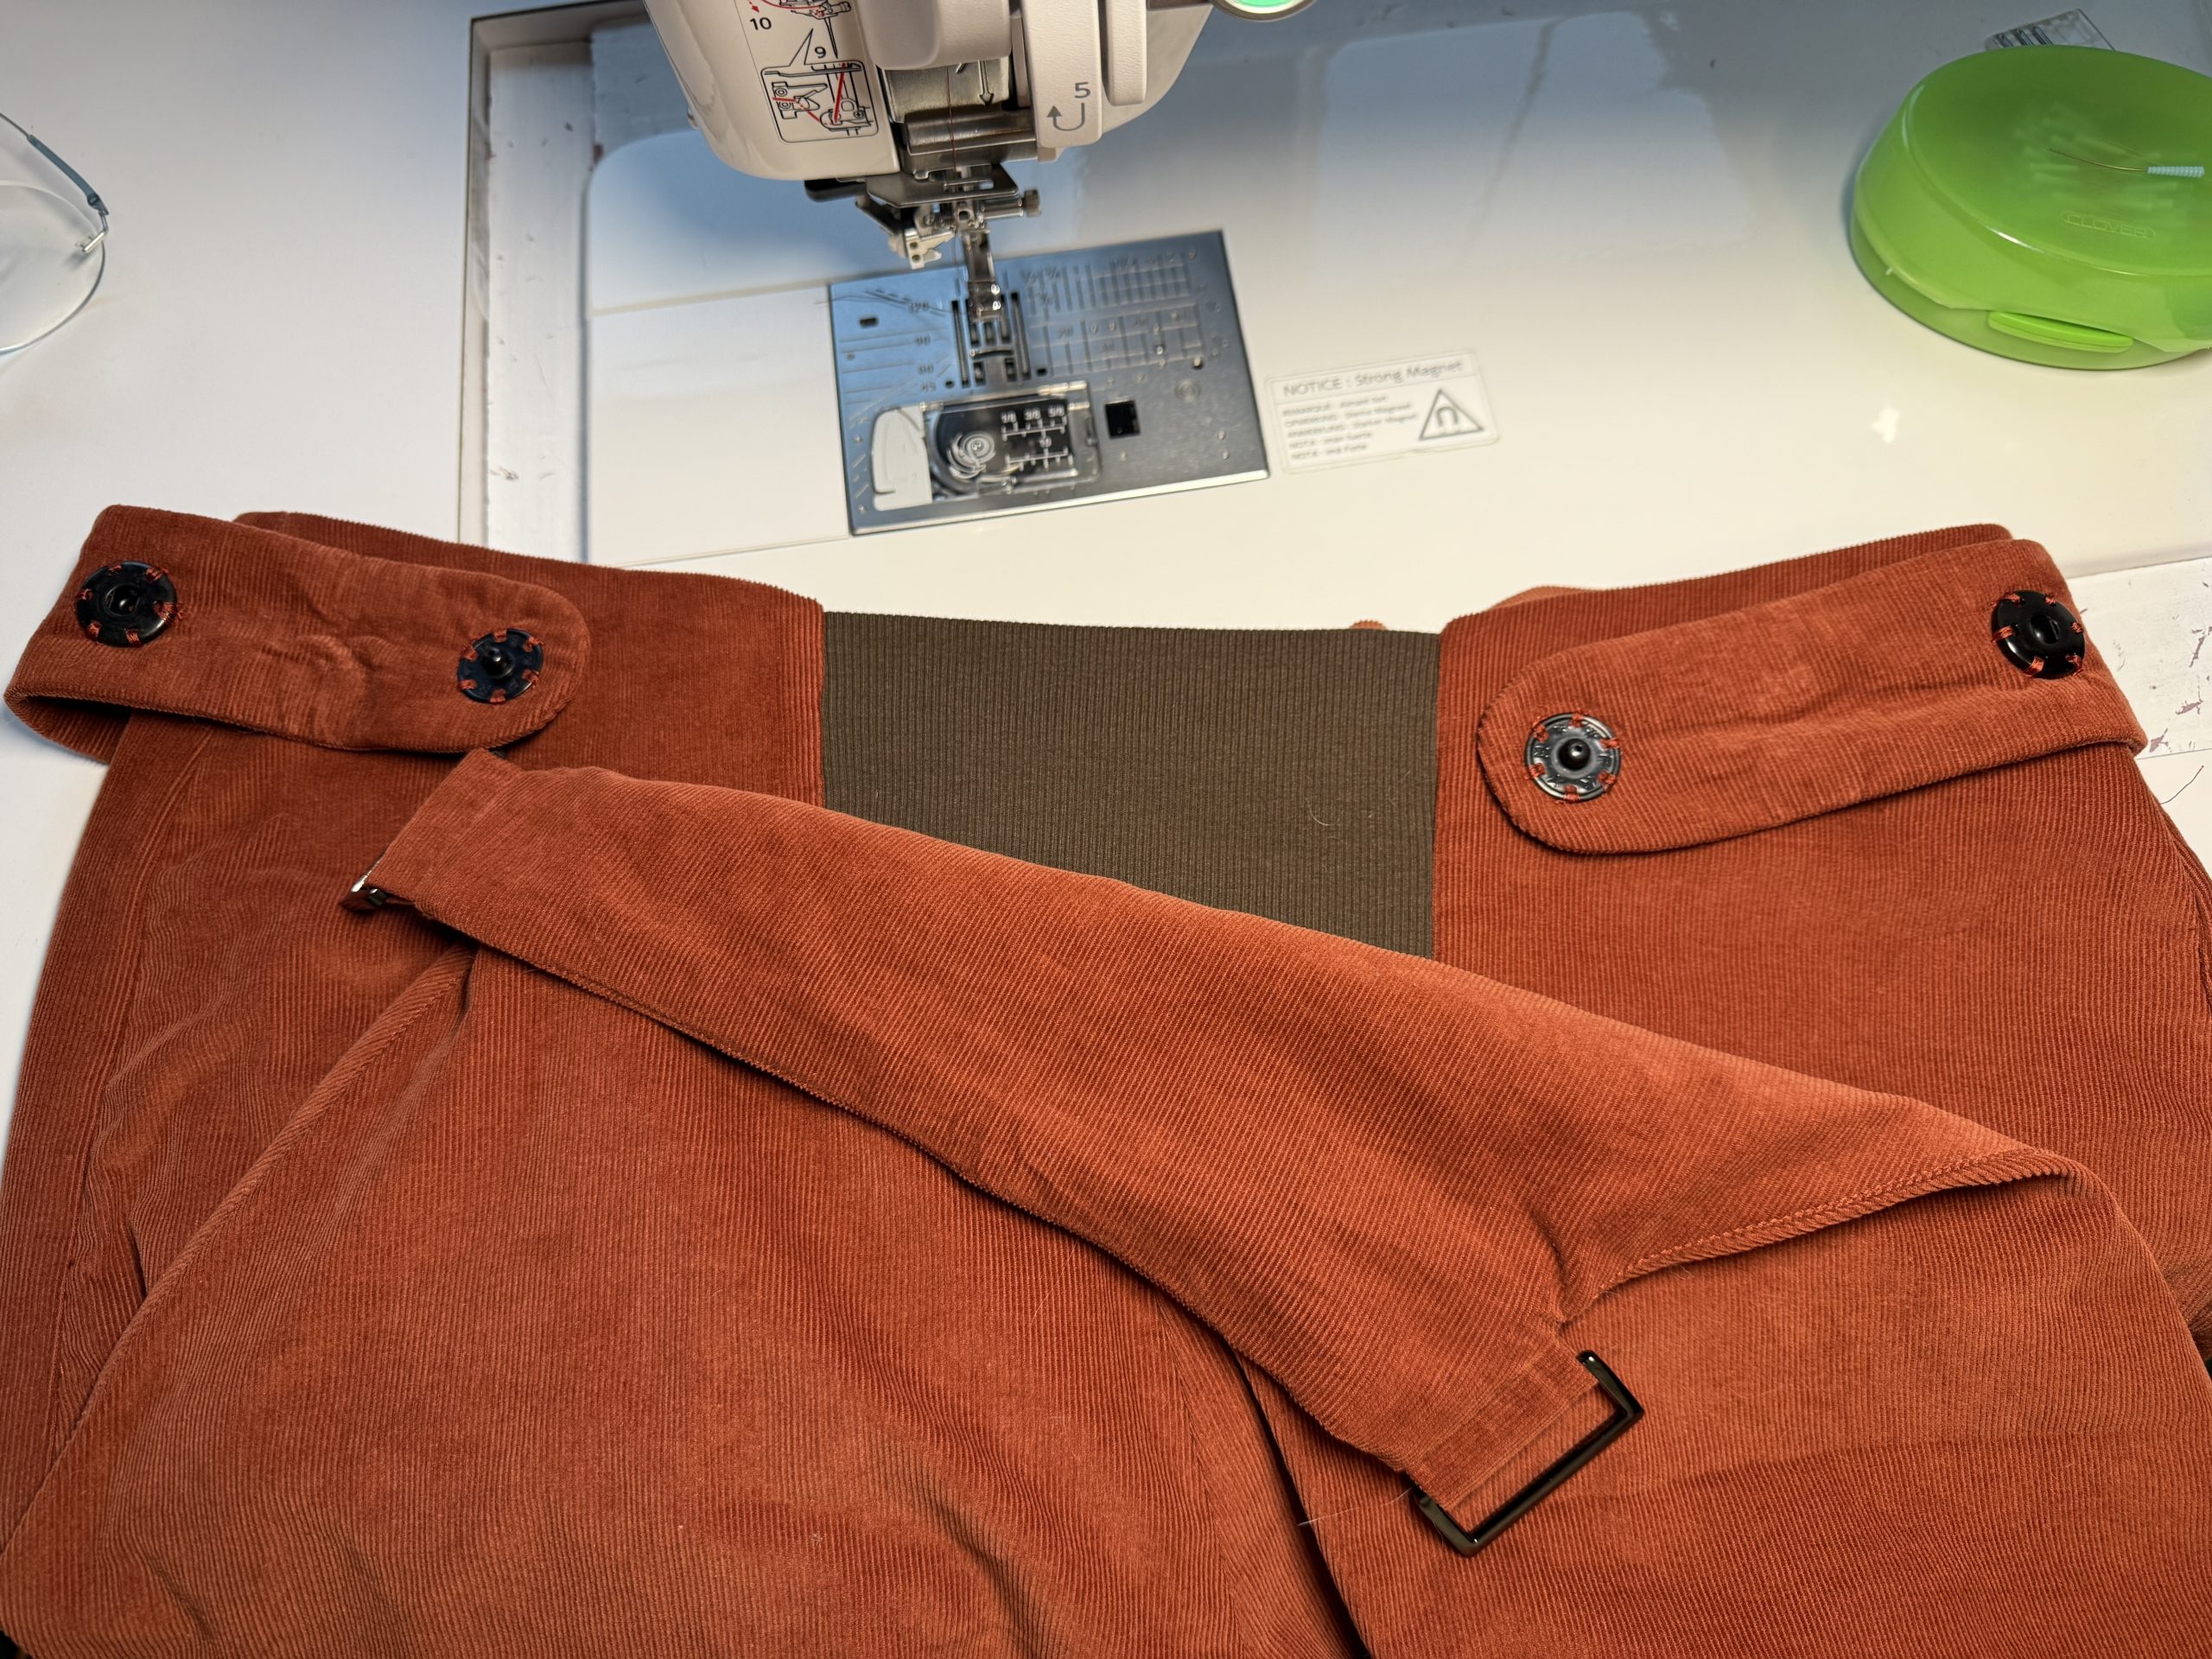
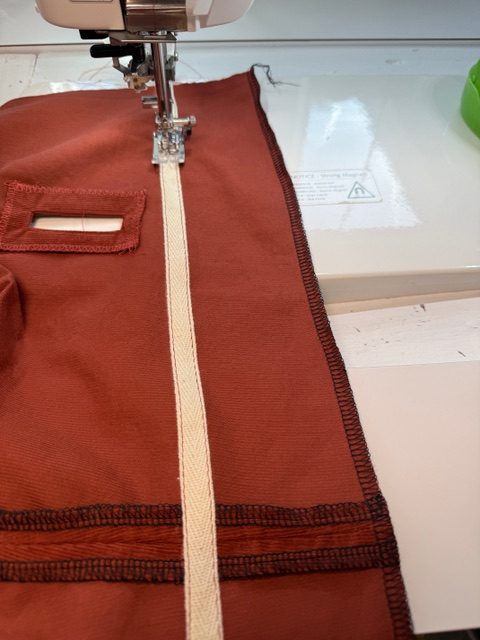
The next step in the process is to apply twill tape right next to the fold line on the back of the pants which have a fold-over facing. Once that is in place, it is time to measure and sew the wide elastic to the ends of the tabs. Tune in to the next section for more details!
Tabs: adding the elastic, inserting:
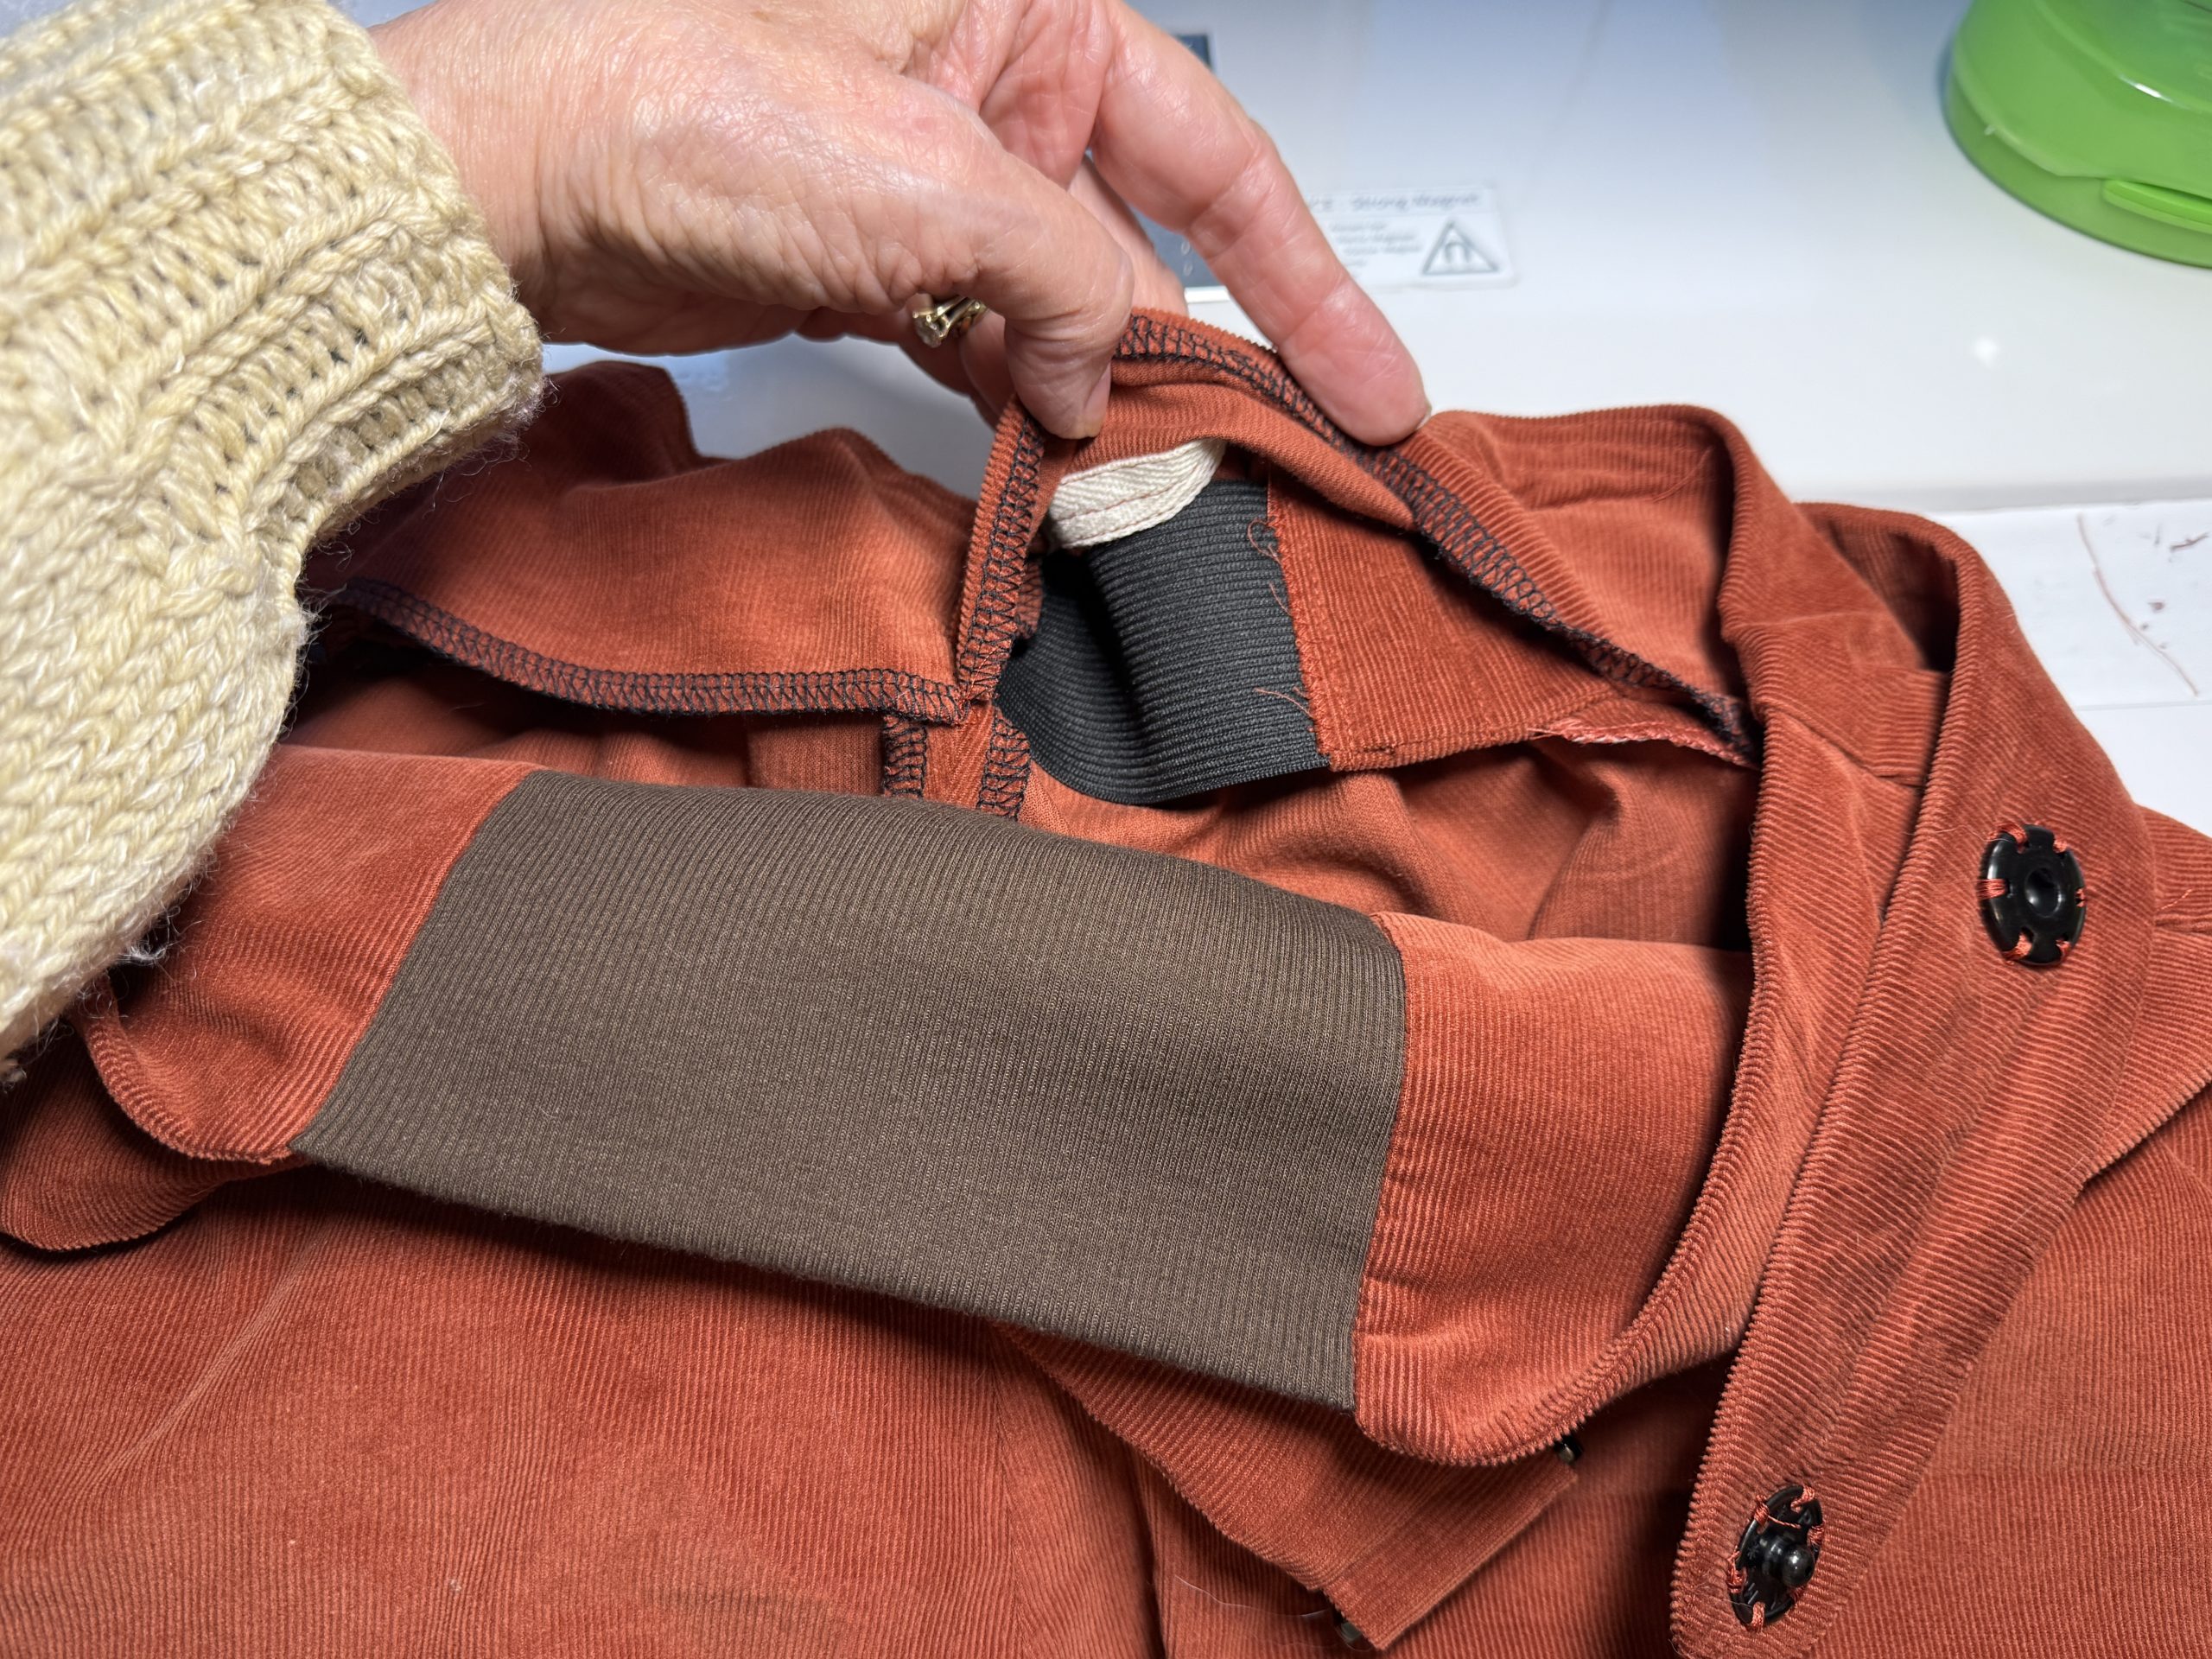
The second feature that makes these pants magic (and comfortable…yep, that again!) is there is a hidden elastic across the back. The tabs you see on the outside move to inside the garment through those slots I showed on Day 1. They are connected by wide elastic which is hidden under a self-facing across the back (I’m including the twill tape photo again—the facing folds down over the stabilizing tape and the elastic runs right next to it).
Cut the suggested length or a little more and then safety pin it to the tabs and adjust to fit you and how snug you do/don’t want it to be. Once you’ve got that set, sew the elastic to the end of the tabs, fold the back self-facing over but *don’t* sew it down on the bottom! You tack the sides, sew down the center back seam to prevent the elastic from rolling, and tack down the facing. By leaving this open, you can OMG **adjust** the elastic later easily for weight loss/gain/replace old elastic! Genius!
The last step is sew on the snaps—that’ll be tomorrow’s post. And remember, these are the Magic Pants by Ann Tilley handmade. Yes, I WILL be making another pair and using her brilliant tweaks on a different pattern to make them more comfortable.
Sewing the Snaps:
The tabs are almost done! It’s time to hand-sew the snaps. The pattern recommends sewing the flat side (the “innie”) to the portion of the tab that is visible. But I found that I could see that bump on the exterior of the garment (lower left photo). So I put the outie side of the snap (popper in the UK) there instead. Also, remember there is a 13 minute video on my YouTube channel with the construction video clips together.

On the top row: left: find and mark the exact center of the strap with a pin; center: with doubled thread, take a stitch on the underneath and bring the needle up through the exact center spot you marked. Then take that thread to the back with a tiny stitch—I was able to hide mine in the ditch between the wales of the corduroy. Carry the thread to the outside of the snap and stitch through each hole 3 or 4 times, being sure to put in a small knot before moving on to the next hole. That way, if the thread breaks, you’ll only need to re-stitch that one section.
Bottom left: first I sewed the innie section of the snap and you can see on the left how there is a visible bump. On the other strap I tried it the other way around and it looks lovely. So I picked out the first one and re-did it. Then try the pants on again, pull the tabs and see what feels comfortable, mark the spot for the second half of the snap, and sew it the same way. (how many times can I use snap in one post??? too many! LOL!)
Bottom right: looks fantastic! Next up, on Monday, a brief post about a lengthy process of testing the fit with a muslin, then tweaking the fit in the corduroy. Hope you’ve enjoyed this series of posts!
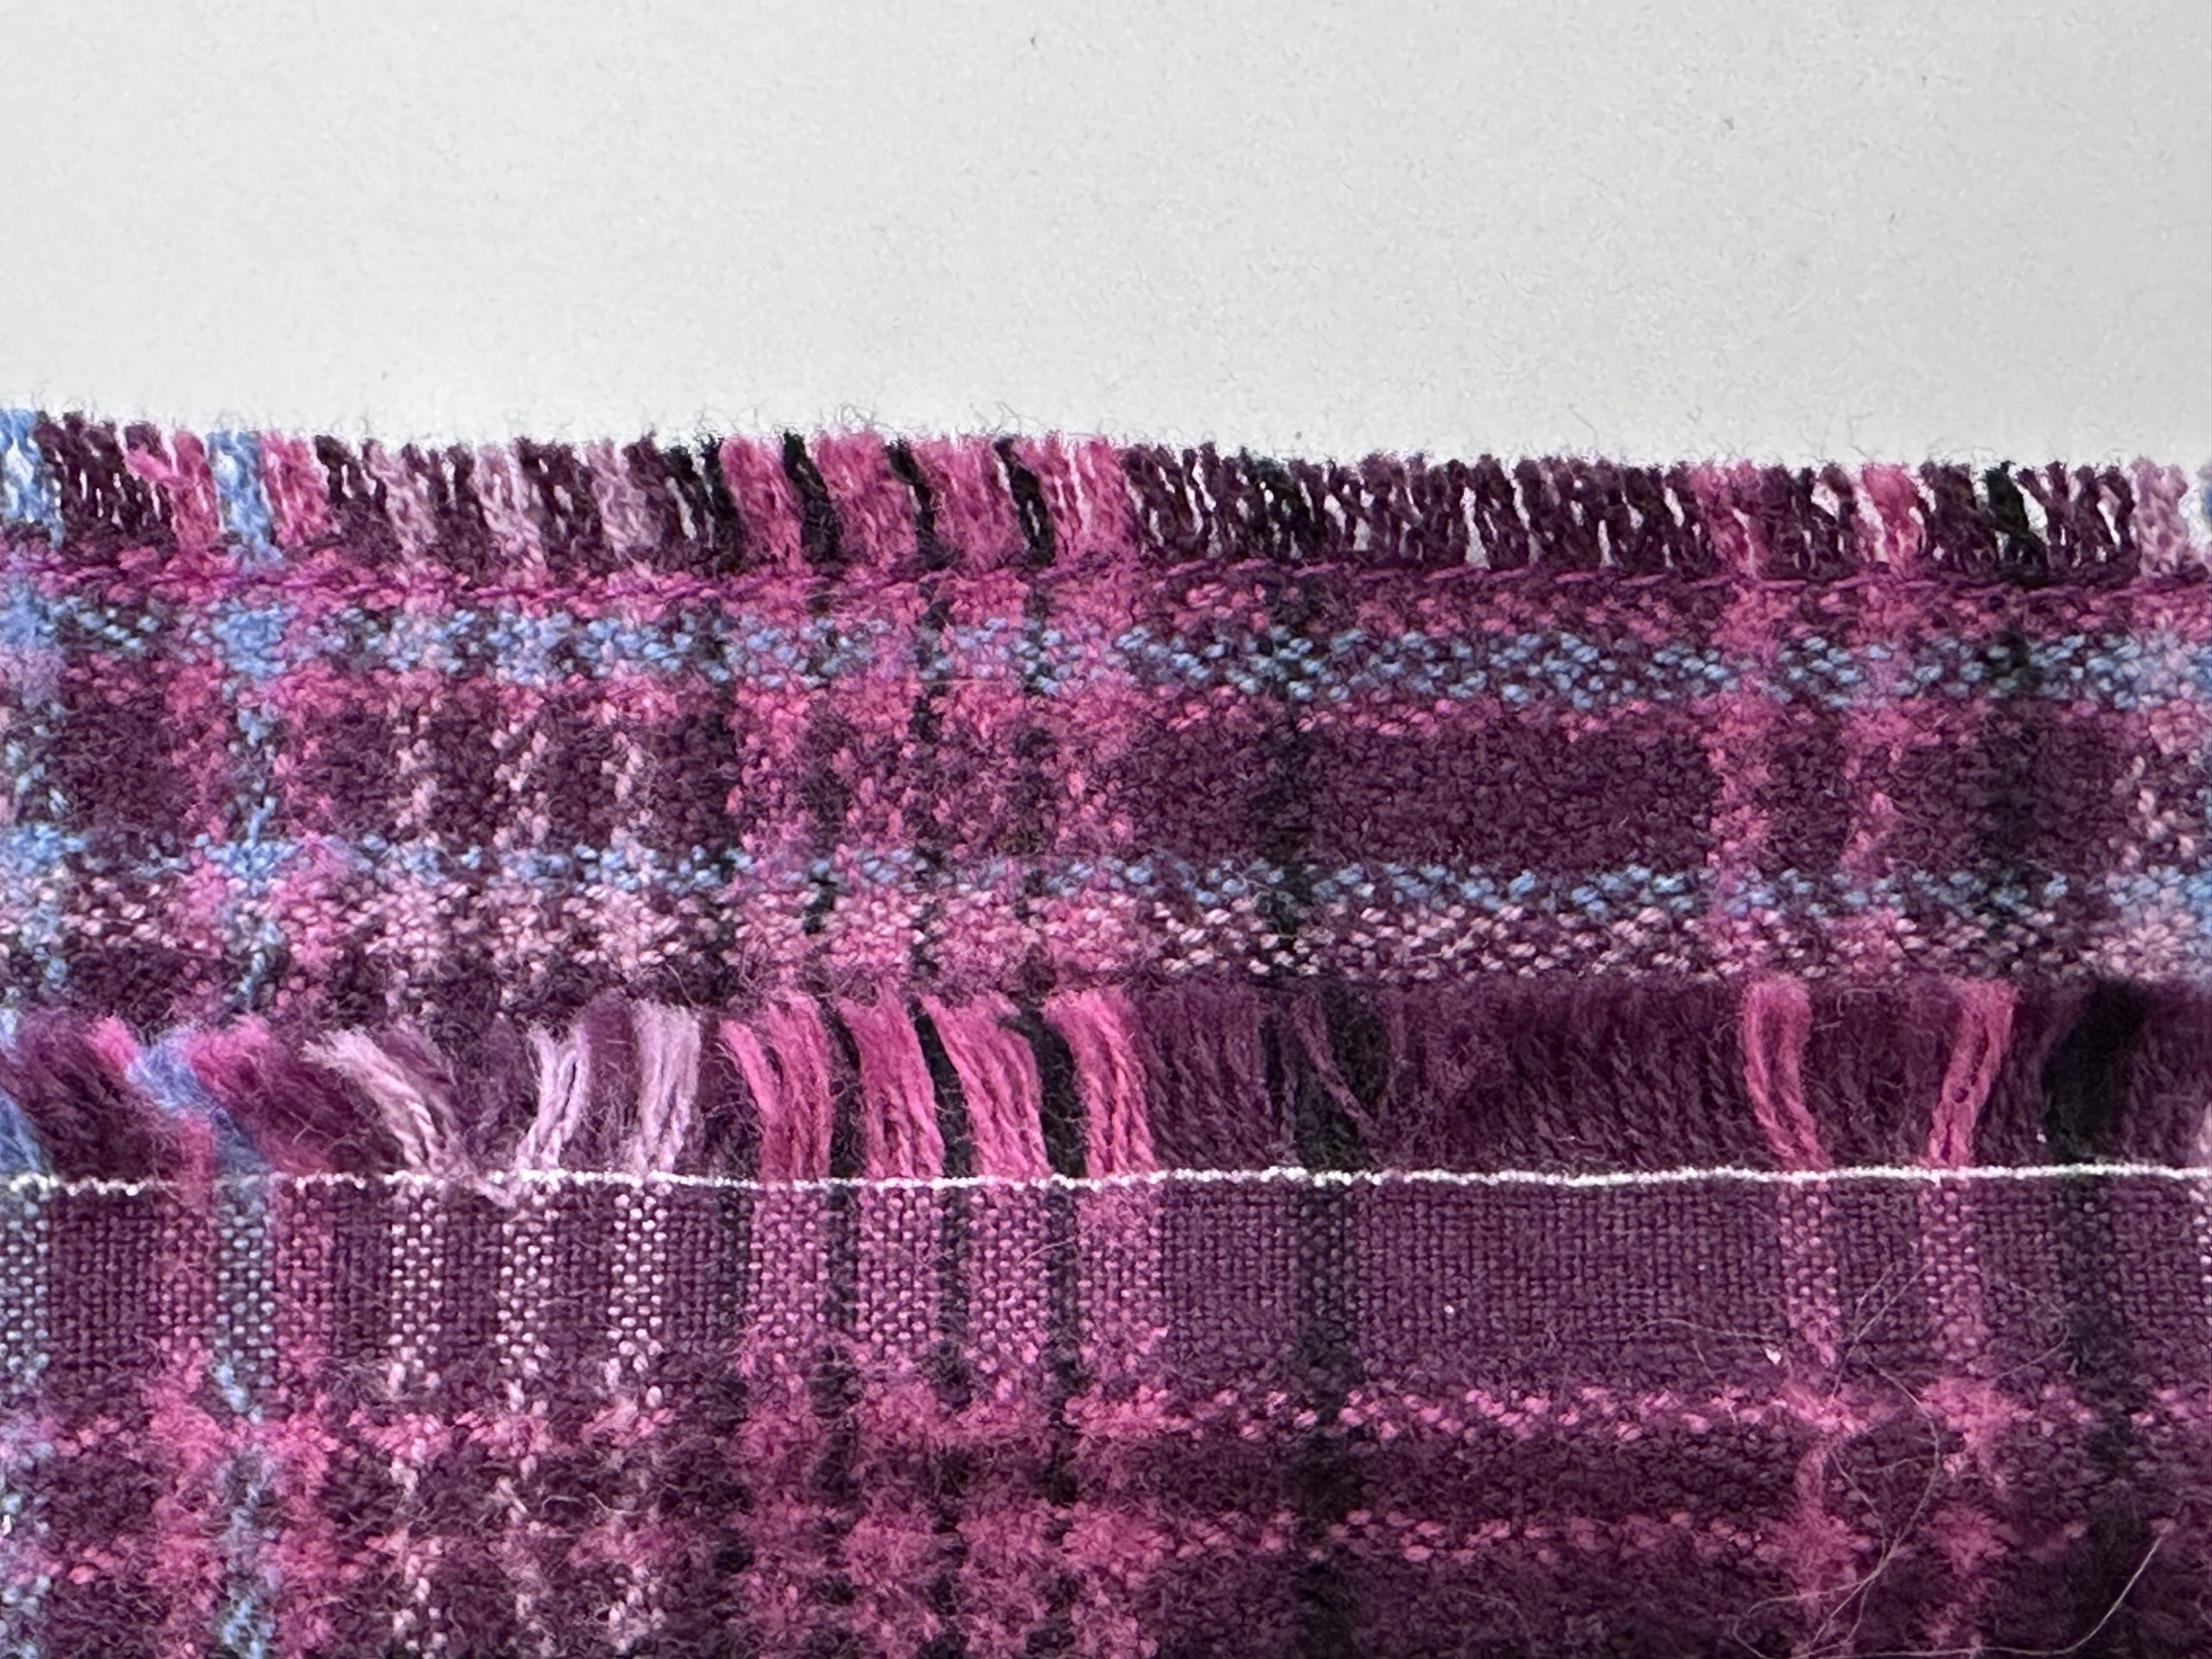
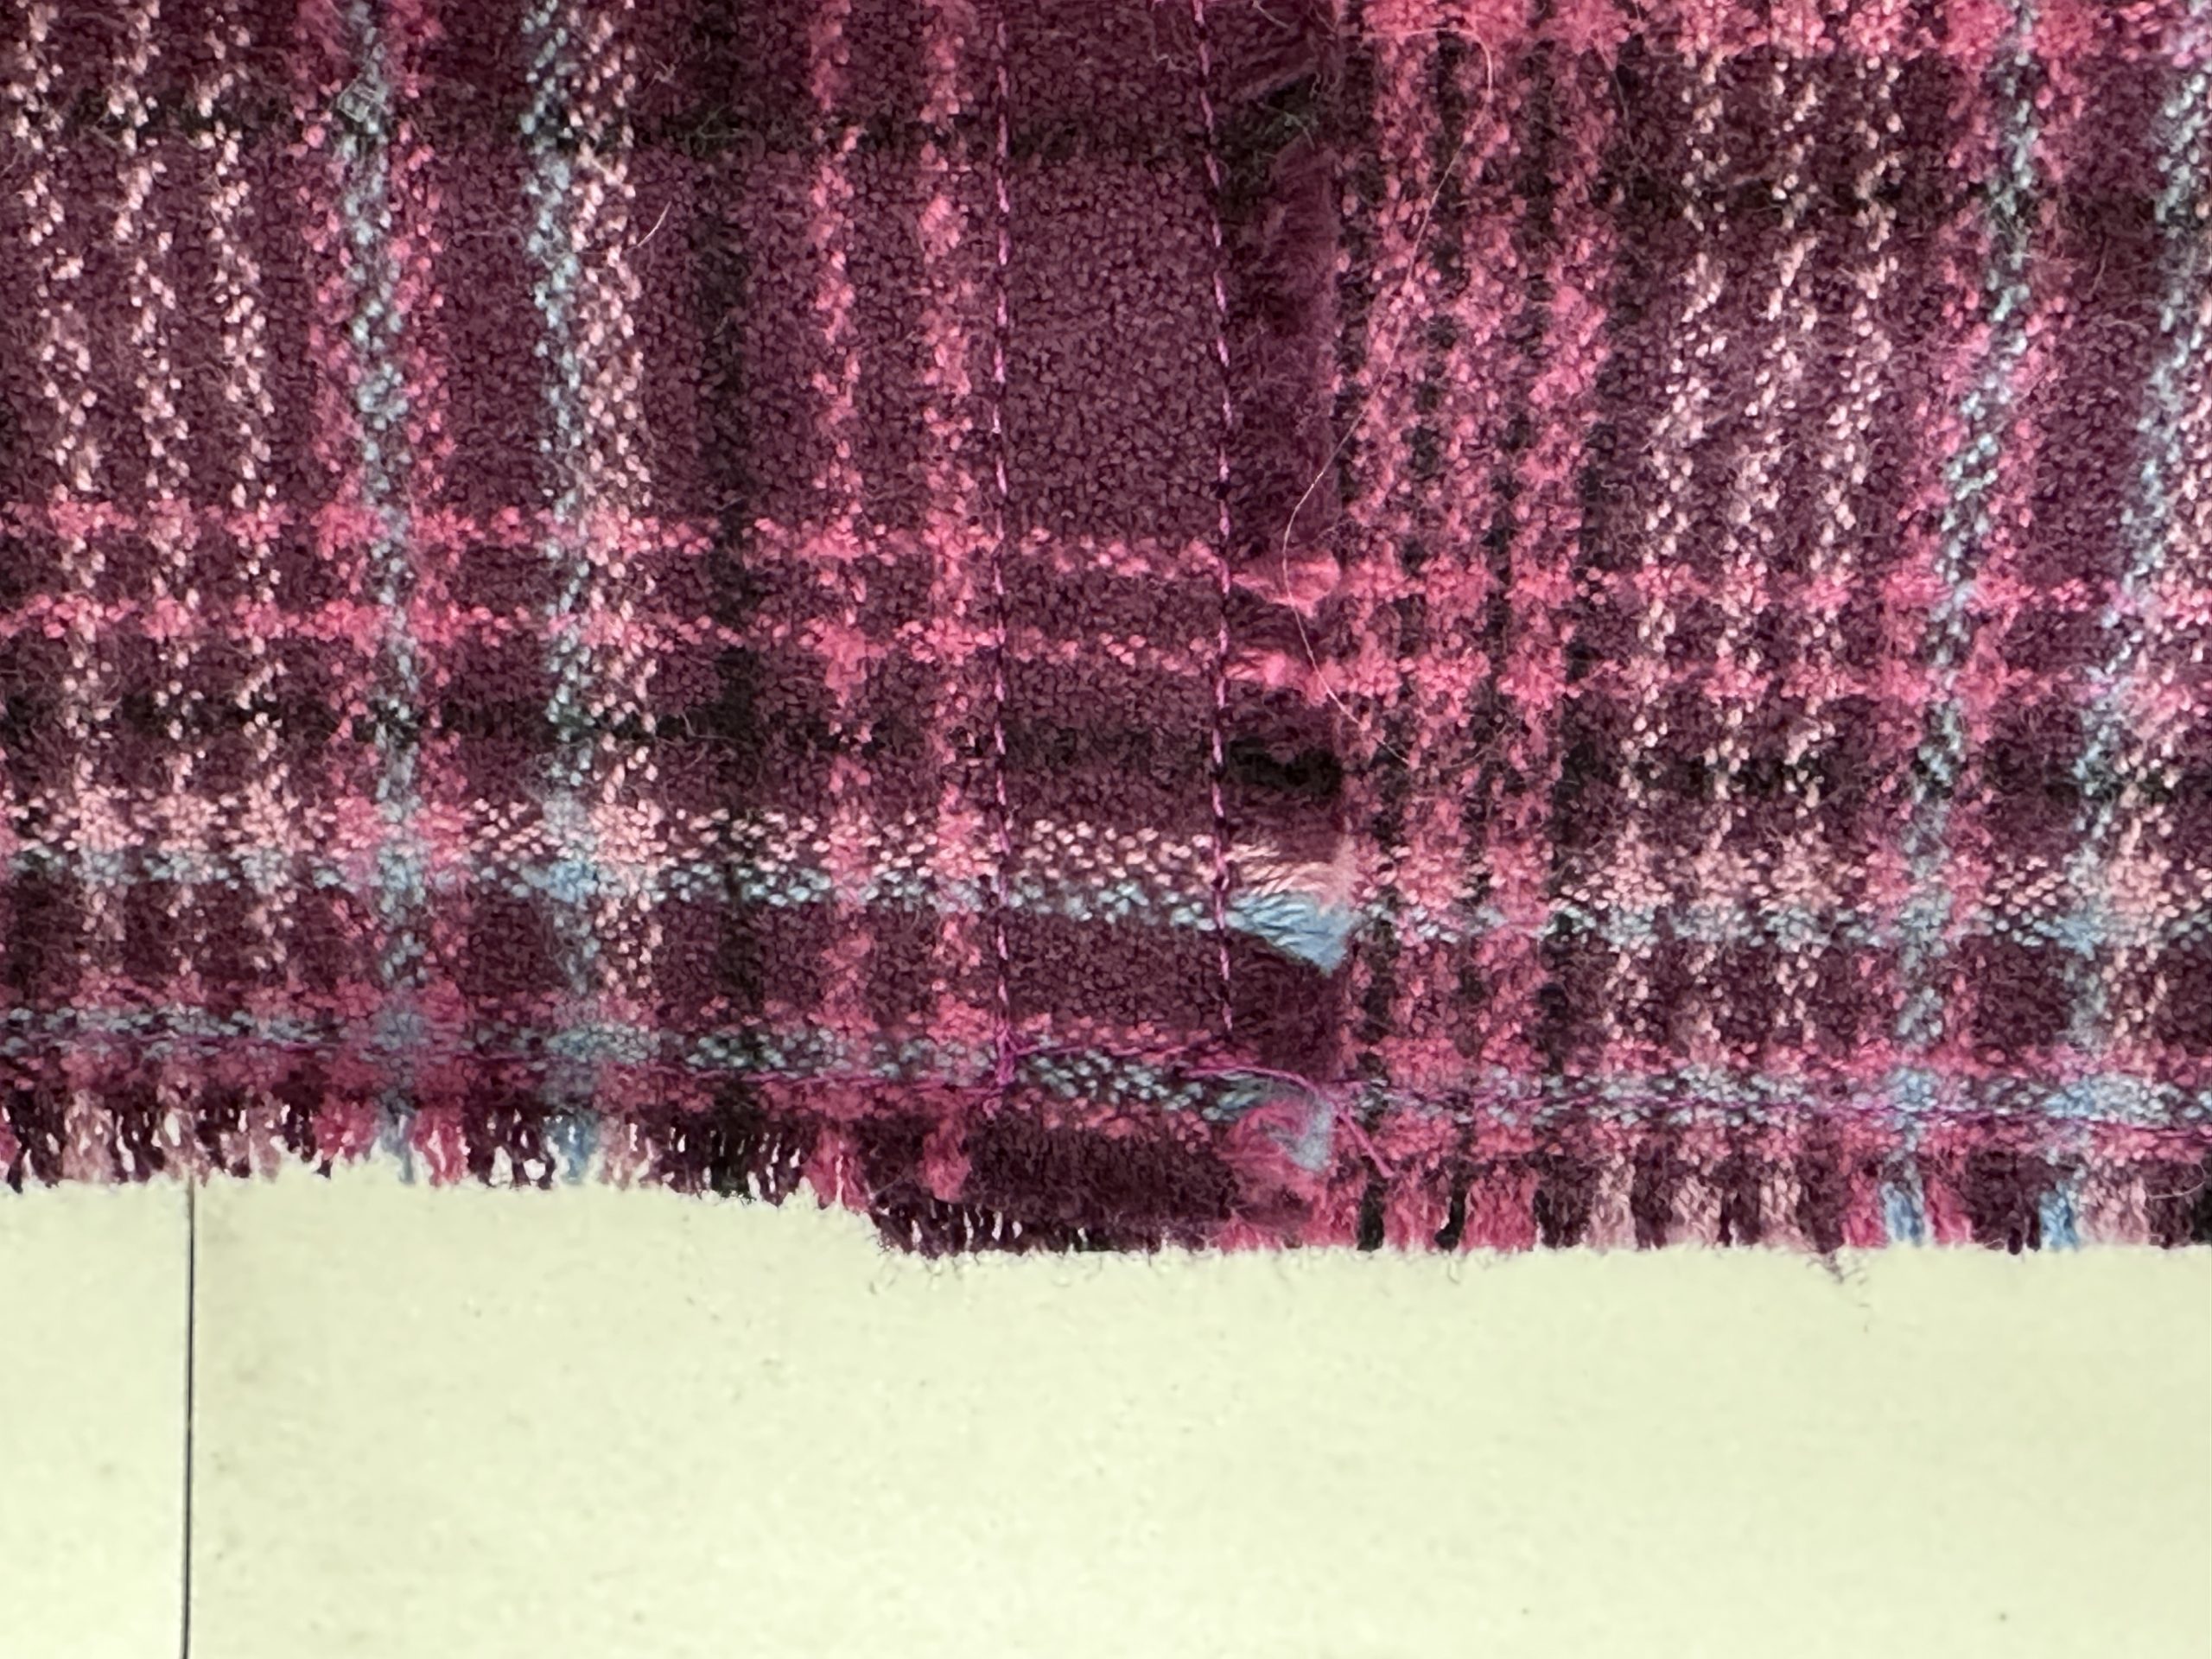
A little bit of fitting:
I have at long last learned that making a toile aka muslin to test how a pattern fits **before** just cutting out your fabric and finding out you’ve picked a too-small size or that something in their basic pattern shaping isn’t quite right for your body. As you can see in the top right image, some seriously unattractive (( )) at the back center seam. ICK! So I “scooped” the back crotch seam, let out the hips and waist seams and fiddled a bit more. Then after some extremely helpful feedback from a now-closing online workshop (so I won’t tell you what it is because the teacher is moving on with her interesting life) and some YouTube surfing, I got a quite good fit—about 90 percent there.
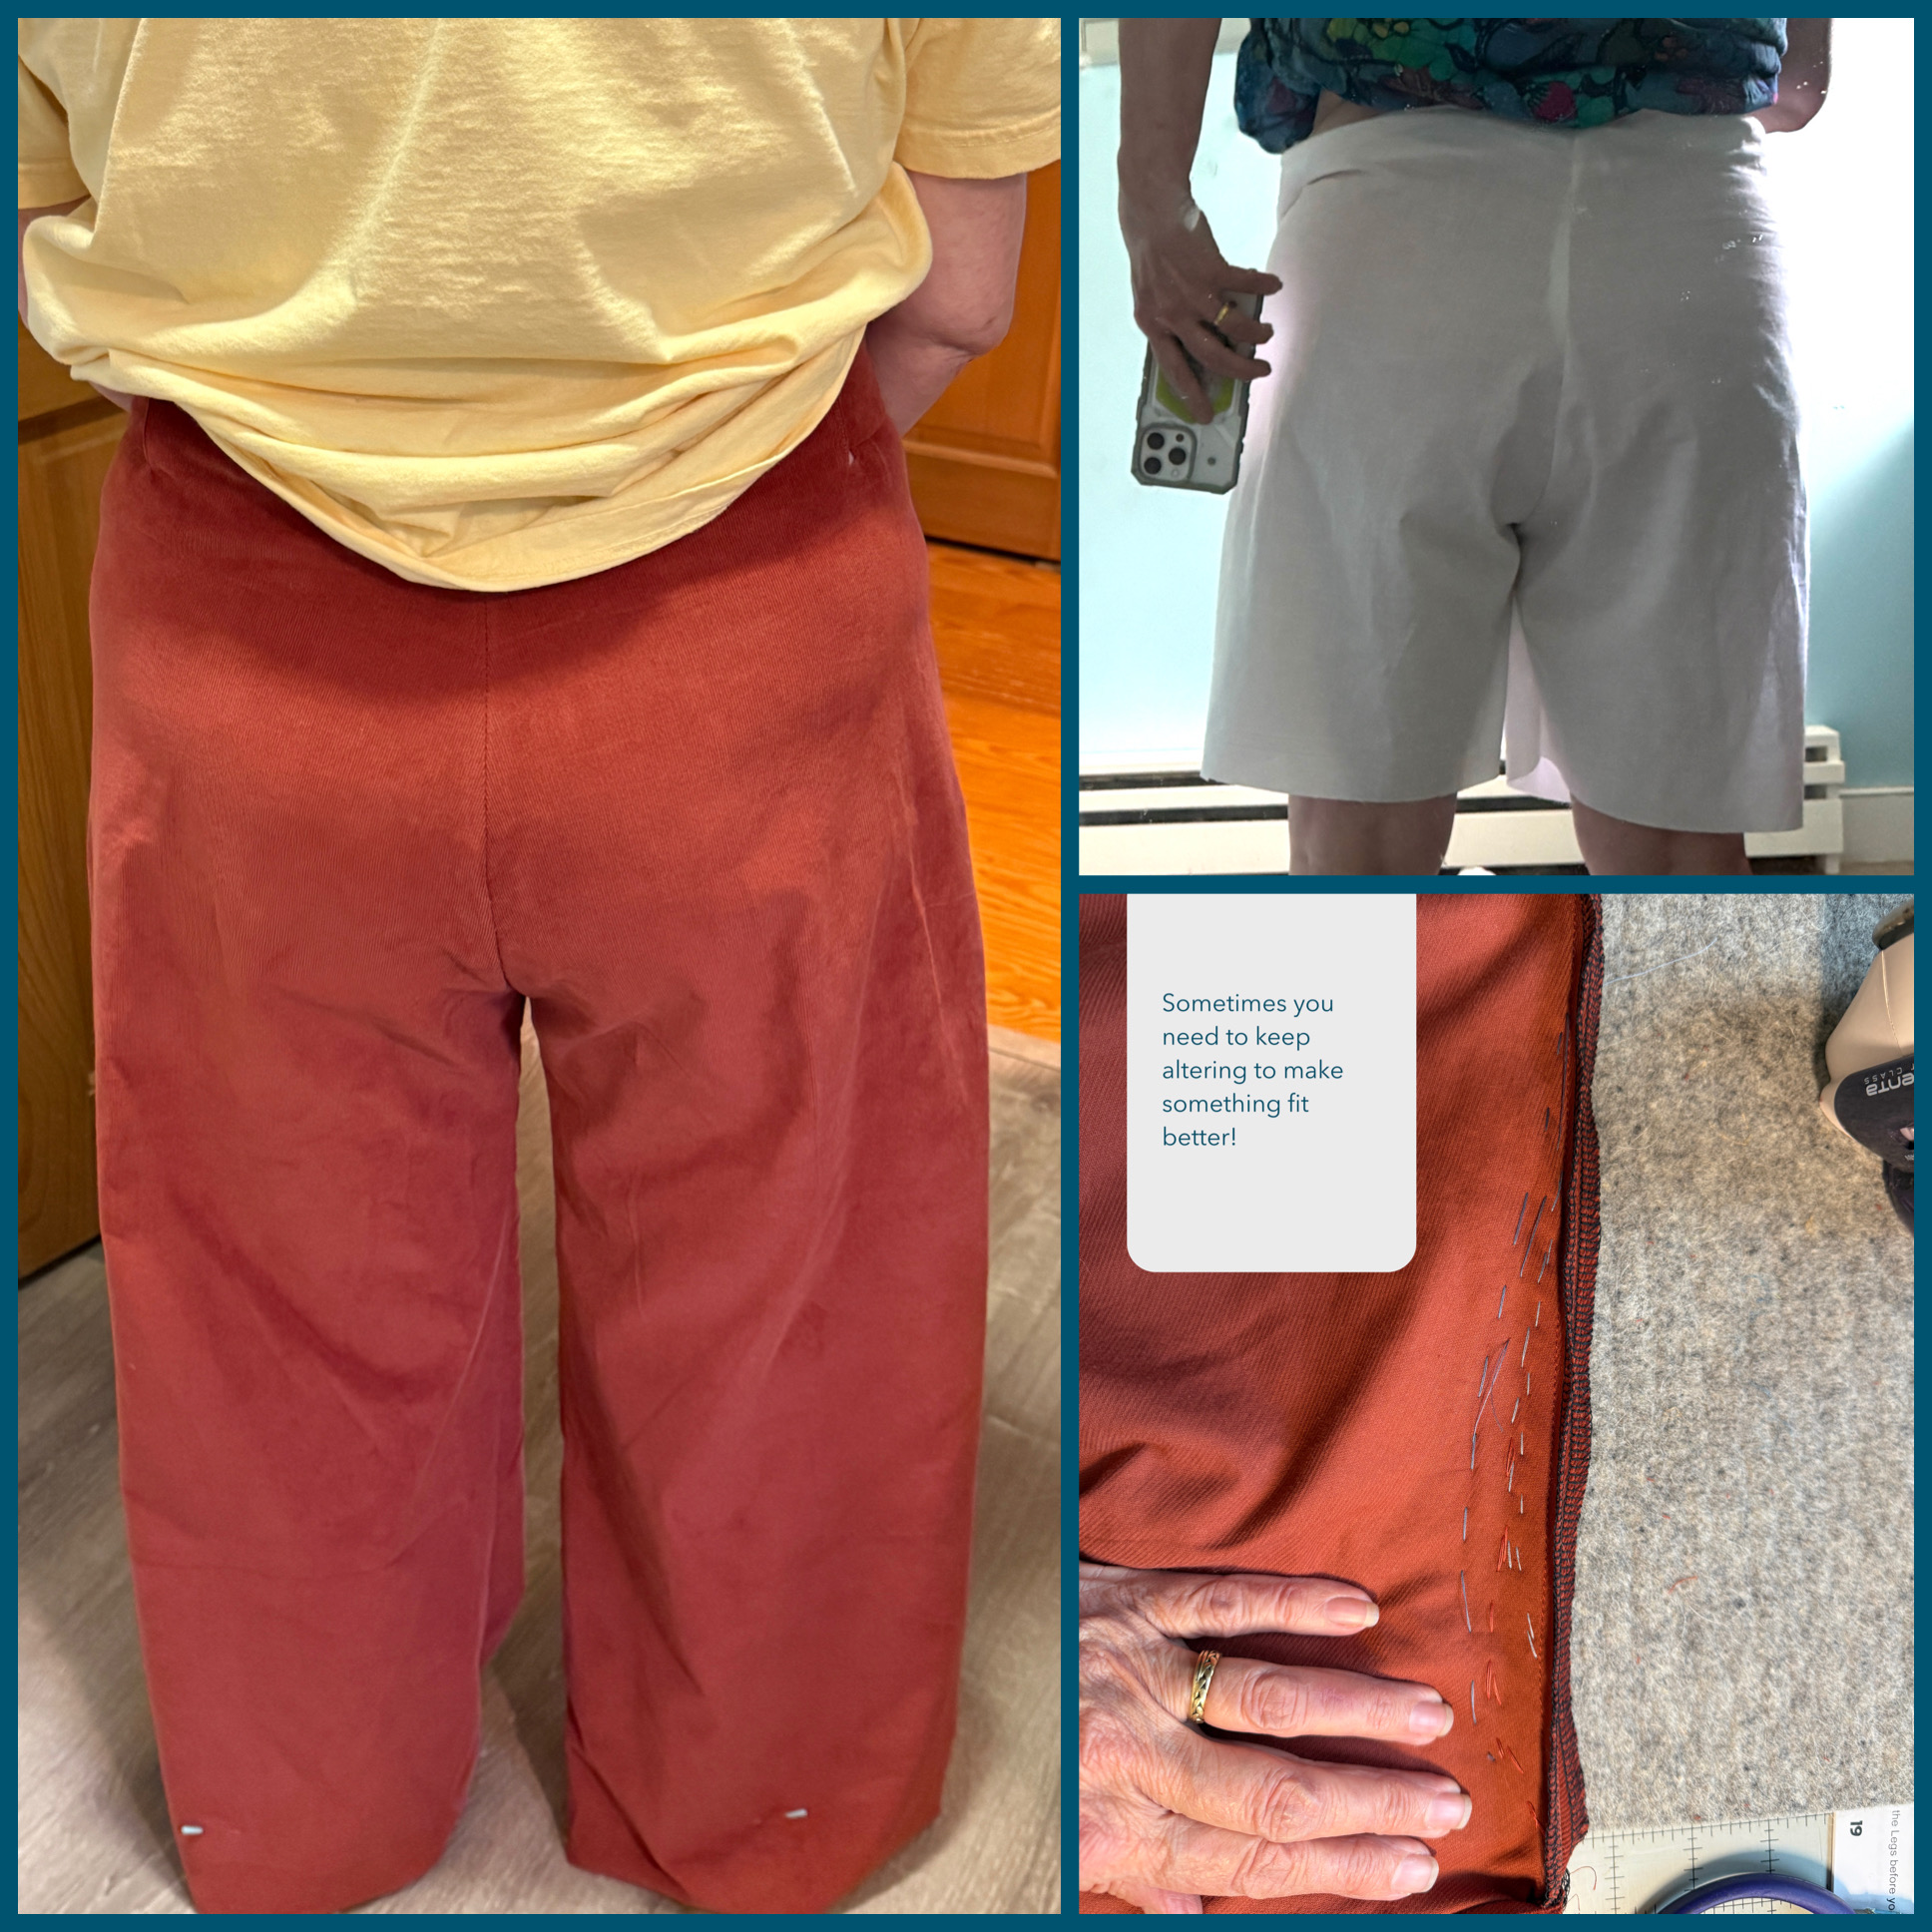
The front looked good but in the lower right image you can see my basting lines—each different color of thread is removing more fabric to get rid of the (( )). Photo on the left is about as good as I can get with this ice-cream loving body of mine ; ) . Tomorrow, a short video on using the locking button on the Janome A foot and then the next day hemming on the machine!
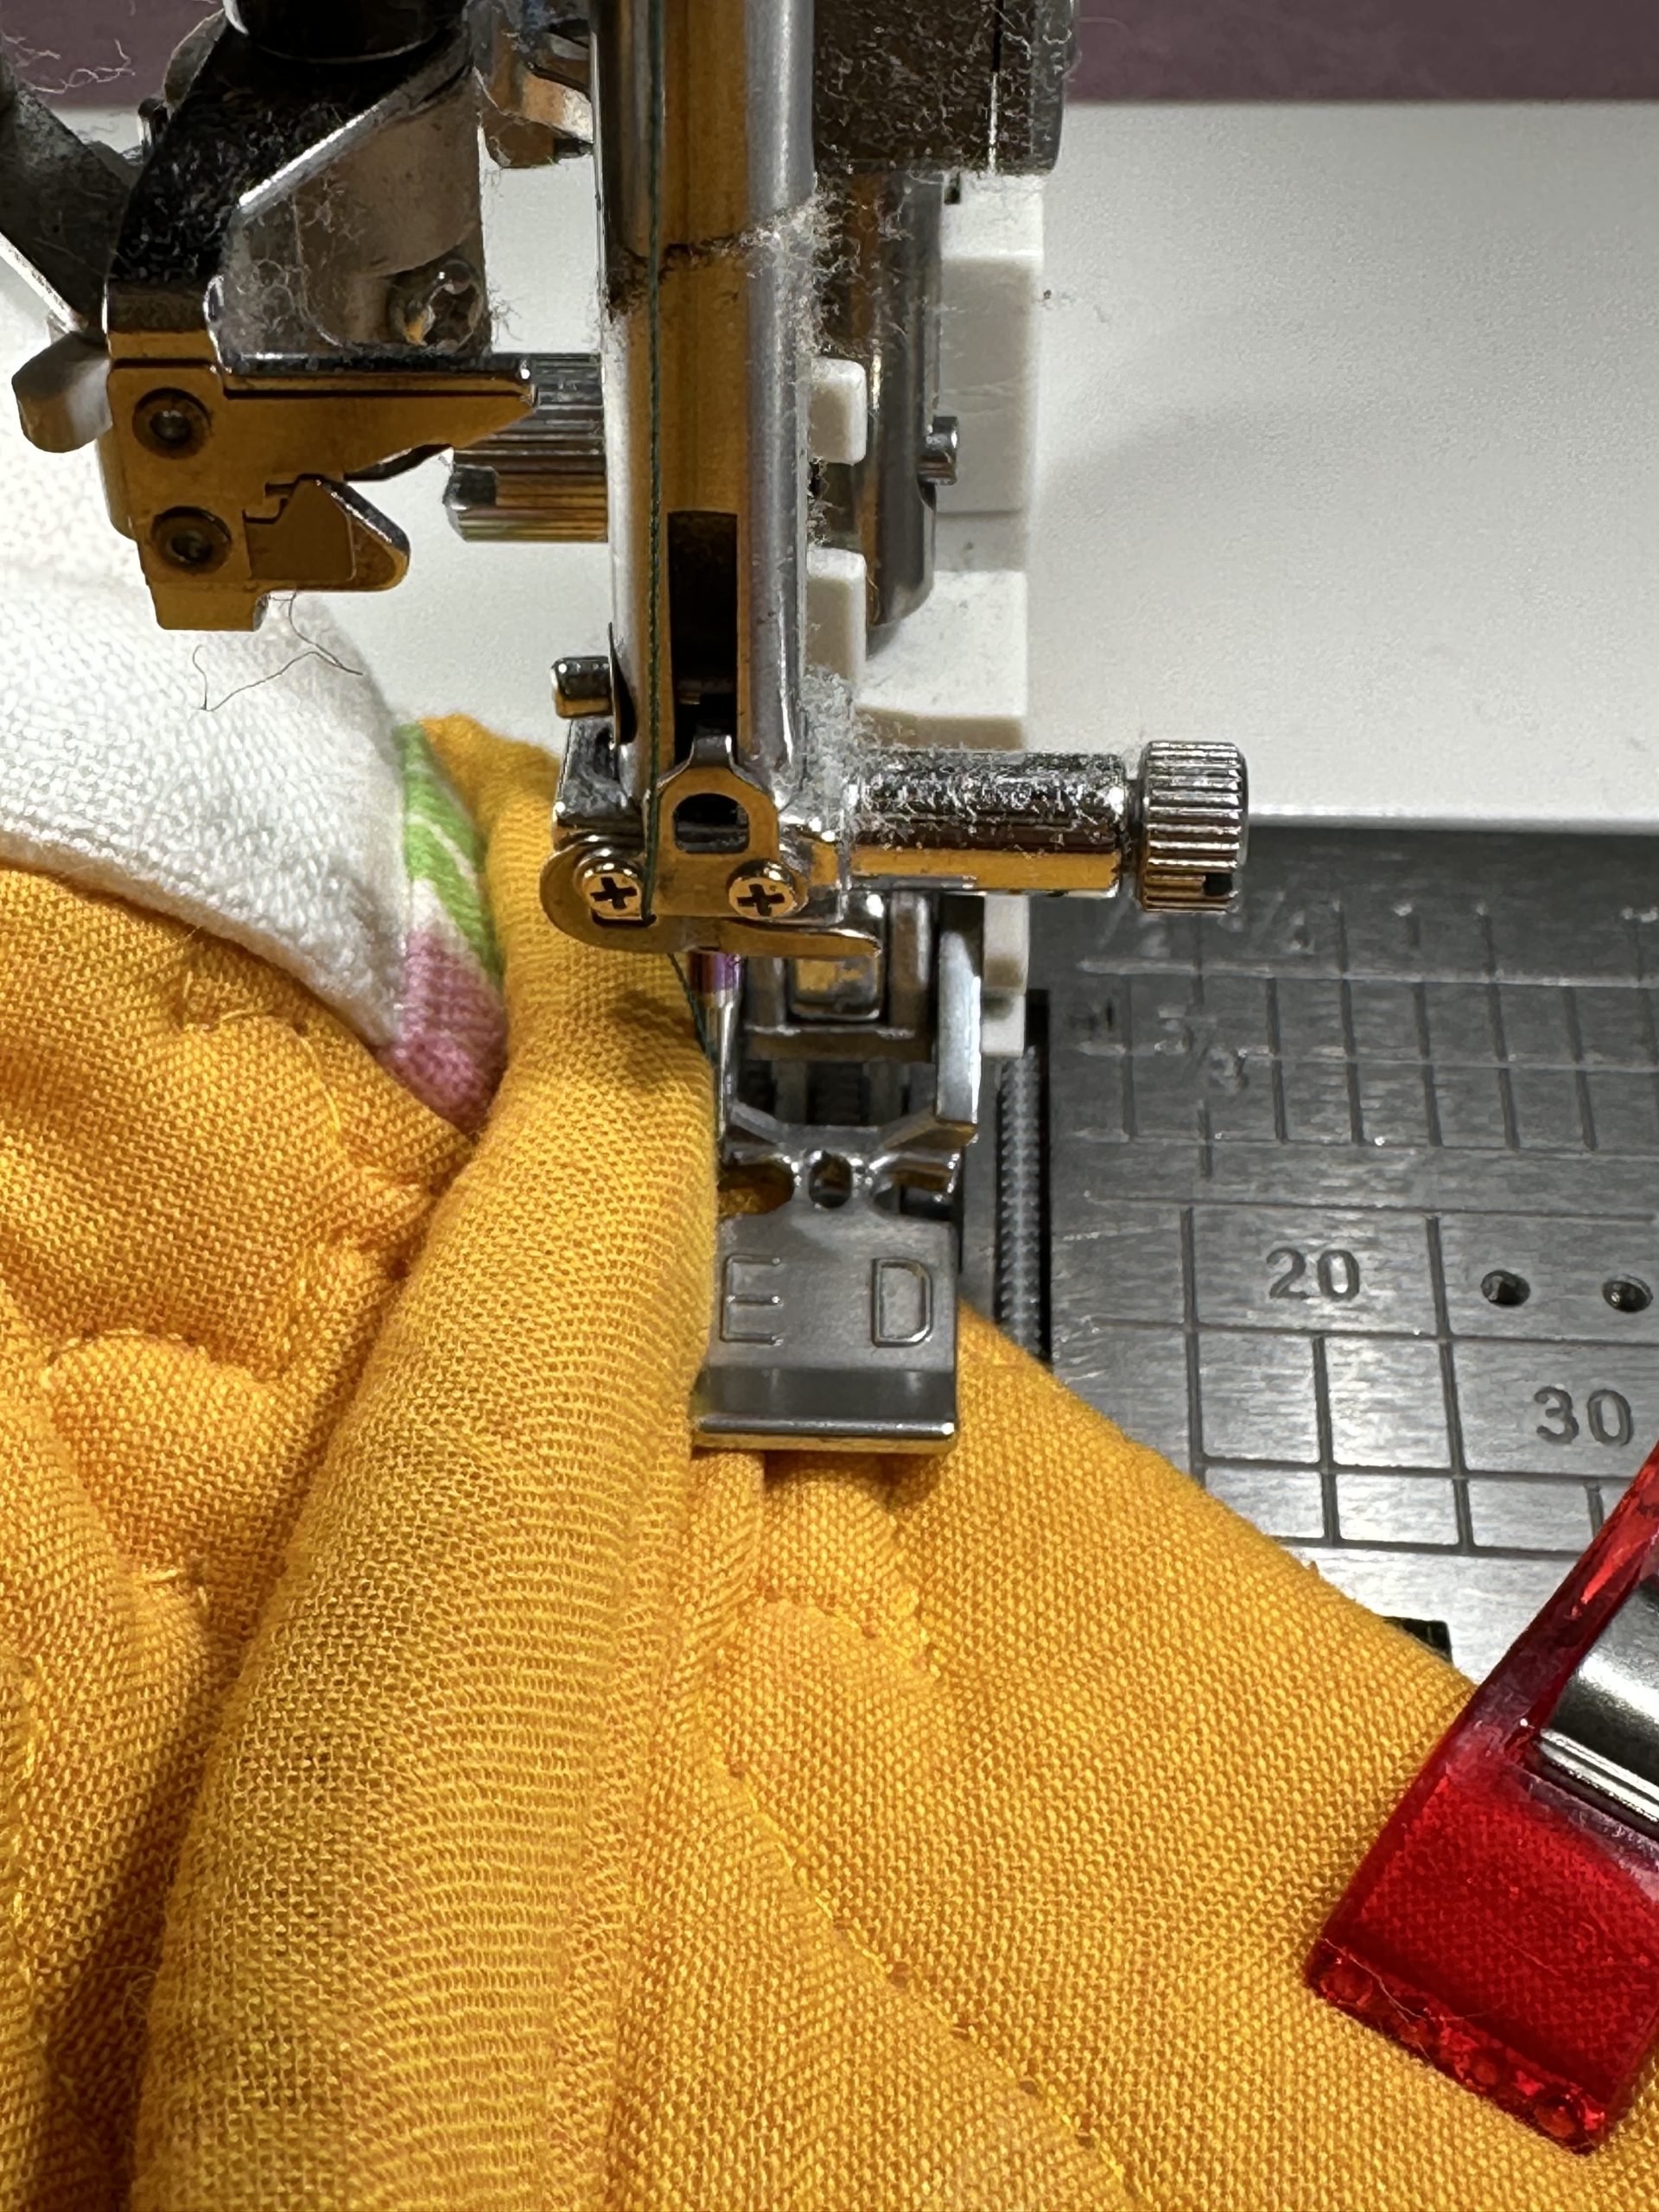
The Leveling button on the standard Janome A foot:
Today the magic is the black button on Janome’s standard A foot, found on (I am pretty sure) most if not all of their machines. By definition, the bottom of most presser feet angle up and down a little to go over different thicknesses of fabric. But sometimes, the hump of seam that you need to jump is just a bit too much and doesn’t want to feed under the foot nicely: result is short stitches, often followed by a looonngg stitch or two on the downhill slide before returning to where it should be.
This video is also on my YouTube channel @SmithQuilts:
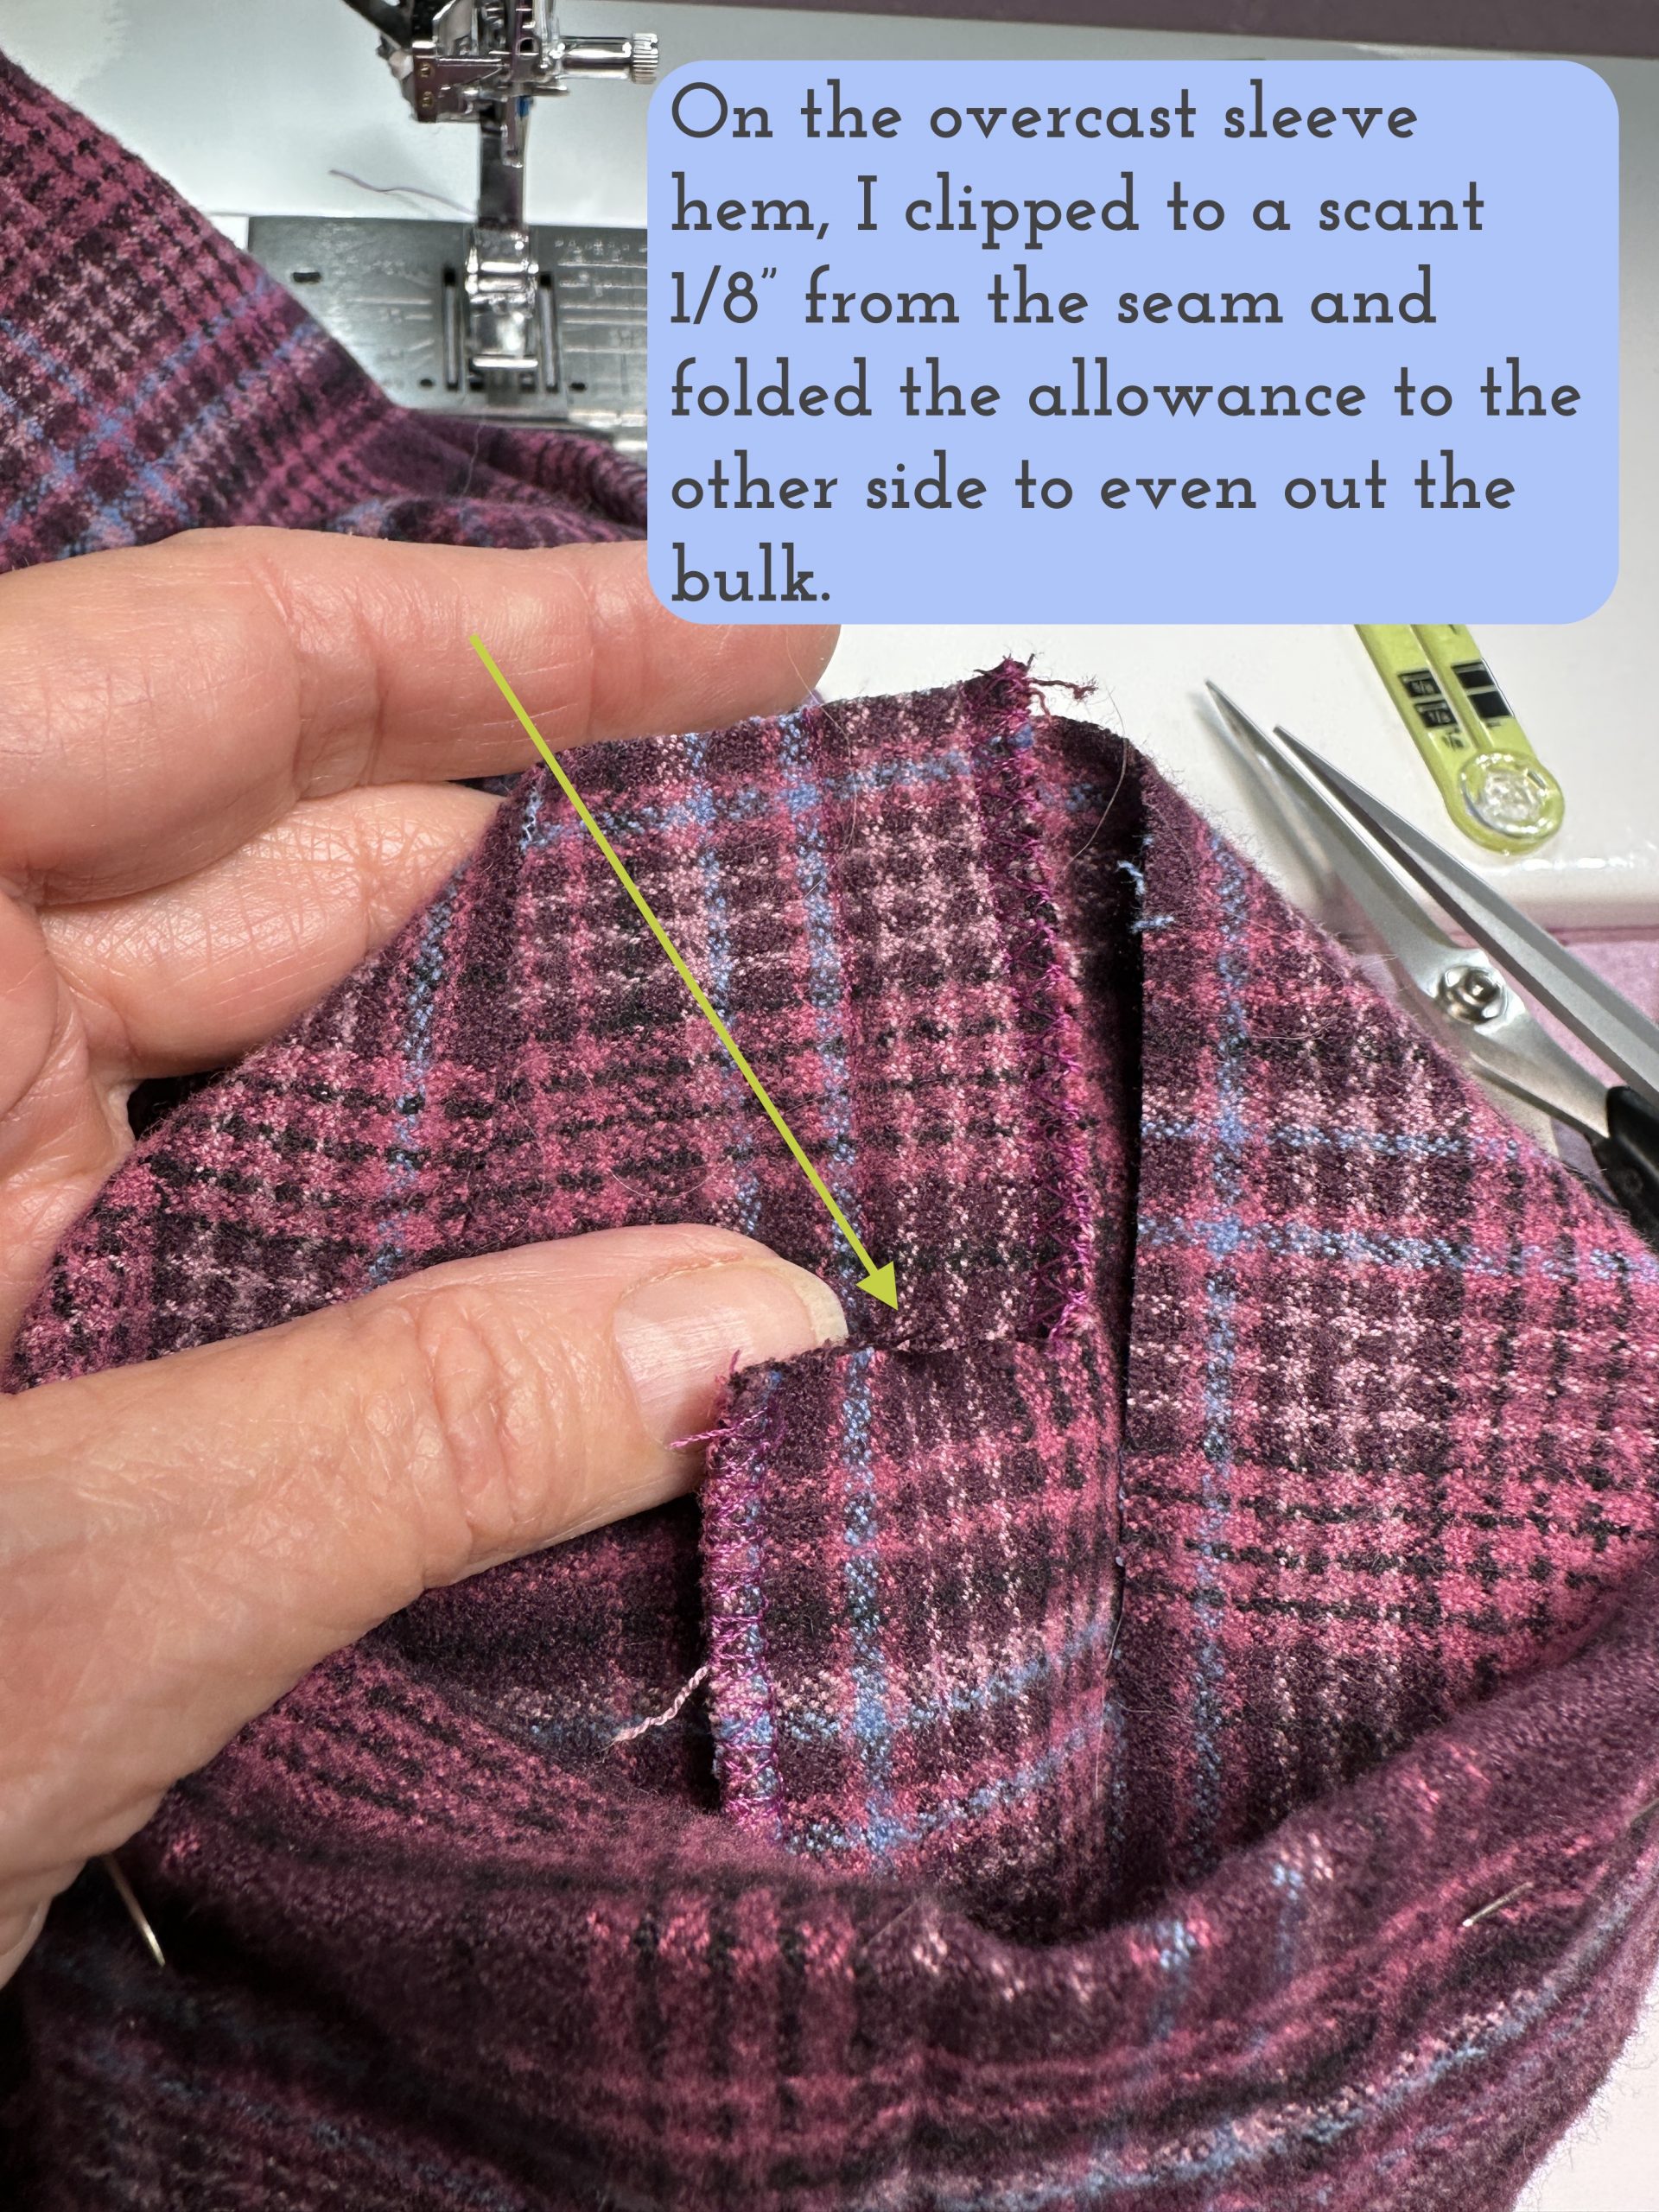
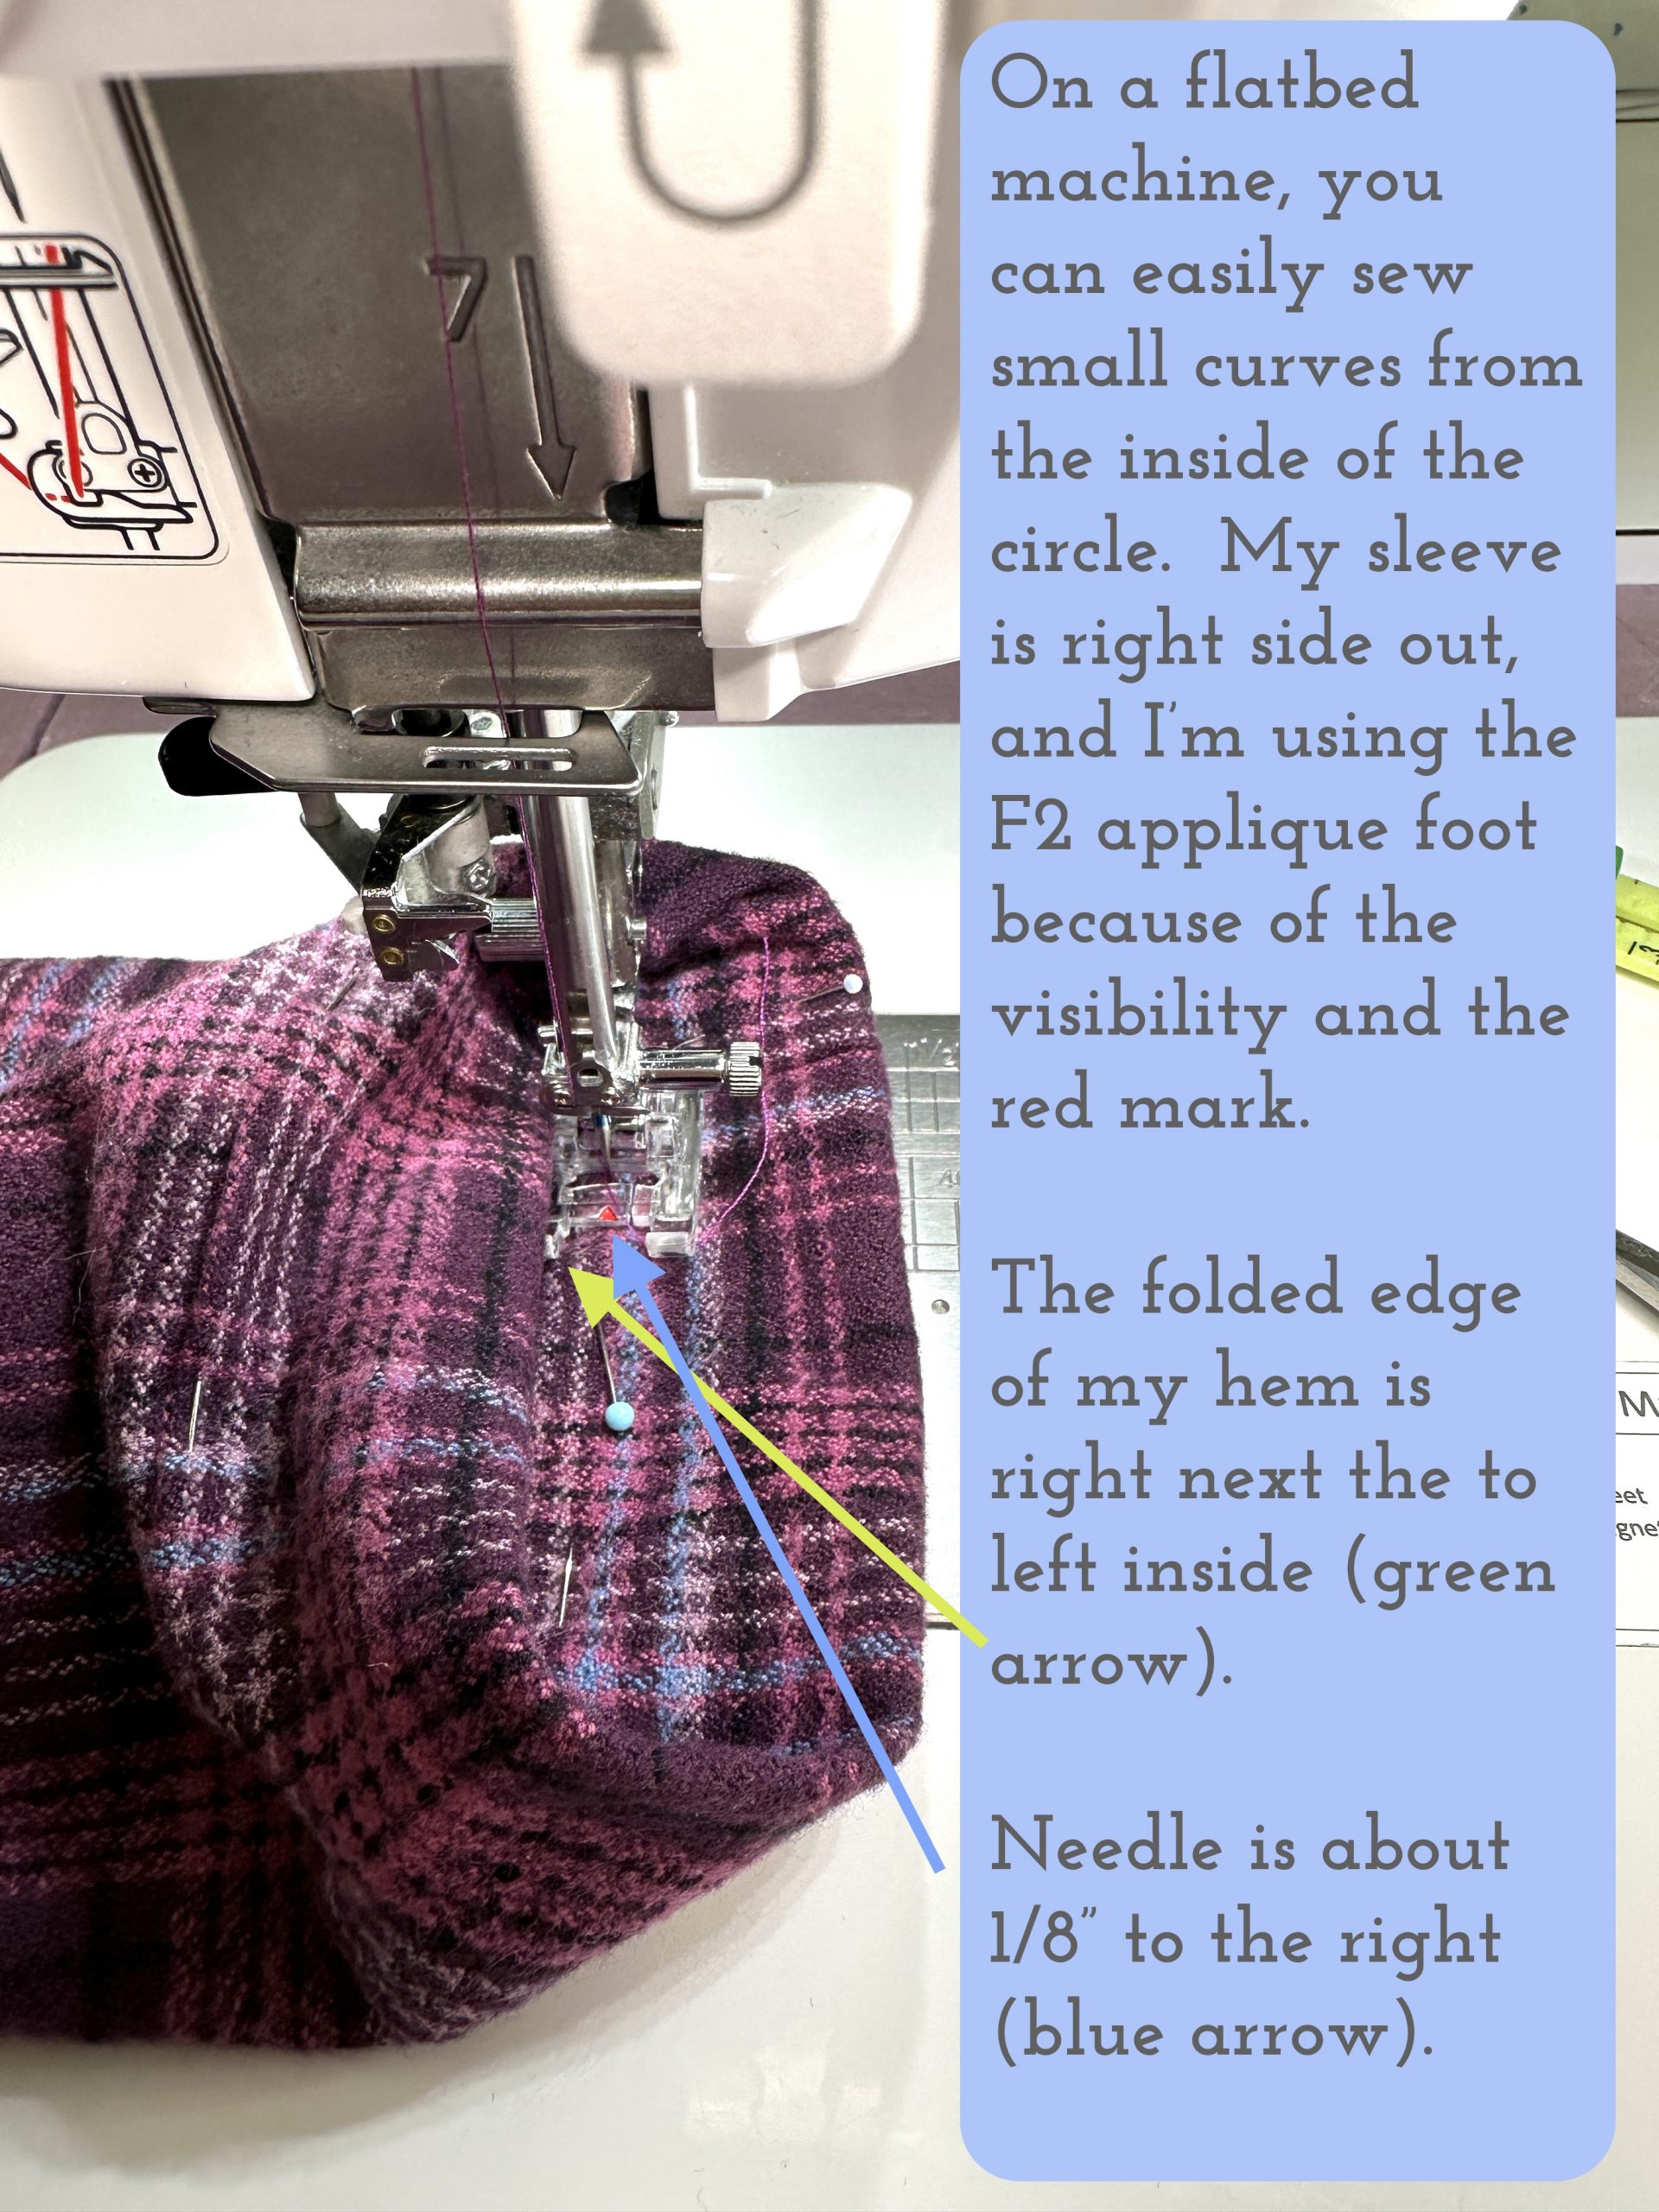
HEMMING!
The final step: the hem! using a blind hem stitch to secure a hem can be slightly mind-bending as you are sewing on the upper inside edge of the hem, but the fabric makes a Z shape, where the bottom of the Z is the bottom of the hem (on the inside). Depending on the thickness of your fabric you can adjust the width of the Zig on the stitch:
|
|
>
|
|
>
|
or
|
|
>>
|
|
>>
etc. If the fabric is thick like heavy wale corduroy or a thicker wool, you need a longer stitch to go through and catch the top point of the Z securely.
WOW…. what a marathon of social media posts and blogpost–thanks for getting to the end. I LOVE my new pants and can’t wait to make another pair!
 Here’s the links again:
My YouTube channel with all the videos
Ann Tilley Handmade Magic Pants pattern
Thea Colman’s Blueberry Vodka Lemonade pattern on Ravelry and on her website
My Ravelry profile page and my Blueberry Vodka Lemonade project page