Mastering Metallics is a half day workshop which will teach students to use metallic in both the needle and the bobbin. The workshop will debut at International Quilt Festival in Fall 2020, and is the half-day version of my Tame Fussy Fiddly Threads class. The class is Wednesday afternoon. Fly in Tuesday, join me in the Machine Quilting Forum (there are TWO this year!) Wednesday morning, then come take this workshop with me on Wednesday afternoon. We will finish up just in time to get to Preview Night at 5!
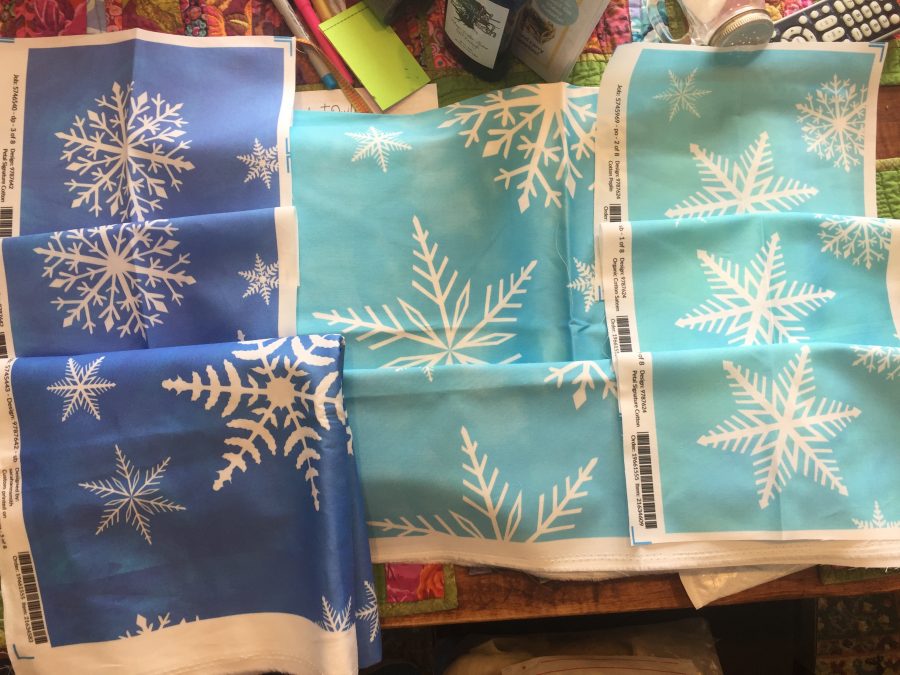
Ta DAAAA! A month or so ago, I asked for input from folks on Facebook about which color to make my project for my new Mastering Metallics workshop. Folks liked pretty much all THREE versions. I ordered up samples from Spoonflower:
Here’s the rather spendy order testing all three color ways and three fabrics: Petal Cotton (the basic), Cotton Poplin and Organic Cotton Sateen. Left to right colors are blue, sky blue and aqua, with the later two being VERY close…the aqua has just a bit more yellow in it.
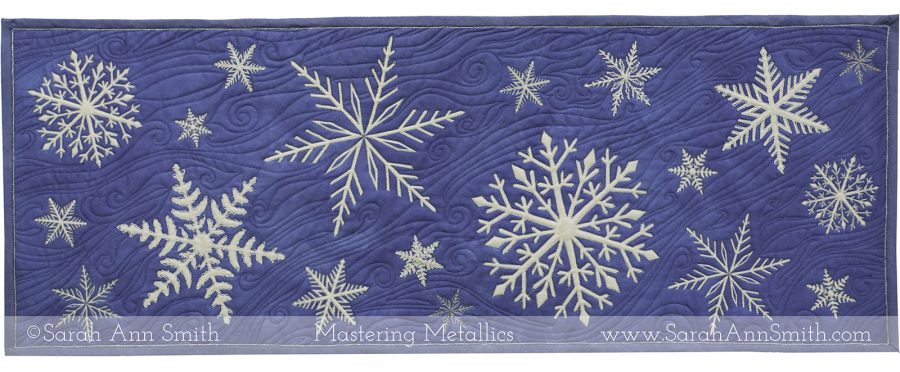
I am hoping to sell the fabric on Spoonflower later this year–if anyone is interested, let me know and I’ll email you when it is ready. I am planning to offer the blue and aqua (but if someone REALLY wants the sky blue, in the middle above, just ask and I’ll add that also). I need to re-do the master graphic file to be 44″ across rather than 36″ vertically–I will need to add some larger snowflakes so they fit a 12 x 44″ space nicely without getting cut off at a 12″ line. This way, one yard would yield a table runner and four to six placemat tops. The Blue works perfectly with Michael Miller Cotton Couture Sailor, which I will use in class kits for the back and binding.
I ordered a full yard of the Sateen, which is what I used for my Thread-Coloring the Garden workshop which features a photo printed on fabric. I was delighted that the new Cotton Poplin showcased the snowflake design as well as the more expensive sateen, so I’ll use that in the workshop. That also means the table runners will be width-of-fabric, not the shorter 36 inches (I learned the hard way you need to print designs so the lengthwise grain of the fabric is vertical on the photo image with the sateen!).
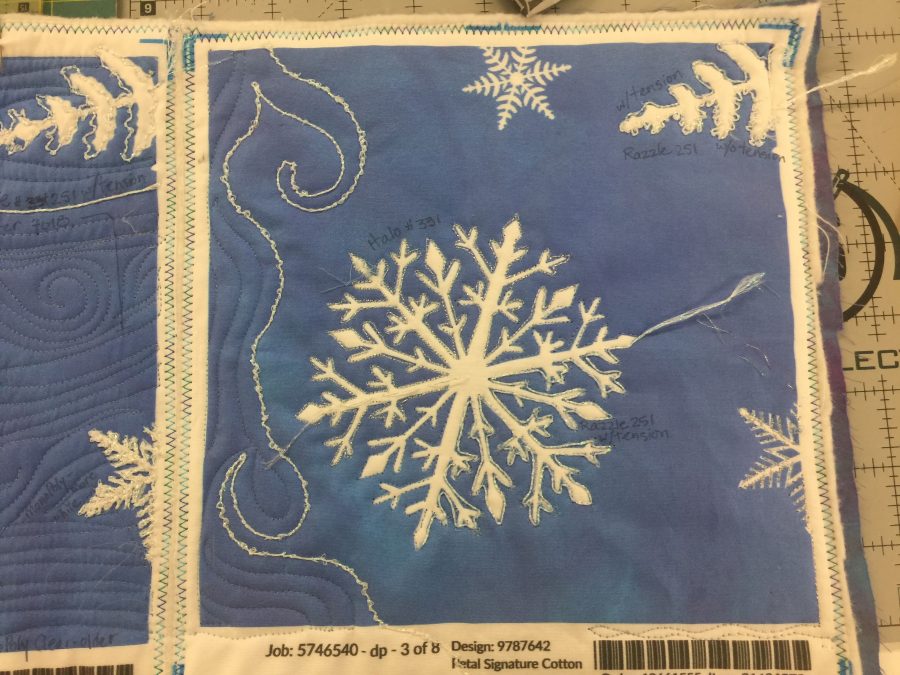
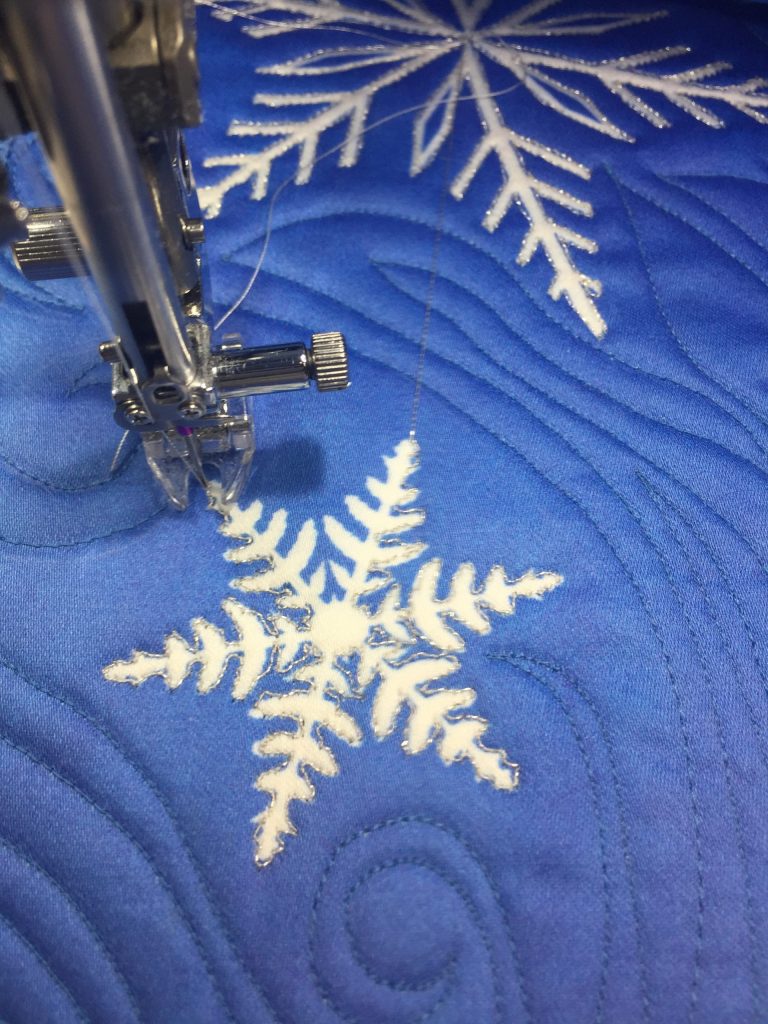
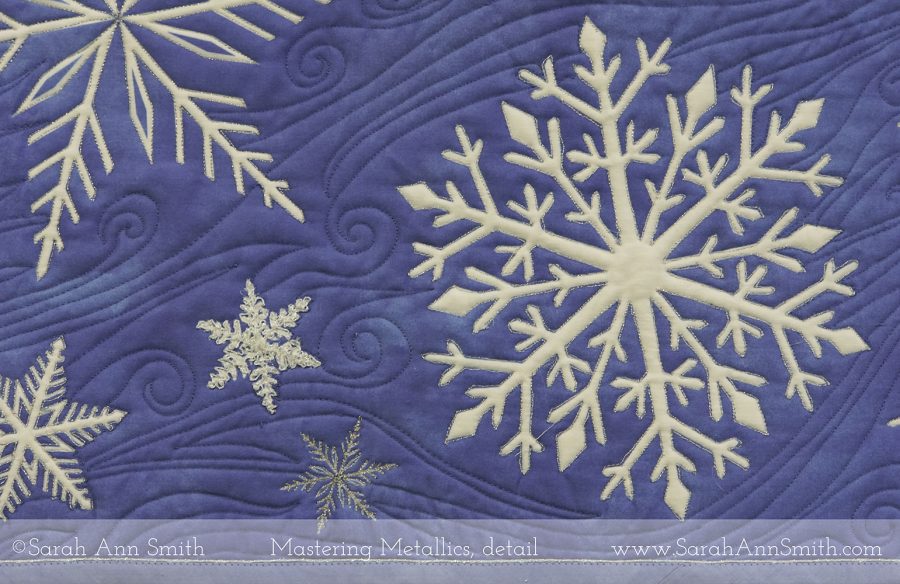
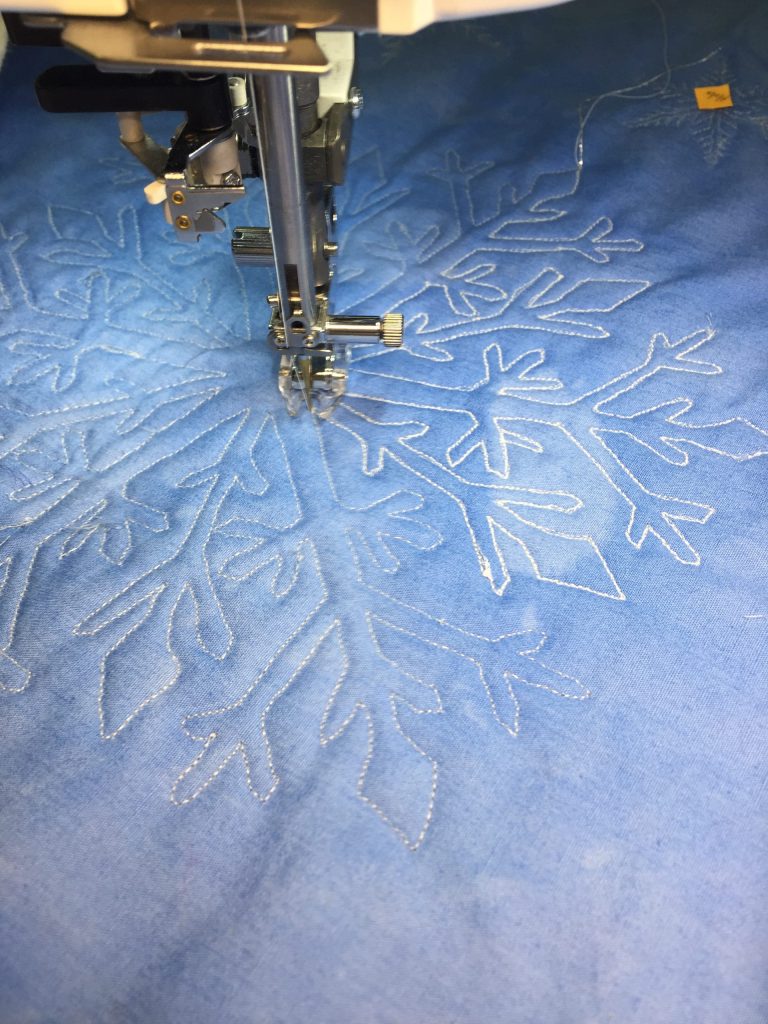
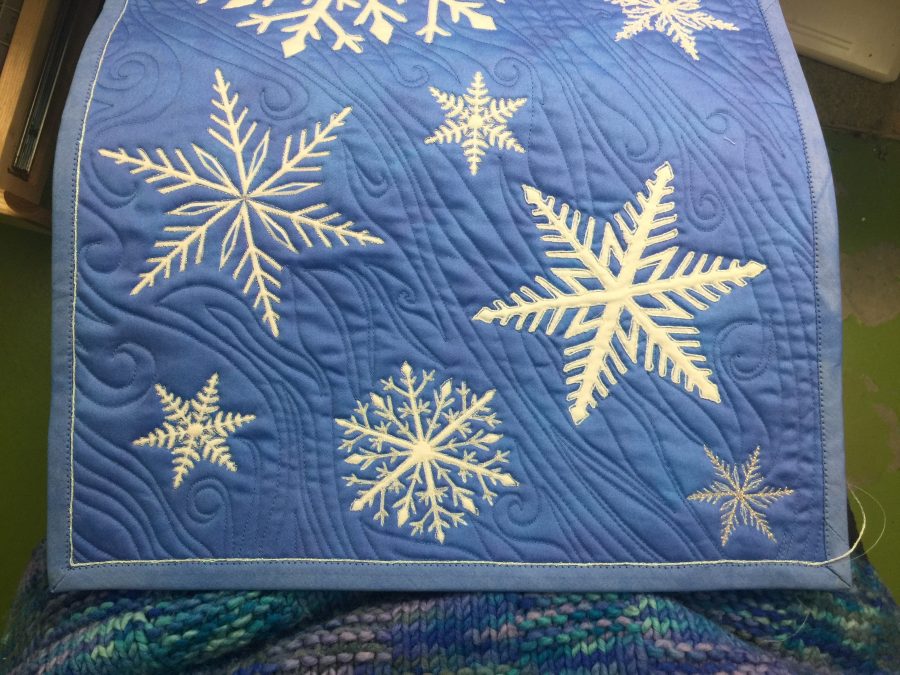
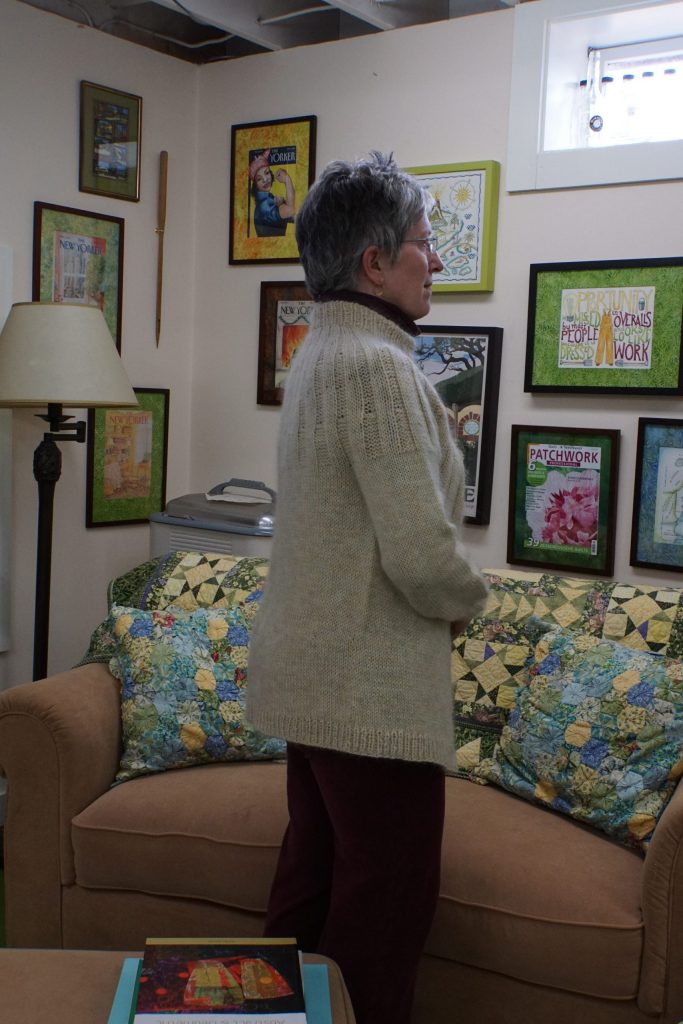
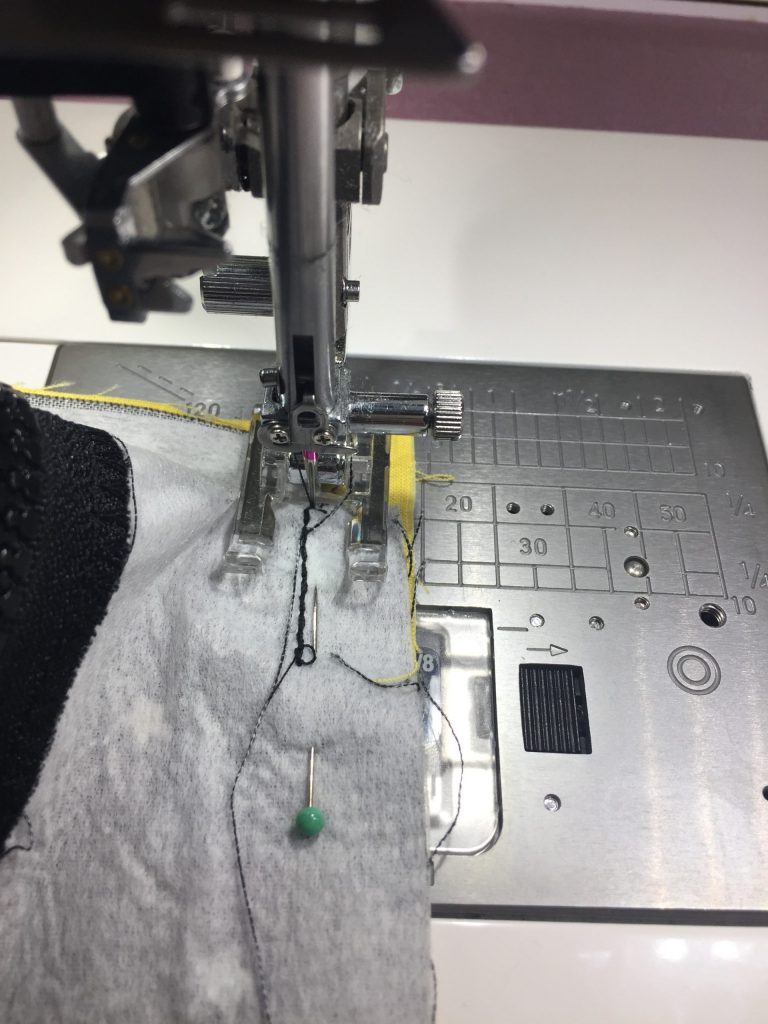
First I used two of the less expensive 8″ samples to test various threads. The Petal cotton has a coarser weave–not as clunky as Kona Cotton, and the image is nice and crisp. The Cotton Poplin is softer and has a lovely hand to it, so I will choose that for the class kits. The workshop kit will include Silver metallic (the snowflake being quilted here) and Halo used in the bobbin (upper snowflake). I’m also showing how to use the very heavy Razzle Dazzle on the sample, but to keep kit costs down won’t include it since the class time is just 3 hours. I will have some for sale, and it is of course readily available from Superior Threads. The heavy sateen is gorgeous, but given the cost I’ll use the still very nice poplin for class kits. Detail of finished tablerunner. The crinkly looking snowflake is the Razzle Dazzle used in the bobbin. The others are done with Silver Metallic or Halo. The quilting on the back looks awesome if I say so myself. LOVE my Janome M7 Continental! I’ll be teaching in Janome classrooms, so I wanted to fine tune settings to share with class by quilting this on my Janome. I ended up dyeing this fabric to sorta match. Because of the COVID-19 shut downs, I was unable to order the Cotton Couture Sailor (blue) fabric and receive it in time, and I needed to get the sample done quickly for Quilts. Inc to put in the class catalog. Kits will include backing, and I will have some extra if folks want to buy enough to bind the quilt. You can also order — Michael Miller is AMAZING at getting perfect color matching so one can also order the Cotton Couture Sailor to use on the back and bindings without worrying about color matching. And one end of the table runner after I finished the binding and a little extra how-to tip that I’ll share in class.
I hope some of you will want to join me in class at International Quilt Festival–this pandemic physical-distancing should be well over by then! Sign ups usually go live in July, and I will be sure to share with you my teaching schedule, times, class numbers and so on. In the meantime, if you are interested in purchasing fabric from Spoonflower, let me know! If there is a fair bit of interest I’ll move that to a front burner on the to-do list.
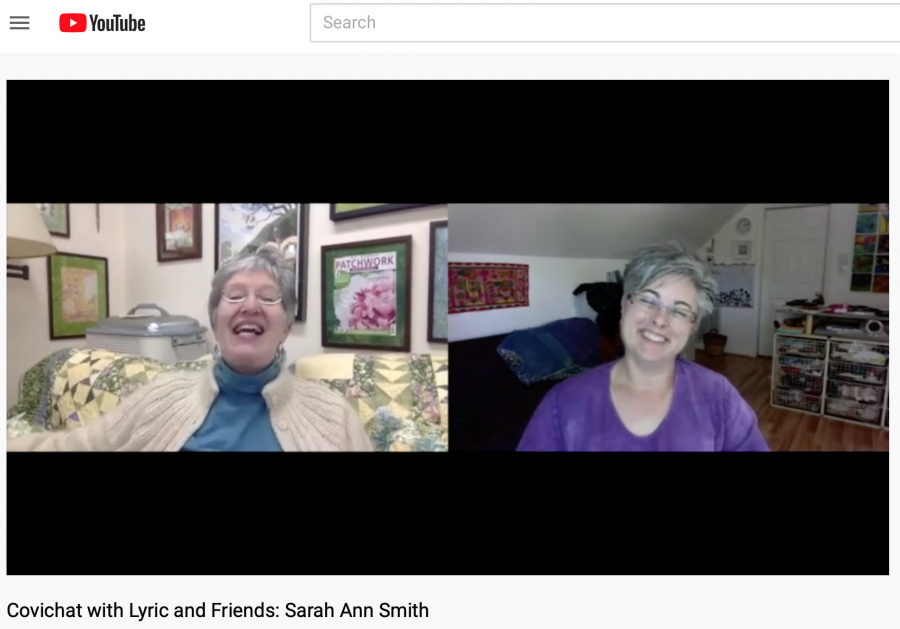
What FUN! My friend and artist and teacher extraordinare Lyric Kinard has started doing a series of taped video chats with folks in our line of work and art. We chatted last Friday, and the Lyric uploaded the video today. So ENJOY!
In the video I mentioned a bunch of things…things which aren’t on my blog yet! BUT…
Mastering Metallics workshop is described here on my website, where you’ll also find the class supply list (I may need to update that though, so just get a rough idea). It is a half-day class that will debut at International Quilt Festival Houston this coming Fall–sign ups usually start up in July. You’ll learn tons, get a full kit with top, batting, backing and thread so all you need to do is show up. This is the project, a wintry tablerunner. Additional fabric will be available for purchase, and I may make it available on Spoonflower for orders from home. Let me know if there is interest.
I also mentioned some bags and projects fro Michael Miller Fabrics using byAnnie patterns. The first blogpost will go live on April 9th, and there will be another in May. Stay tuned!
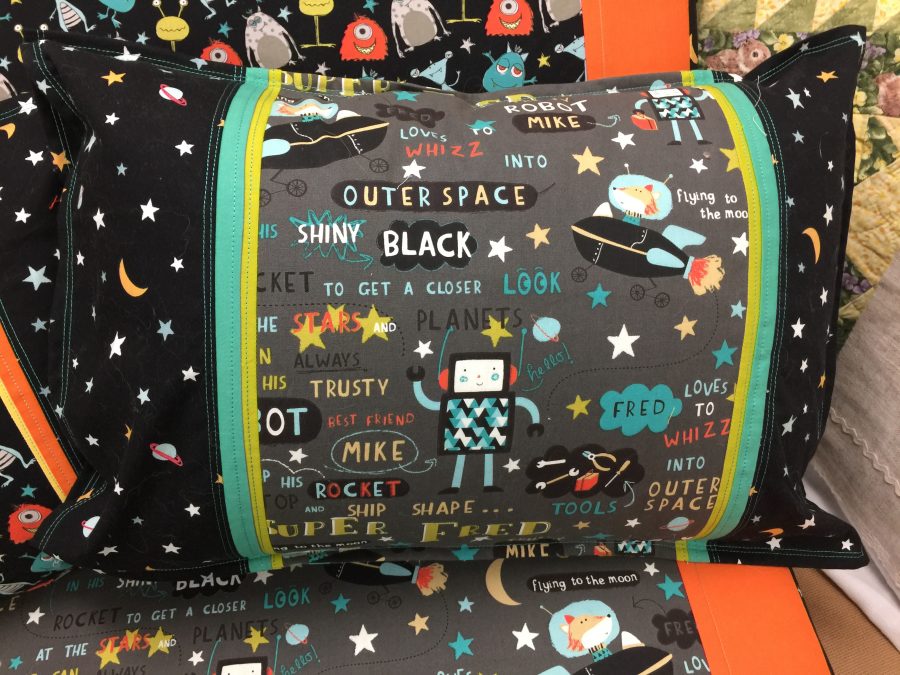
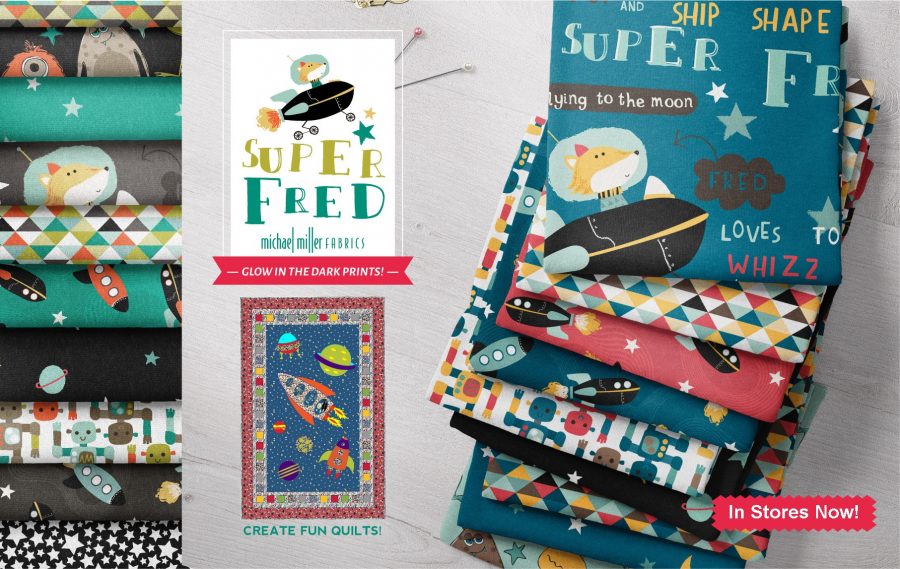
And if you liked that floor cushion, the fabric line is Space Pals and Super Fred. You can find the fabrics usually at Fabric.com, but right now things are messed up due to international shipment restrictions and low staffing at workplaces. So when all this stay-at-home is over and quilt shops can get back in business, as your local shop to carry the line.
The PATTERNS are free and available here with even more information on my blog. Go Here (1) and Here (2) for pdf links and lots of great info and detail.
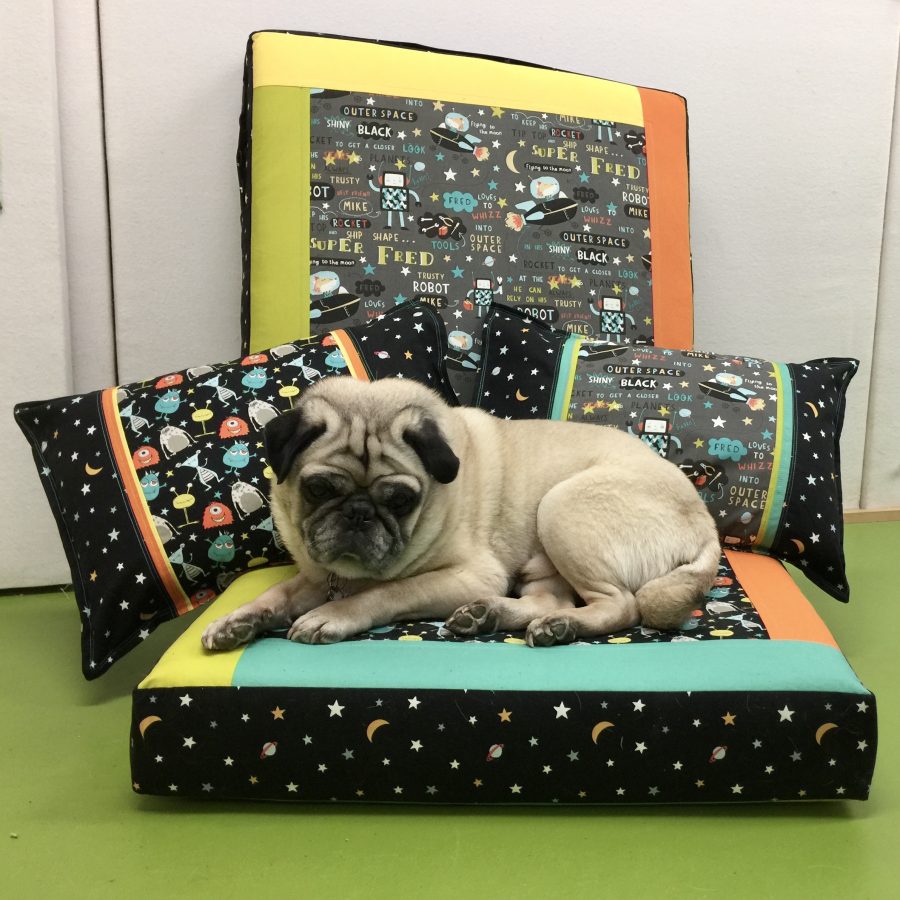
Widgeon loves the cushions!
I’ve already watched Lyric’s interview with Robbi Joy Eklow and look forward to catching up on the chats with Pepper Cory and Thomas Knauer. Thanks for asking, Lyric…it’s always so easy to do these sorts of things when you’re already friends!
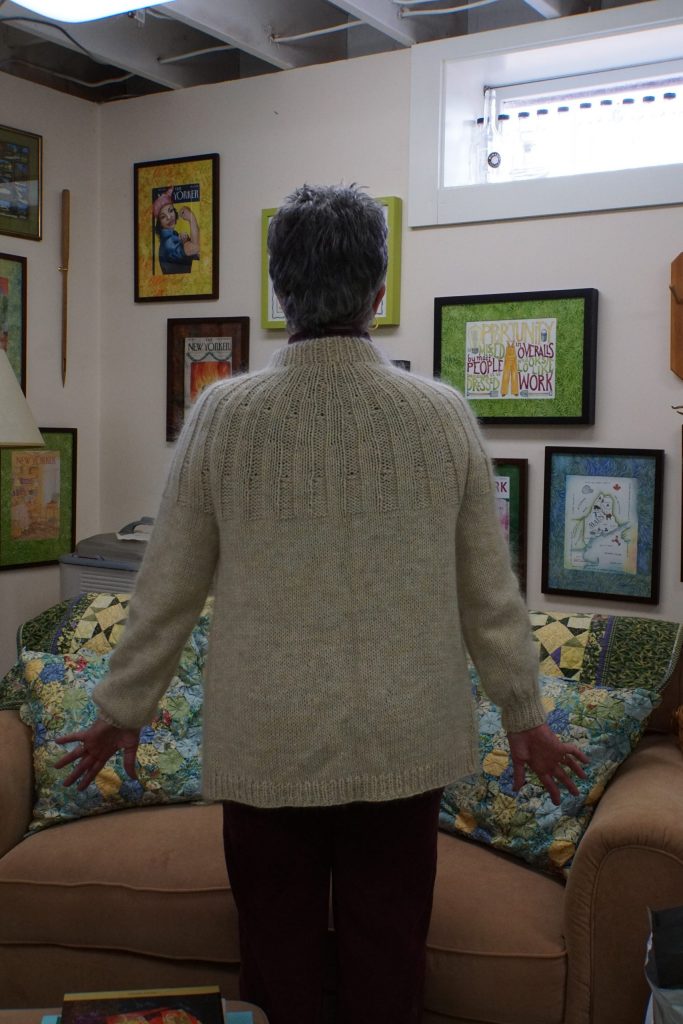
Talk about COZY and warm! I fell in love with the relaxed and comfy look of the Sunday Cardigan (on Ravelry) mohair edition and regular edition immediately and knew I wanted a slouchy, oversized hug-of-a-sweater. So I made one! And then I made another. Here’s the second one, which is what I was craving:
Yes, it feels like a hug!
Now I KNOW many of you are thinking “mohair…ITCHY!” I agree. But this one is made with Rowan’s Kidsilk Mohair, a blend of mohair and silk and it is heavenly soft and doesn’t itch me!
BUT, before I got to this one, I used up some stash. Yes, I used yarn stash! I had this alpaca boucle (according to the receipt in the bag) about a decade. Ahem. I wasn’t sure if I would have enough, so I made a size medium just to be sure. I couldn’t believe how quickly it knit up. My previous sweater was 24+ stitches to 4 inches. This was 12 (!!!!) stitches to four inches. And it knit up in a matter of a few weeks! It is quite fitted, and I’m fine with that. I like the sweater, it is comfortable, and looks good. But I wanted that huggy-oversized look.
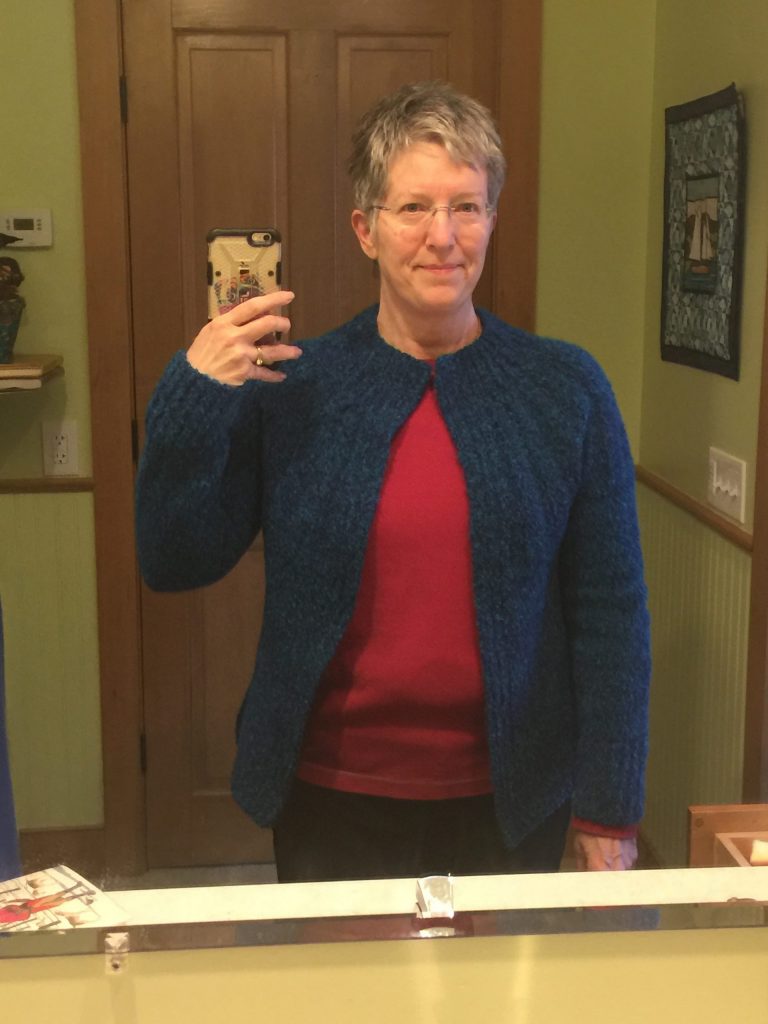
As you can see, the blue sweater fits and looks good, but is not that oversized hug. I can tell already, though, that it will get a lot of use. And did I mention, I used up yarn stash?!!!!
So I bought new yarn at Heavenly Yarns in Belfast, Maine. Thankfully, they got in a new order of the Kidsilk before the current shelter-in-place-followed-by-quarantine-then-extended thing. I wanted mine quite long, so I used just over 4 skeins of Cascade 220 in an oatmeal color (reasonably priced) and four skeins (down to the last 30 inches) of Kidsilk (honestly, a bit expensive) in a soft white. If you want to geek out and are a Ravelry member (free to join), you can see project notes here. The blue version is here. I could have done the math and made a different size of the regular version, but I sprang for the whopping $6 for the mohair edition pattern which did the math for me. My version is a bit of a hybrid: I made the mohair version using one strand of Cascade 220 held together with just one (not two as recommended) strand of Kidsilk and got the gauge of 14 stitches to the inch. Given how warm it is, I’m glad I don’t have another strand of mohair in there!
Even after blocking, it didn’t grow longer…hooray! just what I had hoped it would be.
I opted to make the fold-over collar from the standard version and sew it down as in that pattern (even though I didn’t sew down the collar in the blue one!) and add buttons. I followed the directions in the standard pattern for opening up the stitch rather than making a proper buttonhole. Since I had no idea how long I was going to make mine, that was easier. However I think next time I will do a proper buttonhole that looks better. I also made my sweater longer, with sleeves that are neither snug nor full.
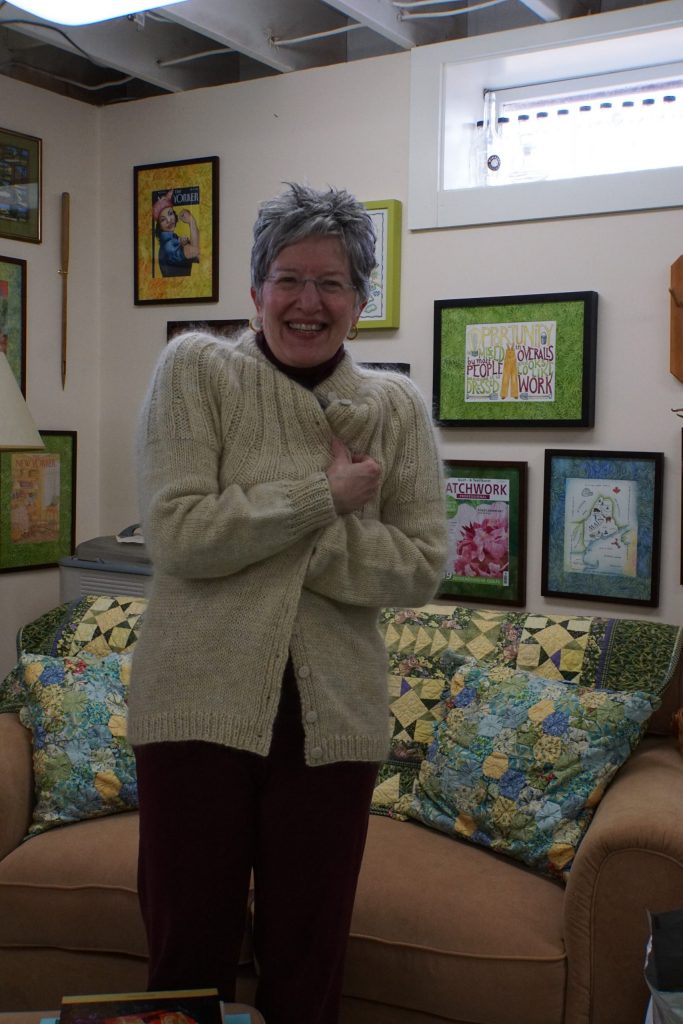
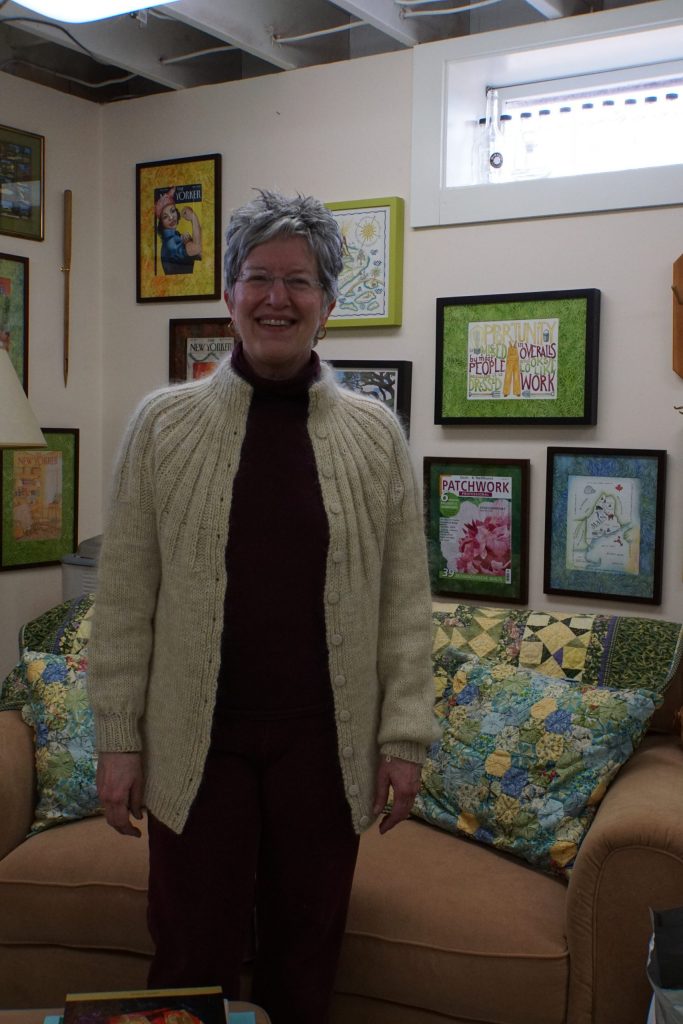
Side view: if I am not tugging on the front of the sweater, it is actually FLAT and even at the hem! Most garment patterns are made for full busted women. I am not among that group. So I always need to make modifications. changing a front and neckline is tricky. It is far easier to do short rows on the back to even out the tilty hem. Above, the bottom of the ruler is on a single row of knitting. The pins mark where I did short rows, turning the work to add almost 2 1/2″ of length in the center back. I went beyond the side seams about 1-2 inches onto the front area. Next time, I would extend the short rows to within 3 inches of the center front. I would also do the short rows just above the hem, but I thought I was gong to make this as long as the four skeins of Cascade lasted, but after doing the short rows decided I really wanted it longer. But the short rows mean that the sweater doesn’t hang down and sag and point to the ground in the front! Problem solved!On the blue sweater, the medium version really wasn’t large enough for my broad shoulders, so the collar–which was designed to be doubled over–got pulled outwards. So I decided not to fold the collar to the inside and stitch and just left it as is because my neck gets cold in winter. For my oatmeal version, I made a size L and made sure that I had enough rows in the yoke that I didn’t have that problem in my Hug Sweater!
So that’s what I’ve been doing in the evenings while watching Midsomer Murders on Amazon Prime on my iPad. Next up: a pattern hack of Jeri Riggs’s stunning Lily of the Valley vest. I’m attempting to do my own thing and make a linen t-shirt with two columns of the Lily of the Valley motif up the center front, mimicking one of my favorite cloth shirt patterns that has a square neck and short sleeves. The Quince and Co. linen yarn isn’t fun to work with my arthritis, but everyone tells me I will LOVE the yarn once it is all done and washed. About 24 stitches to the inch, so it is slow going, but I’m about 6 inches up from the bottom. Hopefully it will be done by the time it is warm enough to WEAR it! And hopefully we’ll be able to go out!
So in January I was diagnosed with bursitis in my right elbow. Seemingly overnight a big bubble popped up on the outside of the elbow–like half a golf ball big. ( I hear my father saying Keep your elbows off the table! Remember that?) It didn’t really hurt, but if I leaned on the table it was annoying. For a long while I used an empty squeeze bottle (one I use for dyeing). I had first brought it up to support my wrists at the computer instead of buying an expensive do-dad for such purpose. I realized I could use the bottle to elevate my forearm so I could sit at the table as I always do, lean on my arms, but not aggravate the bubble (by the way, two months later it is pretty much finally gone). But the cat kept stealing the bottle as a toy.
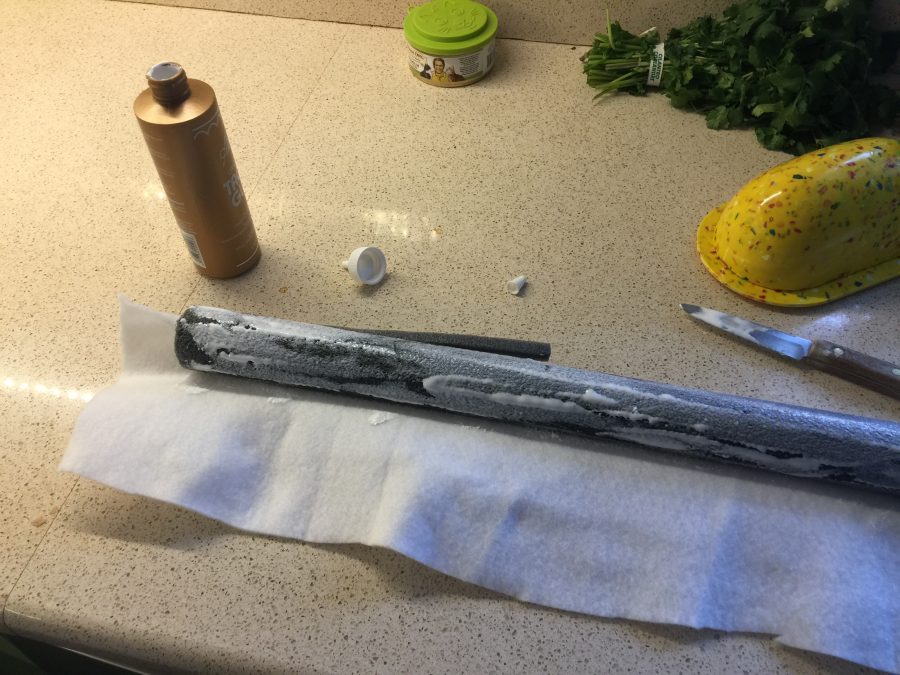
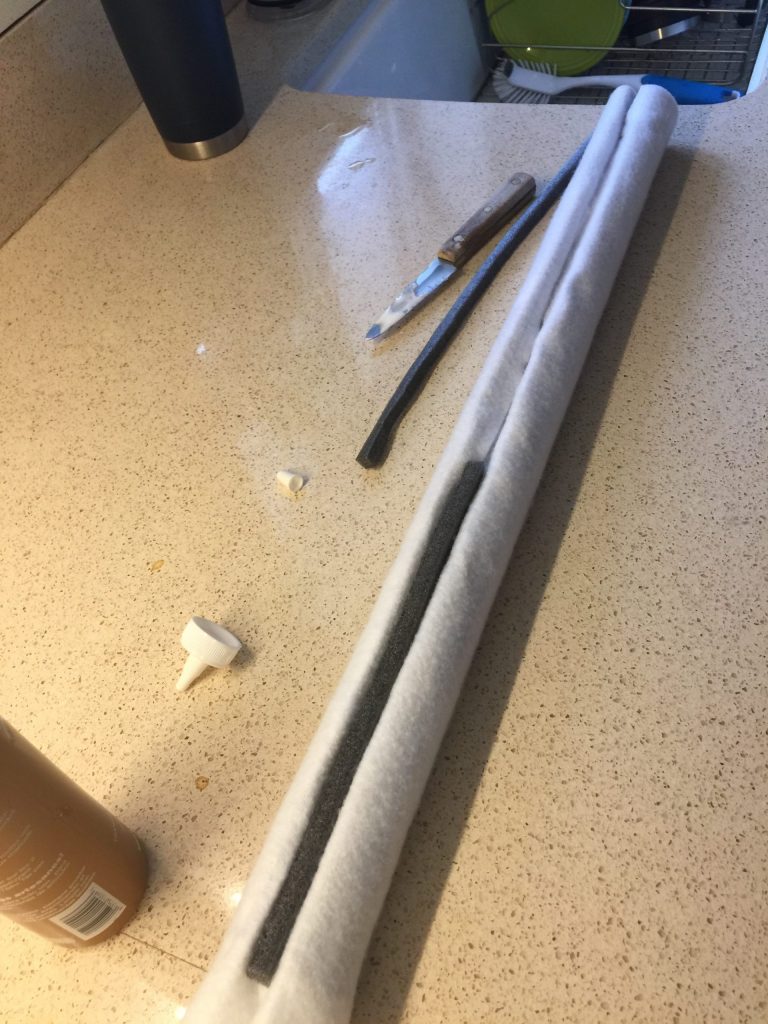
I remembered those wrist supports they sell and thought “I’ll bet I could make something.” So, I did. For a whopping $1.99 for a length of foam pipe insulation (I used the kind for 1/2″ diameter copper pipe, the one with the smallest hole in the center) and scraps of cloth, fusible and batting. Here’s what and how I did it, and what I’d do differently.
I measured how long I wanted the foam support to be, then cut a batting scrap (ya know those long skinny ones you can’t quite toss?) to fit around plus 1-1 1/2″ extra on the circumference, plus an extra 1 1/2″ on either end. Next, open up the sliced bit. Then, I used some, um…., “vintage” Aleene’s tacky glue, which meant I needed to spread it since it wouldn’t pour. Ahem.
I tucked the batting inside the slot, then filled in the hole in the center with remnants trimmed for extra pipe insulation. If I leaned on the tube, it sorta collapsed, so I just stuffed it. Do NOT glue this bit! You may opt to tuck things in.
THIS IS WHERE I’D DO IT DIFFERENT: Next time, I think I would fuse the fabric to the batting first rather than later because the outside isn’t quite as smooth as I could like.
I refused my fabric (cheerful!) and fused it to the roll. If I were to make another, I’d fuse it to the batting first. I added the batting because I thought trying to fuse directly to the foam would not be successful–melted foam? No thanks.
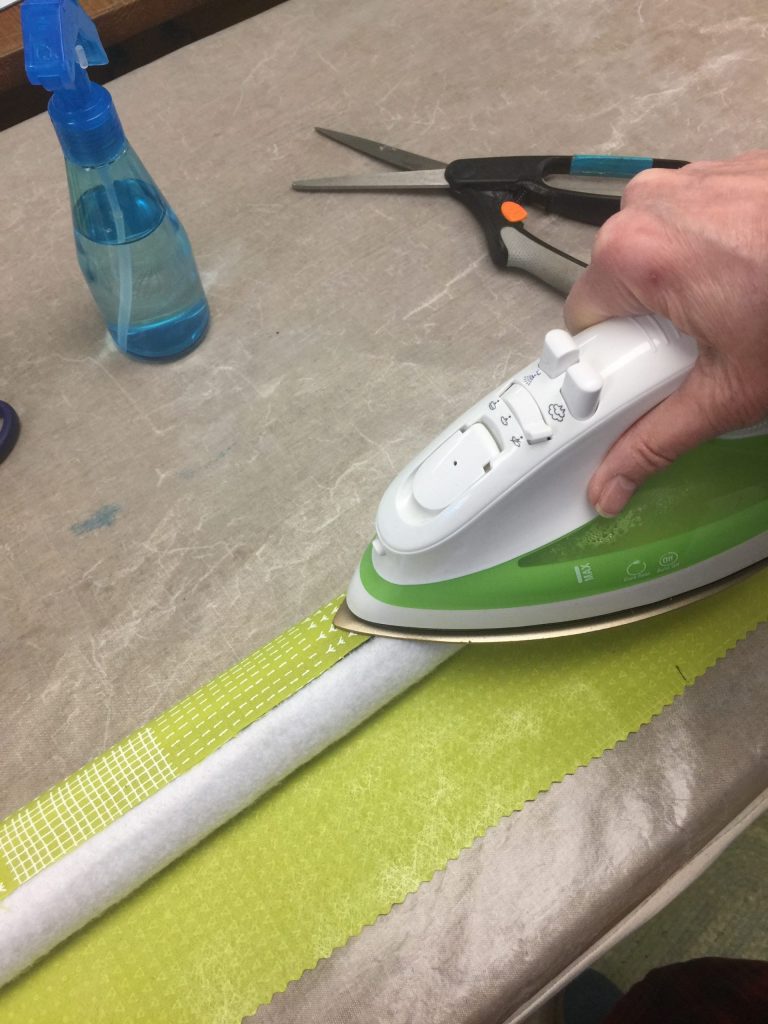
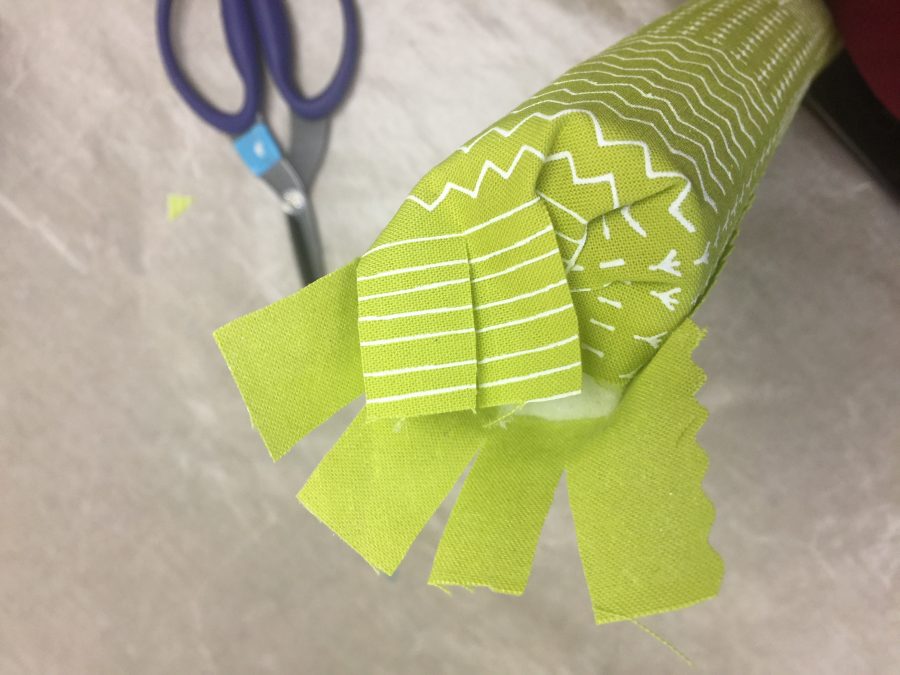
I used a wave/pinking blade to trim the exposed edge of the fabric, overlapped the edges and fused together. Next time (if there is one), I would tuck the ends into the slice, then glue it shut.
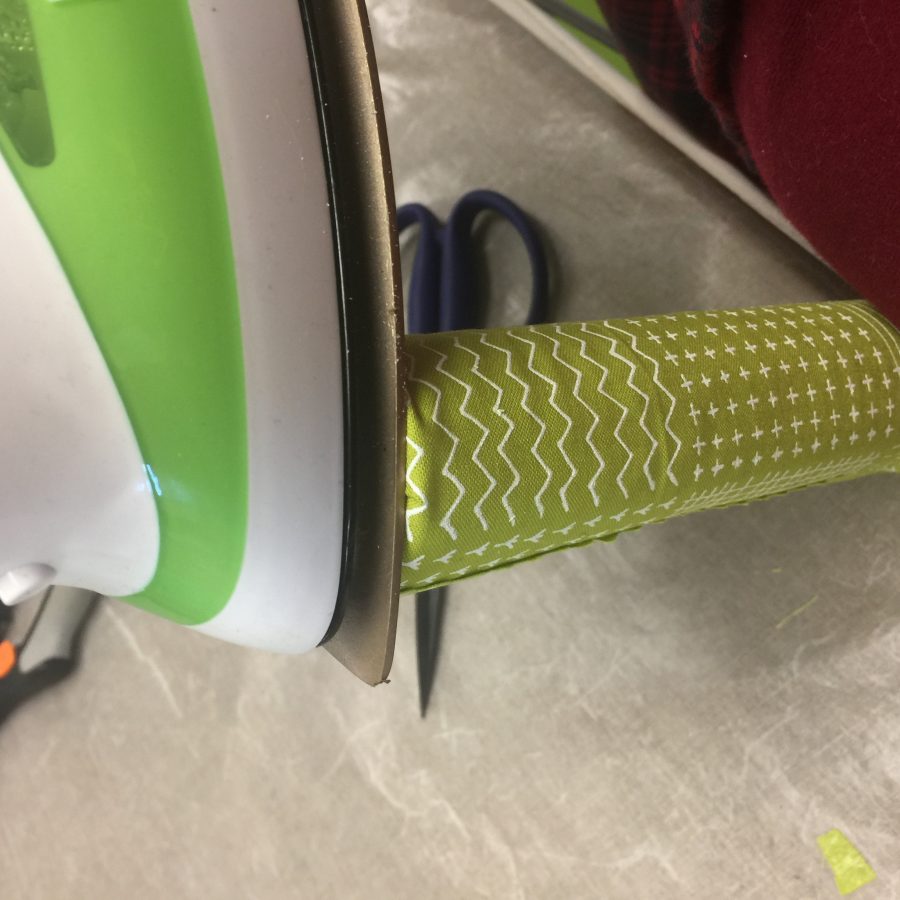
For the ends, I snipped the excess at the ends to 1/4″ away from the foam pipe. I worked my way around from the underneath edge to the overlap edge of the fabric, fusing as I went. By not cutting to the outside edge I got a neat fold that won’t ravel.
Just place your iron on the end and fuse as you work your way around. When it’s all down, hold the iron on the end for a bit extra to get it to really stick.
PS: Best fusible in the world: MISTYFUSE. Hands down. The Best!
And here’s my end.
Using the roll as a support for my forearms, which keeps my wrists straight and not bent (since the arthritis in the wrists acts up when bent).
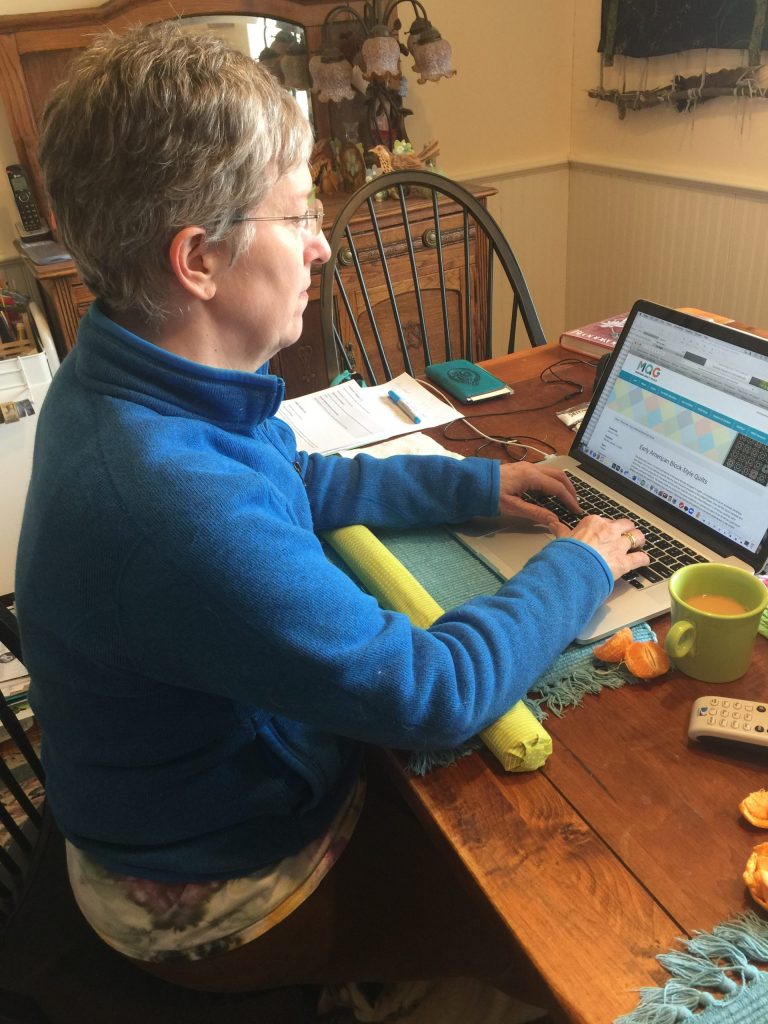
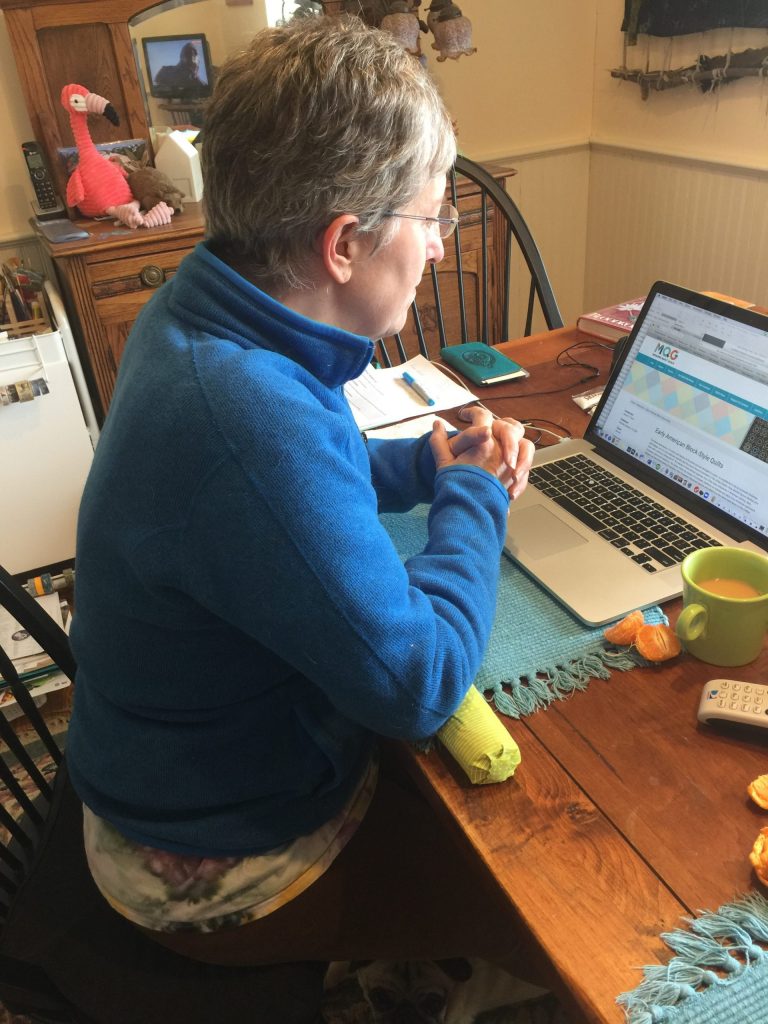
How I spend way too much of my life…at the laptop! Business and friends and internet happen!
Hope this mini tutorial will help you or someone you know. Thanks for reading!
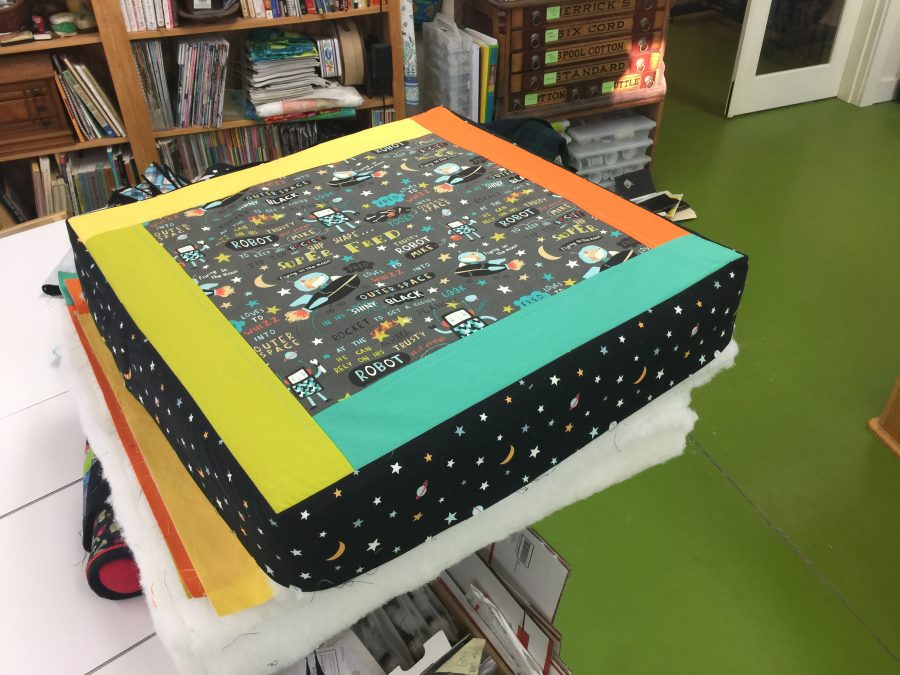
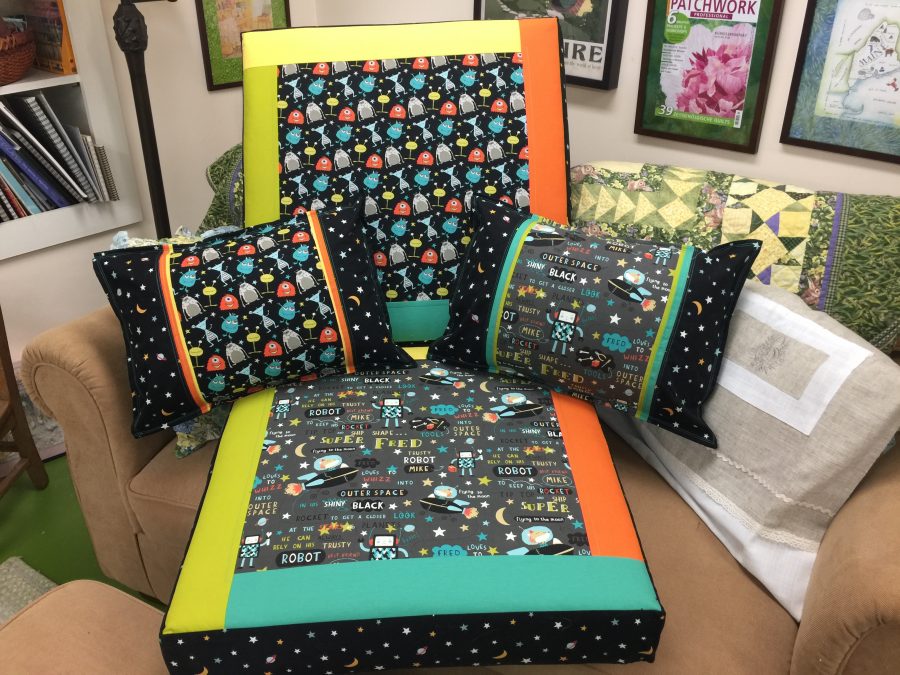
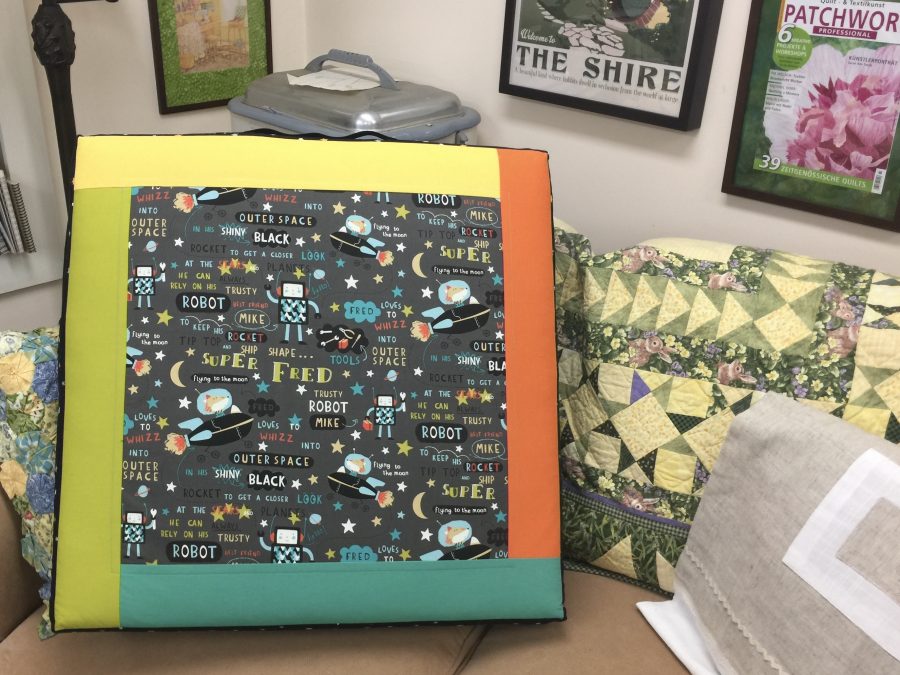
Today it’s time for part 2 of 2 in the “how to make cushions” tutorial! In this image, I’ve sewn the boxing strip–the bit on the edges/sides (black Galaxy fabric from Michael Miller Fabrics, Spring 2020) to one of the squares (top and bottom) to make sure I’ve got the fit right. Looks pretty good! The top on this one is the SuperFred fabric in gray (with this fun fox named Fred and a robot named Mike). Those glorious solids (SWOON) are part of the Cotton Couture collection. Colors are Acid (left), Yellow (top), Apricot (right), and Lilypad (bottom). Like I said, SWOON!
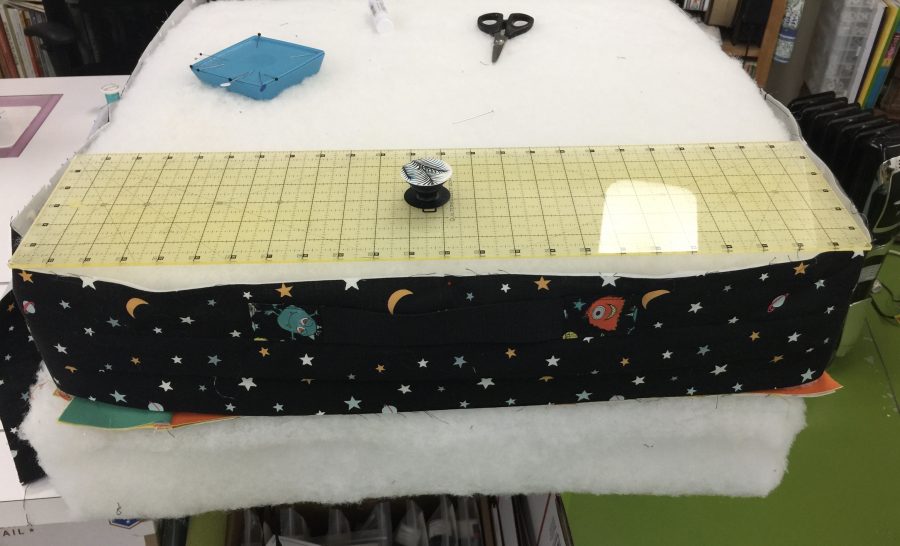
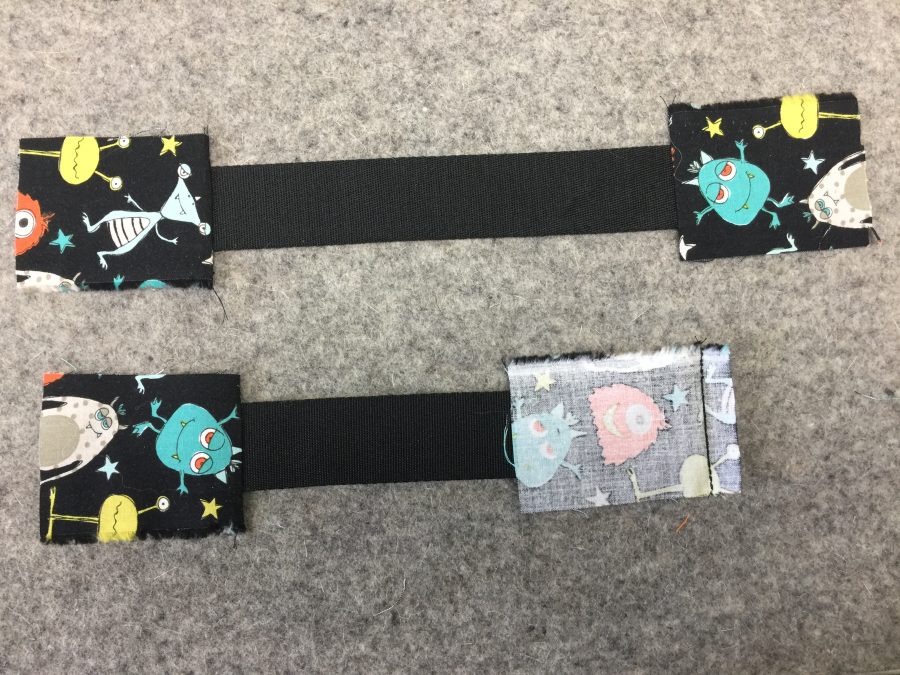
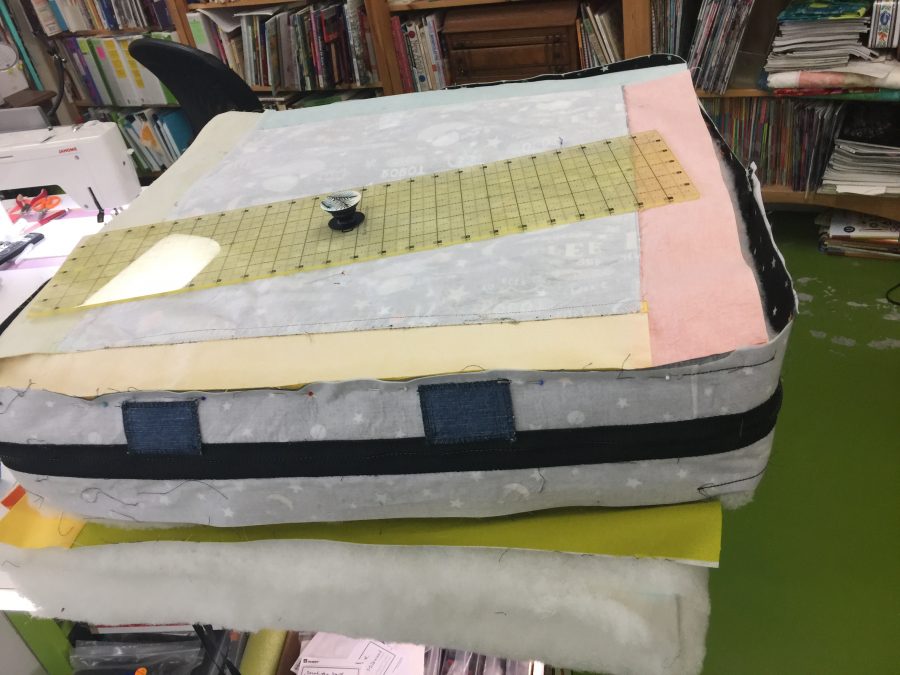
I shared this photo before, but didn’t point out the very hard to see black strapping handle which is in the center of the side facing us. If you look at the pop-socket on the ruler, come down to the cloth. Then look and you’ll see two Space Aliens, fussy cut from that fabric, at the ends.My dear DIL is a kindergarten teacher, and these cushions and pillows are headed to her classroom for wee people to flop upon and read. Or just flop upon! She’ll need to be able to move them about easily. As she is TINY, we need to make this easy (not a bear hug thing just to move a pillow). I cut some of the Space Pals fabric into rectangles, centering one of the Pals so it would show. Sew the rectangle to the end of some webbing. I could only find 1 1/2″ wide locally in rural Maine. It works but I think 1″ wide would be better if you can find it. Sew the rectangle to the end of the webbing, then fold and press the side edges in, turn under the remaining raw edge, and sew. I use–get ready for this–washable glue stick instead of pins. When doing your folding and pressing, use a swipe of glue. Presto. Stays put. When you fold things together into a nice little package, a little dab of glue will do ya! (Who else remembers Dippity Do?) Center the handle exactly over the zipper and sew. I put some squares of old denim on the inside to reinforce the fabric. See next photo.Next step: sew the boxing to one side. Start by finding the center of the zipper. Here, you can see those rectangles of denim (with overcast stitch to prevent raveling) I used to reinforce the handle which is on the right side of the fabric. Mark 12″ to the right and to the left of the zipper’s exact center. Then measure 24″ to mark the other corners on the boxing strip. I chose to put some reinforcing stitching (triple straight stitch–see below) at each corner–about an inch to either side of th marking pin. I sewed about 3/8″ from the edge. If your overall gusset/boxing length is a little off, you may need to remove the stitching for one of the zipper garages and adjust the overall circumference of the boxing strip/gusset so it is snug.
Put the boxing strip (now a loop) on the cushion inside out. It’s much easier to assemble and pin with the fabric held upright (and not floppy on the table)! Place the top fabric face down. If you use a print that is directional, as I did, I put the top of their heads on the zipper side of the cushion. Pin all the way around.
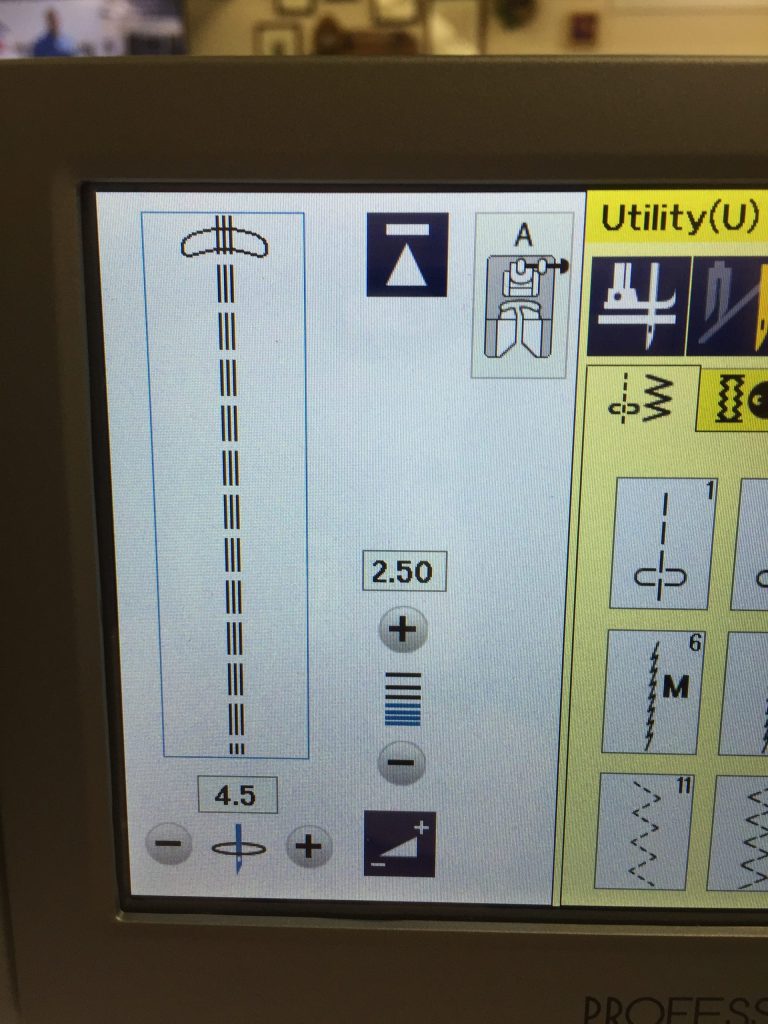
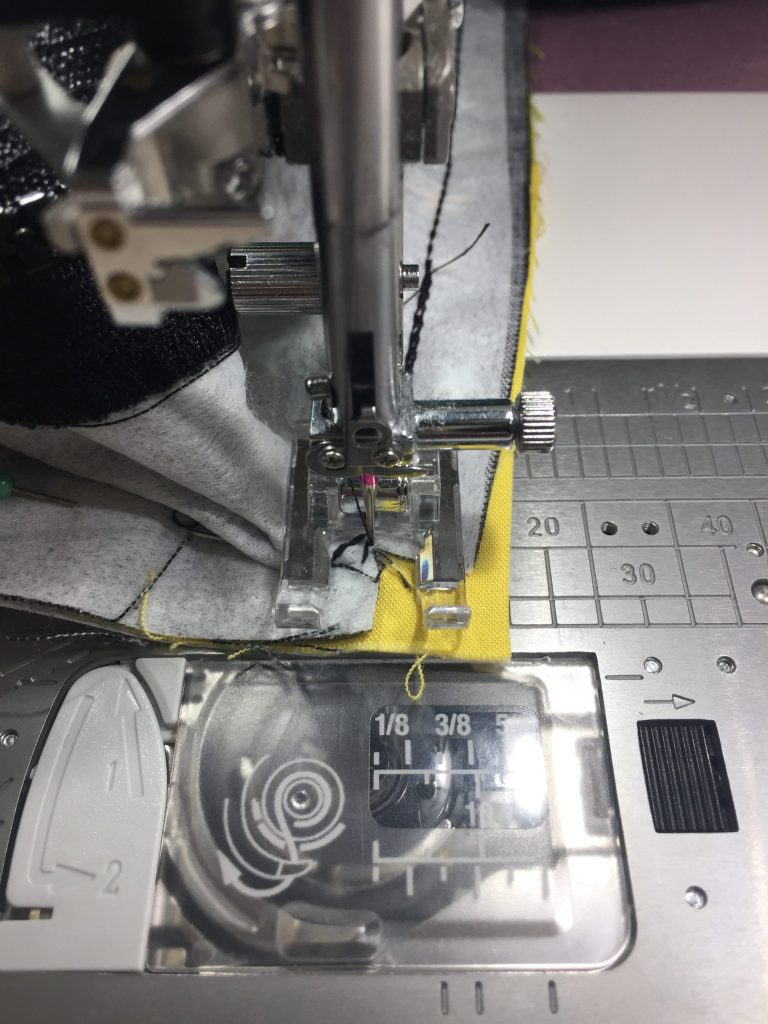
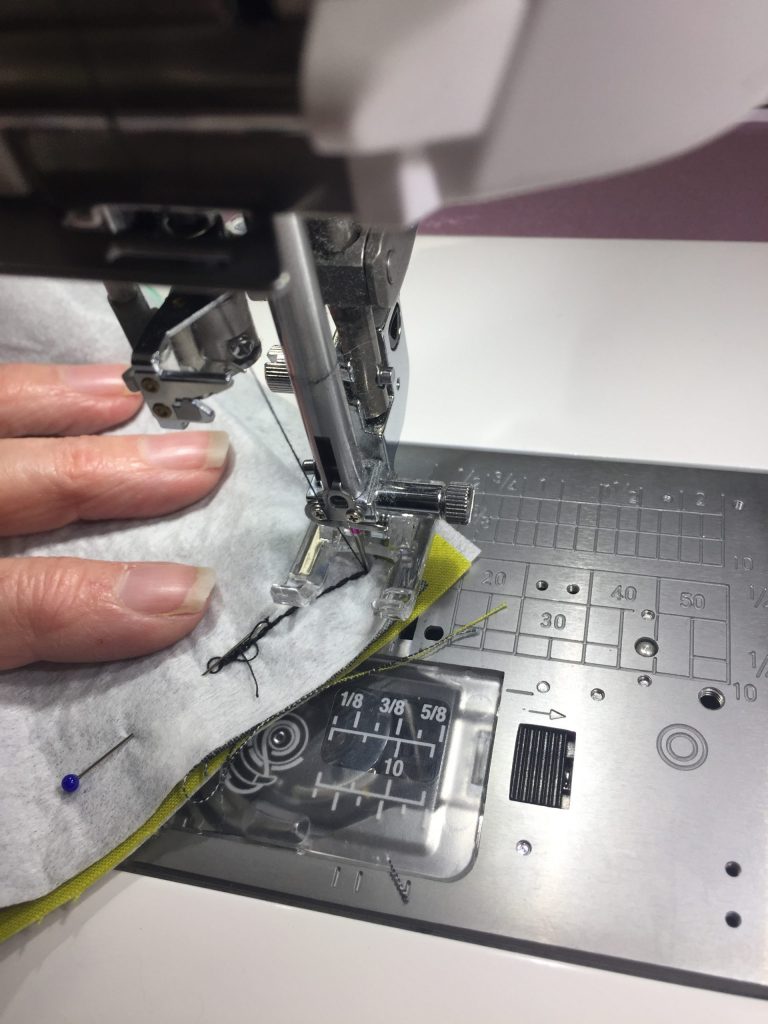
You’ll want to clip each corner about 3/8″–so to the reinforcing stitching / almost to the very seamline in each corner. I clip right before stitching. I like to use the triple-straight stitch when I need a strong seam with some flex. This is on my Janome M7 Continental, but almost all machines other than straight-stitch only have something similar. This is what I used to reinforce the corners AND sew the seams. Since the corners are clipped, this provides a little insurance against tears, especially in the cushion stuffing/wrestling stage. Or when anticipating wee people thumping their little bodies all over the place.With the top of the cushion on the bottom and the boxing/gusset on top, sew together with a 1/2″ seam. I sewed this with the triple straight stitch, again because I expect these cushions to see some enthusiastic use in a classroom. Sturdy is wise. Sew RIGHT UP to the CORNER and stop with the needle down. You can see some of the reinforcing stitching just to the left of the needle. You can also see that clipping has allowed the boxing strip to make a 90 degree turn at the corner, and that a bit of the boxing has folded over and is pushing into the next side to be stitched.With the needle still DOWN, lift the presser foot. Ease the boxing to the left to remove that little pushed bit you see in the photo above. Notice the reinforcing stitching that goes down to the pin. I will sew on or just a thread’s width to the left of that when I sew the seam. Make sure the raw edges are aligned–you’ll see a perfect little square of the fabric on the bottom as the boxing strip pivots around the corner/needle. Sew the next side. And here we are, corner turned, ready to roll. Or sew. Or have a something rewarding. Wine? Pina Colada? Nap? Chocolate? Anyway, Repeat until you have reached where you began!
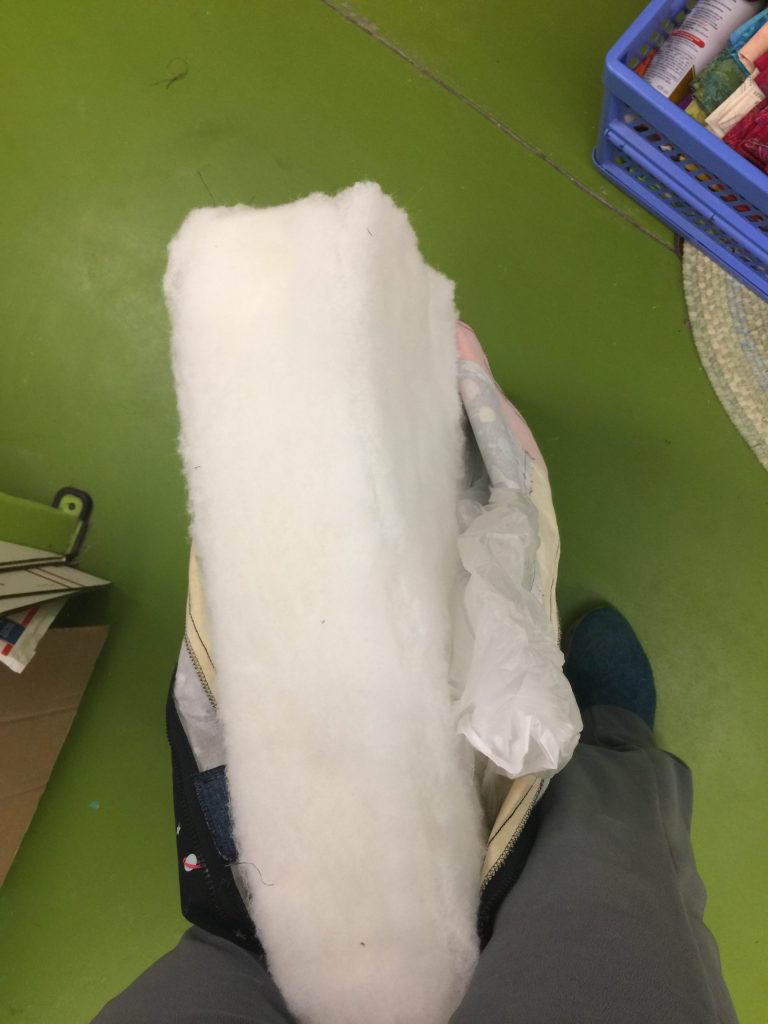
Then do it again with the other side. REMEMBER to leave the ZIPPER OPEN just enough to reach your arm inside. Makes turning the cushion right side out a whole lot easier. Ahem. Yeah, didn’t do that when I first began working for that interior designer. I was able to fiddle the zipper pull and get it open. Trust me, gap is better. OMG–almost done!!!!! Most furniture cushions are foam wrapped with dacron (outdoor cushions are the exception). There are different grades of foam. Softer ones are generally used for seat backs, firmer foam for seat cushions. There is even this miraculous “outdoor” flow-through foam–instead of being sponge-like and holding water, it drains out. The foam is kinda very firm, but think about it…no mildew! Anyway…back to this program. Upholsterers then use a spray glue to adhere the Dacron wrap (like quilt batting but fluffier, scratchier, cheaper I think, I had leftover, only partly mouse-munched in the shed). I had a vintage can of the spray upholsterers use but I think an artist’s spray glue **might maybe** work–check the label to see if it says anything about eating/eroding foam. And test. You can also just hand baste the edges. When using spray glue, I just spray the surface, pat the one huge, long and wide-enough-to-cover-the-edges Dacron in place and then trim it to the edges.
Next: Stuffing the cushion cover you just lovingly made. In the above photo, notice that I have used a dry cleaner bag (a big leaf bag works too) that I wrapped around the bottom of the cushion to facilitate wrestling it into the cushion cover. Do NOT put the cushion inside the bag–wrap plastic-something around the bottom. You need to be able to remove the plastic bag easily, and trying to tear a bag off the innards while stuffed inside the cover is not workable.By having zippers that come halfway around the sides of the cushion, you have made this part–stuffing–a whole LOT easier. Place the cushion inside like you are putting a pillow inside a pillowcase. Then place the cushion on the floor, using your legs to hold it upright. Smooth and pull the cushion up the sides. Pull the plastic out, then slide your arm inside and coax the seam allowances toward to boxing on all sides. Tuck the corners of the foam on the top edge under the zipper, and zip closed . See next photo. Here I’ve got the cushion on its side…see the zipper garage on the left? Use one hand to squish the foam/dacron down, and pull the zipper up over your hand (prevents getting dacron in the zipper). Slide your hand back, repeat. When you get to the corner, nudge the innards into the corners and continue until done. Park the zipper pull in the zipper garage on the other end. You may wish to fine tune where the seams are–straighten them, etc. Wearing quilting gloves or rubbery kitchen gloves gives your fingers a bit of grip and allows you to ease the fabric into perfect position.
DRUM ROLL PLEASE!!!!!!!
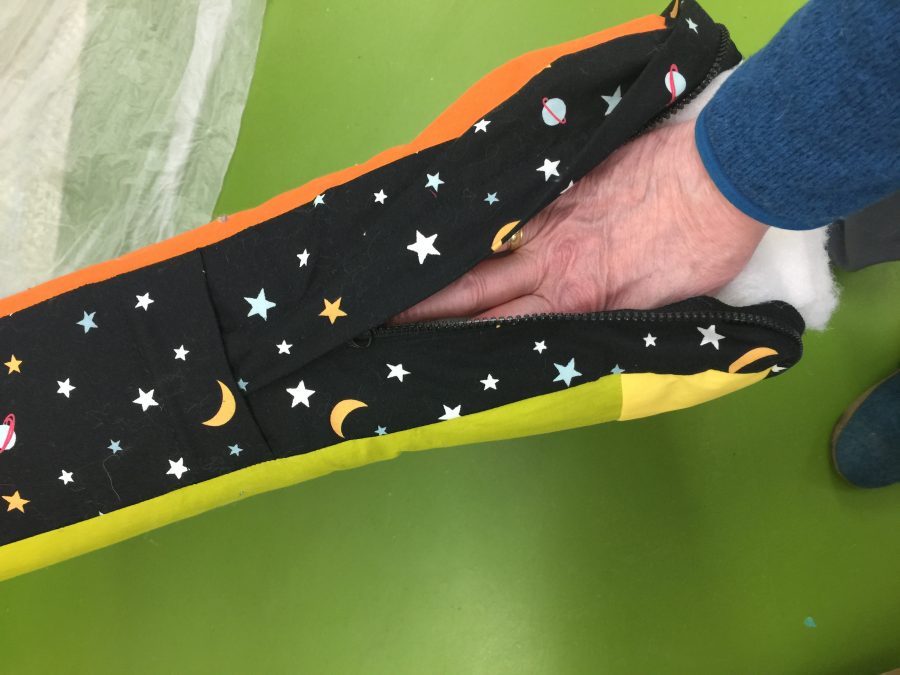
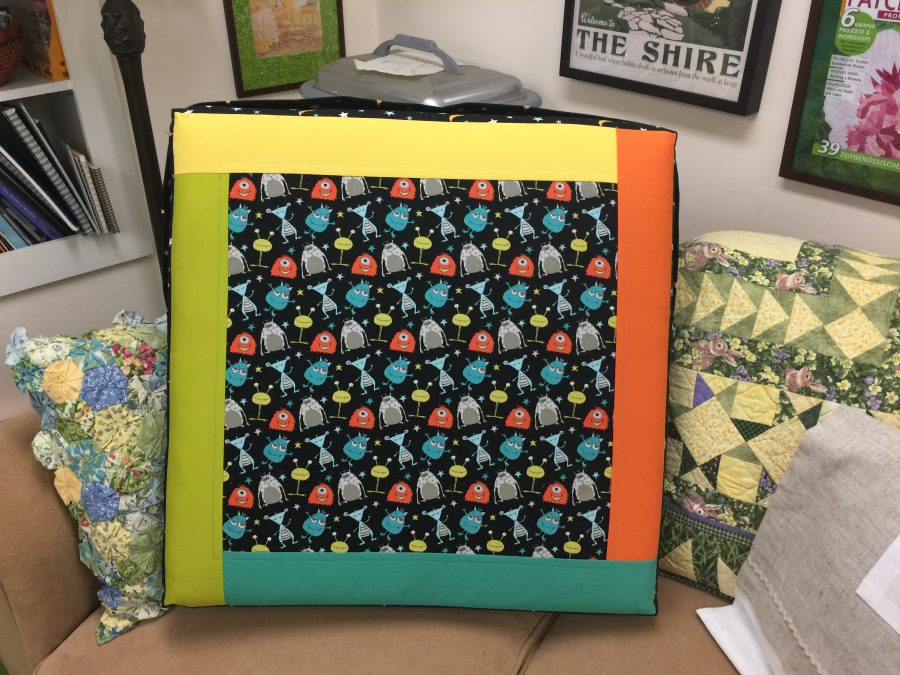
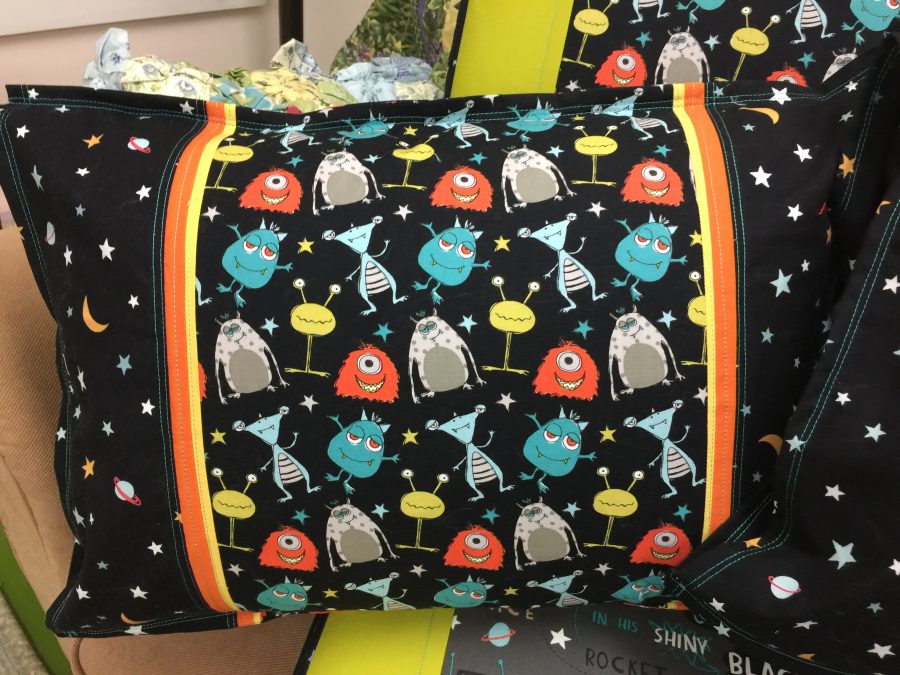
Ta DAAAAA! DONE! Celebrate! Feel a bit chuffed (great Aussie word meaning proud or pleased).The Space Pals in Gray side of the cushion. I put a different feature print on each side, so the kids can have Super Fred up on both cushions, or Space Aliens (next image), or one of each. Notice on the top of this one that black ripple? That’s the carry handle so the kids and DIL can tidy up! AND these cushions stand up on their edges, better for stashing in a crowded classroom. And yes, that’s my one and only (so far, I hope for another) magazine cover behind the love seat..my pink peony on Germany’s Patchwork magazine.Are those Space Pals in Black not the cutest things ever? I think some pillows made in their image need to happen…Close up of the Space Pals toss pillow. I got my pillow inserts from (Sigh…I go there sometimes…no one else within an hour’s drive has some of what they carry) WalMart for cheap. And Super Fred in gray. Adorable. Although I think we need some gender equality…It’s gonna be Super Freddie, short for Frederica! for me.
Thanks for sticking with me this long. I know these have been long and detailed posts, but sometimes when you’re essentially teaching a day-long workshop in two blogposts, that happens! I hope you’ve learned something and enjoyed the visit. THANK YOU!