Sometimes it is the little things, that turn out to be not-so-little, that make the difference in life. In my life, watching the bubbles form and the water boil gives me joy…what can I say, I live a rural life LOL! Another one is tools that make my sewing life easier like the Janome M7’s HP Presser Foot and throat plate, which are available on select other Janome models. It also turns out, you can teach someone who has been sewing for about 57 years new tricks!
Yes, I like to watch water boil! No, I am not chanting “bubble, bubble, toil and trouble” over the cauldron! (chortle…..)
I have never been precise at piecing like my friends Krispi Staude on San Juan Island or Joan Herrick, Tori Manzi and Karen Miller here in Maine. I try, but I just never quite get it perfect. And I am Type A enough that it Really Bugs Me. Either go totally improv OR Get It Right. A couple things introduced into my life recently have helped a lot. The Janome M7 Continental (I’m a Janome Artisan, get to borrow this machine for extended periods for free, but I’d say all this good stuff if I paid full MSRP!) is one of them. I’ll share another next week or so. I’m also trying to improve my skills and learn to shoot and edit videos, so I’m practicing on these short clips.
Here I’m showing and explaining Janome’s HP system, which I think must mean Heavenly Perfection. I need to get better at holding the phone and zooming, but with each video I improve. Lookit the titles and comments I was able to add! AND I did TWO transitions! Maybe by summer I’ll be adept enough to consider online classes.
Anyway, the automatic / magnetic throat plate is one of those “little” things that make my life easier. So yeah, it’s the not-so-little things that make life good! Thank you, Janome! Here’s the video…if for any reason it cuts out part way through, click on it to go watch on my YouTube Channel.
The HP foot can be used for piecing, garment construction and quilting. I’ve just finished a somewhat “quilt Modern” top–about 34″ square–that I’ll share over the next couple of months. Next week, I’ll share a video with me actually piecing! Who me? FUN… a total and much needed mental break in the Time of Covid-19!
I’ll be teaching at the Mancuso quilt shows later this year and next! They asked teachers to do a brief 1-minute video. To no one’s surprise, my first attempt ran long…at least it was only 3 minutes and not 10 LOL! But I decided to upload the longer version here. I hope you’ll enjoy this peek at what I’ve been doing and maybe take a workshop with me at one of the Mancuso shows–I’ll be in Massachusetts in August of 2020–or at International Quilt Festival Houston in Fall.
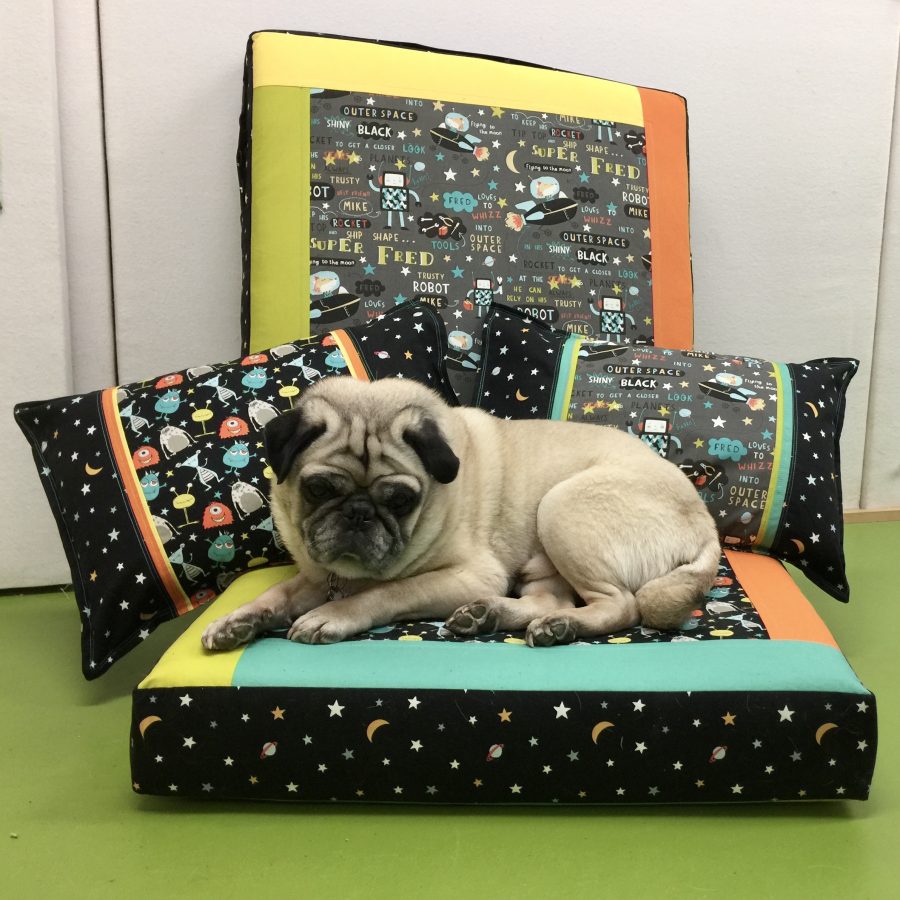
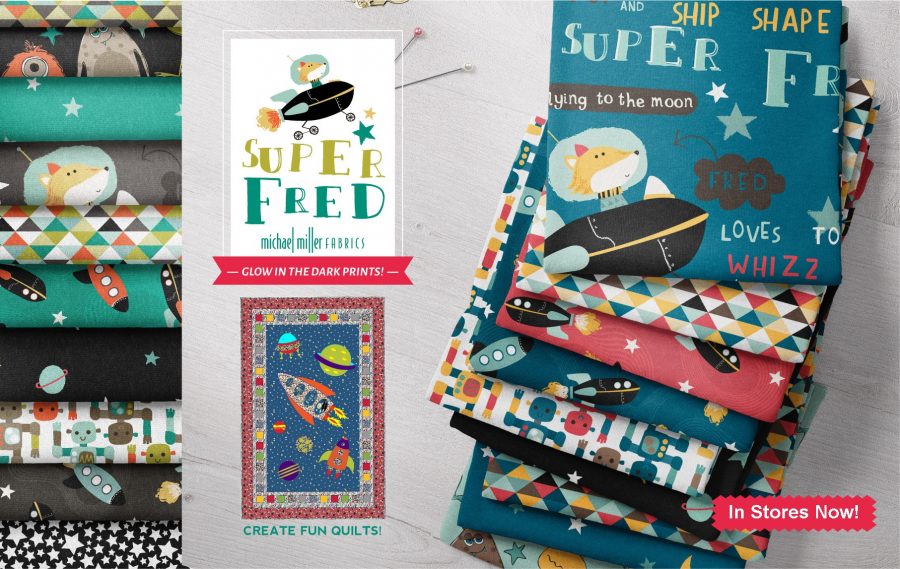
Today’s projects are floor cushions and toss pillows from Michael Miller’s adorable new fabric line, SuperFred and Space Pals. As soon as I saw them I knew I’d love to make some floor cushions for my daughter-in-law’s Kindergarten classroom! You can find part 2 here as of March 12, 2020.
Pigwidgeon was asleep in front of the wood stove but allowed me to move him to another comfy spot to be my model. I am a Michael Miller 2020 Brand Ambassador for 2020, for which this is a monthly project. I’m also a Janome Artisan since 2003.
With the help of my trusty (just try to pry it out of my cold dead hands! I’m taking it with me) Janome M7 Continental, and some experience having done custom home dec work in a previous life, sewing these cushions was easy, and I’d like to share a free pattern for Everyone’s a Kid Floor Cushions and Toss Pillows with you and show you just how easy!
Super Fred! Ask for the collection at your local shop!
Fabric requirements are at the bottom of this post and on the free pattern (link in the previous paragraph). The pattern also has all the other “stuff” you’ll need (zipper, interfacing, and so on) and ridiculously detailed instructions. I will focus on bigger pictures for the “how-to” things in this and my next post even though there are plenty of photos in the pattern.
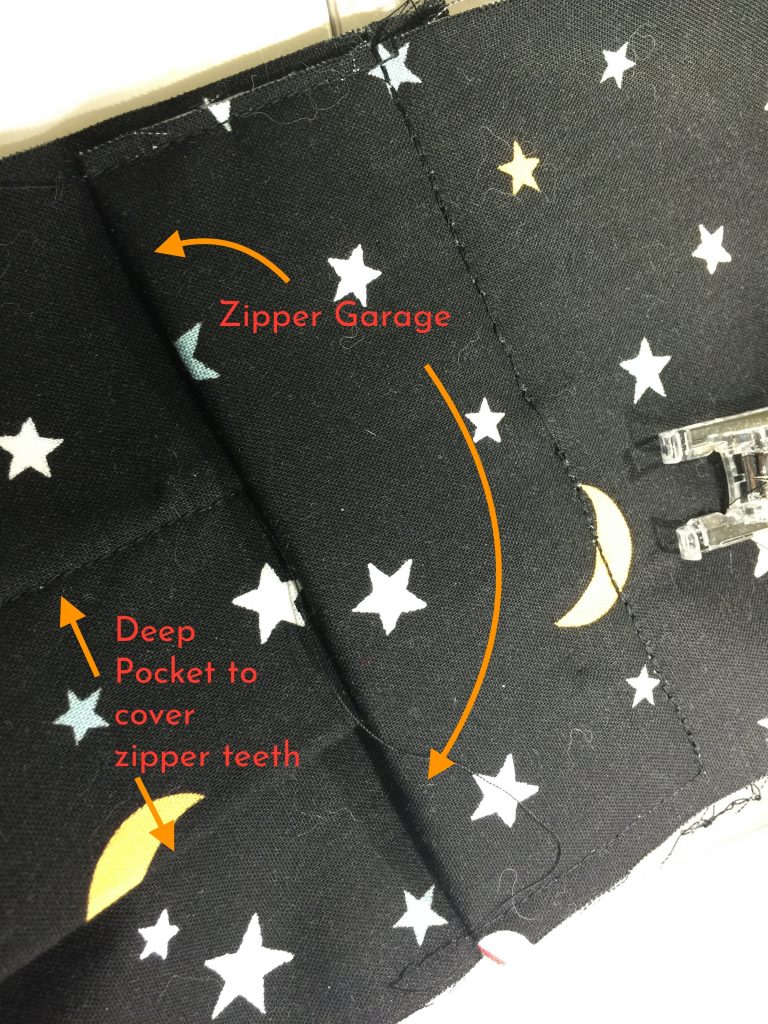
My Deep-Pocket Placket
So many home dec books and pieces of furniture are made with skimpy zipper plackets that gap open and show the zipper teeth–boo hiss! The designer for whom I worked eons ago had *very* high-end clients, so I developed what I think is a much nicer zipper method. Yes, it uses a couple more inches of fabric, but the zipper is fully concealed, doesn’t gap, and even has a little “garage” at the end to hide the zipper pull. I have leftover (miles of leftover) upholstery zipper tape and pulls from doing custom home dec work, but you can order #5 weight zippers or use heavy duty zippers available at big box stores.
If you’re going to make it at home, make it better than stuff you buy!
The pattern has exact cutting dimensions for the finished zipper gusset (the section of the boxing/sides of a cushion that has the zipper), but honestly I usually cut my strips about an inch wide than I think I’ll need. This gives me some fudging room to get the zipper centered. Once the zipper is sewn in, then I trim it to the desired finished measurements and complete making the gusset.
For this project, I knew the cushions would get a LOT of wear and tear, so I decided to reinforce all of the quilting-weight-cotton fabric with mid-weight fusible interfacing. Then I began assembling the components starting with the zipper. Of course, I was so excited to get started that the interfacing isn’t (yet) on the fabric shown below….I fixed that!
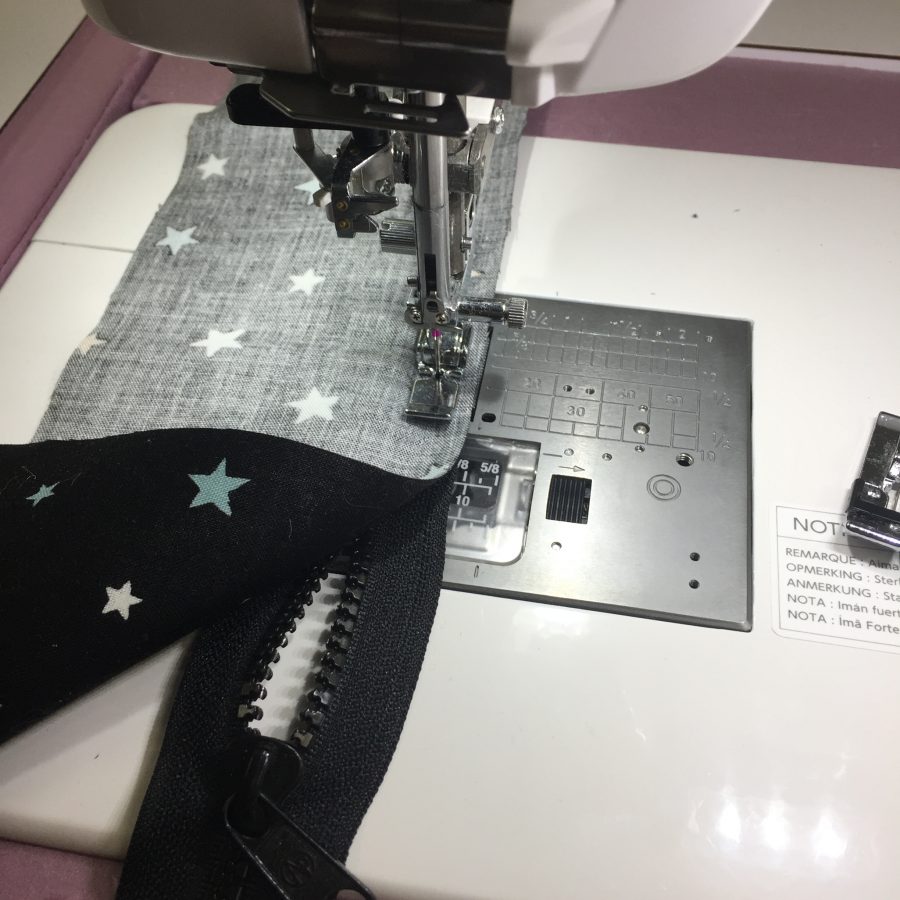
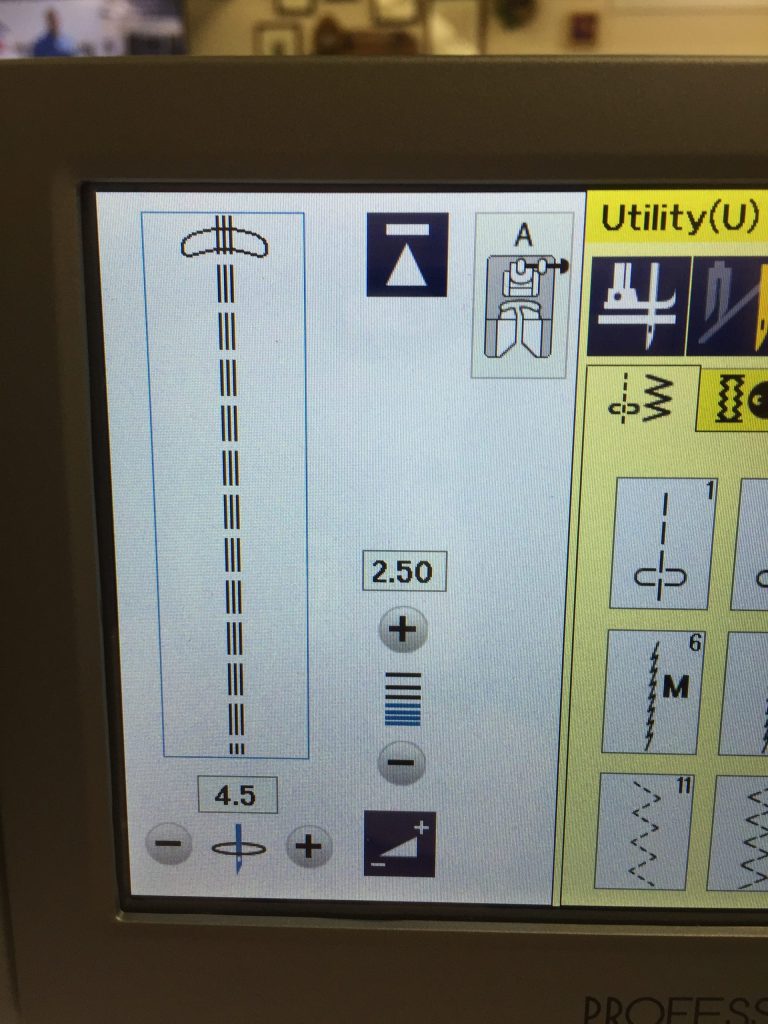
Attach the bottom part of the zipper gusset with the zipper foot. I set the foot so the left edge is next to the zipper teeth; this helps me sew a consistent distance. I set the needle to the center of the foot at first, but decided after checking that was too far away, so see the needle position in the next photo. Be careful not to move the needle to where it will hit the foot. Hand-walk the needle to test position!Here’s I’ve adjusted the needle position to use the left opening, but moved to the right–again, hand-walk after changing needle position to make sure you aren’t going to hit the zipper foot itself. I use the fingers of my right hand to squish the fabric down so I can see and feel where the teeth are.This photo shows the second pass along the zipper, this time with the overcast foot. This is similar to using a serger to clean-finish the edges and it reinforces the stitching. On the M7, it is stitch 15, but there are several choices for an overcast edge stitch. Use something similar on your machine.
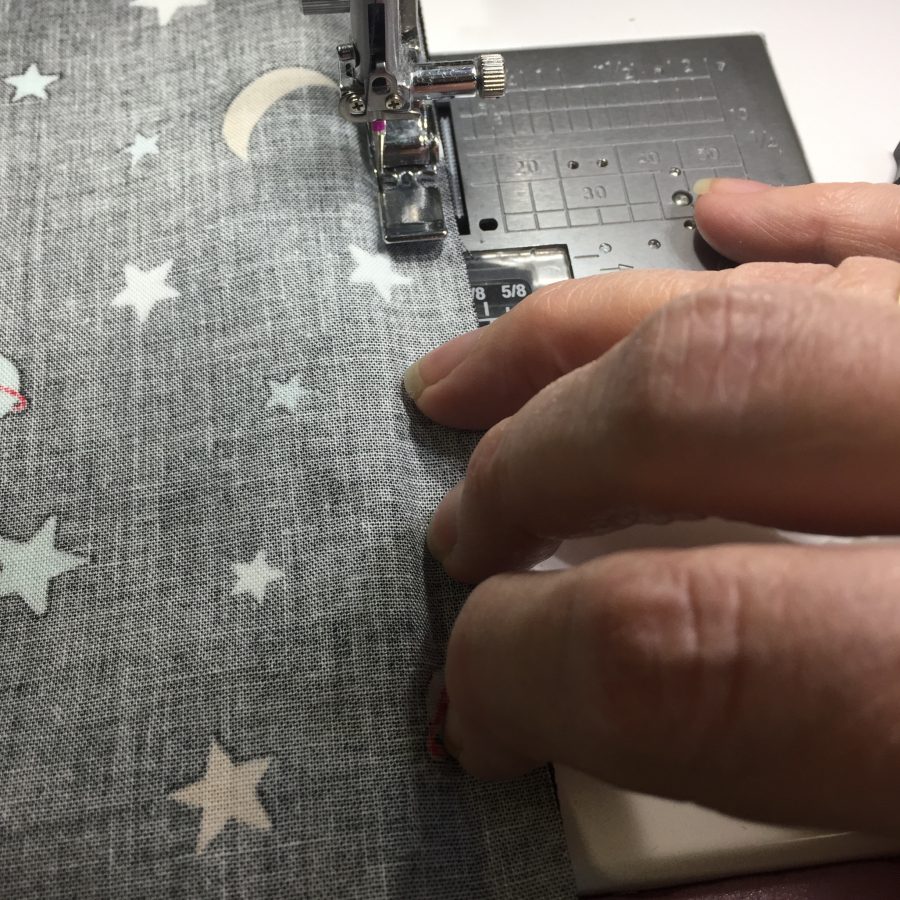
The video below shows me using the Janome M7’s “M” foot. Most machines have something similar. The three little wires help hold the fabric flat, the blade keeps the stitch perfectly positioned on the edge of the seam so you get a good-looking, functional, and non-puckered stitch.
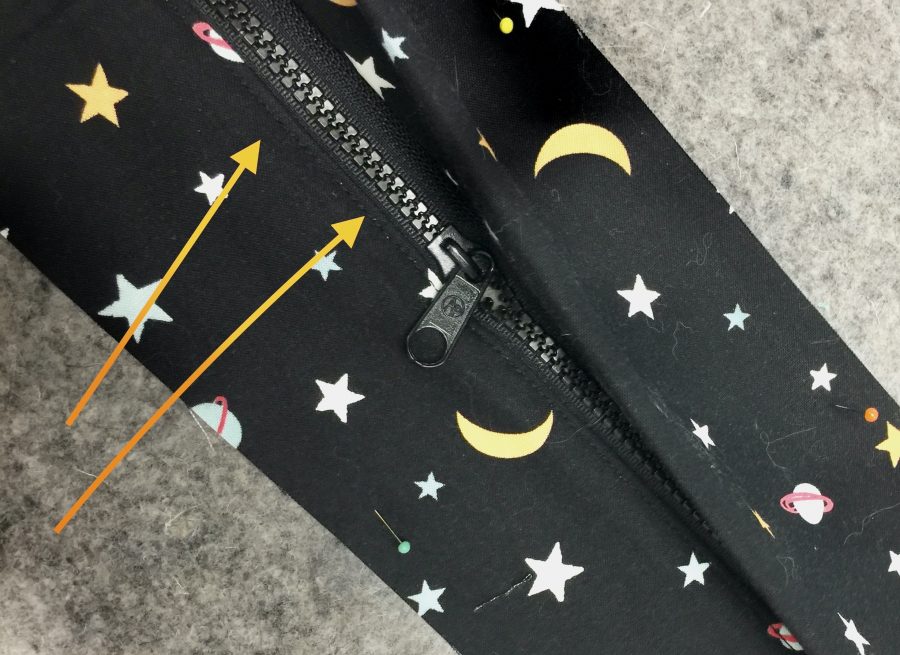
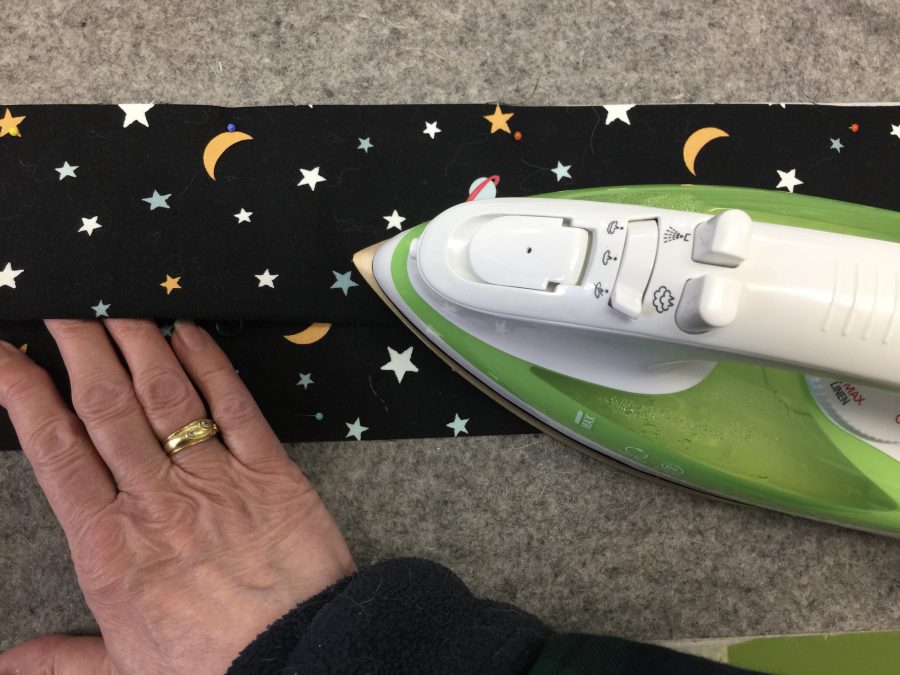
Once the lower fabric strip is sewn and edge-stitched (orange arrows point to edge stitching…hard to see black on black!), I press it away from the zipper teeth and edge stitch. This prevents the fabric from trying to roll up toward the zipper teeth and further reinforces the seam since there is a fair amount of pressure once the cushions is stuffed and being used. This photo also shows that I have attached the upper strip. See photos below for more on how to create a perfectly even and deep placket.
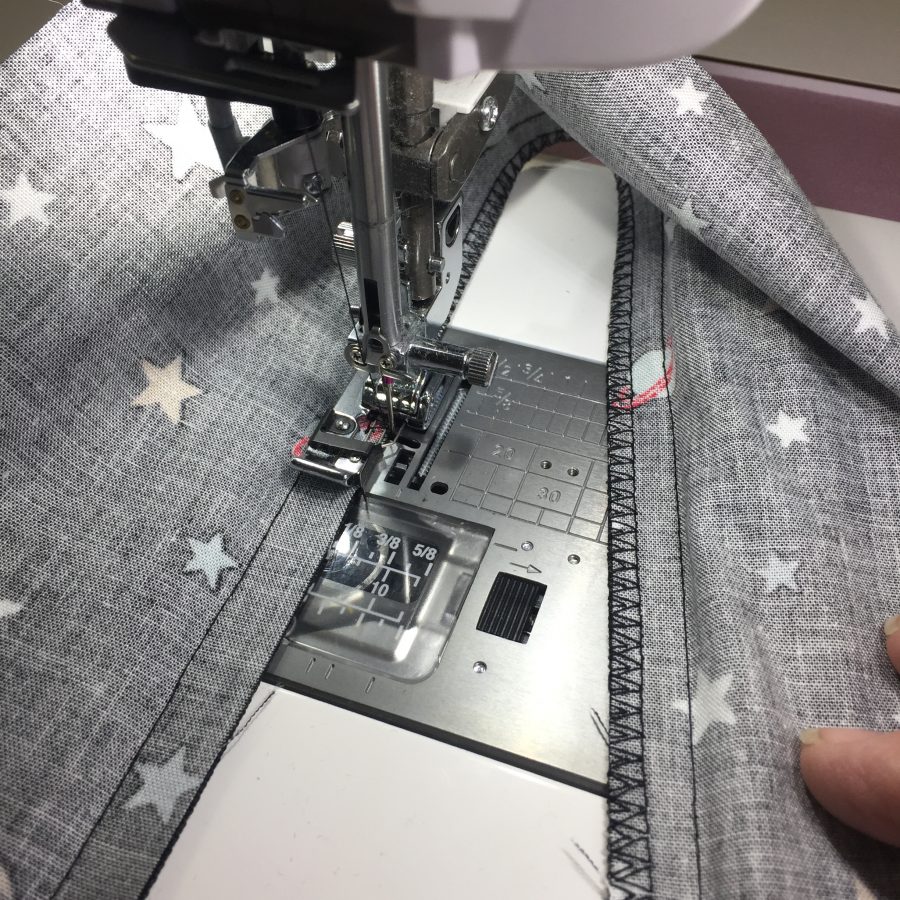
Next, sew the wider upper side of the zipper gusset to the zipper tape using the edge-stitch foot only–you don’t need to do the straight seam close to the teeth as you did with the lower side of the gusset.
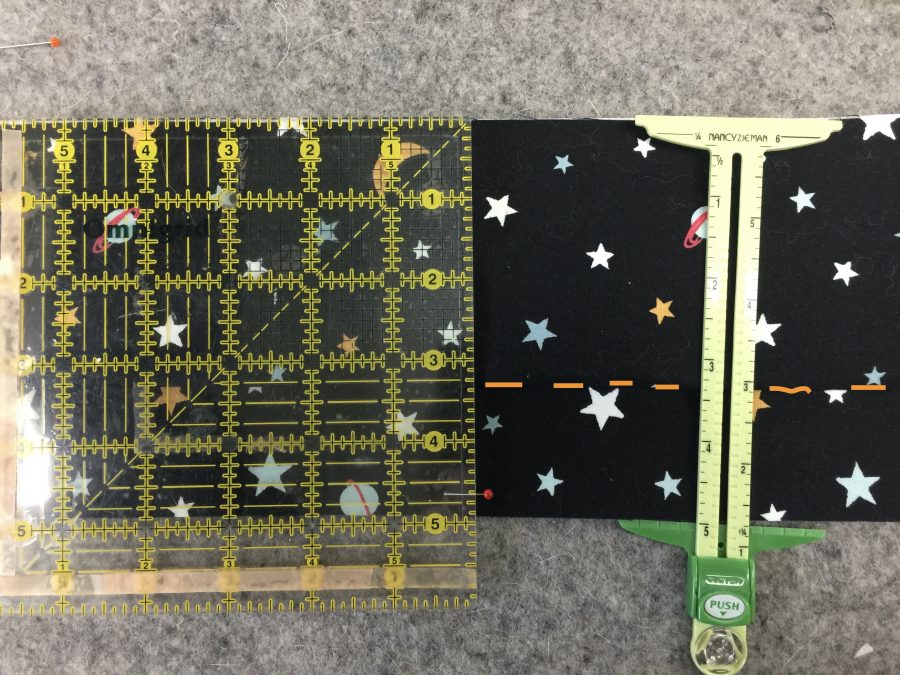
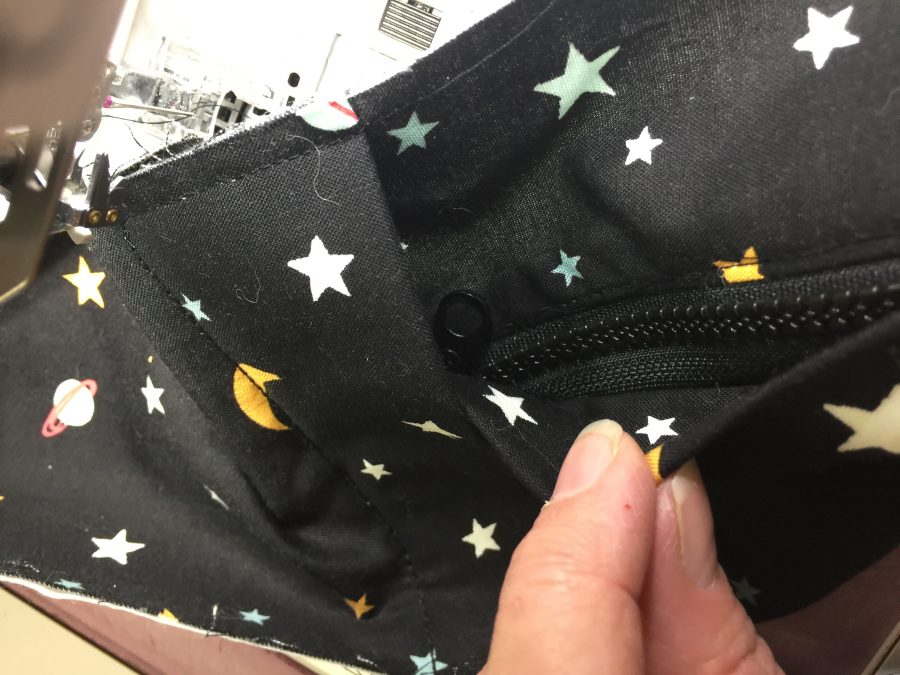
This photo shows TWO zipper gussets. The one on top is as-sewn so you see zipper-interfaced lower edge, upper edge. The lower zipper gusset is the one I’m working on. Pin the lower edge of the zipper to your ironing board, making sure it is perfectly straight–long ruler helps. Pin the top edge of your zipper gusset to be 5″ away from the lower edge. This will form a placket to cover the zipper teeth. I found the green Clover hem gauge to be the best tool because the dark green bit snugs up against the raw lower edge and the “wings” are wider making it easier to keep it aligned properly (tilted ever so slightly in this photo), but a small quilting ruler also works to measure width. I highlighted the edge of the placket with orange in Photoshop because you can’t really see the fold of the black fabric!Press the placket. Then, pin the placket along the folded edge (out of the way of sewing in the next step). Turn the whole shebang over and stitch about 1/8″ from the edge of the zipper tape. This secures the upper side of the zipper. Notice the pinheads holding the placket in place–so glad I got that ginormous wool press thing-a-ma-doo-dad which makes this easy-peasy.
Your next step is to attach the rest of the boxing a.k.a. sides a.k.a. gusset–the fabric that goes around the edge of the cushion. First, use the overcast foot to sew the ends together. BE CAREFUL to NOT stitch through the ZIPPER TEETH! Just lift your presser foot and move over the clunky zipper teeth before finishing that seam. Repeat on the other side.
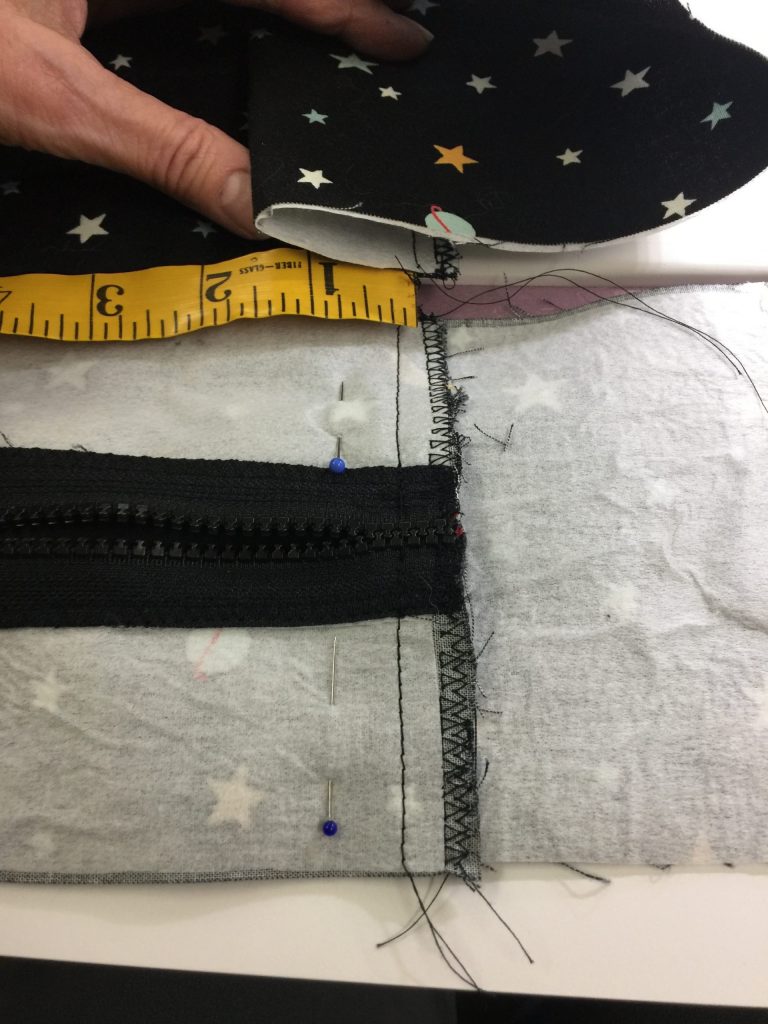
This image shows the seam, edge-stitching, and forming and pinning the “zipper garage”–the little pocket that hides the zipper pull.
Make the first of the little zipper garage / pockets at the zipper ends. You really only need one at the closed end, but I like the cushions to be symmetrical (about the only time I love symmetry in my work!) so I do both ends the same way. In the photo above, you can see that I have made a pocket about 1 1/2″ deep by making a Z-fold (or S- depending on which side you look at). Pin in place (lower part of photo above) and then stitch a straight line about 1/2″ from the raw edges.
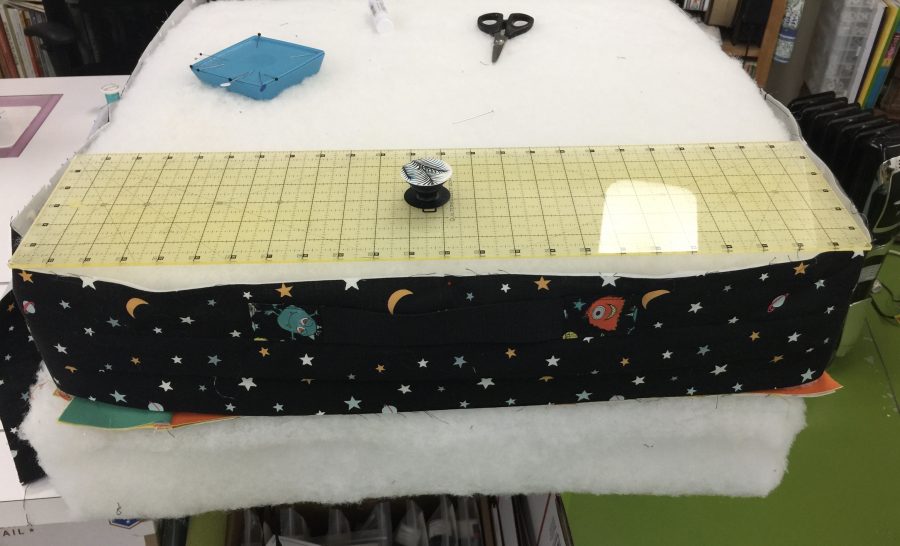
At this point, before sewing the second zipper garage, I place the gusset on the dacron-wrapped foam cushion for a test fit. You want it QUITE snug–fabric is flexible and you don’t want it looking stretched out and worn! Center the zipper on the one side, pinning the boxing/gusset onto the cushion from the sewn garage all the way around to the other side. Your excess fabric will create the second zipper-pull garage. I like to use the triple-straight stitch, a basic stitch that is found on almost all machines other than straight-stitch only. The photo waaaaay back at the top and this one show the stitched zipper garage. You might notice that I have also basted the sides of the garage within the seam allowance–it makes sewing the boxing /gusset to the top and bottom easier.
PHEW…that’s Zipper Wisdom according to Sarah. We are now blessedly done with the zipper–I swear it takes longer to explain it in writing than actually do it…well except for the fussing to make sure it is absolutely perfectly straight and nice! In my next post I’ll show constructing and stuffing the floor cushions. And, there are TONS of photos in the pattern, too. One more time, here’s the PDF for the Everyone’s a Kid Floor Cushions and Toss Pillows. Check back in 3 days for Part 2!
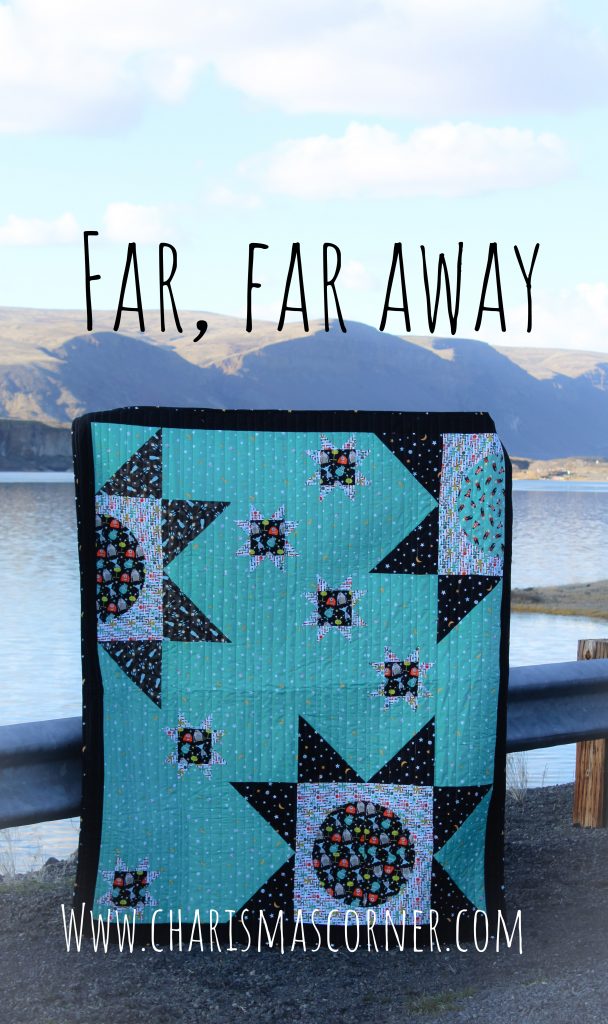
And one last minute goodie–my fellow Brand Ambassador Charisma Horton has made this adorable quilt out of different color ways of Super Fred–what a great combination for a kiddo: my cushions and pillows and her quilt! Check it out here on her blog, or the Far, Far Away pattern in her Etsy shop, in both download or paper versions.
Both print and digital versions of Far, Far Away are available in Charisma’s Corner Etsy shop, here. Go to page 3 of the Etsy shop and scroll down to find the patterns.
Fabric requirements for two 24” square floor pillows and two 14×20” toss pillows:
Preshrink all fabrics!
NOTE: Yardage is to make two floor and two toss pillows. Additional materials (zippers, foam and so on) as well as cutting and construction details in the free PDF show measurements and how to make each pillow.
Available now–ask your local shop to order it
Focus Fabric 1: Space Pals Black 3/4 yard (will yield two 19” center squares)
Focus Fabric 2: SuperFred Grey 3/4 yard (will yield two 19” center squares)
Solids:
Yellow 1/2 yard
Apricot 1/2 yard
Acid 1/2 yard
Lilypad 1/2 yard
OPTION: you can use the same fabric for all of the sides if you prefer
Part of every new year should be learning new things…and I’m starting with the Accuquilt GO!
As part of the Michael Miller 2020 Brand Ambassador program, we received the Ready. Set. GO! Ultimate Fabric Cutting System from Accuquilt. It includes an AccuquiltGO! plus the 8″ Qube (a set of dies to cut shapes often used in piecing 8″ blocks) and a ginormous die to cut my own 2 1/2″ strips. I’ve never seen one of these used in person, let alone done it myself. They are supposed to be lots faster than traditional rotary cutting and more accurate to boot. That makes two things where I need improvement–grin!
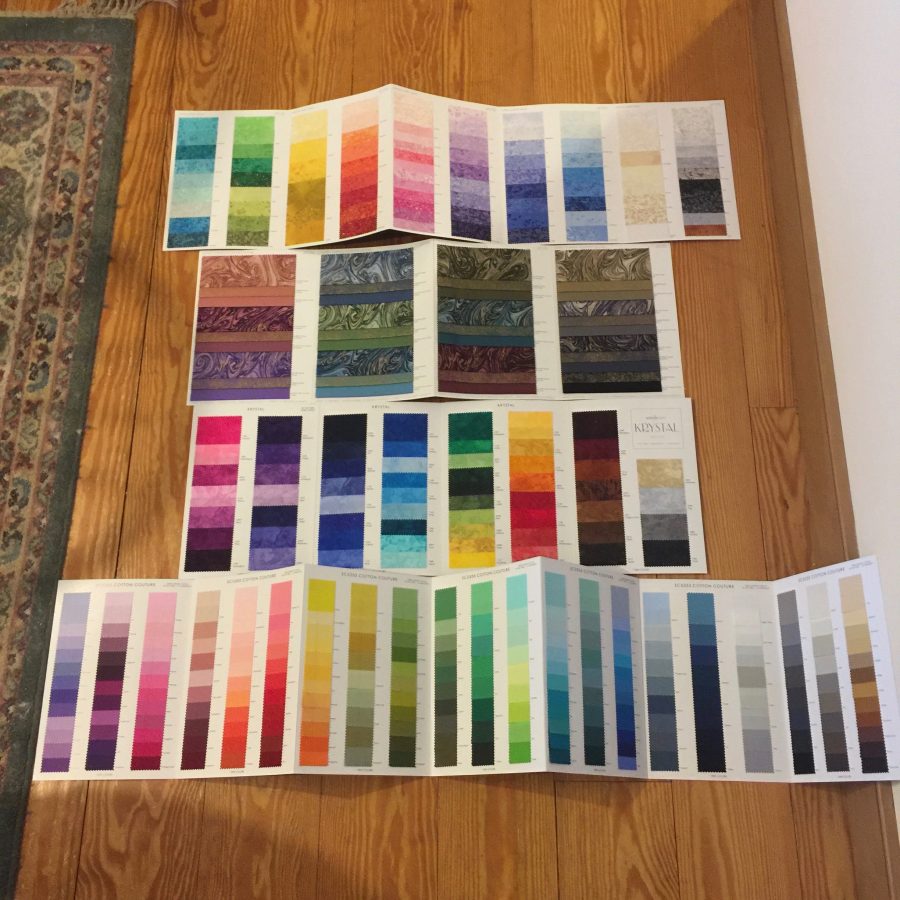
Lookit those amazing colors…don’t you want to dive in face first?
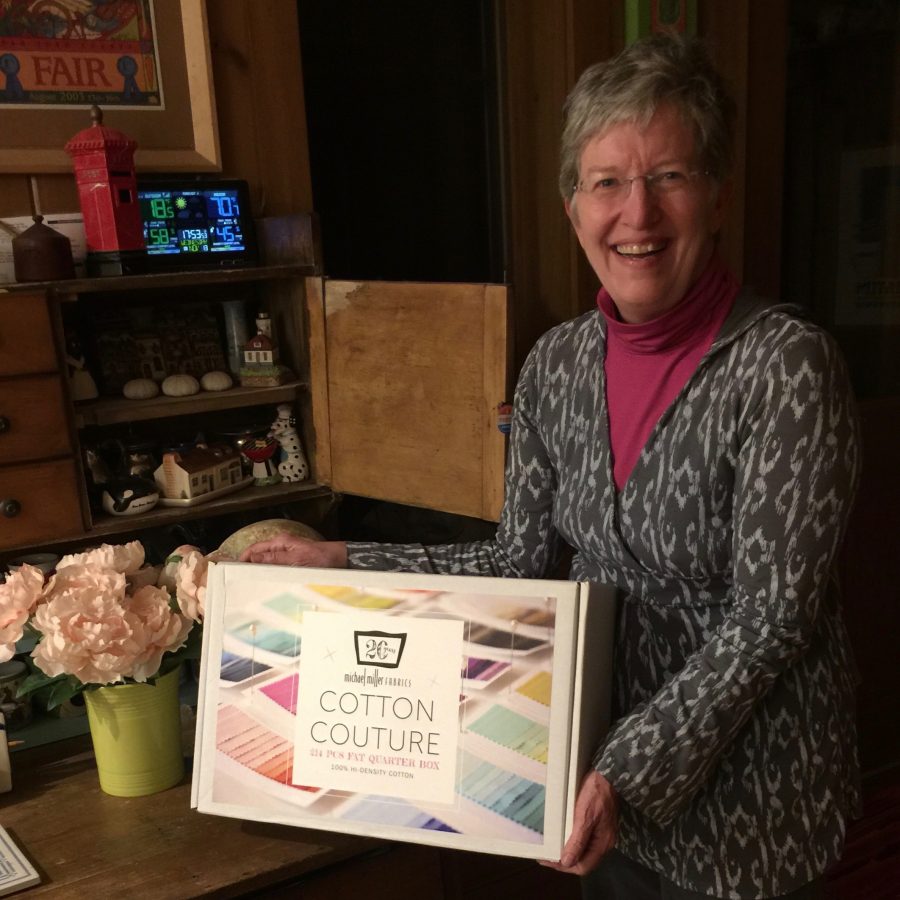
A while back, I was deliriously delighted to learn I had WON all 214 colors (above and below) of Michel Miller’s Cotton Couture (this was before I even applied for the Brand Ambassador program). I’ve been wanting to make a quilt I shall call “214.” As I’ve been waiting to upload this post, I realized that I can use the AccuquiltGO! to do the majority of the cutting, even the sashing! If I use the die for 2 1/2″ strips, I can then manually cut those in half vertically to get the 3/4″ finished strips I want to use for sashing. And then (!!!) I can use the die to cut 4 1/2″ squares (4″ finished) — if I am careful — to subcut the strips into 4 1/2″ lengths to match the size of squares I’m going to use in the quilt! Stay tuned…guess what I’m going to do today!
So, with that I am going to sign off and go play with my new fabric and toys!
I mentioned earlier that I am DELIGHTED to have been selected as a Michael Miller Brand Ambassador for 2020. As part of that we received, just before Christmas (Squee!), a box of goodies to use. I cannot WAIT to get into the studio to play. As a reward for getting all the gift wrapping and prep actually done before the 24th, I treated myself to opening the box on December 23rd, but waited until today to post and share the joy.
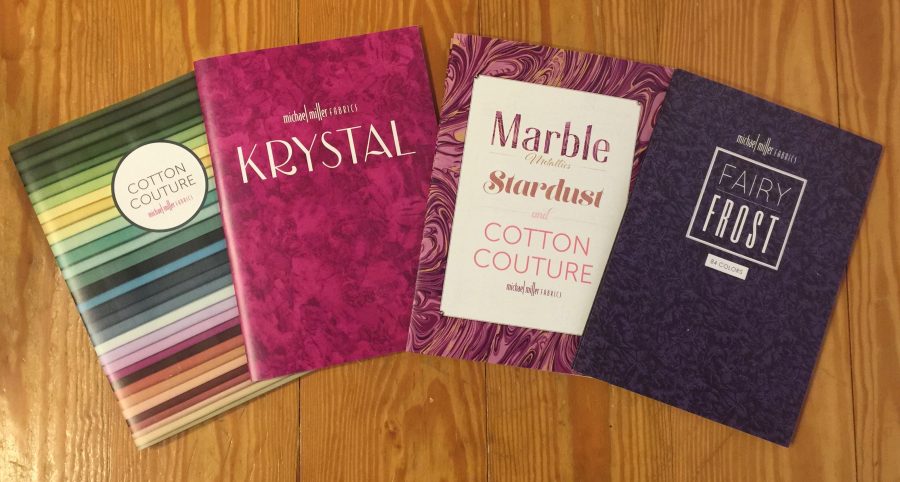
There are so many goodies in this package I hardly know where to start, but since I am prepping for a new 3-day workshop, Exploring Paint on Cloth (details here) August 5-7 at ProChemical and Dye in Massachusetts, I think I’ll start with the Krystal and some of my thermofax screens and paint!
These are the “color cards” for this year, and OH MY what joy awaits inside. It’s going to be a FUN year!Here’s those color cards opened up. Top to bottom: Fairy Frost, Marbles, Krystal and Cotton Couture–all 214 colors!!!!!!! SWOON!
Thanks to Michael Miller Fabrics @michaelmillerfabrics for selecting me. Can’t wait to get started on my projects!