email Youtube

Home
Galleries
Blog
Workshops & Calendar
Store
Resources
About
Contact

Archive for the ‘Techniques’ Category

Rockin’ Retro Apron in Kitschy Cocktails, Part 2

Friday, February 21st, 2020
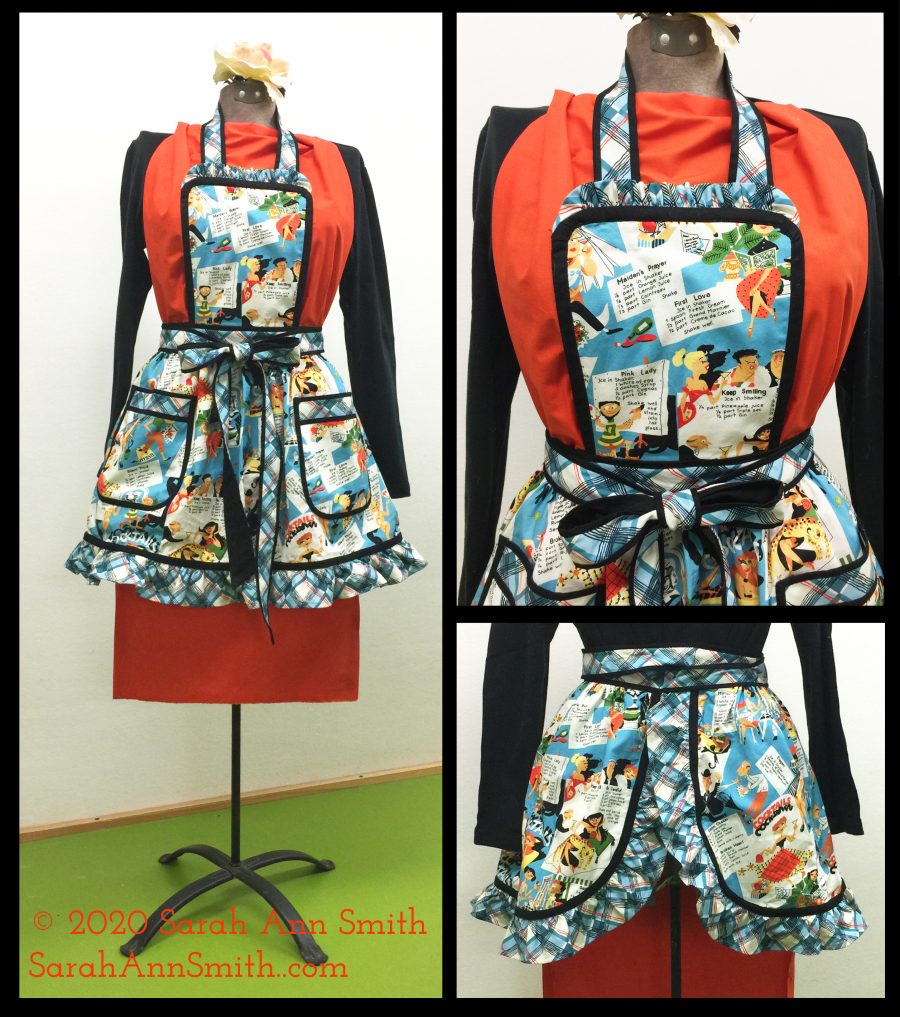
For Part 1, go here.

Today we’ll continue constructing your fun and funky Rockin’ Retro Apron. Fabric requirements, layout/cutting instructions and making the apron skirt are all in Part 1, here. You can download a formatted and numbered pattern–free in 2020!–with ALL the instructions and requirements at Rockin’ Retro Apron in Kitschy Couture. The fabric was provided as part of the Michael Miller Brand Ambassador 2020 program, and my brilliant Janome M7 Continental is provided to me as a Janome Artisan. Thank you!

Make the Apron Ties and Neck Strap

  • Spray starch the bias-cut plaid for the ties and neck strap.  Stiffening this fabric slightly will make the following steps less fiddly.
  • Sew an inch-wide strip of black to the short pointy end of each of the waist ties. Press as stitched, then press seam allowances toward the black.
  • Sew the plaid to the black apron ties and neck strap only.  Do not sew the waist portion, which is handled differently.  
  • Press as stitched.  Press seam allowances toward the black. Turn straps/ties right side out.  You can use a narrow pole/stick/curtain rod to make this easier:  turn the first couple inches by hand, then slide onto the top of the curtain rod and gently coax the entire strap until it is all right side out. 
  • Press, centering the plaid and coaxing the seam allowances toward the black.  Because the black is cut wider than the plaid, it wraps to the front to create an accent edge.  The seam allowances should be underneath this accent edge.  Leave the square end open.  On the pointy end, trim to 5/8” from where the short black piece is stitched to the plaid.  Turn under about 3/8” and press.  You can machine or hand stitch this opening. 
  • Stitch on the edge of the black or in the ditch so the seam allowances stay where they are supposed to.  This will help a lot once you start wearing and washing it—worth the extra effort.!

Make the Apron Bib

FITTING NOTE:  Because of different body types, you will want to adjust the width of the bib and the  length of the bib and strap to flatter your body.  Cutting measurements are for my medium-sized build.  I actually wish I had made the bib an inch shorter, so those with an average or larger bust size should be fine.  Measure before you cut and before you sew.
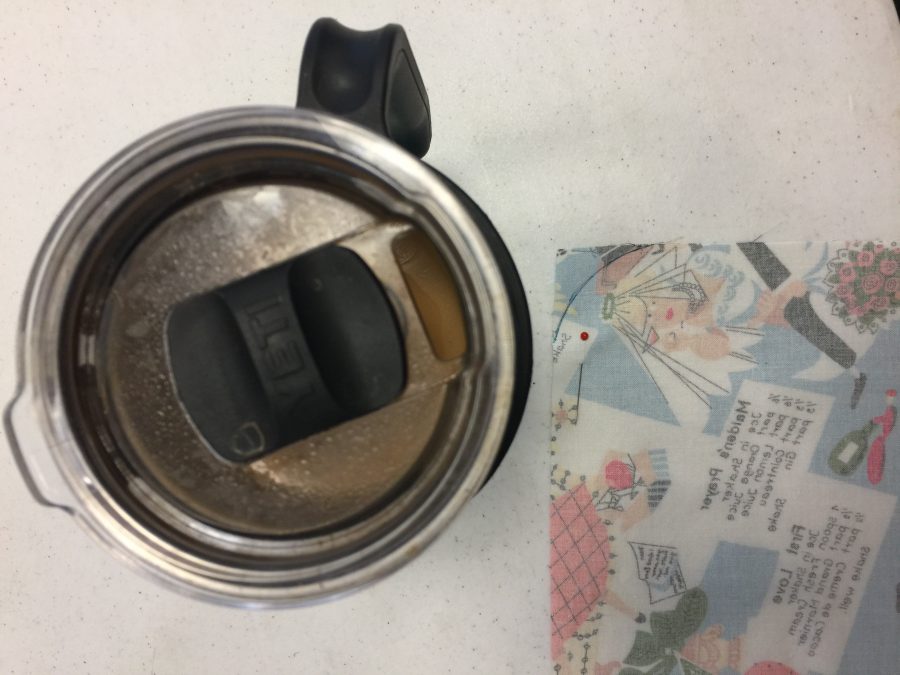
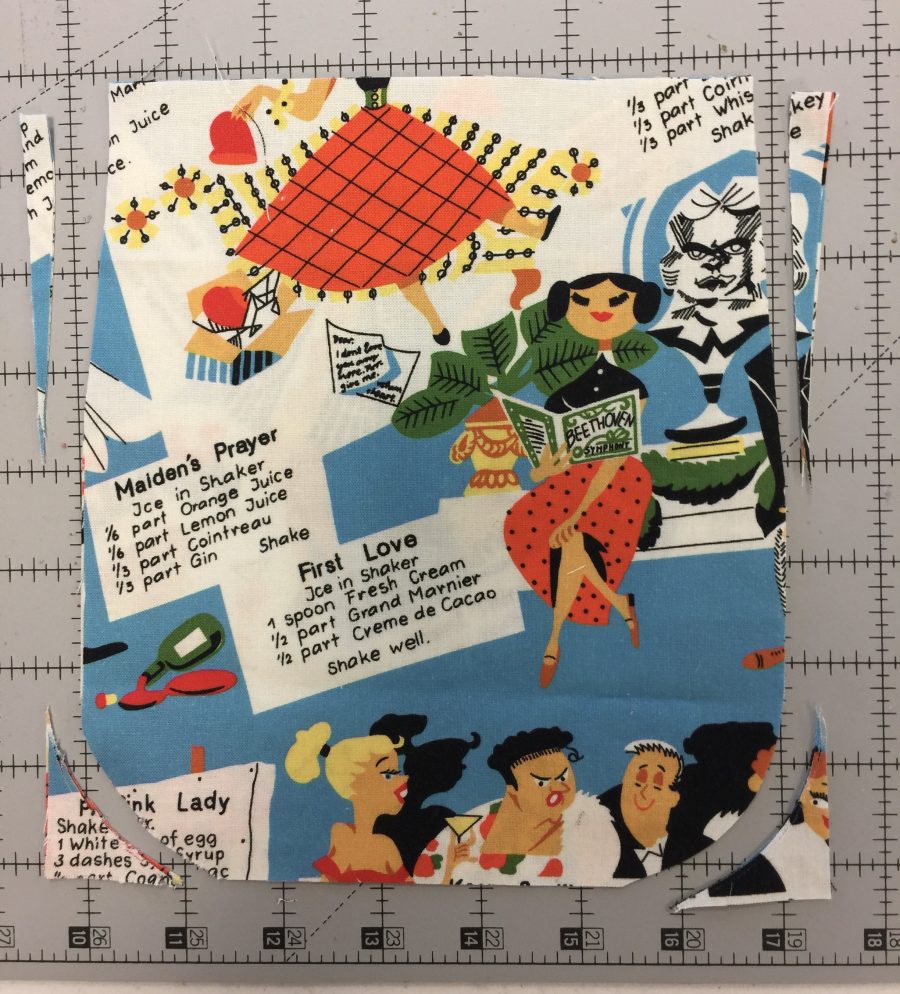
Use something like a mug lid to round the upper corners of the bib.
Trim slivers off the bottom edge of the bib (optional). This photo is of the pocket, where you do the same thing.
  • Use something round to curve the top edges of the apron bib, see first photo above.  I used the lid of my travel mug.  Just draw a line around the curved edge, then trim off on both sides of the bib, second photo.
  • Optional:  taper the lower edge of the bib by trimming two skinny triangles off the lower edges. Mine were about 3/8” wide by just under 6” tall, center and right photos.
  • Gather bib ruffle.  Fold fabric in half, wrong sides together.  Sew basting lines at ¼” and ½” and gather as before.  This will be a very tight gather, which helps the ruffle stand upright.  If yours is too long when gathered to your preference, trim as needed—see next steps. 
  • Pin ruffle to the bib lining (inside piece). See photos below.                                                                  
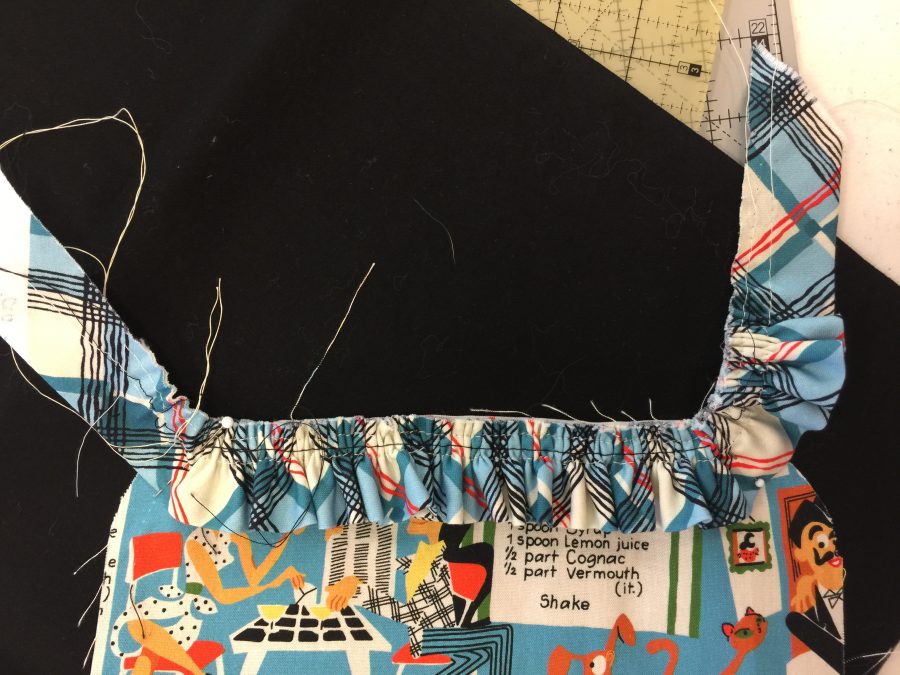
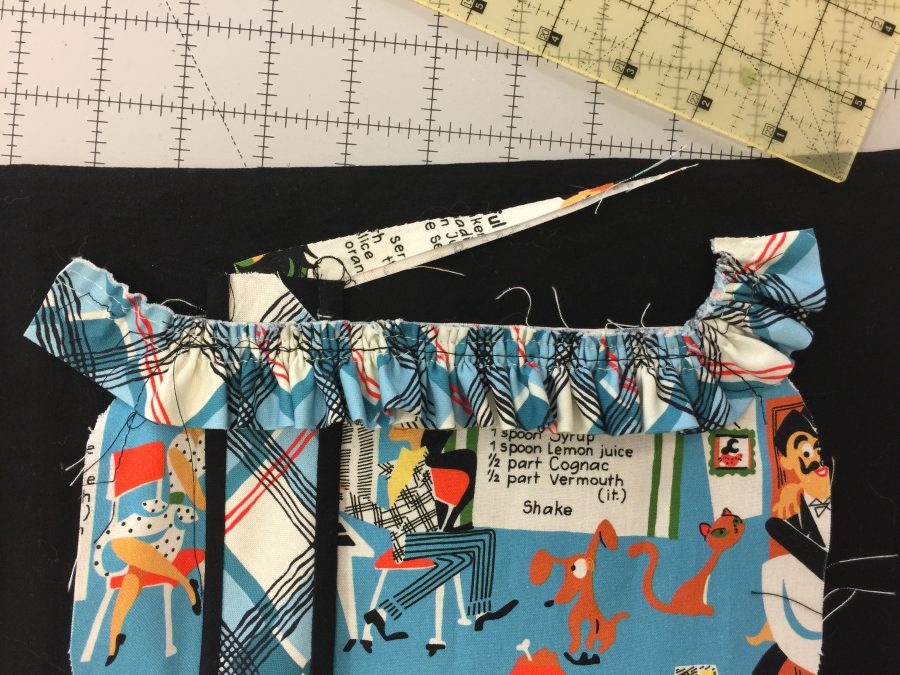
  • Curve the ends of the strip up, see second and third photos, below. Be careful (if this sort of thing bugs you) to make sure the curved ends are symmetrical.  Ahem—guess which one I am.
  • Tuck one end of the neck strap between the ruffle and the bib lining, photo on right below.  Be sure the plaid side of the strap is as pictured so that it will face the correct direction when the bib is completed.
  • BASTE by machine.  
  • Turn up to make sure it looks good.  Adjust if needed, especially on the ends.  
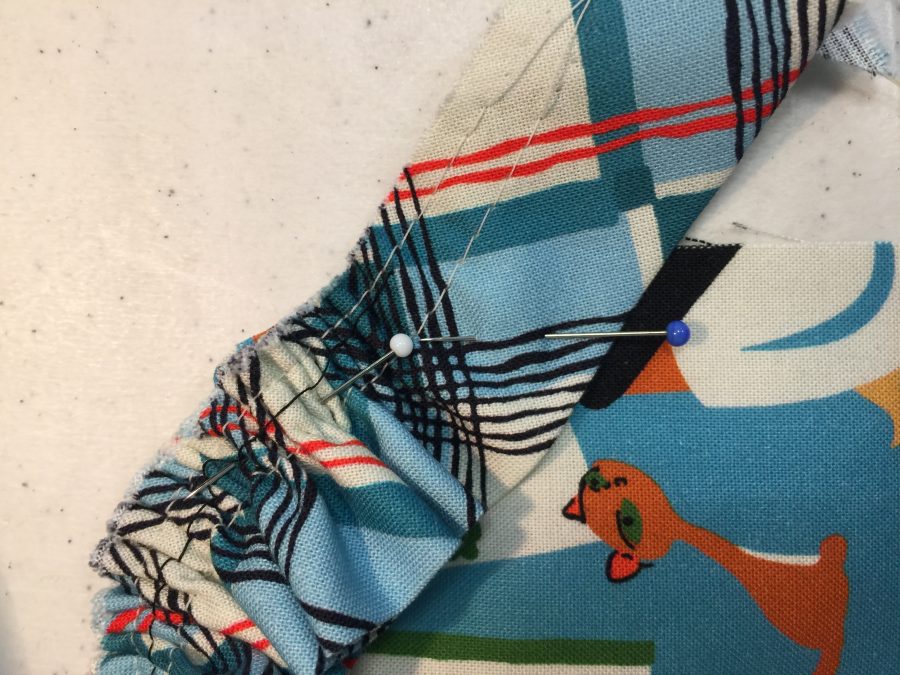
Curve the end of the gathered bib ruffle up–see the overall photo at the start of the post to guide you.
The top of the bib lining will look like this once you have basted the ruffle in place. Don’t be like me…remember to tuck in the neck strap so you don’t have to pick out some stitches. Ahem. See next photo.
Insert the neck strap as pictured and baste along with the ruffle.
  • Prepare front of bib.  
    • Cut black bias the length of the outside edge of the front bib plus 1” just in case.
    • Press ¼” under along one long edge.  
    • Pin to the right side of the bib front with the fold edge turning under towards the center of the bib.  
    • Baste on outside edge.
    • Press towards the center, easing excess in the rounded corners.
    • Applique/stitch the black trim to the bib.  I used glue stick to “pin” the black in place and sewed used the edge-stitch foot/quarter inch foot with the flange and a straight stitch.  
  • Pin bib front and bib lining right sides together.  Sew 3/8” seam.  You may wish to sew a basting stitch seam first to make sure everything at the top is correctly placed and the corners and ruffle turn nicely.  If you do, adjust as necessary, then sew the final seam.

Prepare the Pockets
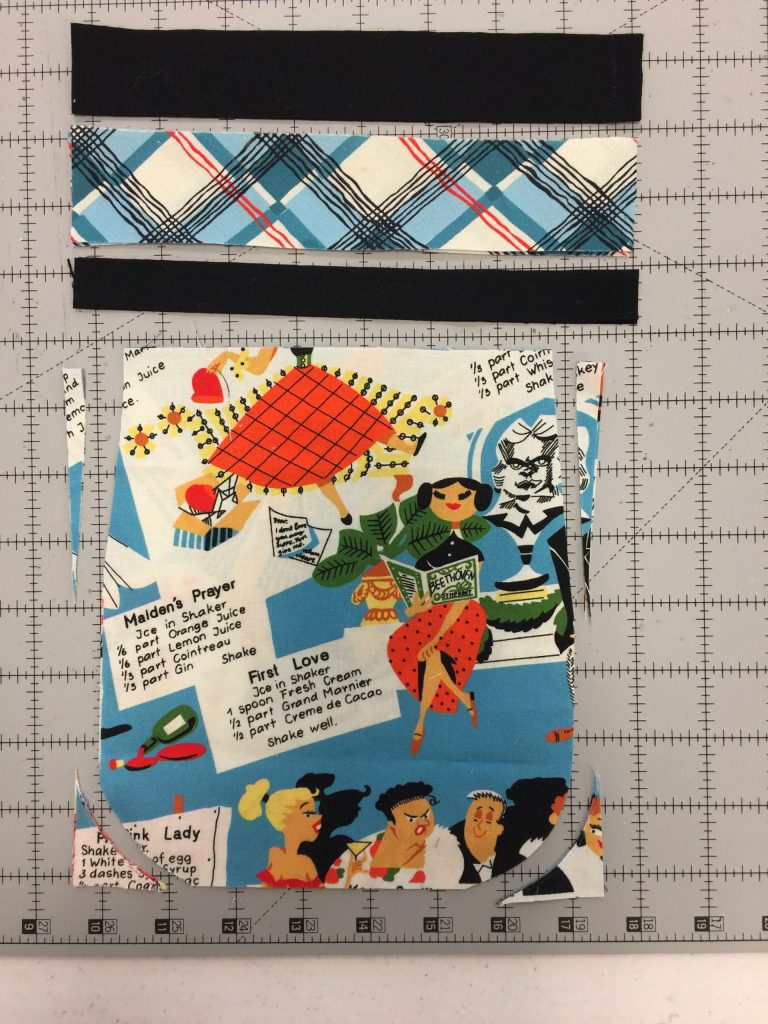
You’ll need a wider black band, the plaid strip, and a narrower black band. These strips are sewn together, then sew the right side of the strip to the wrong side of the pocket top. Press, then fold the strip to the front and topstitch in place.
  • Create plaid-and-black band for the pockets.  
  • Sew a ¾” strip of black (straight of grain) to bottom edge of starched plaid strip.  Upper photo.
  • Sew a 1 1/8” strip of black to the top of the pocket.  Upper photo.
  • Sew wide black strip to the back of the pocket with a ¼” seam.  Press as stitched, then wrap the strip around the seam allowance.
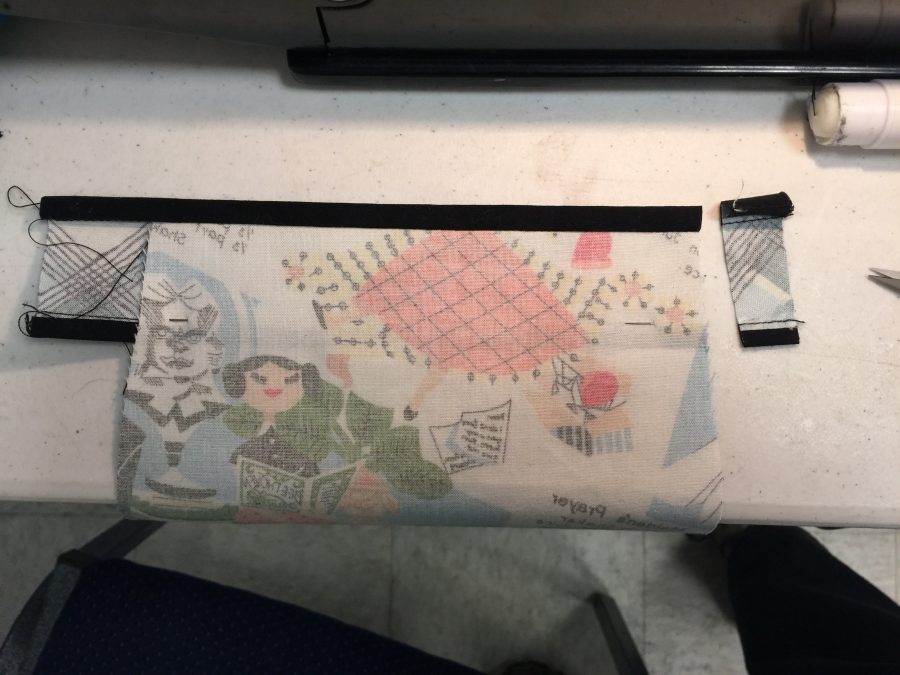
Wrap the strip to the front, trim, and stitch in place.
  • Wrap the bias unit to the front and applique in place.  Stitch in the ditch or on the edge of the black.  Photo above.
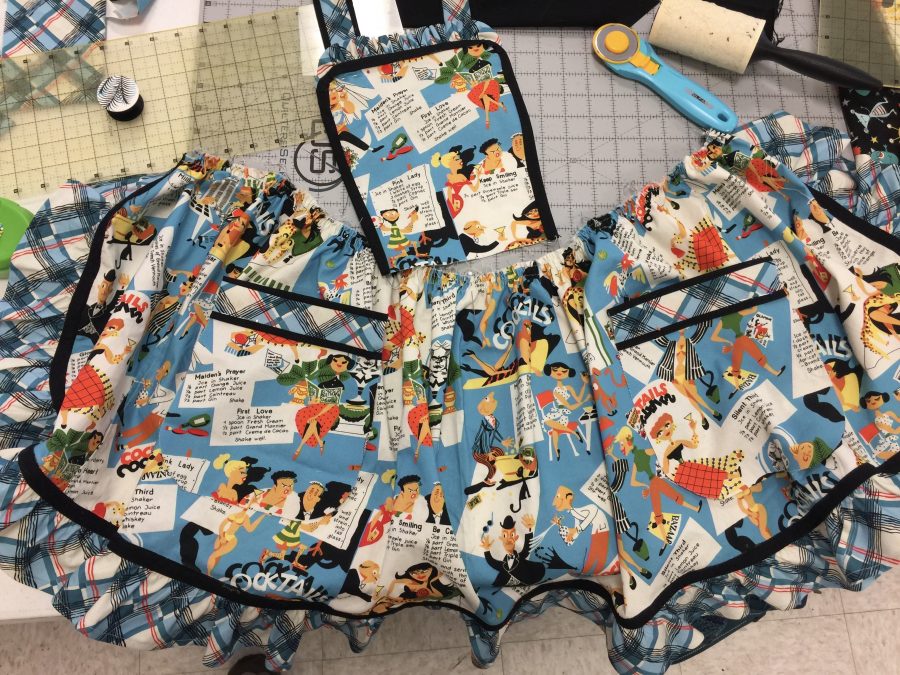
Pockets are positioned 6″ to either side of the center, but the black edging has not yet been applied.
  • Press under ¼” on long side of 1 1/8” bias black edging that is long enough to go around the pocket. and extend about ¼” beyond the top edge.  If making two pockets, repeat. Turn under top edge of black trim even with top edge of plaid section.

And that’s it for today! In the final post we will manage the waistband–it took some mental gymnastics to figure out the easiest way to encase all raw edges, have long ties, and have it look good, but I figured it out. Stay tuned!

Remember, you can download the complete Rockin’ Retro Apron pattern here. It’s also listed under Tutorials (lotsa good free stuff on there) on my Resources page.
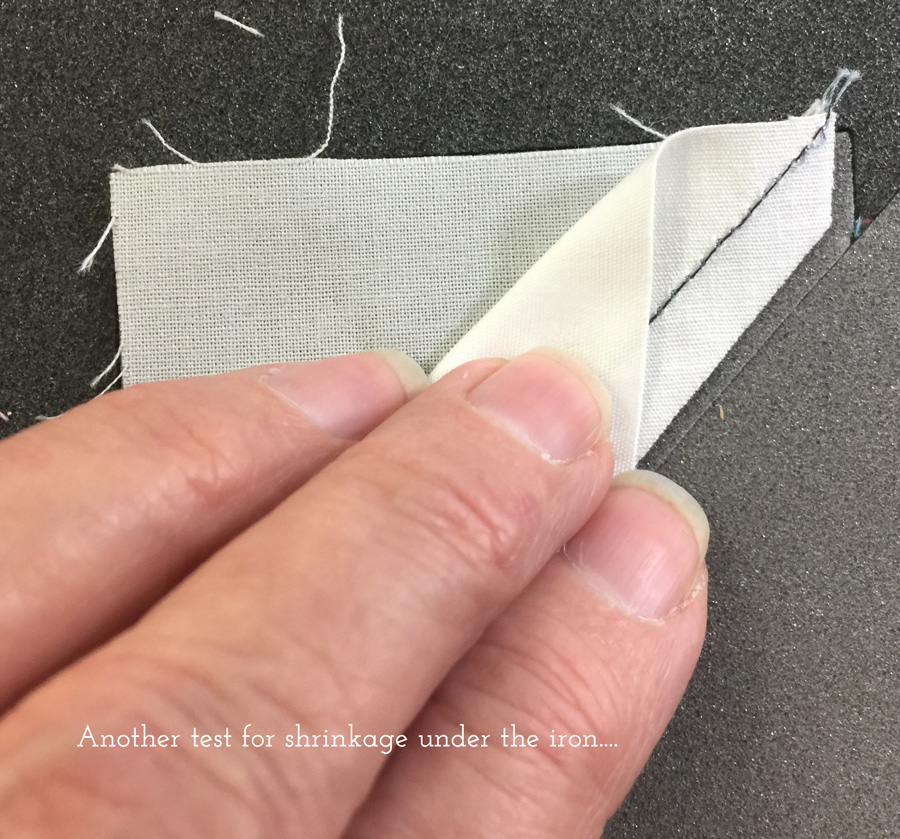
When to pre-shrink!

Thursday, January 23rd, 2020

Over the past week to two weeks, I have been working on ….sit down and prepare yourselves for this… a **pieced** quilt. Yes, me. A very simple pieced quilt, but nonetheless.

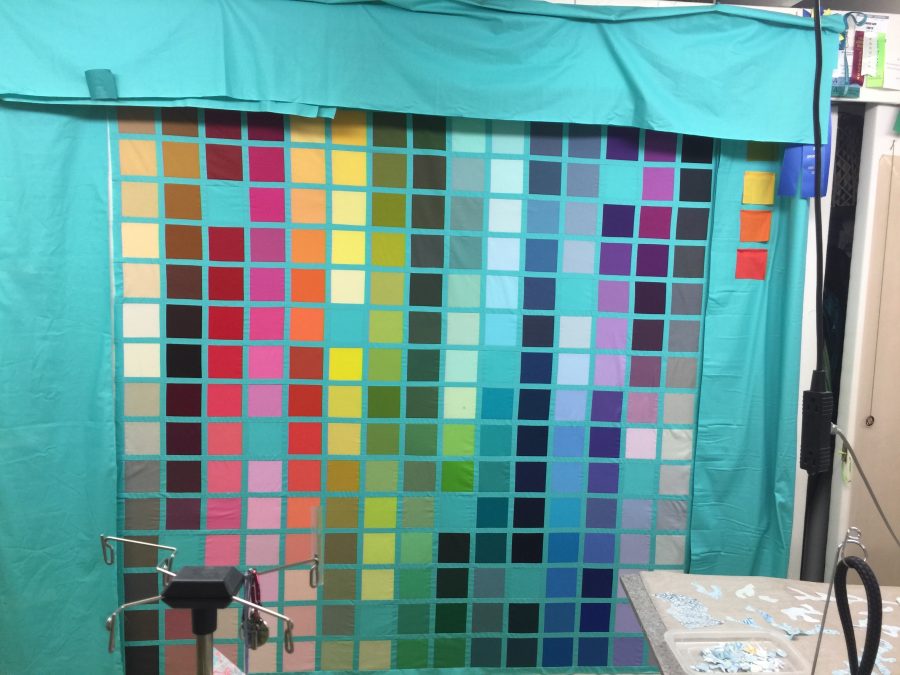
Eye-candy…my 214 colors, test-driving super wide borders with possible squares or rectangles. I’m going with nothing to distract from that glorious grid of color. Hopefully the quilting will make the wide borders look good. Want them that big so they will fit on a king size bed–we’ve got a queen but the pug takes up a ridiculous amount of room for such a small dog! The center is 72″ and overall I’m hoping for about 100″ square.

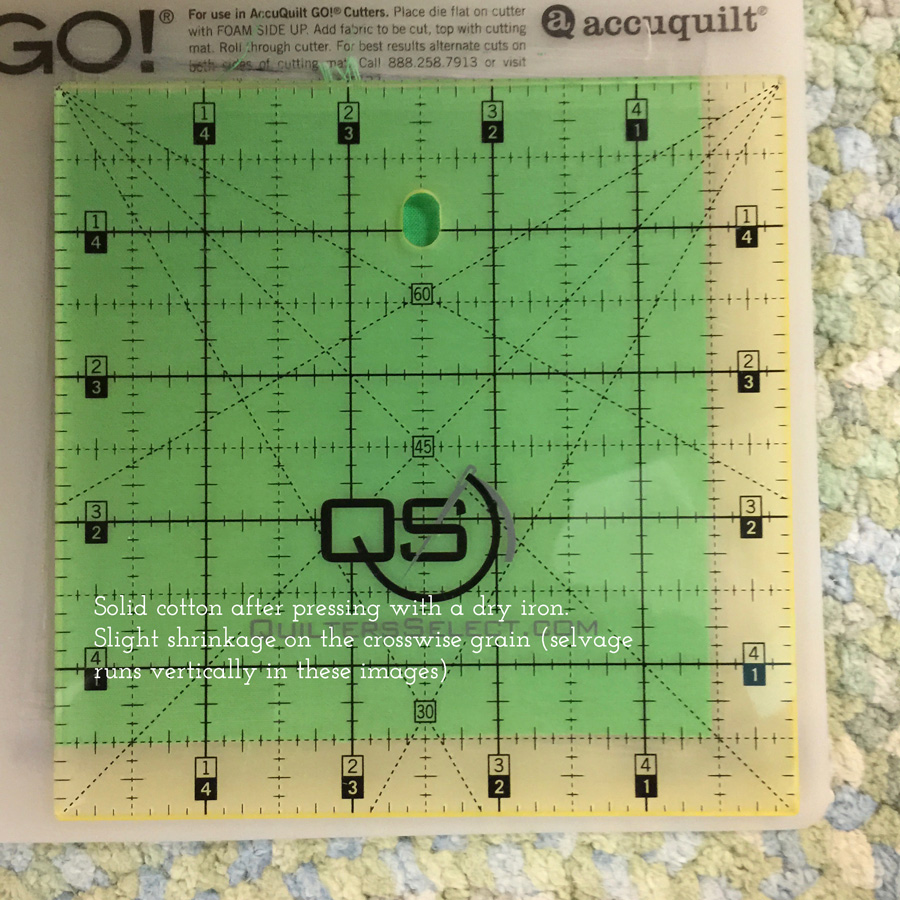
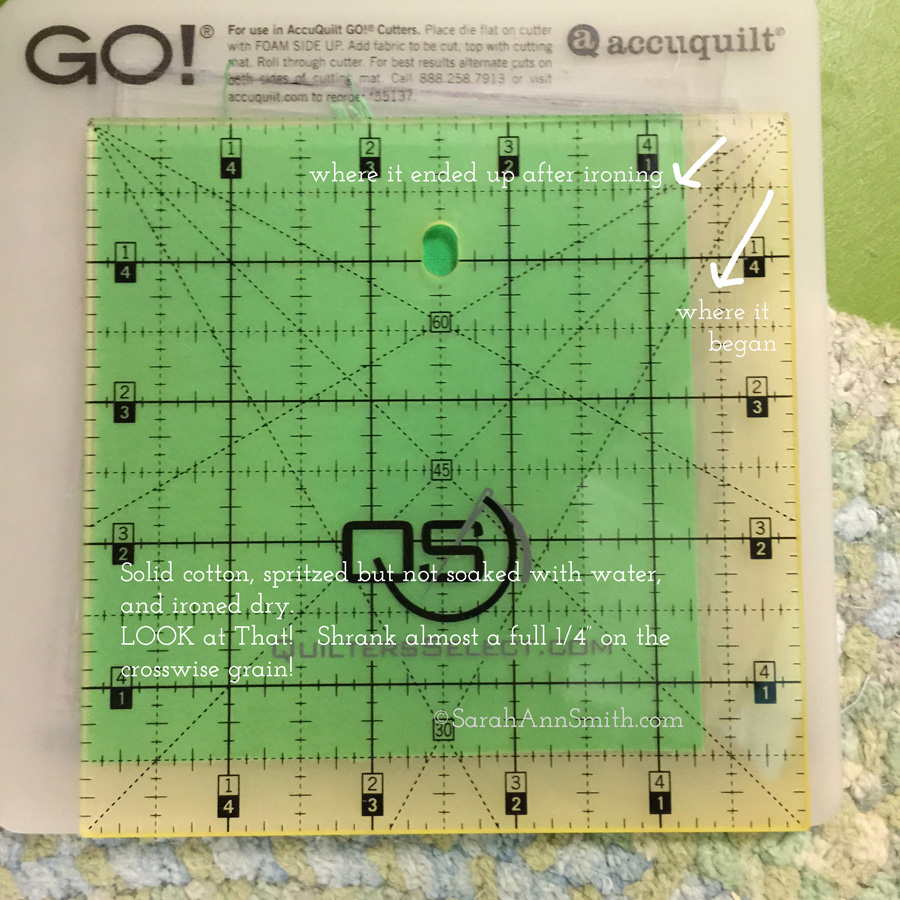
I’ve also been experimenting with the AccuQuiltGO! that was given to this year’s crop of Michael Miller Fabrics Brand Ambassadors. To my distress my block was not perfect–too small! I KNEW it had to be something on my end (it was), so I triple checked my seams (perfect to scant). I checked the size of the fabric cut on the dies: perfect. I checked that I used the correct dies: I did. Then I noticed something. After ironing, the block seemed off. Look at what I discovered:

First I placed my half square triangles on the dies, and look how much smaller the pieces are after sewing and ironing! So then I checked the start of the square-in-a-square center of the block. Same thing: after steam ironing/pressing, a unit that finishes at 2″ and one that finishes at 3 1/4″ are each 1/16-1/8″ smaller!

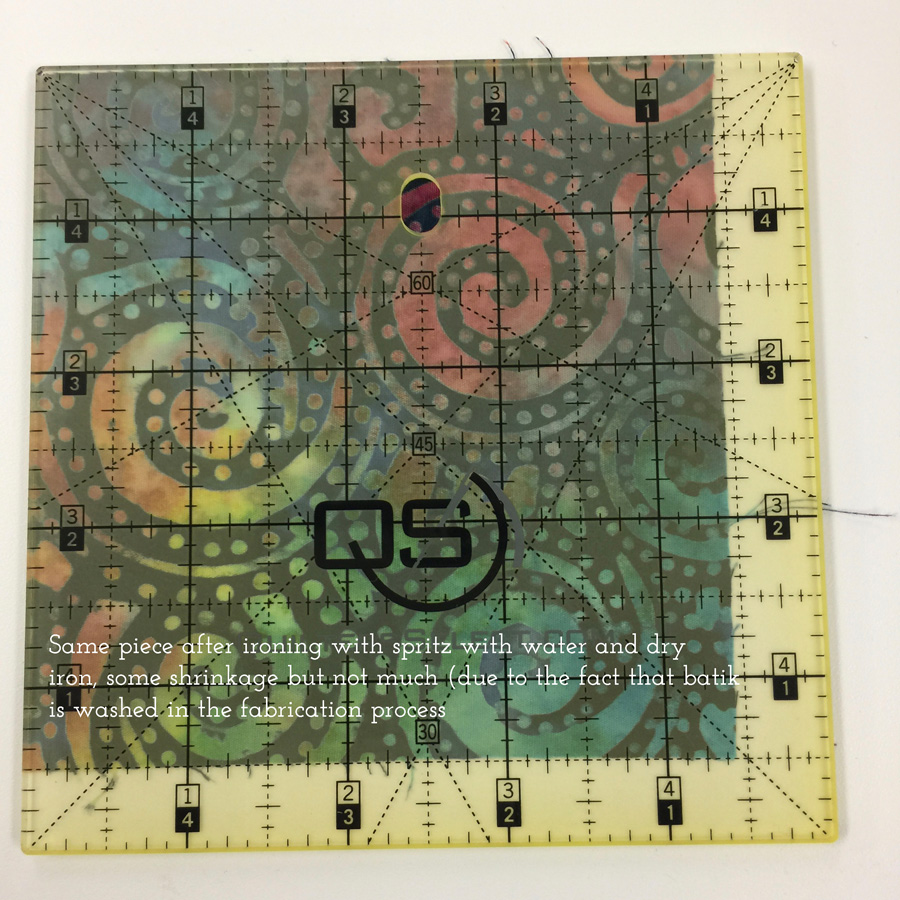
I decided to get a bit more scientific about it: Cut, measure, dry iron, measure, steam iron, measure. Here is what happened with the Cotton Couture, a delightful solid with a glorious feel in the hand:

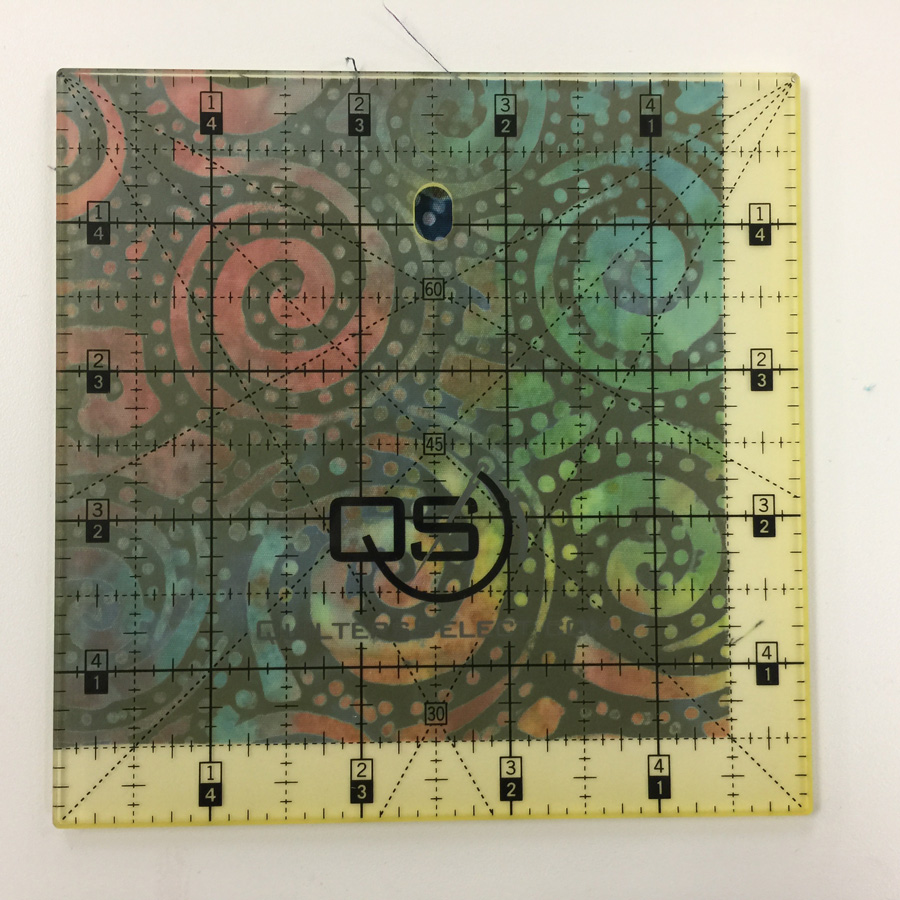
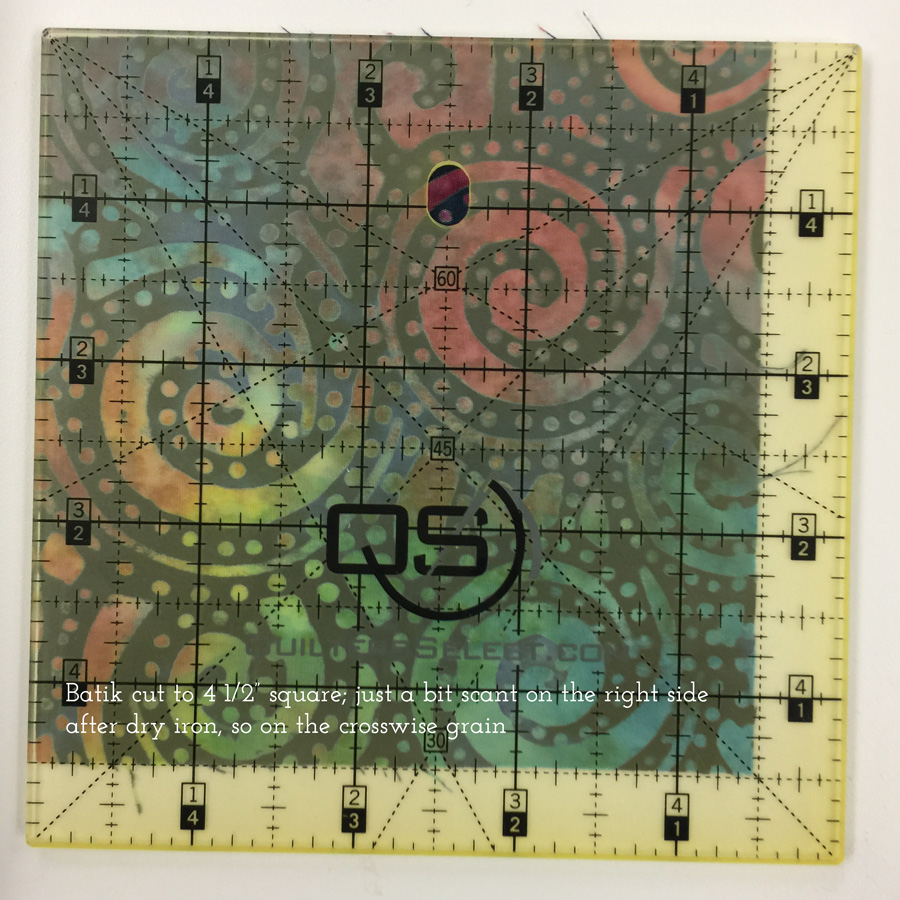
Batiks are made using hand-dyeing processes that include a resist being applied (usually wax of some sort), then the wax is washed out, more dye applied, and so on. This means some of the shrinkage should already have happened.

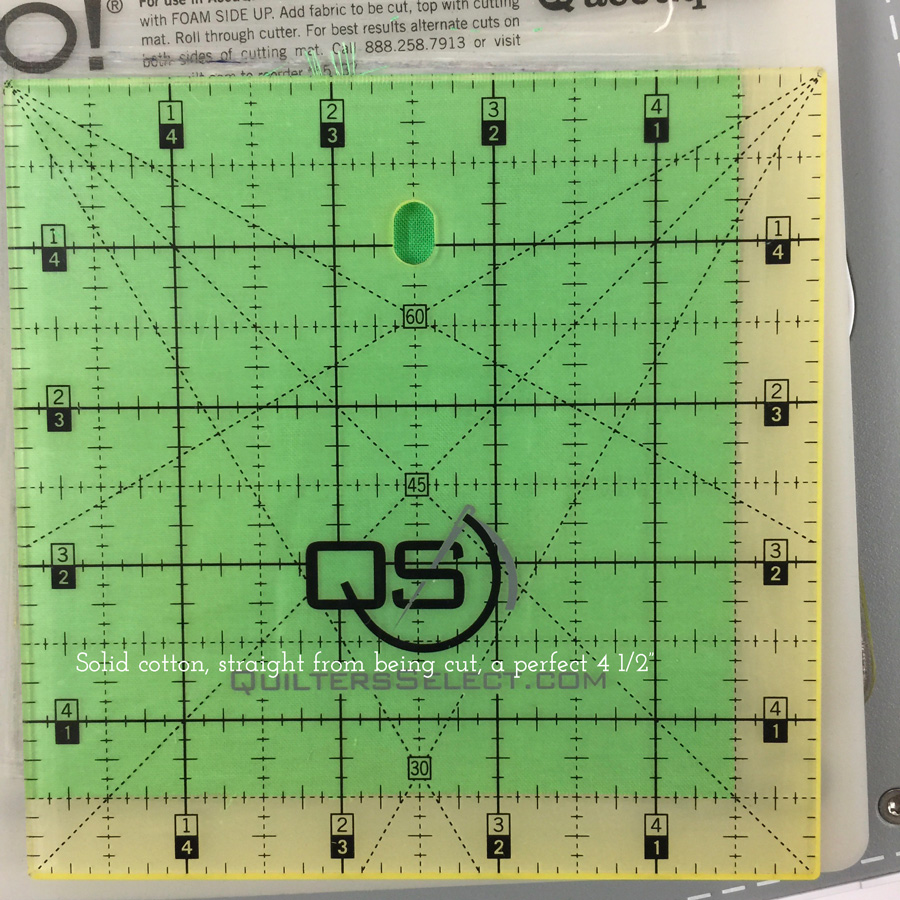
As cut with the AccuQuiltGO! Perfect 4 1/2″
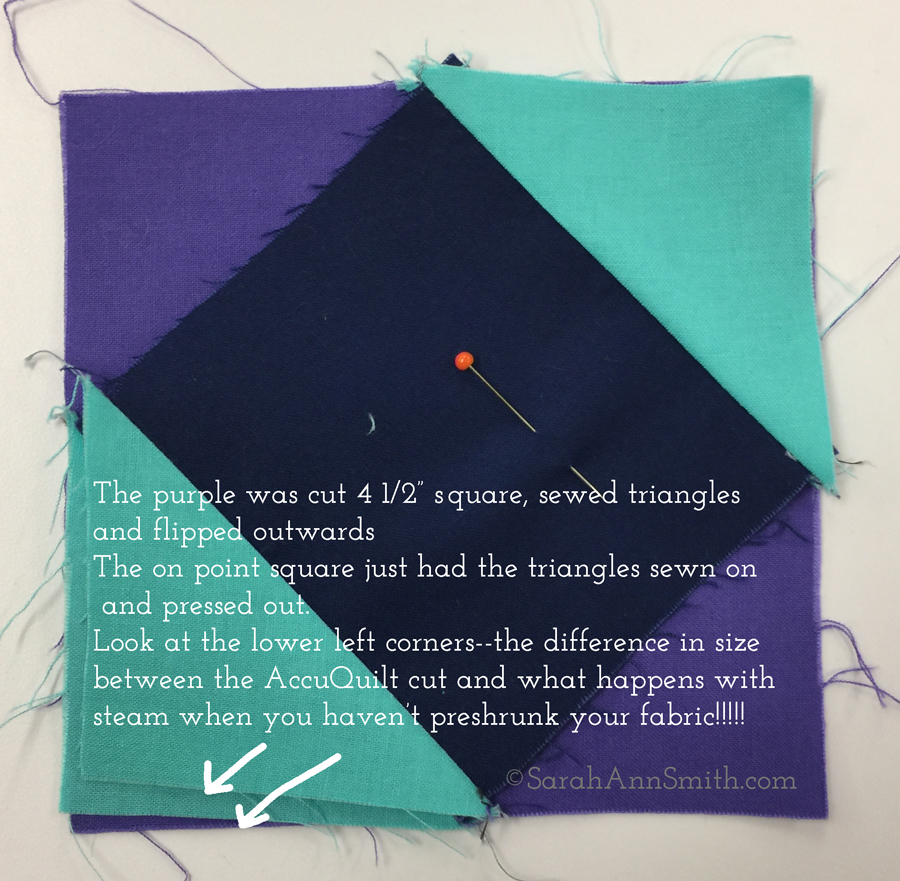
One last image: Here I created the center square-in-a-square for a pieced block. I cut the purple fabric to 4 1/2″ thinking that might help my accuracy, and sewed on two half square triangles. I then used navy for the central square and piled on identical half square triangles. All are cut with the lengthwise grain as suggested by Accuquilt for accuracy. LOOK at how much smaller due to more pressing and moisture from the iron. ERK!

So my lesson is, when I am not fusing things up, I really need to either pre-steam-iron everything, or prewash and mostly-dry it and then iron dry and smooth. I can now use the perfection of the AccuquiltGO and actually achieve as close to perfect as I will ever get! Now, off to order backing fabric for my BIG quilt.

A donut shirt for Joshua, the M7 Continental dream

Tuesday, January 14th, 2020
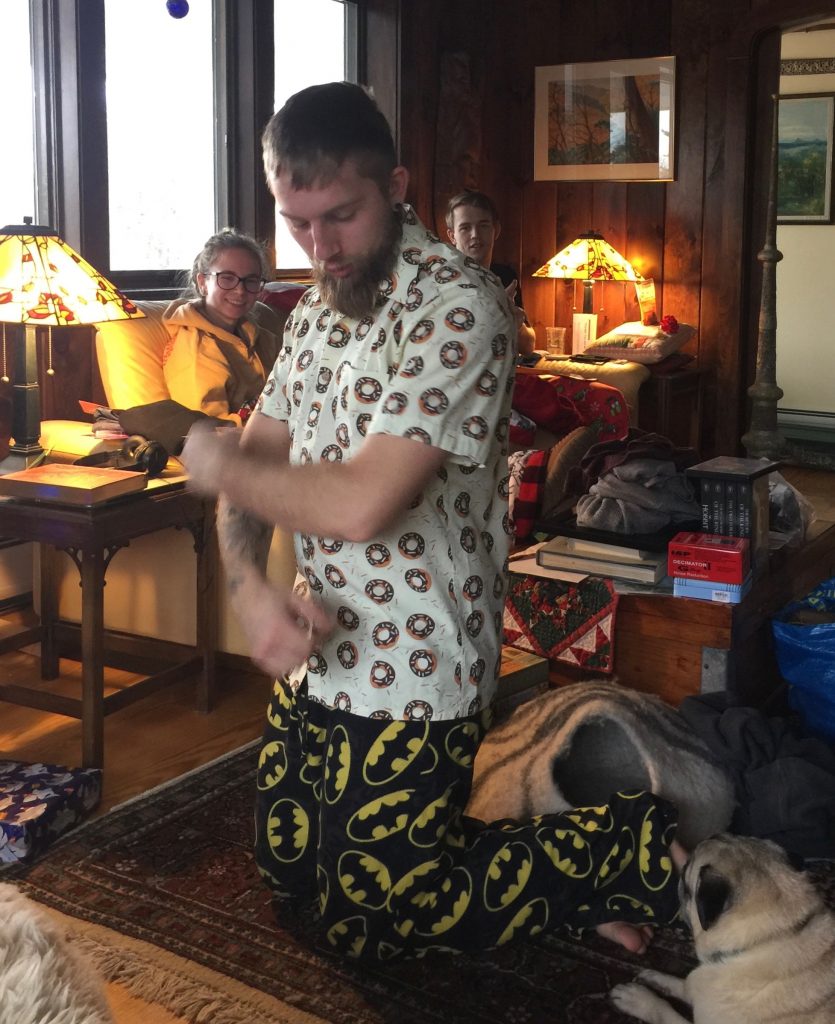
As soon as it came out of the box it went on…fit perfectly (thanks to borrowing one of his existing shirts!)

The first thing I made on the splendid new M7 Continental from Janome was something I haven’t made in decades: a button down tailored shirt! Anyone who knows Joshua knows that he is all about good food, perhaps starting with donuts. In fact, Joshua and Ashley’s wedding cake was a tower Joshua made of donut holes from Willow Bakery in Rockport! He also loves shirts with a sense of humor: sushi rolls, watermelon, lobsters. So I decided I wanted to make him a shirt for Christmas. And I succeeded beyond my wildest expectations in part due to the excellent sewing of the M7. There’s even a video below of making a buttonhole!

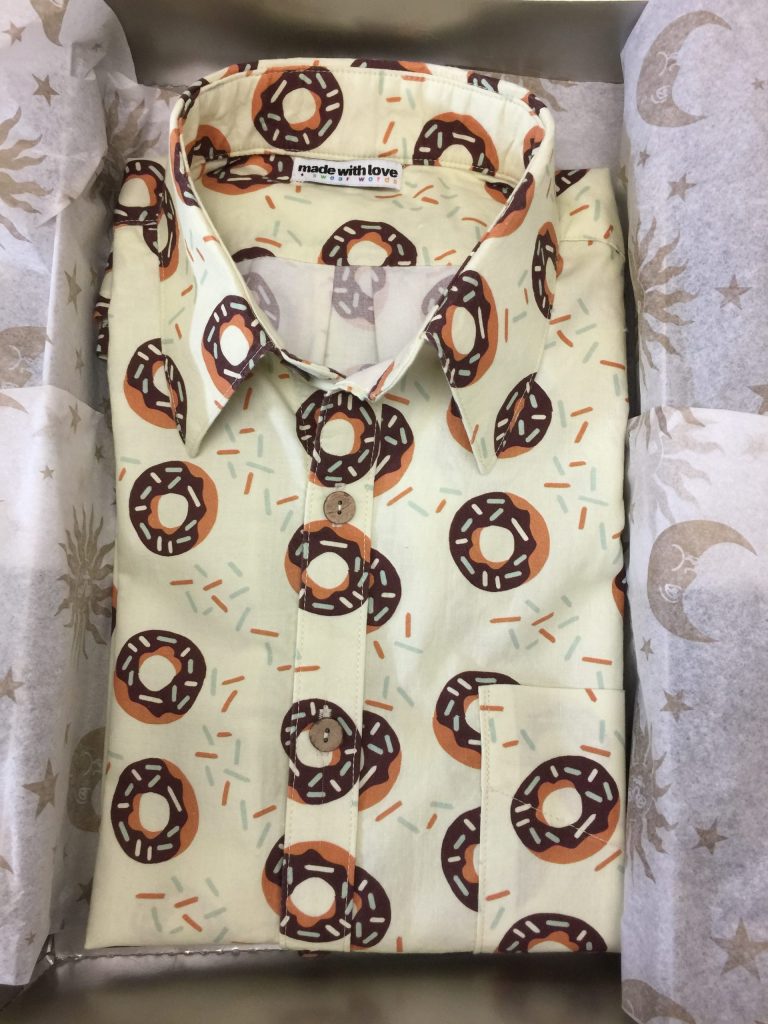
In the box ready for going under the tree, and looking professionally made if I do say so myself! The label was purchased at Fancy Tiger Crafts in Denver–when I was taping for The Quilt Show I had a day to play and met friend Sandra Wheeler (hullo SandyAngel!) who took me out and about. The label reads “made with love {and swear words},” which I figured correctly would make Joshua laugh.

I used the Men’s All Day Shirt Pattern from Liesl + Co patterns. It was my first time using a downloadable pattern where you print and then tape together the pieces. If you download the free Adobe Acrobat software (not just your built in PDF reader) you can turn off the “all sizes” so it prints ONLY the size or sizes you want so you don’t have to navigate all those lines that end up nearly on top of each other. By measuring Joshua’s existing shirt, I was able to figure out which size would be best (Medium) but with the Large collar/neck stand. My only issue was when I combined the sizes. I should have printed the neck line of both patterns SEPARATELY (instead of on the same sheet), then traced the size large and lined it up properly. It took a while, with astounding and much appreciated personal replies from both Liesl and her husband Todd with troubleshooting suggestions, before I figured out what I was doing wrong. Kudos for the service as well as the pattern!

Sewing down the underneath side of the front, where the buttons will go
Needle moved to the far left.
the stitched fold-back, the buttons will go on the other side.
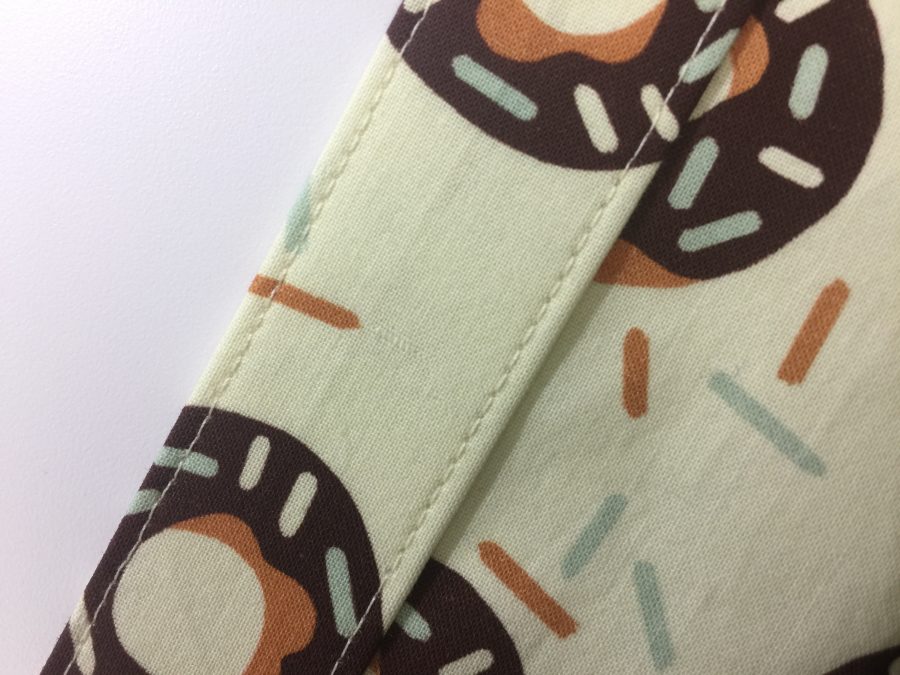
Look at how perfect that stitching is! It sure helps to have a machine that is so precise.

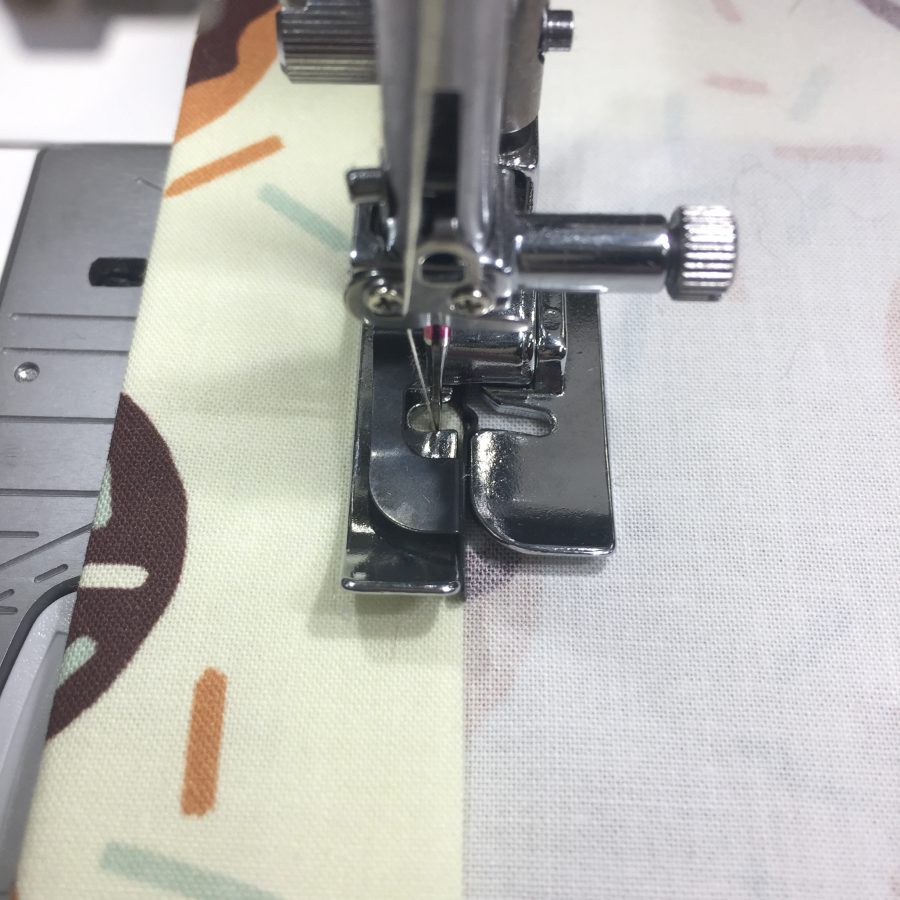
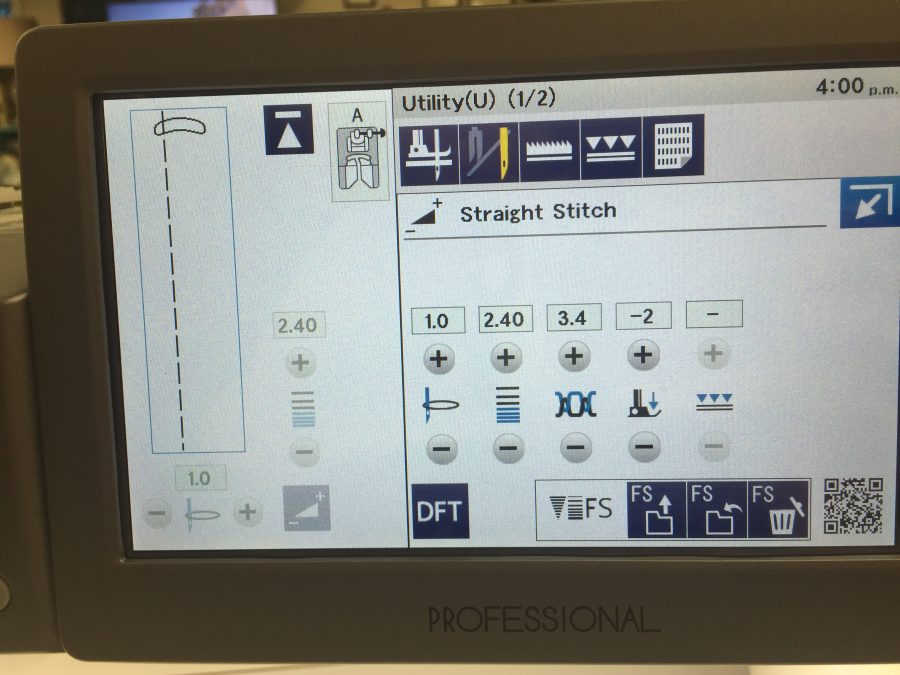
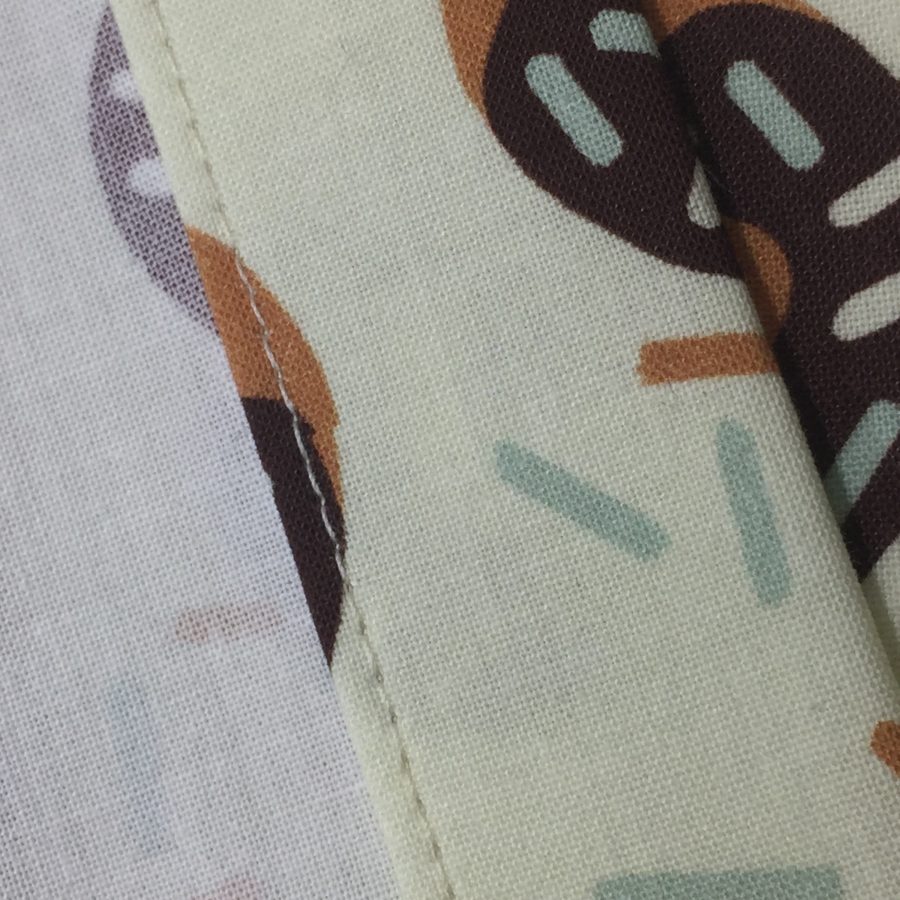
Using the included edge stitch foot, I was able to get absopositively perfect stitching. The first of the four photos above shows the underneath side of the shirt opening, using the edge stitch foot to sew down the turn-under. The second image shows the Janome M7 Continental screen (other Janome machines work similarly) with the needle set to the left. Because of the tiny increments in needle placement, I could get the stitches to form the exact distance I wanted from the edge. Third photo (top right) is a detail of that stitching. And the large image is the button band, stitched. I can’t believe it looks so good! There’s a video just below these still photos.
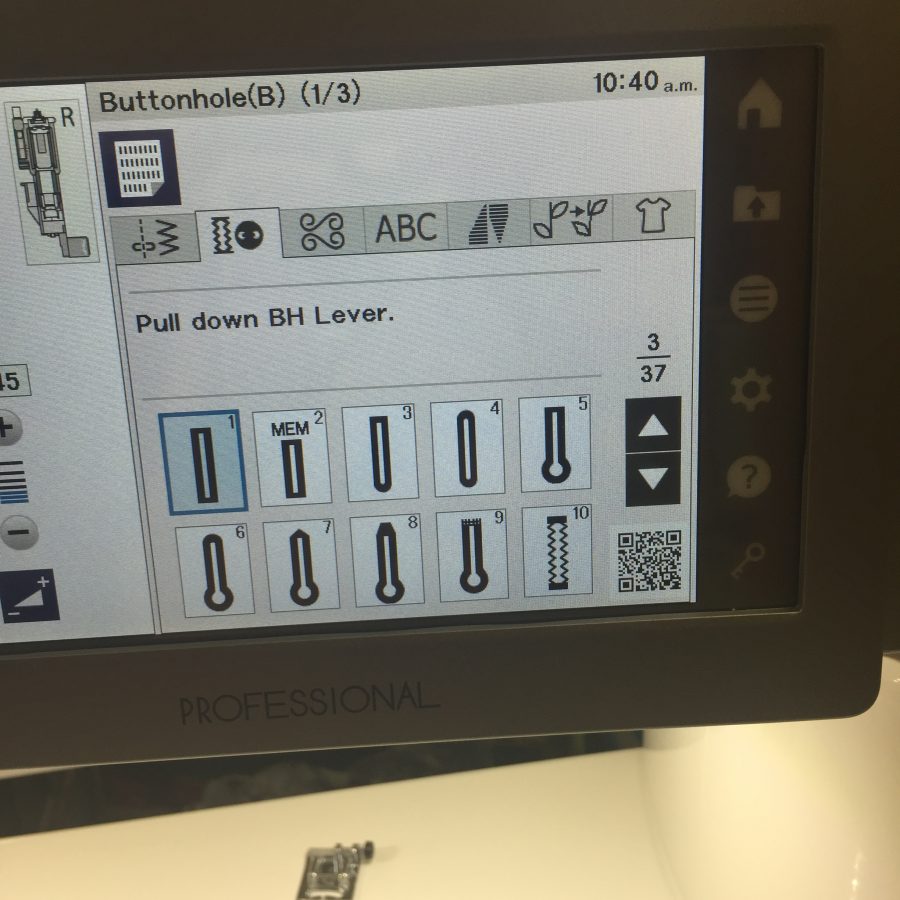
There are a couple screens of buttonhole options, but I used the basic one. Note the QR code in the bottom left corner (more info below).
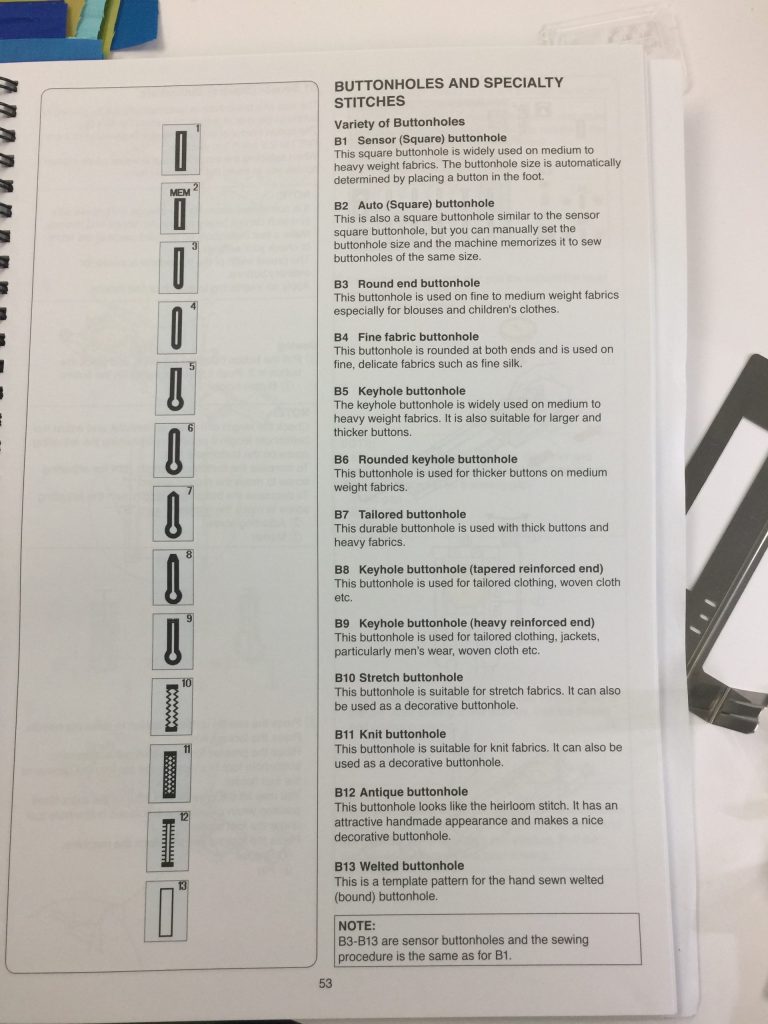
The manual explains the different purposes of the many buttonholes.
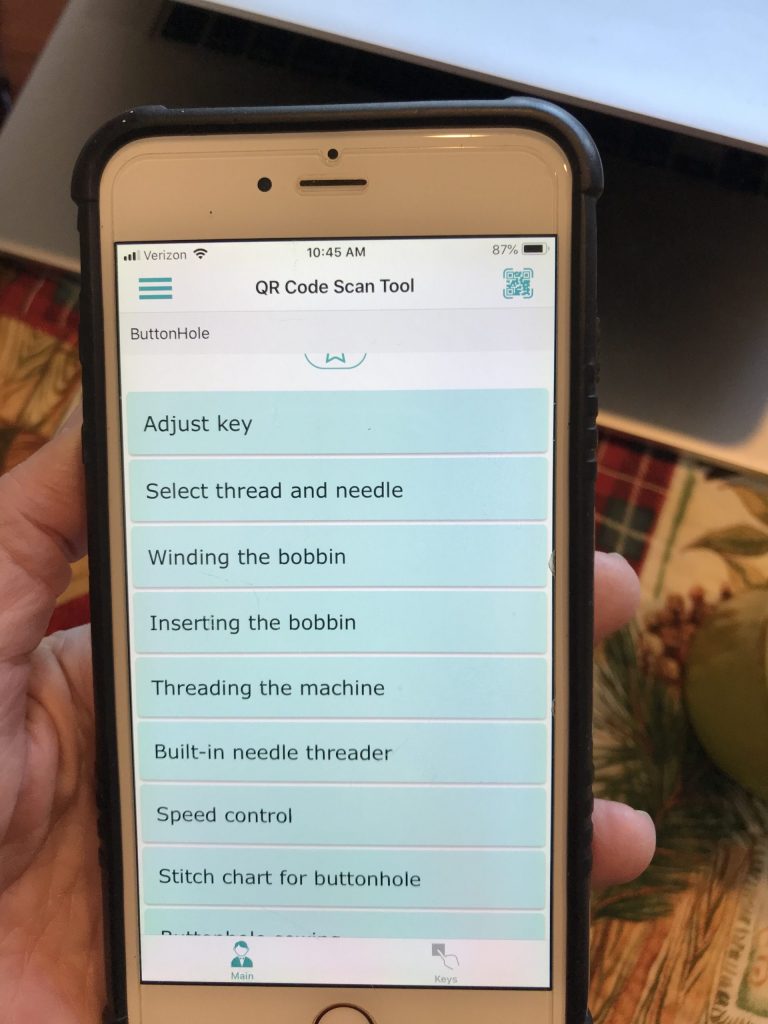
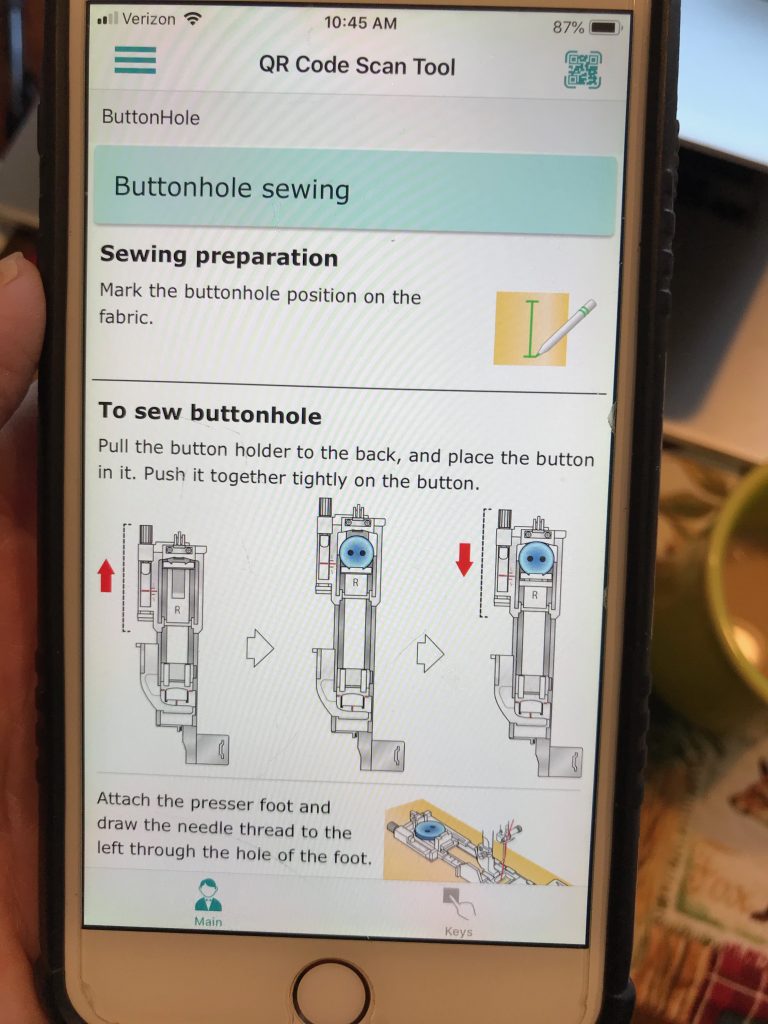
First, you can select from a wide variety of buttonholes. I went for the standard (after all, I hadn’t sewn a buttonhole in over two decades!). Using the AcuSpark app (free on the App store, works with the M7 and a few other Janome’s), you open the app on your phone/device, scan the QR code in the bottom right of the machine’s screen (photo on left). This takes you to a tutorial within the app.
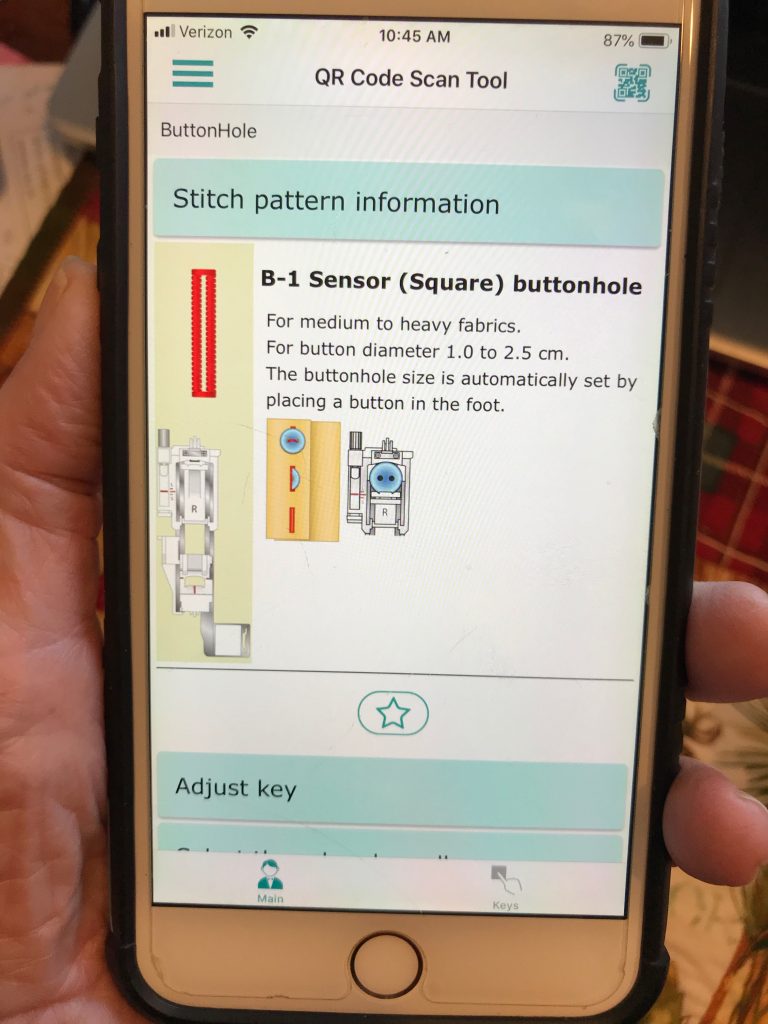
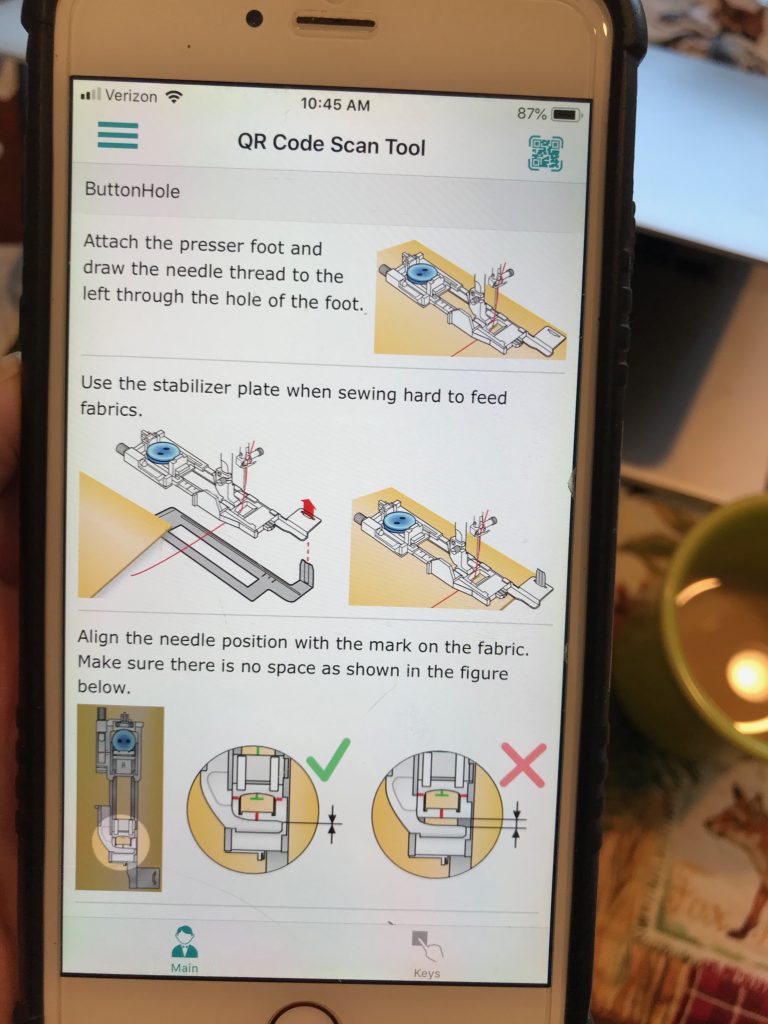
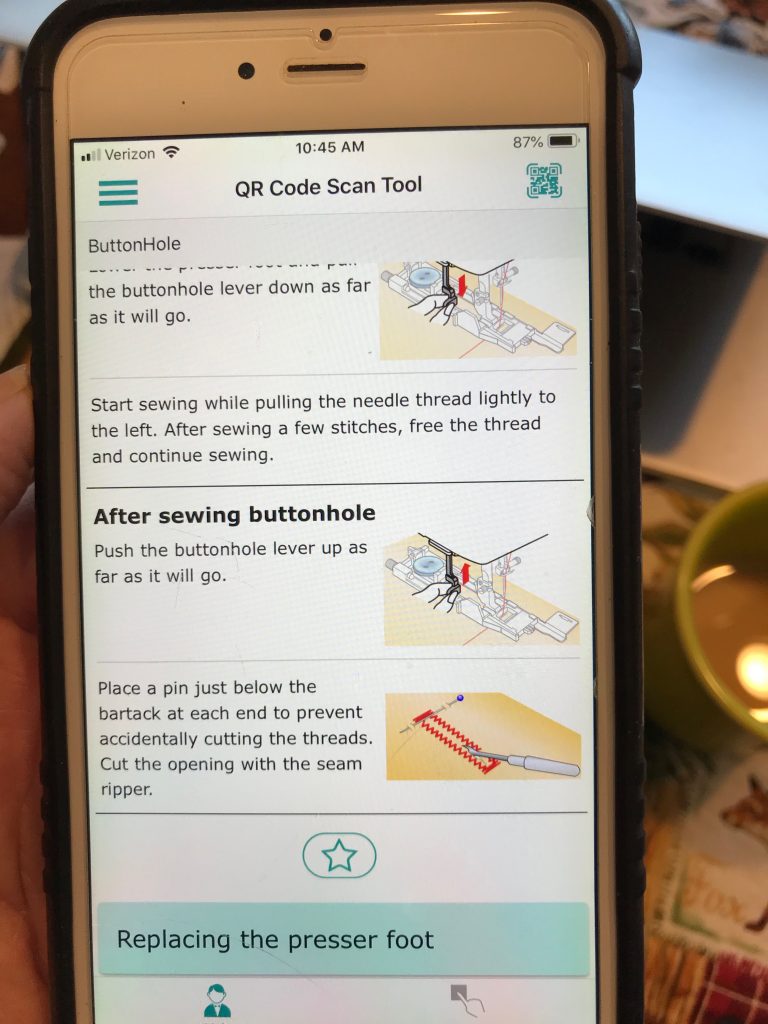
As you can see from the screen shots, the tutorial walks you through the process step by step. Easy peasy…my kind of sewing!
Here’s the app telling you how to make a buttonhole!
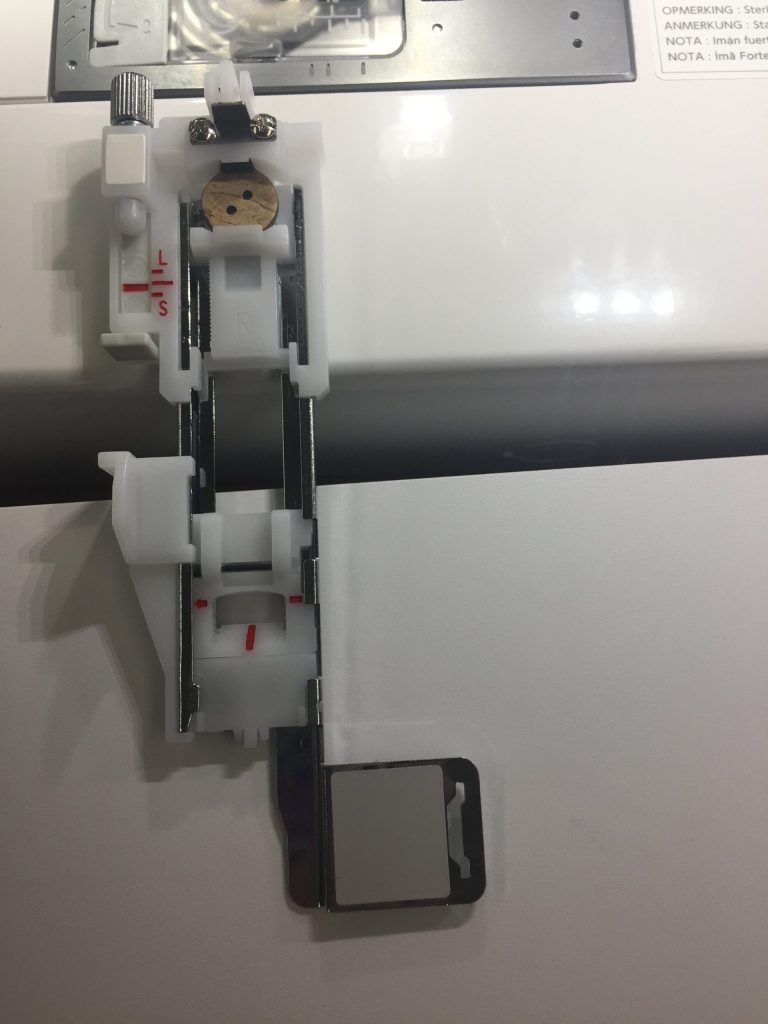
This is what that buttonhole foot looks like in real life. You slide the button into the back, attach the foot to the machine, and it makes the perfect sized hole every time. I kid you not, I make SEVEN buttonholes, perfectly, in seven minutes, and most of that was repositioning to the next spot!
More instructions on attaching and using the special buttonholer foot.
And how to finish the buttonhole.
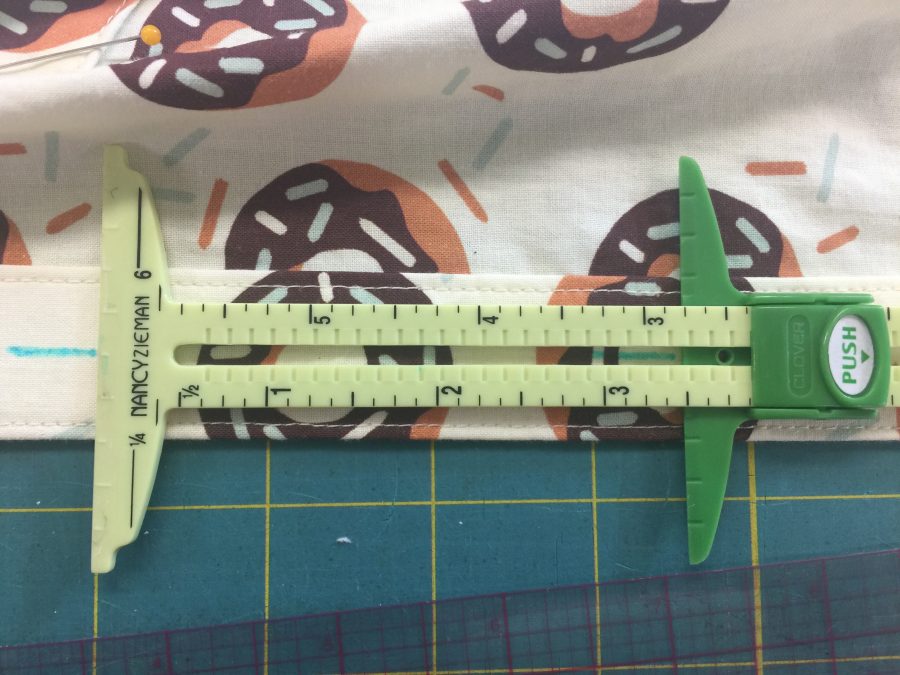
This Nancy Zieman (oh how I miss her!) tool from Clover is an improvement over the old-school metal one. Although I have a fondness for the metal one, this version allows you to center the ruler exactly on the button band and mark your buttonholes. The darker green slider notches into the grooves so it doesn’t slide up and down the center as you work. I wondered when I bought it why I thought I needed a newer (plastic, yuck) version. Now I know. Once again, smarter sewing.

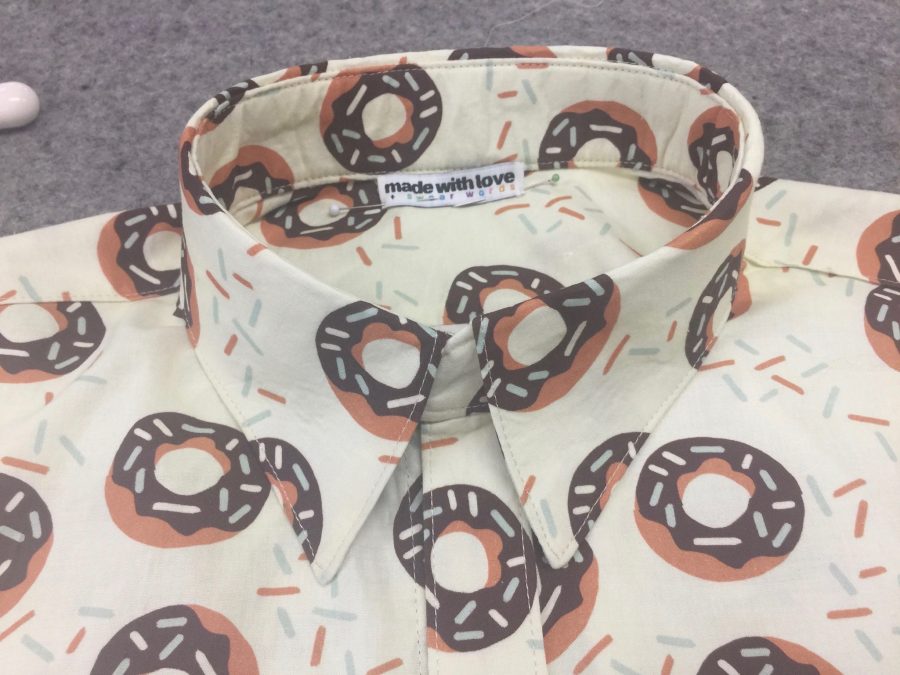
(Alert: even geekier pattern and garment sewing paragraph!) From the pattern, I also learned a new process for sequence of sewing and attaching the collar and collar stand. Instead of sewing the stand to the neckline, inserting the collar, and closing it up where the collar meets the neck band, the pattern has you sew collar and stand together, then sew the inside of the stand to the inside of the shirt and topstitch the collar to the shirt body. Ended up with absolute precision and perfection!!!!!!

LOOKIT how perfect that turned out! The only thing I would change on the next one (and yes there will be more for both sons) is to use a slightly less crisp interfacing so the collar stand holds up but isn’t quite so stiff.

So, with 50 years of sewing experience (albeit minimal garment making in the past three decades), an excellent pattern that taught this greying sew-ist a couple new things, and the incredible precision of the Janome M7 Continental machine, I am a seriously happy camper. Even better, Joshua loves his shirt!

Accuquilt GO!

Sunday, January 12th, 2020

Part of every new year should be learning new things…and I’m starting with the Accuquilt GO!

As part of the Michael Miller 2020 Brand Ambassador program, we received the Ready. Set. GO! Ultimate Fabric Cutting System from Accuquilt. It includes an AccuquiltGO! plus the 8″ Qube (a set of dies to cut shapes often used in piecing 8″ blocks) and a ginormous die to cut my own 2 1/2″ strips. I’ve never seen one of these used in person, let alone done it myself. They are supposed to be lots faster than traditional rotary cutting and more accurate to boot. That makes two things where I need improvement–grin!

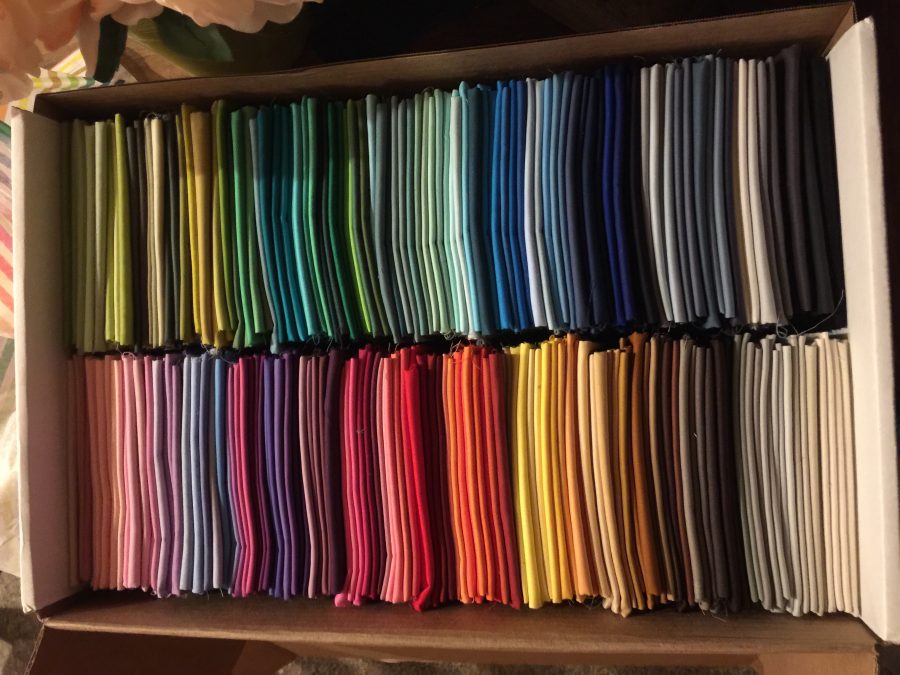
Lookit those amazing colors…don’t you want to dive in face first?

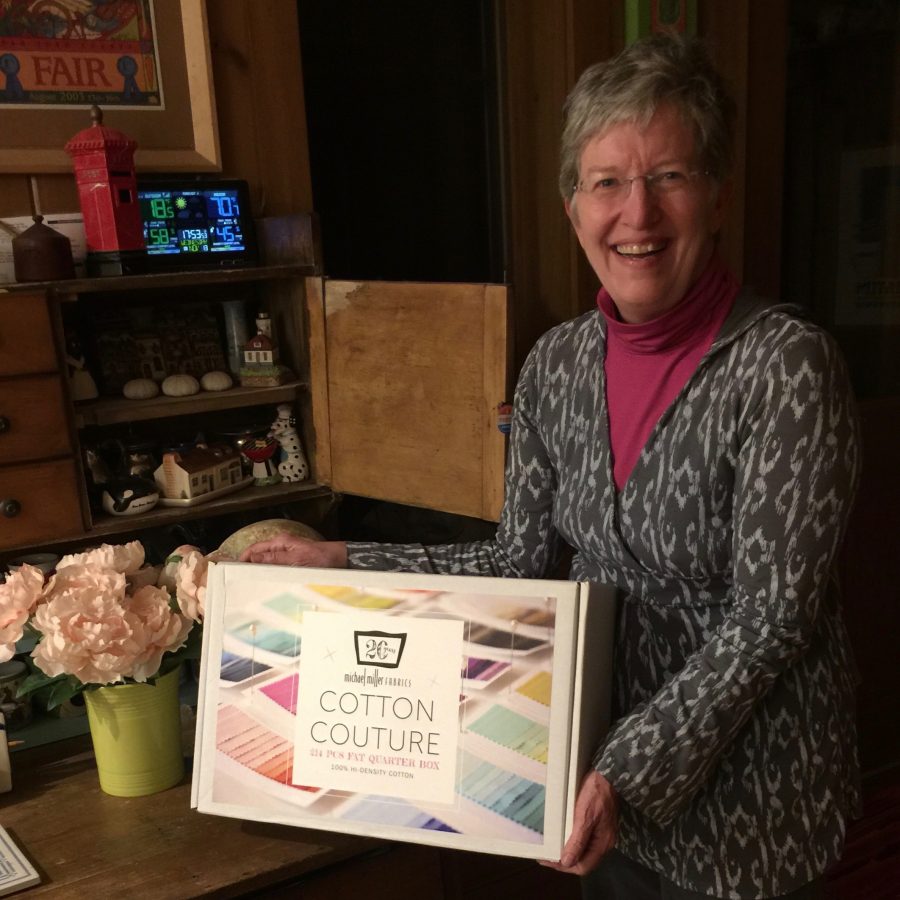
A while back, I was deliriously delighted to learn I had WON all 214 colors (above and below) of Michel Miller’s Cotton Couture (this was before I even applied for the Brand Ambassador program). I’ve been wanting to make a quilt I shall call “214.” As I’ve been waiting to upload this post, I realized that I can use the AccuquiltGO! to do the majority of the cutting, even the sashing! If I use the die for 2 1/2″ strips, I can then manually cut those in half vertically to get the 3/4″ finished strips I want to use for sashing. And then (!!!) I can use the die to cut 4 1/2″ squares (4″ finished) — if I am careful — to subcut the strips into 4 1/2″ lengths to match the size of squares I’m going to use in the quilt! Stay tuned…guess what I’m going to do today!

So, with that I am going to sign off and go play with my new fabric and toys!

The BRILLIANT new Janome M7Continental produces A York Pinafore for Christmas

Monday, December 23rd, 2019

Sewing machine companies are always coming out with new models, most of which are incrementally different from before. But every 10-15 years, Janome re-thinks the machine from all angles and comes up with something that is a major leap–and worth considering adding to your studio. The Janome 6600 was such a machine (circa 2004/5), and the new M7 Continental may well go down as one of The Best Sewing Machines Ever (in any brand!), and given the quality of Janome’s machines that is a high standard.

The Janome M7 Continental is a quantum leap in a sewing machine. Even if you aren’t in a market for a new machine, it is worth taking a look at this model. You might have something new on your wish list!

I have been dying to share with you the things I’ve been making, but most of them are Christmas gifts, so I can’t yet. But I made myself the York Pinafore from Helen’s Closet Patterns, so now I can finally tell you about this wonder with the dress as my example.

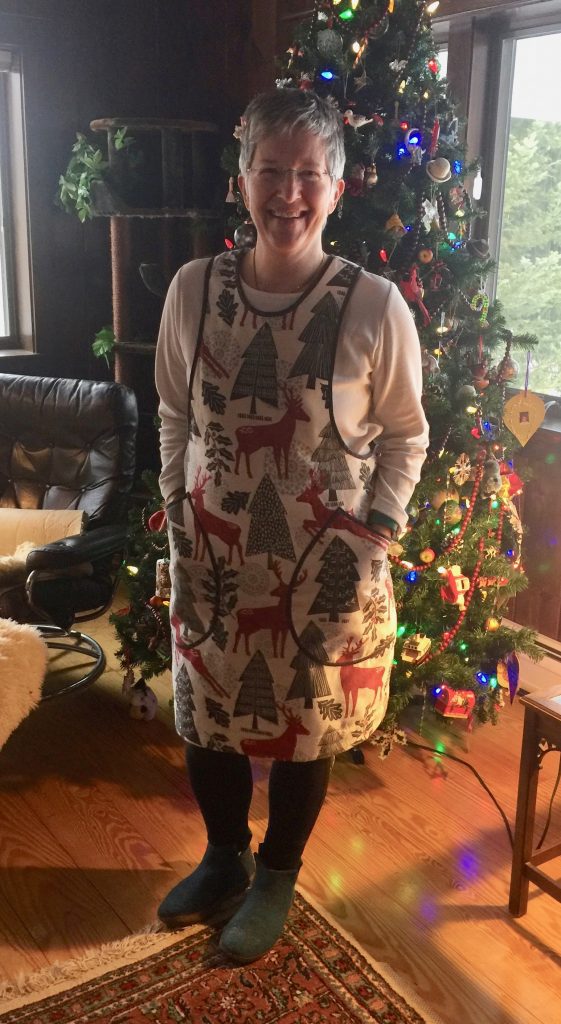
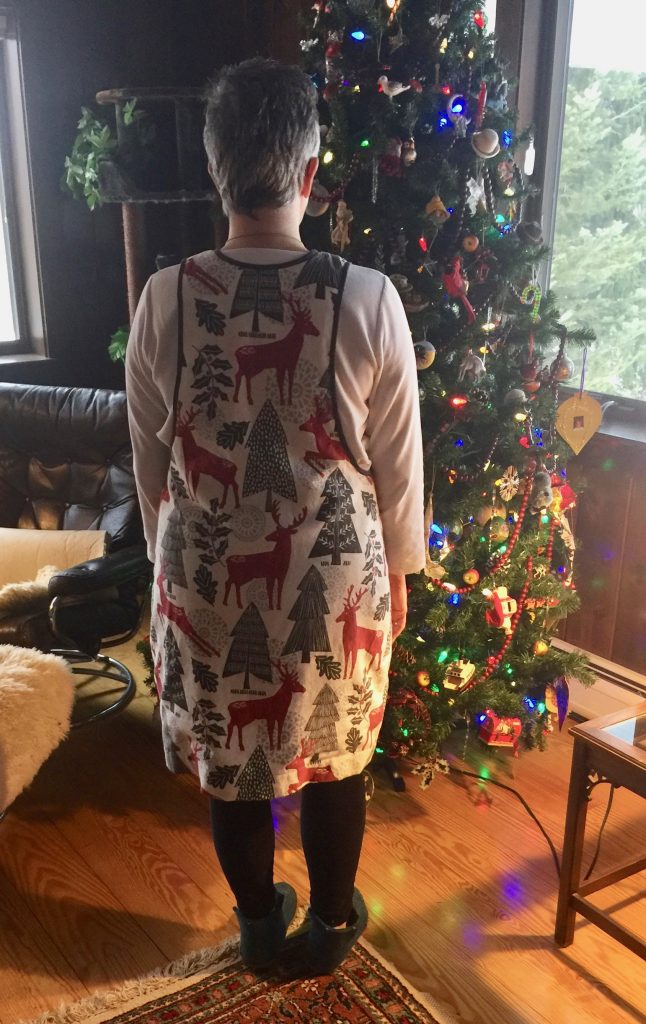
In my new “Pinafore” (which I would have called a jumper when I was a kid) in front of the Christmas tree. I’m particularly chuffed about how well the M7 and I worked as a team to get those pockets PERFECTLY placed to have the design flow.

When Janome comes out with a new machine, every single time I think “oh, I can’t give up the loaner I have” (I’m beyond fortunate to be a Janome Artisan so I get to try out their brilliant machines year after year), nothing can be better than this one. And then the new one is even better. Every single time they add new features that make me wonder “oh gosh why didn’t I realize that would be so wonderful.” The M7 is even MORE SO….read on!

The first thing I did, after cutting out the pattern, was to make a lining. I knew that using flannel that I intended to wear over leggings meant that the dress would stick like velcro. Fiddlehead Artisan Supply had a fabric I’ve not used before, Bemberg Rayon, for linings. The bolt end says dry clean, but we all know that can be ignored sometimes. I just bought an extra quarter yard to accommodate shrinkage and tossed it in a wash with hot water wash, cold water rinse, and hot dryer so it would do whatever shrinking it planned to do.

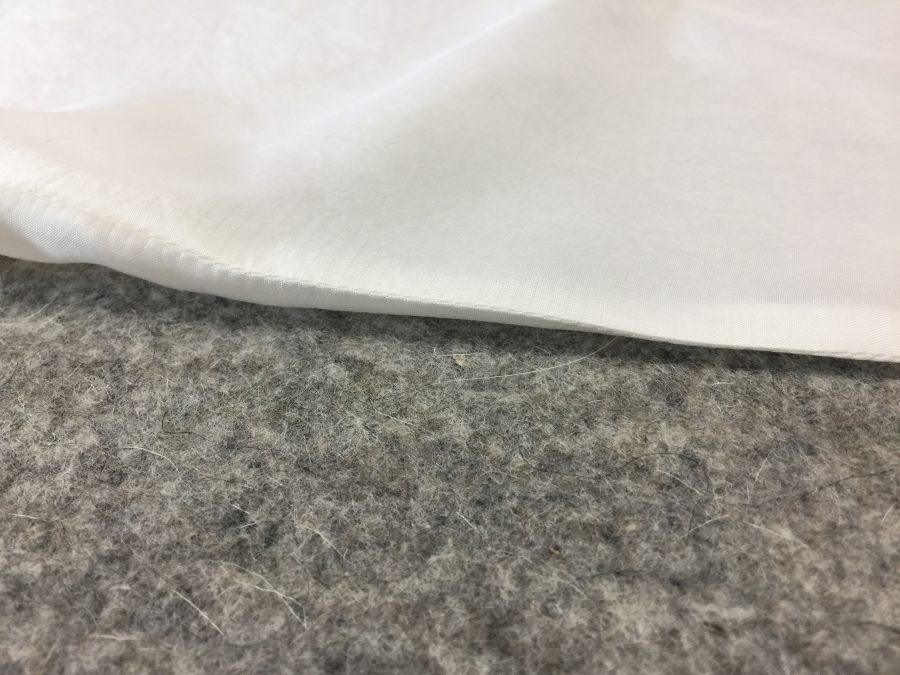
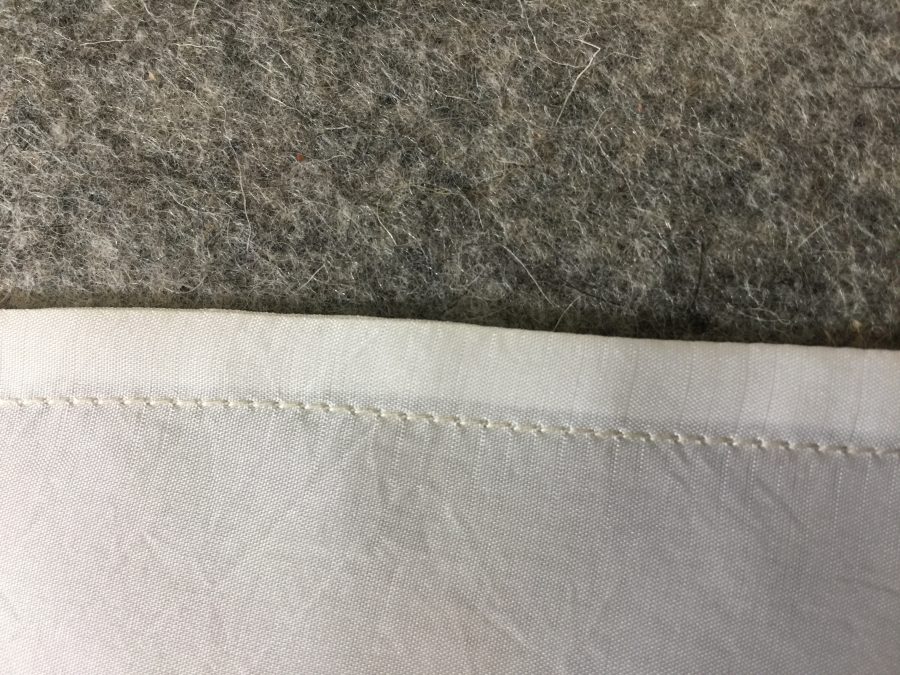
Then I cut, pinned, and started sewing. I probably should have used a thinner needle and the walking foot. I didn’t need to! The feed on this machine is so good that I had no issues going from thick flannel to silky thin rayon! Because rayon ravels, I used the quarter inch piecing foot to create a narrow seam that I turned into a French Seam.

A French seam is really a seam inside of another seam that completely encloses the raw edges. It is typically found in high end garments and used on fabrics that ravel.

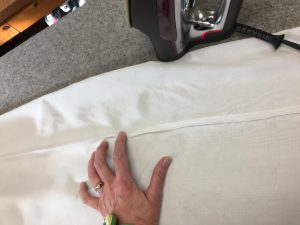
Once you have sewn the first seam, you press it as stitched to set the seams. It helps the thread sink into the cloth. Then you press the seam *open* which facilitates turning.

Then you fold the seam right along the stitching to create a “knife edge.” The best way to get the line perfectly on the edge is by pressing open (photo above) and then pressing flat. You can see how crisp and clean the edge is.

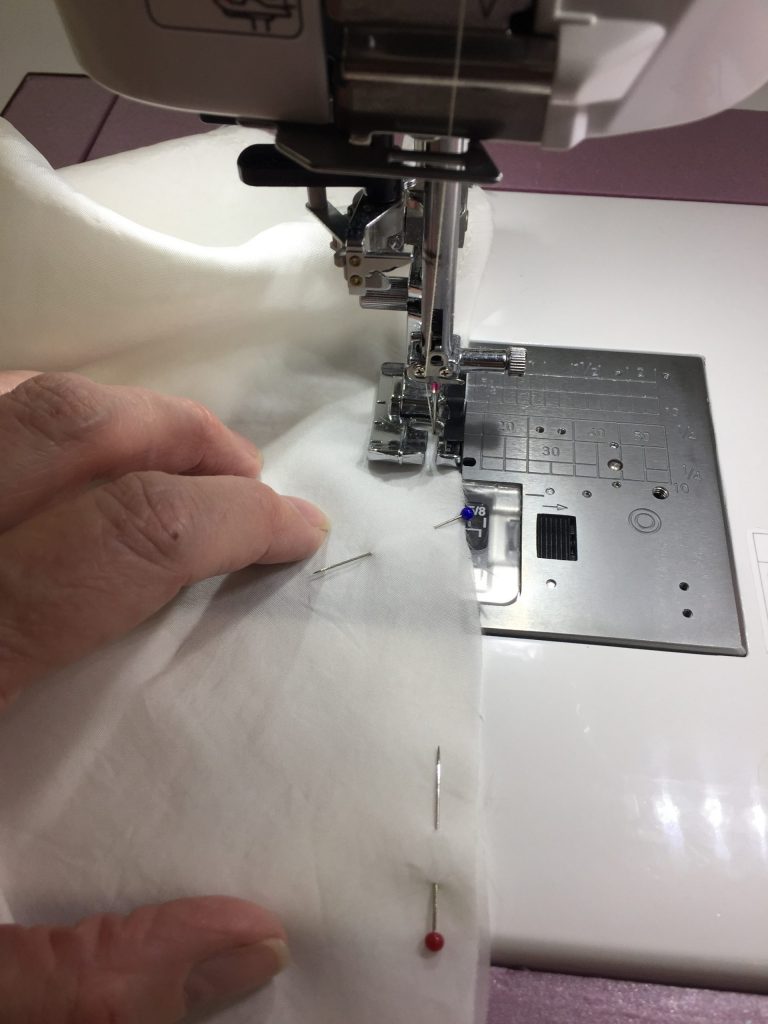
I used the quarter-inch foot with the edge guide but moved the needle to the left to 3/8″ from the edge to achieve this perfect seam. In this photo you can see the quarter inch encased and perfect stitching. The rayon won’t ravel ever!

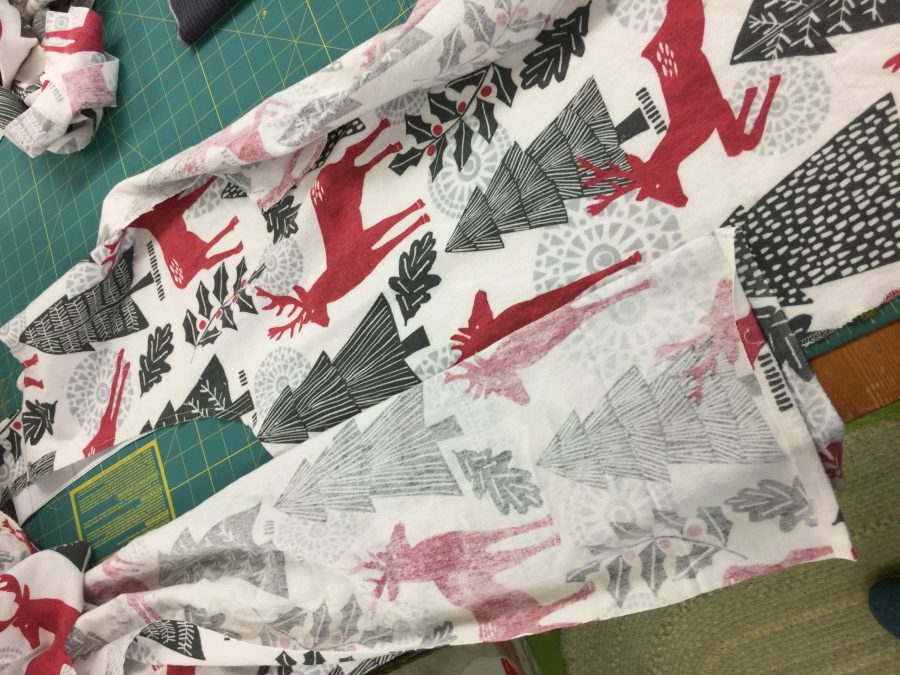
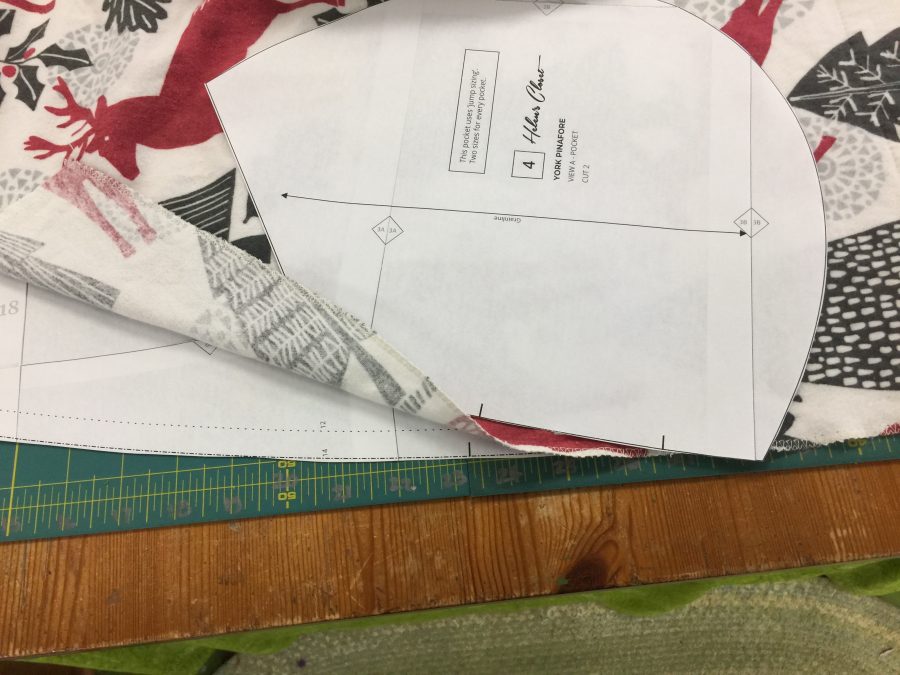
Here I’m matching the scraps and the front of the pinafore so I can cut the pocket pieces to exactly match!

Getting the design lined up perfectly to cut a matching piece for the pocket.

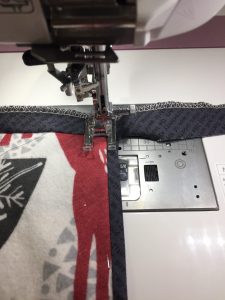
Here I’m stitching in the ditch for the opening of the pocket. I decided to outline the entire pocket with binding. I used the M foot and stitch 15 to overcast the edges as I did the gift bag in yesterday’s post. There are many ways to stitch in the ditch, including an edge-stitch foot that is included with most Janome machines, but personally I find I get my best results using the open-toe F-2 which offers the best visibility. I move the needle to the far right, set the right edge of the foot on the bias, and can get absolutely snug up next to the bias trim.

Now THAT is “stitching in the ditch.”

Throughout the process the M7 handled flawlessly–I mean FLAWLESSLY!

I can’t wait to show you more of what it can do.

Janome’s new slogan is Reliability by Design….I stopped to think about it: I have been sewing on Janome machines since 2003 and not once–let me repeat that, NOT ONCE– have I had an issue that was due to the machine. Once or twice due to operator error, but really, the machines have been utterly, totally and completely reliable. And each one gets better.

Lining done and waiting for the dress to be made.

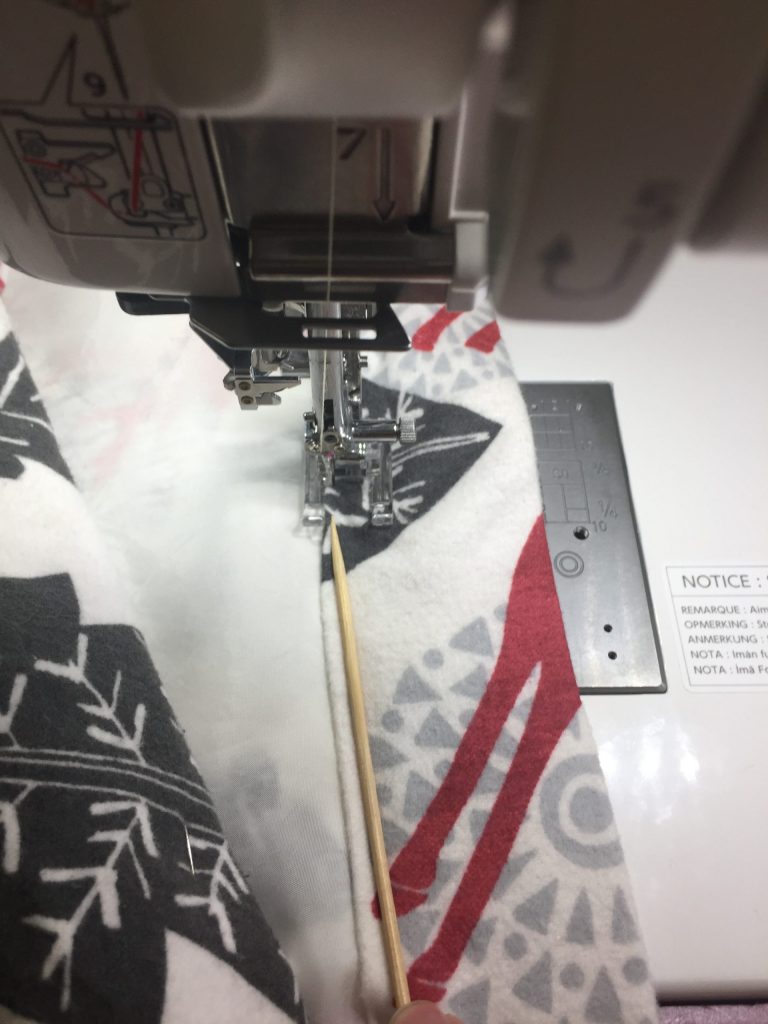
For hemming, I use the same foot and process, just move the stitch to the far left and adjust the needle drop (the Janome’s have so many needle positions you can get it perfect!). Because I have the rayon lining tucked inside the hem of the flannel outside, and because flannel is loosely woven and really quite stretchy, I use a bamboo skewer to press down on the hem. This compresses the hem, keeps it from rolling up, and controls the stretch. I hold the skewer in place and let the fabric feed underneath it–the tip of the skewer never gets up near the needle. The outstanding feed mechanism on the M7 meant I didn’t need to put on the AcuFeed at all… I couldn’t believe how easy it was!
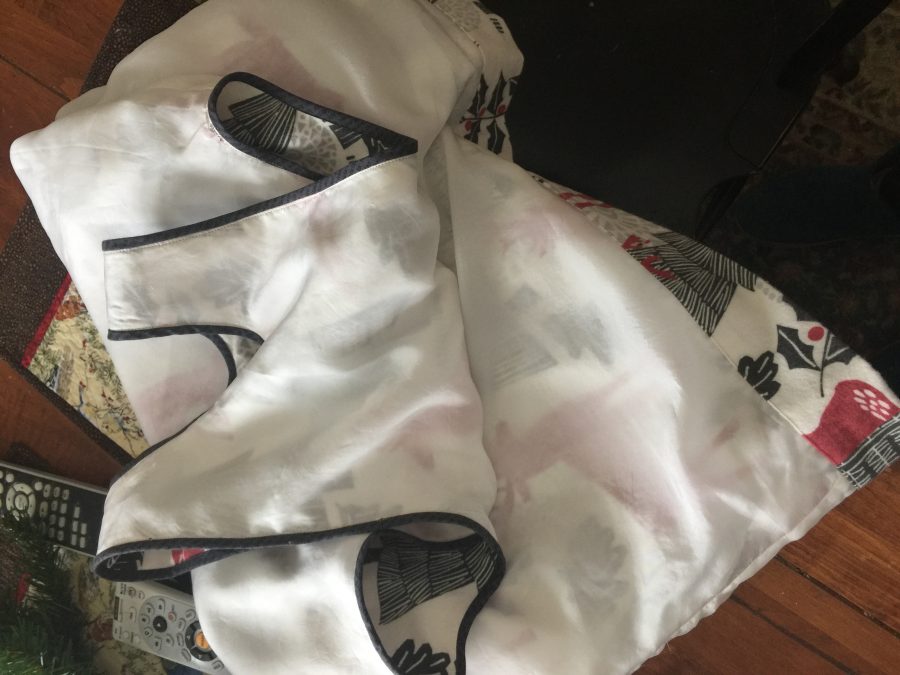
Here’s the inside: all seams contained between the lining and fashion (!) fabric/flannel. I tucked the lining dress inside the flannel dress and basted at the neckline and sleeves. The pattern calls for using bias a narrow facing, but I chose to go quilty and have the grey accent the edges. Then, very carefully because lining is so slippery, I measured the hem and tucked the lining inside (instead of having it hang loose as is more common) and hemmed the dress.
Dress from the back. If you are curious, put York Pinafore in the search box and Pinterest…SO many cute ideas, fabulous on a wide range of body types, and fast to make. I can see using a quilting cotton for a fun summer dress with tank or T underneath, and corduroy for winter.

This new M7 Continental Janome is really something else, and although I am a Janome Artisan and affiliated, I would say all this if I had bought this machine at full retail. I’ll take you through some of the other marvelous things it can do in January and February. In the meantime, another small but marvelous detail: the thread stand has a COLLAPSING antenna.

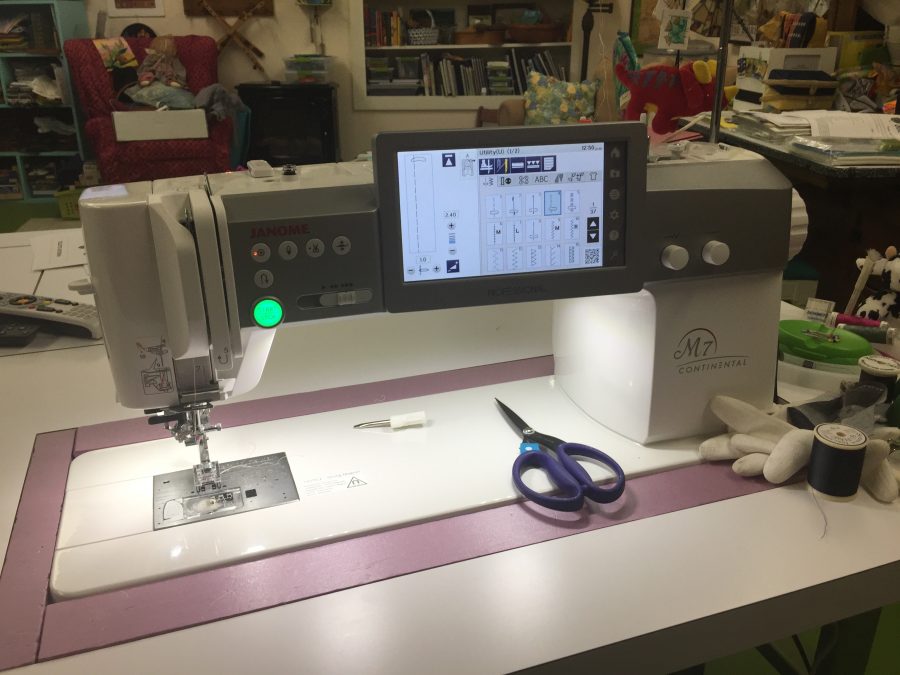
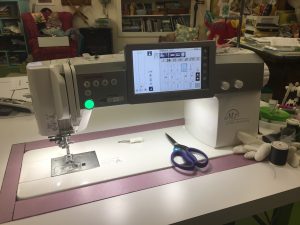
Here’s the machine again…it’s hard to see in the clutter of my room, but there is a thread antenna on the right rear of the machine.

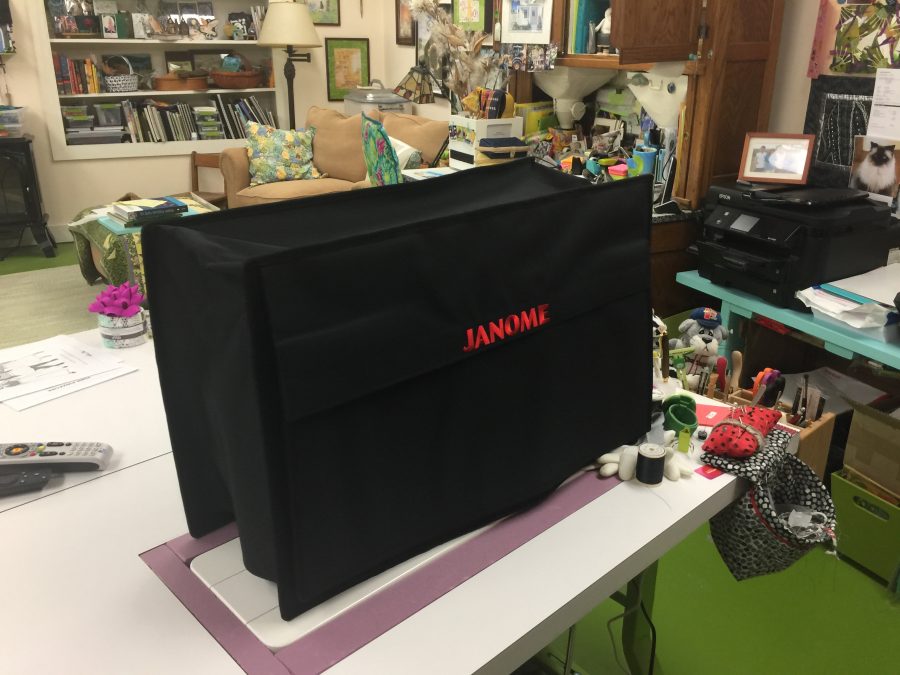
The thread antenna is telescoping, meaning you can push it down and then cover up your machine with the very good quality included cover! WOOT! PS: It also comes with a great extension table with a drawer in it, but even with its vast size (more on that later), I wanted to set it into my table. I cut rigid foam core to fill in the gaps. The mother of invention!