Over the past week to two weeks, I have been working on ….sit down and prepare yourselves for this… a **pieced** quilt. Yes, me. A very simple pieced quilt, but nonetheless.
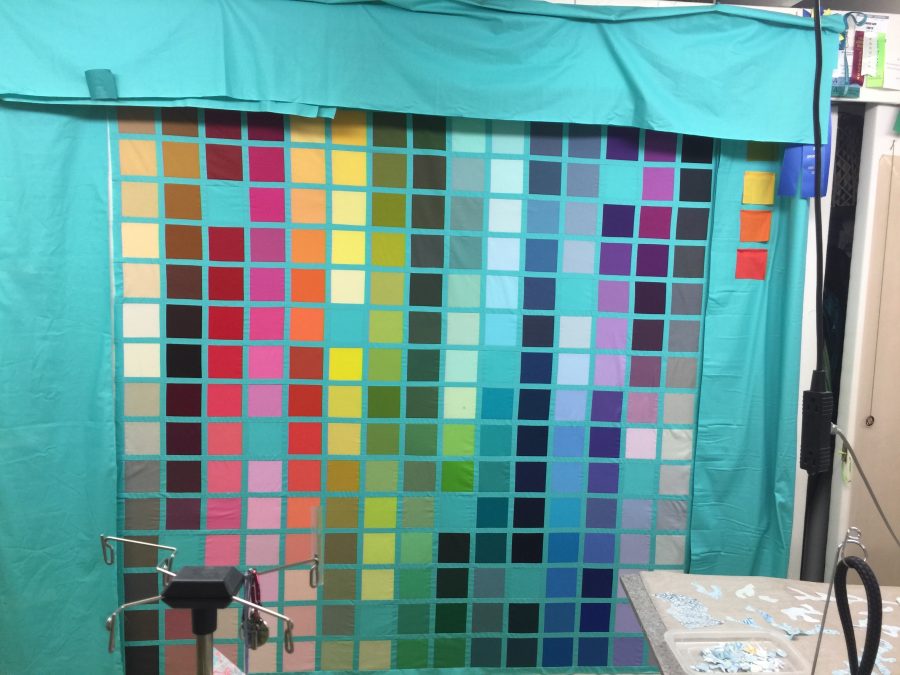
Eye-candy…my 214 colors, test-driving super wide borders with possible squares or rectangles. I’m going with nothing to distract from that glorious grid of color. Hopefully the quilting will make the wide borders look good. Want them that big so they will fit on a king size bed–we’ve got a queen but the pug takes up a ridiculous amount of room for such a small dog! The center is 72″ and overall I’m hoping for about 100″ square.
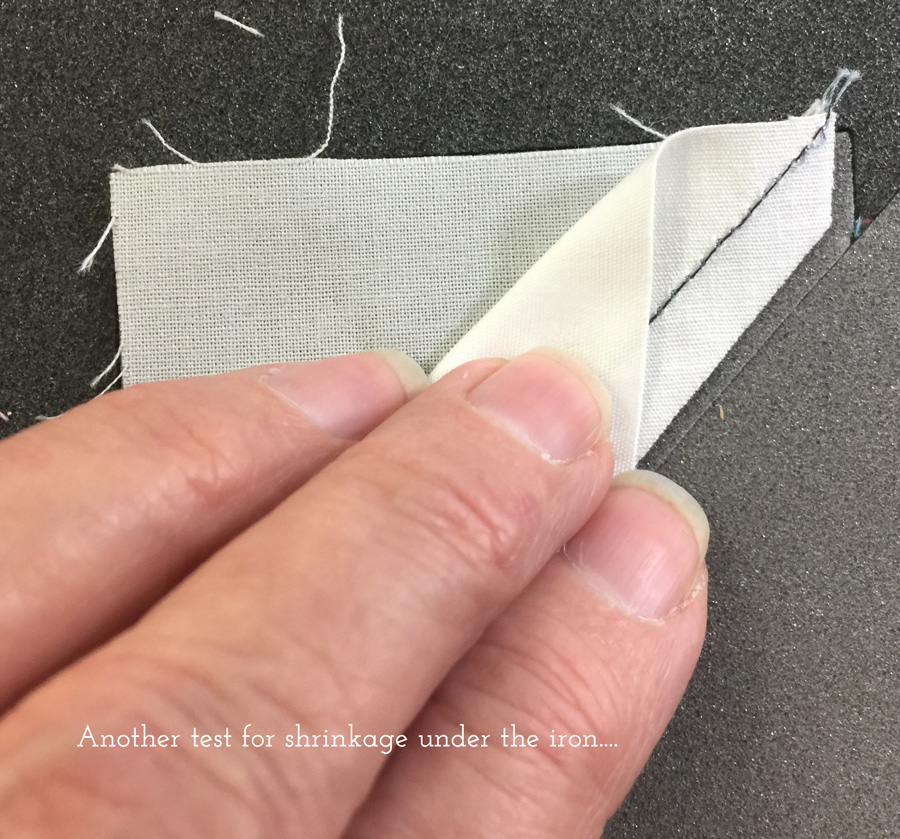
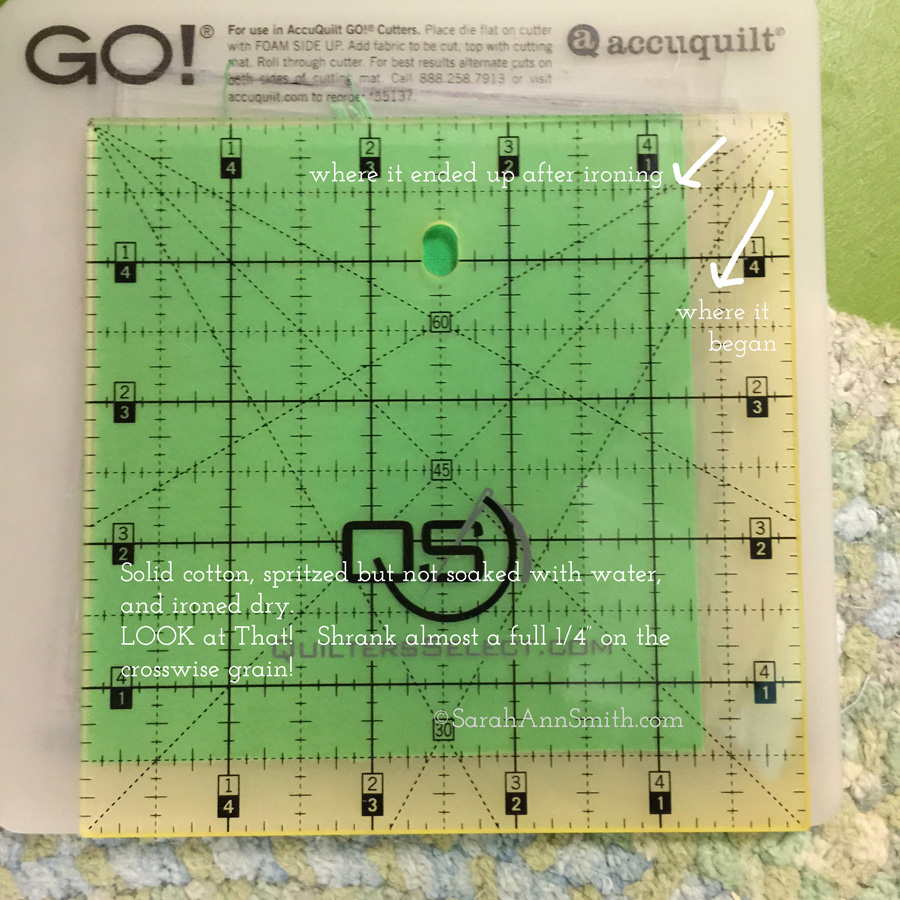
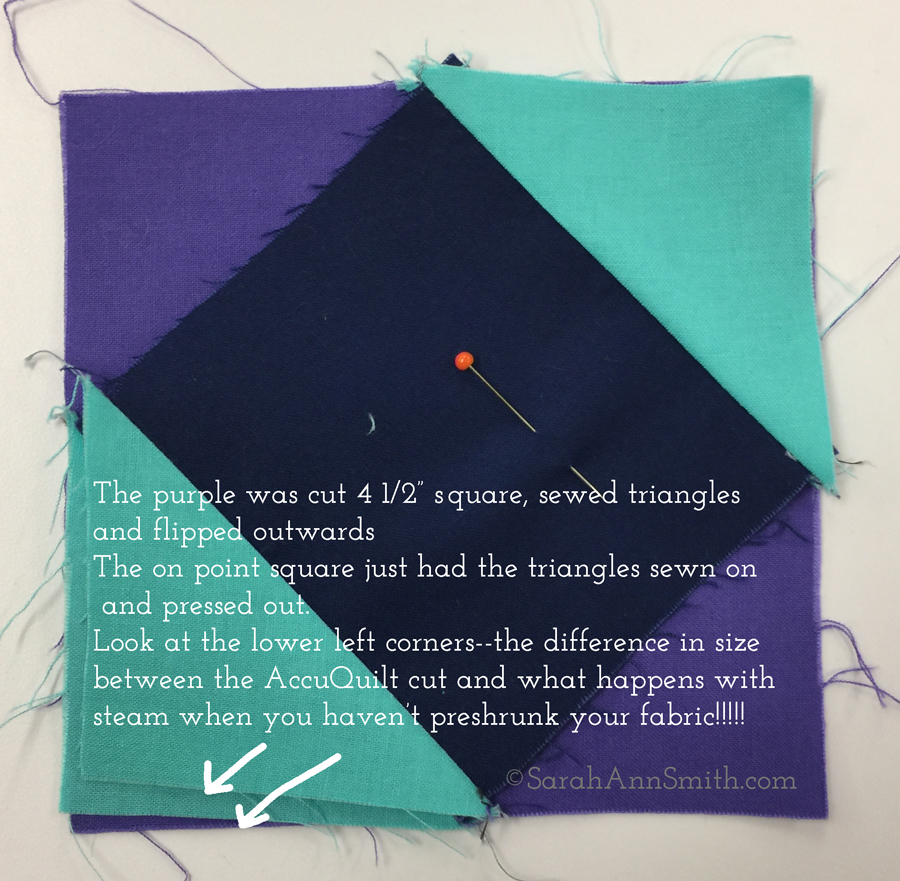
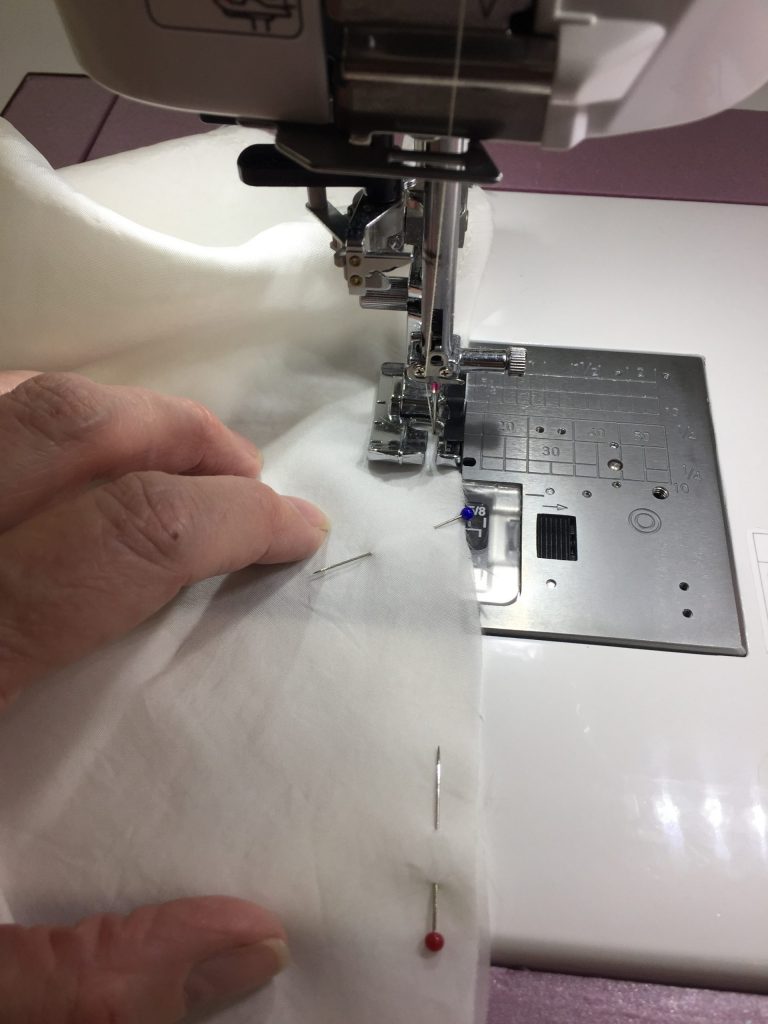
I’ve also been experimenting with the AccuQuiltGO! that was given to this year’s crop of Michael Miller Fabrics Brand Ambassadors. To my distress my block was not perfect–too small! I KNEW it had to be something on my end (it was), so I triple checked my seams (perfect to scant). I checked the size of the fabric cut on the dies: perfect. I checked that I used the correct dies: I did. Then I noticed something. After ironing, the block seemed off. Look at what I discovered:
First I placed my half square triangles on the dies, and look how much smaller the pieces are after sewing and ironing! So then I checked the start of the square-in-a-square center of the block. Same thing: after steam ironing/pressing, a unit that finishes at 2″ and one that finishes at 3 1/4″ are each 1/16-1/8″ smaller!
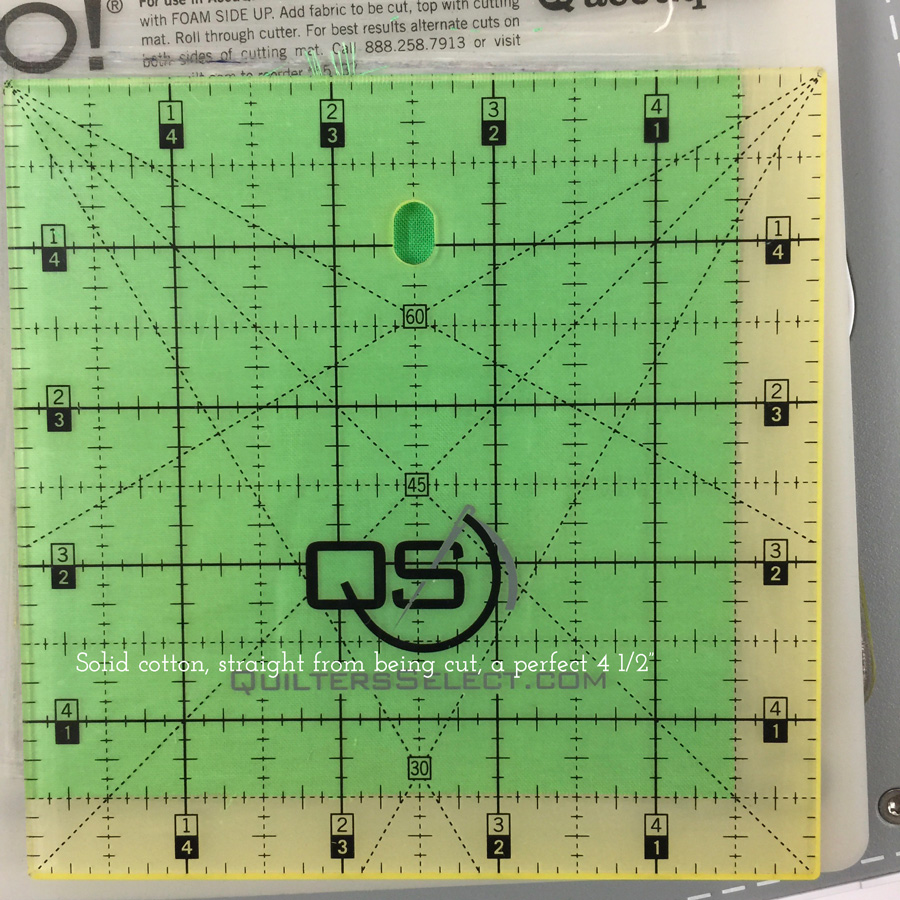
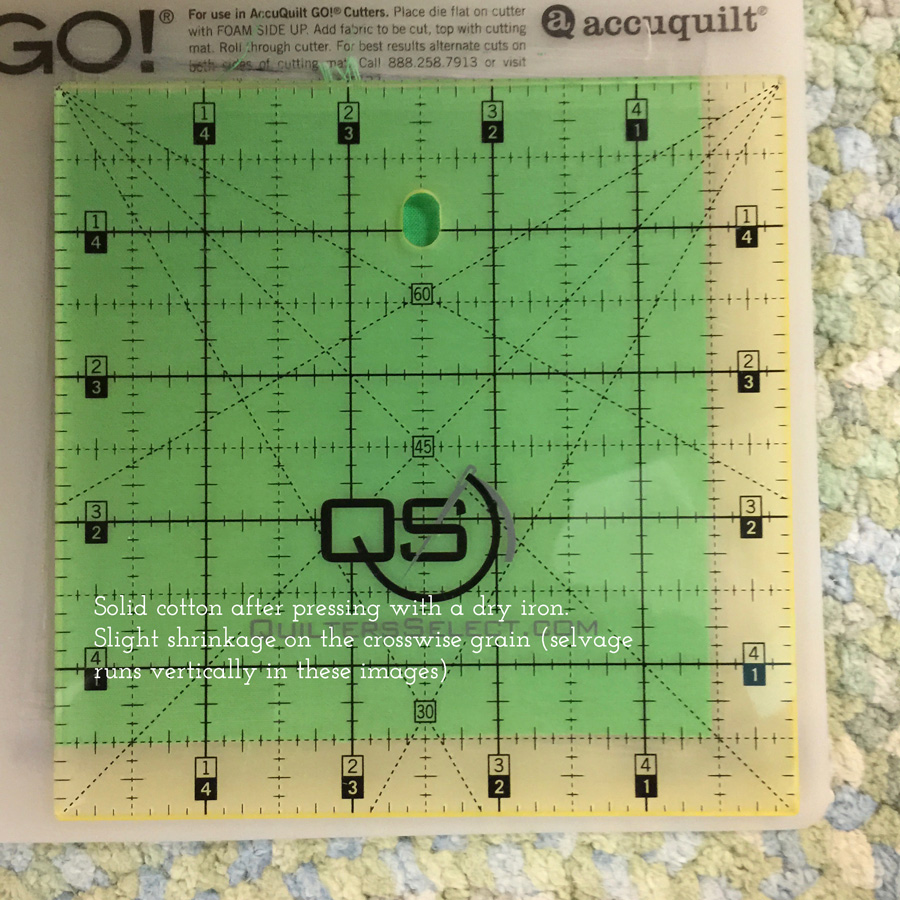
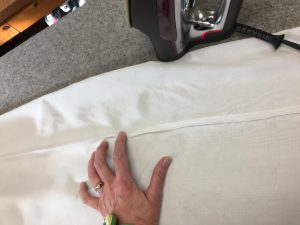
I decided to get a bit more scientific about it: Cut, measure, dry iron, measure, steam iron, measure. Here is what happened with the Cotton Couture, a delightful solid with a glorious feel in the hand:
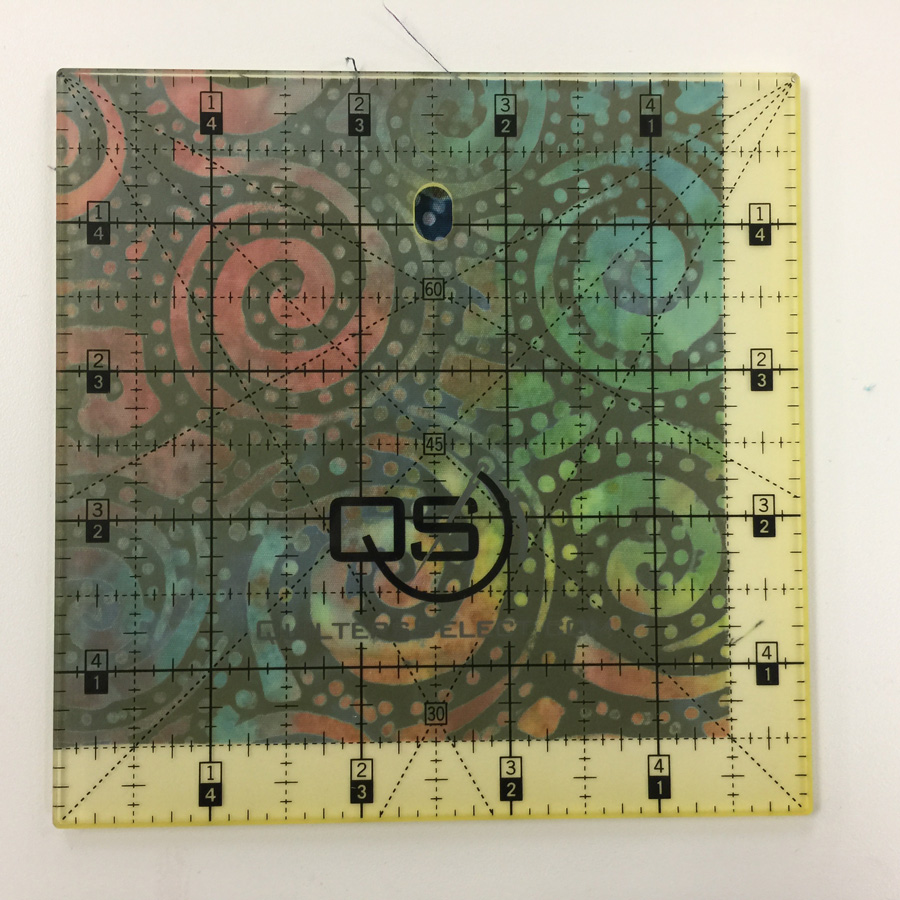
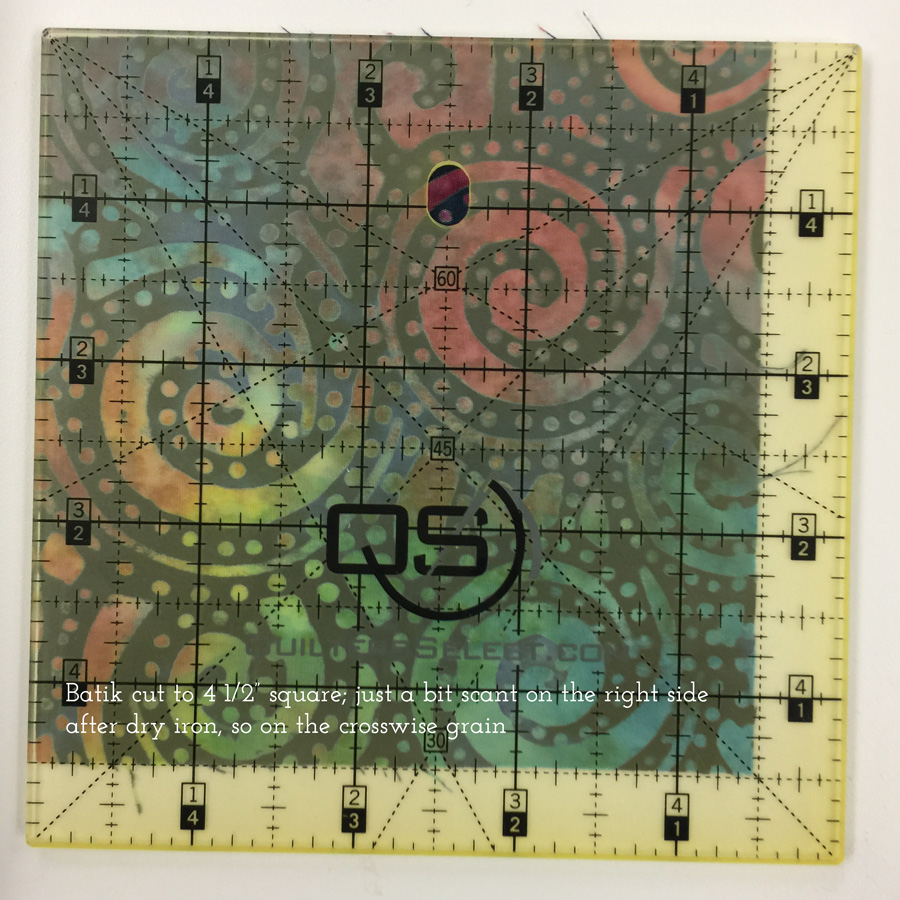
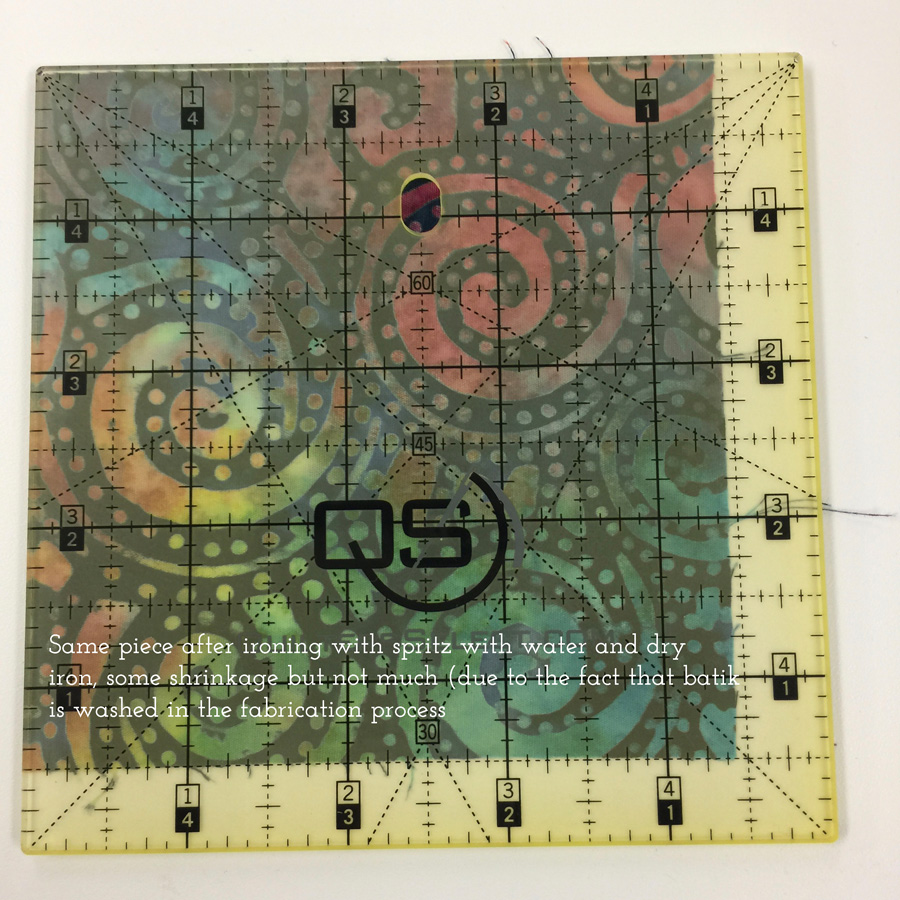
Batiks are made using hand-dyeing processes that include a resist being applied (usually wax of some sort), then the wax is washed out, more dye applied, and so on. This means some of the shrinkage should already have happened.
As cut with the AccuQuiltGO! Perfect 4 1/2″One last image: Here I created the center square-in-a-square for a pieced block. I cut the purple fabric to 4 1/2″ thinking that might help my accuracy, and sewed on two half square triangles. I then used navy for the central square and piled on identical half square triangles. All are cut with the lengthwise grain as suggested by Accuquilt for accuracy. LOOK at how much smaller due to more pressing and moisture from the iron. ERK!
So my lesson is, when I am not fusing things up, I really need to either pre-steam-iron everything, or prewash and mostly-dry it and then iron dry and smooth. I can now use the perfection of the AccuquiltGO and actually achieve as close to perfect as I will ever get! Now, off to order backing fabric for my BIG quilt.
Part of every new year should be learning new things…and I’m starting with the Accuquilt GO!
As part of the Michael Miller 2020 Brand Ambassador program, we received the Ready. Set. GO! Ultimate Fabric Cutting System from Accuquilt. It includes an AccuquiltGO! plus the 8″ Qube (a set of dies to cut shapes often used in piecing 8″ blocks) and a ginormous die to cut my own 2 1/2″ strips. I’ve never seen one of these used in person, let alone done it myself. They are supposed to be lots faster than traditional rotary cutting and more accurate to boot. That makes two things where I need improvement–grin!
Lookit those amazing colors…don’t you want to dive in face first?
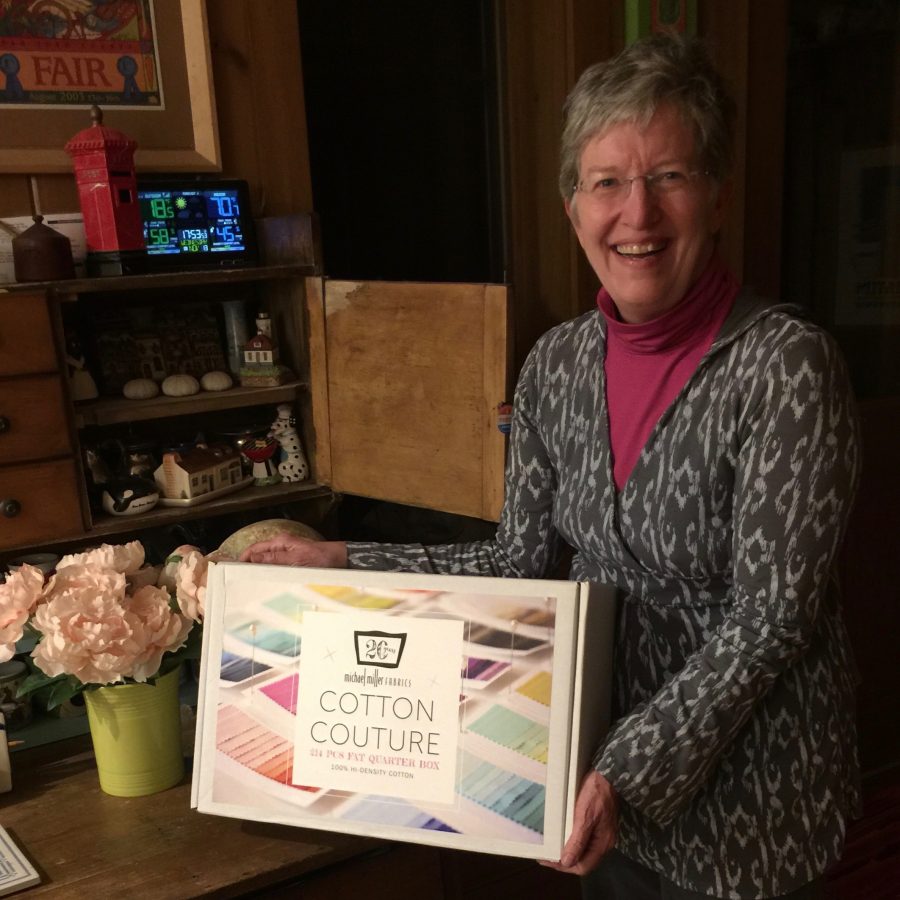
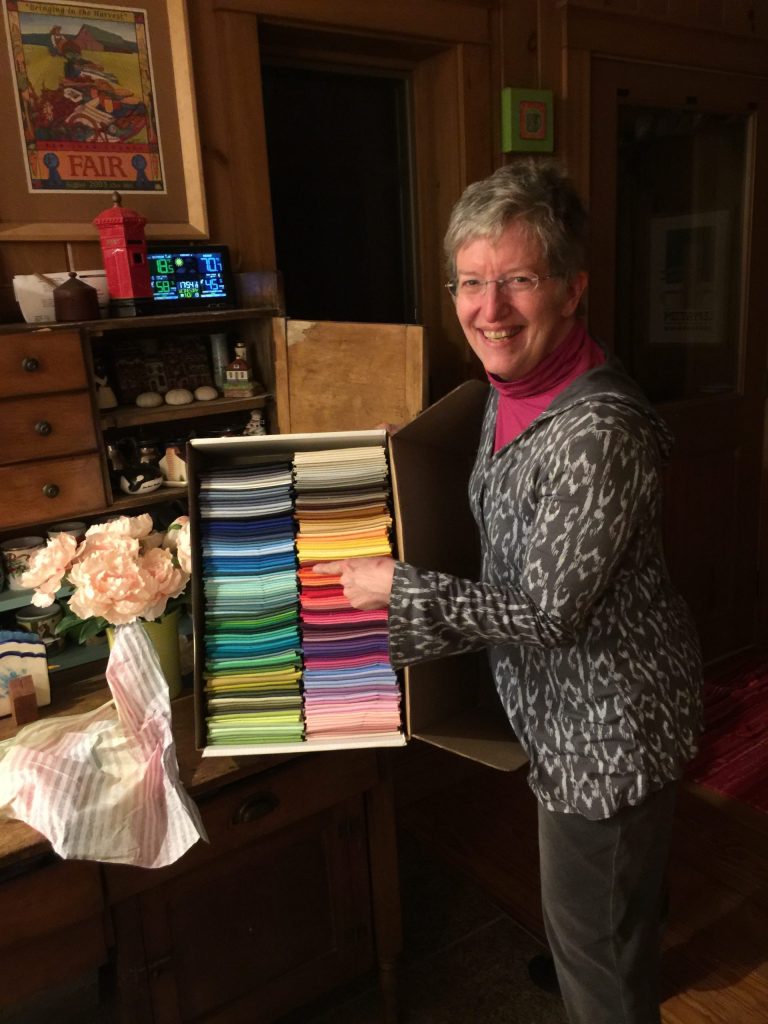
A while back, I was deliriously delighted to learn I had WON all 214 colors (above and below) of Michel Miller’s Cotton Couture (this was before I even applied for the Brand Ambassador program). I’ve been wanting to make a quilt I shall call “214.” As I’ve been waiting to upload this post, I realized that I can use the AccuquiltGO! to do the majority of the cutting, even the sashing! If I use the die for 2 1/2″ strips, I can then manually cut those in half vertically to get the 3/4″ finished strips I want to use for sashing. And then (!!!) I can use the die to cut 4 1/2″ squares (4″ finished) — if I am careful — to subcut the strips into 4 1/2″ lengths to match the size of squares I’m going to use in the quilt! Stay tuned…guess what I’m going to do today!
So, with that I am going to sign off and go play with my new fabric and toys!
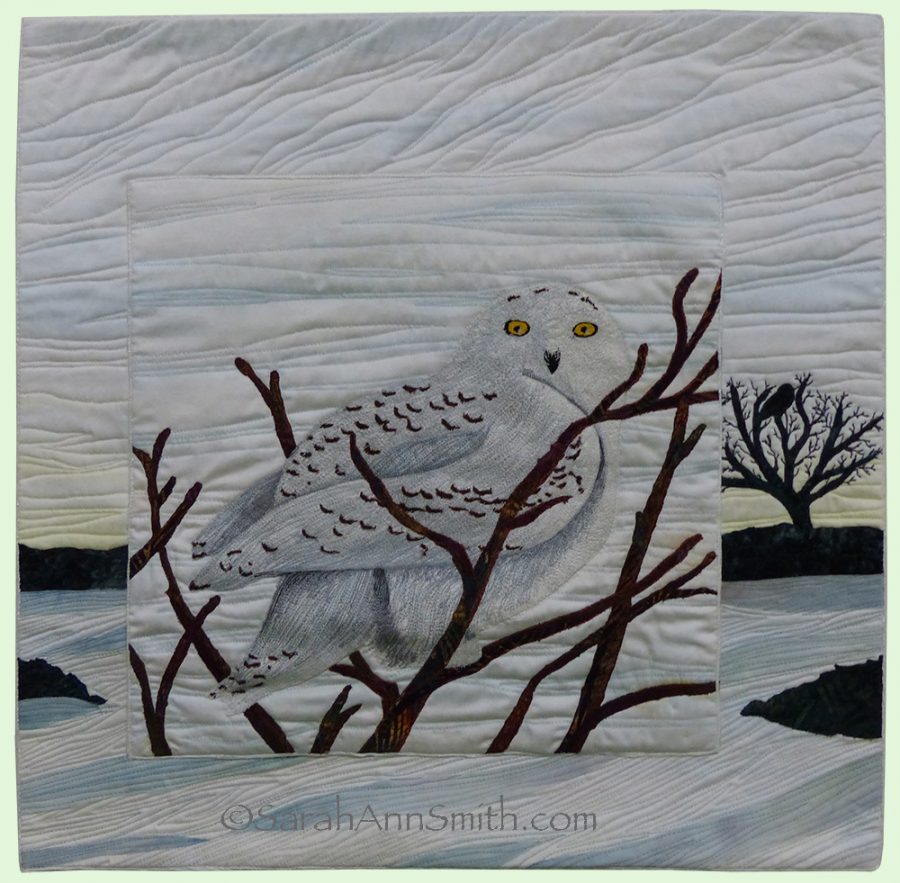
Well today sure started off well…. got an email from curator and exhibit organizer extraordinaire Donne DeSoto that my Snowy Owl, from Acadia National Park, will be on display at the Library of Congress soon! Here’s the LoC’s information on the exhibit–I SO wish I lived close enough to go see it!
Here’s my owl, based on photographs I took at nearby Clarry Hill Ridge. Of course I had to pick something from Acadia National Park, here in Maine. The fabrics are my hand dyes, include a little bit of paint, and lots of threadwork!
This quilt is part of the Inspired by the National Parks exhibit which debuted in the National Parks Centennial Year. The exhibit will finish its phenomenal run in February at the Mancuso Brother’s Mid-Atlantic show. Donna told me the exhibit has been to THIRTY ONE venues in the three years it has traveled! That is astounding! So many thanks to Schiffer Publishing for putting out the tome with all our quilts and to the other participants. But most of all, special thanks to Donna. I can’t even begin to imagine how much work it is to keep tabs on so many quilts and get them traveling so many places for multiple years. THANK YOU DONNA!
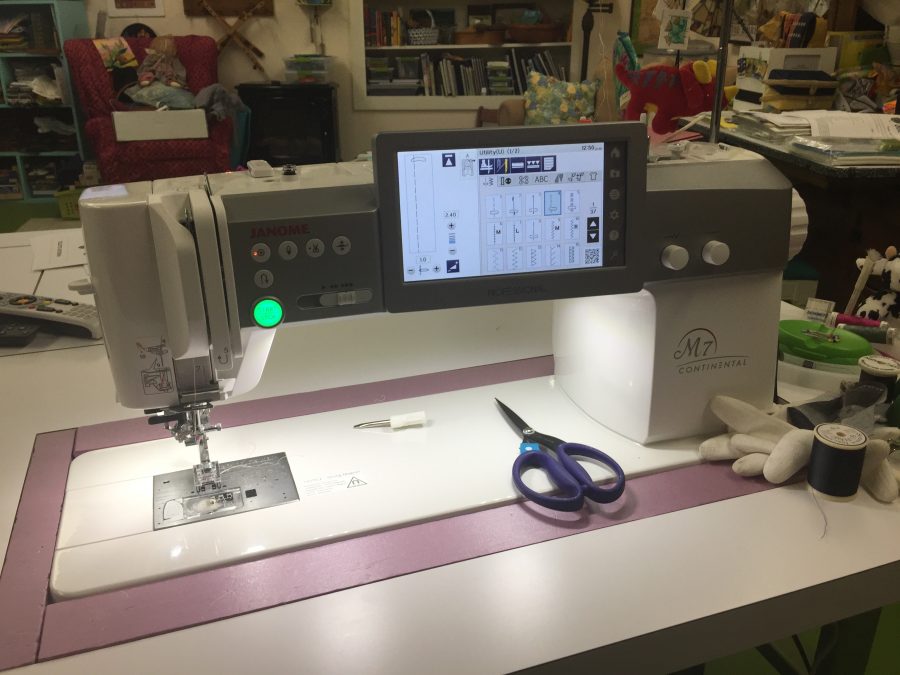
Sewing machine companies are always coming out with new models, most of which are incrementally different from before. But every 10-15 years, Janome re-thinks the machine from all angles and comes up with something that is a major leap–and worth considering adding to your studio. The Janome 6600 was such a machine (circa 2004/5), and the new M7 Continental may well go down as one of The Best Sewing Machines Ever (in any brand!), and given the quality of Janome’s machines that is a high standard.
The Janome M7 Continental is a quantum leap in a sewing machine. Even if you aren’t in a market for a new machine, it is worth taking a look at this model. You might have something new on your wish list!
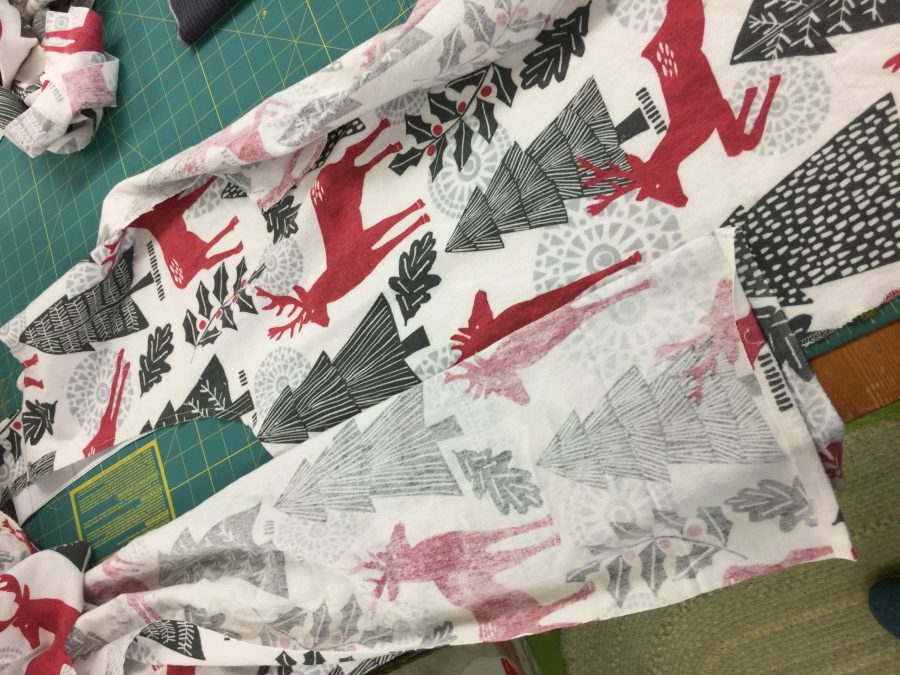
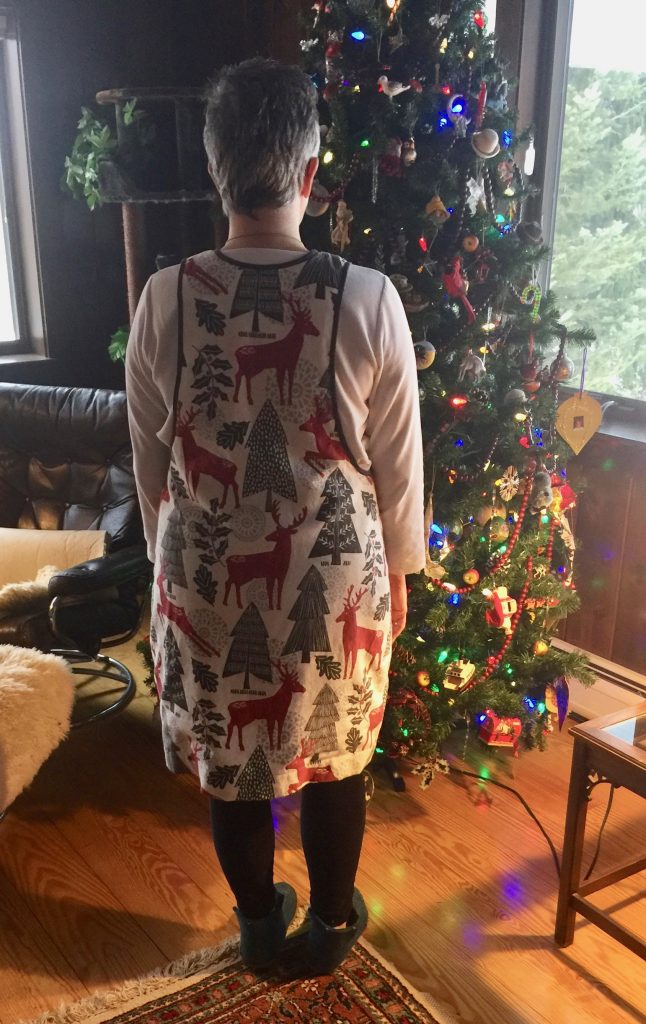
I have been dying to share with you the things I’ve been making, but most of them are Christmas gifts, so I can’t yet. But I made myself the York Pinafore from Helen’s Closet Patterns, so now I can finally tell you about this wonder with the dress as my example.
In my new “Pinafore” (which I would have called a jumper when I was a kid) in front of the Christmas tree. I’m particularly chuffed about how well the M7 and I worked as a team to get those pockets PERFECTLY placed to have the design flow.
When Janome comes out with a new machine, every single time I think “oh, I can’t give up the loaner I have” (I’m beyond fortunate to be a Janome Artisan so I get to try out their brilliant machines year after year), nothing can be better than this one. And then the new one is even better. Every single time they add new features that make me wonder “oh gosh why didn’t I realize that would be so wonderful.” The M7 is even MORE SO….read on!
The first thing I did, after cutting out the pattern, was to make a lining. I knew that using flannel that I intended to wear over leggings meant that the dress would stick like velcro. Fiddlehead Artisan Supply had a fabric I’ve not used before, Bemberg Rayon, for linings. The bolt end says dry clean, but we all know that can be ignored sometimes. I just bought an extra quarter yard to accommodate shrinkage and tossed it in a wash with hot water wash, cold water rinse, and hot dryer so it would do whatever shrinking it planned to do.
Then I cut, pinned, and started sewing. I probably should have used a thinner needle and the walking foot. I didn’t need to! The feed on this machine is so good that I had no issues going from thick flannel to silky thin rayon! Because rayon ravels, I used the quarter inch piecing foot to create a narrow seam that I turned into a French Seam.
A French seam is really a seam inside of another seam that completely encloses the raw edges. It is typically found in high end garments and used on fabrics that ravel.
Once you have sewn the first seam, you press it as stitched to set the seams. It helps the thread sink into the cloth. Then you press the seam *open* which facilitates turning.
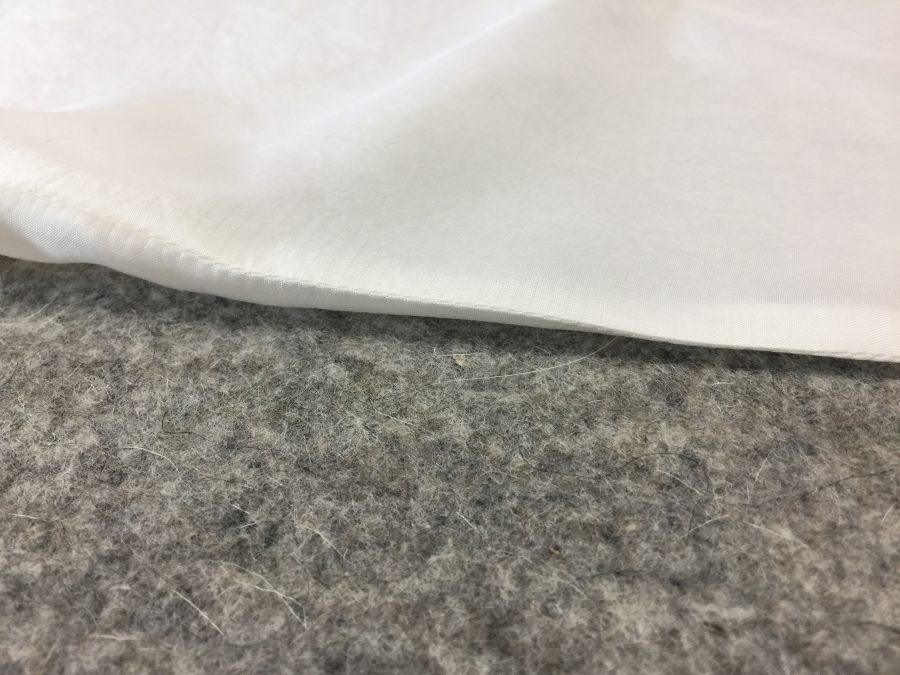
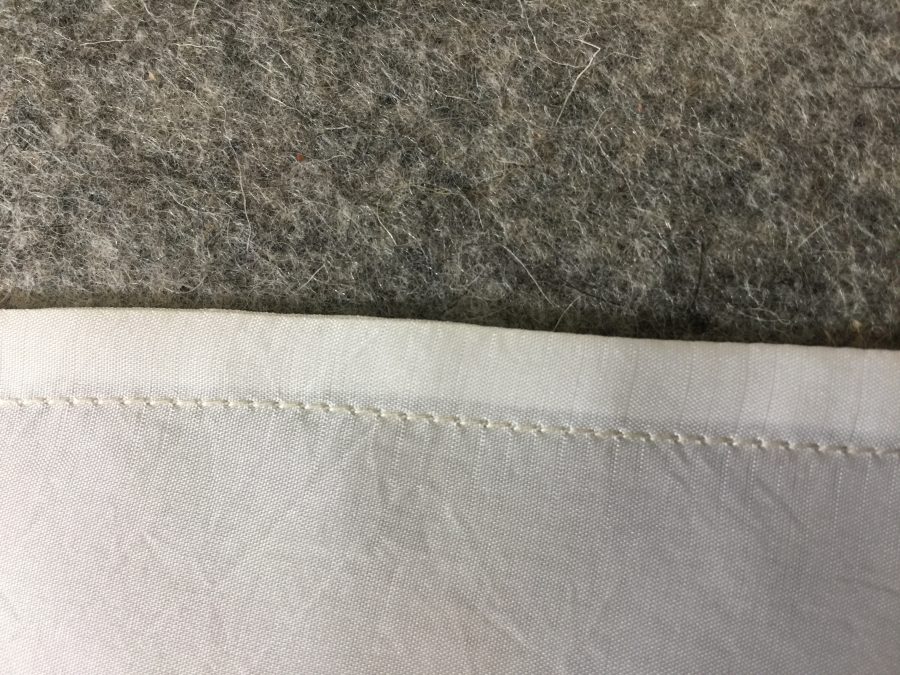
Then you fold the seam right along the stitching to create a “knife edge.” The best way to get the line perfectly on the edge is by pressing open (photo above) and then pressing flat. You can see how crisp and clean the edge is.
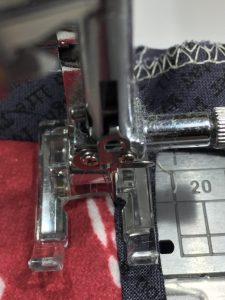
I used the quarter-inch foot with the edge guide but moved the needle to the left to 3/8″ from the edge to achieve this perfect seam. In this photo you can see the quarter inch encased and perfect stitching. The rayon won’t ravel ever!
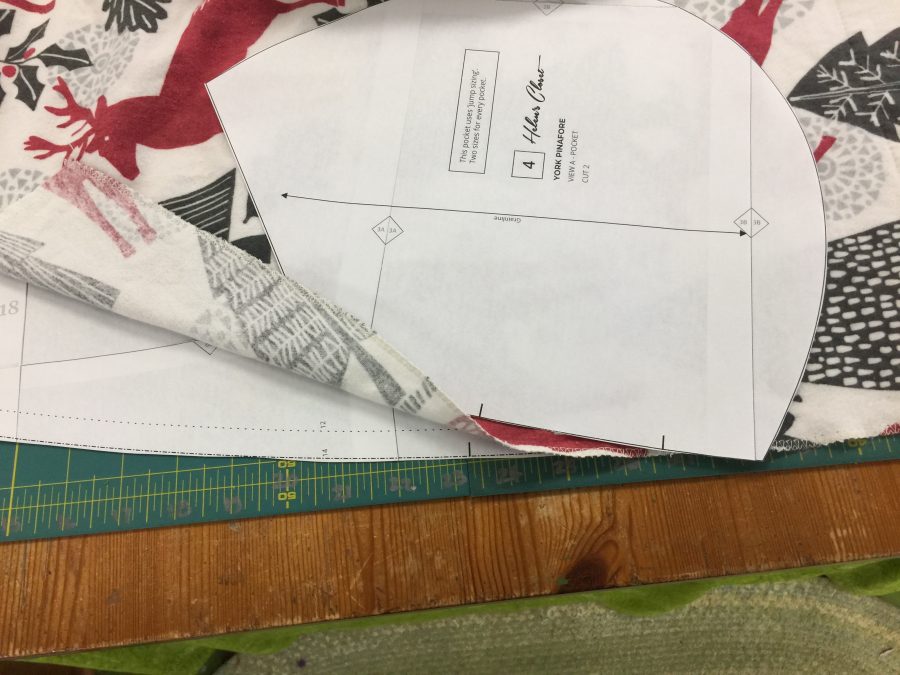
Here I’m matching the scraps and the front of the pinafore so I can cut the pocket pieces to exactly match!
Getting the design lined up perfectly to cut a matching piece for the pocket.
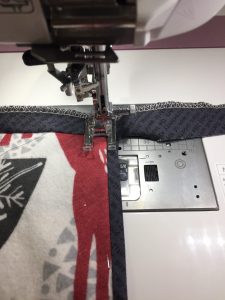
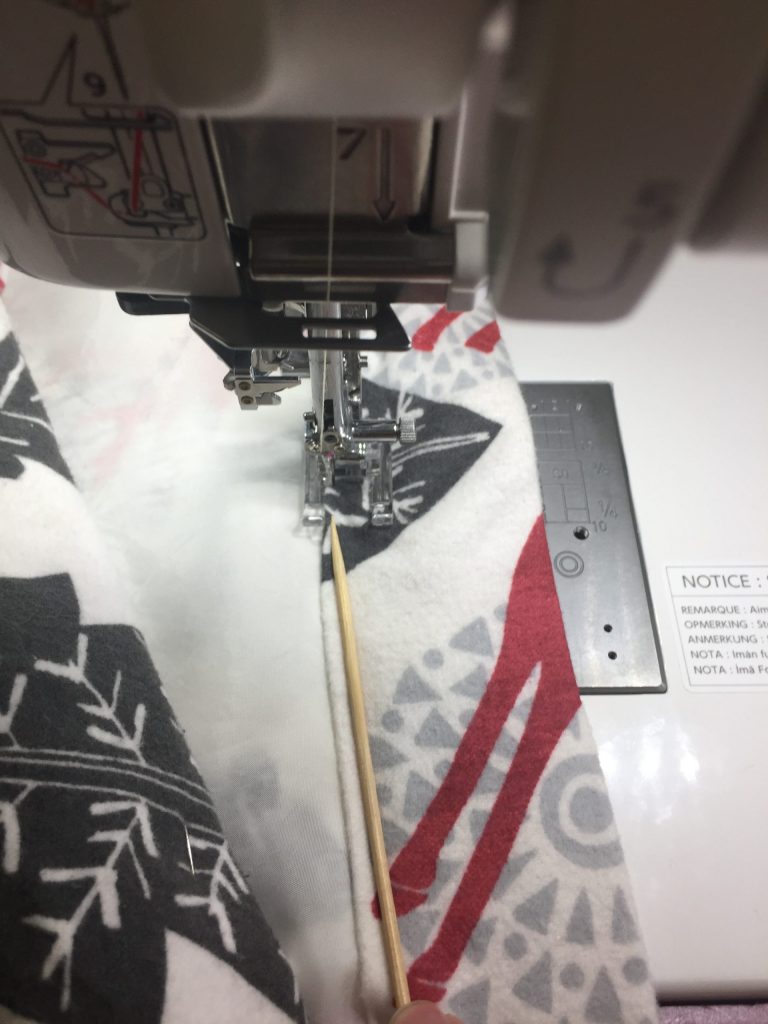
Here I’m stitching in the ditch for the opening of the pocket. I decided to outline the entire pocket with binding. I used the M foot and stitch 15 to overcast the edges as I did the gift bag in yesterday’s post. There are many ways to stitch in the ditch, including an edge-stitch foot that is included with most Janome machines, but personally I find I get my best results using the open-toe F-2 which offers the best visibility. I move the needle to the far right, set the right edge of the foot on the bias, and can get absolutely snug up next to the bias trim.
Now THAT is “stitching in the ditch.”
Throughout the process the M7 handled flawlessly–I mean FLAWLESSLY!
I can’t wait to show you more of what it can do.
Janome’s new slogan is Reliability by Design….I stopped to think about it: I have been sewing on Janome machines since 2003 and not once–let me repeat that, NOT ONCE– have I had an issue that was due to the machine. Once or twice due to operator error, but really, the machines have been utterly, totally and completely reliable. And each one gets better.
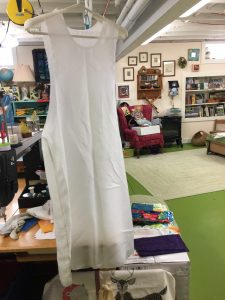
Lining done and waiting for the dress to be made.
For hemming, I use the same foot and process, just move the stitch to the far left and adjust the needle drop (the Janome’s have so many needle positions you can get it perfect!). Because I have the rayon lining tucked inside the hem of the flannel outside, and because flannel is loosely woven and really quite stretchy, I use a bamboo skewer to press down on the hem. This compresses the hem, keeps it from rolling up, and controls the stretch. I hold the skewer in place and let the fabric feed underneath it–the tip of the skewer never gets up near the needle. The outstanding feed mechanism on the M7 meant I didn’t need to put on the AcuFeed at all… I couldn’t believe how easy it was!Here’s the inside: all seams contained between the lining and fashion (!) fabric/flannel. I tucked the lining dress inside the flannel dress and basted at the neckline and sleeves. The pattern calls for using bias a narrow facing, but I chose to go quilty and have the grey accent the edges. Then, very carefully because lining is so slippery, I measured the hem and tucked the lining inside (instead of having it hang loose as is more common) and hemmed the dress.Dress from the back. If you are curious, put York Pinafore in the search box and Pinterest…SO many cute ideas, fabulous on a wide range of body types, and fast to make. I can see using a quilting cotton for a fun summer dress with tank or T underneath, and corduroy for winter.
This new M7 Continental Janome is really something else, and although I am a Janome Artisan and affiliated, I would say all this if I had bought this machine at full retail. I’ll take you through some of the other marvelous things it can do in January and February. In the meantime, another small but marvelous detail: the thread stand has a COLLAPSING antenna.
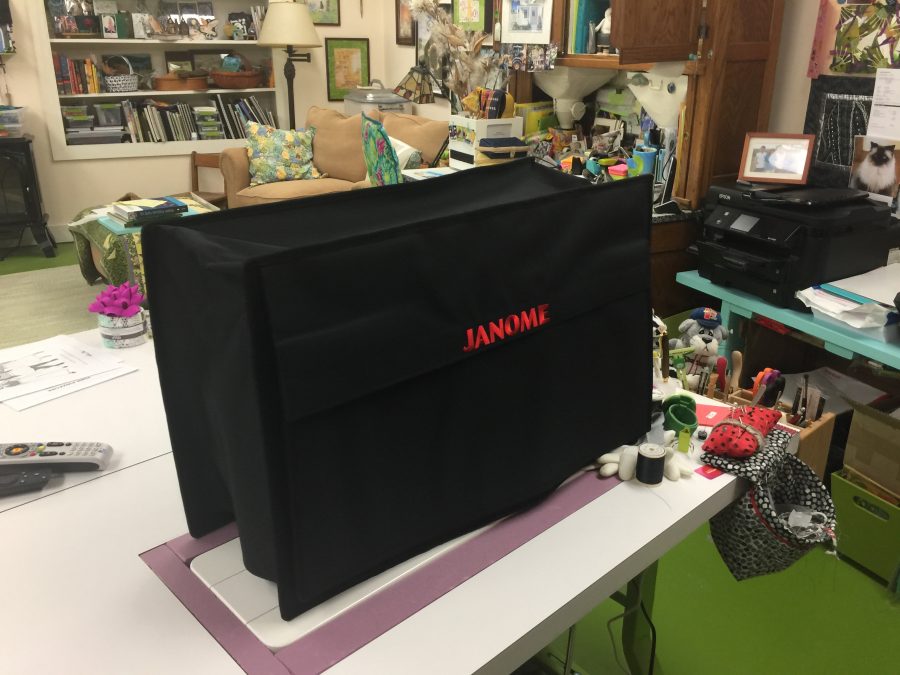
Here’s the machine again…it’s hard to see in the clutter of my room, but there is a thread antenna on the right rear of the machine.
The thread antenna is telescoping, meaning you can push it down and then cover up your machine with the very good quality included cover! WOOT! PS: It also comes with a great extension table with a drawer in it, but even with its vast size (more on that later), I wanted to set it into my table. I cut rigid foam core to fill in the gaps. The mother of invention!
That’s it in a nutshell! I really need to go buy a lottery ticket! During International Quilt Market, which I recently blogged about, I stopped in the Michael Miller booth while swooning over many things, including the indigo design minky (!!!) and the Cotton Couture solids. One of the staff members mentioned the Brand Ambassador program….when I got home I followed up, submitted an application and this morning this happened ……
Ta DAAAAAAAAA!
Today started off with a great big WHOOOP when I saw an email titled “2020 Michael Miller Fabrics Brand Ambassador Selection” and that began with “Congratulations! You have been chosen…..”
I wasn’t sure as an art quilter I’d be up their alley, but clearly they are willing to give it a go and so am I. Early next year I’ll let you know more about what it that means and what I’ll be doing as a Brand Ambassador, and in the meantime I have already ordered 3 yards of a print minky of theirs coming to help me make a lap quilt of a top I finished at least a decade ago from a charm square pack purchased in Hawaii circa 2002! And I ordered 7 yards of an aqua in Cotton Couture (Luna) to play with those amazing fat quarters in the giveaway I won….remember this? Can’t wait for it to arrive!
That’s how happy one looks when you’ve just won 214 glorious fat quarters in the softest cotton fabric around!
Now, alas, reality intrudes and I’m going back to cleaning the kitchen (so it can get really mucked up over the next couple of days…makes total sense, right?)! But I’ll go back to work happy as a clam!