email Youtube

Home
Galleries
Blog
Workshops & Calendar
Store
Resources
About
Contact

Archive for the ‘Piecing’ Category

Never underestimate the inspiration caused by a group project

Sunday, December 20th, 2020

Art should be like a holiday: something to give a man the opportunity to see things differently and to change his point of view. -Paul Klee, painter (18 Dec 1879-1940) 

So I’m part of Mt. Battie Modern Quilt Guild, one of two local groups. This chapter, part of the MQG (Modern Quilt Guild) is the smaller of the two and is almost completely comprised of members of Coastal Quilters (the other group) which is part of the statewide Pine Tree Quilt Guild (Maine is the Pine Tree state). For once, I decided to participate in a round robin sort of thing. This year, the group opted to have each person do a block for ONE member of the group, doing it every other month or so.

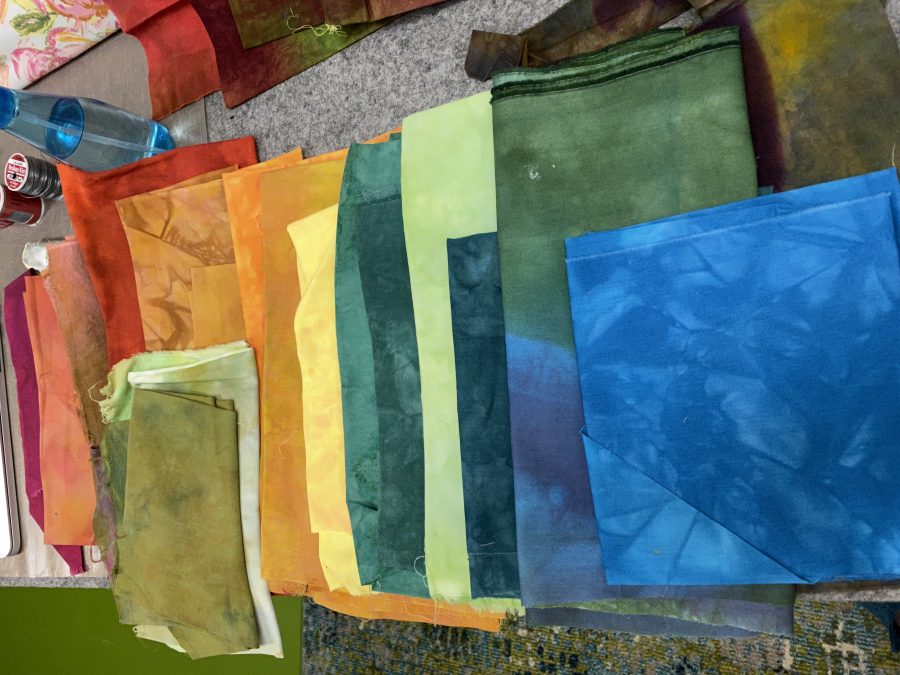
Let me tell you I was stumped. I started by pulling fabrics.

Other than the sky fabric which I purchased because I didn’t have the right color or the time to dye something to order, I used only my own hand-dyes, above.

This past month was Becca’s turn. At first her prompt had me totally baffled: Paul Klee – Swiss/German Artist 1879-1940, use solids/read as solids, and she quoted several bits about his style and inspiration:

  • Klee … greatly admired the art of children who seemed free to create free of models or previous examples. In his own work, Klee often strove to achieve a similar untutored simplicity, using the intense colors inspired by an early trip to North Africa and by line drawing in the unstudied manner of everyday craftsman.
  • Klee suggests that color, shape and the faintest suggestion of a subject are enough to powerfully recreate in the eye of the viewer the actual feeling of repose the artist experienced in the original landscape.

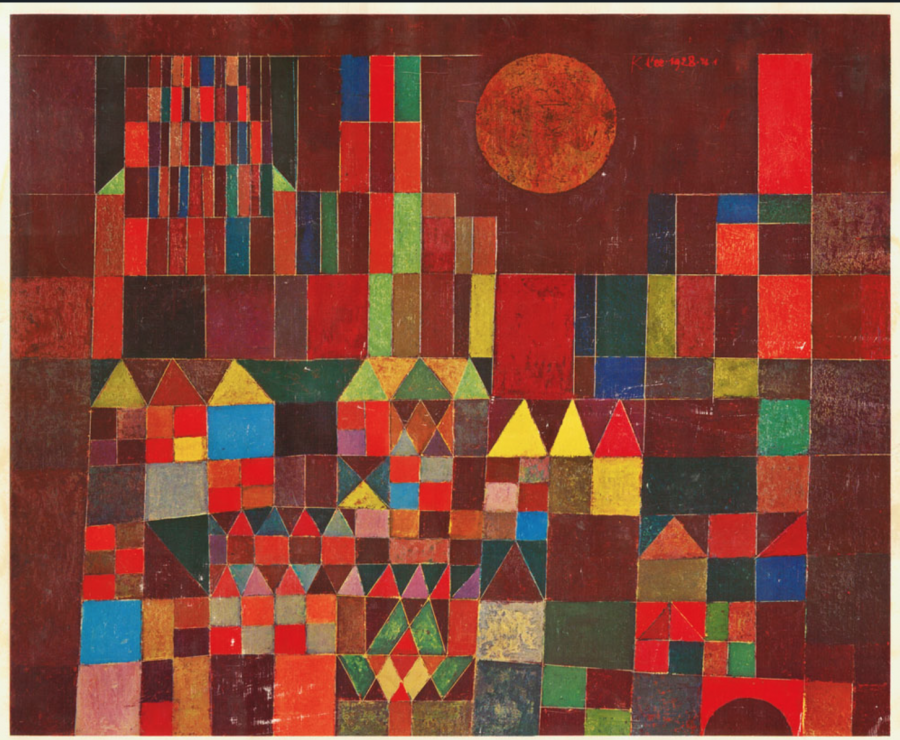
Once I started pulling fabrics, though, I got excited. I googled Paul Klee…well first I googled Klimt and it didn’t seem to jive, then Becca corrected my mental jump from Klee to Klimt and things made more sense. I thought this quilt looked like good imagery for improv piecing:

Paul Klee’s Castle and Sun

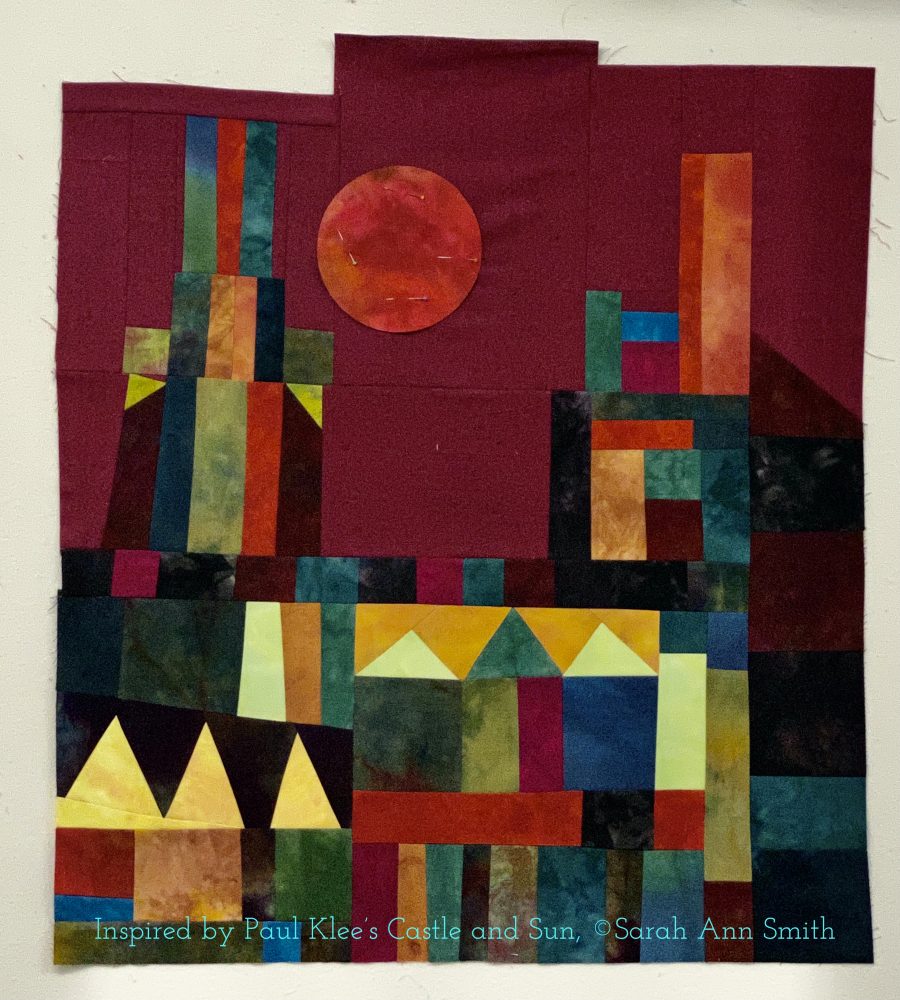
I started with the pointy roofed houses and made two sets, then did some strips. I made my castle wall darker and shorter than his, but opted to have two towers reminiscent of the ones here. I used a few pops of the brighter yellow and ochre and the light green and the bright blue scattered hither and yon as in the original. I really liked the odd jigs at the top so left it up to Becca to leave them or trim.

At about 24 x 27 inches, it is a rather large “block,” but only took me a couple days to put together. There may be something to this improv stuff! Anyway, I had a ton of fun and am energized to dive into dyeing fabric and new work in January once the holidays are done. Hope you’ve enjoyed!

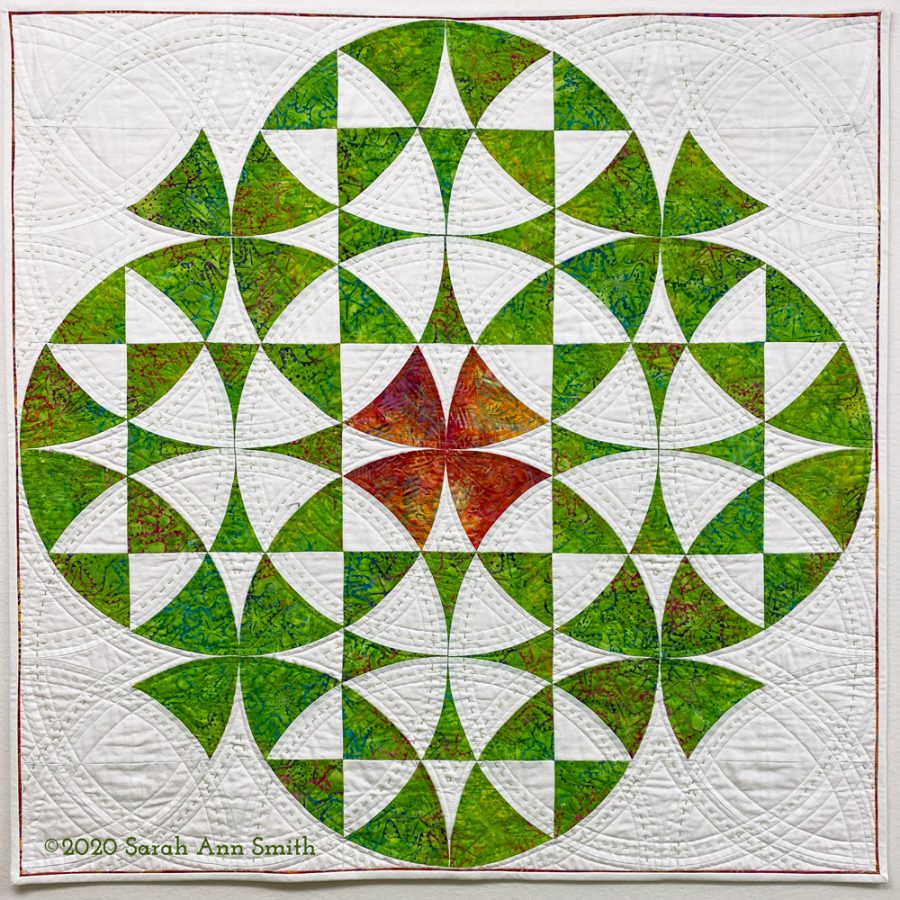
Winding Ways: quilt and done!

Saturday, August 29th, 2020
Good tools (AccuQuiltGO!), good fabric (Michael Miller Fabrics), good thread (Aurifil), good machine (Janome Continental M7), and some experience, and you can do a lot! This return to my quilty roots just makes me happy!

Over the course of the year I’ve shared progress on this quilt:

  • First, there was learning to use the AccuQuiltGO! which I blogged about here. It was a different block, but the easy applies.
  • Then there is the PIECING of CURVES: see the blogpost here or go directly to the video on my YouTube Channel here.
  • Now there is the quilting video (that covers a couple other things), embedded below and share-able on my YouTube Channel here.

Full disclosure: I have proudly been a Janome Artisan since 2003, and this year am a Michael Miller Fabrics Brand Ambassador for 2020. MMF provided the fabric and we were given, as part of being a brand ambassador, an AccuQuiltGo and several dies. To my surprise I enjoyed the process so much I have purchased both the Winding Ways and Crossed Canoe dies. Stay tuned for more!

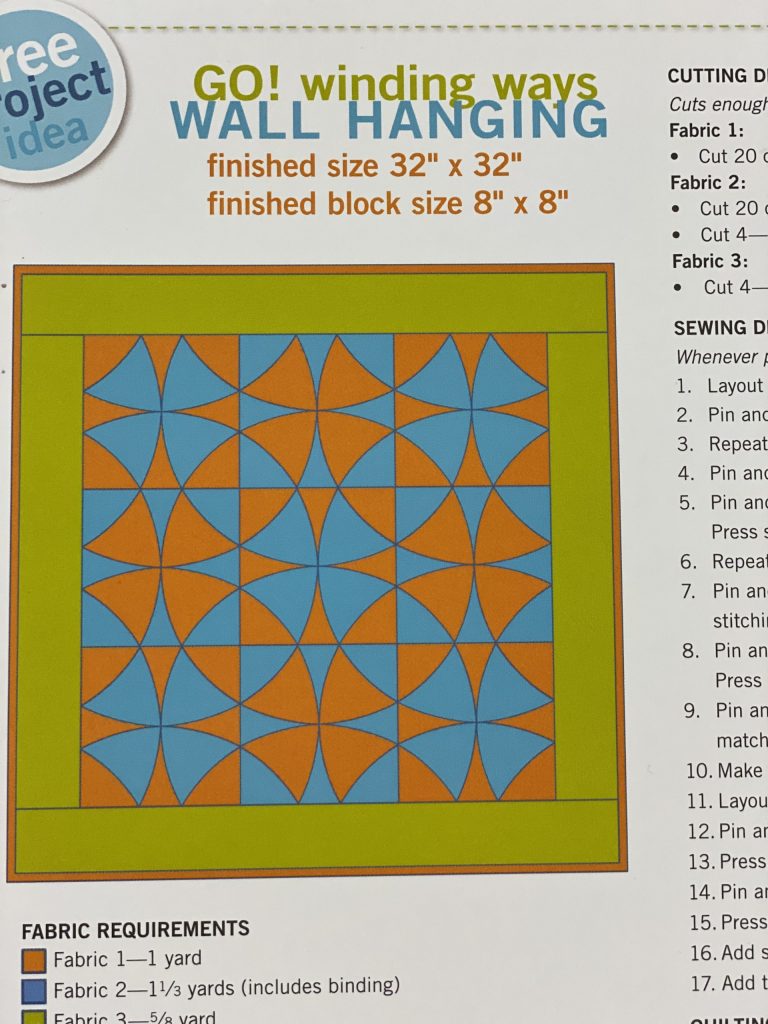
This is the die that I purchased to make the Winding Ways, which has always been one of my favorite traditional blocks. Click this link to see a blogpost of using the AccuQuiltGO (for another block, but it’s the exact same process) including a video.
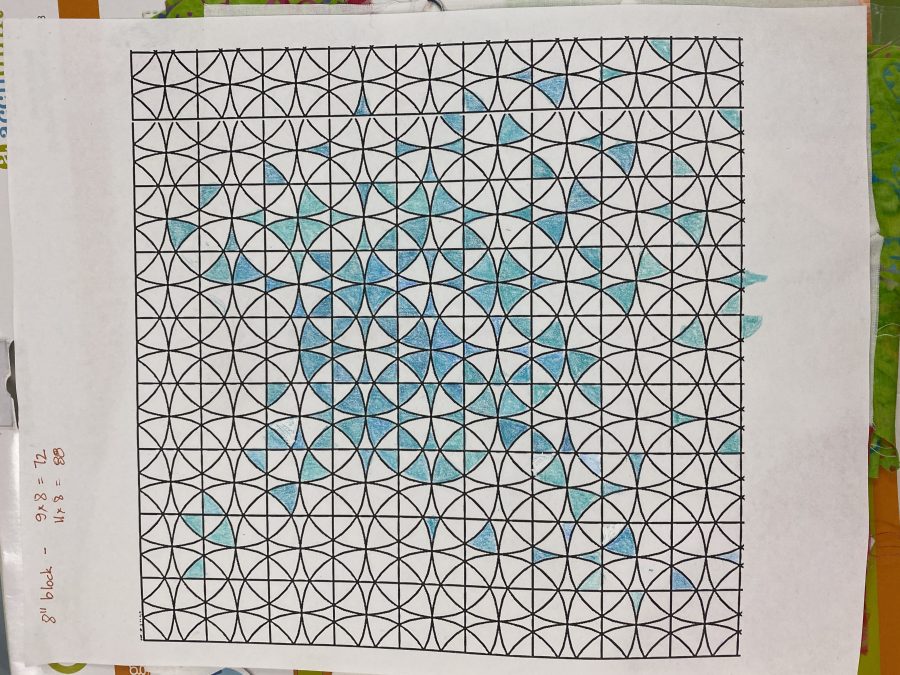
I found this design somewhere on the internet and printed it out to mess around with a design for a future quilt! Stay tuned for a WANDERING Winding Ways! Using a grid like this can help you plan out fun color fades and settings.

Next came machine quilting. I worked on that a while back–I did end up teaching for the Mancuso Online Quiltfest in August and will do a Threadcoloring the Garden workshop in October! More info on that soon! In this video I’m practicing making a video, demonstrating at the machine, and it just happens to be walking foot quilting (fast! easy!) on my beloved Janome M7. Even if I had paid full price instead of being a Janome Artisan I’d rave about this machine’s wonderfulness! Their new slogan, Reliability by Design, is really true!

Then, the hand quilting and the finishing!

I haven’t done any hand stitching in a thousand years, but nearly two years ago I bought matching green thread from aurifil in piecing/light quilting weight and a heavier 12-wt that is about the size of a light perle cotton or 6-strands of floss. I LOVE IT…and it went so fast! I can remember clearly sitting on the porch in early summer, something to watch on the iPad, stitching away.

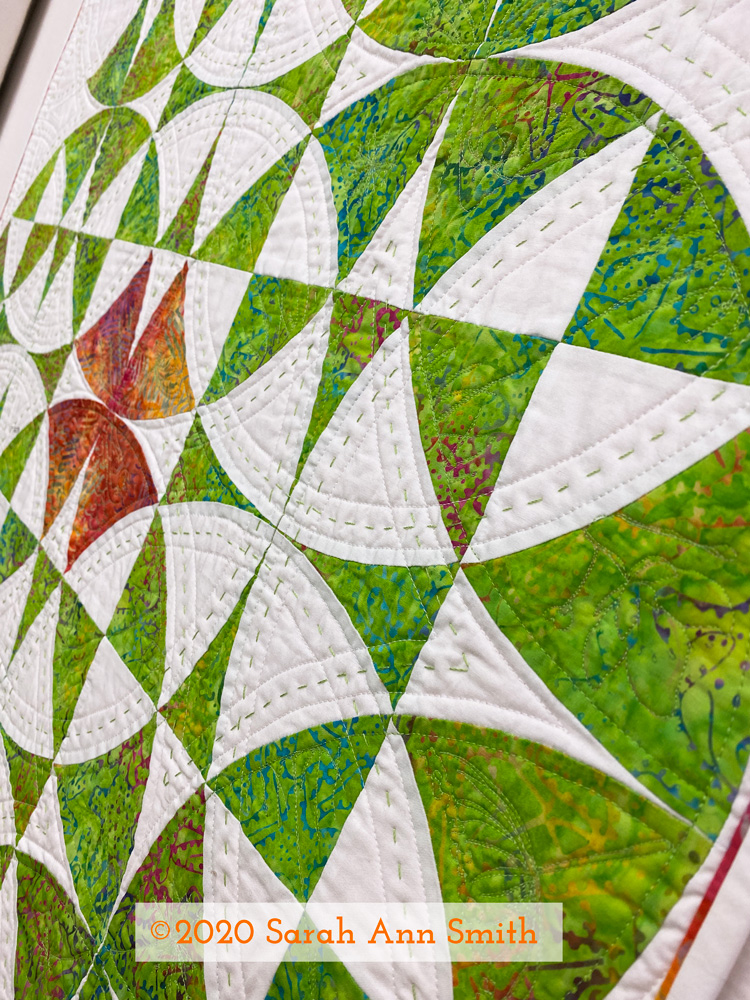
I just love how an angled shot shows the texture and dimension. I was surprised at how quickly the hand stitching went. I used the same green color of thread on the green parts for machine quilting as the green in the heavyweight Aurifil thread.

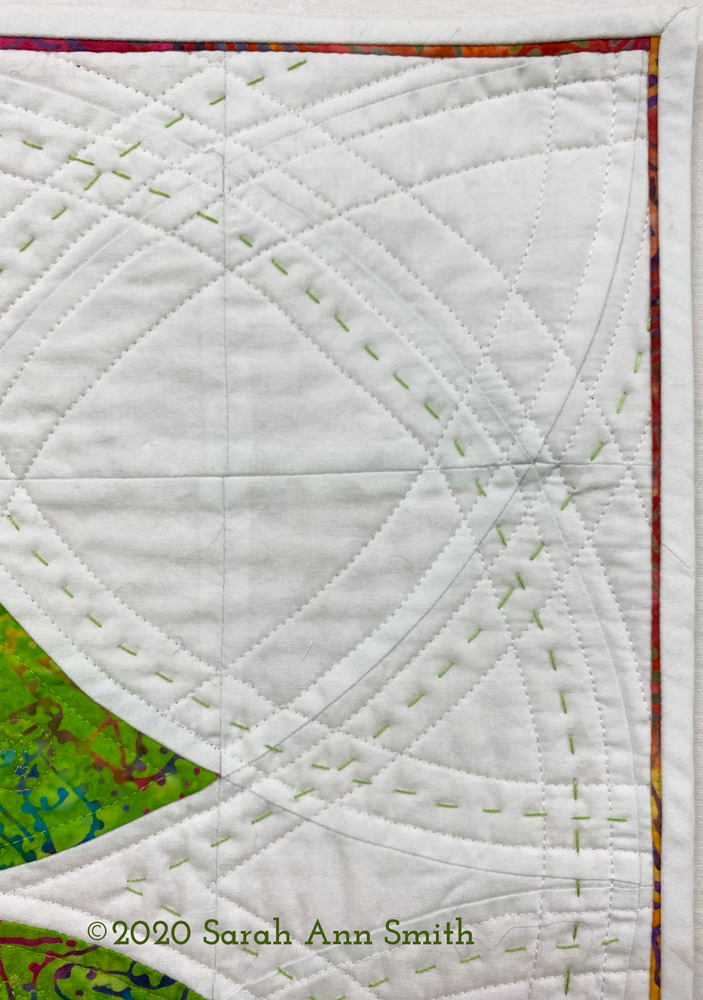
I wanted to repeat the orange batik in the center on the edges, but using it as the binding was too much. I instead inserted a tiny stitched down “reveal” that is a scant 1/8″ just inside the white binding. Can I also put in a plug for Michael Miller’s Cotton Couture solids? The quality of the base cloth is SO GOOD! And the consistency in color / dye lots over the years is really amazing. I dye fabric and know how hard it is to get perfect matches from batch to batch and it does.

Last but not least, those skinny inserts and perfect corners.

I taught the half day version of my bindings workshop at the Mancuso Online Quiltfest in June and may do so again in the new year. I am scheduled to teach and have an exhibit of my work at the Mid-Atlantic Quiltfest in Virginia in February, but at this point who knows if it will be in person or online! I promise I will teach the bindings (full or half day) again in the new year online, just need to figure out when. My students in June had GREAT results online so it works online too!

Anyway, I hope you’ve enjoyed my 2020 detour back to my quilty roots. Coming soon, a new art quilt!

Piecing Curves…it is possible even for me

Monday, August 3rd, 2020
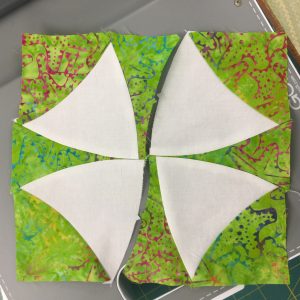
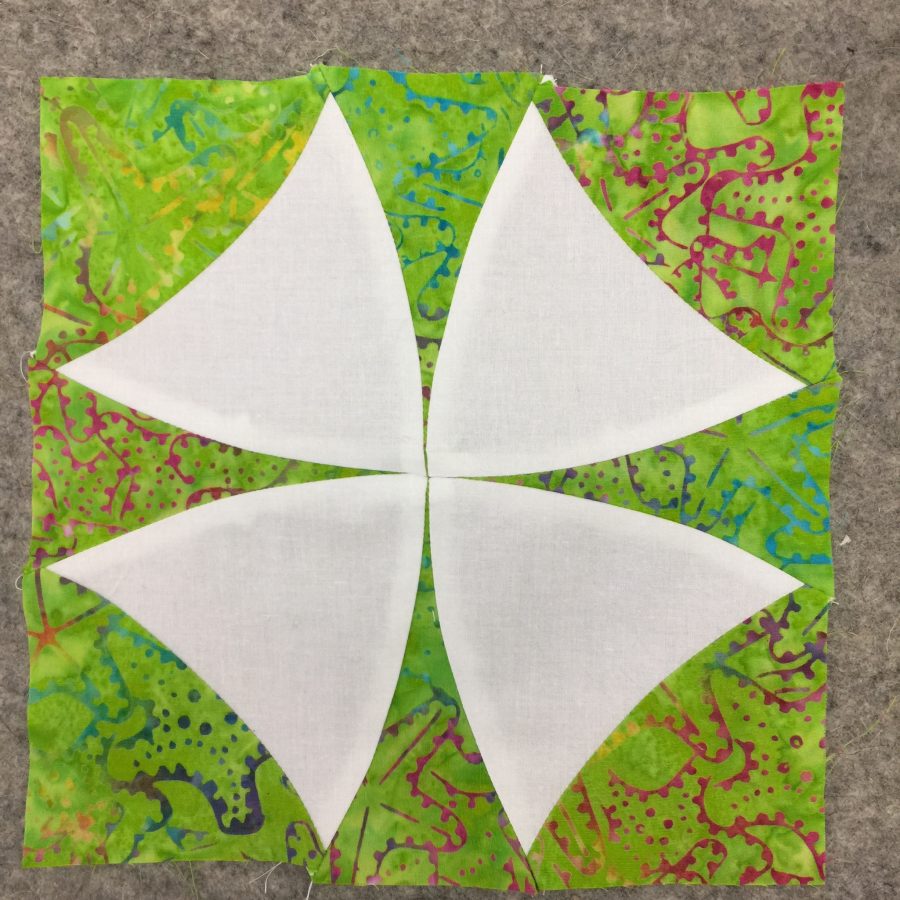
Whoo-eeeee! Lookit those perfect seams… this was my second block, and I think it looks pretty durn good for someone who doesn’t really piece a lot! There are a few MINOR things I can fuss at (like the seam allowance on the center top spike is a skosh wide and the upper left corner edge isn’t perfect, but still! Fabrics are batiks and Bright White Cotton Couture from Michael Miller Fabrics.

Precision piecing has never been my strong suit, but I am — like Michaelangelo at age 80 — still learning. One of the things I’ve learned is that it is OK to use specialty tools like the AccuQuiltGO! and byAnnie’s stiletto. Thank you to Michael Miller, for whom I am a Brand Ambassador this year) and Janome America for having me as an Artisan. For me, careful cutting for squares, rectangles and triangles isn’t too TOO challenging (as long as I’m paying attention which is never to be take for granted LOL). But CURVES? Not so much.

Back in May, I shared a video that tells yo about the amazing (Heavenly Perfection?) HP presser foot and throat plate, herhttps://www.sarahannsmith.com/weblog/?p=13206e. If you have a Janome with this option and haven’t tried it out, DO! Go watch the video… it’s a brief but I hope helpful mini tutorial. The video is also on my YouTube channel, here. I’ve been doing a bit more with brief videos…looks like about one a month. I’ll have another later this month about using the blind hem stitch for some slacks I made–you can subscribe to the channel.

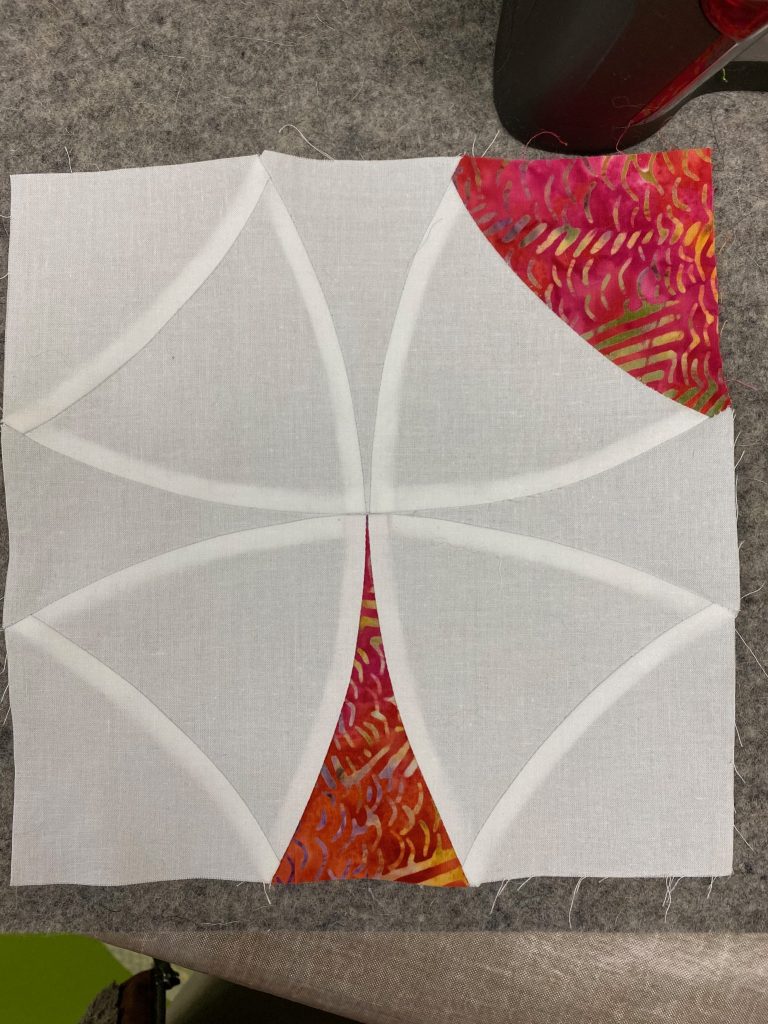
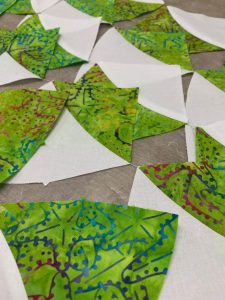
After cutting using the Winding Ways die (requires the AccuQuiltGo or similar cutter, too), I laid out the blocks to see how they looked (and to make sure I had enough of each shape).
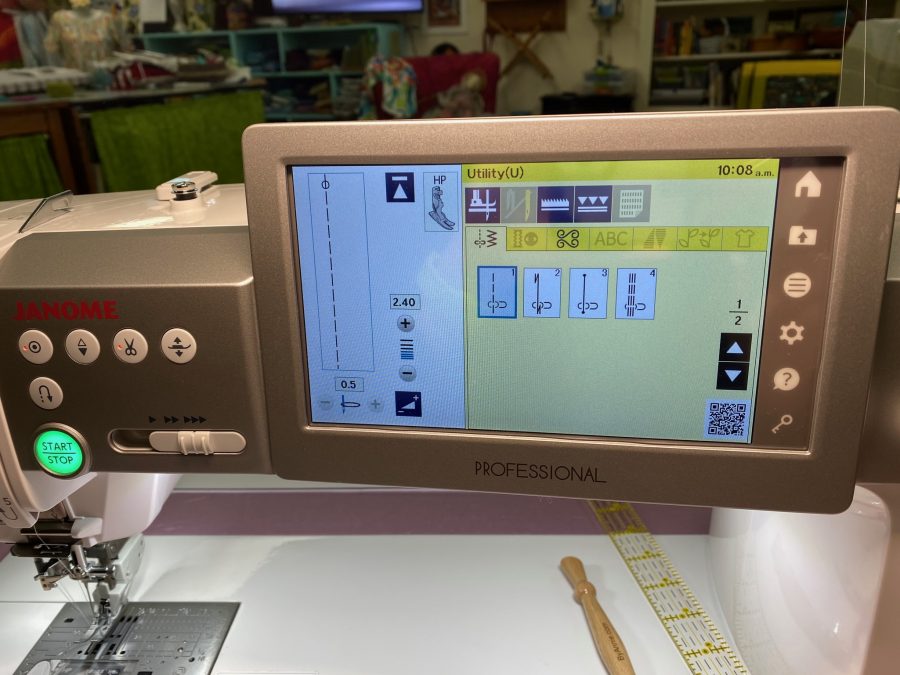
Here are the settings on my M7 for the HP foot which helped me get such amazing accuracy and careful piecing. Slowing down helps, too. Ahem.
First, I cut and assembled segments.

Here’s a quick video of me using the oh-so-wonderful HP accufeed foot and throat plate from Janome, on my M7. Thanks to Kimberly Einmo who shared her love of this accessory at the 2018 Janome Education Summit! Like I said…there is ALWAYS more to enjoy learning.

The stiletto from byAnnie.com is here.

Sub-units created
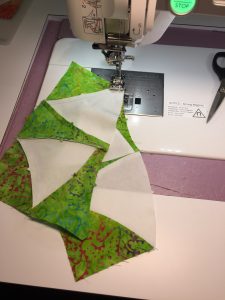
Following the assembly instructions that come with the Winding Ways die, you press seams in specific directions and create and assemble sub-units in a specific order.
Then you get as close to perfection as I am ever going to get! There is still some fine tuning I need to do (meaning the dreaded P-word: PRACTICE) to get the outside edges straight, but I mean really, look!
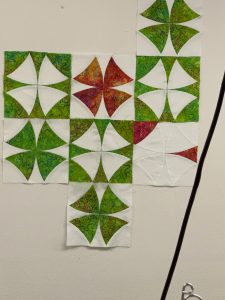
Here’s my Winding Ways on the design wall, considering various settings. I ended up going fairly traditional…I’ll share “done” in a week or two.

Hope you’ve enjoyed my detour from art quilting. I’ve actually needed a break to recharge myself, and this has been DELIGHTFUL. I’m thrilled with the finished quilt… will post it in about a week or so.

Full disclosure: I’ve been a Janome Artisan for 16 years, and am forever grateful for their support and machines. I’m a Michael Miller Fabrics (MMF) Brand Ambassador for 2020; the batiks and white fabric were donated as part of that ambassadorship. The AccuQuiltGO! was a GIFT (!!!!) as part of the MMF thing, and I purchased the Winding Ways die once I realized that wow, I could USE this machine! Whooda thunk it? Well, I should have. Having FUN! And lastly, thanks to byAnnie.com; their donations to the Teacher Goodie Bags in Houston one year netted me that awesome (and not expensive) Stiletto!

The Janome HP foot and throat plate, or…The not-so-little things

Thursday, May 7th, 2020

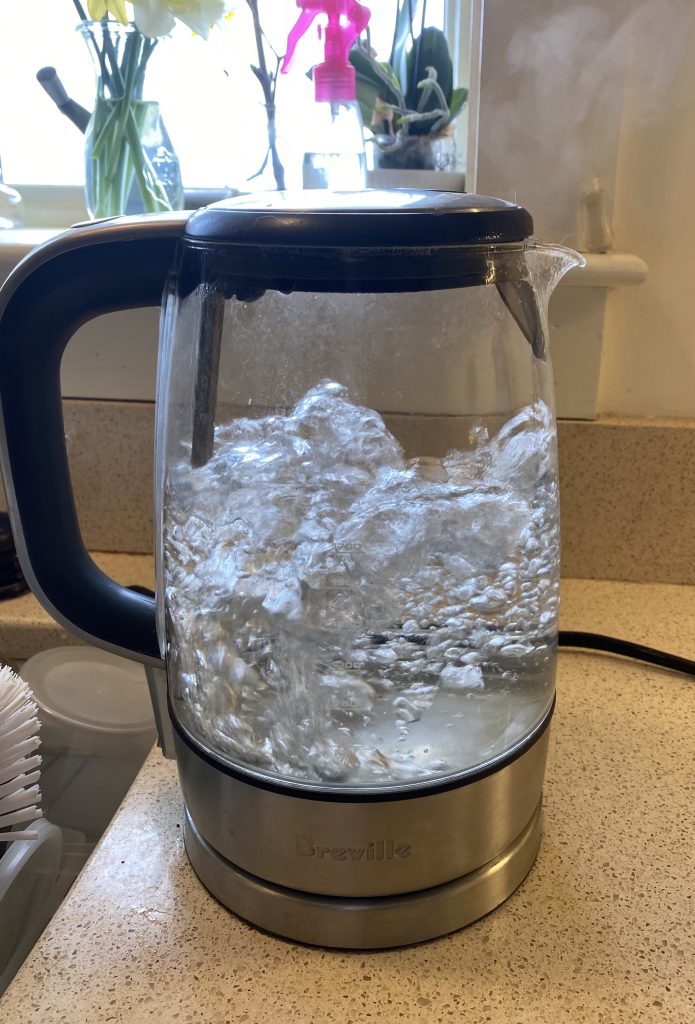
Sometimes it is the little things, that turn out to be not-so-little, that make the difference in life. In my life, watching the bubbles form and the water boil gives me joy…what can I say, I live a rural life LOL! Another one is tools that make my sewing life easier like the Janome M7’s HP Presser Foot and throat plate, which are available on select other Janome models. It also turns out, you can teach someone who has been sewing for about 57 years new tricks!

Yes, I like to watch water boil! No, I am not chanting “bubble, bubble, toil and trouble” over the cauldron! (chortle…..)

I have never been precise at piecing like my friends Krispi Staude on San Juan Island or Joan Herrick, Tori Manzi and Karen Miller here in Maine. I try, but I just never quite get it perfect. And I am Type A enough that it Really Bugs Me. Either go totally improv OR Get It Right. A couple things introduced into my life recently have helped a lot. The Janome M7 Continental (I’m a Janome Artisan, get to borrow this machine for extended periods for free, but I’d say all this good stuff if I paid full MSRP!) is one of them. I’ll share another next week or so. I’m also trying to improve my skills and learn to shoot and edit videos, so I’m practicing on these short clips.

Here I’m showing and explaining Janome’s HP system, which I think must mean Heavenly Perfection. I need to get better at holding the phone and zooming, but with each video I improve. Lookit the titles and comments I was able to add! AND I did TWO transitions! Maybe by summer I’ll be adept enough to consider online classes.

Anyway, the automatic / magnetic throat plate is one of those “little” things that make my life easier. So yeah, it’s the not-so-little things that make life good! Thank you, Janome! Here’s the video…if for any reason it cuts out part way through, click on it to go watch on my YouTube Channel.

The HP foot can be used for piecing, garment construction and quilting. I’ve just finished a somewhat “quilt Modern” top–about 34″ square–that I’ll share over the next couple of months. Next week, I’ll share a video with me actually piecing! Who me? FUN… a total and much needed mental break in the Time of Covid-19!

Everyone’s a Kid Floor Cushions and Toss Pillows (part 2 of 2)

Thursday, March 12th, 2020
Today it’s time for part 2 of 2 in the “how to make cushions” tutorial! In this image, I’ve sewn the boxing strip–the bit on the edges/sides (black Galaxy fabric from Michael Miller Fabrics, Spring 2020) to one of the squares (top and bottom) to make sure I’ve got the fit right. Looks pretty good! The top on this one is the SuperFred fabric in gray (with this fun fox named Fred and a robot named Mike). Those glorious solids (SWOON) are part of the Cotton Couture collection. Colors are Acid (left), Yellow (top), Apricot (right), and Lilypad (bottom). Like I said, SWOON!

In my last post, we went through my deep-placket zipper construction that I use for home dec use. Sturdy and classy. You can find the free PDF pattern with gobs of photos here at Everyone’s a Kid Floor Cushions and Toss Pillows. And here’s a link to the first post. And close up views of all the pillows are at the end of this post.

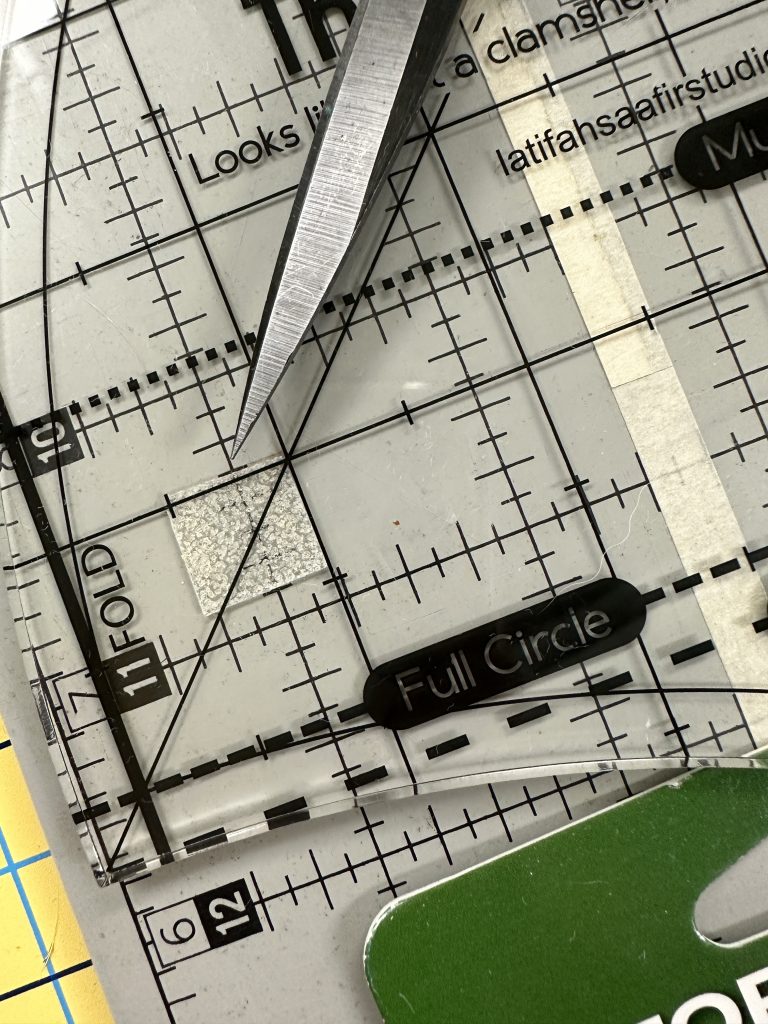
I shared this photo before, but didn’t point out the very hard to see black strapping handle which is in the center of the side facing us. If you look at the pop-socket on the ruler, come down to the cloth. Then look and you’ll see two Space Aliens, fussy cut from that fabric, at the ends.
My dear DIL is a kindergarten teacher, and these cushions and pillows are headed to her classroom for wee people to flop upon and read. Or just flop upon! She’ll need to be able to move them about easily. As she is TINY, we need to make this easy (not a bear hug thing just to move a pillow). I cut some of the Space Pals fabric into rectangles, centering one of the Pals so it would show. Sew the rectangle to the end of some webbing. I could only find 1 1/2″ wide locally in rural Maine. It works but I think 1″ wide would be better if you can find it. Sew the rectangle to the end of the webbing, then fold and press the side edges in, turn under the remaining raw edge, and sew. I use–get ready for this–washable glue stick instead of pins. When doing your folding and pressing, use a swipe of glue. Presto. Stays put. When you fold things together into a nice little package, a little dab of glue will do ya! (Who else remembers Dippity Do?) Center the handle exactly over the zipper and sew. I put some squares of old denim on the inside to reinforce the fabric. See next photo.
Next step: sew the boxing to one side. Start by finding the center of the zipper. Here, you can see those rectangles of denim (with overcast stitch to prevent raveling) I used to reinforce the handle which is on the right side of the fabric. Mark 12″ to the right and to the left of the zipper’s exact center. Then measure 24″ to mark the other corners on the boxing strip. I chose to put some reinforcing stitching (triple straight stitch–see below) at each corner–about an inch to either side of th marking pin. I sewed about 3/8″ from the edge. If your overall gusset/boxing length is a little off, you may need to remove the stitching for one of the zipper garages and adjust the overall circumference of the boxing strip/gusset so it is snug.

Put the boxing strip (now a loop) on the cushion inside out. It’s much easier to assemble and pin with the fabric held upright (and not floppy on the table)! Place the top fabric face down. If you use a print that is directional, as I did, I put the top of their heads on the zipper side of the cushion. Pin all the way around.

You’ll want to clip each corner about 3/8″–so to the reinforcing stitching / almost to the very seamline in each corner. I clip right before stitching.
I like to use the triple-straight stitch when I need a strong seam with some flex. This is on my Janome M7 Continental, but almost all machines other than straight-stitch only have something similar. This is what I used to reinforce the corners AND sew the seams. Since the corners are clipped, this provides a little insurance against tears, especially in the cushion stuffing/wrestling stage. Or when anticipating wee people thumping their little bodies all over the place.
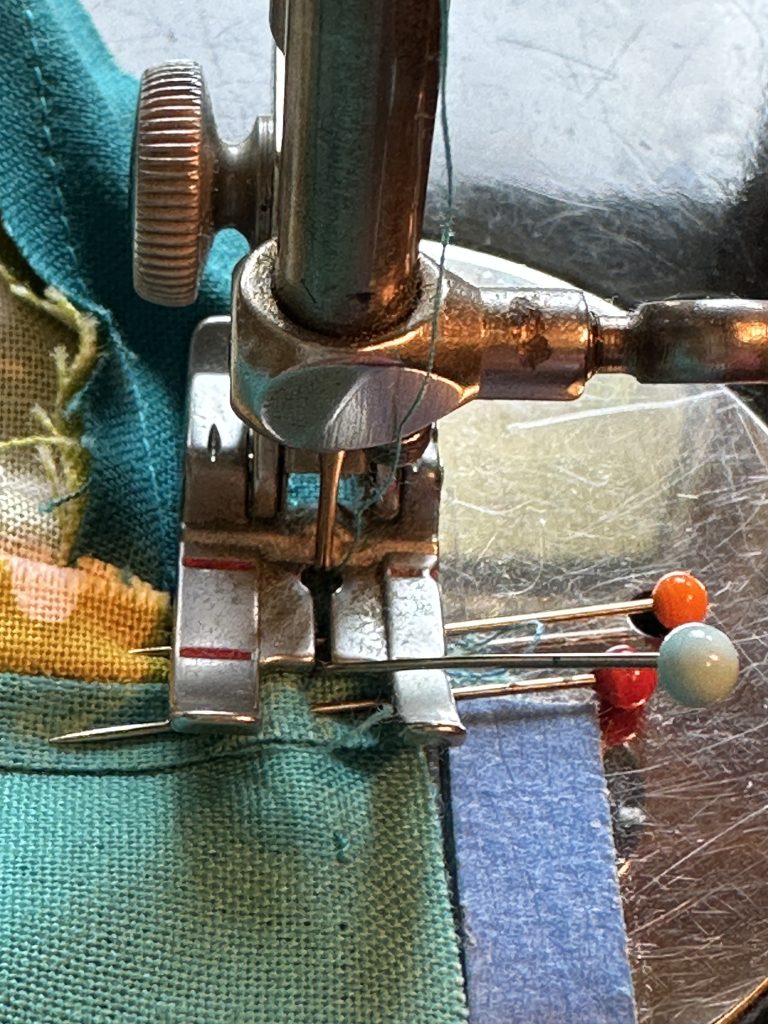
With the top of the cushion on the bottom and the boxing/gusset on top, sew together with a 1/2″ seam. I sewed this with the triple straight stitch, again because I expect these cushions to see some enthusiastic use in a classroom. Sturdy is wise. Sew RIGHT UP to the CORNER and stop with the needle down. You can see some of the reinforcing stitching just to the left of the needle. You can also see that clipping has allowed the boxing strip to make a 90 degree turn at the corner, and that a bit of the boxing has folded over and is pushing into the next side to be stitched.
With the needle still DOWN, lift the presser foot. Ease the boxing to the left to remove that little pushed bit you see in the photo above. Notice the reinforcing stitching that goes down to the pin. I will sew on or just a thread’s width to the left of that when I sew the seam. Make sure the raw edges are aligned–you’ll see a perfect little square of the fabric on the bottom as the boxing strip pivots around the corner/needle. Sew the next side.
And here we are, corner turned, ready to roll. Or sew. Or have a something rewarding. Wine? Pina Colada? Nap? Chocolate?
Anyway, Repeat until you have reached where you began!

Then do it again with the other side. REMEMBER to leave the ZIPPER OPEN just enough to reach your arm inside. Makes turning the cushion right side out a whole lot easier. Ahem. Yeah, didn’t do that when I first began working for that interior designer. I was able to fiddle the zipper pull and get it open. Trust me, gap is better.
OMG–almost done!!!!! Most furniture cushions are foam wrapped with dacron (outdoor cushions are the exception). There are different grades of foam. Softer ones are generally used for seat backs, firmer foam for seat cushions. There is even this miraculous “outdoor” flow-through foam–instead of being sponge-like and holding water, it drains out. The foam is kinda very firm, but think about it…no mildew! Anyway…back to this program. Upholsterers then use a spray glue to adhere the Dacron wrap (like quilt batting but fluffier, scratchier, cheaper I think, I had leftover, only partly mouse-munched in the shed). I had a vintage can of the spray upholsterers use but I think an artist’s spray glue **might maybe** work–check the label to see if it says anything about eating/eroding foam. And test. You can also just hand baste the edges. When using spray glue, I just spray the surface, pat the one huge, long and wide-enough-to-cover-the-edges Dacron in place and then trim it to the edges.

Next: Stuffing the cushion cover you just lovingly made. In the above photo, notice that I have used a dry cleaner bag (a big leaf bag works too) that I wrapped around the bottom of the cushion to facilitate wrestling it into the cushion cover. Do NOT put the cushion inside the bag–wrap plastic-something around the bottom. You need to be able to remove the plastic bag easily, and trying to tear a bag off the innards while stuffed inside the cover is not workable.
By having zippers that come halfway around the sides of the cushion, you have made this part–stuffing–a whole LOT easier. Place the cushion inside like you are putting a pillow inside a pillowcase. Then place the cushion on the floor, using your legs to hold it upright. Smooth and pull the cushion up the sides. Pull the plastic out, then slide your arm inside and coax the seam allowances toward to boxing on all sides. Tuck the corners of the foam on the top edge under the zipper, and zip closed . See next photo.
Here I’ve got the cushion on its side…see the zipper garage on the left? Use one hand to squish the foam/dacron down, and pull the zipper up over your hand (prevents getting dacron in the zipper). Slide your hand back, repeat. When you get to the corner, nudge the innards into the corners and continue until done. Park the zipper pull in the zipper garage on the other end. You may wish to fine tune where the seams are–straighten them, etc. Wearing quilting gloves or rubbery kitchen gloves gives your fingers a bit of grip and allows you to ease the fabric into perfect position.

DRUM ROLL PLEASE!!!!!!!

Ta DAAAAA! DONE! Celebrate! Feel a bit chuffed (great Aussie word meaning proud or pleased).
The Space Pals in Gray side of the cushion. I put a different feature print on each side, so the kids can have Super Fred up on both cushions, or Space Aliens (next image), or one of each. Notice on the top of this one that black ripple? That’s the carry handle so the kids and DIL can tidy up! AND these cushions stand up on their edges, better for stashing in a crowded classroom. And yes, that’s my one and only (so far, I hope for another) magazine cover behind the love seat..my pink peony on Germany’s Patchwork magazine.
Are those Space Pals in Black not the cutest things ever? I think some pillows made in their image need to happen…
Close up of the Space Pals toss pillow. I got my pillow inserts from (Sigh…I go there sometimes…no one else within an hour’s drive has some of what they carry) WalMart for cheap.
And Super Fred in gray. Adorable. Although I think we need some gender equality…It’s gonna be Super Freddie, short for Frederica! for me.

Thanks for sticking with me this long. I know these have been long and detailed posts, but sometimes when you’re essentially teaching a day-long workshop in two blogposts, that happens! I hope you’ve learned something and enjoyed the visit. THANK YOU!

Ask for it at your local shop!

And one last time… here’s the link to the free PDF pattern!