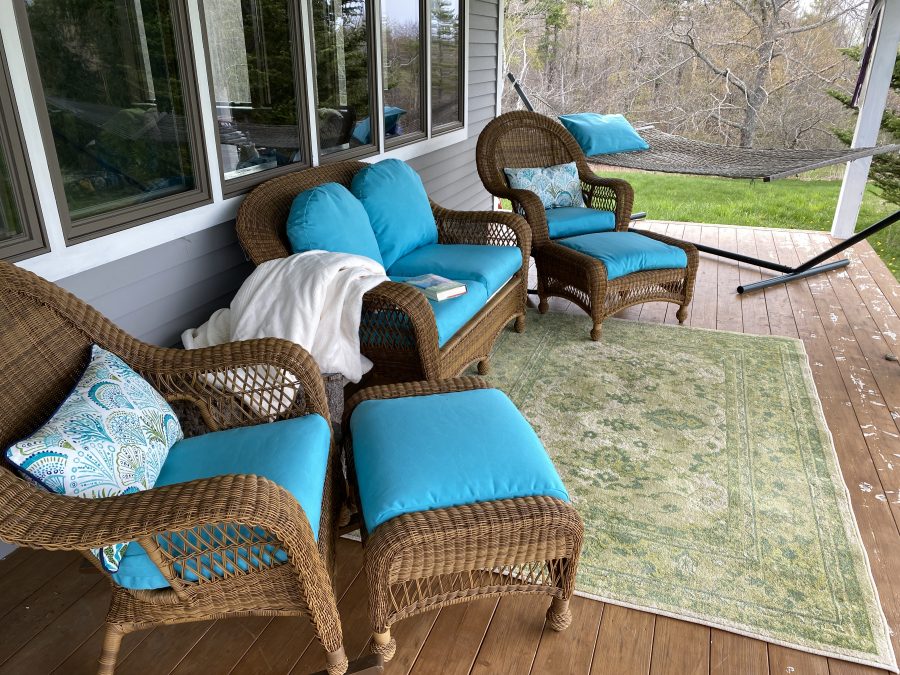
I’ve posted some in progress pictures on social media, but at long last the cushions are done, and oh my what an improvement!
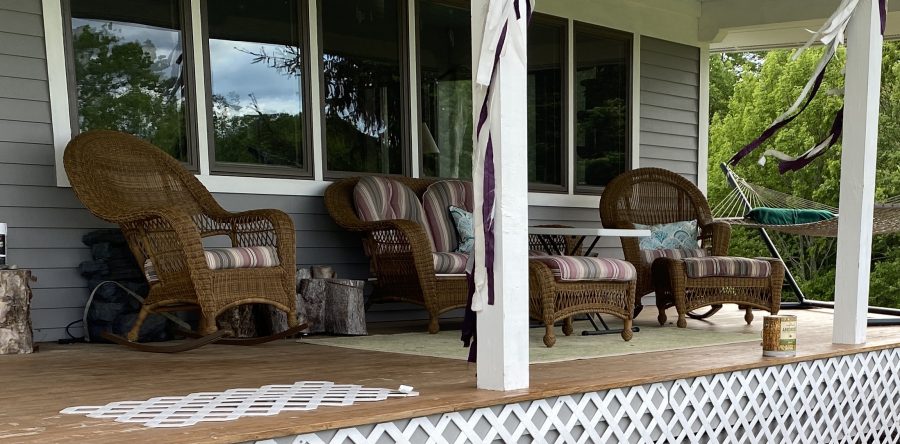
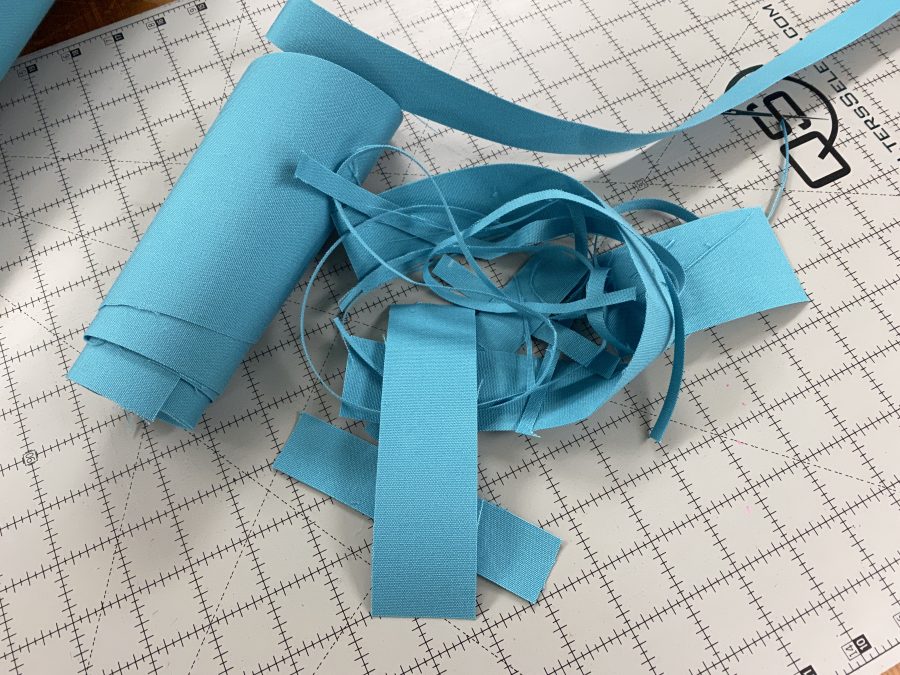
After wheedling a lot one year about 12-14/15 years ago, I convinced Paul to buy this “wicker” (ie extruded plastic) furniture. It came with the cushions you see below. I dislike stripes, and don’t like drab colors. I’ve wanted to replace the covers all this time, and finally last summer purchased the Sunbrella Awning fabric in the Aruba color. The Awning fabric is wider at 60″ than the regular upholstery fabric, stiffer so harder to work with it, and sheds water. It was both the width, which allowed me more efficient use of the yardage, and the ability to prevent water from getting into the cushions that led me to use this version of Sunbrella. I bought it online from a place in Florida, Outdoor Fabric Central. I used almost all of the 7 yards ($28 a yard).
This is what it looked like before. Furniture nice, fabric: definitely not my style!
Apparently I really dislike the old cushions so much it took searching in 4 years of summer photos to find a single one with the old striped cushions!
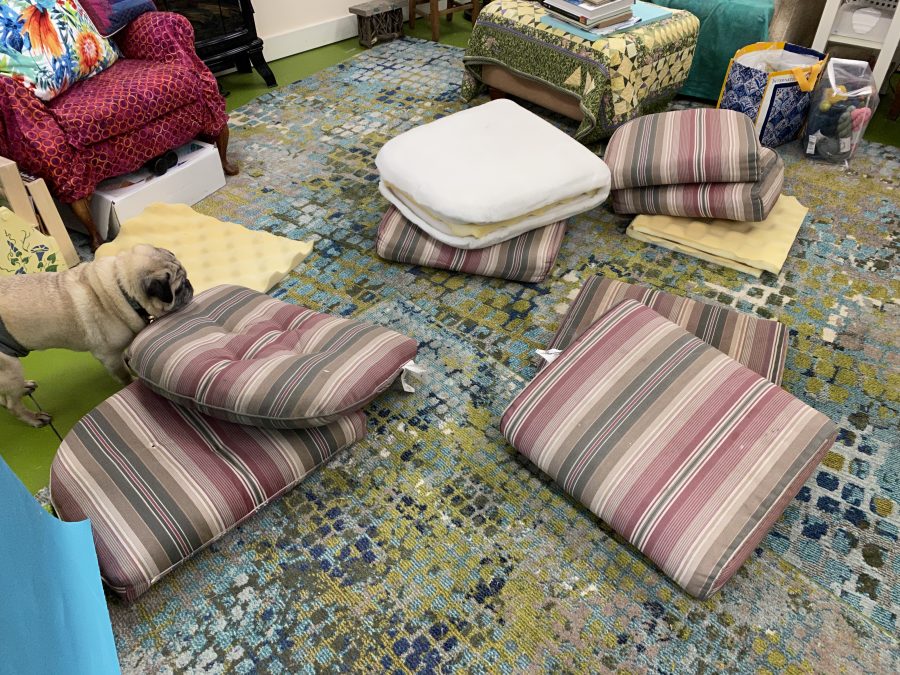
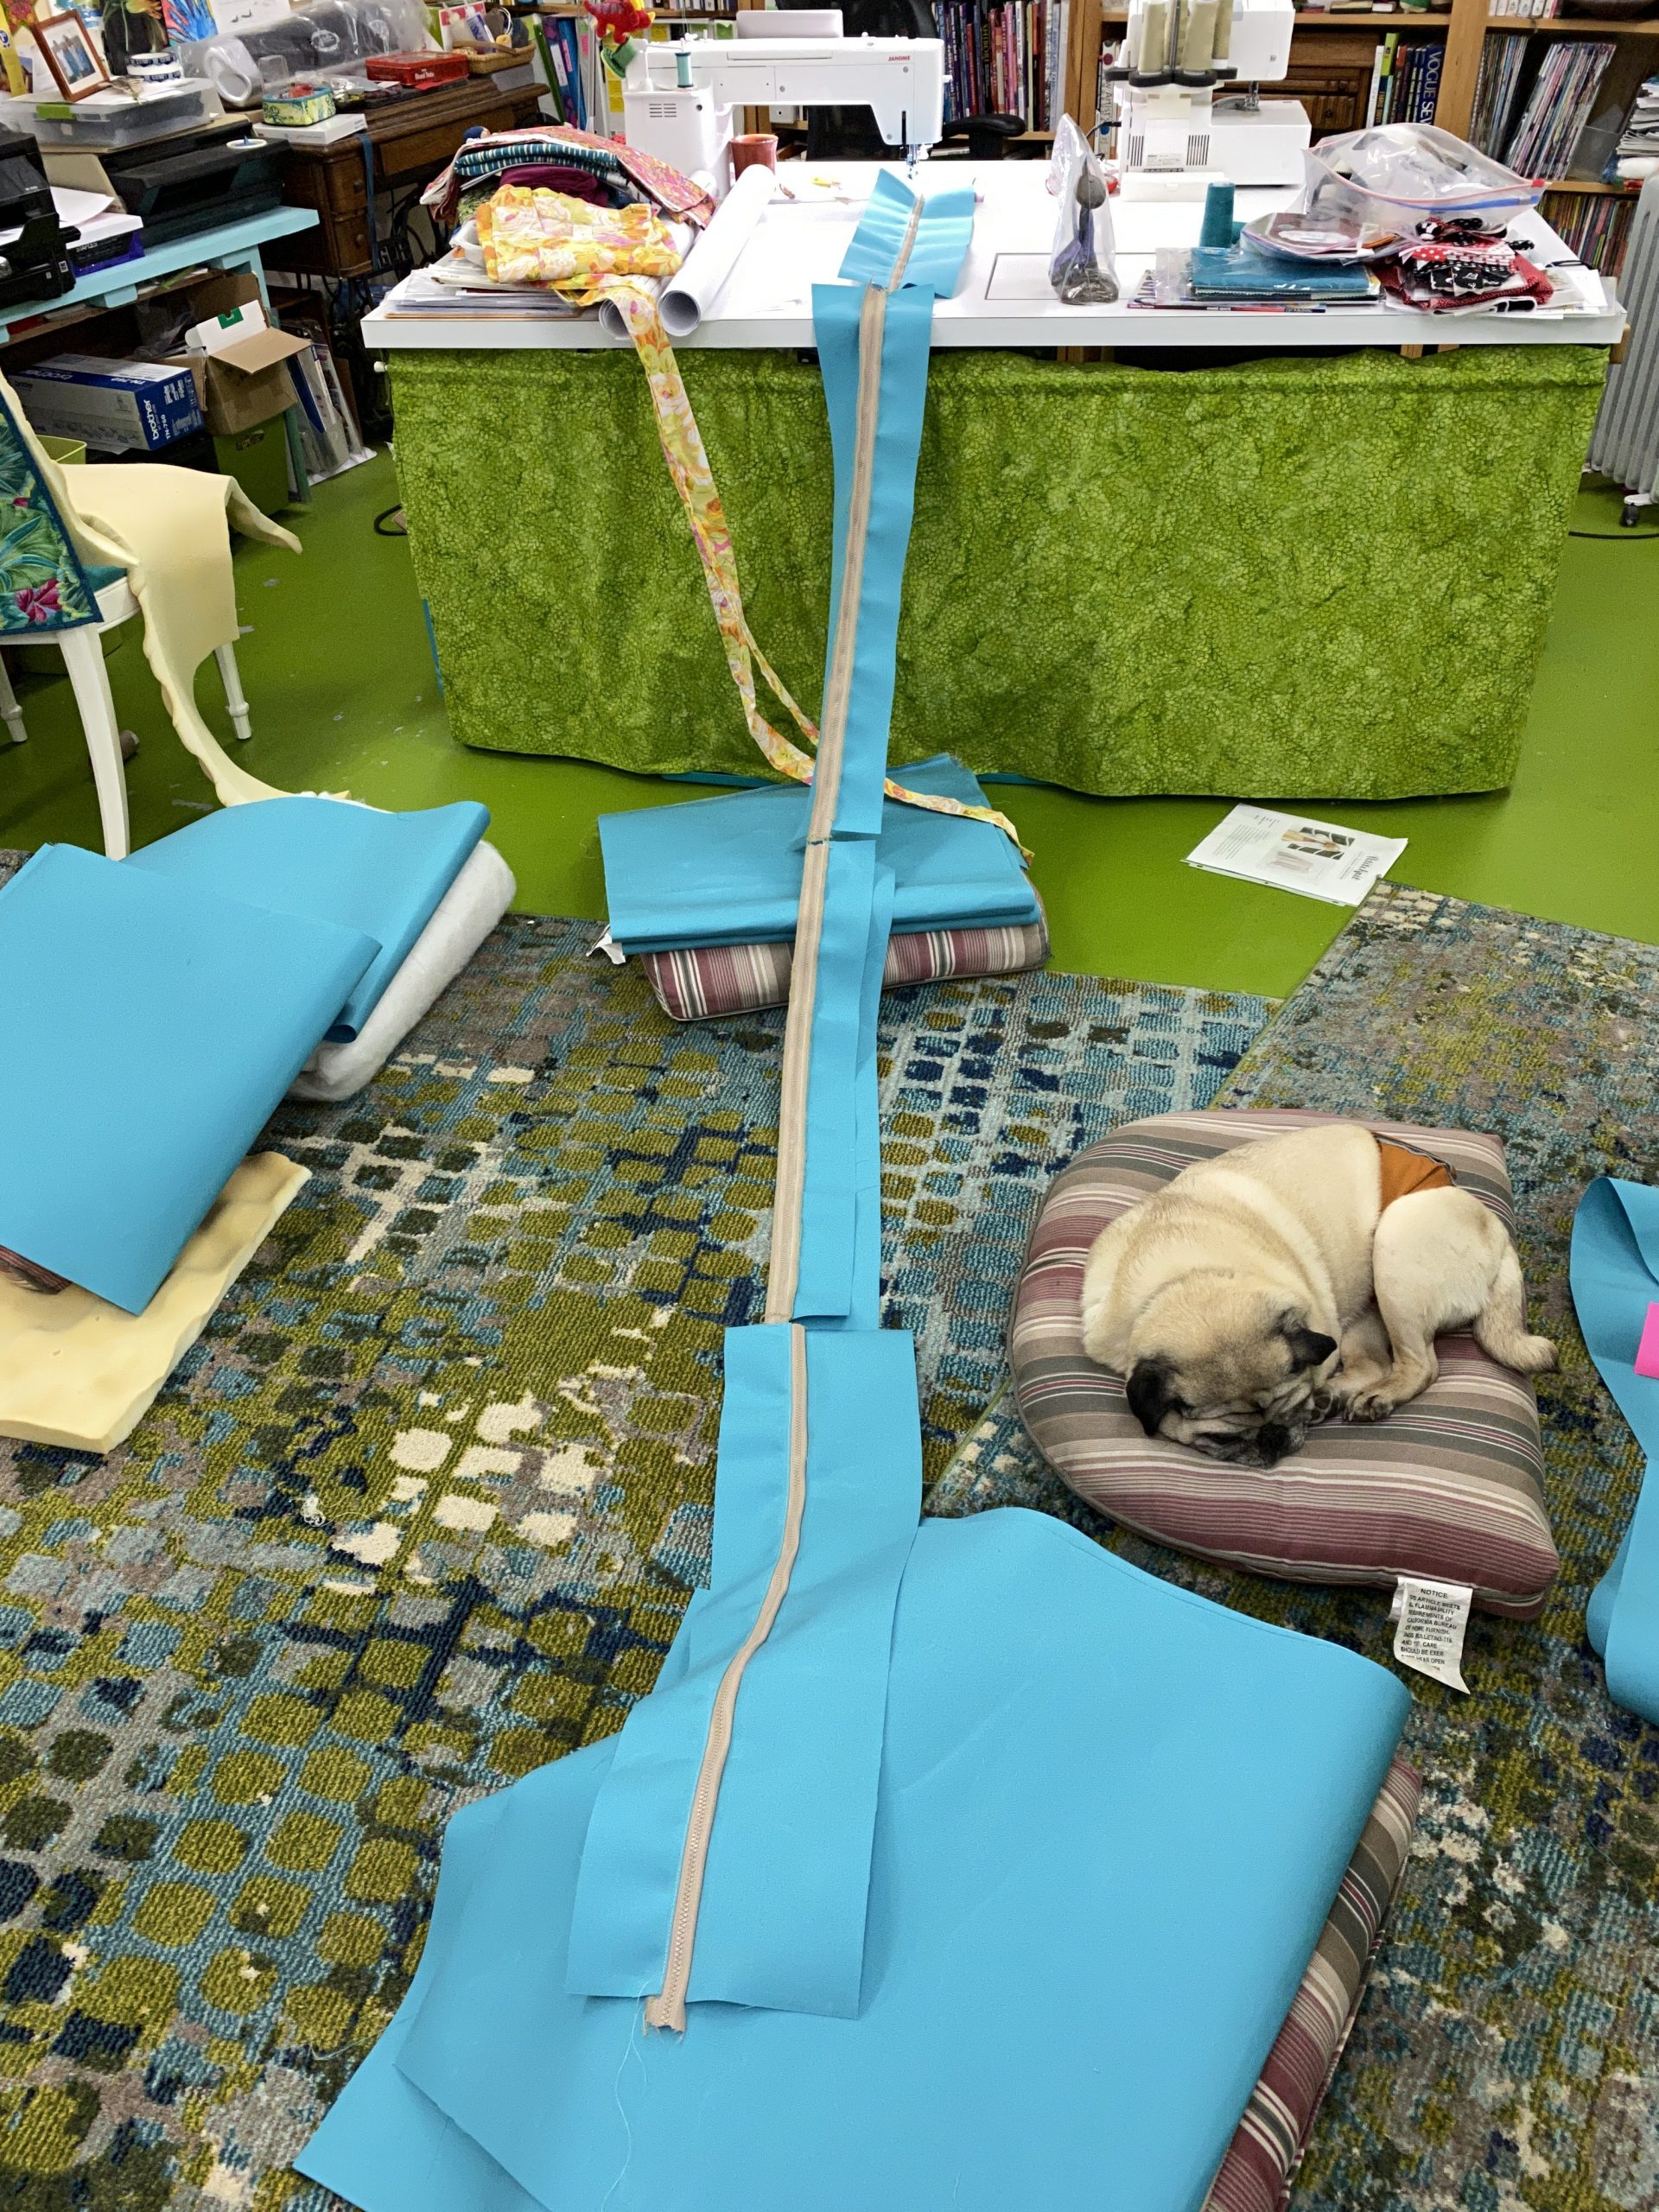
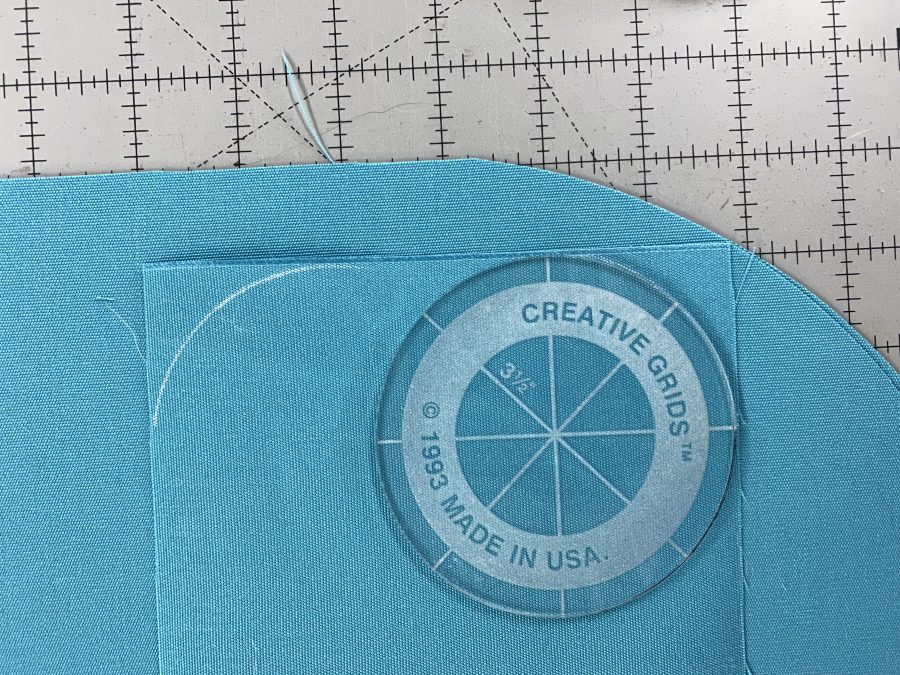
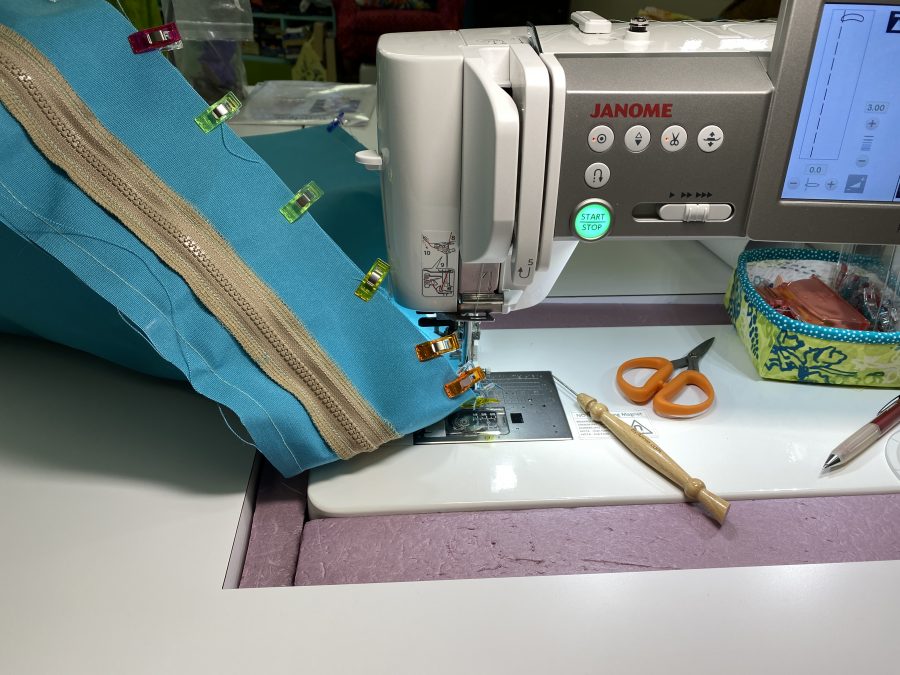
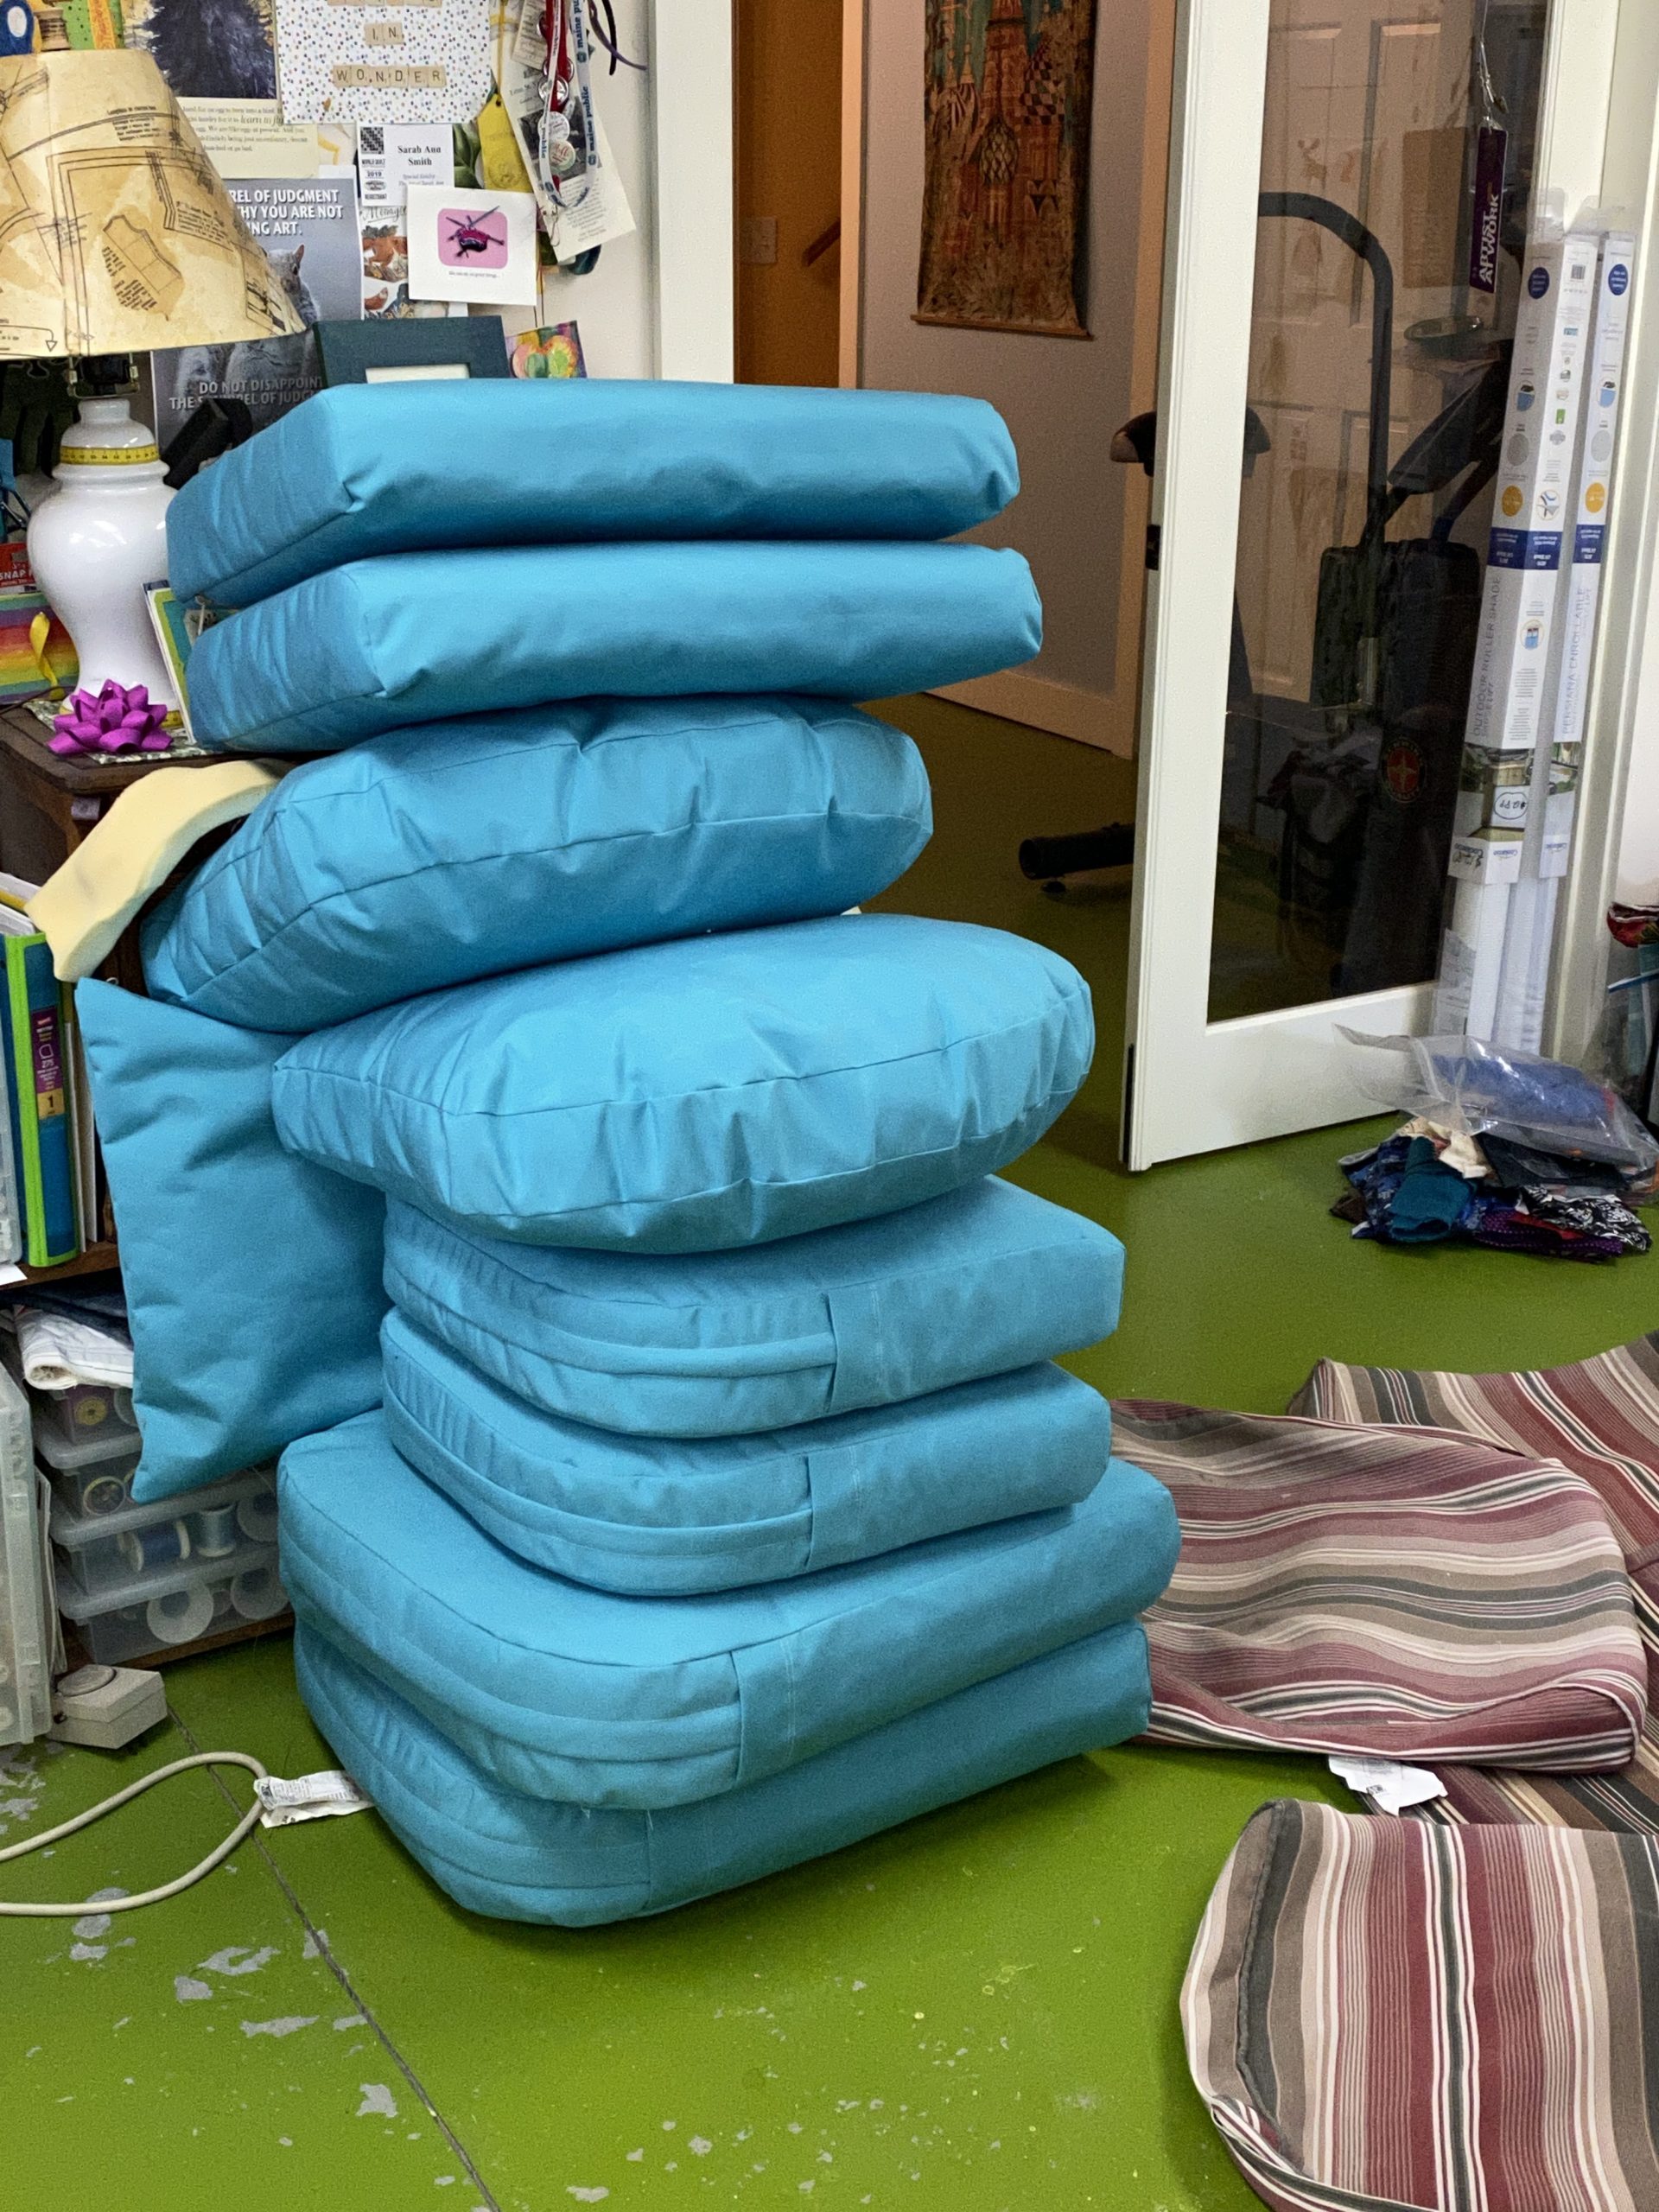
Here are the old ones on the floor in my basement studio. I used to work for an interior designer for a couple years when we lived on San Juan Island, so I learned to pattern from an existing cover and also to start from scratch. Measuring existing is easier! I knew I didn’t want the backs tufted, and knew also that I would move the zippers and do things my way.When I opened up the seat cushions I discovered the reason they weren’t comfortable is because there was no foam, just dacron! I still need to do something with the frame–it is “strung” with elastic, and after 14 years the stretch is stretched out. I set plywood under the cushions last summer, but even with the addition of foam, I need something with more give. Will look for webbing/strapping to see what I can find that my arthritic hands can actually install and make work. I used an egg-crate foam mattress topper that Eli used to use. I’m replacing his twin with a Queen sleeper sofa for when the kids come to visit, so the topper is now cushion fodder.With careful planning and careful cutting I had minimal waste! My trusty M7 Continental from Janome sewed through stuff like a champ! I used my antique (20+ years old) serger to overcast the inside seams. Because of the stiffness of the fabric, I chose to not do piping.The Janome at work, the dog at rest.My circle templates came in handy for rounding corners.Wonder Clips (from Clover) are worth the price! I bought a pack of 50 and have used them for so many things! And of course the machine sewed like a champ! I LOVE MY JANOME! You might also wonder about the tan zipper. Well, 20 years ago I bought a roll of black and a roll of tan zipper tape and a billion pulls. Since I completely hide the zipper, no worries that it doesn’t match. This is wide and strong zipper tape as there is a lot of stress on seat cushions…the same bulky weight as sleeping bags. Here’s the pile of nearly complete cushions.
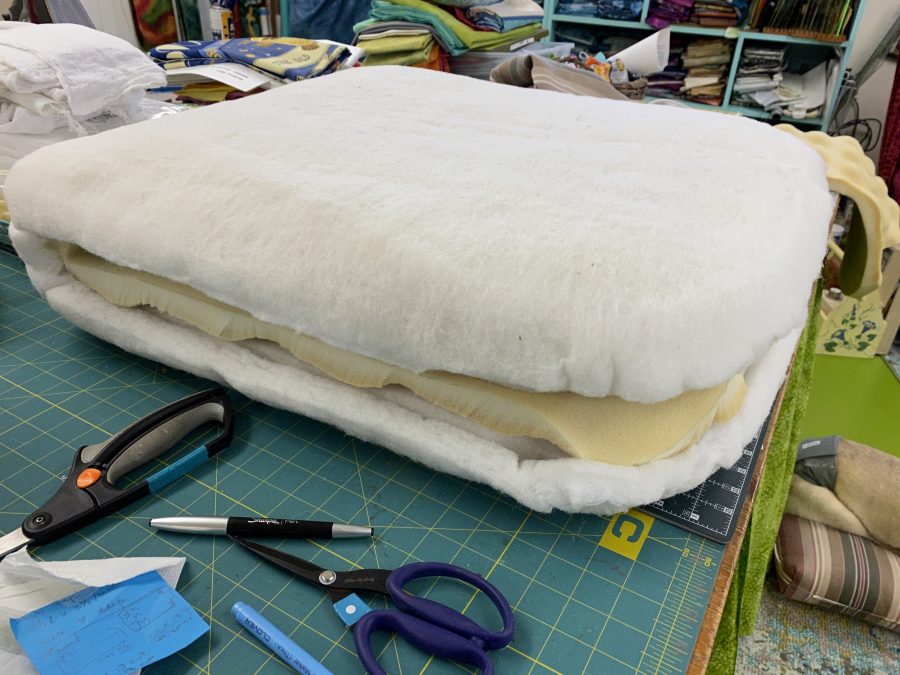
Thanks to a suggestion from Diana Feit on FB, I cut a pool noodle in half and used that arched inside the settee back cushions to fill them out. I had already cut a 3″ wide strip from the egg crate foam, smooth side out, and then used the foam arched from one bottom corner to the other to fill that out. Worked like a charm. Also, notice those DEEP zipper plackets. The place is centered on the gusset, and there are “zipper garages”–little pockets on either end to conceal the zipper pull. These deep plackets use a bit more fabric, but they cover the zipper SO much better that I always make them. Last year about this time I did a blogpost tutorial on one of my Michael Miller Fabrics brand ambassador projects here and here. Click on those links for details on the how–the process is exactly the same.
So there we are….now all I need to do is MAKE TIME to sit on the porch (once it warms up, even with the electric throw it was kinda nippy out there two days ago, then it got colder!). But summer IS coming and I intend to enjoy some Porch Time!
Good tools (AccuQuiltGO!), good fabric (Michael Miller Fabrics), good thread (Aurifil), good machine (Janome Continental M7), and some experience, and you can do a lot! This return to my quilty roots just makes me happy!
Over the course of the year I’ve shared progress on this quilt:
First, there was learning to use the AccuQuiltGO! which I blogged about here. It was a different block, but the easy applies.
Then there is the PIECING of CURVES: see the blogpost here or go directly to the video on my YouTube Channel here.
Now there is the quilting video (that covers a couple other things), embedded below and share-able on my YouTube Channel here.
Full disclosure: I have proudly been a Janome Artisan since 2003, and this year am a Michael Miller Fabrics Brand Ambassador for 2020. MMF provided the fabric and we were given, as part of being a brand ambassador, an AccuQuiltGo and several dies. To my surprise I enjoyed the process so much I have purchased both the Winding Ways and Crossed Canoe dies. Stay tuned for more!
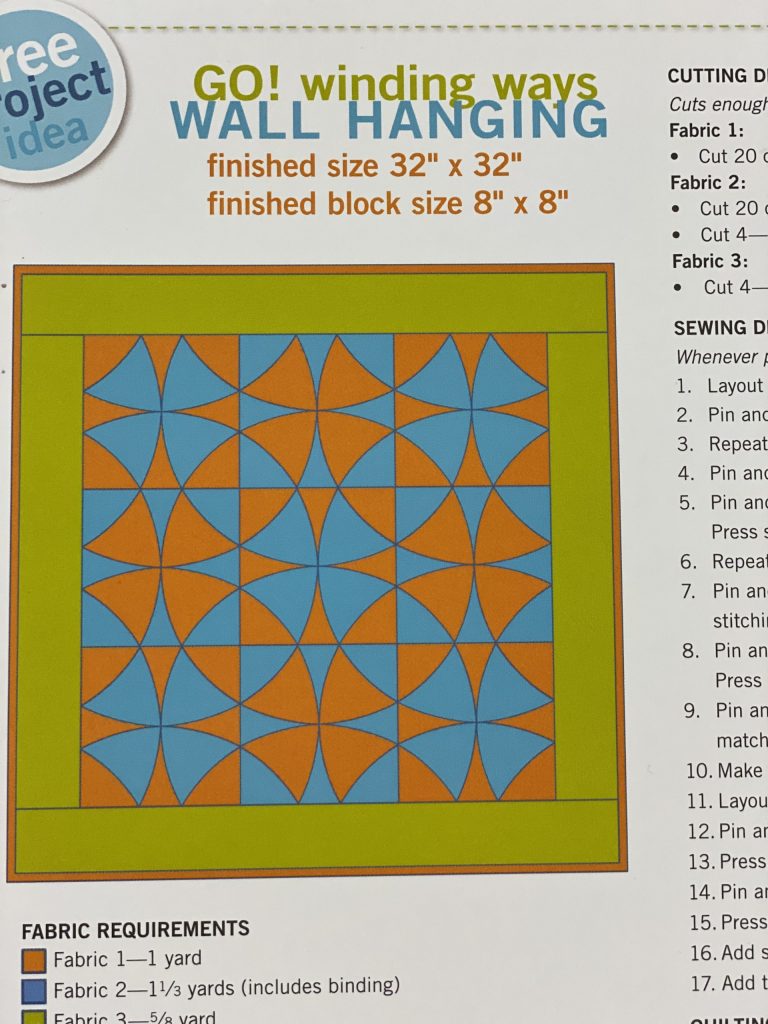
This is the die that I purchased to make the Winding Ways, which has always been one of my favorite traditional blocks. Click this link to see a blogpost of using the AccuQuiltGO (for another block, but it’s the exact same process) including a video.I found this design somewhere on the internet and printed it out to mess around with a design for a future quilt! Stay tuned for a WANDERING Winding Ways! Using a grid like this can help you plan out fun color fades and settings.
Next came machine quilting. I worked on that a while back–I did end up teaching for the Mancuso Online Quiltfest in August and will do a Threadcoloring the Garden workshop in October! More info on that soon! In this video I’m practicing making a video, demonstrating at the machine, and it just happens to be walking foot quilting (fast! easy!) on my beloved Janome M7. Even if I had paid full price instead of being a Janome Artisan I’d rave about this machine’s wonderfulness! Their new slogan, Reliability by Design, is really true!
Then, the hand quilting and the finishing!
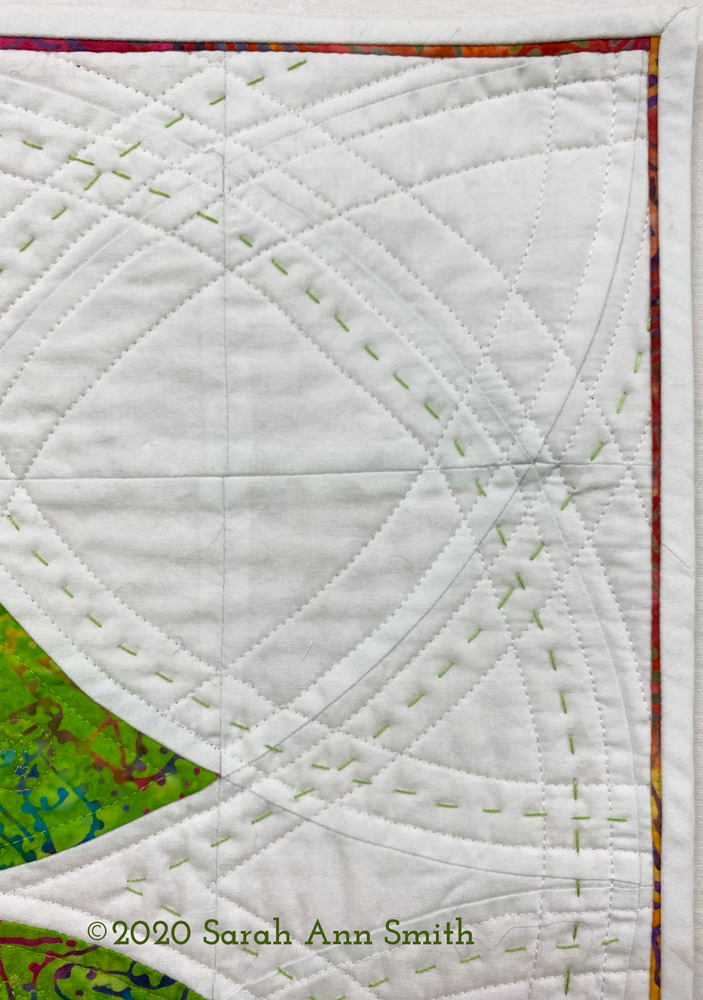
I haven’t done any hand stitching in a thousand years, but nearly two years ago I bought matching green thread from aurifil in piecing/light quilting weight and a heavier 12-wt that is about the size of a light perle cotton or 6-strands of floss. I LOVE IT…and it went so fast! I can remember clearly sitting on the porch in early summer, something to watch on the iPad, stitching away.
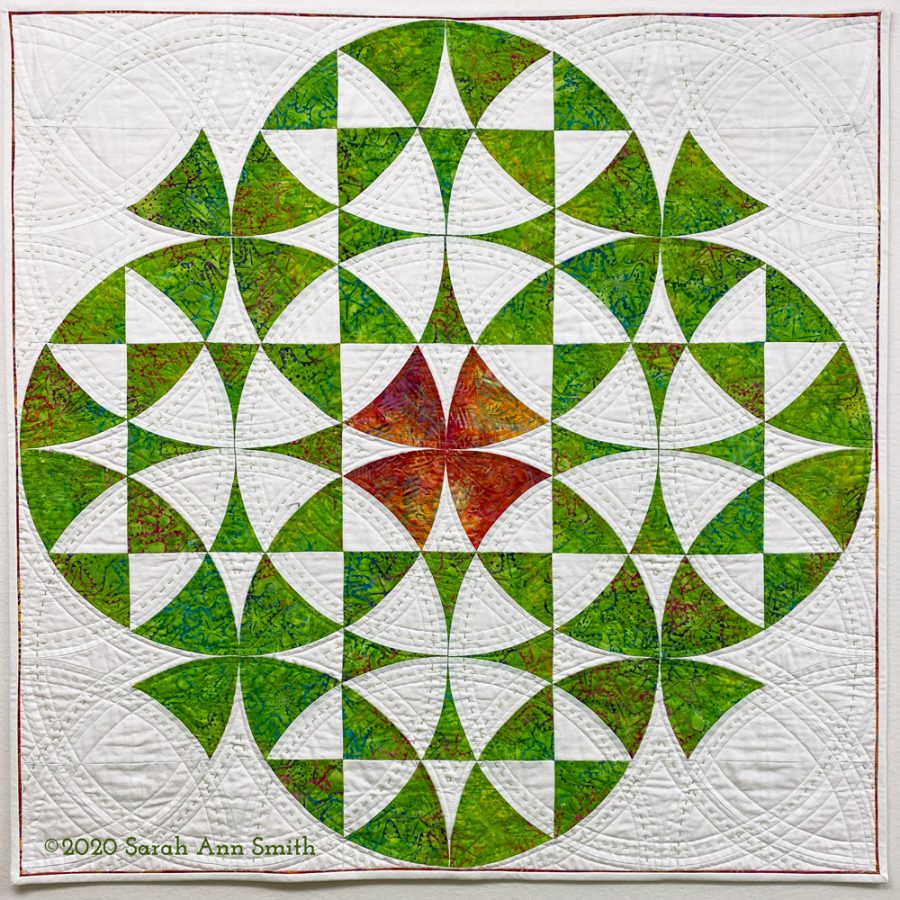
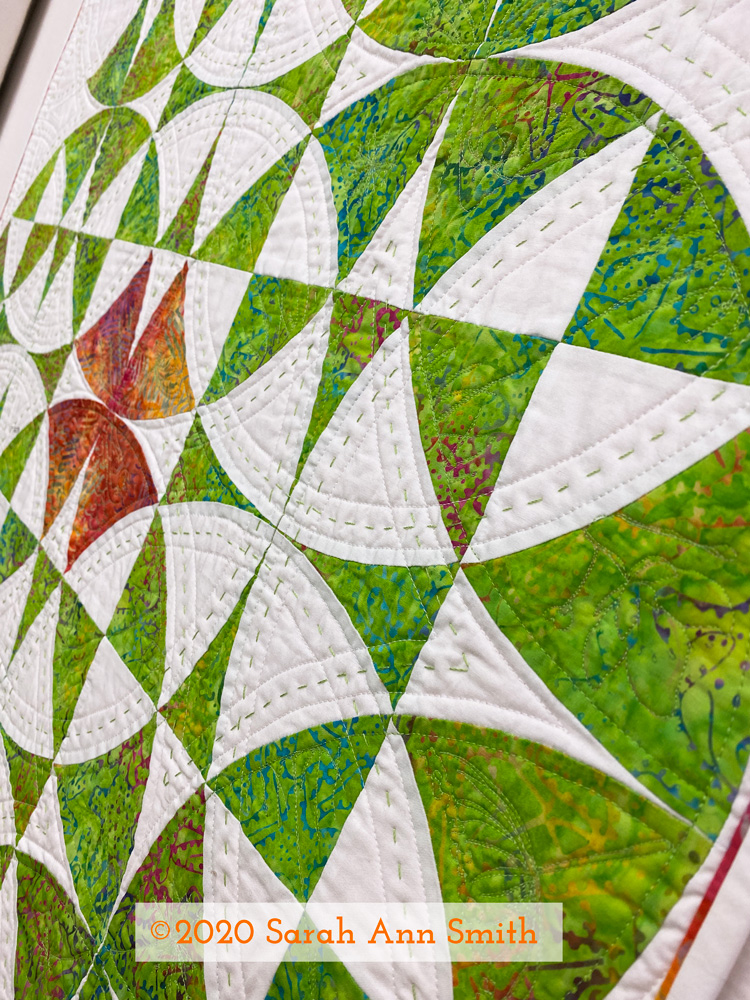
I just love how an angled shot shows the texture and dimension. I was surprised at how quickly the hand stitching went. I used the same green color of thread on the green parts for machine quilting as the green in the heavyweight Aurifil thread.
I wanted to repeat the orange batik in the center on the edges, but using it as the binding was too much. I instead inserted a tiny stitched down “reveal” that is a scant 1/8″ just inside the white binding. Can I also put in a plug for Michael Miller’s Cotton Couture solids? The quality of the base cloth is SO GOOD! And the consistency in color / dye lots over the years is really amazing. I dye fabric and know how hard it is to get perfect matches from batch to batch and it does.
Last but not least, those skinny inserts and perfect corners.
I taught the half day version of my bindings workshop at the Mancuso Online Quiltfest in June and may do so again in the new year. I am scheduled to teach and have an exhibit of my work at the Mid-Atlantic Quiltfest in Virginia in February, but at this point who knows if it will be in person or online! I promise I will teach the bindings (full or half day) again in the new year online, just need to figure out when. My students in June had GREAT results online so it works online too!
Anyway, I hope you’ve enjoyed my 2020 detour back to my quilty roots. Coming soon, a new art quilt!
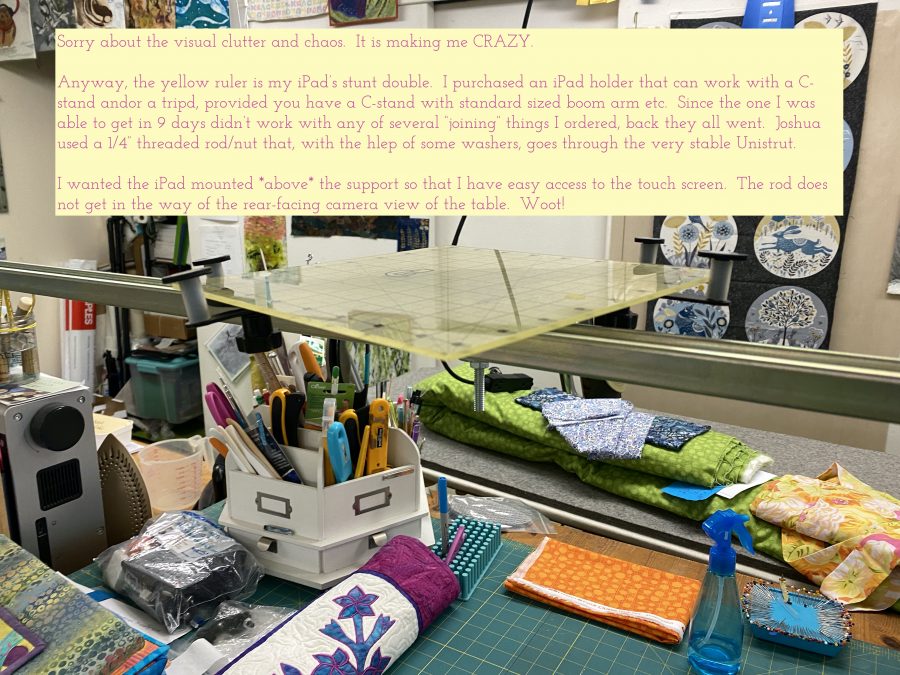
As I was setting up for my next online teaching gig, I thought it would be fun to share what it’s like totally upending your workspace to get ready to teach. Have fun watching this video. The sound varies (probably moved the phone farther away then closer), so with apologies, just adjust the volume as it goes along!
As I transition to holding online classes to supplement live and in person classes, I needed an overhead view of my work table. The traditional way to do this (outside of a fancy filming studio) is with a “C-stand” that is sturdy/heavy, stands on the floor next to your work table and has a boom arm that extends over the table. Then you hang the camera/iPad/iPhone from the boom arm. Cue COVID delays in shipping. I tried the one I could get in time for this week’s Perfect Bindings class at the first ever Mancuso online shows. The accessories didn’t fit the boom arm. Back they went!
Cue: Mama’s brainstorming, Mama and son’s (Joshua) creativity, and Joshua’s awesome tools (Band saw! drill! Random bits and bobs) and construction experience and help, and a stand using leftover stuff and $5 in supplies.
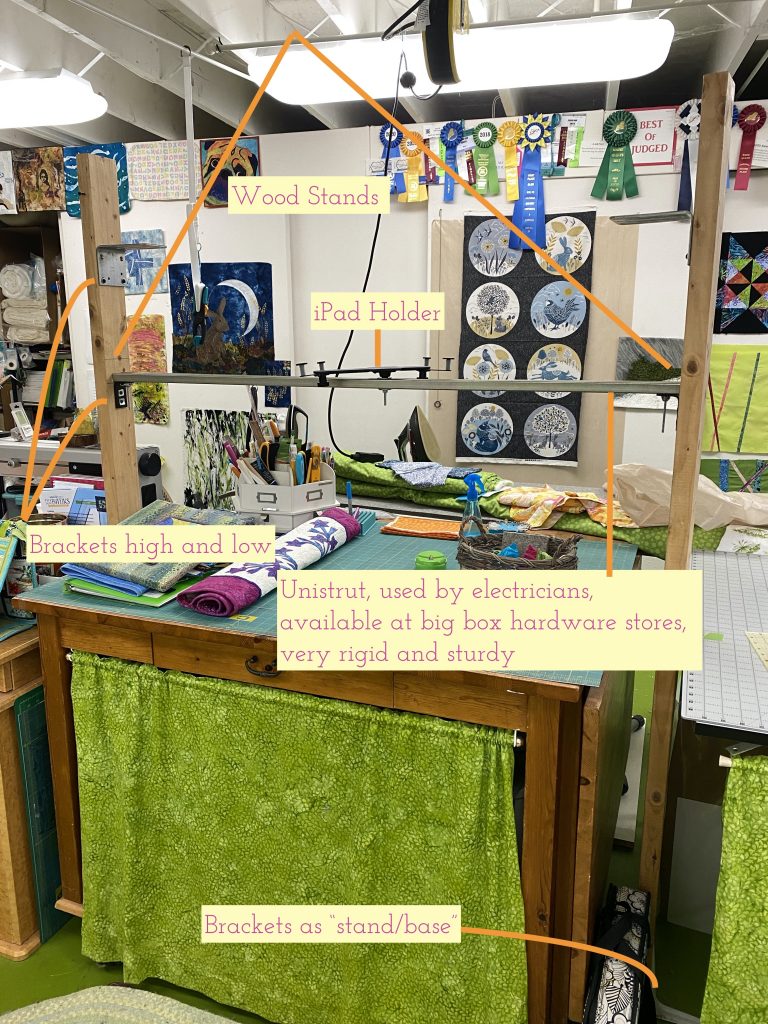
A DIY overhead camera stand
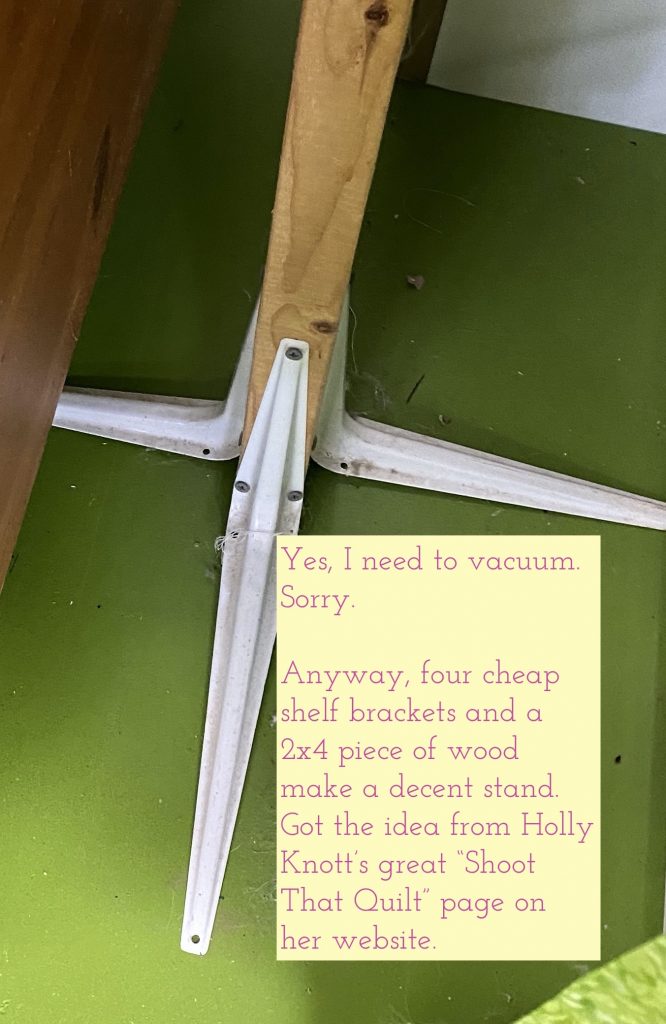
The wooden “light stands” were built based on information from Holly Knott’s wonderful “Shoot That Quilt” section on her website about taking great photos yourself of your quilts to enter in shows and magazines: two pieces of 2×4 lumber and four cheap shelf brackets for each stand.
Ignore the dust, cat hair, pug hair and thread. Please. Sorry. Here’s the link to Holly’s useful webpage on quilt photography.
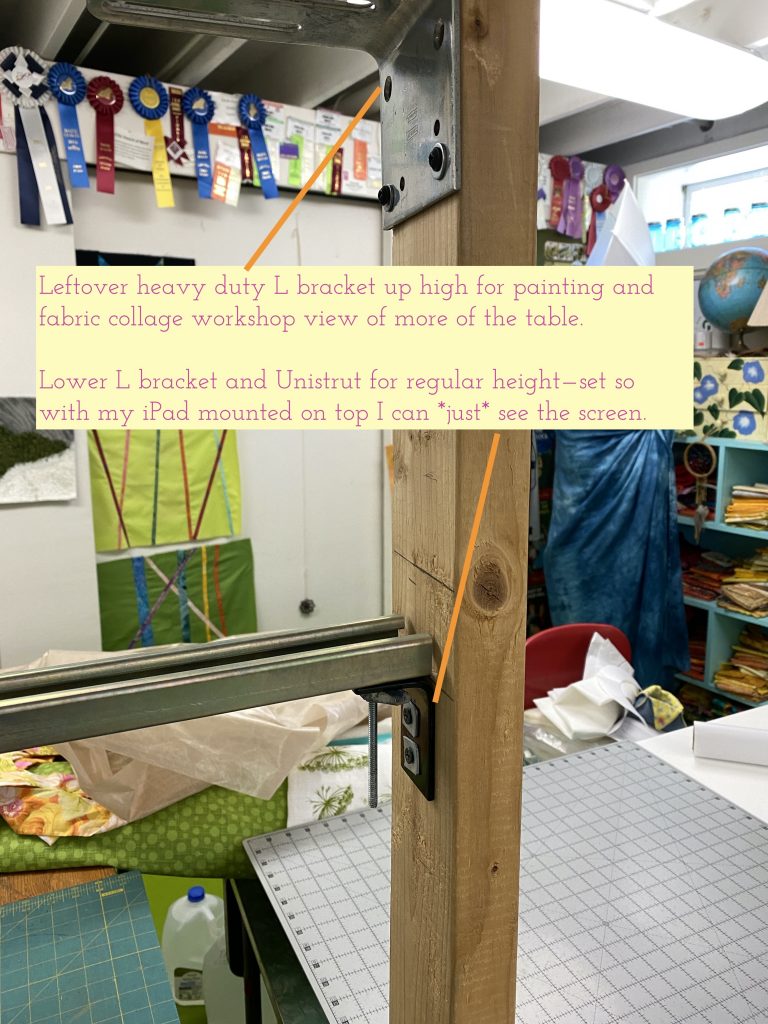
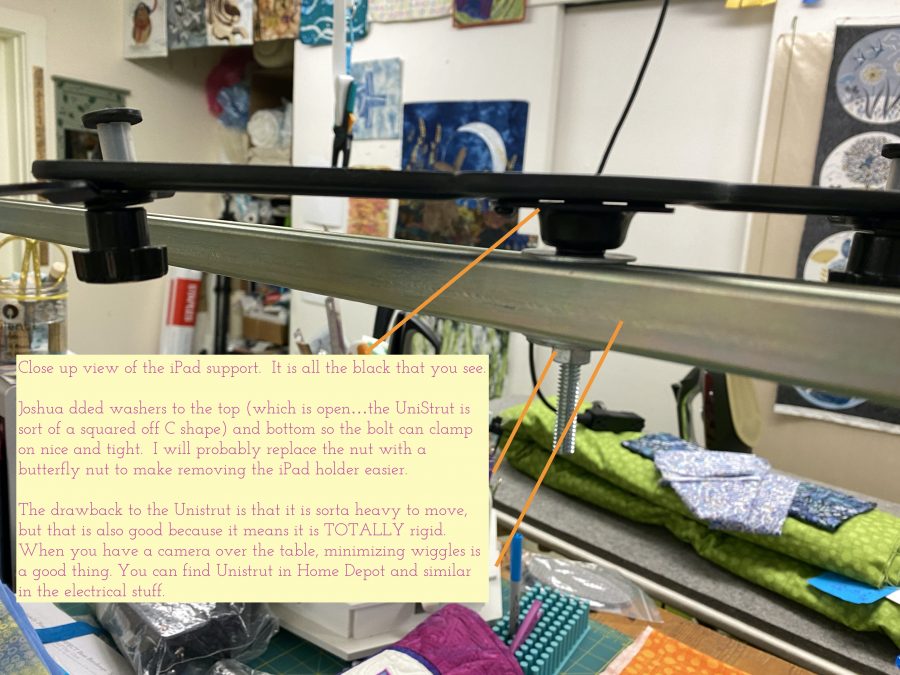
Joshua, our older son, did some electrical work for Mom and Dad (us) a while back, and introduced us to something called Unistrut. Link here. It is a bit heavy, which is why I looked at C-stands to begin with, but that is also its virtue: it is totally rigid. Rigid helps keep your camera (in my case my iPad) stable.
The upper brackets were from something else that was modified. Knew they’d be handy! I bought two small black brackets with one hole on each side. Joshua said I needed two holes to prevent the small L brackets from wobbling, so using his awesome power tools (tool envy!), he just drilled an extra hole. He cut the Unistrut in about 8 seconds with his band saw. It would have taken me the better part of an hour with a manual hacksaw! The length is the width of my table plus an extra inch or so to help maneuver the stand into place.The ruler is serving as my iPad’s stunt double because I was too lazy to run upstairs and get the iPad while taking photos. Can you tell from the clutter how chaotic it has been? I CAN’T WAIT to have a MASSIVE TIDY ATTACK! I wanted the iPad above the bar for added stability and so I could have full access to the screen while teaching live online workshops. A close up view of the stand attaching to the unistrut. Here’s a link to the iPad holder on Amazon. It isn’t the most rigid thing and the little grip thingies that hold the iPad in place aren’t huge, so that’s another reason to have the iPad on top supported by the cross bar and not just those four little pads.
SO if you are wondering what your teachers does to get ready for you, this is just one small but vital component. If you are going to TEACH online, I hope this helps you–please feel free to ask questions! MASSIVELY HUGE thanks to Lyric Kinard for her help on so many things on the technical side over the years, and to Lee Chappell who gave us newbie online teachers for the Mancuso show a studio tour by Zoom to share with us how she set things up. And THANK YOU to my wonderful, creative son who comes home and always wants to do some sort of “fix up” something for his mom and dad. Joshua, you ROCK!
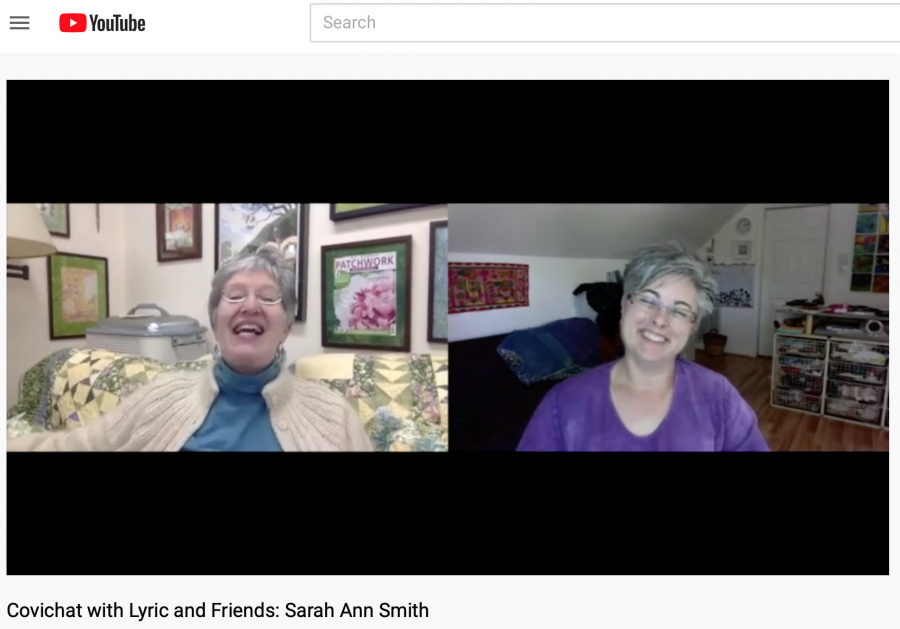
What FUN! My friend and artist and teacher extraordinare Lyric Kinard has started doing a series of taped video chats with folks in our line of work and art. We chatted last Friday, and the Lyric uploaded the video today. So ENJOY!
In the video I mentioned a bunch of things…things which aren’t on my blog yet! BUT…
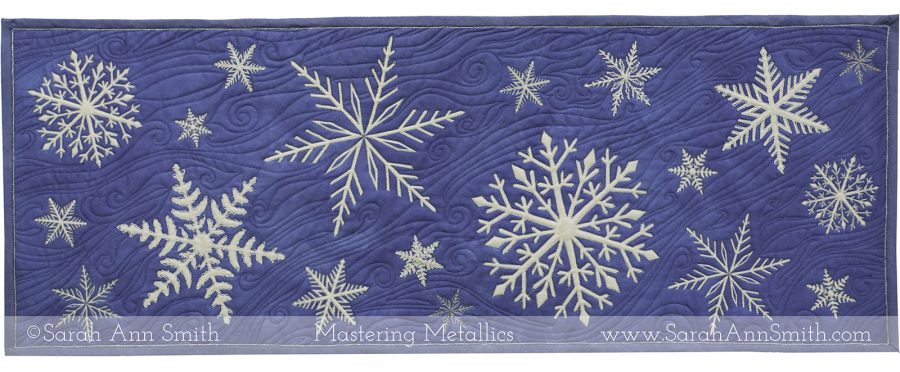
Mastering Metallics workshop is described here on my website, where you’ll also find the class supply list (I may need to update that though, so just get a rough idea). It is a half-day class that will debut at International Quilt Festival Houston this coming Fall–sign ups usually start up in July. You’ll learn tons, get a full kit with top, batting, backing and thread so all you need to do is show up. This is the project, a wintry tablerunner. Additional fabric will be available for purchase, and I may make it available on Spoonflower for orders from home. Let me know if there is interest.
I also mentioned some bags and projects fro Michael Miller Fabrics using byAnnie patterns. The first blogpost will go live on April 9th, and there will be another in May. Stay tuned!
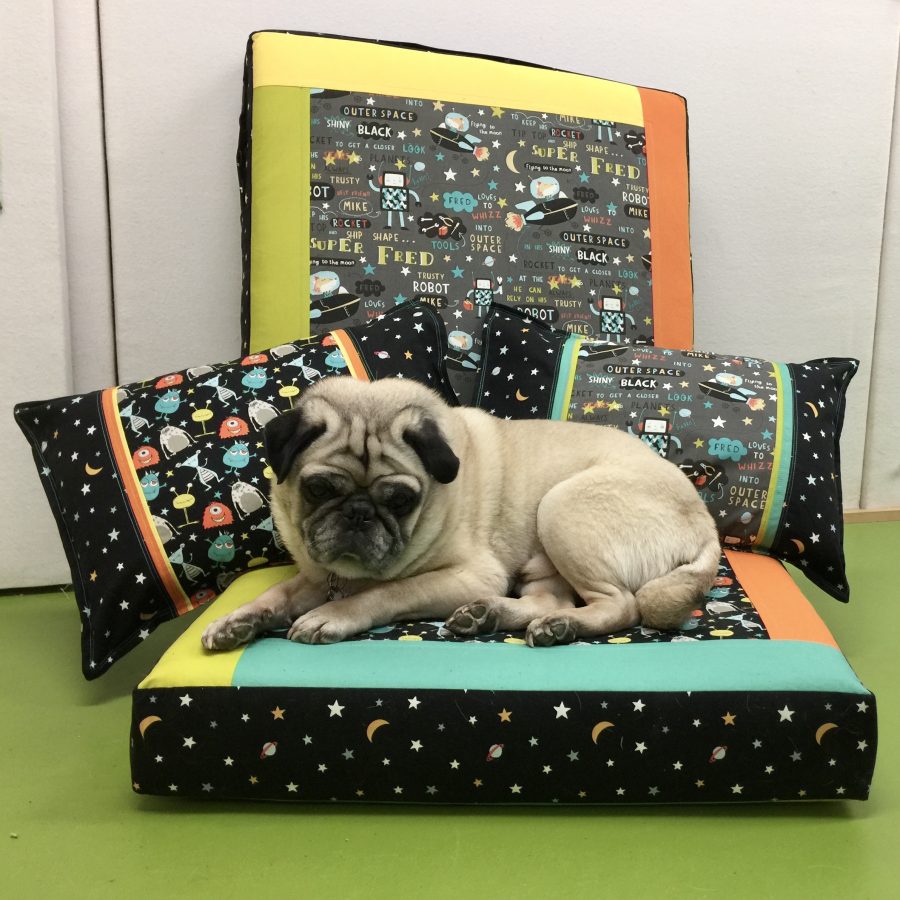
And if you liked that floor cushion, the fabric line is Space Pals and Super Fred. You can find the fabrics usually at Fabric.com, but right now things are messed up due to international shipment restrictions and low staffing at workplaces. So when all this stay-at-home is over and quilt shops can get back in business, as your local shop to carry the line.
The PATTERNS are free and available here with even more information on my blog. Go Here (1) and Here (2) for pdf links and lots of great info and detail.
Widgeon loves the cushions!
I’ve already watched Lyric’s interview with Robbi Joy Eklow and look forward to catching up on the chats with Pepper Cory and Thomas Knauer. Thanks for asking, Lyric…it’s always so easy to do these sorts of things when you’re already friends!