email Youtube

Home
Galleries
Blog
Workshops & Calendar
Store
Resources
About
Contact

Archive for the ‘Quilt Design’ Category

Piecing tips from the art quilter!

Saturday, September 9th, 2023

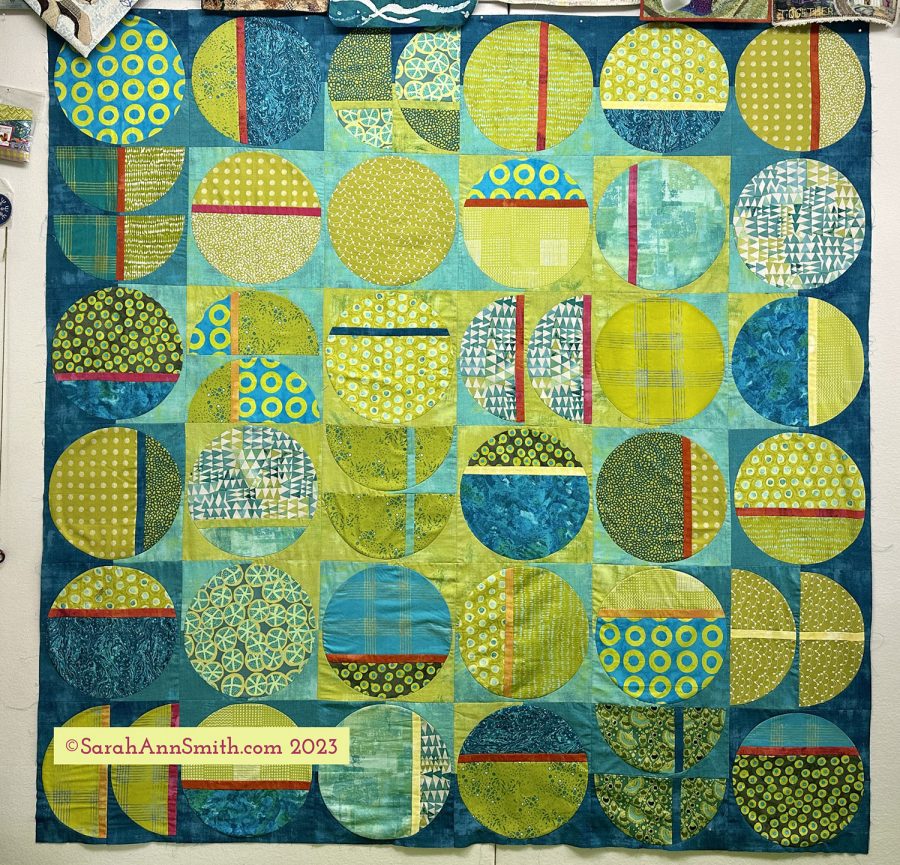
First, hi everyone and welcome to new readers!  I’ve actually been piecing…set-in circles no less!   Above is the 74″ square top.  Each block will finish at 12 1/2 inches.  I used Latifah Safari’s 12″ Clammy to cut the circles, half circles and the corner quarter squares.  Her instructions have you cut the outside from a single piece of cloth, but in addition to wanting to mix up the colors I felt that used too much yardage.  I do have a nice stack of the background fabric “pumpkin seeds” from the leftovers to use in something, though!    Need a title…not Crop Circles! Going in Circles?  Nah… maybe Hither and Yon? My newsletters readers have come up with a few really good ideas… I’m narrowing in on a title but Help me here! Suggestions welcome! And if you’d like to get my newsletter, look in the menu bar on the right of the blog page (or at the bottom of any other page on this site) to sign up.  If you live outside the US or prefer privacy, when it asks for a zip code just type in 12345 as a place holder–it works.

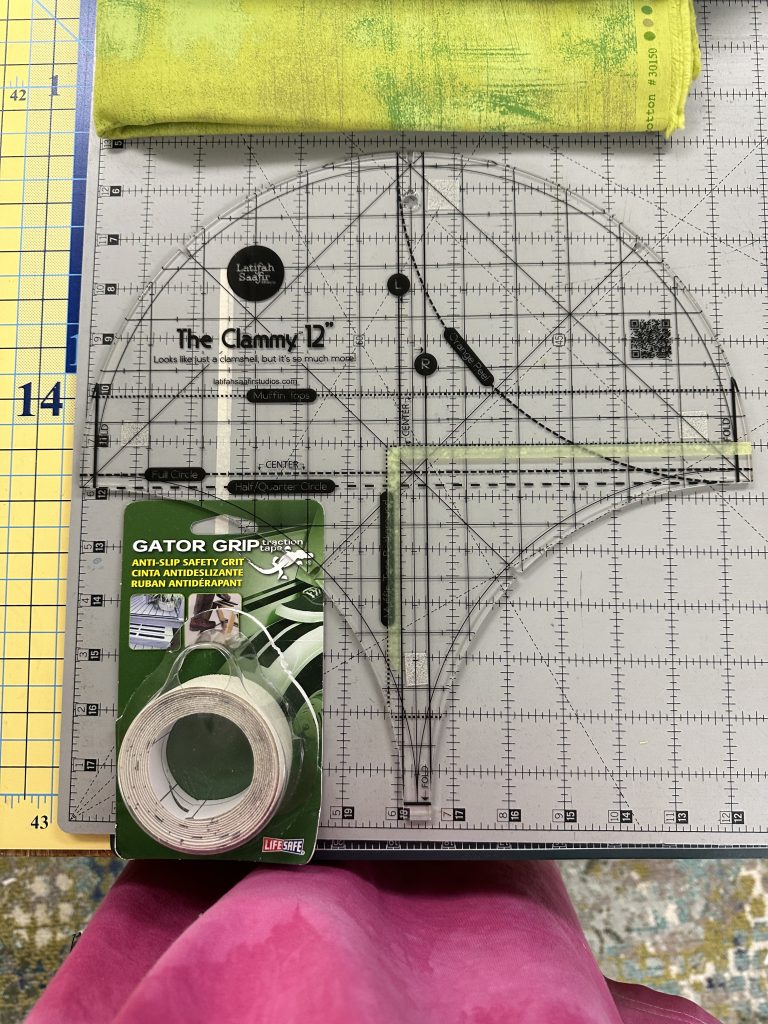
#latfahsaafir ‘s clammy and some grip tape made cutting the circles easy peasy!

I love many modern quilts because of the large scale of the blocks (for a graphic impact rather than ease of construction, though that is a bonus too), the room for quilting and/or the use of straight line quilting, the color and, frankly, for a change of pace.  I’ve also fallen for Latifah Saafir’s Clammy and Muffin Top quilts so I bought both the 8″ and 12″ templates.  What I didn’t realize is how incredibly versatile her templates are, allowing you to make clamshells, half circles, muffin tops (about a generous 1/3 of a circle), quarter circles, background pieces, pumpkin seeds (that elongated football shape you see in the top right, and all the really useful markings to cut on the fold, add seam allowances and what not. In going to collect the hotlink for you, I noticed she has bundles that save on cost and also some seconds that are less expensive.

You can see that I used highlighter tape to mark where I needed to cut for my background.  Her instructions have you cut a square, then cut from the square for the clamshell or circle.  That gave me more odd leftovers than I wanted, so I cut the circle from the edge of my fabric and then cut four corners so I could mix up the background as well as save on scraps.  Still, I’ve got a use for the leftovers….stay tuned (probably in a year LOL).

A longarmer recommended the Gator Grip tape to me; got it on Amazon to use for ruler-work machine quilting rulers, but it works for cutting rulers too.  I found that I wasn’t able to hold the template without making it slip sometimes, so I cut four small squares of the grip tape.  You can’t even hardly see it in this photo.  See the next one for a close up.  I LOVE THIS on the templates! You can still see the lines on the mat beneath the clear grip tape.  It works better than the sandpaper dots and other products I’ve tried, and a roll of this stuff will last forever.
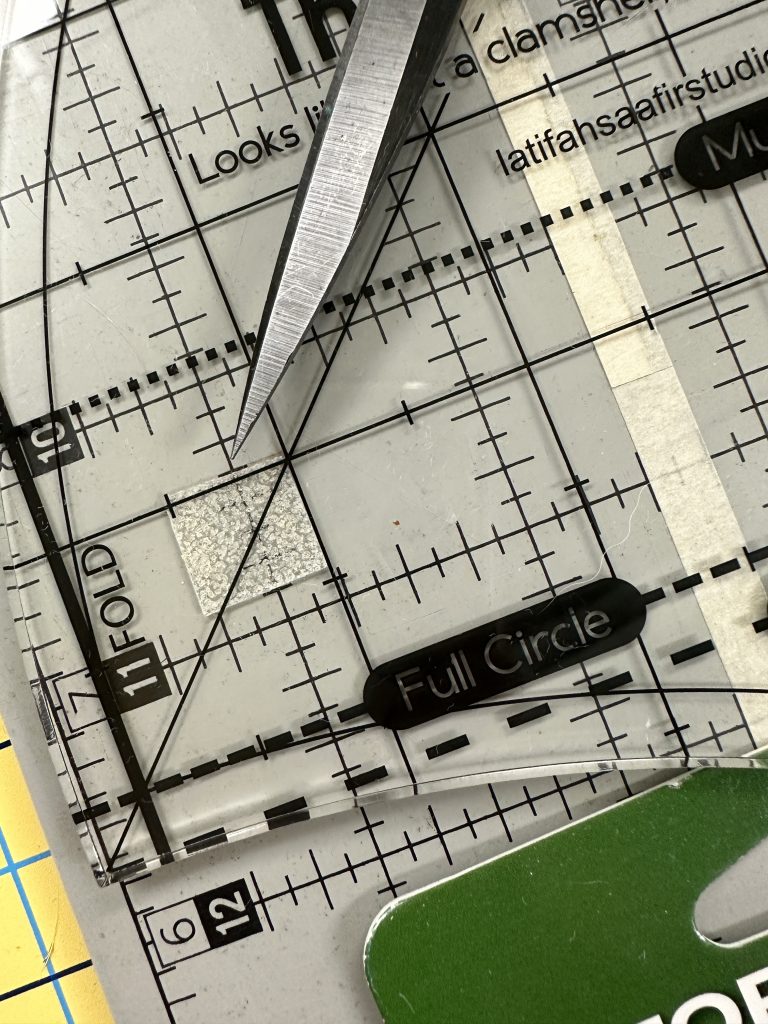
The scissors are pointing to the 1/2″ square of grip tape on the under side of the ruler. You can even (slightly) see the markings on the cutting mat through the tape! Also notice the helpful makings on the ruler for various extra ways to use the template for cutting things other than a clamshell.

Cutting and Precision

Let me just say “perfectly precise” are two words that have never been used to describe my work.  But I am trying and learning.  An online master class in International Quilt Festival’s Virtual Festival  (it was in either December 2020 or 2021) with Philippa Naylor showed me I really COULD be precise if I tried. First, slow down.  Second, cut as carefully and precisely as you can.  If the pieces aren’t exact, then nothing else will be!

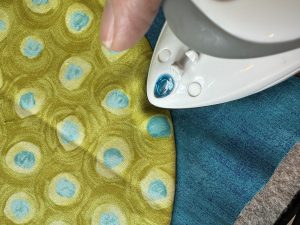
Pressing is also super important.  To avoid tucks when pressing seams to one side, use the tip (or toe if in the UK) of the iron, NOT the side of the iron. Astonishingly, it really is more precise at getting the entire fabric pushed away from the seam without an inadvertent little fold or tuck.  Sometimes, though, it is better to press seams open, and that takes a bit of learning when and how.  I’ve taken Philippa’s online Garment Makers’ Question Time workshop, and think in a year or so (if/when I get caught up on everything else) I may take her Quilters Question Time, even with as many years of quilting as I have–egads coming up on 33+ years!
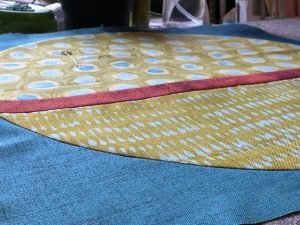
It’s amazing how nice and a FLAT I got the blocks–precise cutting, careful sewing, smart ironing for the win!

Use the tip/toe of the iron to press seam allowance–here the allowance is under the green fabric.


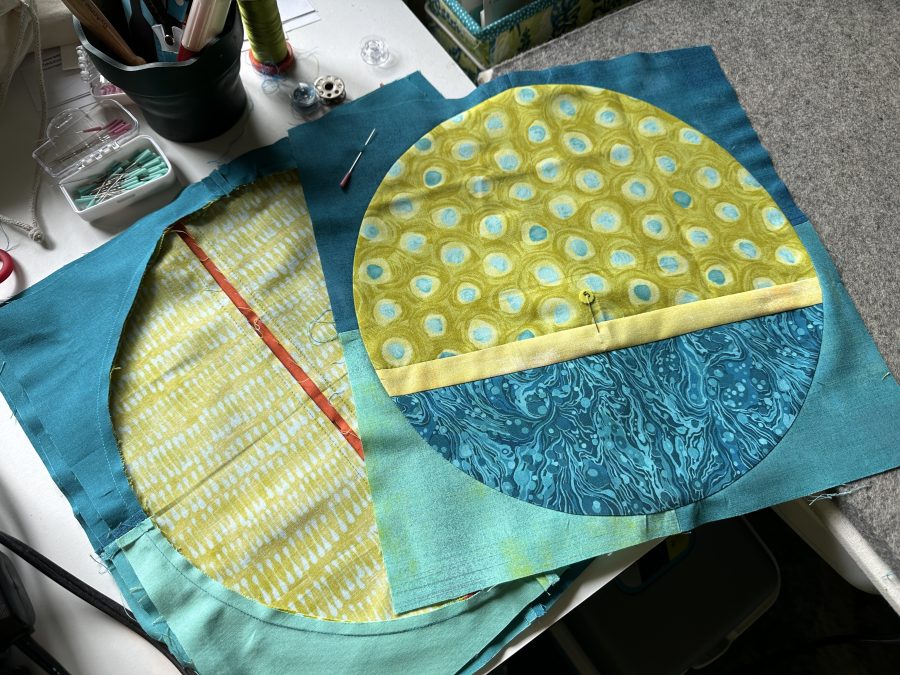
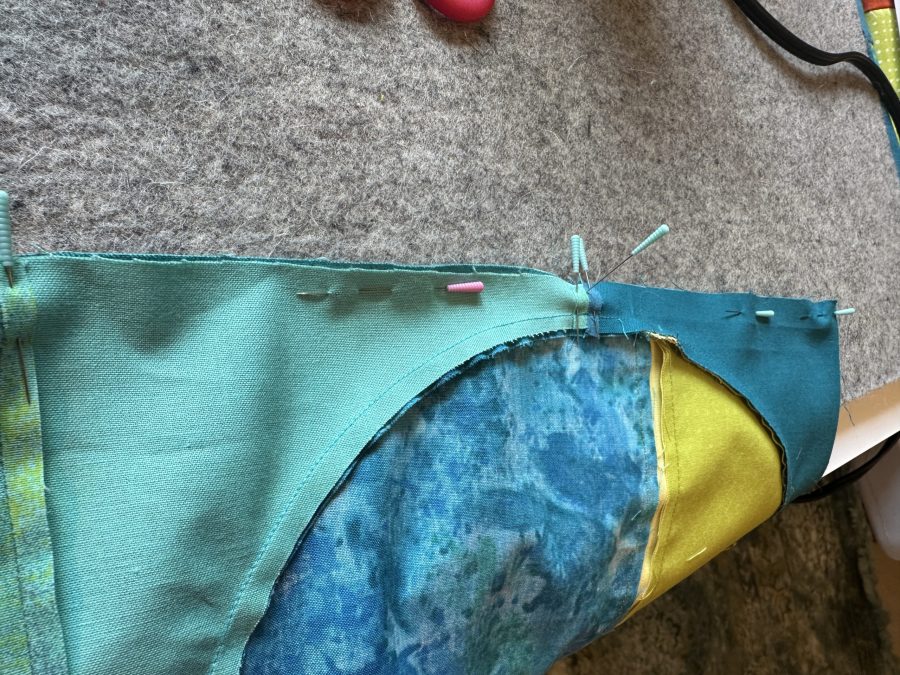
  • Stitched blocks front and back.  I used my alphabet and number pins to keep track of column and row.  I placed a pink pin (Taylor Seville’s Magic Pins…the pink are the LONG ones) in the top left background quarter to help me keep track of placement.  The letter/number pins are pinned vertically with the flower toward the top of the block, also to help me remember which way is up. Pressing:  the background sections are pressed open.  The stripe inserts are pressed under the strip.  The background goes under the circle.
  • Front and back of the blocks. Although the cross-cut on the circles creates thicker bumps, I opted to press under the circle to “raise” it above the background. Here you can see the top and the under side of two blocks.

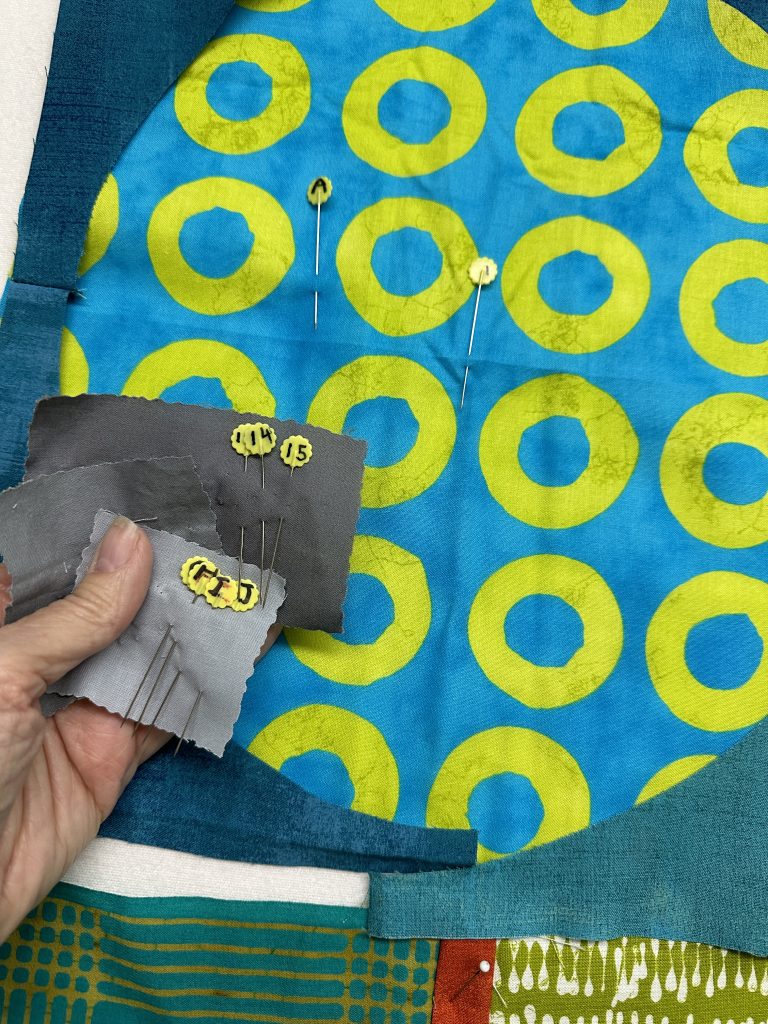
  • I used a Sharpie to mark A,B,C etc. on some flower head pins, and 1-12 on even more.  Each row is A, B, C etc., then each block going across is 1, 2, 3 etc.
  • My DIY numbered pins help me keep track of what goes where–and a photo on the phone is a MUST!

  •   Fold the circle in half exactly and press a crease on the edges.  Open it back up.
  • Fold circle in half. I am careful to align the strip so it folds directly on top of itself.

  • Turn the circle 90 degrees, fold in half the other way aligning the first pair of crease marks, then iron in the second set of creases at the fold.  At first I just quartered the circle and pressed, but I got more accurate alignment after I tried marking the spots in two steps.
  • align the creases you made (above), bringing the top all the way down–it’s offset here to show you the crease marks on both edges.

  • I pinned the background (sewn into a circle) to the center circle on the creases at the top, bottom and sides. In other words, the concave (innie) curve goes on top of the convex (outie) curve.  As I stitched I added a pin about  1 1/2″ before each of those pins–the fabric doesn’t ease in as well where the grain is closer to on-grain.  In the rest of the quarter circle arc, I use my fingers to ease in and hold the background in place.Being as accurate as you can at all steps helps!
  • This is a do what works best for you thing. I find that just a couple pins and using my fingers works better and more accurately (along with sewing reasonably slowly) than using a thousand pins.

In the studio I love my Zirkle magnetic pin minder, but this Clover magnetic pin “cushion” with a lid (that fits on the bottom when you don’t need the pins covered) is perfect for retreats and travel.
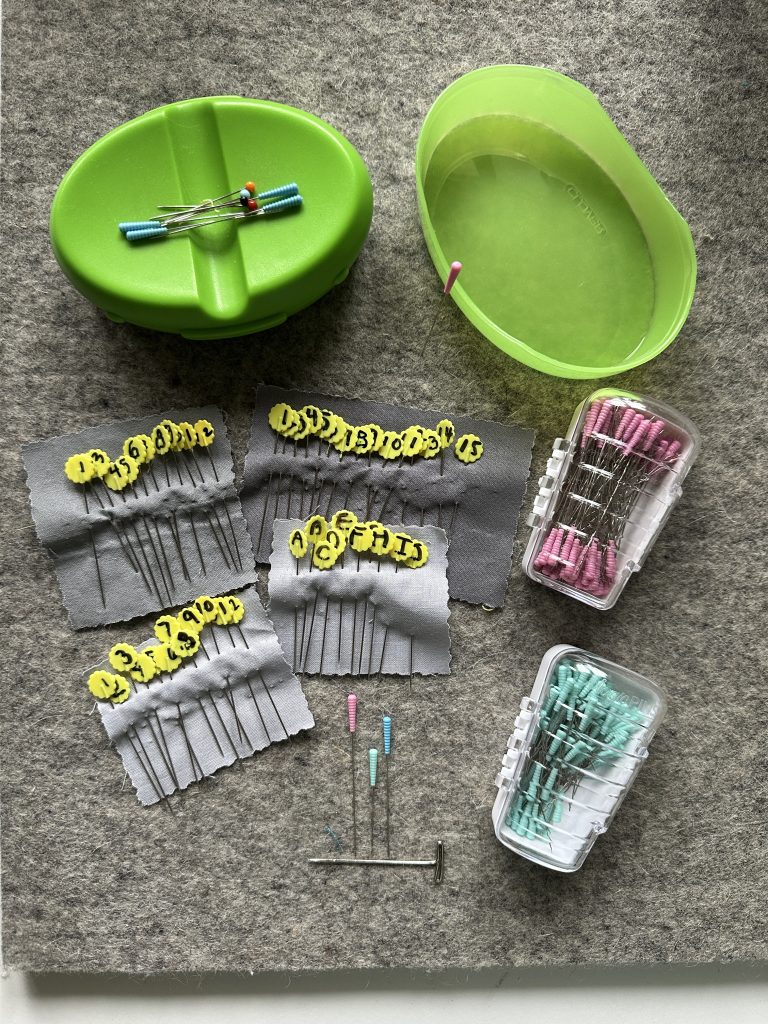
You can never have too many pins. For hand appliqué, you want them short so the thread doesn’t tangle. For machine piecing, I prefer really LONG so the head of the pin doesn’t get caught under the foot. ALWAYS pull the pin out before it reaches the needle–sometimes that maybe when it is one stitch away, but don’t sew over it. If you hit the pin you can knock the machine out of timing (expensive repair!).

My sets of homemade ABC and 123 pins are on the bottom, along with some of my Taylor Seville pins.  Taylor Seville reached out to me when I was teaching at a couple shows in the past year or so, and sent me some to try (I hadn’t used them before but now I do!) and more to share as classroom giveaways.  The pins come in different lengths and thicknesses.  The mint green ones are the shortest of the ones I have, the blue are a finer metal (makes pinning seam allowances open flatter and therefore sew up more accurately, but they bend more easily so choose your usages wisely), the pink are longer.  I prefer the longer as the grippy ends don’t get snugged under the presser foot.  Best of all, Taylor Seville is coming out with a BOX of ABC 123 pins with SLOTS for each one… no more pinning into cloth or having a muddled mess of pins….. I always figured why spend the $$$ when I could make my own cheaper, but that organizing box is Da Bomb!  Will be ordering as soon as they are available!  I saw maybe September 2023 for them…..

PERFECT intersections!  

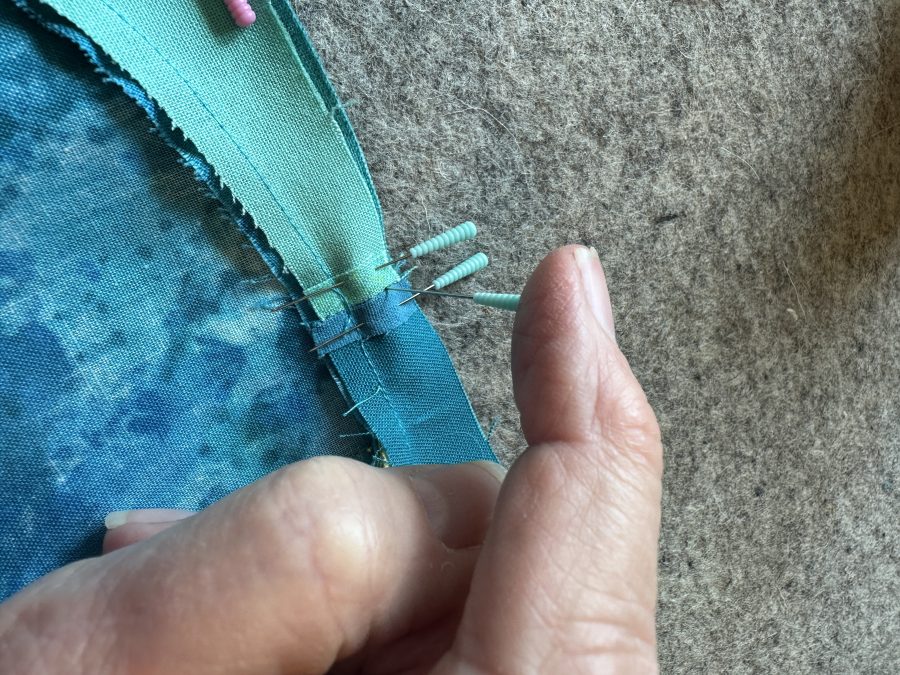
Pinning is the key, with a big helping hand from seams pressed OPEN:

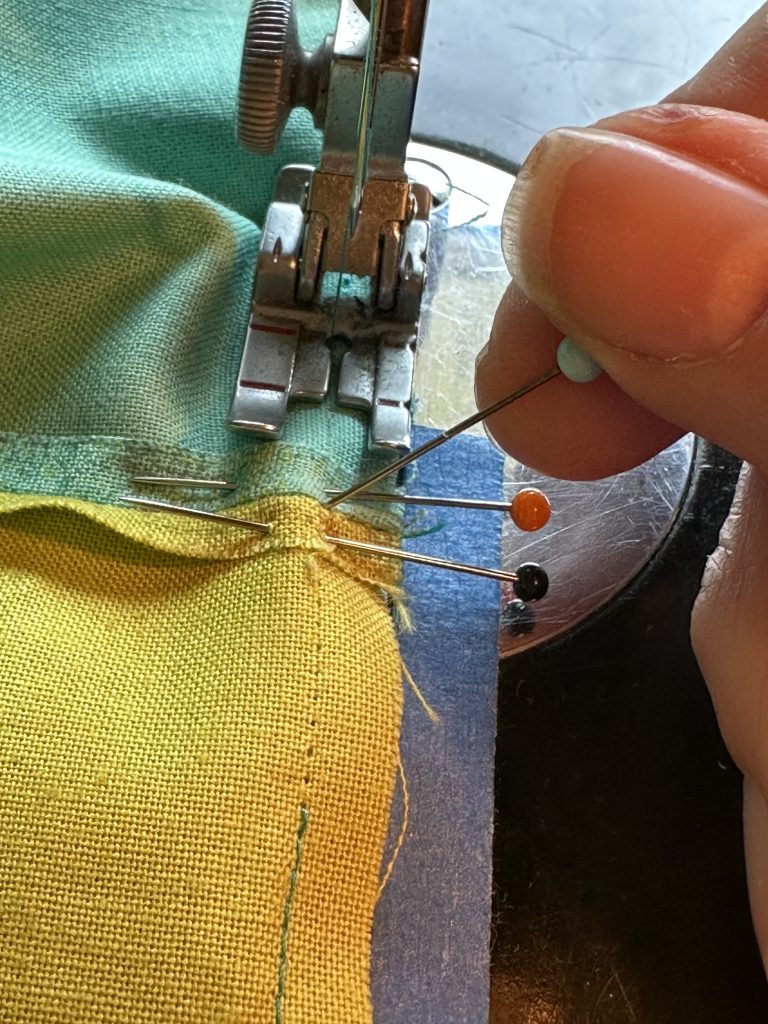
  • first, put one pin through the Very Center of the seam of the pieces on the top,
  • then poke that pin through the seam of the pieces on the bottom.

LEAVE the pin in the seam vertically–don’t bend it sideways or “pin the seam.”

  • Place two more pins in the seam allowances on both sides of the seam.

The pin through the seam stays poking up!

  • Slide the fabric under the presser foot and try to keep the vertical pin in place.

In the photos, below, you see that at a certain point you need to let the vertical pin pivot out of the way.  The photo on the right shows me holding the pin still IN the seam to keep it aligned until the very last moment.
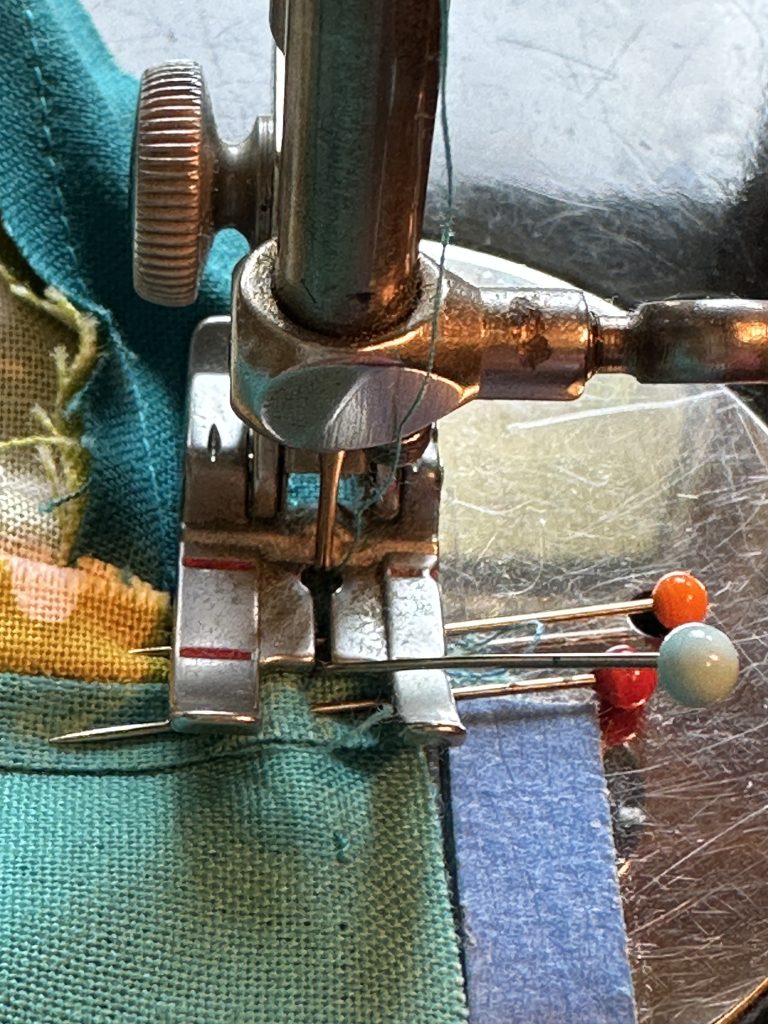
Sew SLOWLY when you approach all those pins. The finer the pins (in this image I’m using glass-headed pins that have a thicker shaft -metal part). The thinner the shaft, the more flat the fabric remains and the easier it is to get a perfect match. The drawback to finer pins is they bend more easily. Do what works for you. For me, I’ll sacrifice a few pins (and use them bent for a long while too) to get flat and perfect and not have to rip out and re-do.

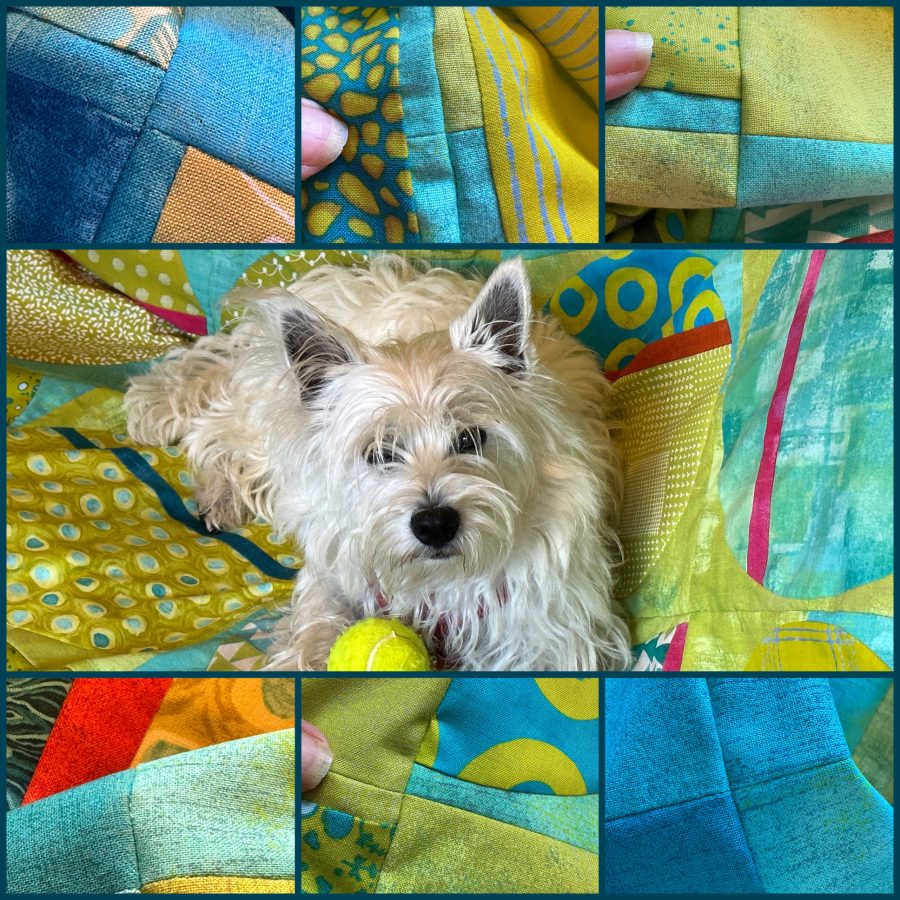
I counted up on the horizontal seams that joined the rows (see top photo) and counted about 50 intersections.  I only had to “fine tune” (i.e. fix) three, and even before fixing the perfect match was off by only a thread of two!  Since I am nowhere near a perfect or precision sewer, that is nearly a miracle!  I mean look at the next photo…SWOON!
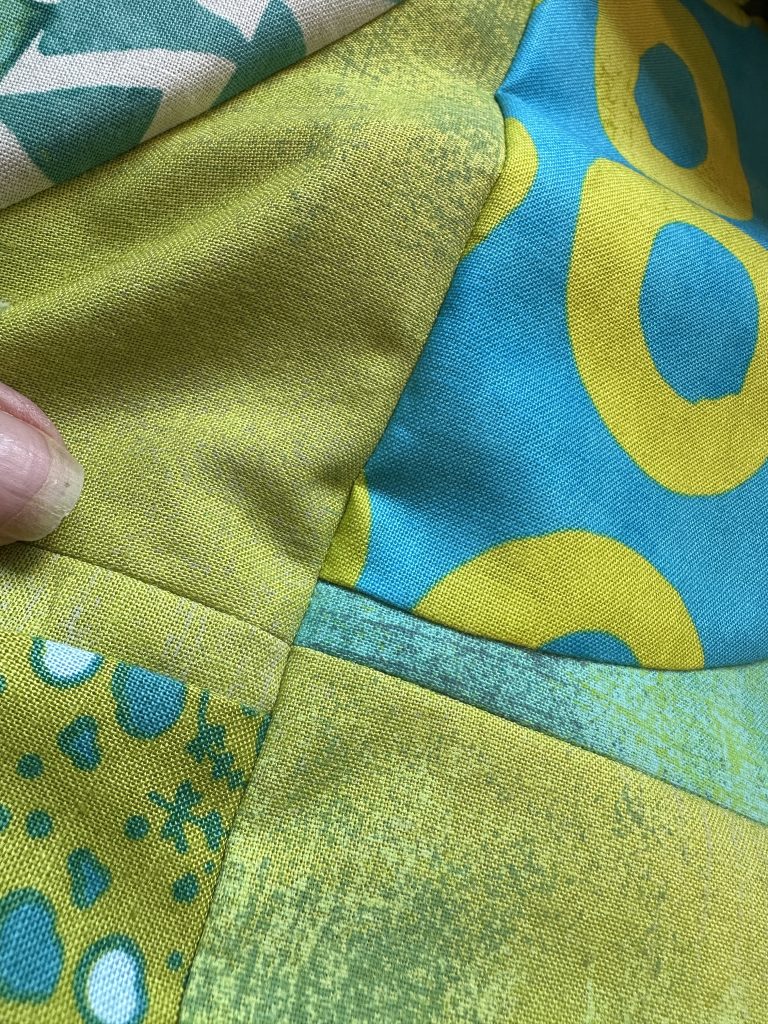
Since I wrote my newsletter, I got the backing made from leftovers (hooray…about 2″ of stash used up…sigh…..).
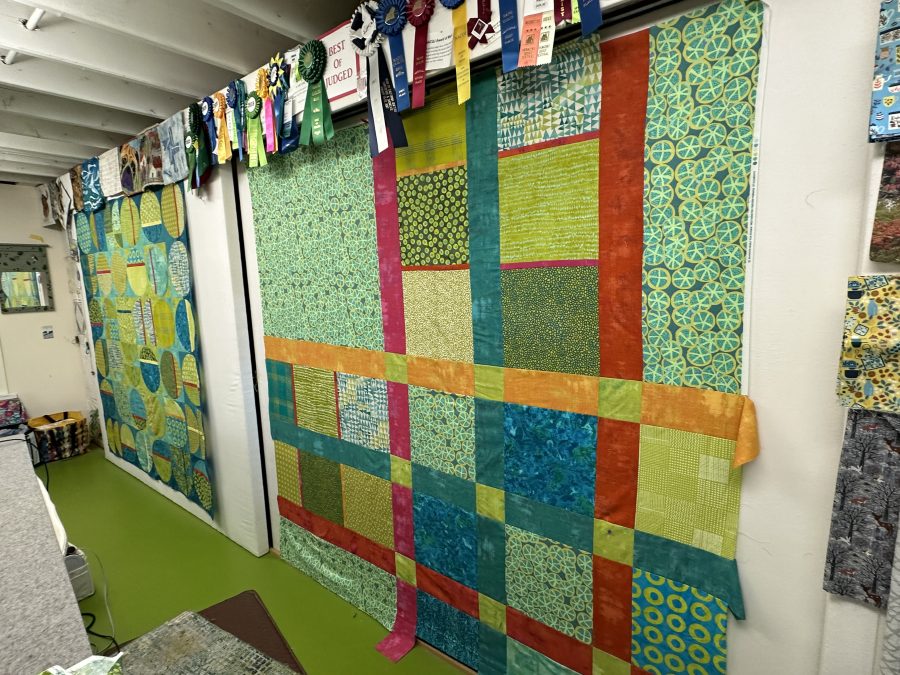
I LOVE my long closet. When we moved in in 2011, this room was awful and unfinished. I had a carpenter make me sliding design-wall doors and I love them. They hide clutter (teaching stuff, storage for mixed media, paper, ribbons, etc., and all my quilts, rolled). Use the search box at right and enter “state of the studio” to see the transformation pictures.

And because we all need cute AND perfect intersections in our lives, I’ll close with Percy, who hopped up on the top the instant it was done to approve of the design!

#thetalesofpercivalwulfric

Peek Into Batik Quilt Along

Wednesday, February 5th, 2020

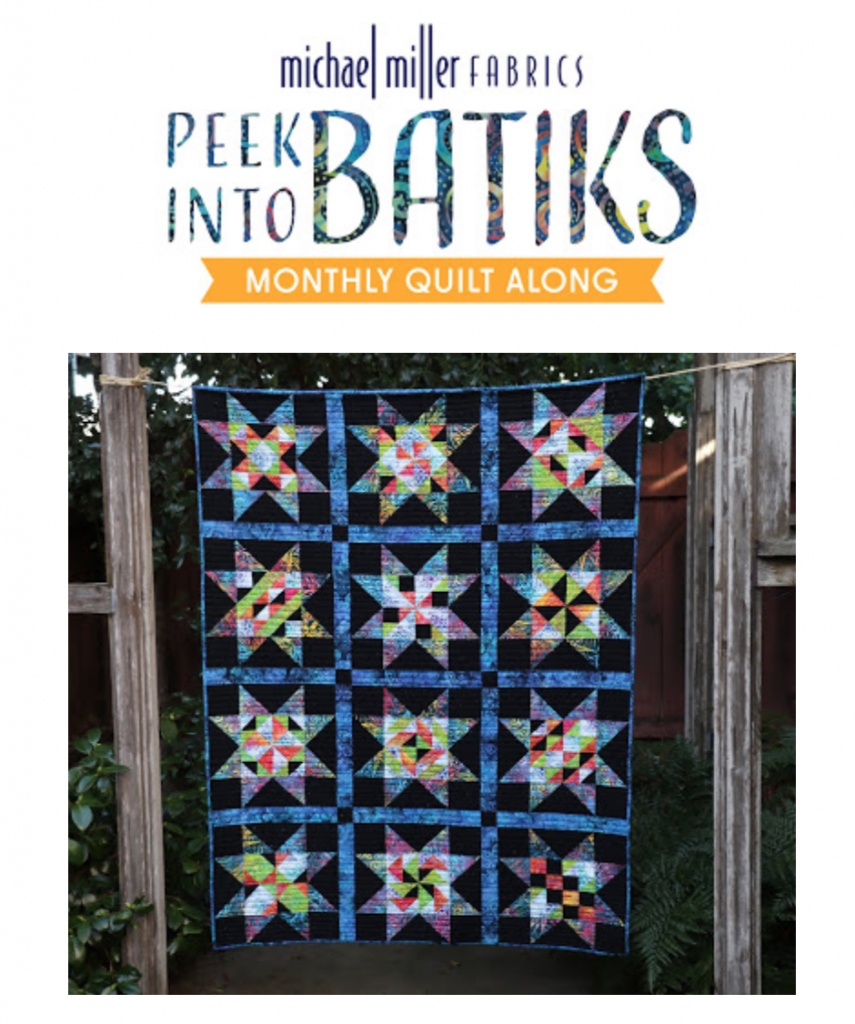
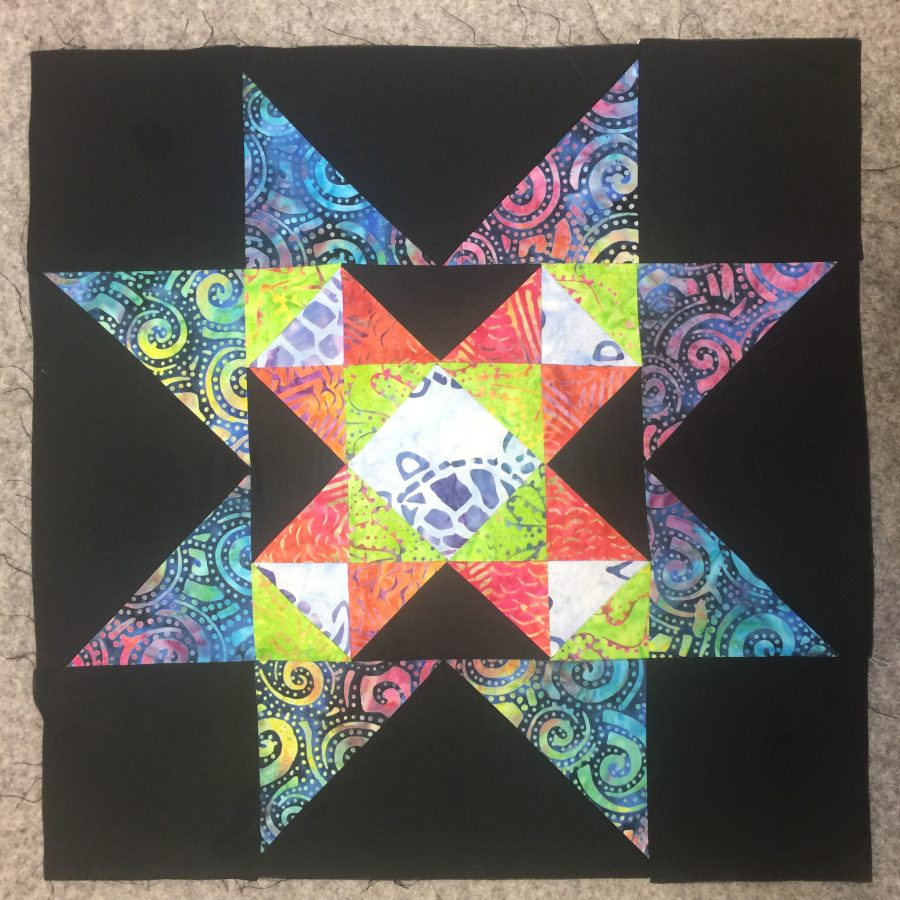
Michael Miller Fabrics is having a year-long batik quilt-along, and you’re invited! Each of the 2020 Brand Ambassadors (including yours truly) was sent the fabrics and invited to play. “My” block will be in October, but I made Miss January too, LOL! If you’d like information, go here to find more information, including free pdfs with yardage requirements.

If your local fabric shop doesn’t carry Michael Miller (ask them to!), you can order these exact fabrics from Fabrics.com. And let me tell you, MM Jet Black Cotton Couture fabric is famous for good reason…it isn’t an over-dyed something that didn’t work the way some other companies do. It is SPECIFICALLY dyed black, really, Really, REALLY black, and it is consistent batch to batch. I have some Cotton Coutures from a 2014 project, and the colors are SPOT ON perfect match to the 2019 color swatch card and the fat quarters from the box I won last year. Amazing!

Peek Into Batiks Quilt Along with Michael Miller Fabrics, January block

I used the AccuQuiltGO! to cut my pieces following the directions in Michael Miller Fabrics’ free PDF pattern. The only change I made was to cut the flying geese black triangles by hand–the pattern by the way comes in two formats: traditional cutting and using the AccuQuiltGO dies. I used the dies with this one exception since I didn’t want to make two half-square triangles and sew them together for that outer unit of multi-batik and black. Instead, I cut a rectangle and placed the half-square triangles cut with the die on it, sewed, then trimmed away the extra black.

Each Brand Ambassador gets a “month” and will post their block. You can follow along via the MM blog, here’s that link again. Have FUN!

When to pre-shrink!

Thursday, January 23rd, 2020

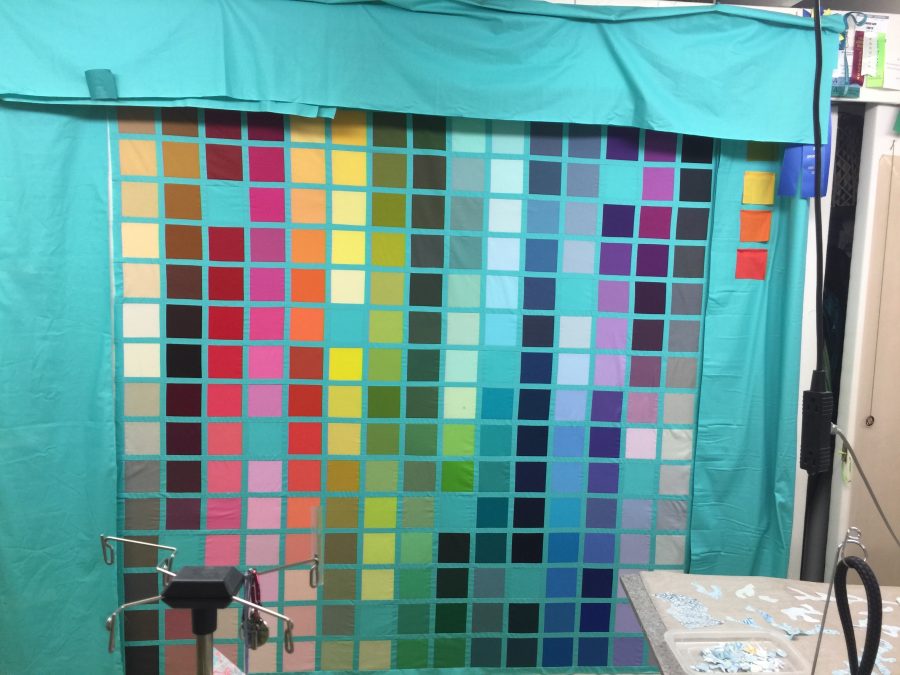
Over the past week to two weeks, I have been working on ….sit down and prepare yourselves for this… a **pieced** quilt. Yes, me. A very simple pieced quilt, but nonetheless.

Eye-candy…my 214 colors, test-driving super wide borders with possible squares or rectangles. I’m going with nothing to distract from that glorious grid of color. Hopefully the quilting will make the wide borders look good. Want them that big so they will fit on a king size bed–we’ve got a queen but the pug takes up a ridiculous amount of room for such a small dog! The center is 72″ and overall I’m hoping for about 100″ square.

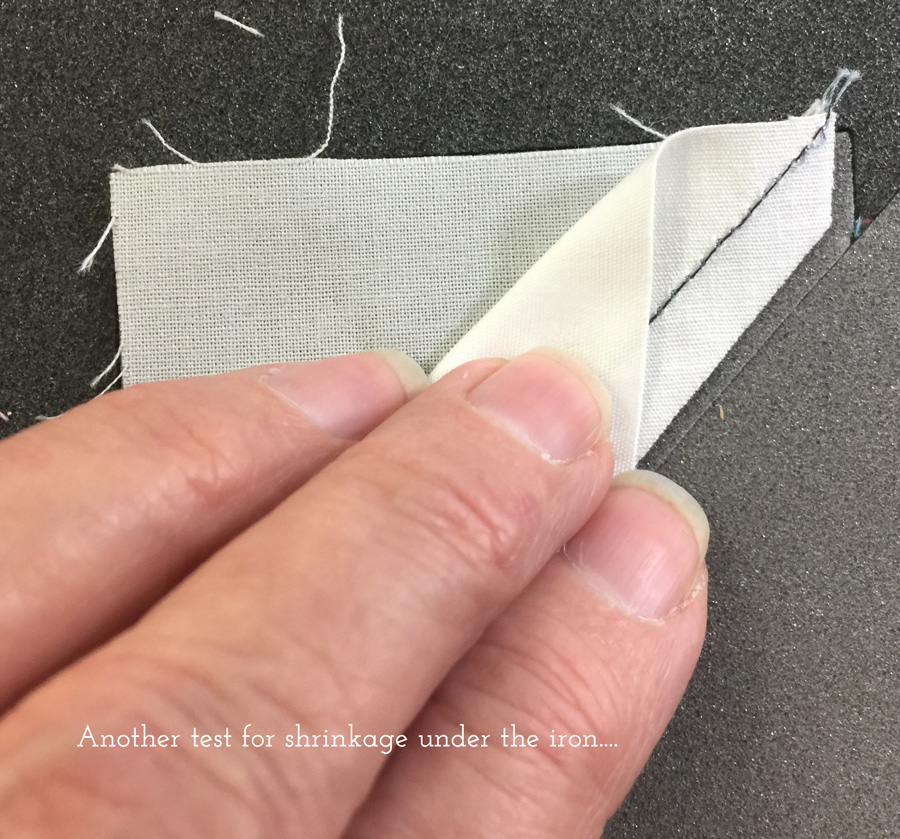
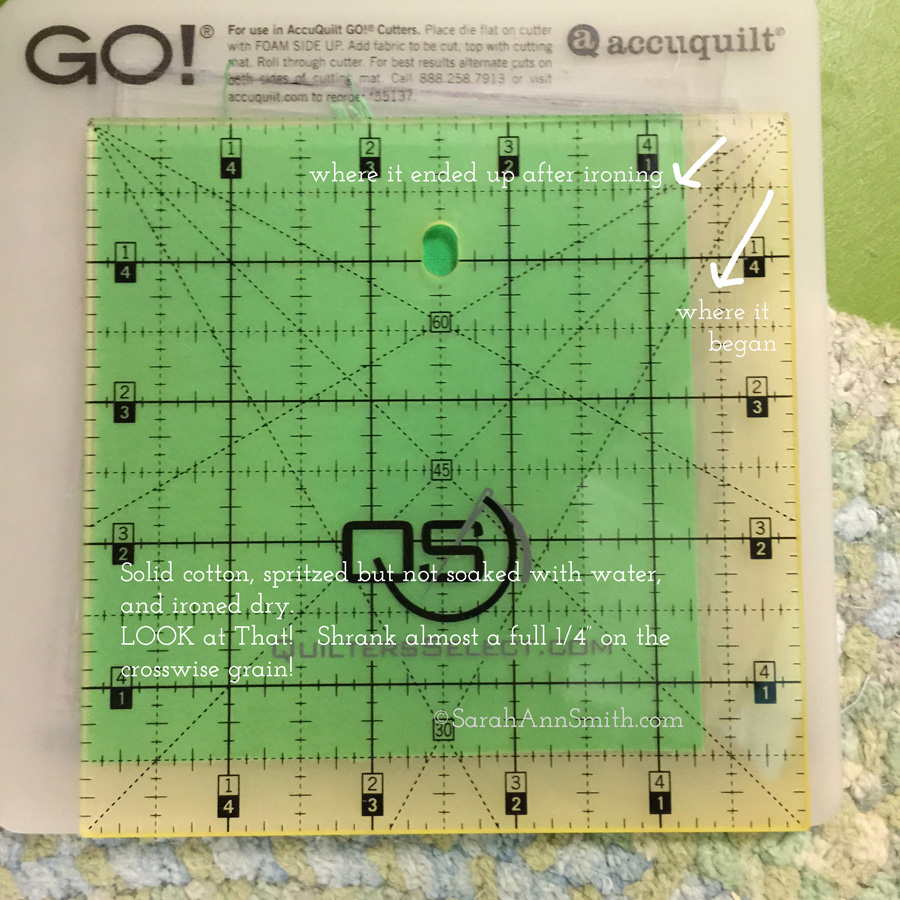
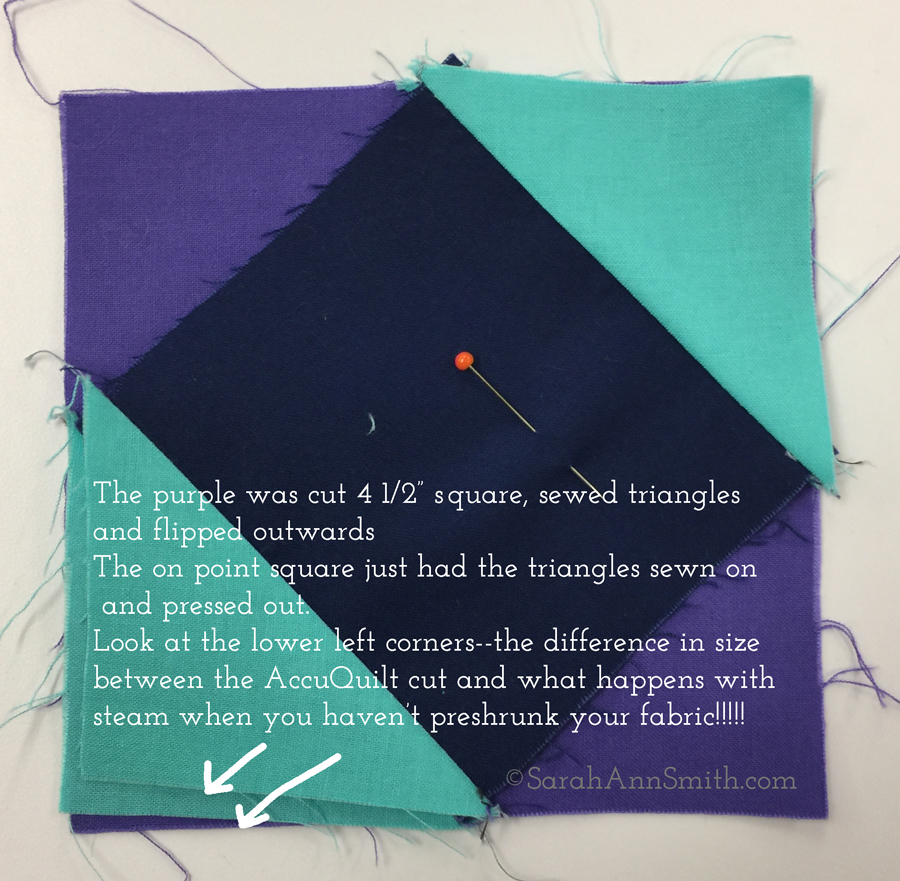
I’ve also been experimenting with the AccuQuiltGO! that was given to this year’s crop of Michael Miller Fabrics Brand Ambassadors. To my distress my block was not perfect–too small! I KNEW it had to be something on my end (it was), so I triple checked my seams (perfect to scant). I checked the size of the fabric cut on the dies: perfect. I checked that I used the correct dies: I did. Then I noticed something. After ironing, the block seemed off. Look at what I discovered:

First I placed my half square triangles on the dies, and look how much smaller the pieces are after sewing and ironing! So then I checked the start of the square-in-a-square center of the block. Same thing: after steam ironing/pressing, a unit that finishes at 2″ and one that finishes at 3 1/4″ are each 1/16-1/8″ smaller!

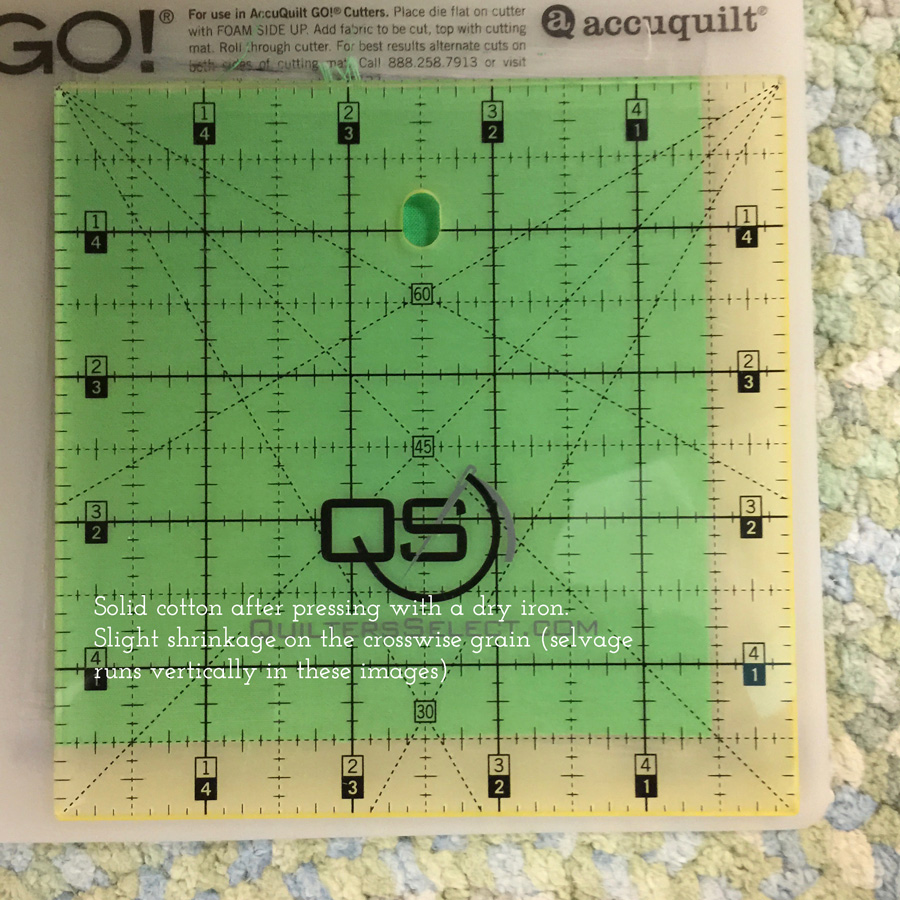
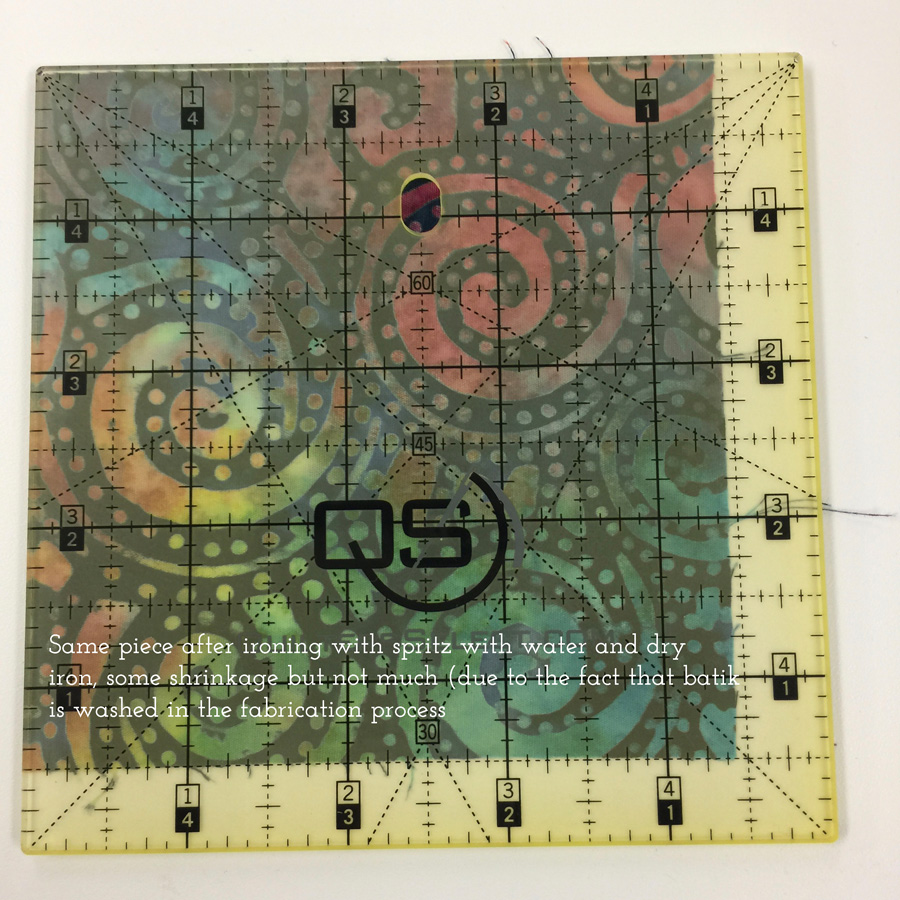
I decided to get a bit more scientific about it: Cut, measure, dry iron, measure, steam iron, measure. Here is what happened with the Cotton Couture, a delightful solid with a glorious feel in the hand:

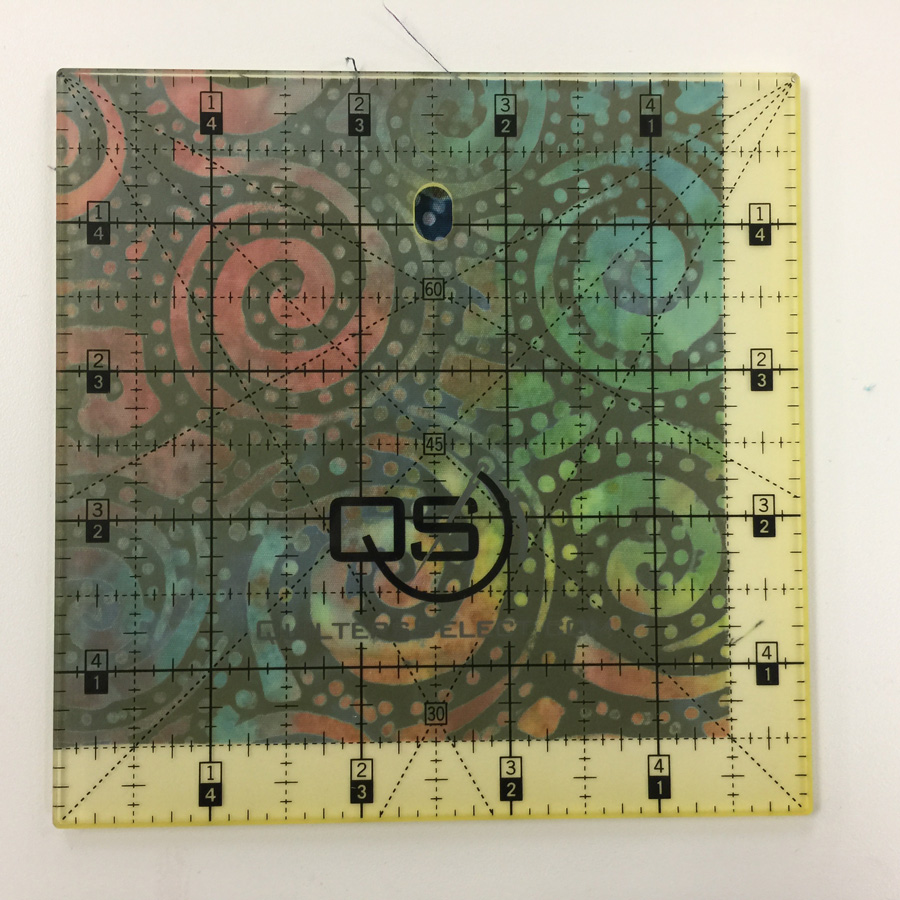
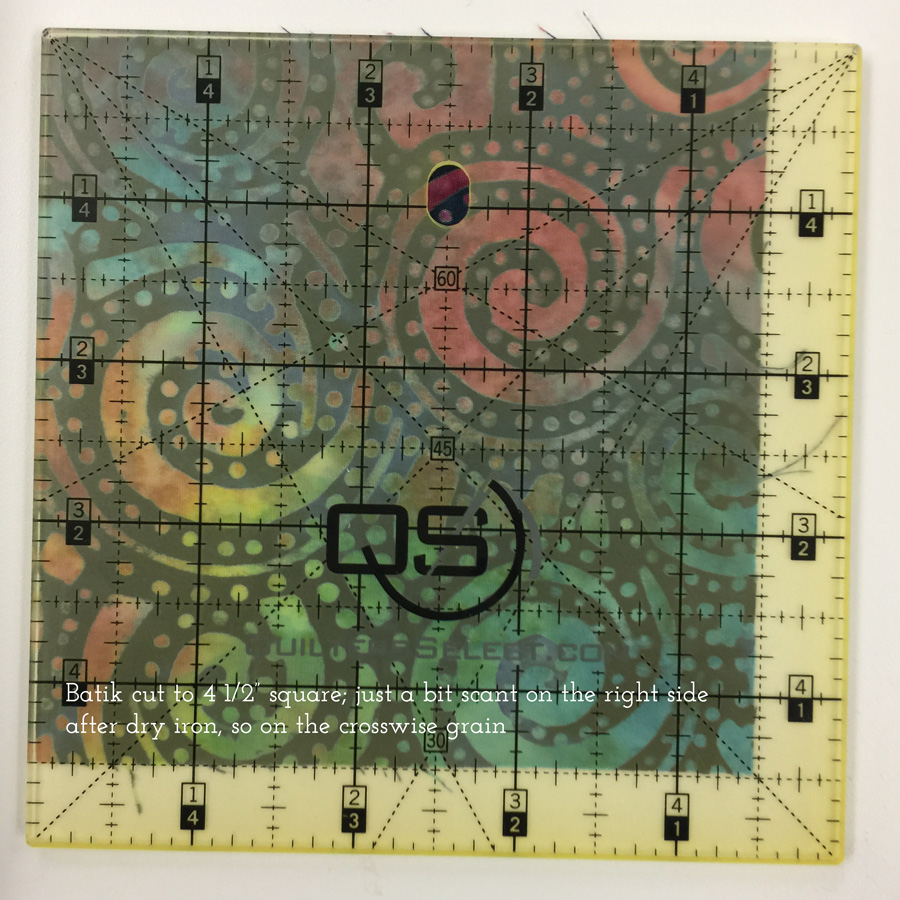
Batiks are made using hand-dyeing processes that include a resist being applied (usually wax of some sort), then the wax is washed out, more dye applied, and so on. This means some of the shrinkage should already have happened.

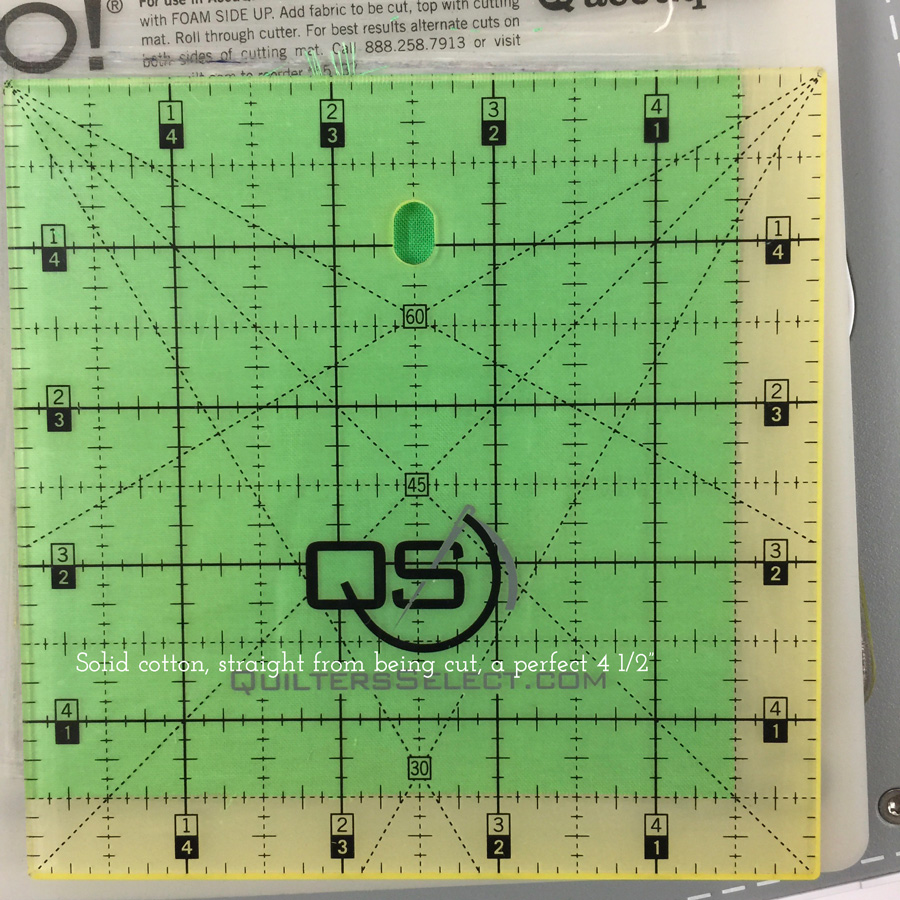
As cut with the AccuQuiltGO! Perfect 4 1/2″
One last image: Here I created the center square-in-a-square for a pieced block. I cut the purple fabric to 4 1/2″ thinking that might help my accuracy, and sewed on two half square triangles. I then used navy for the central square and piled on identical half square triangles. All are cut with the lengthwise grain as suggested by Accuquilt for accuracy. LOOK at how much smaller due to more pressing and moisture from the iron. ERK!

So my lesson is, when I am not fusing things up, I really need to either pre-steam-iron everything, or prewash and mostly-dry it and then iron dry and smooth. I can now use the perfection of the AccuquiltGO and actually achieve as close to perfect as I will ever get! Now, off to order backing fabric for my BIG quilt.

Int’l Quilt Market, Part 3

Monday, November 18th, 2019

And yes, there was even more fun stuff at Market…see why I never got to the quilts? (Previous two posts have more good stuff.)

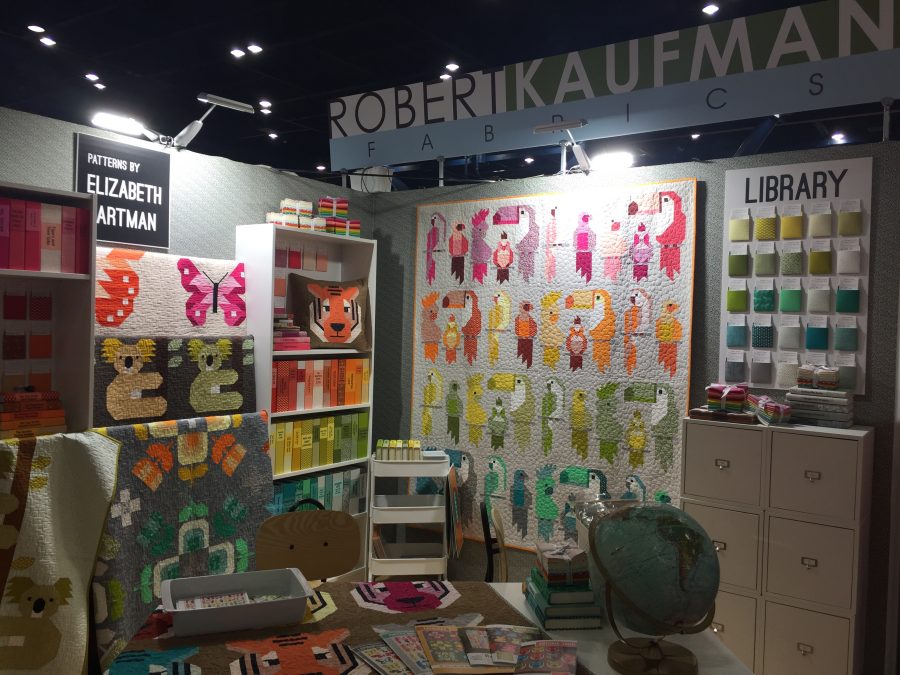
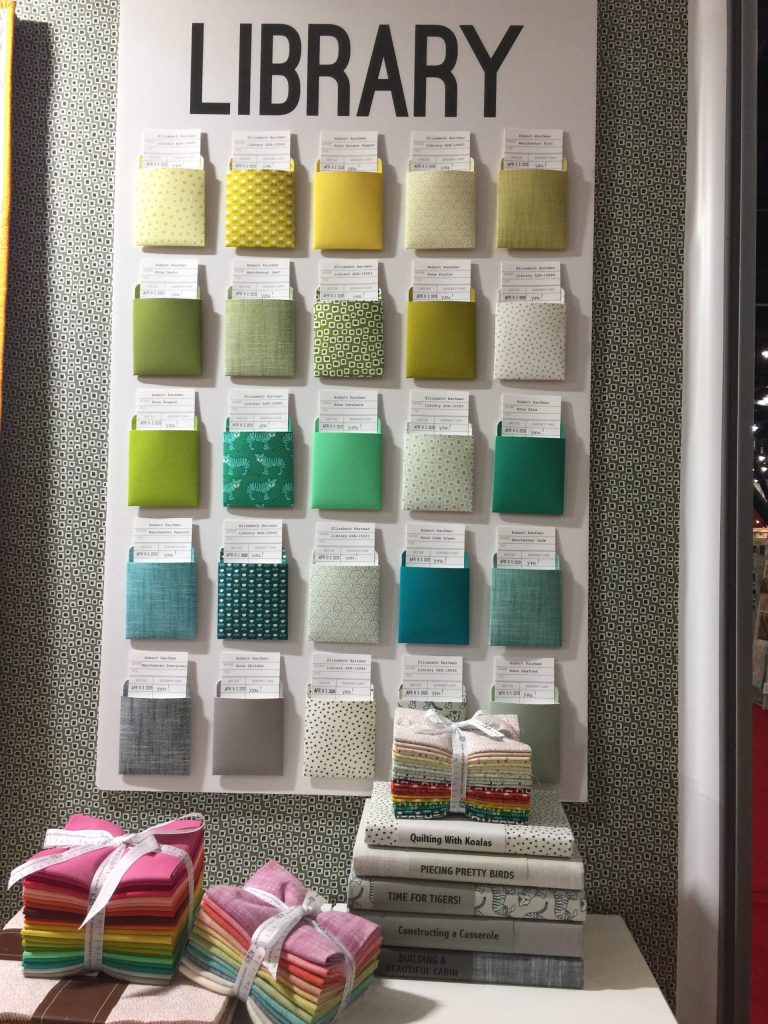
Loved the Robert Kaufmann display, especially the Library Pockets, which of course made me think of my friend Kate C. who is the Bowdoinham town librarian and wonderfully crafty and artful!
Can’t you just see this for a teacher’s room, or library, or your studio, or a busy family?
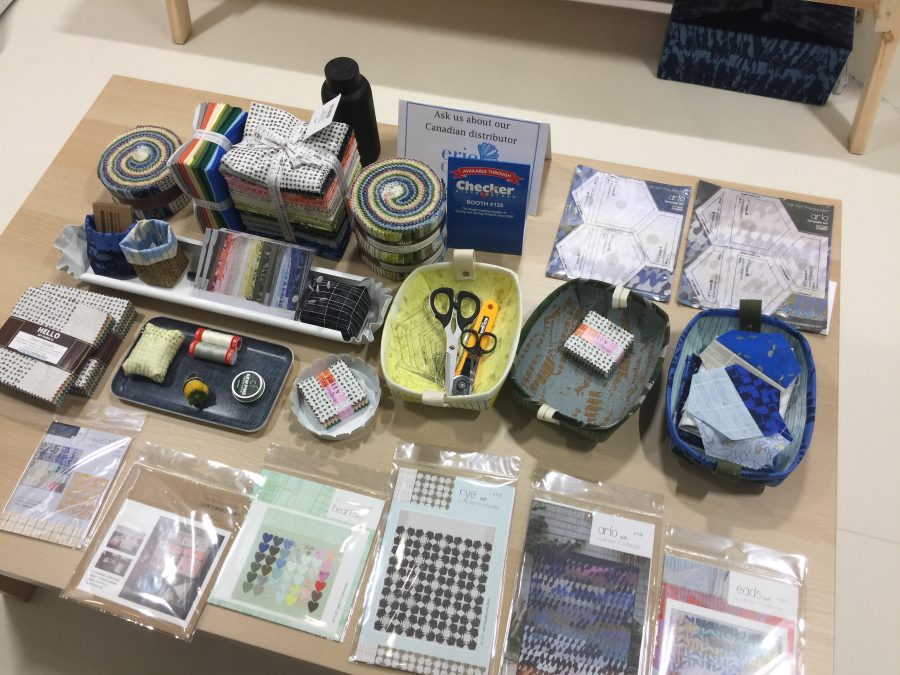
What a lovely display of little “this and thats”
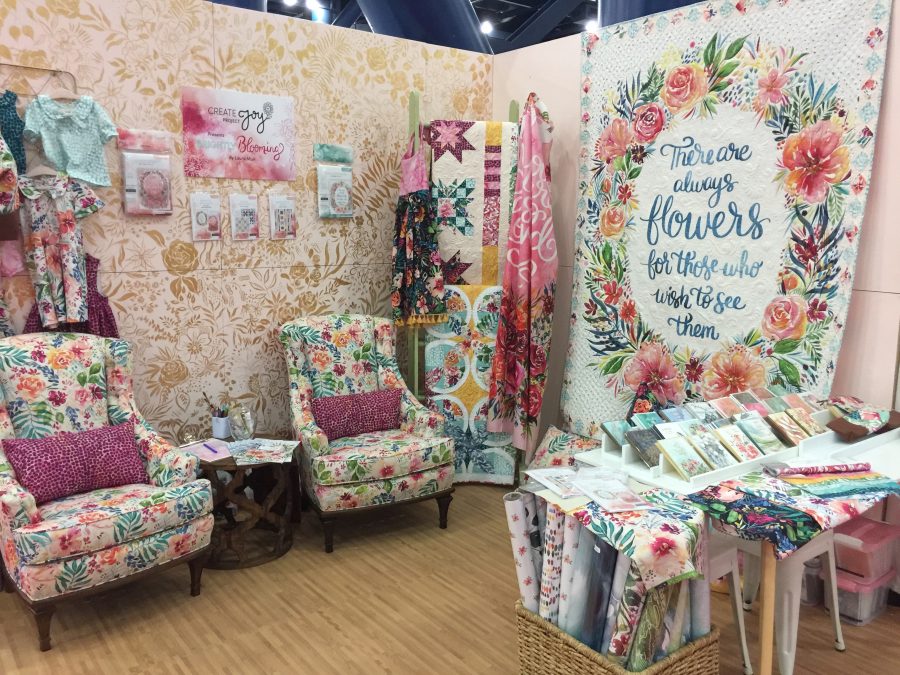
The artwork in these fabrics made me stop in my tracks! I snagged a brochure… and yeah, I’d like THOSE chairs too…. The quilt on the right is a panel. I’m not sure I would use that, but the coordinating fabrics, and even just cut up those BIG flowers, and then cut the text up into smaller bits to piece into something amazing……

One trend I noticed across various fabric booths is that they are getting super smart about cross-marketing. The artwork isn’t just in quilting cotton, but heavier and/or lighter weights (in this case a canvas weight for a jacket, chair upholstery or tote), wall paper, gift paper, note cards, little stationery items. Smart.

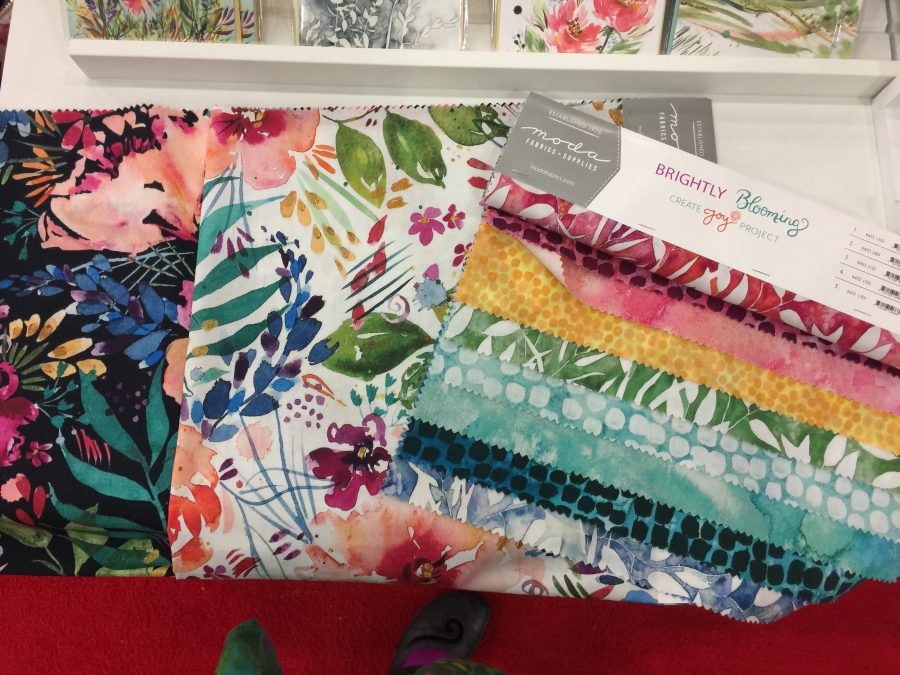
I adore the look of watercolors…. look at the coordinating green and aqua prints on the right! Wonder if Fiddlehead Artisan Supply in Belfast, Maine, will carry these? Or Alewives Fabrics in Damariscotta Mills?
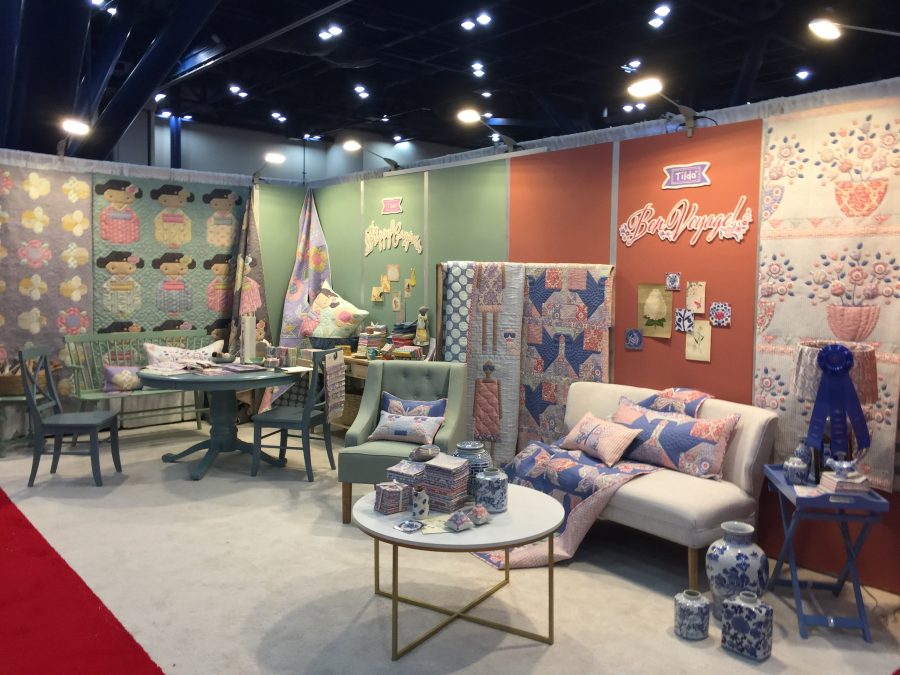
And the Tilda booth….would love to just SIT for a moment
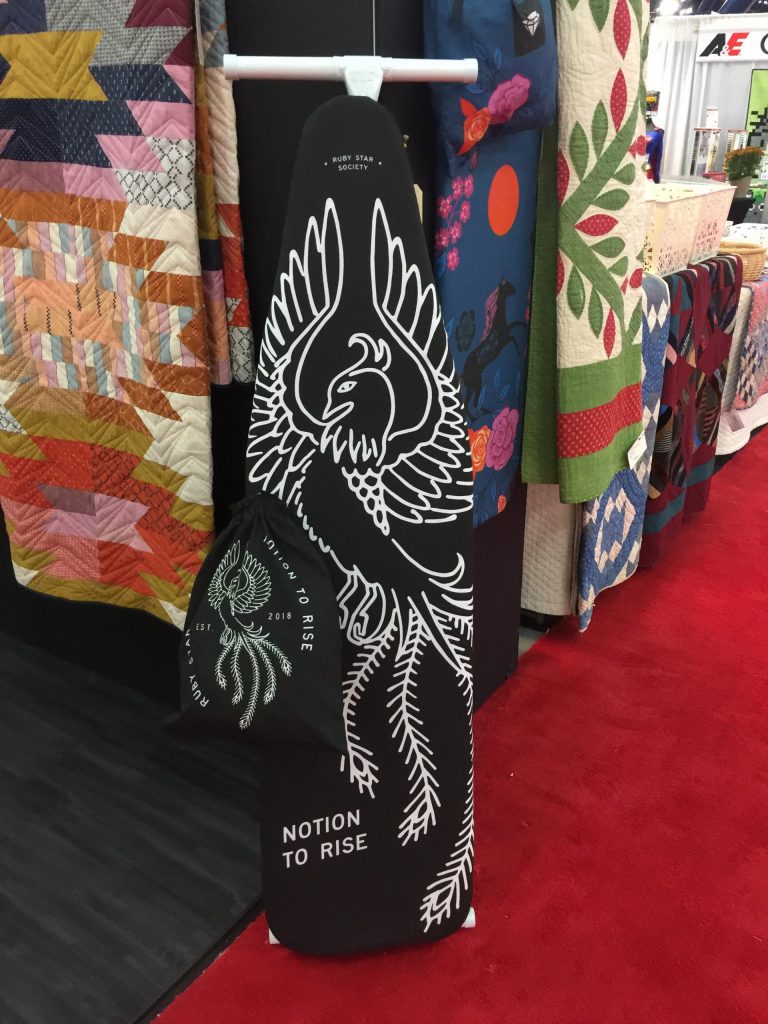
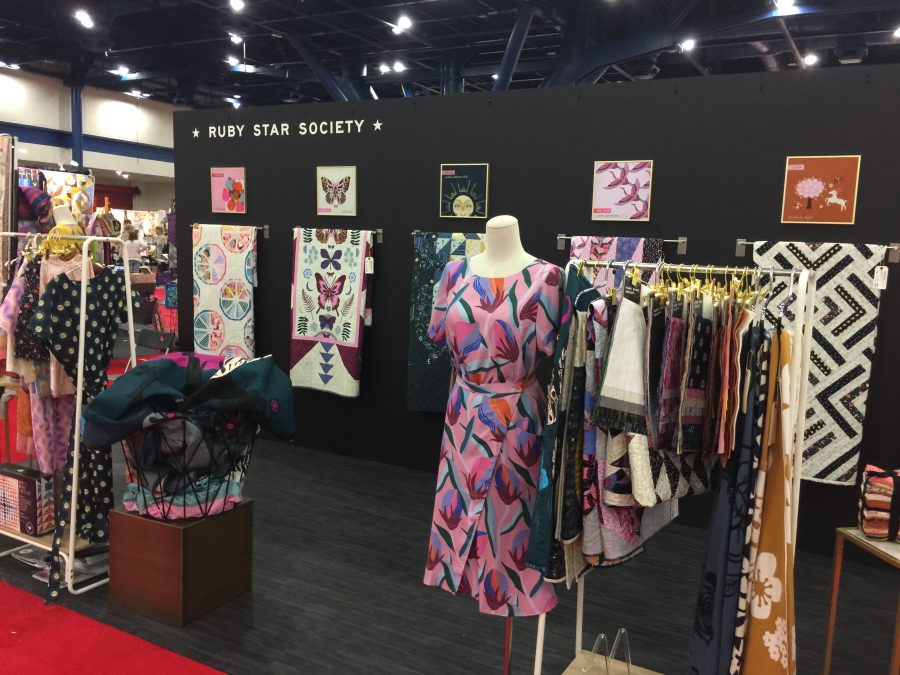
The Ruby Star Society booths and displays were another WOW moment. Almost makes me wish I didn’t have a Big Board and just a regular ironing board–I’d so buy this cover!
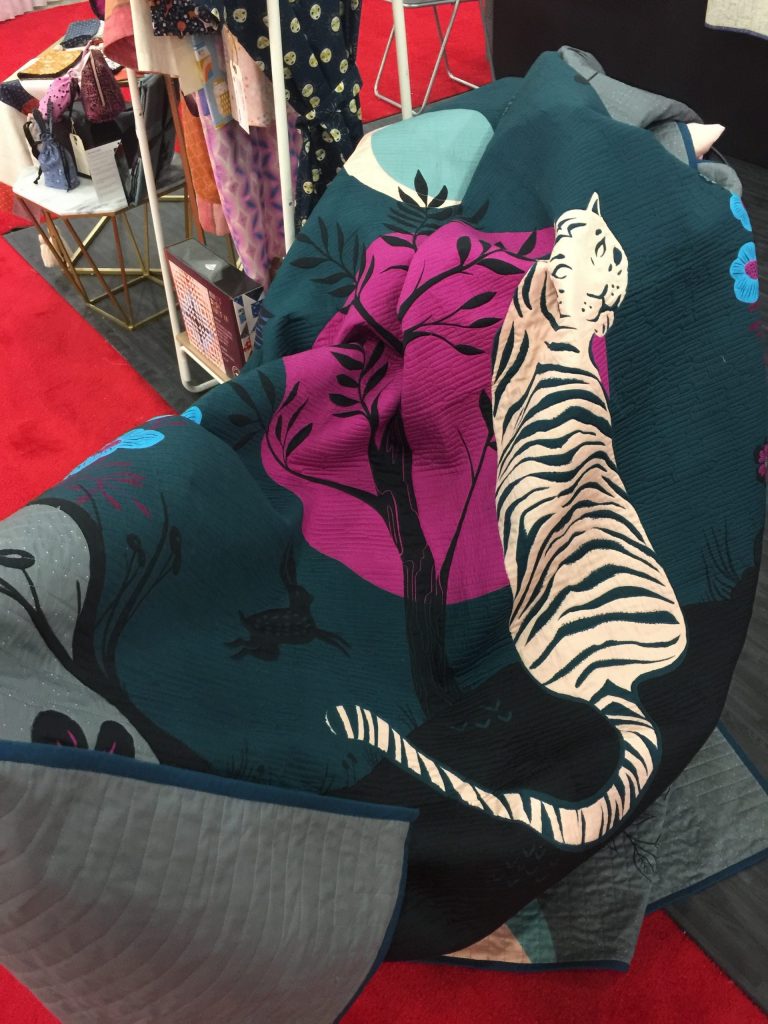
And Ruby Star also is marketing designs in different weights, like the drapey fabric in the dress. For the first time, they had a guest designer! LOVE her bold prints. And that quilt in the basket on the left…OMG it is a PANEL….
No one was around this late on Monday (within a half hour of closing) so I opened it up a bit to get this photo. It is the Tiger Fly panel by Sarah Watts. WOW!
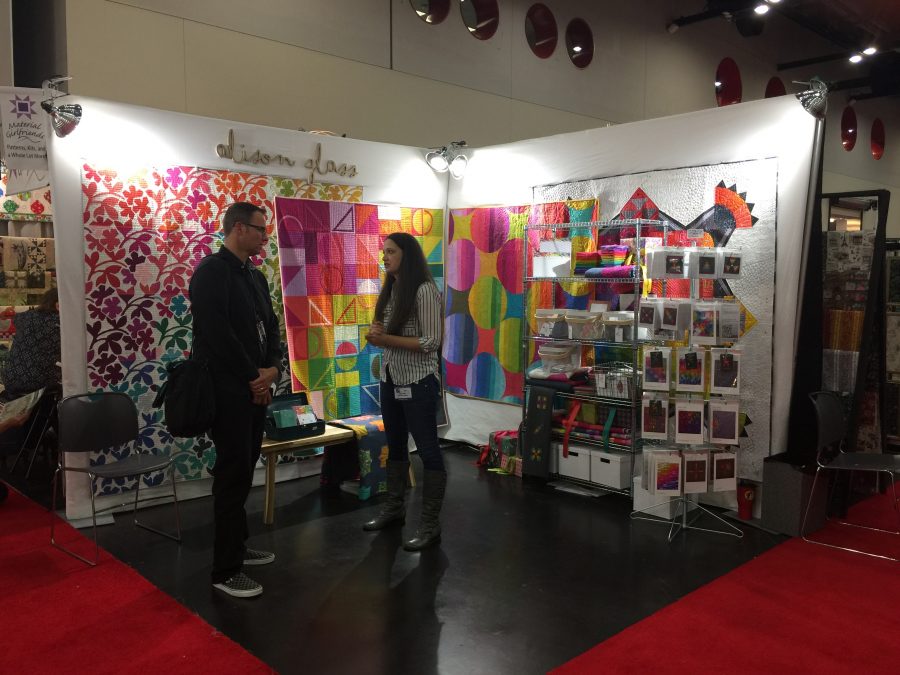
And for my friend Tori, the Alison Glass display!
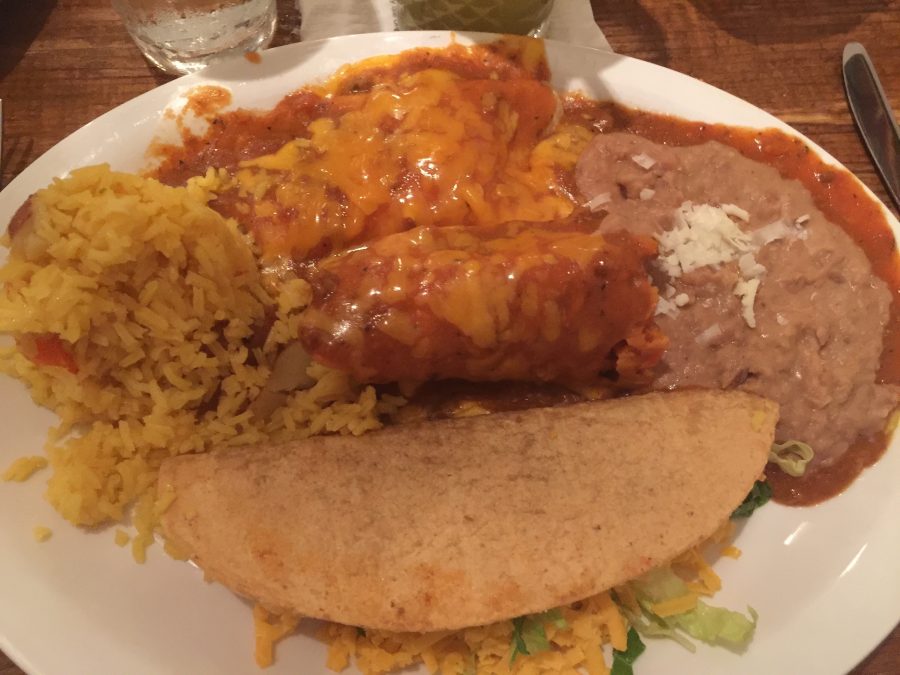
No trip to Houston is a success unless it involves dinner at Ninfa’s. I got to go twice! On Monday my friend Susan Fletcher King picked me up when Market closed, and we spent a lovely rest of the afternoon at her house. Then Lauretta Crites joined us for supper after teaching that day.
I’m a creature of habit: El Henry! Taco, enchilada and ….YUM OH YUM… tamale!

A perfect end to a fun Quilt Market. More on the house renovations, Festival, family and more in the coming weeks.

Teaching at IQF Houston — Fine Finishes, an Album of Techniques, MQForum

Tuesday, August 7th, 2018

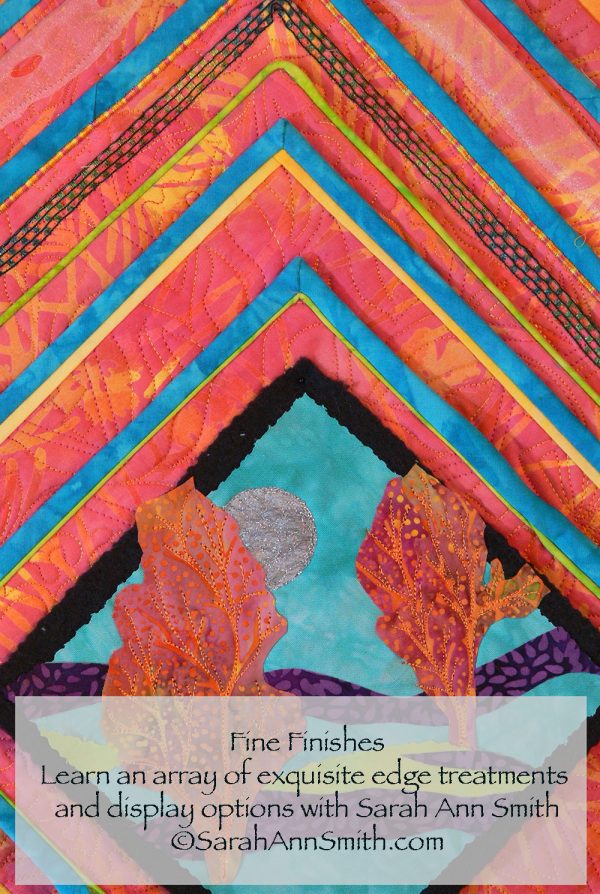
YES, I’ll teach you how to get perfect miters that match your seam measurement, no matter what it is, without having to measure! Today I’ll talk about my Fine Finishes workshop, #525 from 9-5 on Friday, November 9th, at International Quilt Festival Houston.  Link to register is here and at the bottom of this post.

This class is all about what to do with the edges of your quilt…and not just straight edges:  curves, inside points, sharp angles, facings not just bindings.  Using techniques adapted from high end garment construction, you’ll achieve precise results, perfect corners, perfect miters, without measuring your seam allowance!

You’ll learn about all of these and, depending on how fast you work, make at least four samples, maybe more. In Houston, it is class #525 on Friday.


Fine Finishes has proved a perennial favorite –sign up soon!  If the PERFECT bias binding hasn’t happened for you, or the PERFECT facing for an art quilt, one that doesn’t roll and bulge, you need this class.  Have you ever considered piping?  Time consuming, but OH MY what a wonder!  So worth it … try these and more as time permits.

Last but not least–and it usually fills up fast–is the Machine Quilting Forum on Thursday morning.   Think of it as not-so-speedy dating for machine quilters.  We meet in one of the large “ballrooms” at the convention center. The first hour is an introduction to the presenters (I think there are six of us, or maybe seven, this year):  each teacher gets a few minutes to share about 7 slides representing who they are as quilters.  Then the participants break up into six (or seven) groups.  Each group goes to a certain teacher, then after 20 minutes (15 presentation, 5 Q&A) a bell rings and the participants move to the next teacher.  This is a fabulous way to learn a lot in a short time, get a great idea of a teacher’s style teaching, see if you want to take a class with them or have them come teach for your guild.

Registration is OPEN for classes for International Quilt Festival Houston 2018, including my four classes.  For more info on the other workshops, my first class, Birch Pond Season,  is covered here.  Collage the Garden, one of my newest classes and proving to be one of the most popular, is covered here.