Nothing beats a beautifully finished garment, one that is so pretty on the inside that you enjoy it every time you put it on. Though you might be tempted to wear it inside out it’s so pretty, it remains a secret just for you! Top technique for a beautiful inside is using a seam finish to hide the raw edges. Not only does it look nice, it also protects the edges of the fabric, prevents fraying, can improve the way the seam functions, and contributes to a garment that will last longer. After all, you’ve spent money and, more dearly, time creating so enjoy it longer!
Please note: I am affiliated with Janome as a Janome Artisan and am compensated. However, my reviews are honest and I would say what I say whether affiliated or not. I’ve also chosen to be affiliated with Janome since 2003 (!!!) because their machines are so good and they are so responsive to the interests and needs of their customers.
The next several lessons/posts will be about all these seam finishes. We’ll start today with the fastest and simplest, the overcast seam.
There are many ways to finish seams. Today I’ll review one of four methods and suggest why you might choose one over the other. I’ll do the other finishes in subsequent posts so this doesn’t get too long!
Serged or overcast edges
French seams
Flat-felled or lapped seams
Hong Kong finish seams
Overcast:
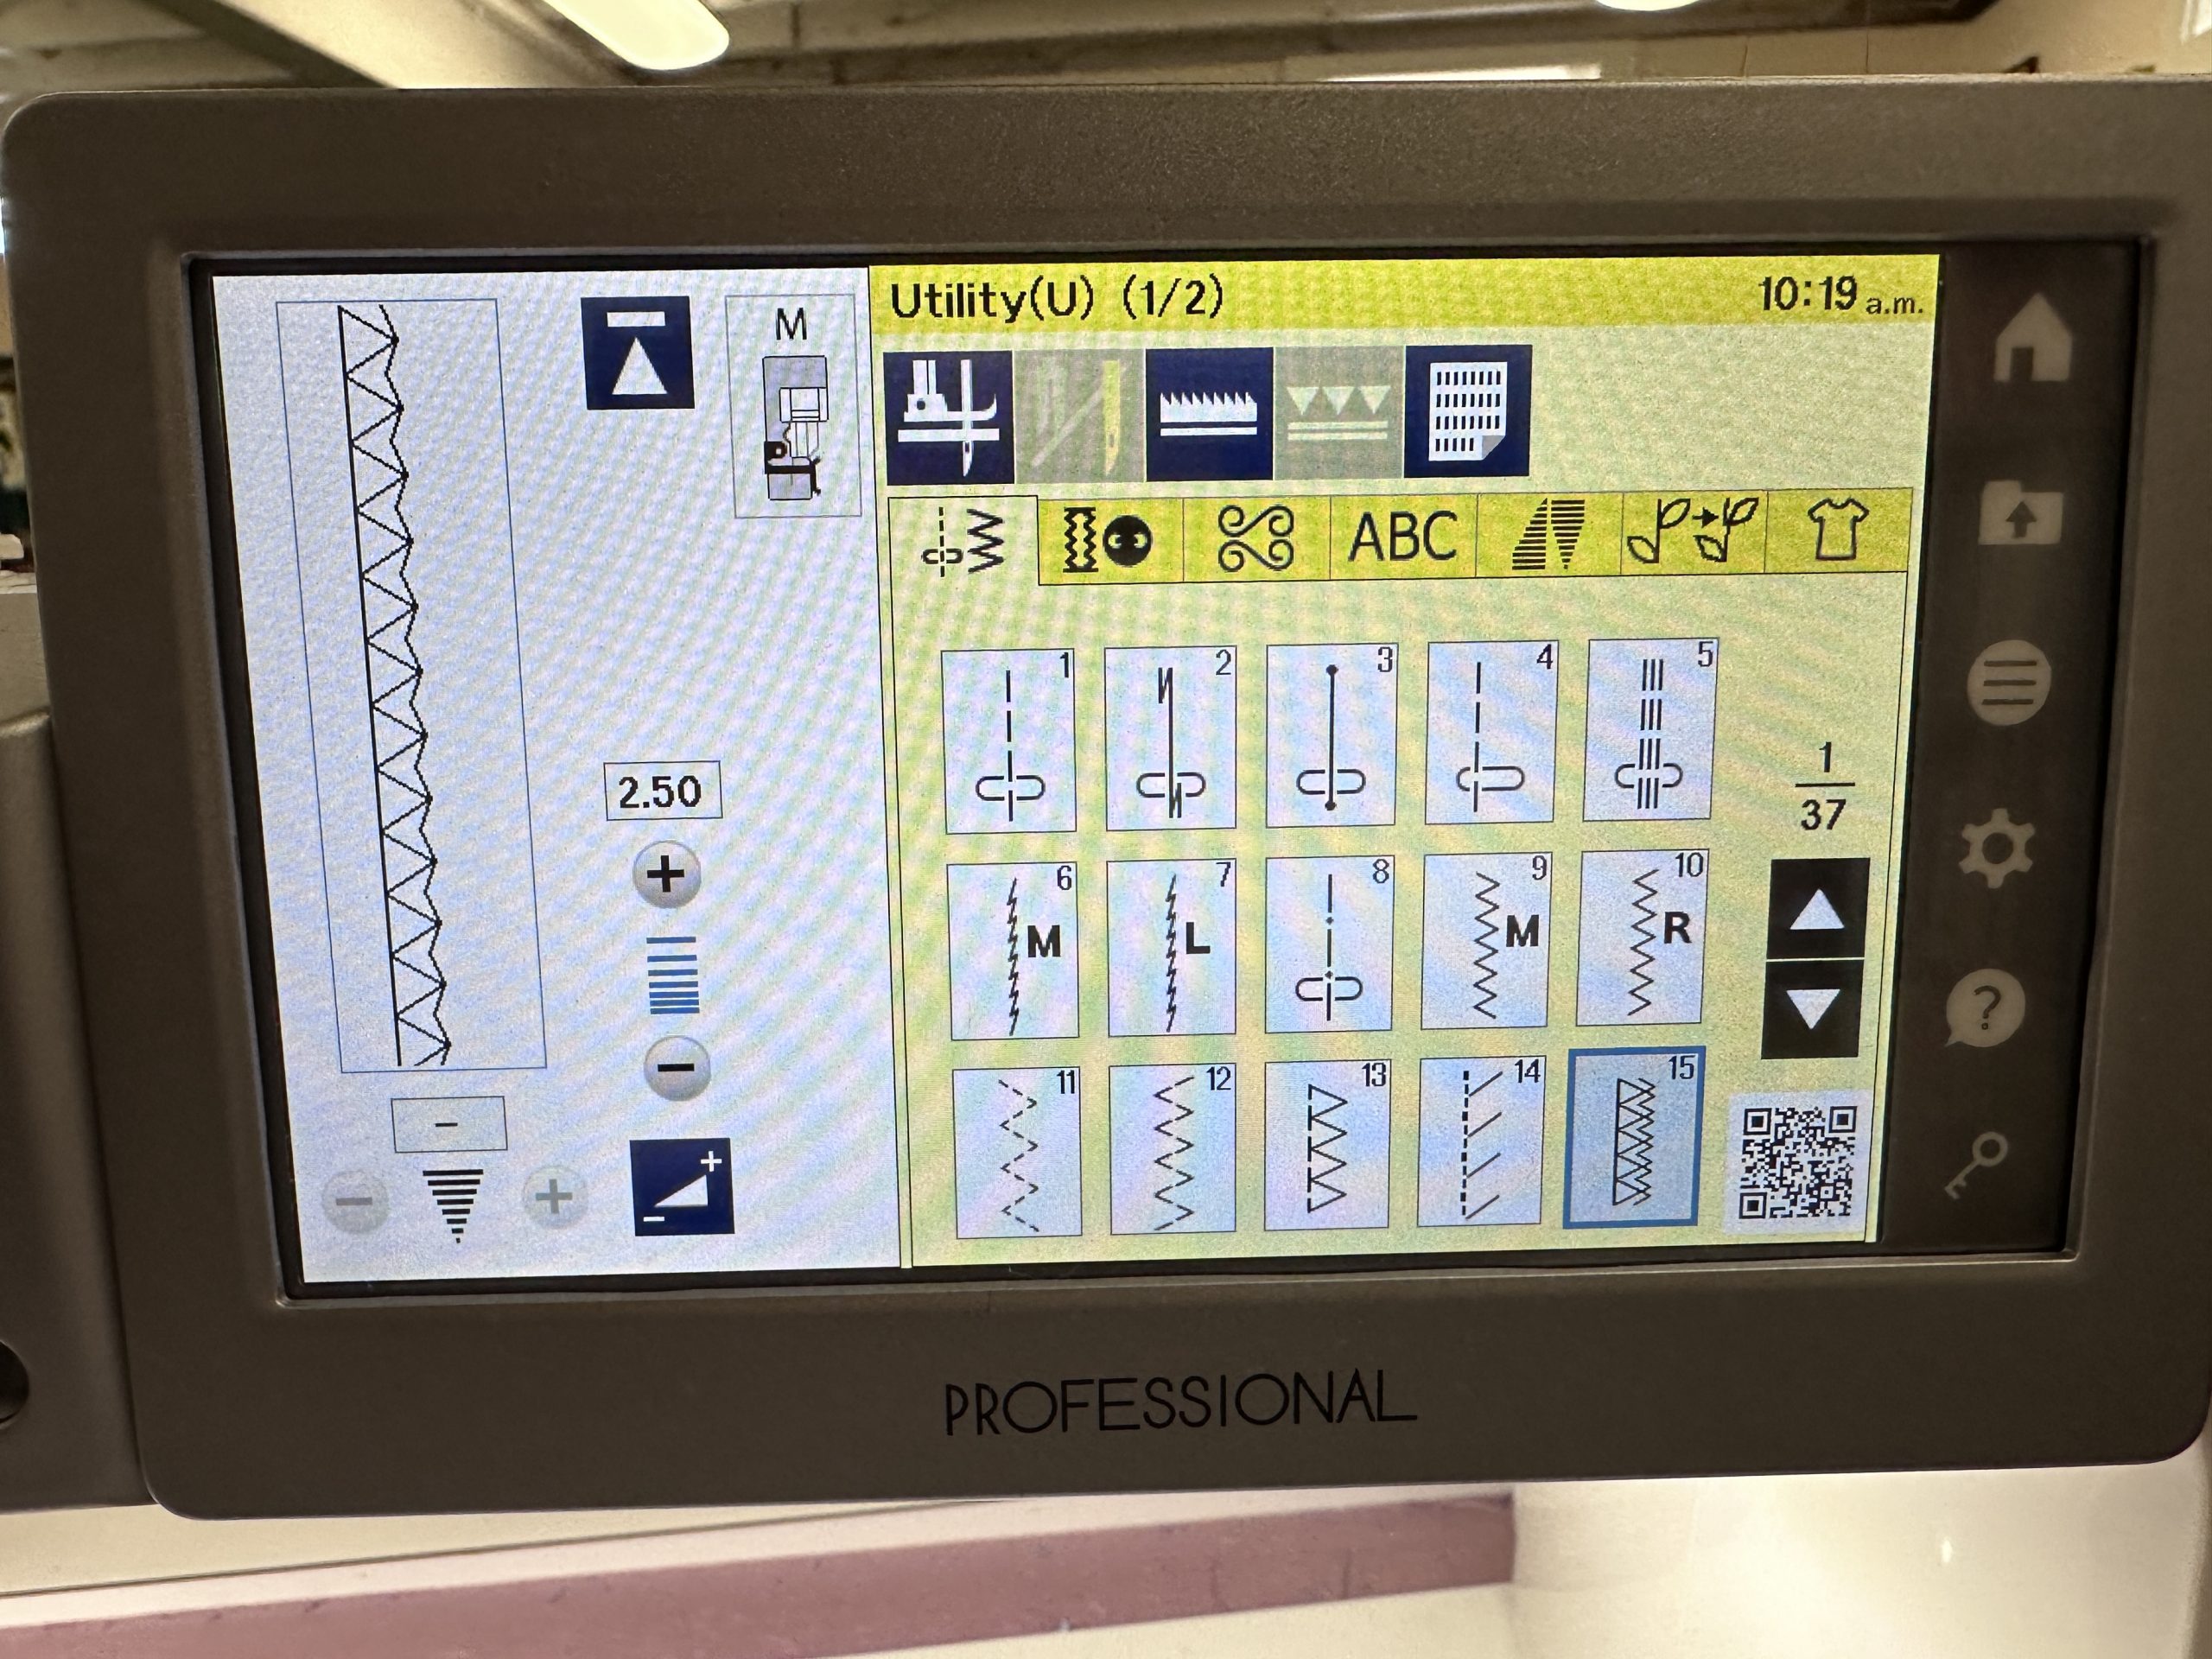
The first seam finish we’ll talk about is perhaps the most well known because it is fast and is used on the majority of commercially made garments: serged seams. These are made with a serger machine, which you might not own. But if you have even a very basic sewing machine (more than straight-stitch-only), you will likely have at least one utility stitch that is called an overcast stitch. On my machine, here are some of the choices:
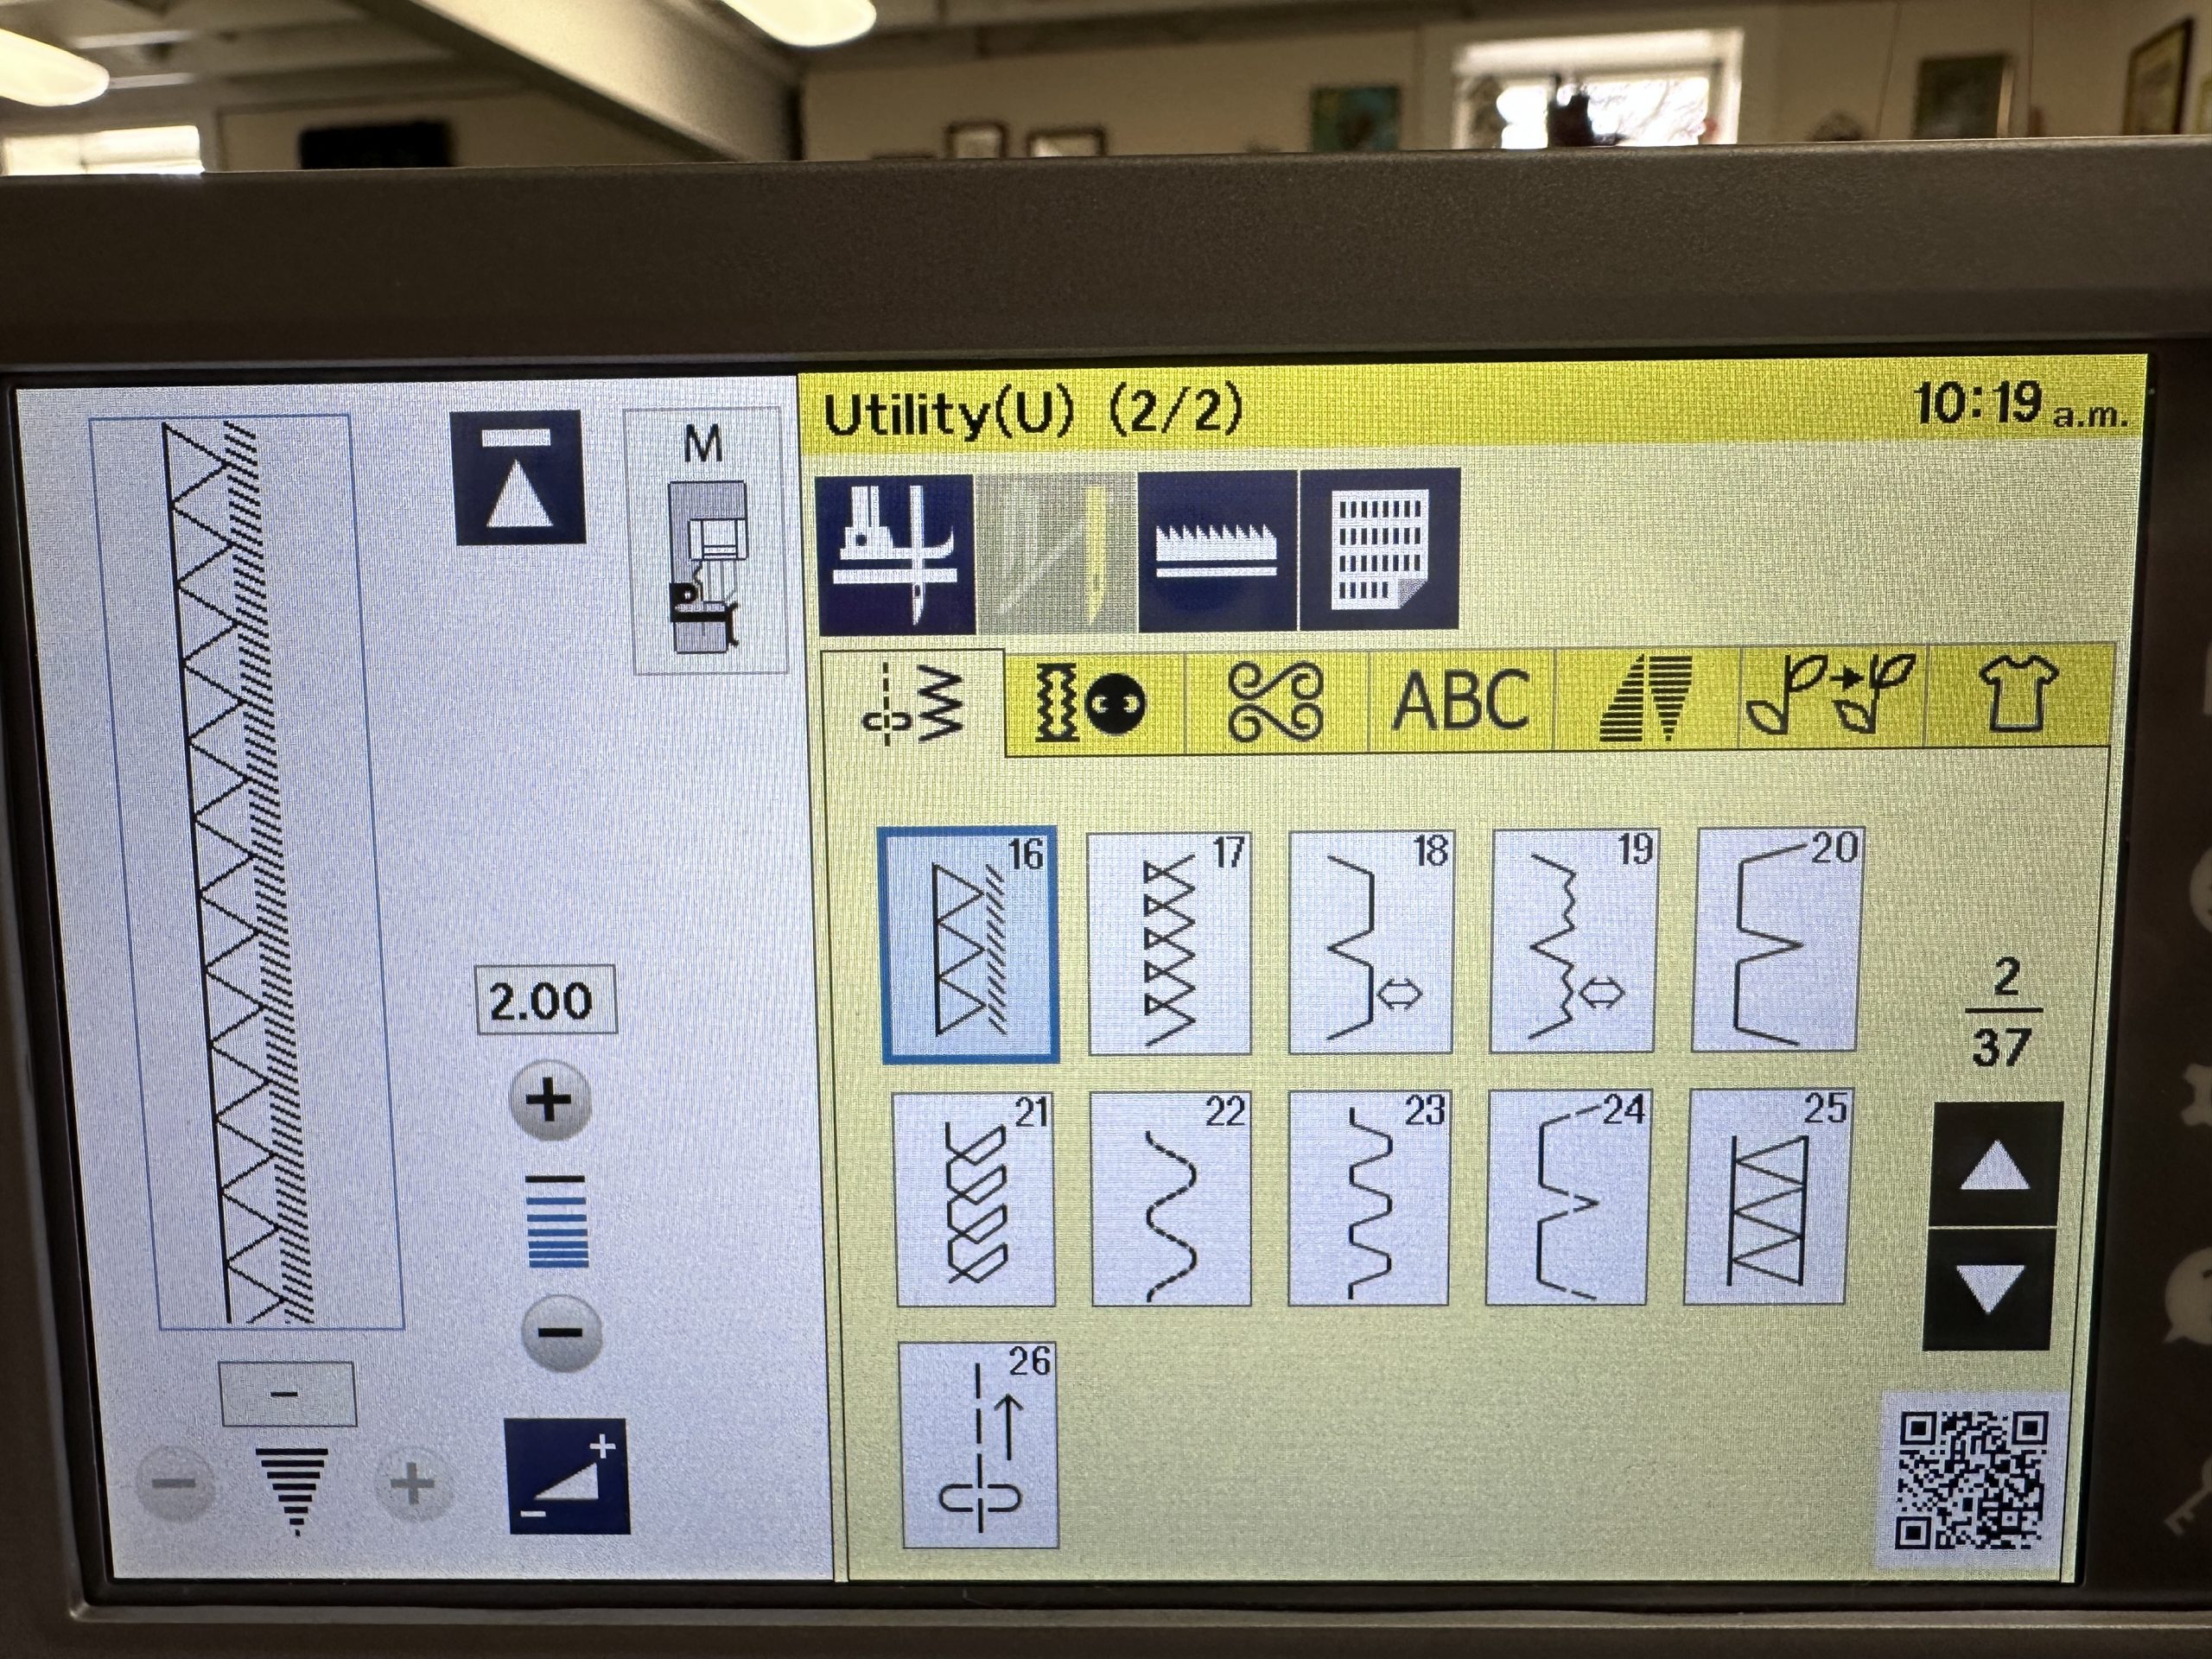
My Janome M7 Continental has a wealth of stitch choices, but even the most basic machines have stitches similar to 13, 14 and 15 (and see next photo for more choices). I particularly like stitch 15 which has an extra narrow zigzag on the raw edge. You can see that you can (within a range) adjust length and width. At the top right of the white portion of the screen, the machine tells you which presser foot to use, and the bottom right of the yellow portion has a QR code you can scan with Janome’s exclusive AcuSPARK app (free in the app store for your device) which works with select higher end Janomes.
This screen, the next one in the sequence on my Janome M7, has additional overcast and hem stitches.
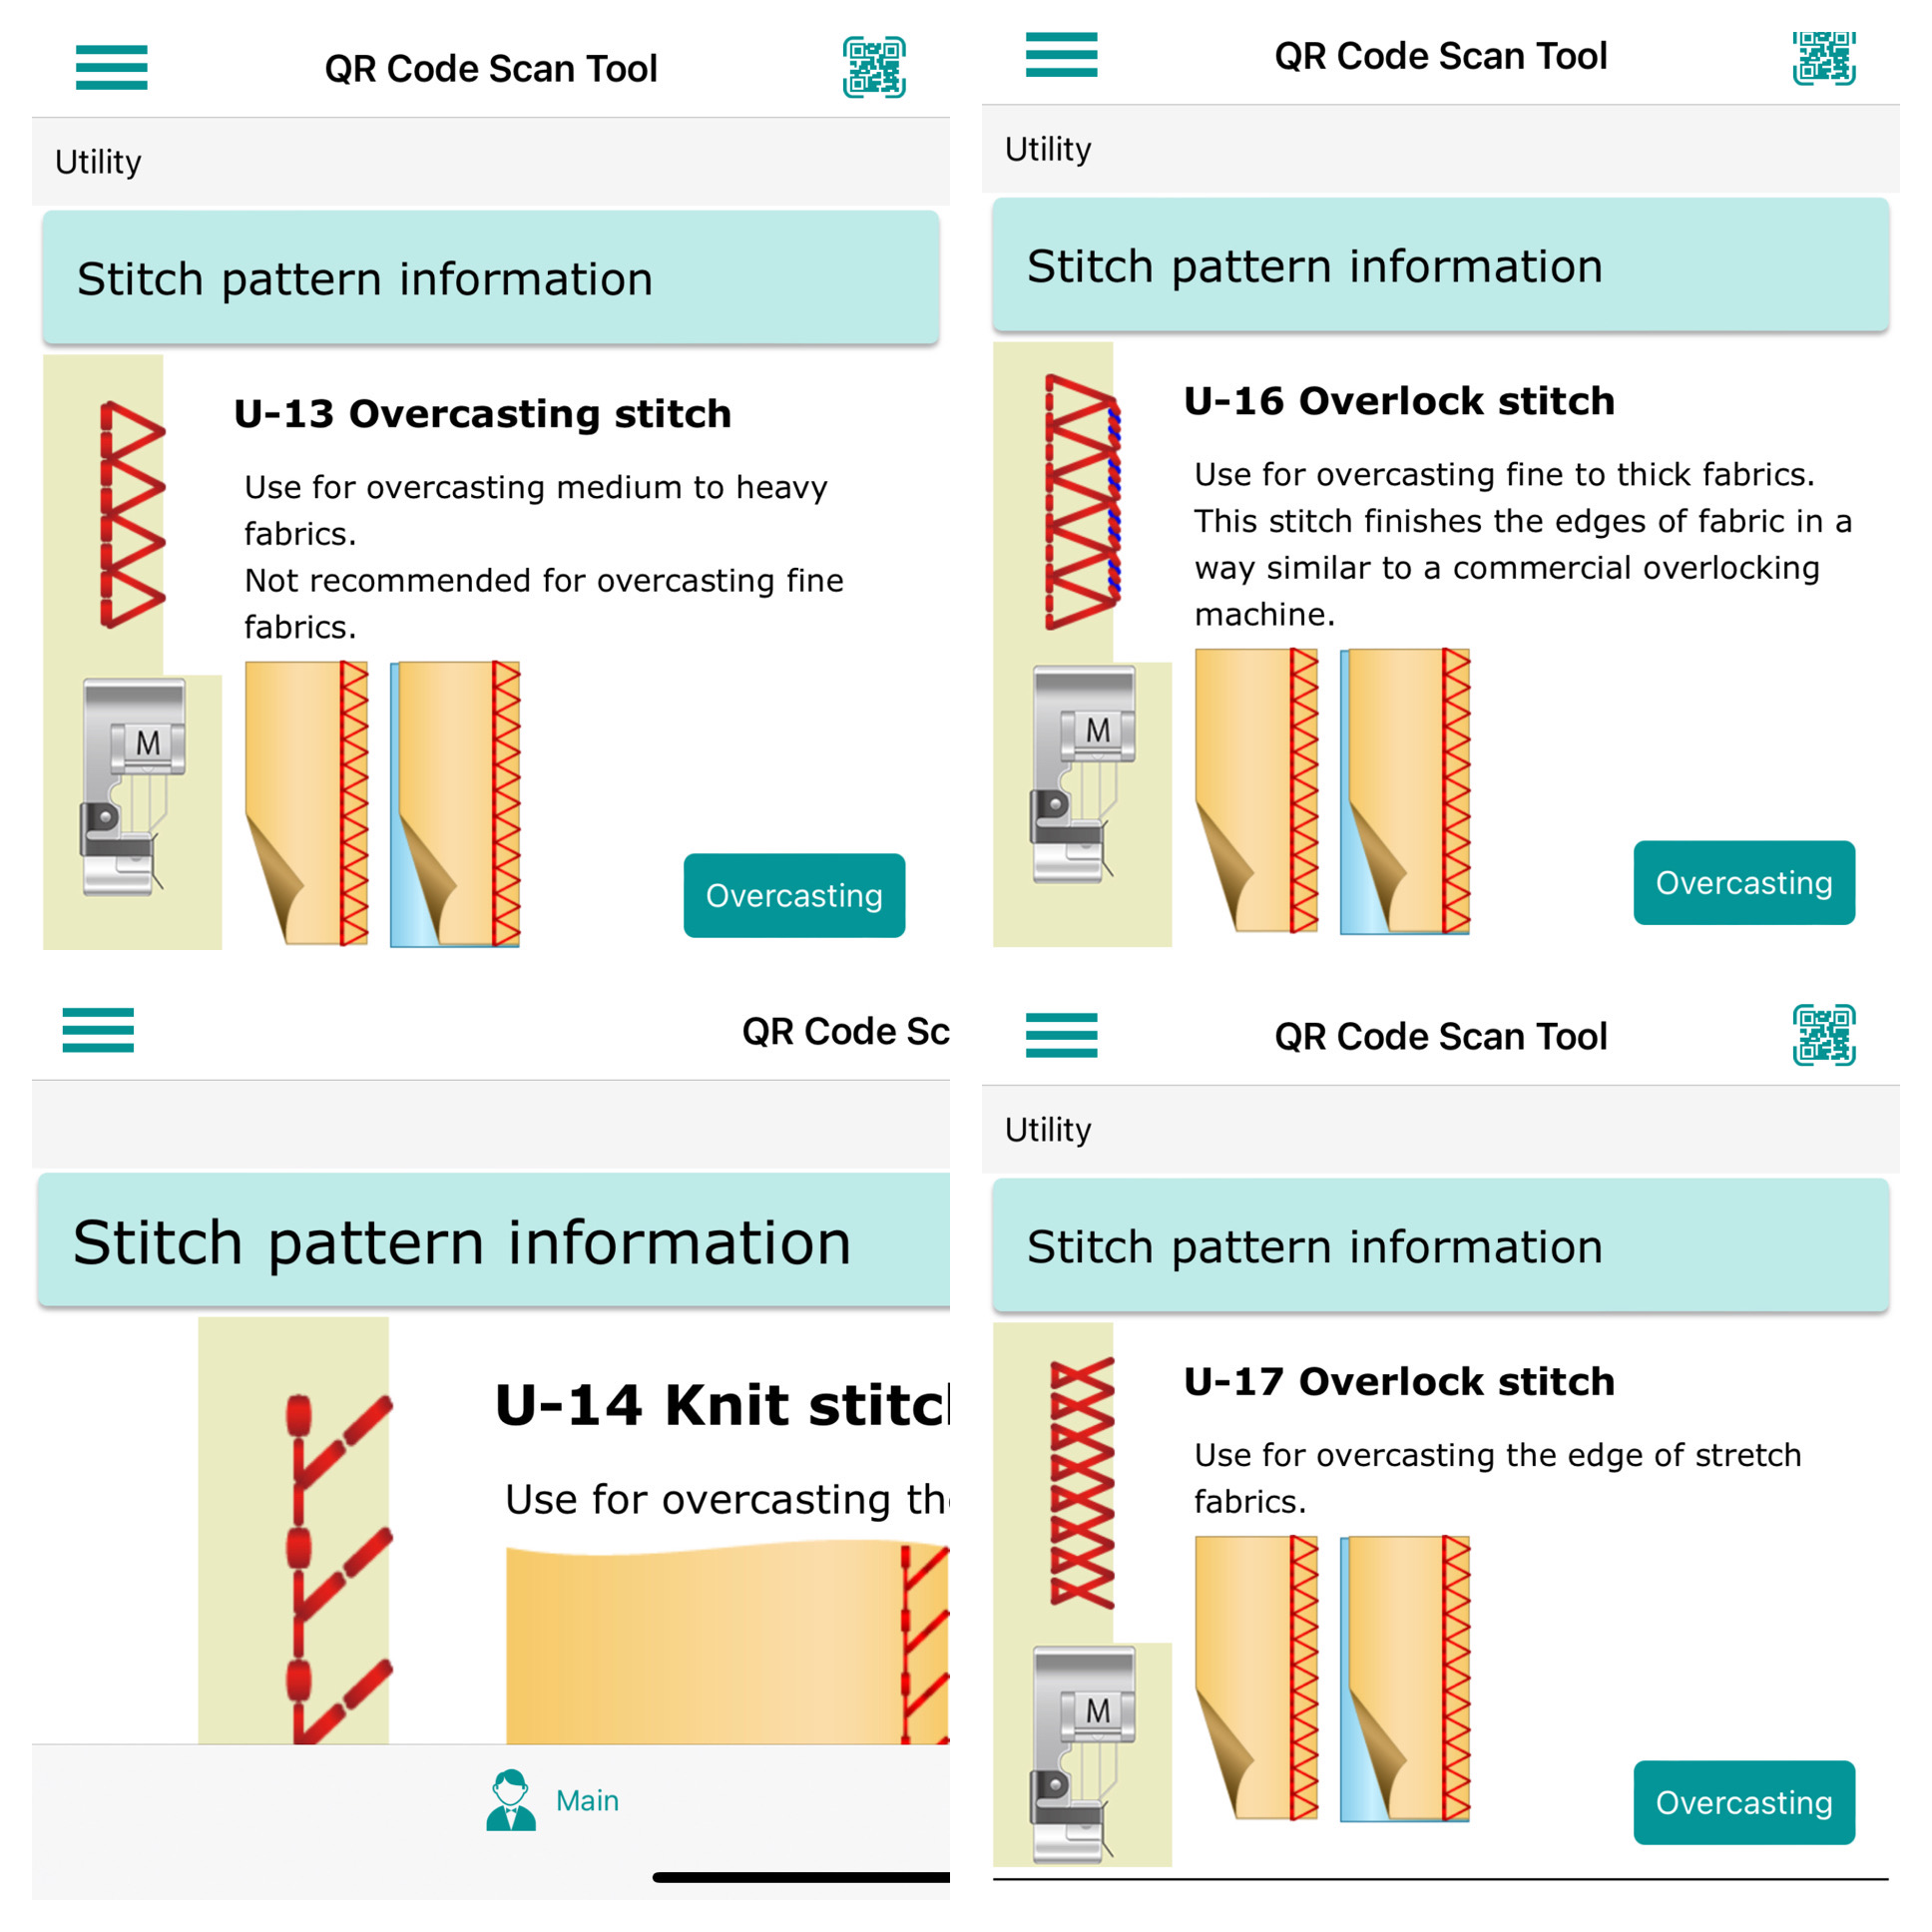
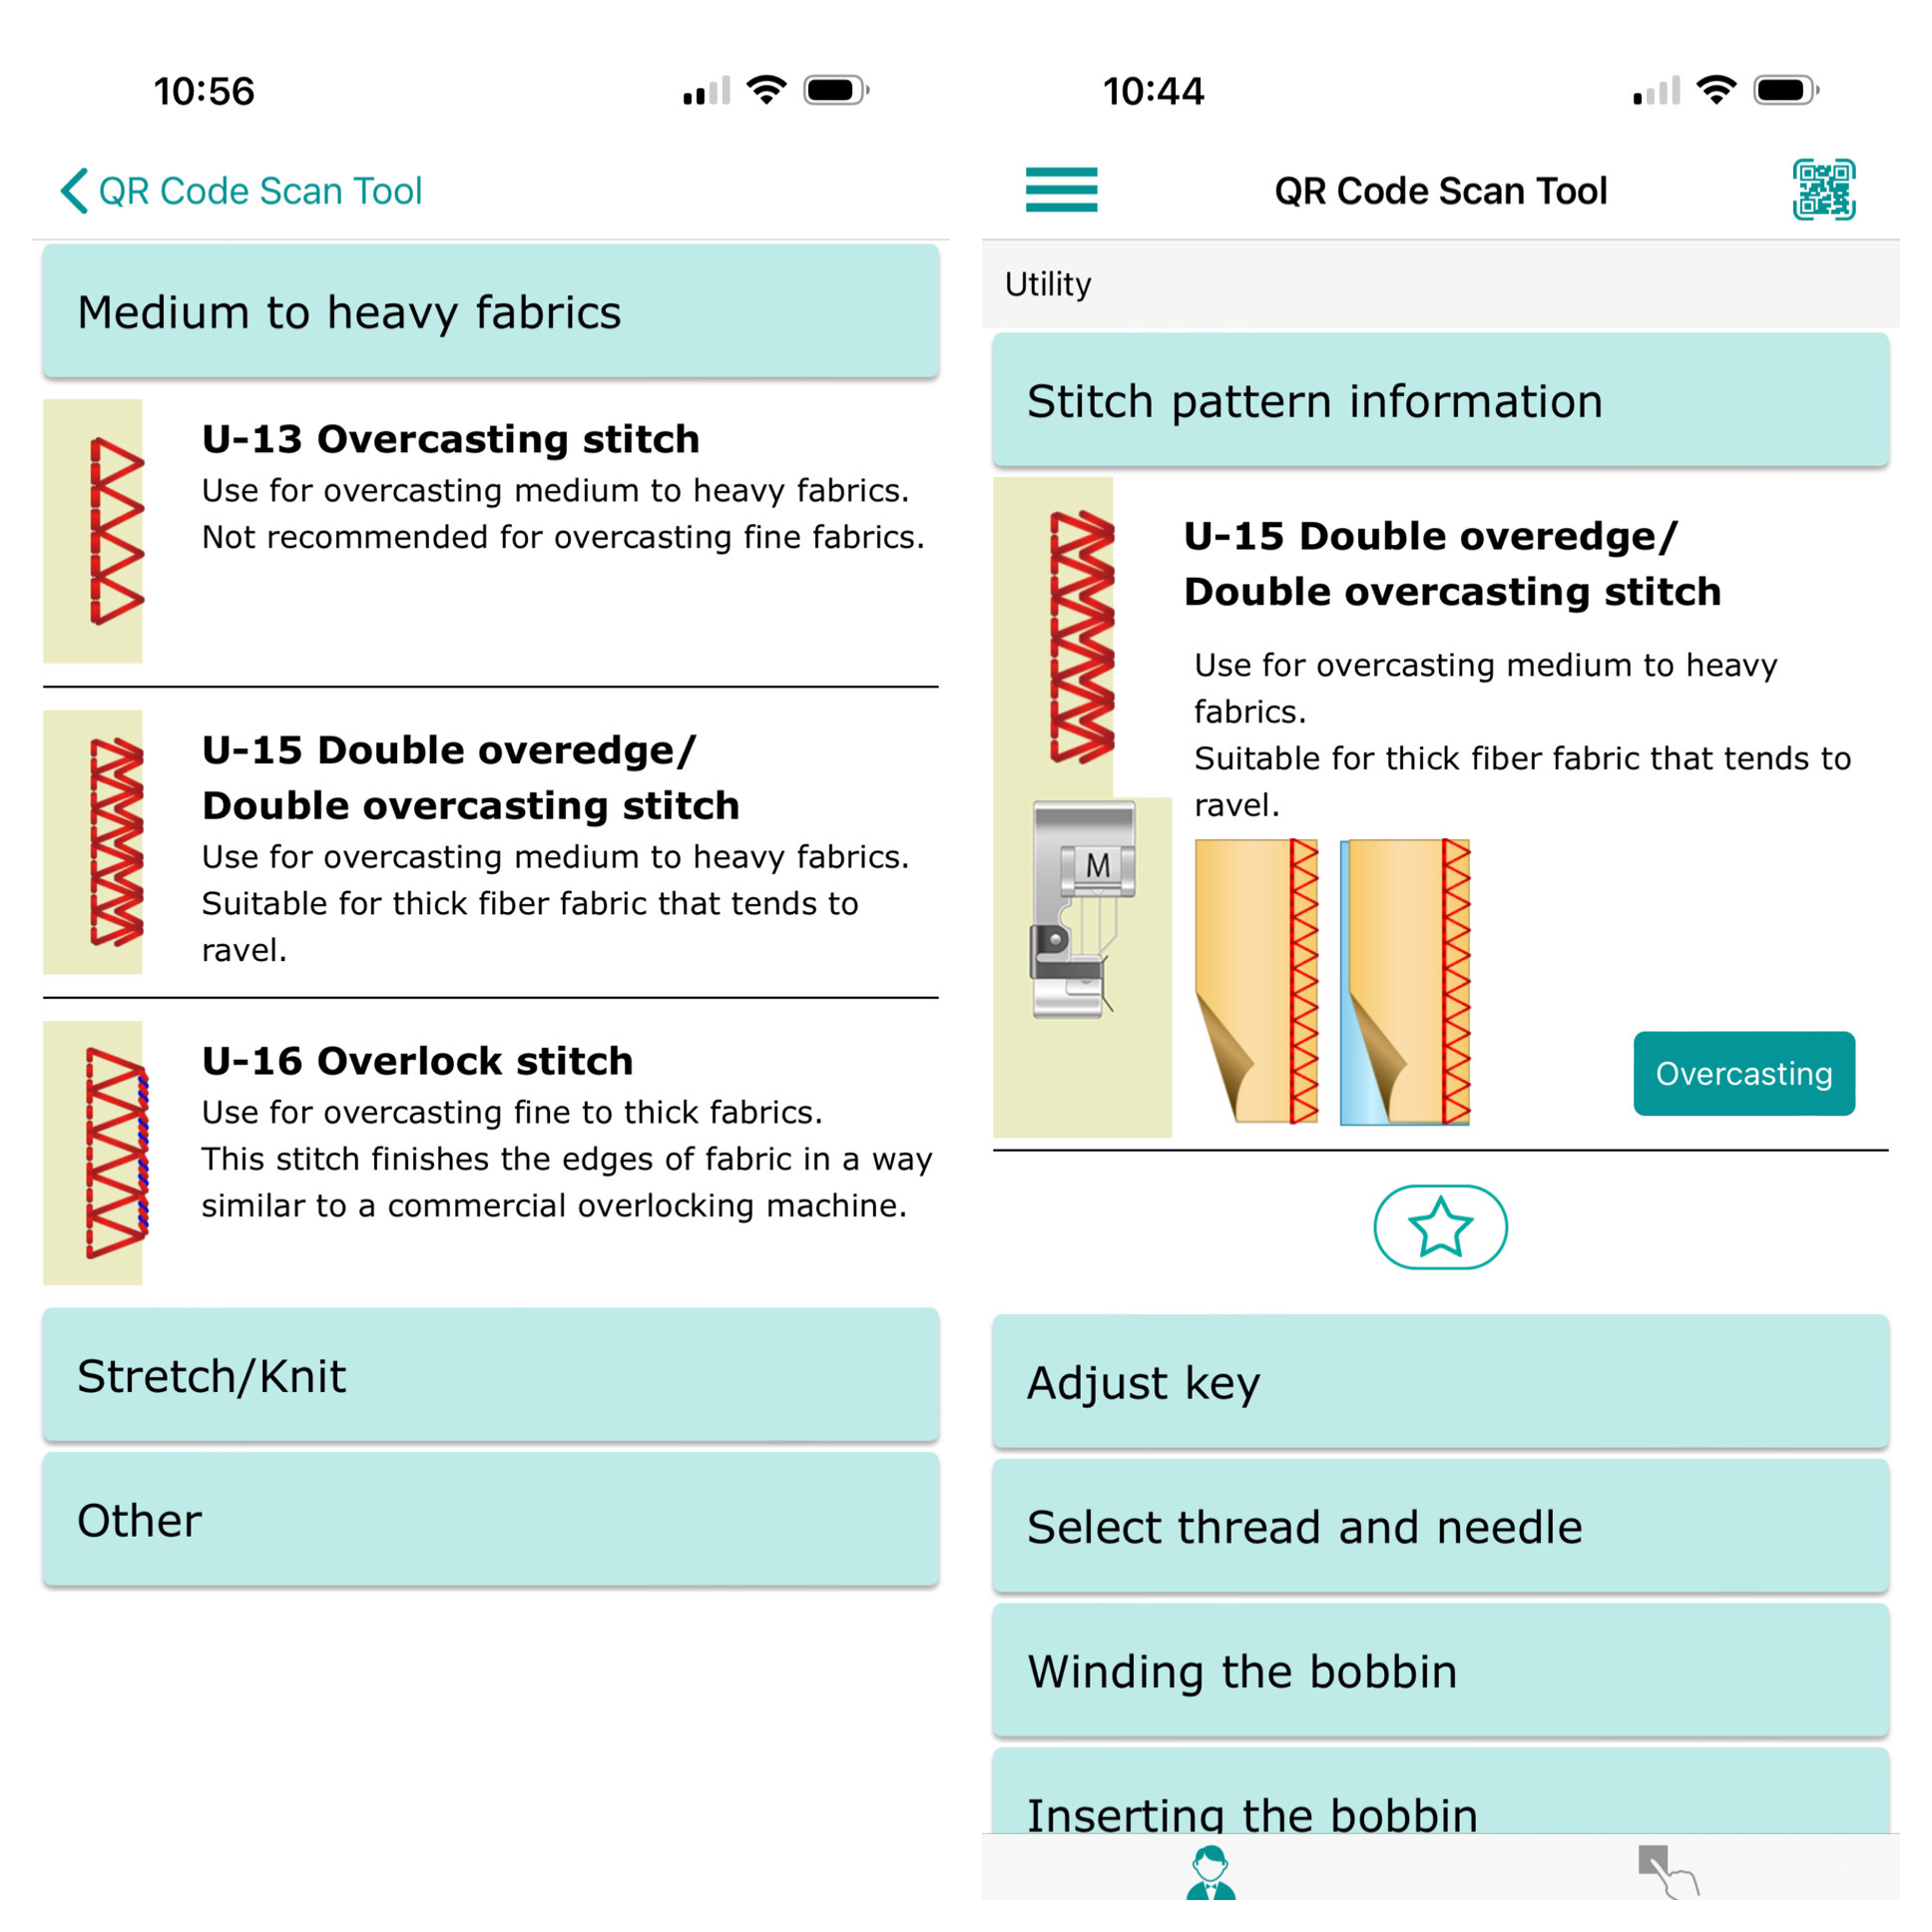
If you want help understanding when and how to use a given stitch, open the AcuSpark app and scan the QR code. It then opens up a screen in the app with all sorts of nifty information on how to use the stitch. Below, I’ve opened the app to the Scan tool and took screen shots of these four overcast or overlock stitches.
There is also a tab to look at various options, on left side of photo below and, on the right, the stitch I like.
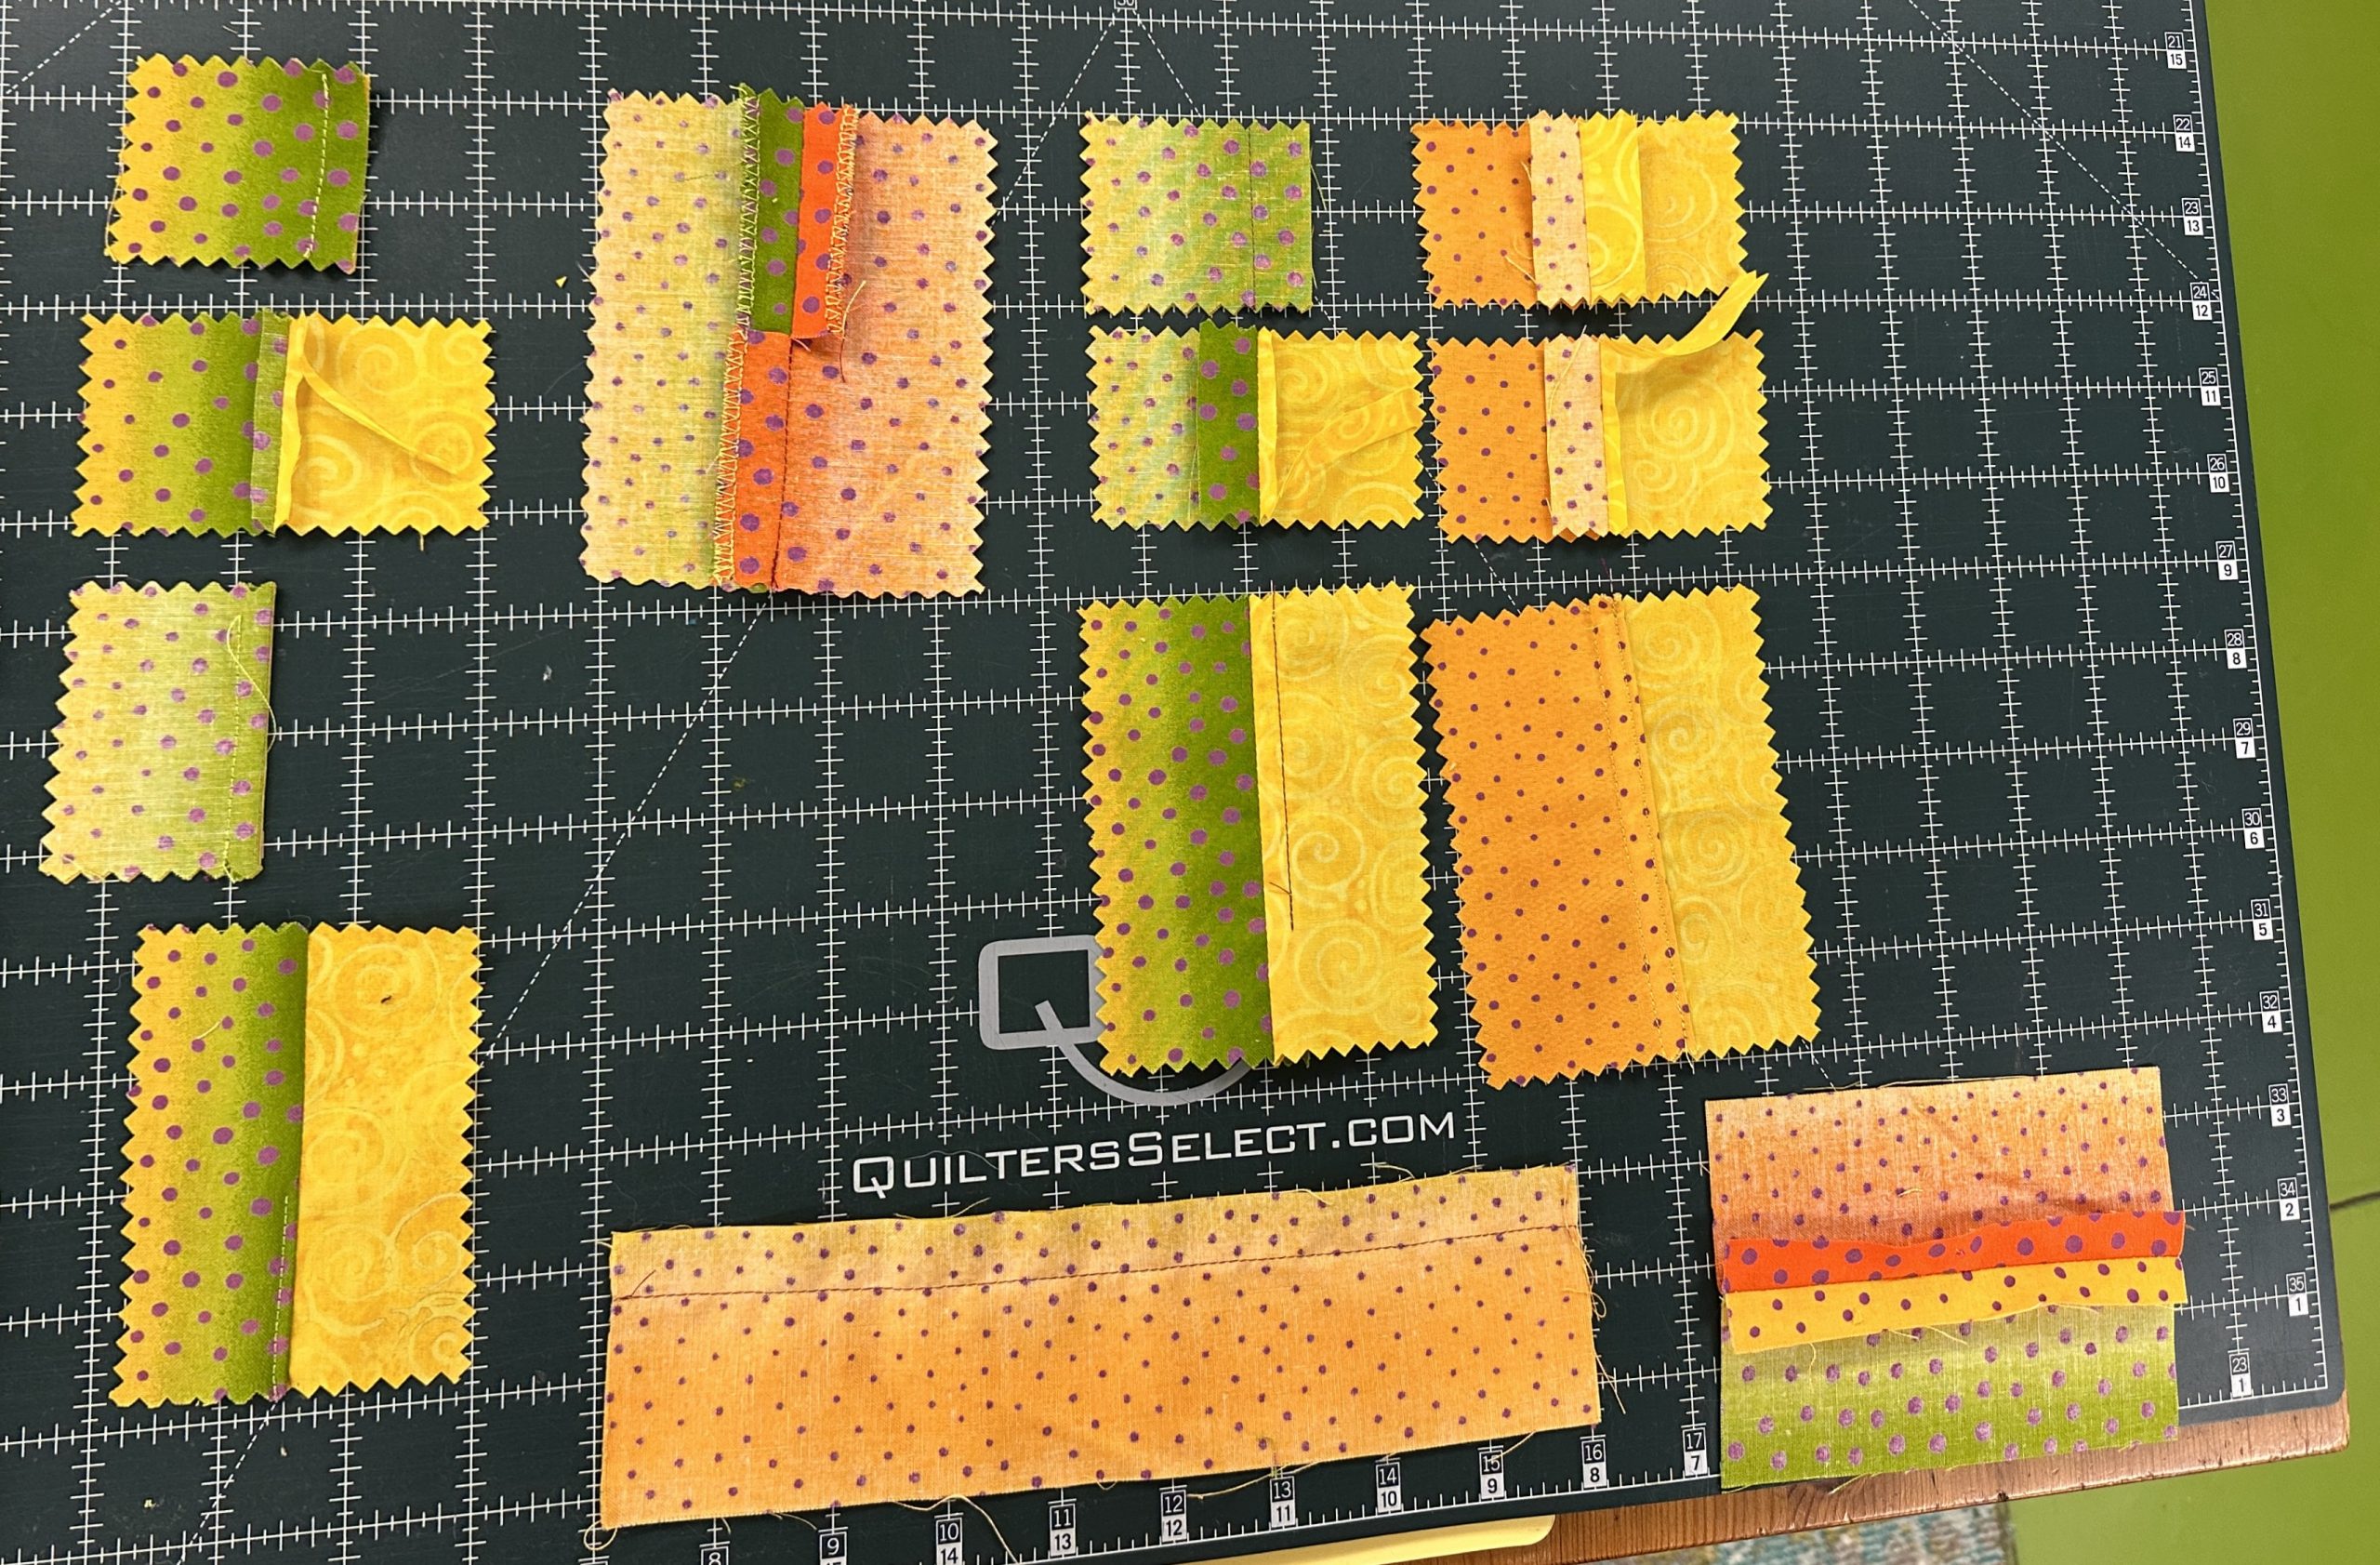
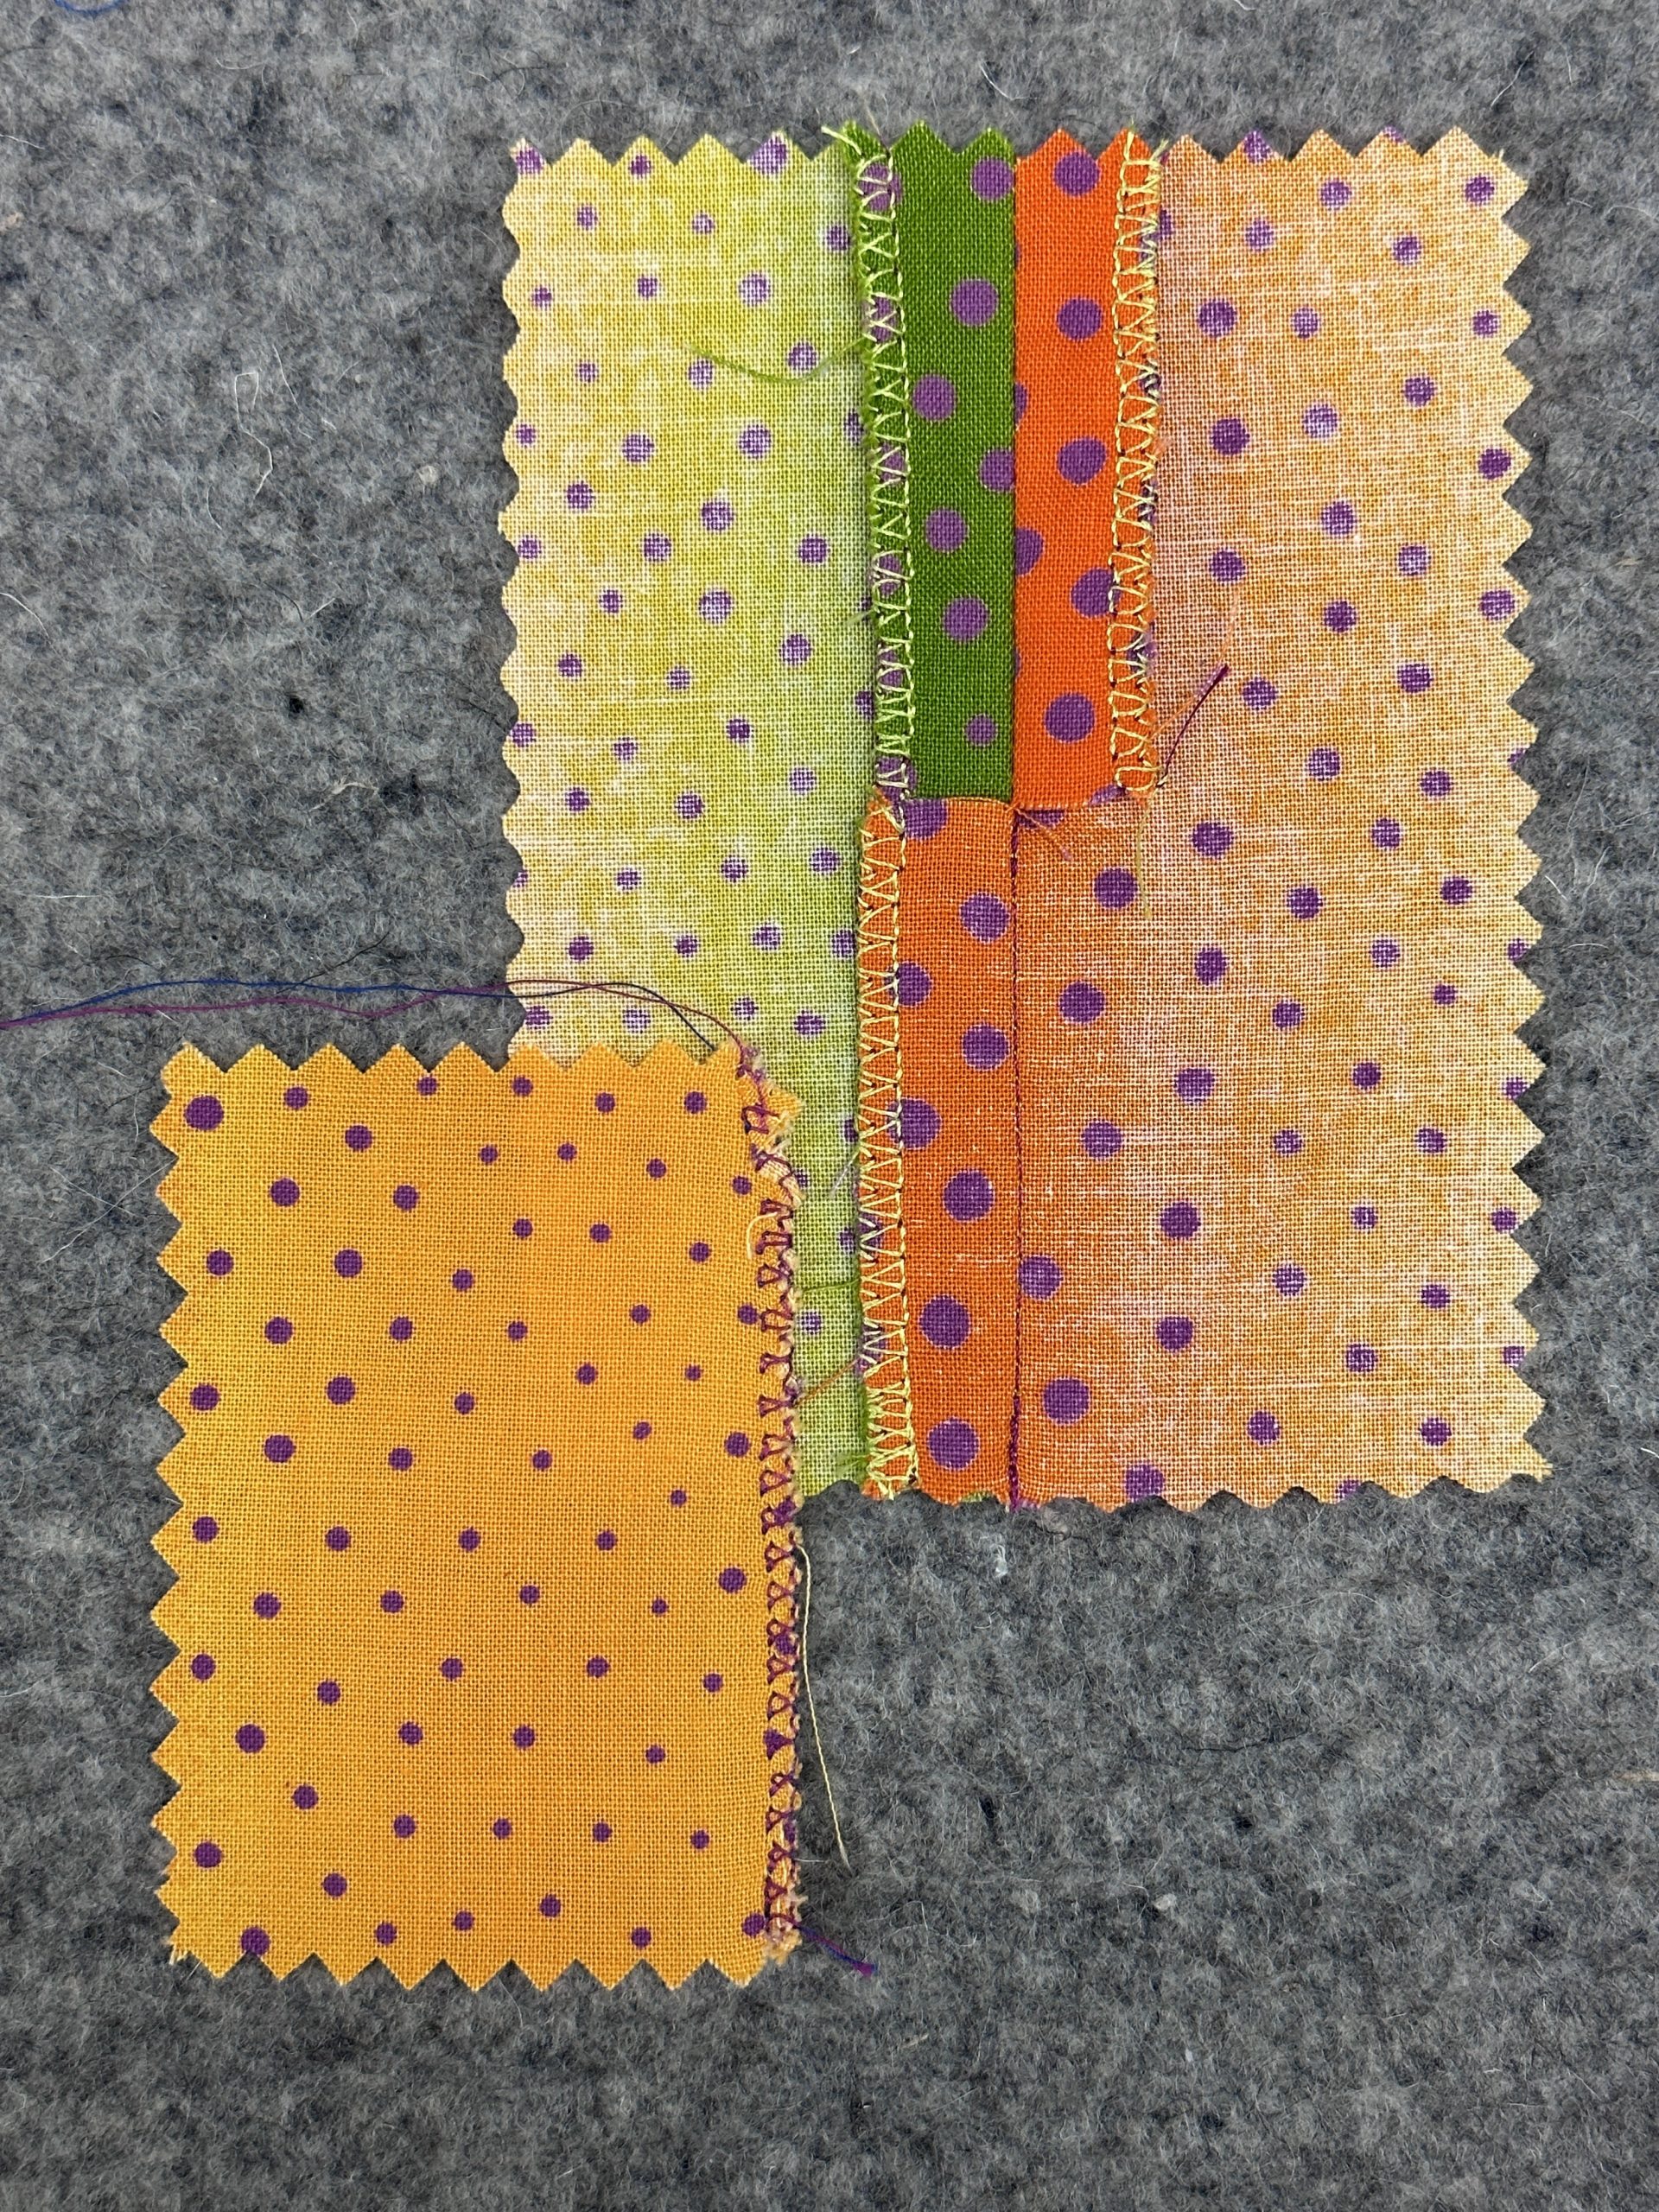
And let’s look at what a difference using the correct presser foot makes! Be sure to watch the video at the end of the post to see this foot in action!
The small sample, lower left, shows using the overcast stitch with the regular presser foot. Messy! The larger sample shows overcasting each side of the seam with the “M” foot, with the seam pressed open at the top AND overcasting both sides together and pressing to one side on the bottom.
Most machines that offer these stitches also come with (or you can buy separately depending on brand and model); buy one made by the company that made your machine for best results) a foot that has a wire on the right. This allows the stitch to form properly and not pull or curl the edge; those distorted edges aren’t as comfortable! On the Janome, it is the “M” foot. Look at the difference between the samples above.
Check the feel of the seam on a scrap. Adding too much thread can make a seam stiff and uncomfortable. If you have/can find a lighter weight thread, that finer thread will make the seam softer, as will using a longer stitch length IF your machine allows any adjustments to stitch width and length. If so, and your fabric ravels a lot, you may choose to use a wider stitch setting to better encase the tendency to ravel and wiggle.
USAGE: pretty much any seam, especially where seams intersect and you’d end up with a lot of bulk.
When I was doing custom home dec sewing for an interior designer, I also used a serger (but you can use the overcast stitches) to secure each cut piece of fabric before constructing the pillows, duvets, curtains, bedskirts, seat cushions and such. Upholstery fabric is VERY ravelly, and expensive, so I secured the edges immediately after cutting and before assembly to prevent an expensive disaster.
Cons: not the classiest finish, but fast and functional.
Here’s a video!
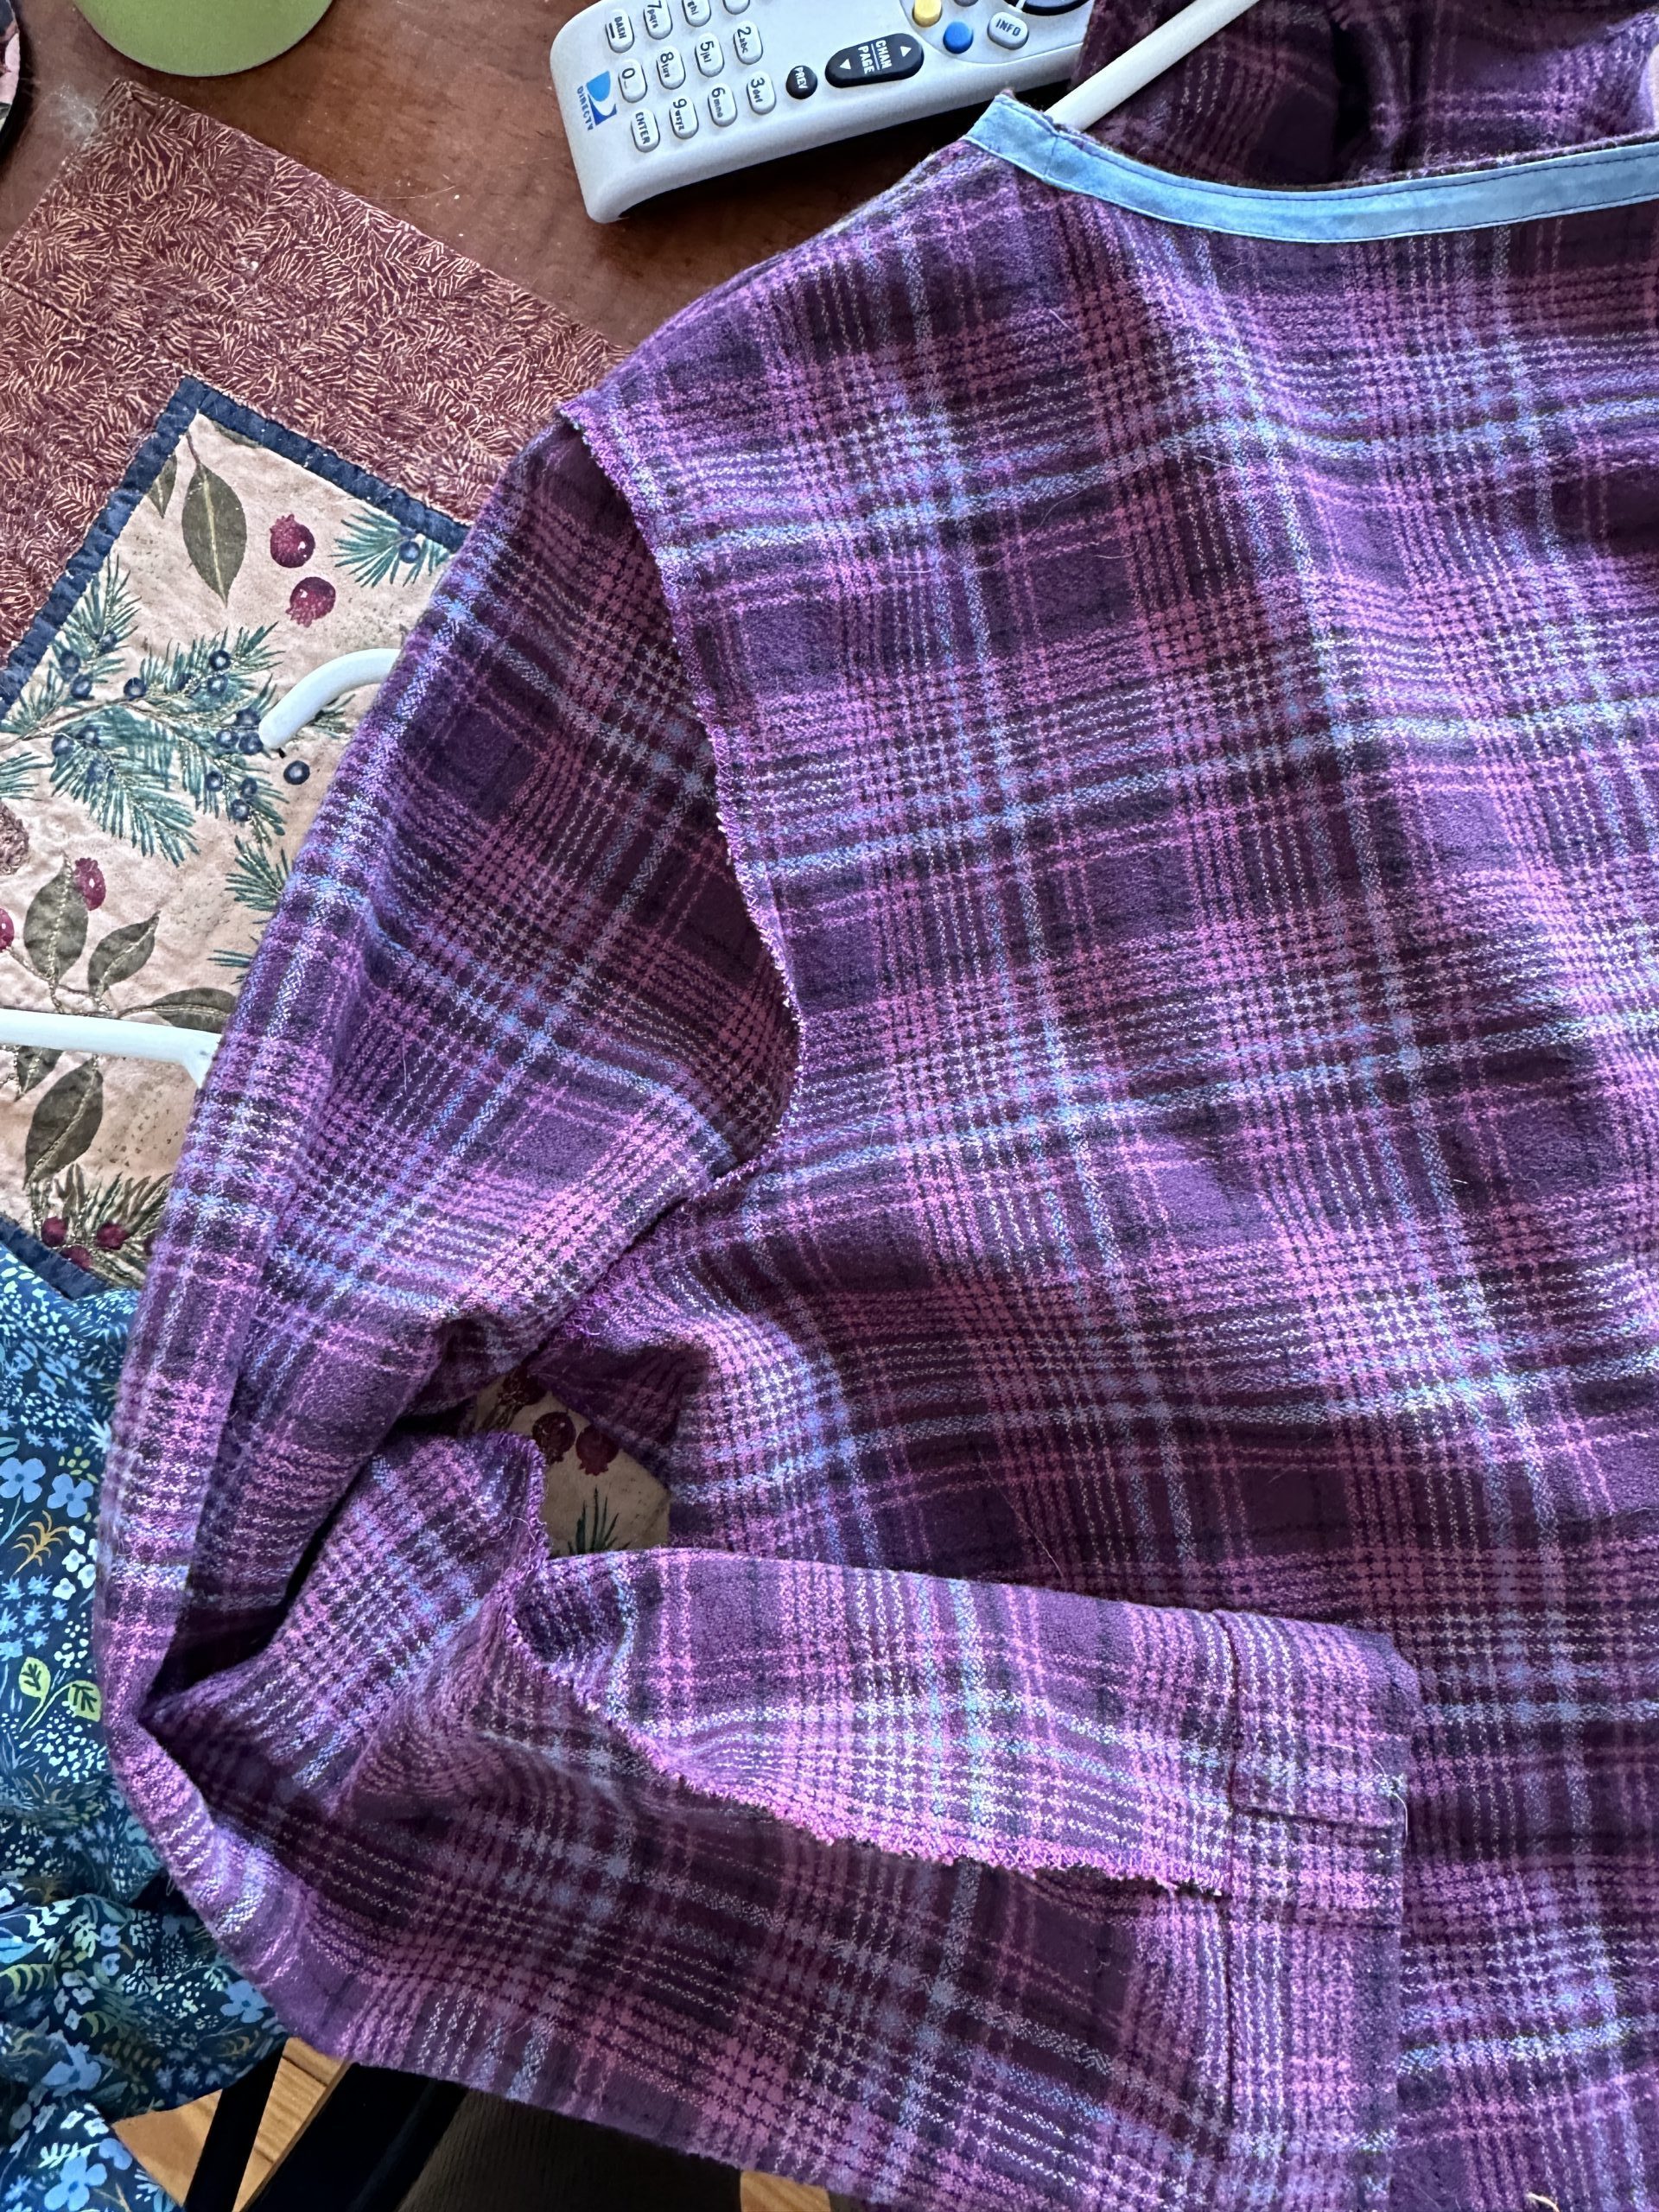
On the Plaid top I used serged together seam allowances for both the underarm and sleeve-to-body seams. This choice is especially useful where the sleeve joins the body because it stiffens the seam just a bit. When you press the seam towards the sleeve it actually helps support the top of the sleeve itself and helps it to hang well on the body.
Inside of the Plaid top: I used the overcast-both-seam-allowances-together method.
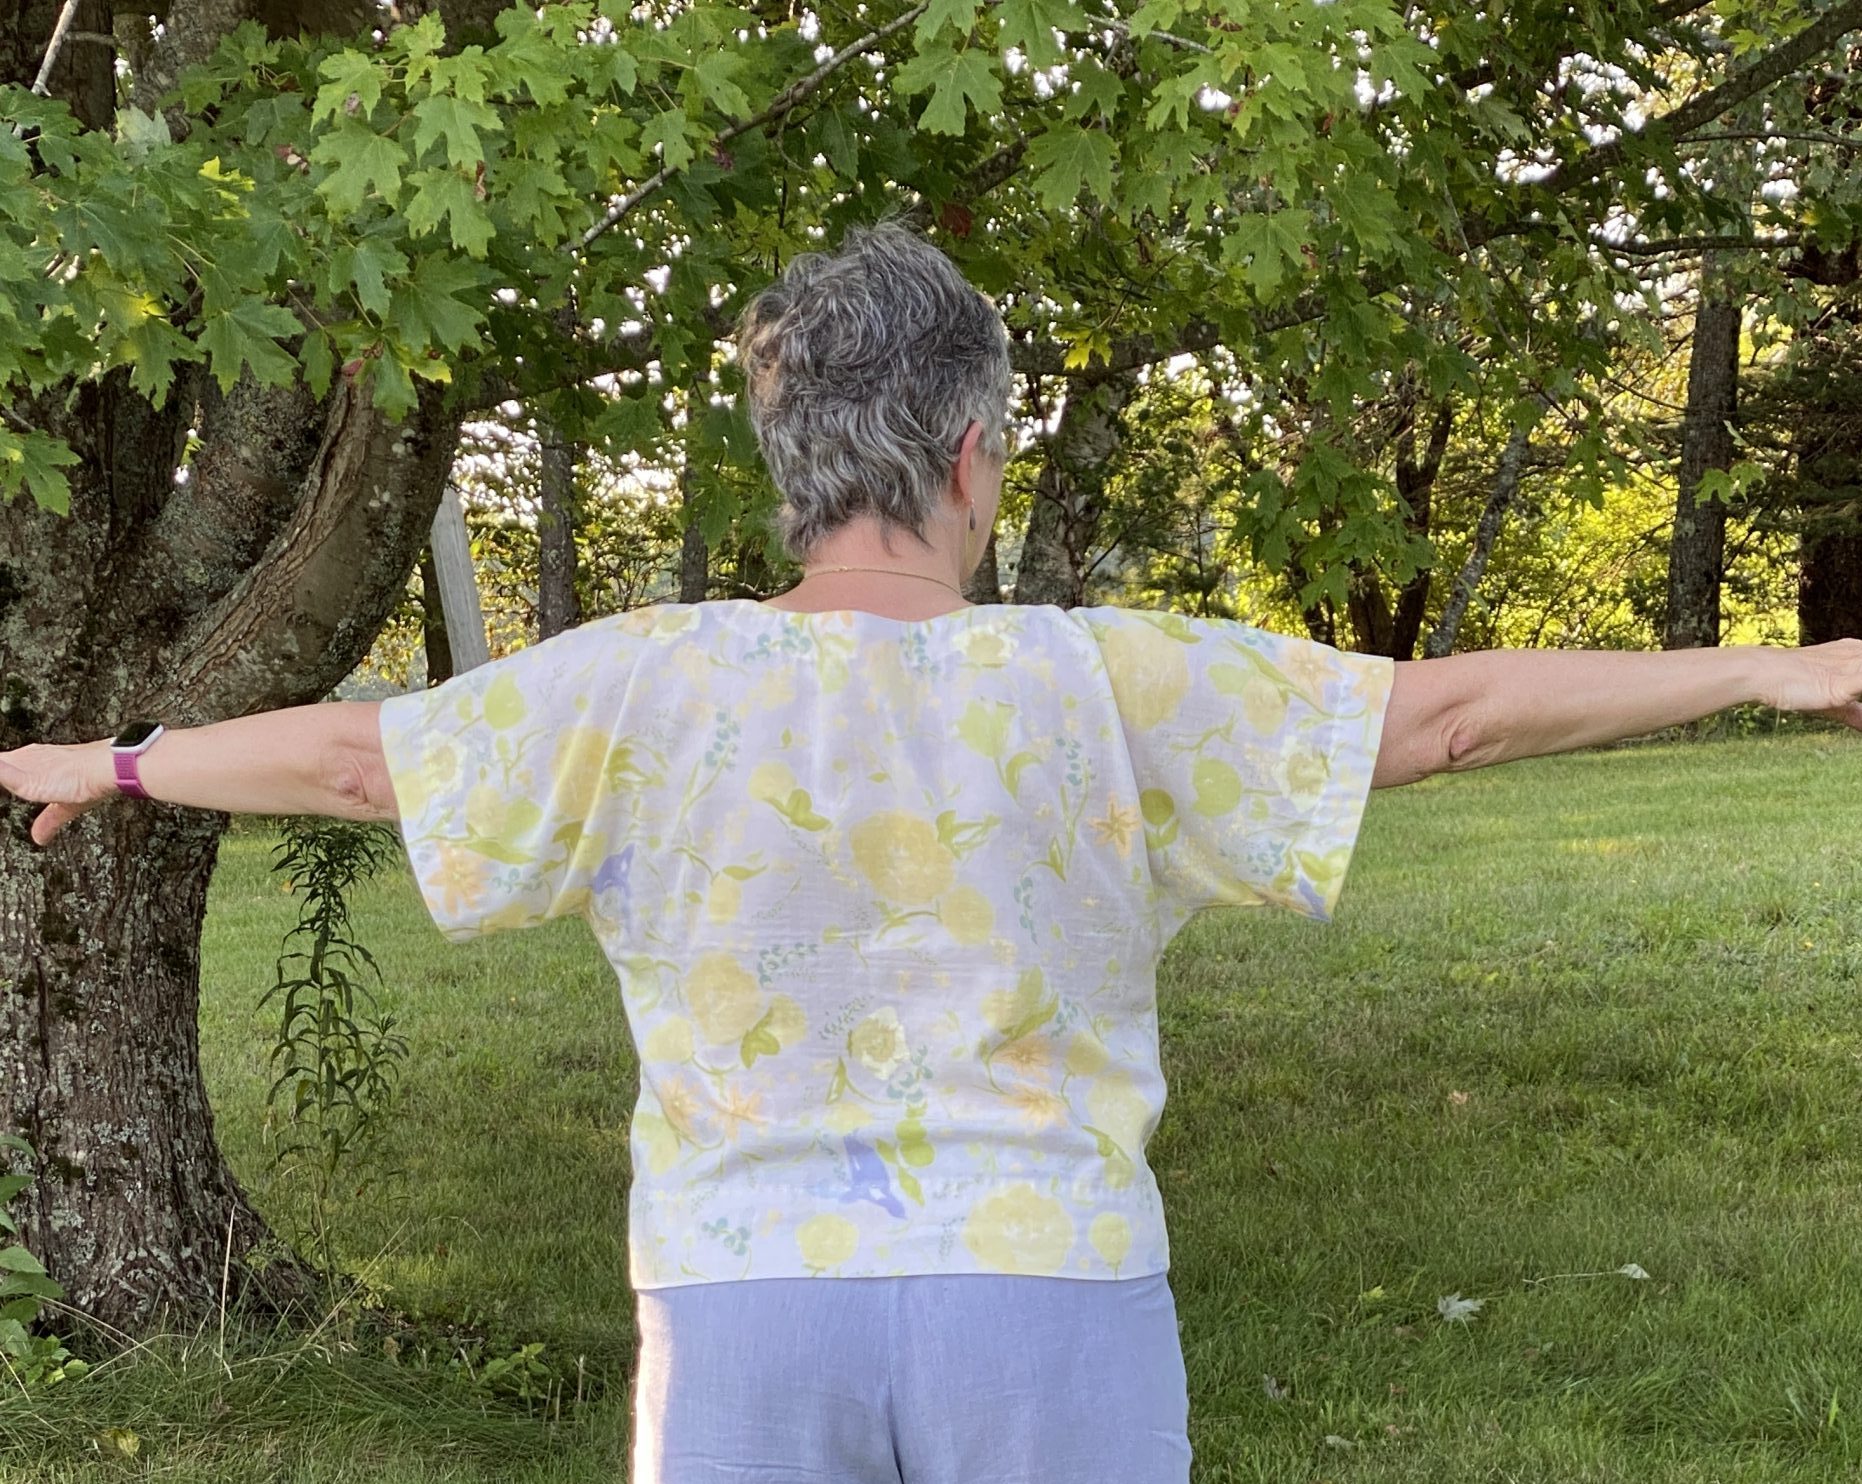
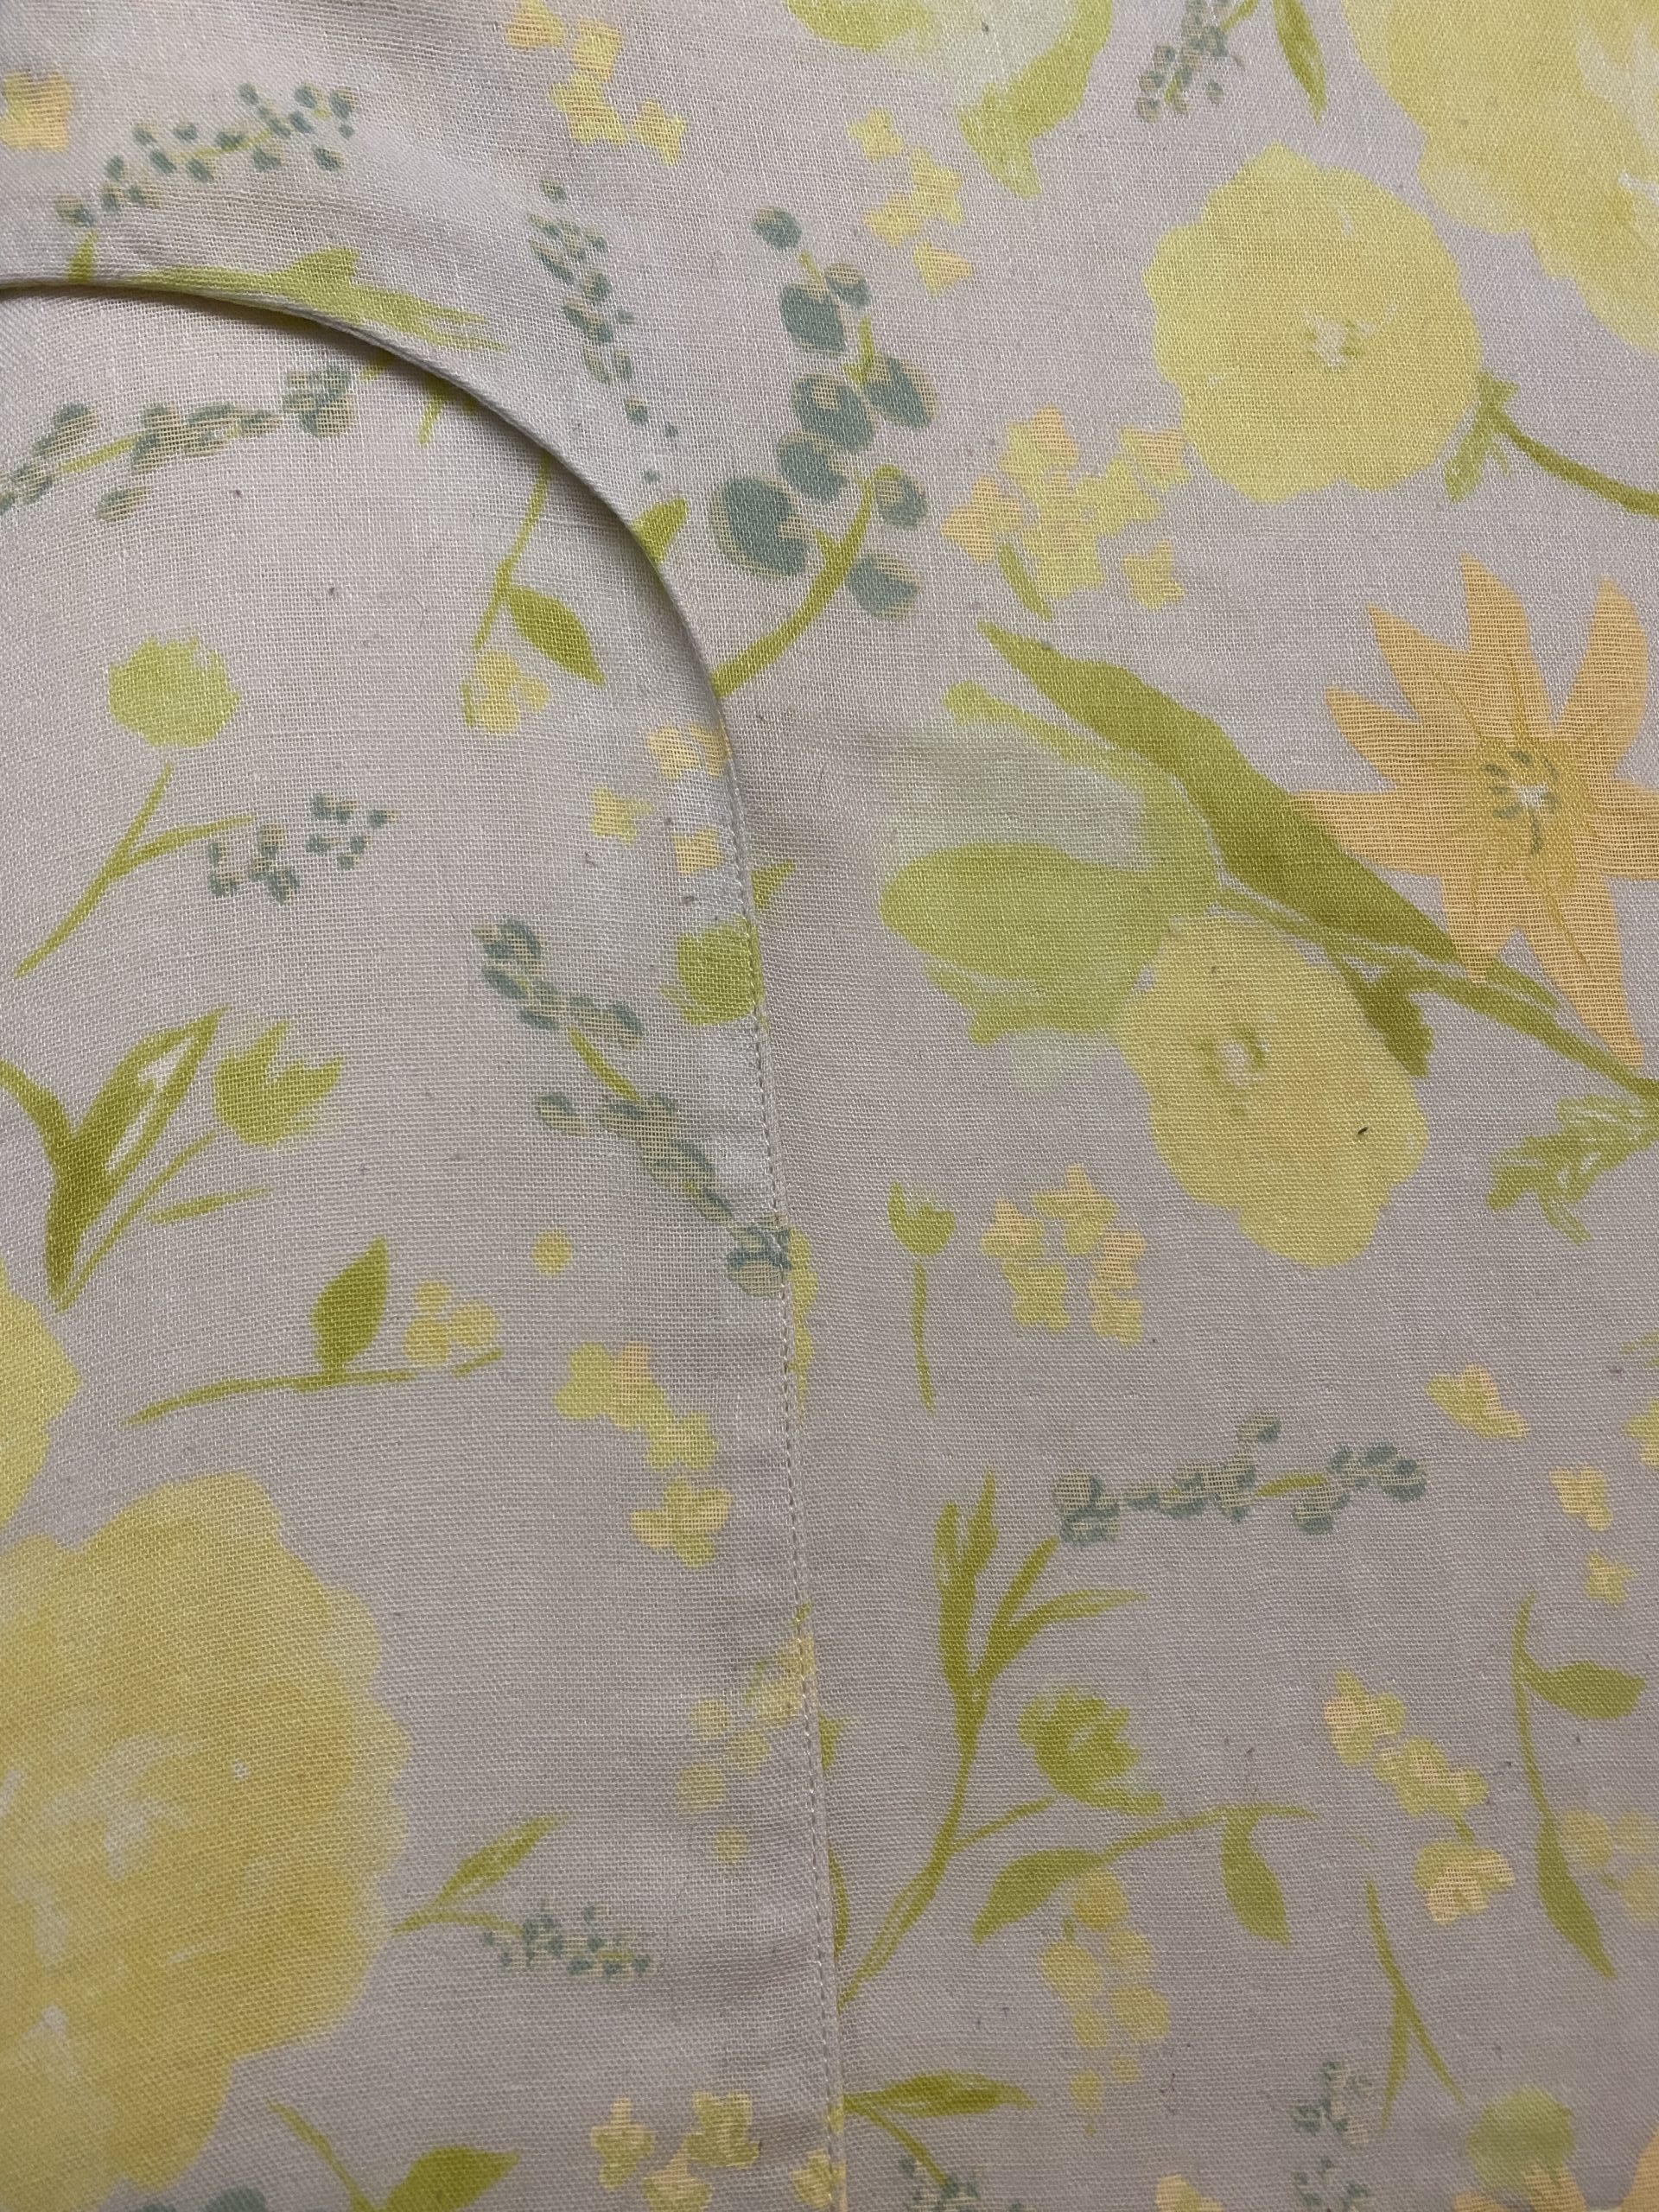
Another nice touch is to edgestitch the seam. Last summer I asked Philippa Naylor in GMQT (see previous post for additional discussion of GMQT) about how best to handle a side seam with a curved bit under the arm to the extended part for the sleeves. The top is literally two “T” shaped pieces of fabric with a neck facing and turned up hems (see photo from the back, below). Any curved seam will tend to pull at the curve. She suggested finishing the seam with an overlock (I used my Janome AirThread2000D serger, but the overcast stitch would do exactly the same), then pressing to the back of the garment and edge stitching. So I did…worked perfectly (and surprisingly well to me) and kept the curve under the arm from wanting to “wonk” on me.
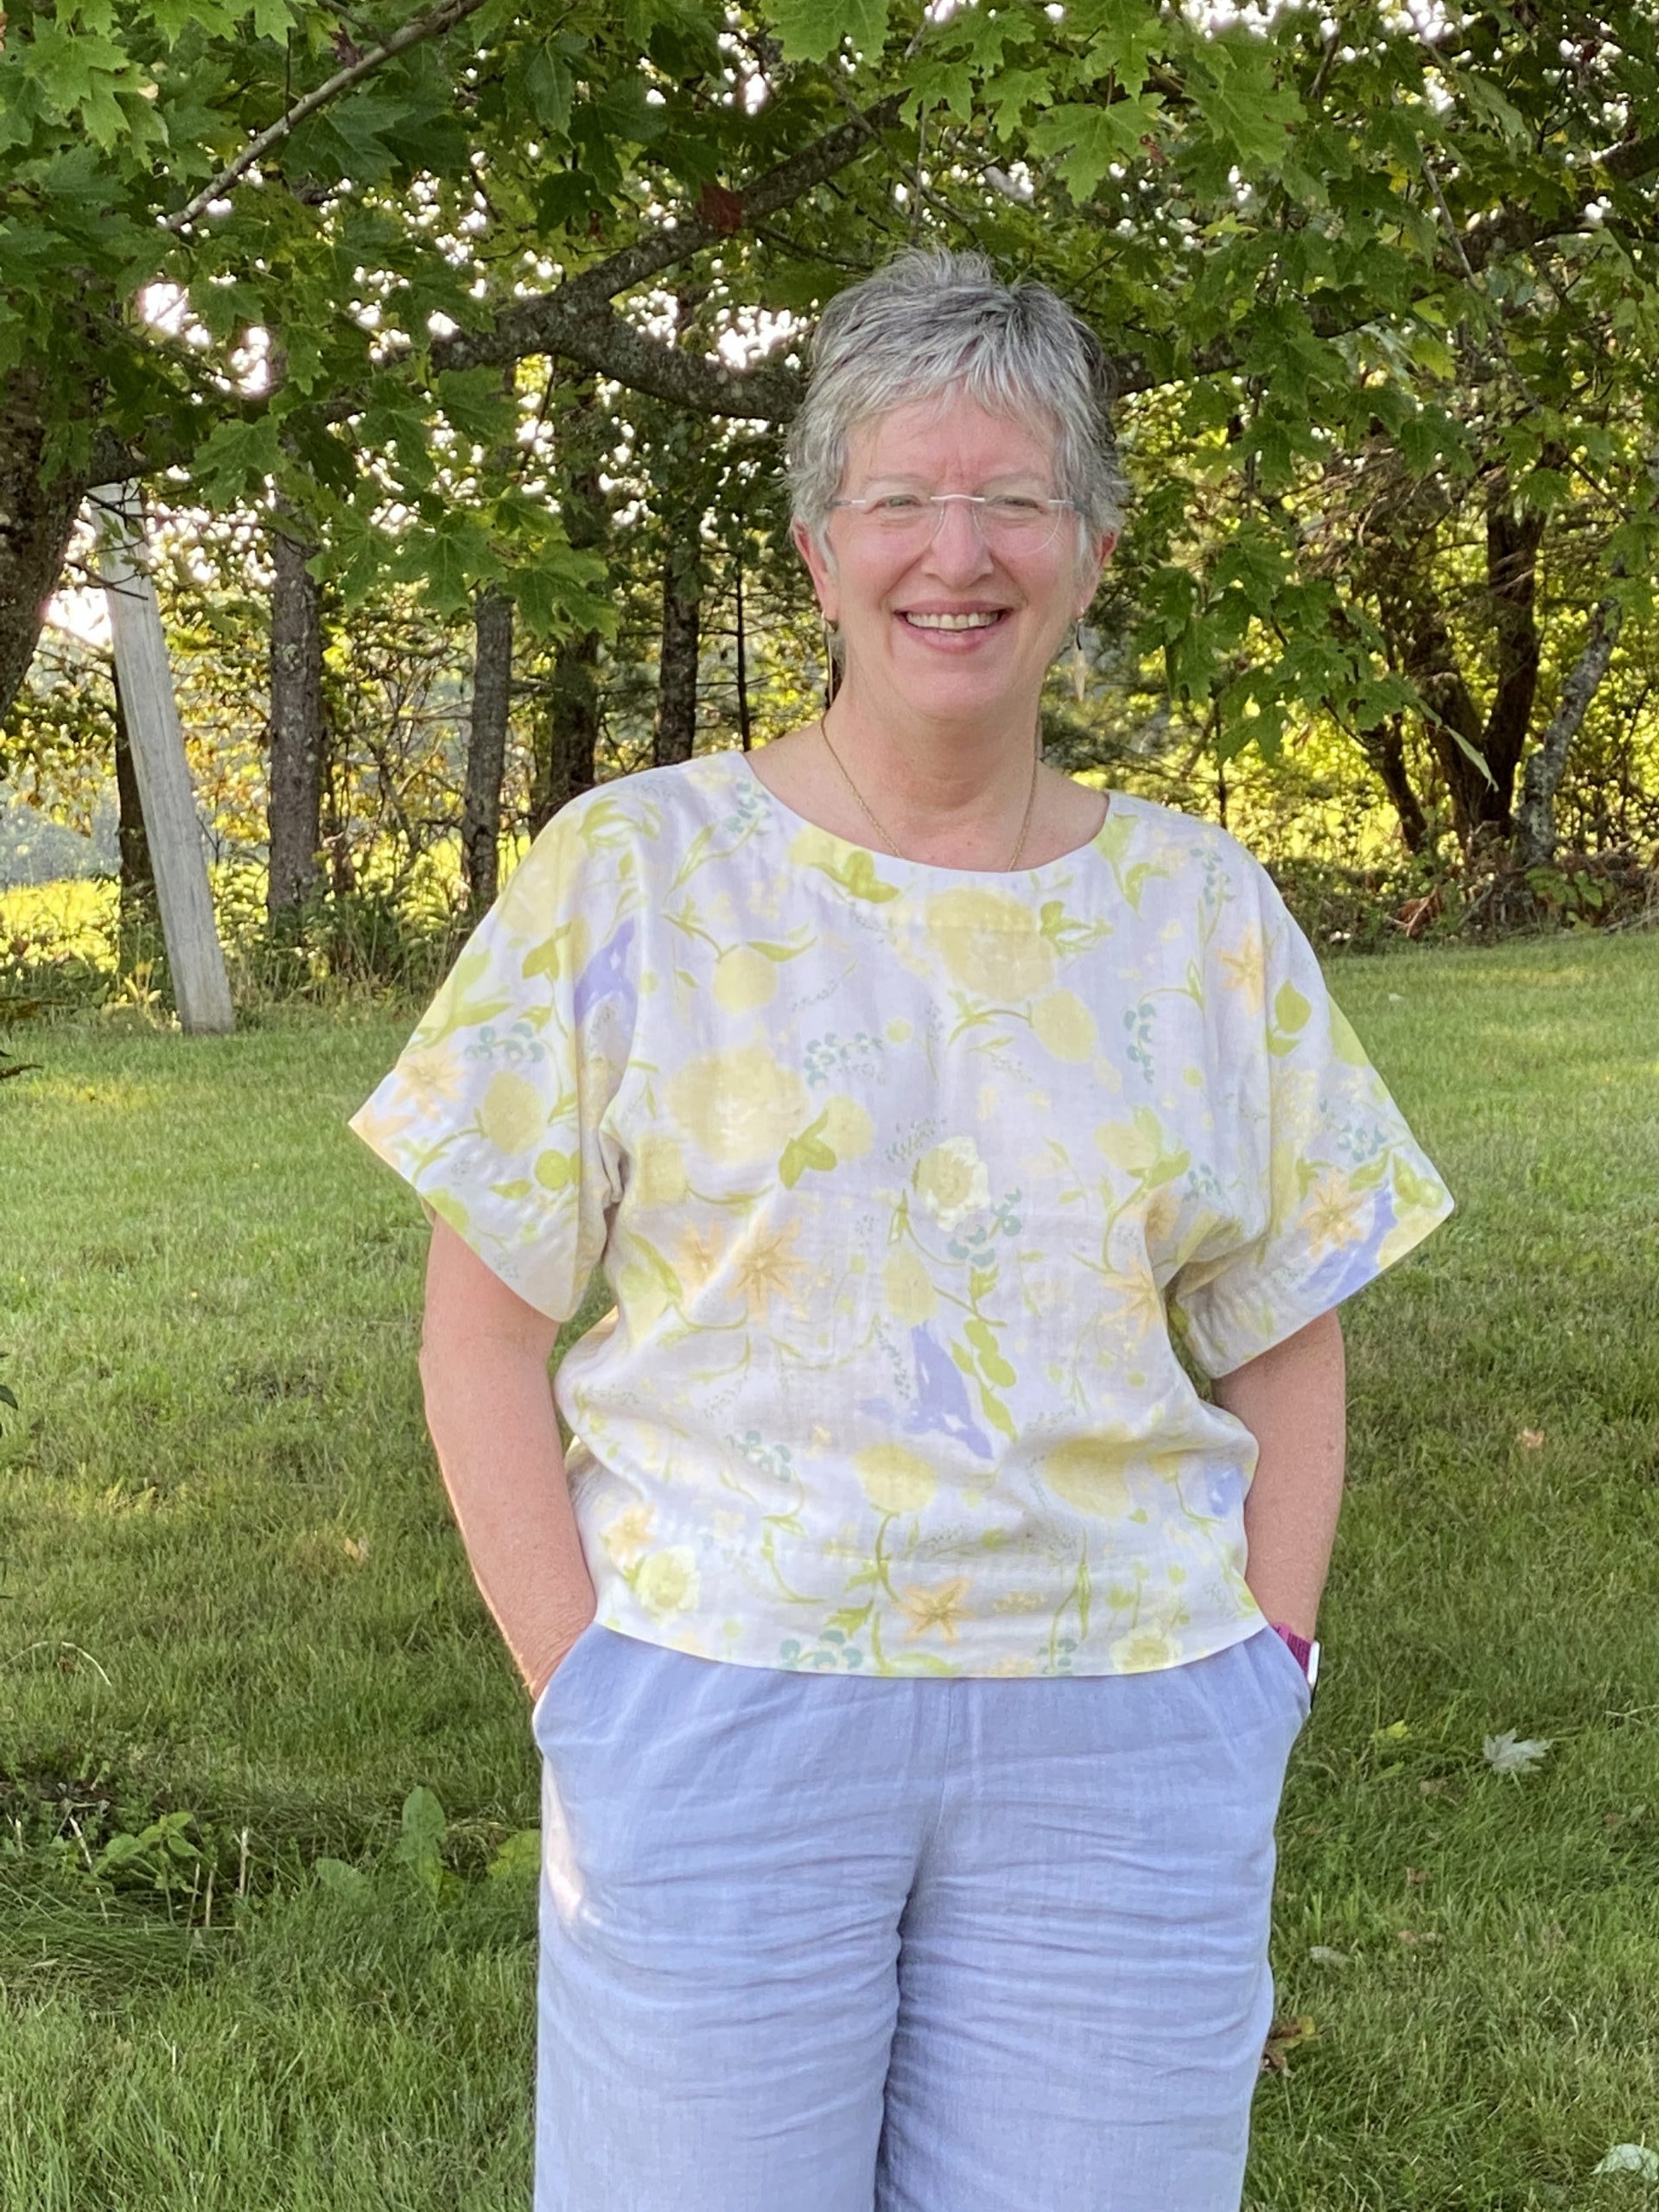
Here’s the finished blouse.
As you can see, this is the simplest of all shapes. The fabric is Nani Iro double gauze, a lightweight cotton that is two layers woven together.
And this is Philippa’s brilliant solution to controlling the tendency of the seam to ripple and buckle at the curve. Worked a charm! And in case you’re wanting that link to sign up for the Garment Makers Question Time classes with Philippa Naylor, here it is.
And a tiny PS: back in the days when dinosaurs walked the earth and my age was in single digits, home ec classes suggested using pinking shears to finish a seam. It would look like this. Problem is that with use and washing, it frays. So here’s a pic, but really, don’t! You put too much effort and money into not doing your best work!
Left, seam as stitched, and pressed open. Bleah. It’s gonna ravel! Just don’t. See you next time!
Here are the links to all the posts in this series of lessons, techniques that can be applied to virtually any garment and many home dec projects. Let me know what you’d like to learn and see here on the blog. Cheers and thanks, Sarah
While visiting a favorite local shop in nearby Rockland, Maine, Clementine, I happened to fondle this amazing thick, soft flannel and thought it would made a perfect winter top. The plaid adds a bit of complexity and opportunity to teach a few more advanced skills along with a fairly simple pattern for this series.
Please note: I am affiliated with Janome as a Janome Artisan and am compensated. However, my reviews are honest and I would say what I say whether affiliated or not. I’ve also chosen to be affiliated with Janome since 2003 (!!!) because their machines are so good and they are so responsive to the interests and needs of their customers.
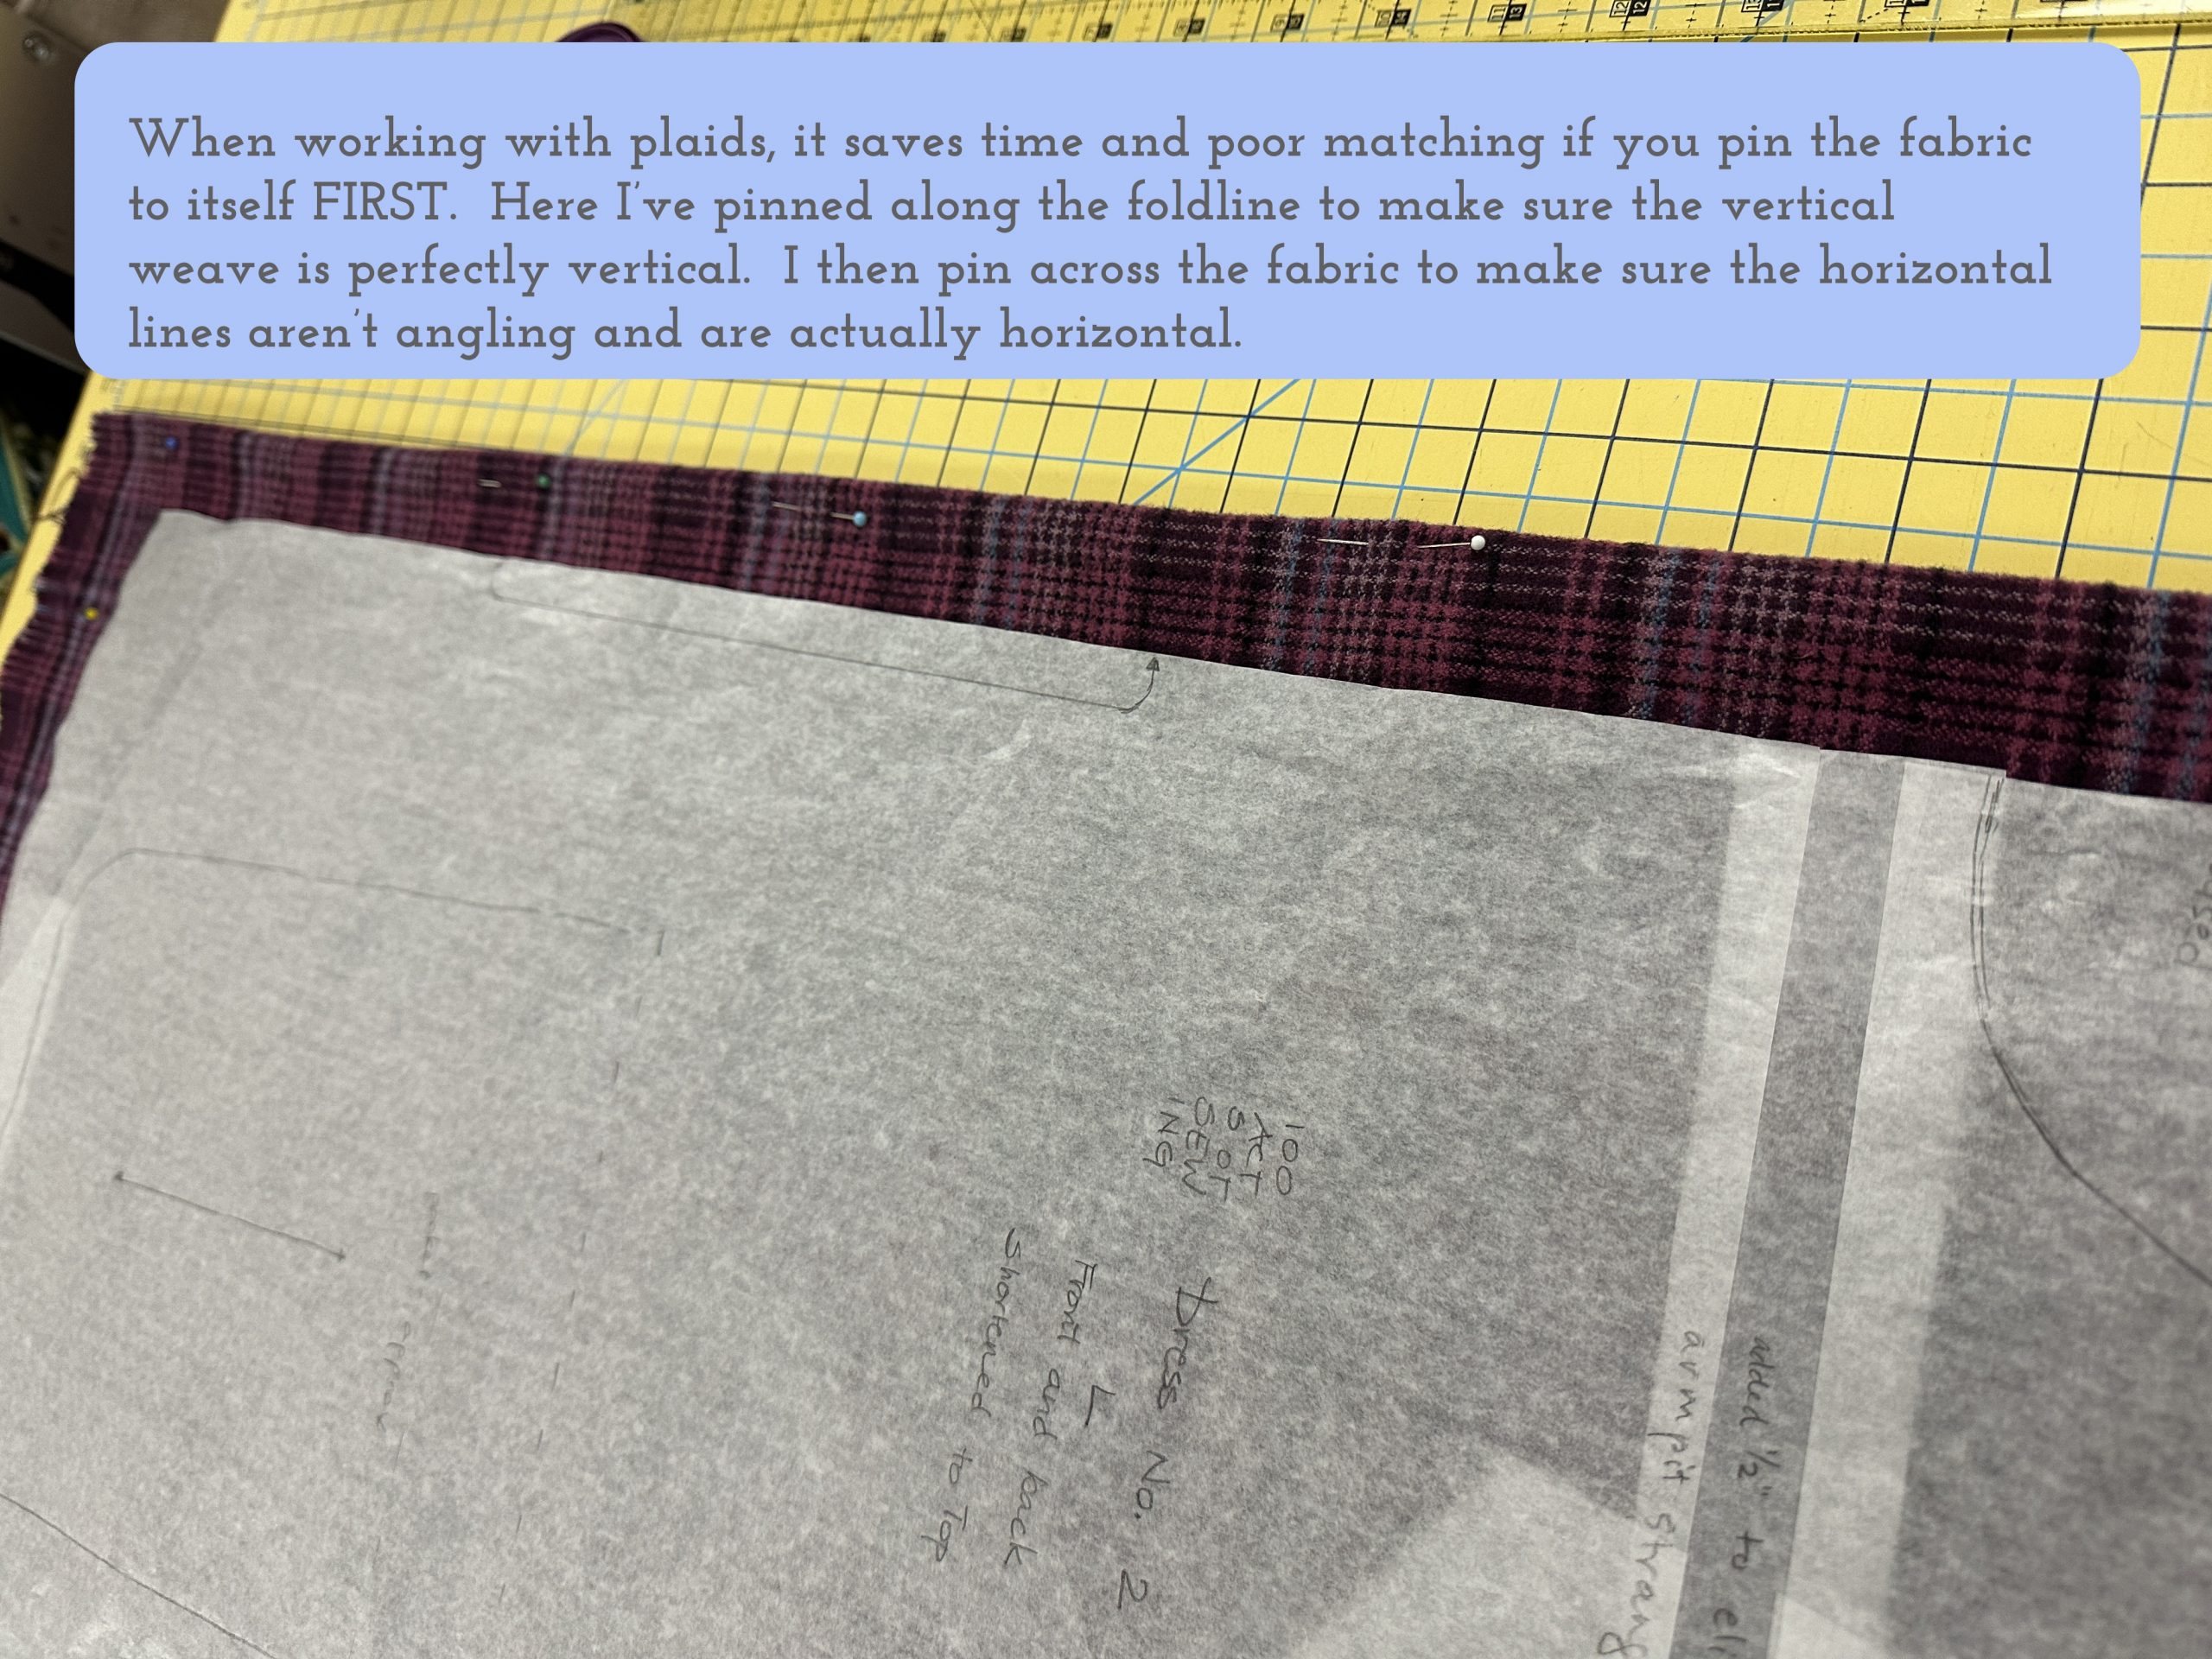
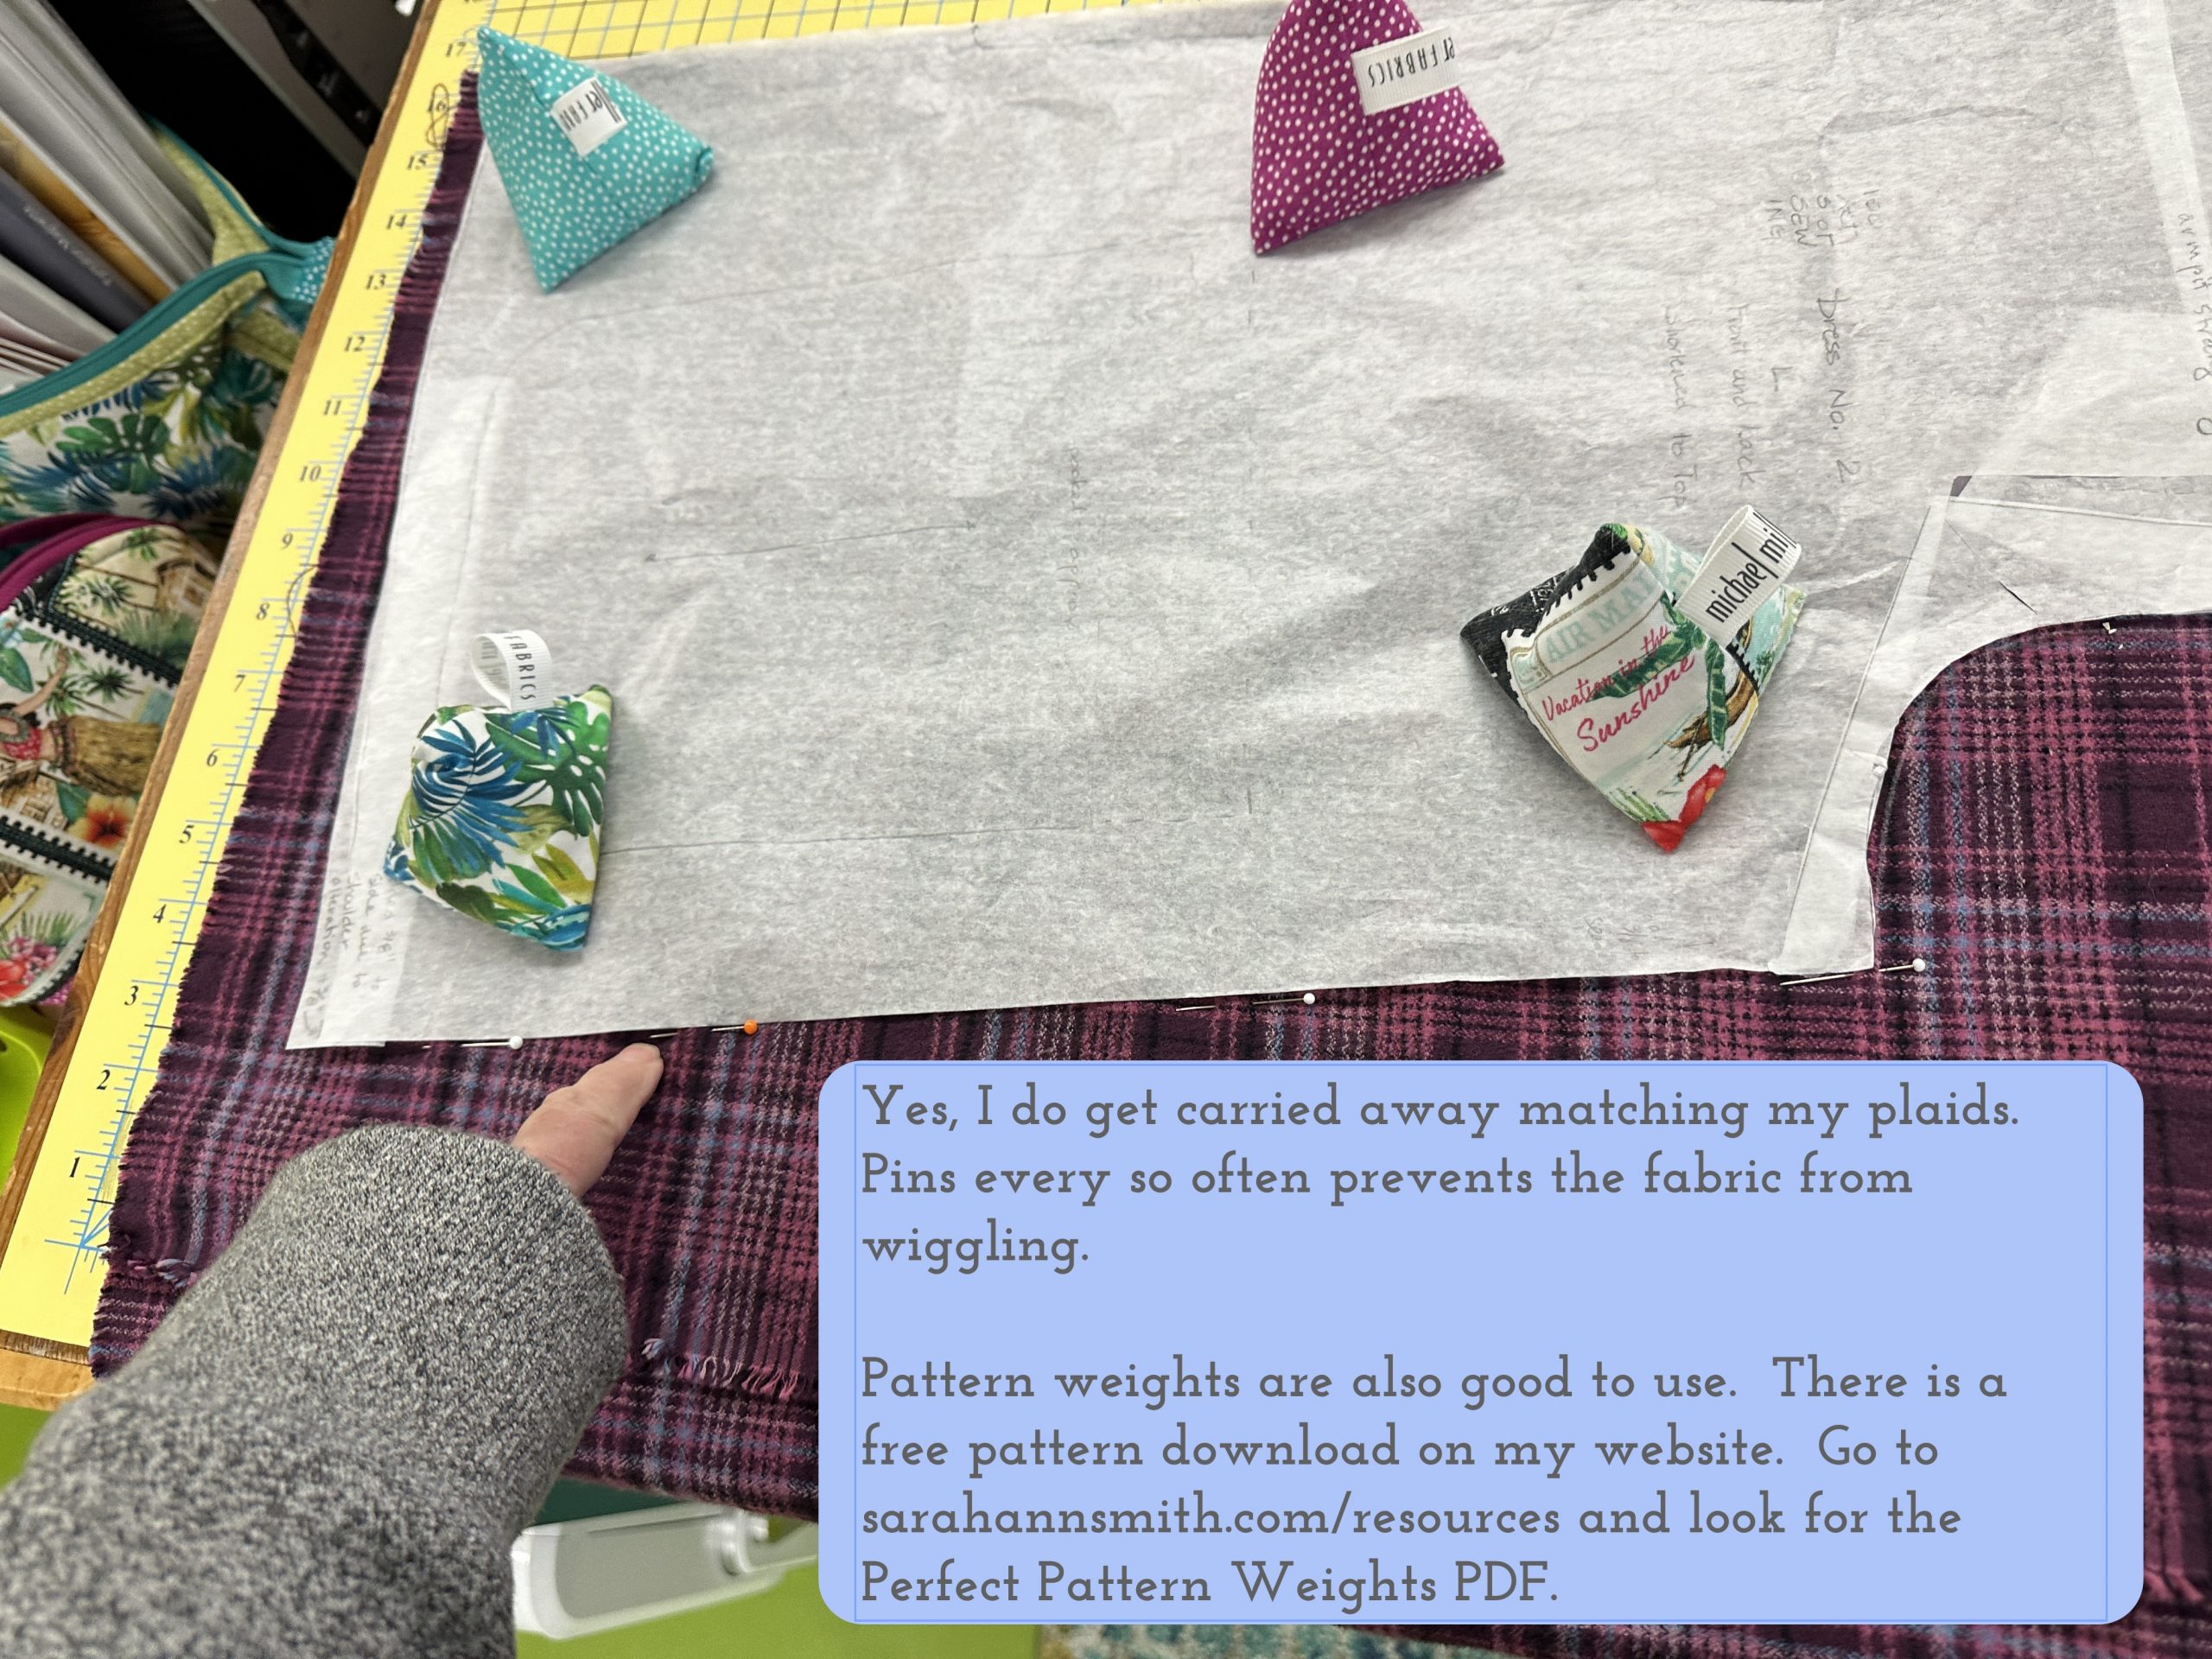
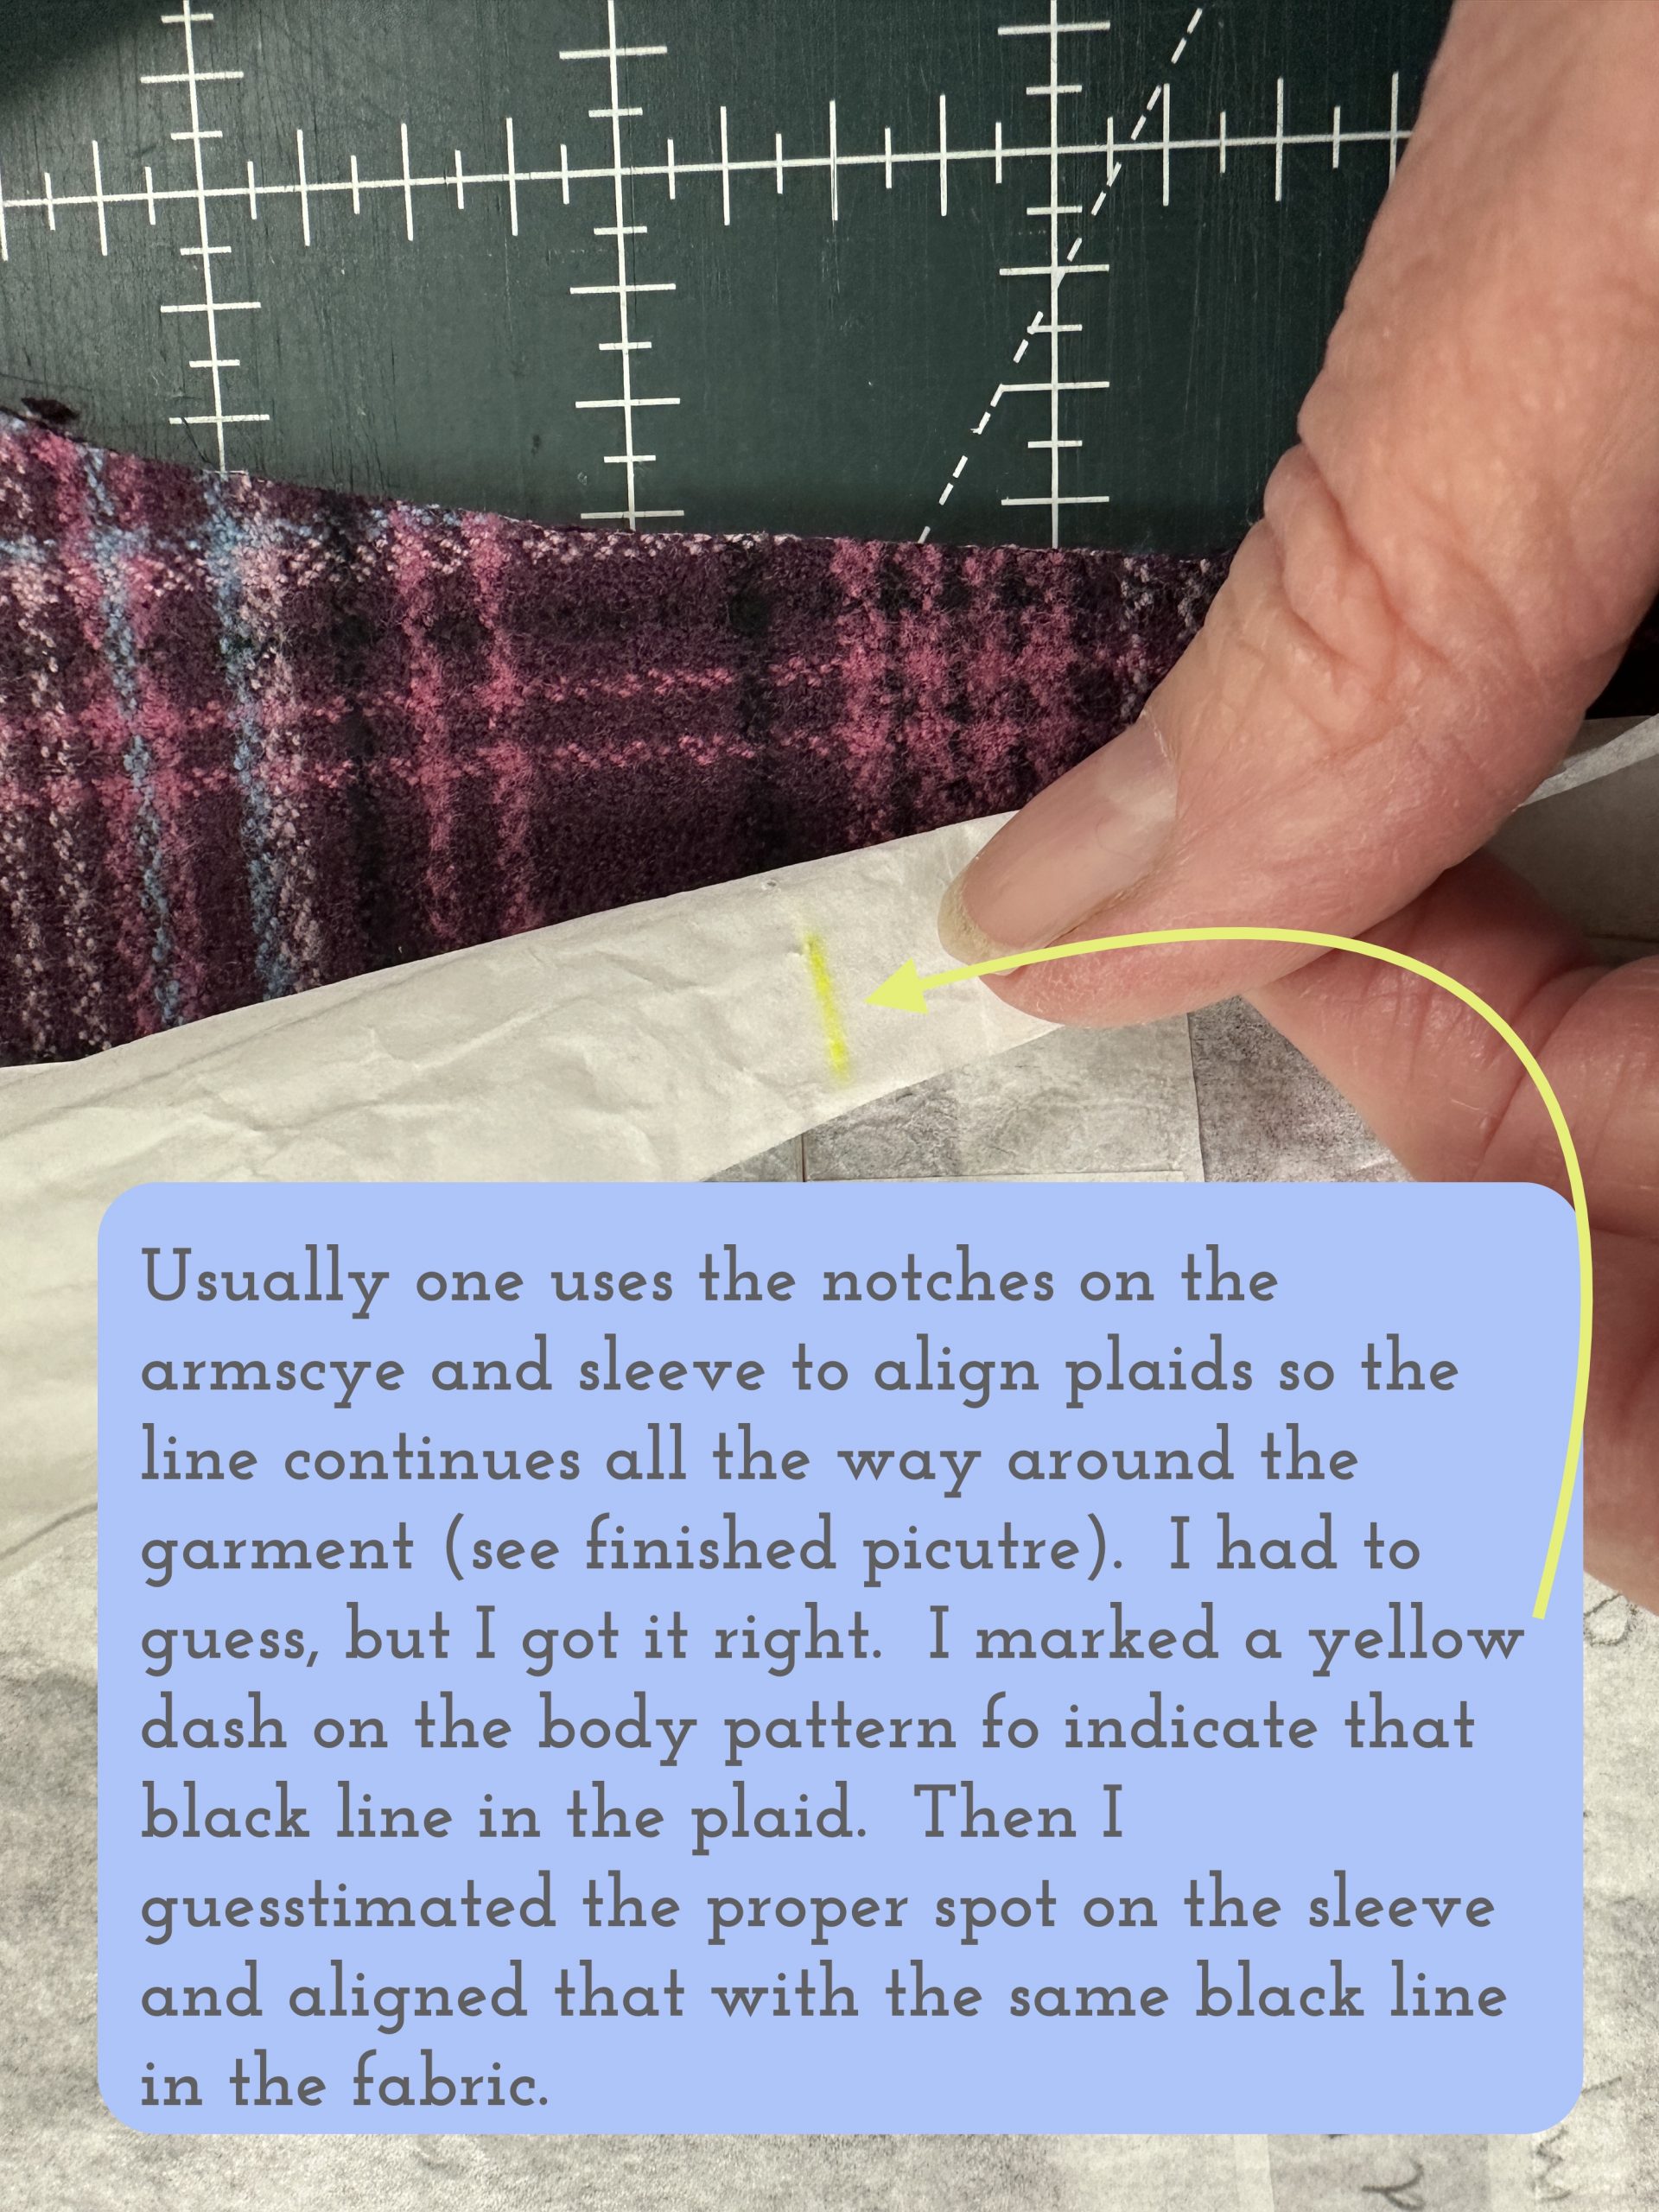
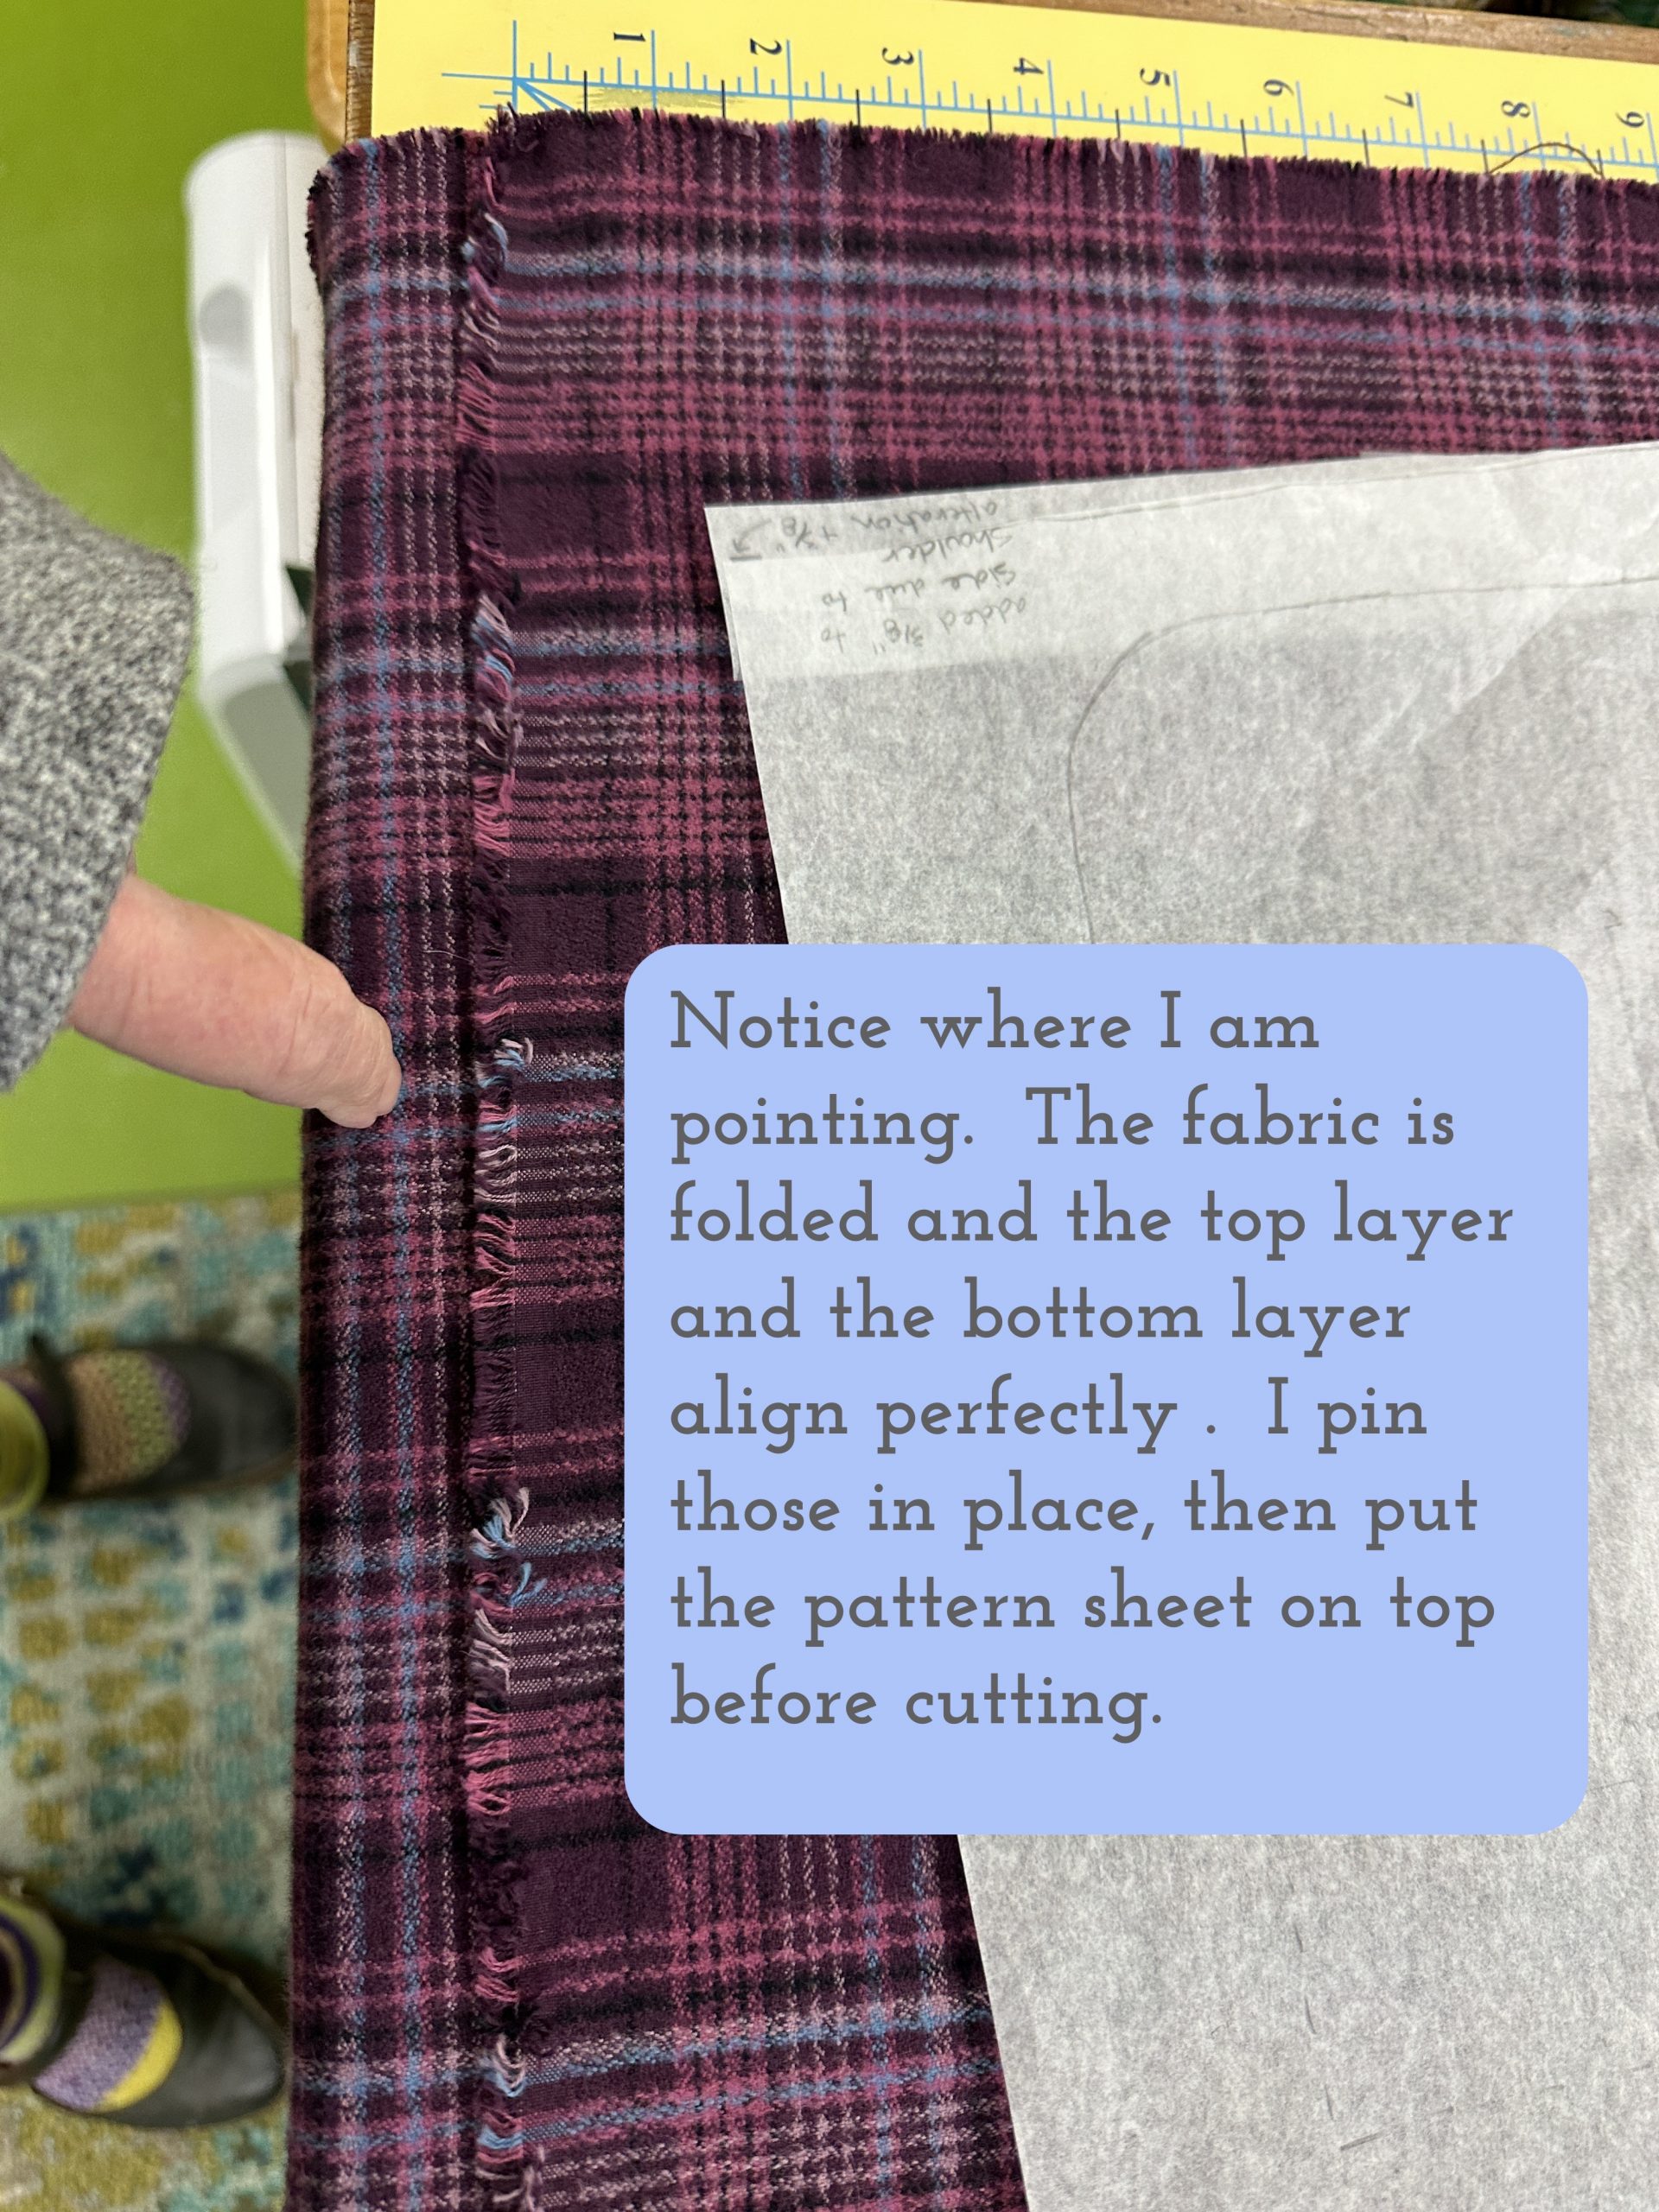
You use the lengthen shorten line to make sure the pattern piece is places squarely on the plaid–the line on the pattern runs on top of the same horizontal band all the way across. The notches (when you have them on a pattern…still grumpy about that!) give you additional “checkpoints” to make sure the horizontals on the front will align with the horizontals on the back.
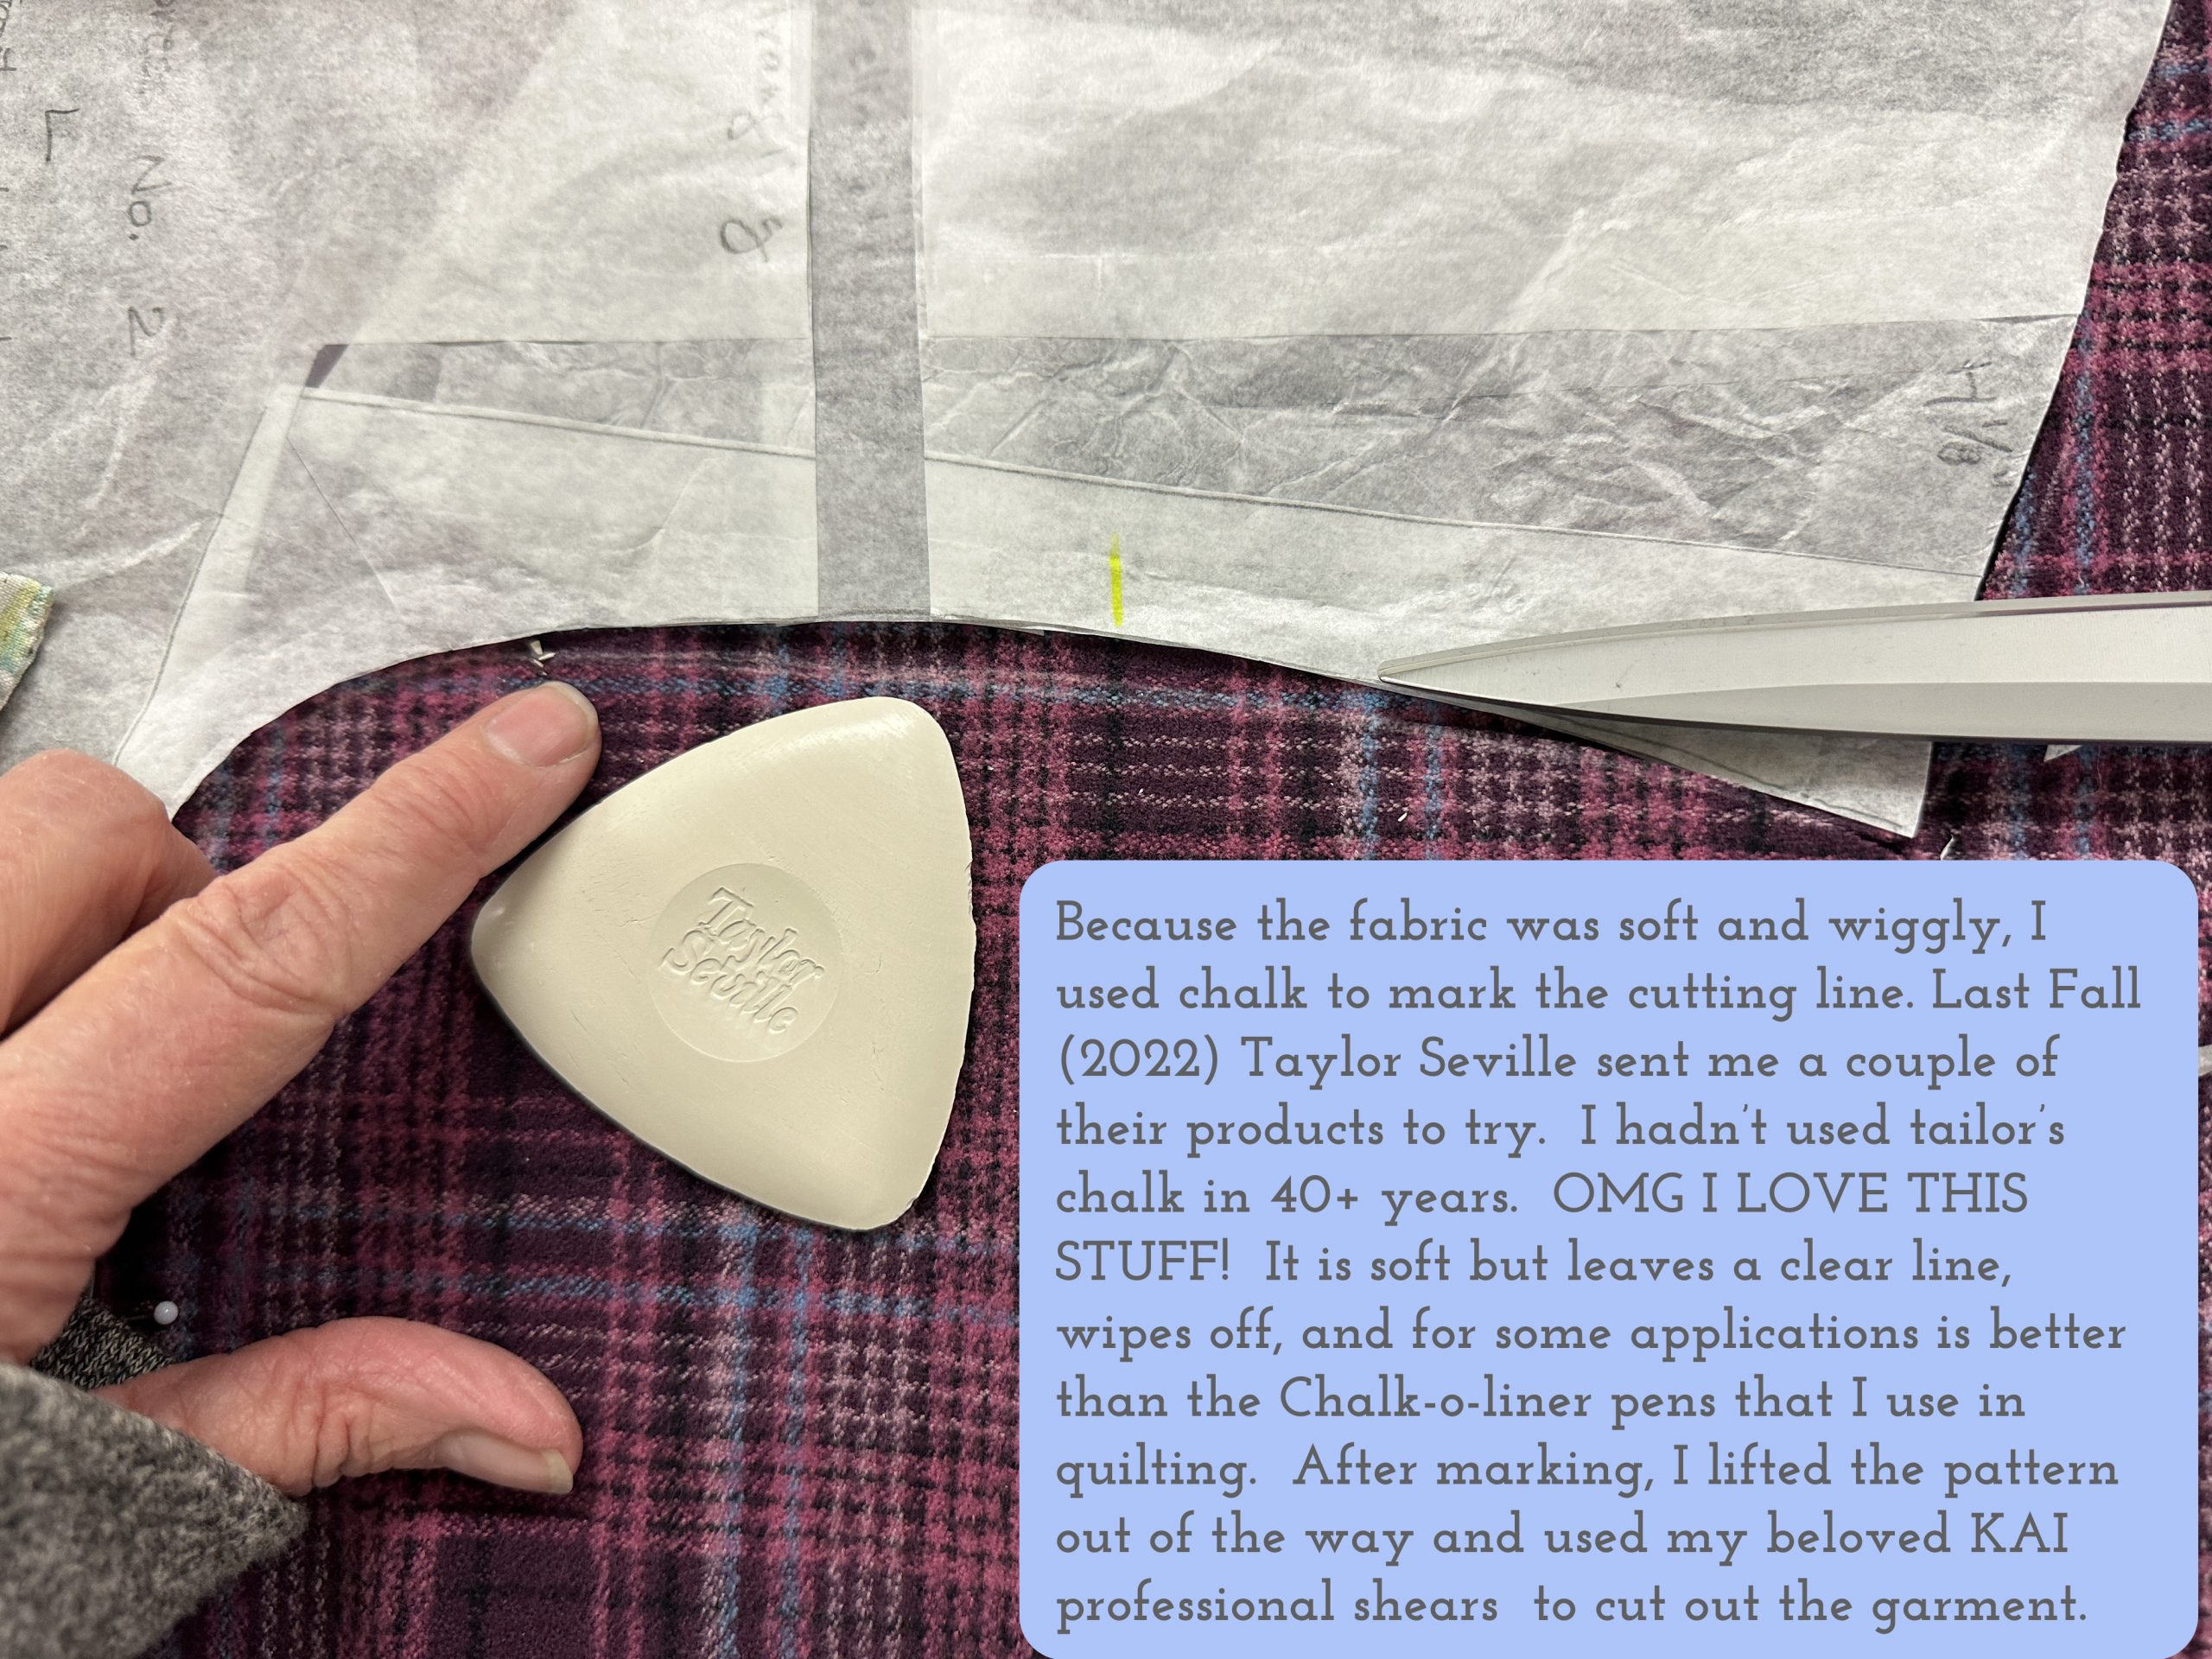
The Taylor Seville chalk is much nicer than the tailor’s chalk I remember from the 70s and 80s. It comes in a nice plastic case that prevents the edges from getting chipped, too. The KAI shears are these. They are the first fine shears I’ve bought in nearly 30-35 years. WHY did I wait so long????? To be blunt, these make my Ginger shears look like lead clunkers! They weigh less and are SO much easier on my arthritic hands. They cut like a hot knife through butter!
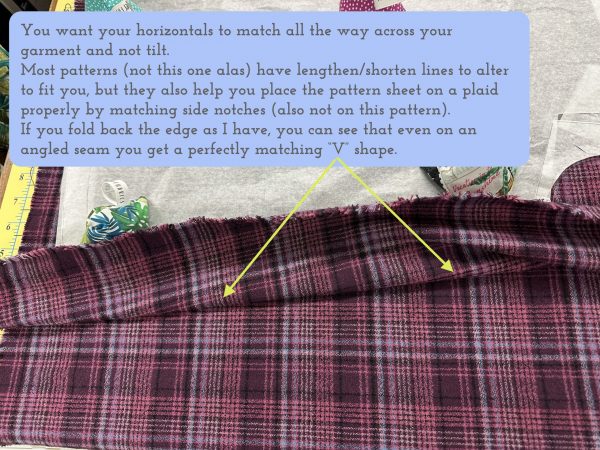
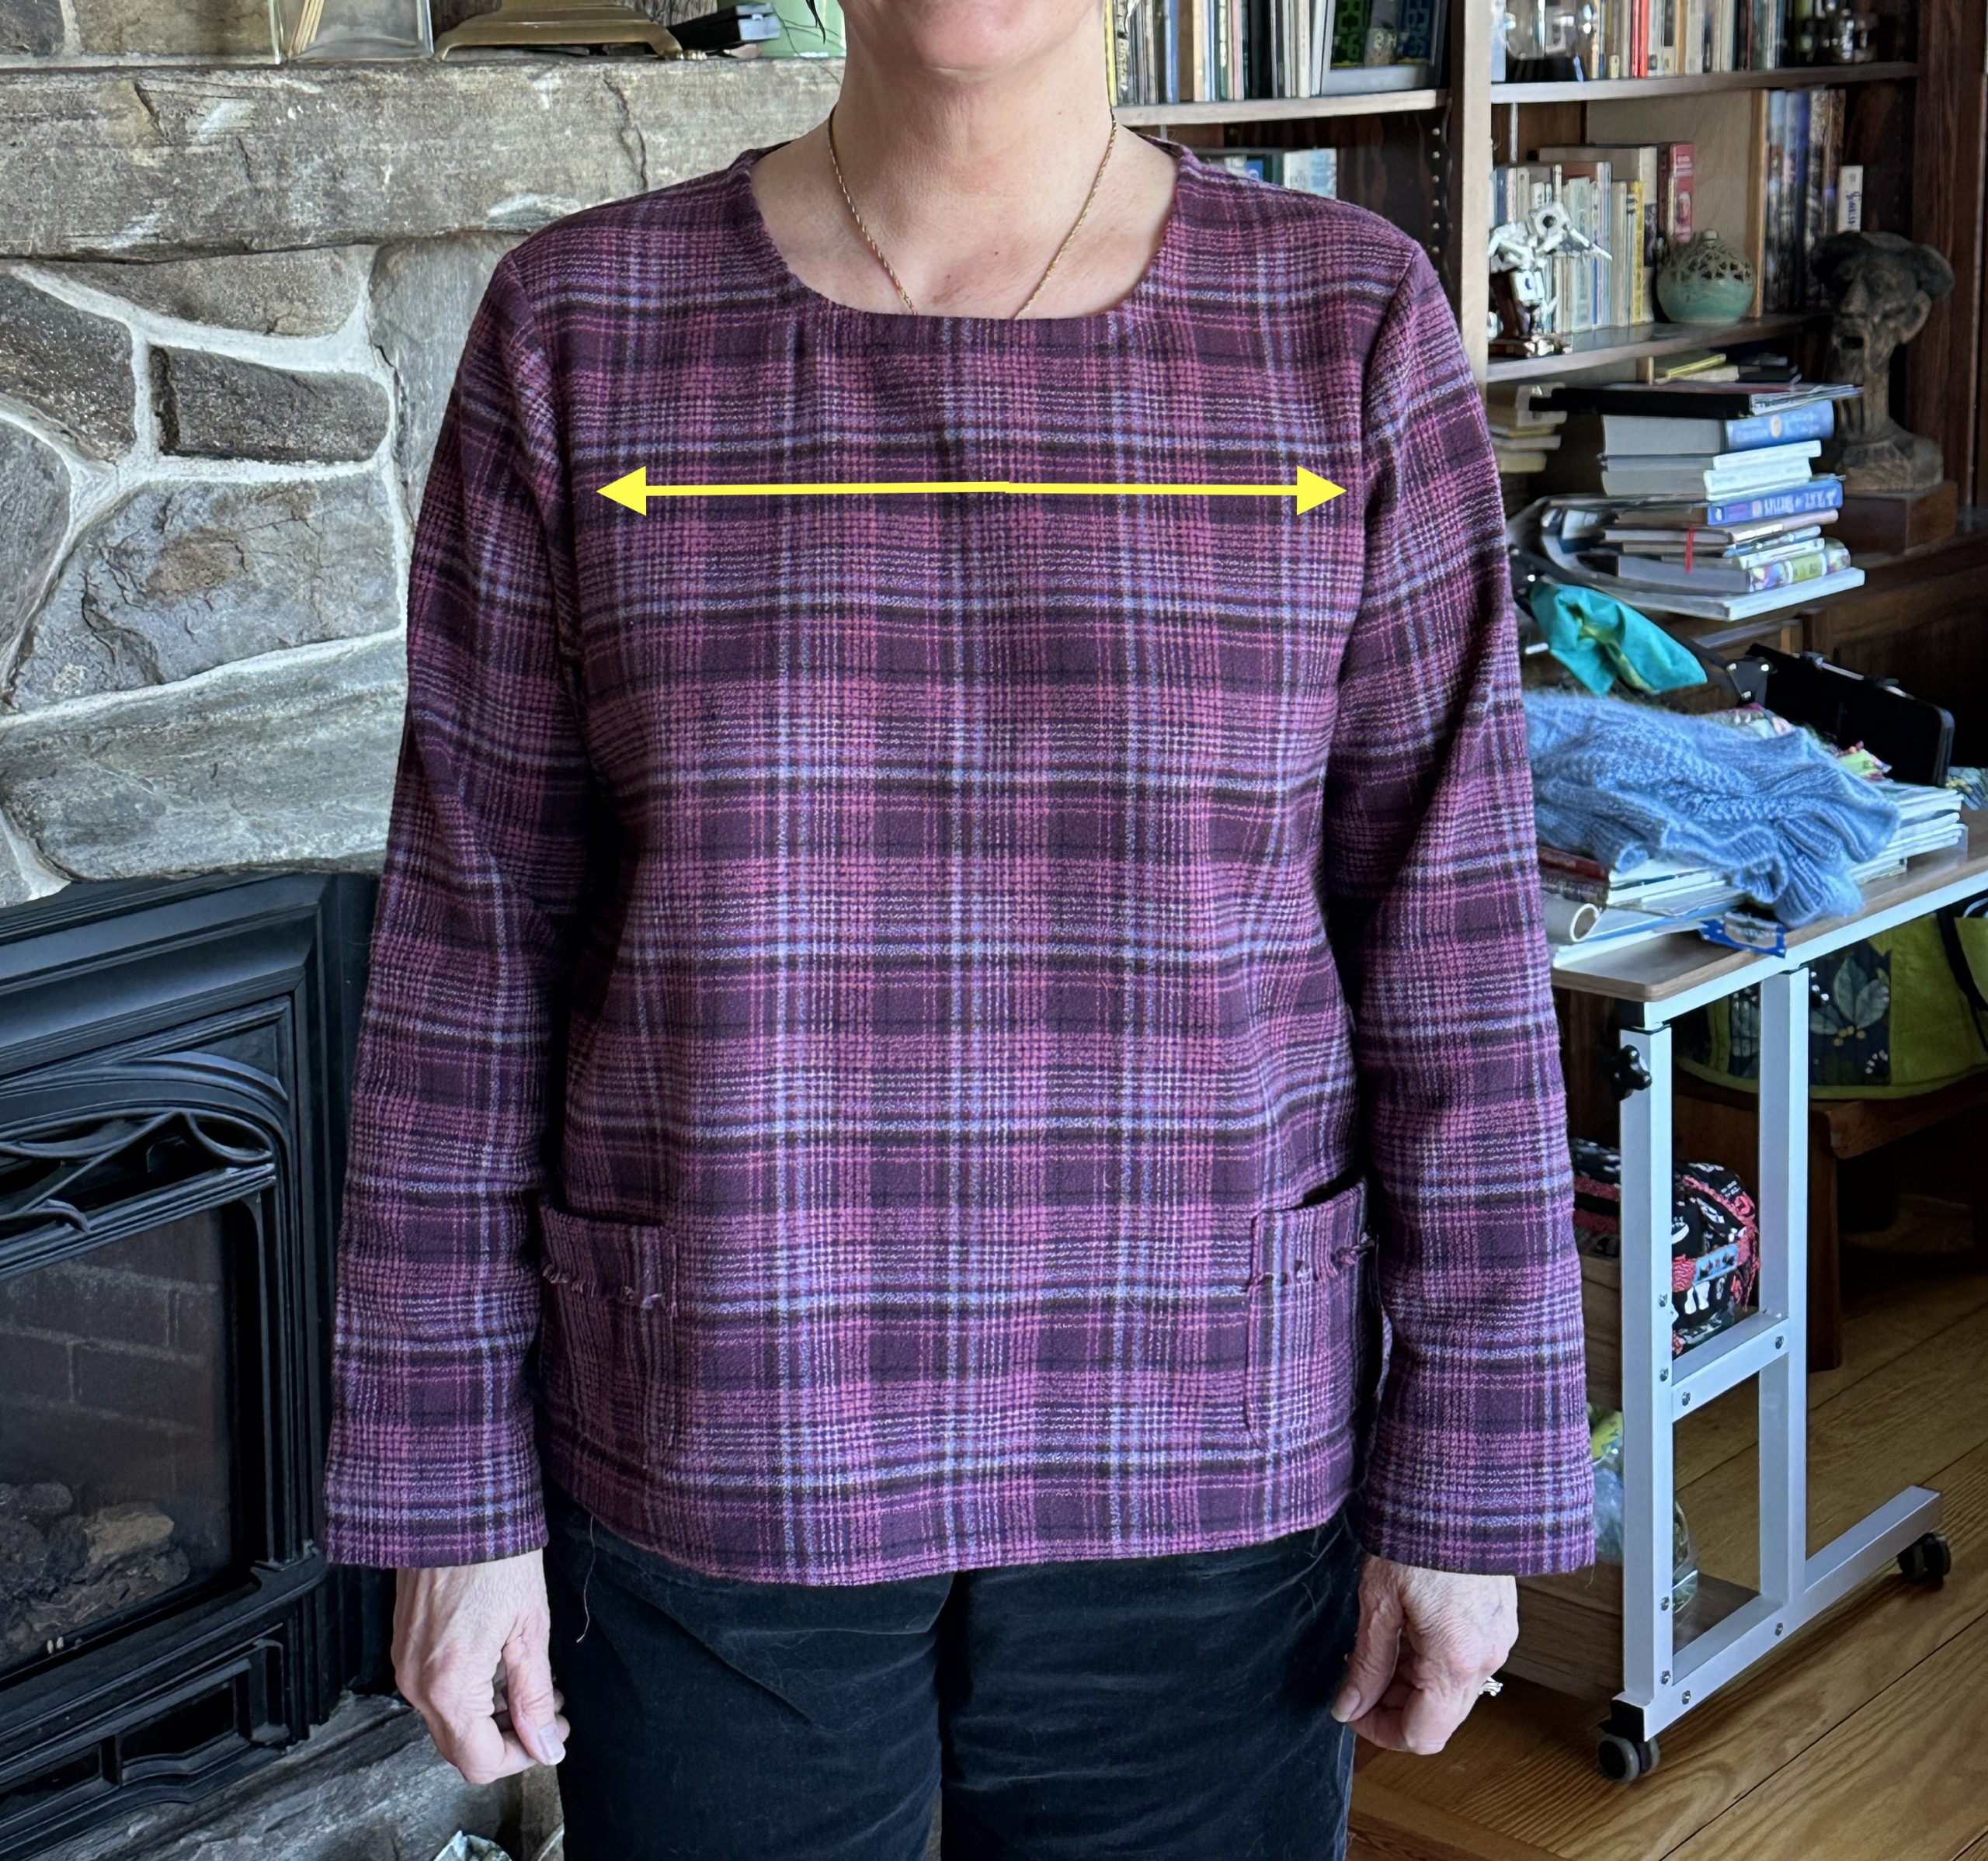
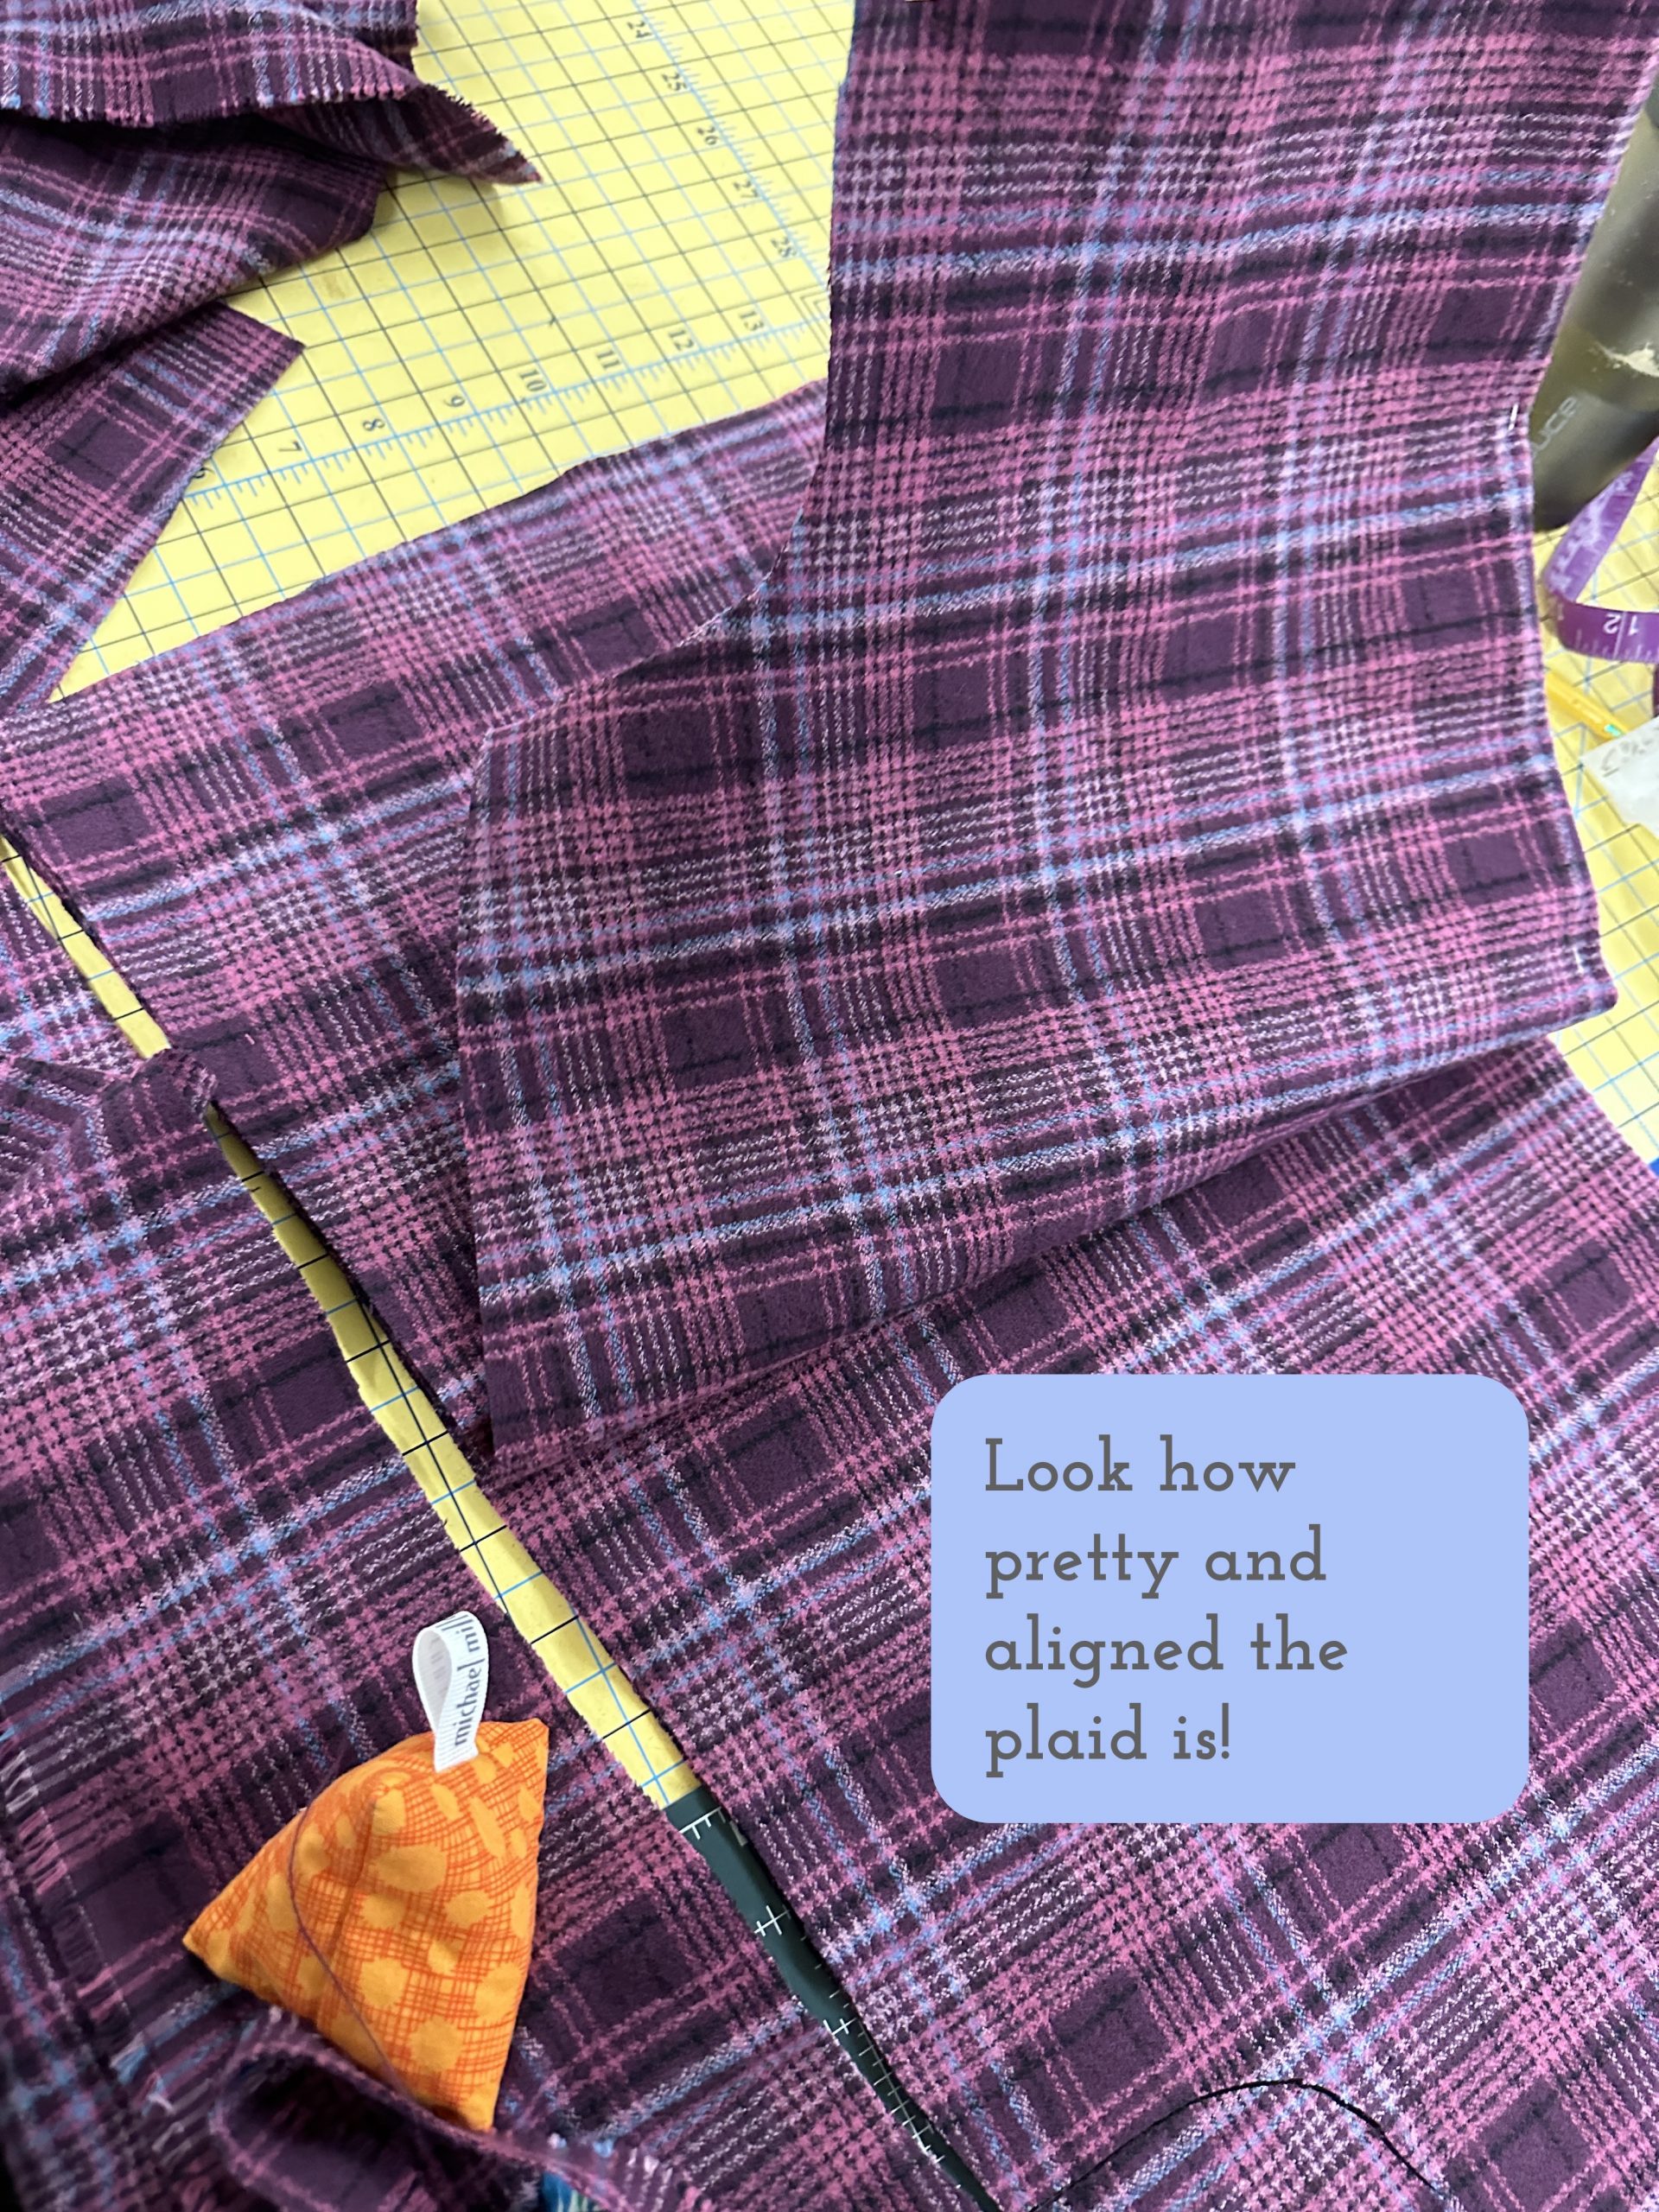
By matching the plaid at the (made by me) “notches” the horizontal lines of the plaid will match up all the way around the garment, continuing from the front to the sleeve to the back to the other sleeve and back to the front. The next photo shows how nicely the line matches up across the garment.
The arrow shows how the black line carries across the garment. Because you need to ease in extra at the sleeve cap, the matching goes off a bit at the top of the sleeve. That’s why it is so helpful to have notches marked on the pattern–that’s where you match up a plaid or stripe as well as easing the sleeve cap to fit properly!
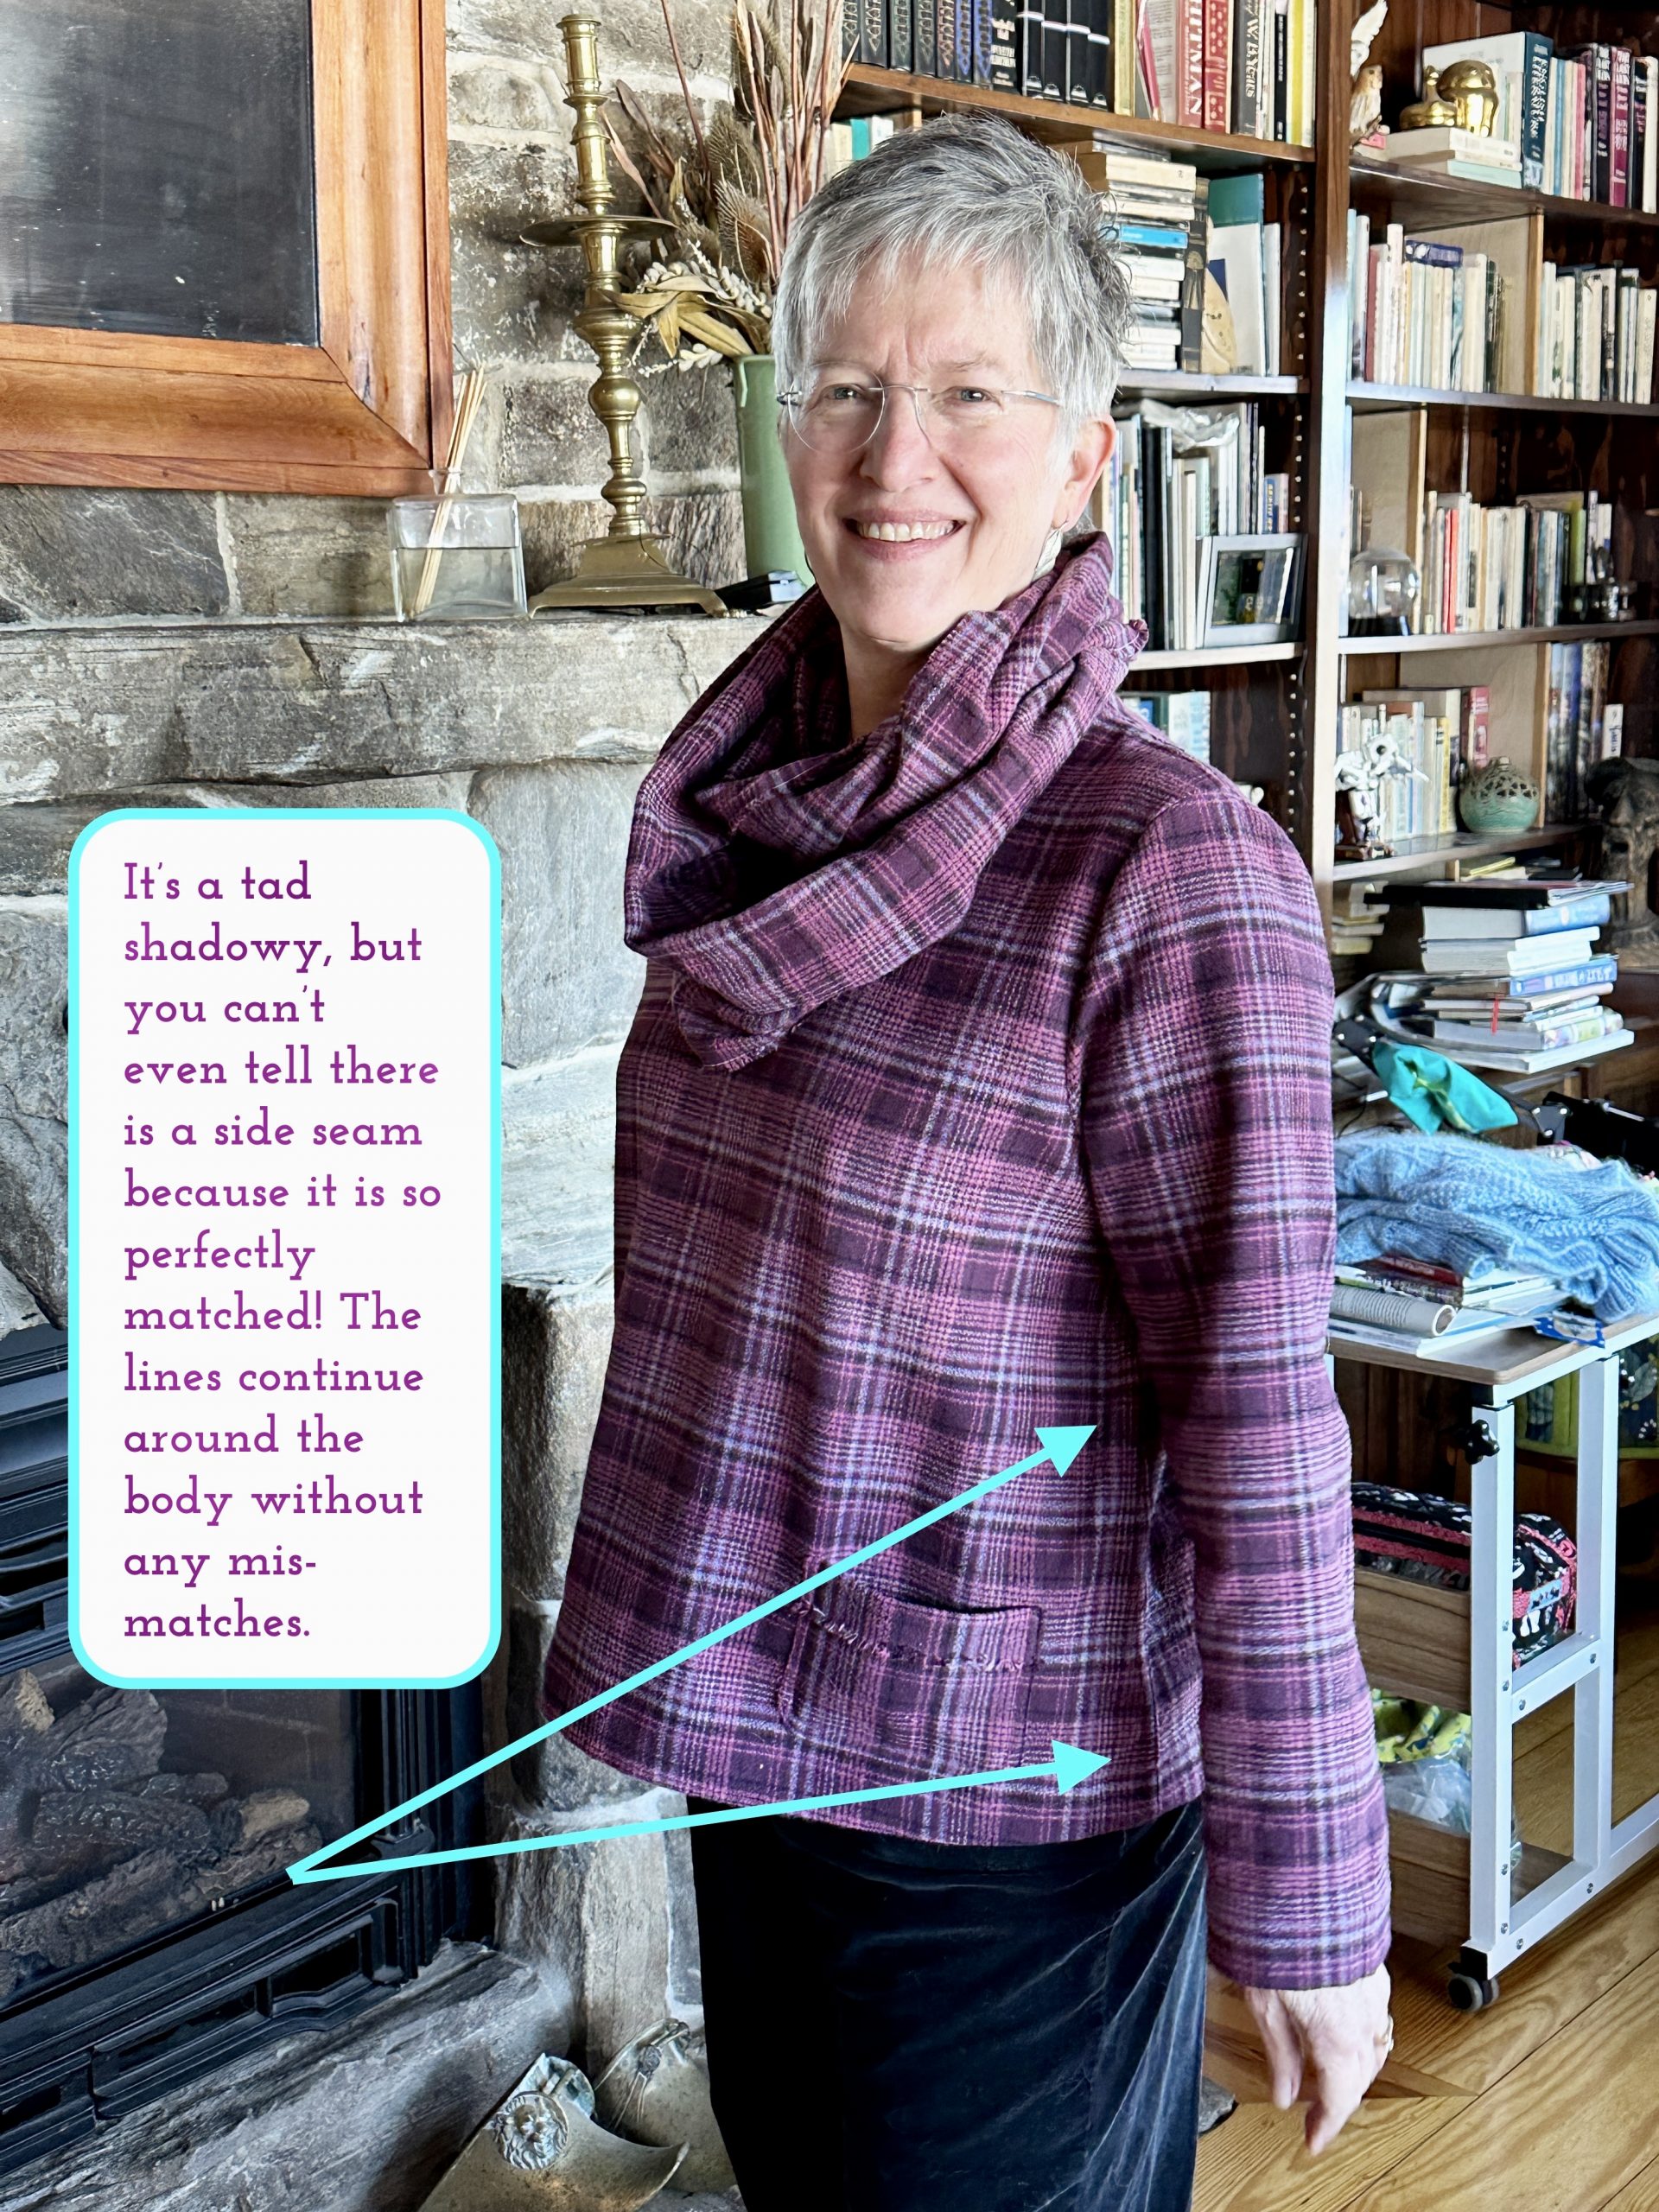
Now that the top is cut out, it is time to start sewing. My next post will be the first one on seam finishes. See you then–but one more side-view to show what a beautiful seam you get when the plaids are properly aligned!
Here are the links to all the posts in this series of lessons, techniques that can be applied to virtually any garment and many home dec projects. Let me know what you’d like to learn and see here on the blog. Cheers and thanks, Sarah
Back in 2013 I did a post on this subject, and decided it was high time to update it! So here you go. There is a downloadable PDF for you to enjoy; it’s also listed on my Resources page.
Sharing is a good thing, so today I want to share some of my favorite things: products that I use and recommend. If you discover a link is no longer working, please let me know by leaving a comment or using the Contact Me page. Since this list is quite long, here is what you’ll find below, my stuff first (sorry) then alphabetical order:
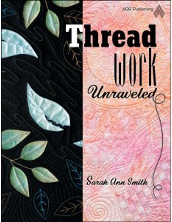
Threadwork Unraveled, my book about all things thread
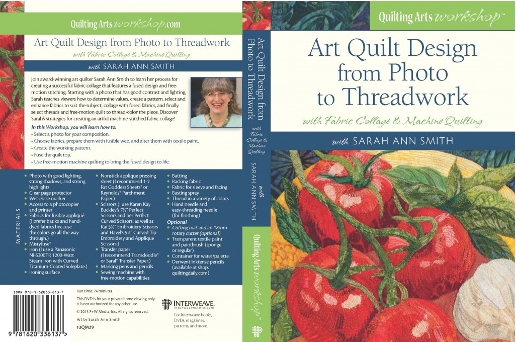
Art Quilt Design from Photo to Threadwork video workshop
The Art of Sarah Ann Smith, so far
Big Design Wall
Clover seam ripper
Clover needle threader
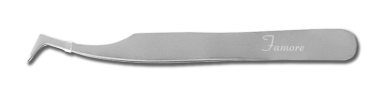
Famore Cutlery Bent-tip tweezers
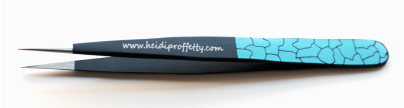
Heidi Proffetty’s insanely sharp tweezers
Janome M7 Continental Sewing Machine
Karen Kay Buckley’s Scissors
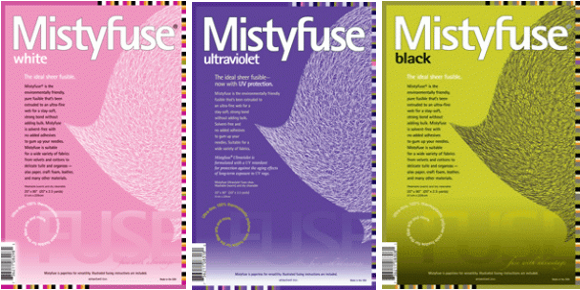
Mistyfuse Adhesive Web
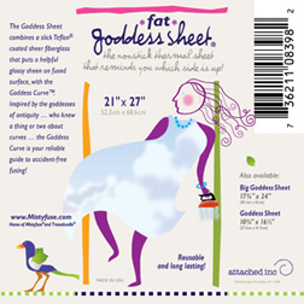
Mistyfuse Goddess Sheets
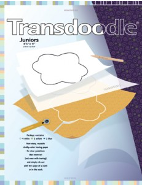
Mistyfuse Transdoodle / Saral transfer paper
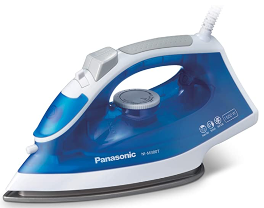
Panasonic Titanium Non-stick Iron
Running with Scissors bag and byAnnie’s patterns
Textile Paints
Val Webb, art teacher extraordinaire
Valerie Hearder—jumbo non-stick press sheeting
Wool Felt ironing pad
Threadwork Unraveled by me, Sarah Ann Smith
My book is about all things thread. You’ll learn everything you need to know about thread, from how it is made to what will make your life easier, and your quilting better! The book is organized in three sections: The Basics, Applique, and Quilting, and is designed to be a reference book you’ll come back to again and again. You’ll learn how needles, tension, your workspace, sewing machine, stabilizers, and other tools all help you in using all those wonderful threads now available. I’ll help you understand how and why certain tools and notions work best and when another option is a better choice. Click here to read more and to order. Now out of print, it is still a valuable reference tool. I have a number of new copies and you may be able to find it online / used elsewhere.
Art Quilt Design from Photo to Threadwork
The complete cover of my video workshop, back when it was a dvd, Art Quilt Design from Photo to Threadwork with Fabric Collage and Machine Quilting. Order the download from Quilting Arts here. https://www.quiltingdaily.com/product/art-quilt-design-from-photo-to-threadwork-video-download-2/
Big Design Wall
There are a ton of different ways to get your own large design wall. When we moved into this house, my studio was a grim, mostly unfinished basement space. I did a series of blogposts in 2011 as I transformed it into my dream studio (well, except for moving it upstairs). Here is the first of the posts… just pop “state of the studio” into the search box. I designed my space and had my carpenter make a storage area by installing “closet doors” made of two hollow-core doors framed with 1x lumber. We nested 1” rigid foam insulation into each of the 48” wide doors. Due to low ceilings, they are a bit under 7 feet tall. If you don’t have space for a permanent design wall, just a 48” wide piece of rigid insulation—perhaps trimmed to 72” tall—works. You can stash it behind a door or under a bed. Trust me, you’ll LOVE having it.
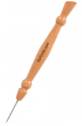
By Annie’s Stiletto
I’d never really liked stilettos until I met this one. The grippy texture on the metal point is what clinched it, but the “ironing” flat end and the comfortable grip help, and the two flat sides to the grip area prevent it from rolling off the table—what a concept! Recently I thought I’d somehow lost mine in the studio and almost ordered another. For once, I found it before I hit Place Order!
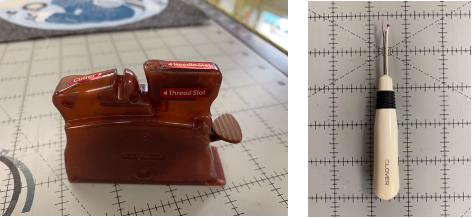
Clover Seam Ripper and Clover Needle Threader
Seam Ripper: Sharp. Narrow tip. Comfortable handle. Little rubbery bit to grip. What more can you ask?
Needle Threader: I received this as a gift when I lectured for a local area guild. I didn’t use it for years. WHY NOT? It really works. Has a place to hold the needle that somehow magically turns the needle so the eye is in the correct direction. Has a thread cutter. Drape the thread as indicated, push down on the lever and presto, threaded needle!
Famore Cutlery Bent-Tip Tweezers
I received these as a gift in a teacher goodie bag at International Quilt Festival Houston. They are AMAZING! They GRIP. The have this bent tip that allows you to use them to slide under a stitch like a seam ripper and pop a stitch. When you have little pesky bits of thread, they grab and pull them out…they are so sharp they just pinch down tight and WORK.
For years, I used the tip of my scissors, fingers, a skewer or a pin to coax and nudge itty bitty bits of fabric into place on my collaged art quilts. Then my friend and colleague Heidi Proffetty came up with a better mousetrap: some ridiculously fine, SHARP, POINTY tweezers to place those little bitty bits into place (she does mosaic quilts and does a lot of fiddly work). I don’t know how I managed without them!
Janome M7 Continental Sewing Machine
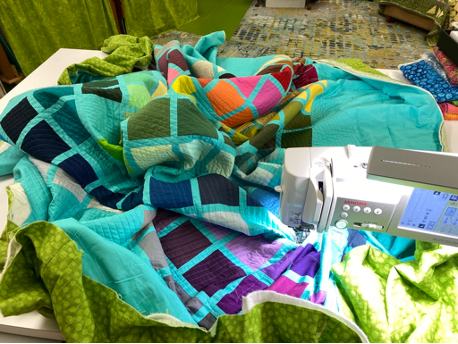
Look at that harp space! That quilt is 104″ square!
Astonishingly, I have been affiliated with Janome since 2003. I am a Janome Artisan, and proud to be associated with them. Even with that, I’d say all the wonderful things I say about Janome machines if I weren’t. There is a reason why I have chosen Janomes for my sewing. Since the 6500 in 2003, with each new machine they send me, I keep thinking they couldn’t get better. But they do. The 6600 all those years ago was a giant leap forward, and the M7 is perhaps even more of a qualitative leap into excellence. The machine is huge, sturdy, easy to use, and performs flawlessly. And the harp space—that is a 104” x 104” quilt in there!
It started in 2003 when I was frustrated with my then-machine’s balkiness using assorted fun threads. I wanted to decide what threads to use, not have my machine dictate what I could use because the machine would otherwise crab at me (for example, on that other-brand-machine, it didn’t like it when I used Superior Threads 40-wt poly in the needle and 60-wt Bottom Line in the Bobbin; ALL the Janomes I have used handle that with ease). A huge, Huge, HUGE Thank You to JanomeAmerica for their long-term support of me! I think I’ll go hug my Janome right now!
I have started making a few videos of me using my beloved machine to help you learn and posted them to my YouTube channel, here. Hope you enjoy! https://www.youtube.com/user/SmithQuilts/videos
Karen Kay Buckley’s scissors
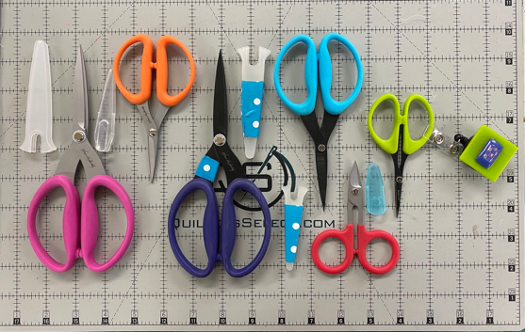
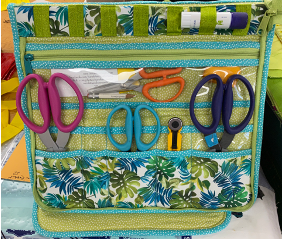
Honestly, I love and use all of them! They are well worth the not- expensive price, and will likely soon become YOUR favorites, too. You can find these on Karen Kay Buckley’s website as well as at many shops and online. The two on the left are “regular” scissors. The four on the right are the micro-serrated scissors with a non-stick coating (the black ones). The precision in cutting with the micro-serrated scissors allows amazing control and is key to creating my work. The Purple handles are the first ones and still the first scissors I reach for. The curved tip on the little red ones is nifty, and I also use the plain (pink and orange) fairly often.
Mistyfuse Adhesive Web
I am a complete fan of Mistyfuse products. I LOVE this fusible web! It leaves such a light, soft hand, never “expires”, doesn’t gunk up the needle EVER, and works really well. I also like that it does NOT come packaged with release paper (which in other brands either comes loose too easily, or sticks, or whatever); you use baking parchment or a non-stick press sheet (next item) which is less wasteful than all that release paper, and once you see how to use Mistyfuse, it is infinitely easier! For most projects you would want either the white or the Ultraviolet; the latter is best for light colored fabrics. The black has lots of fun uses.
Mistyfuse Goddess Sheets
Goddess Sheets are non-stick press sheets. You could use Reynolds Baking Parchment, but these sheets won’t wrinkle and wear out or tear like Baking Parchment. I’ve been using my press sheets for YEARS–the only wear and tear is where I accidentally sliced off a sliver with my rotary cutter! I prefer the largest sheets; the Fat Goddess is so named because it allows you to fuse up an entire Fat Quarter (18×22 inches) of fabric without having to move the sheet. The Holy Cow sheet is 36 x 48 inches!
Mistyfuse Transdoodle Transfer sheets and
Saral Transfer Paper in a roll
To transfer designs, I use Transdoodle or trace; but you could use a light box. If the fabric is light enough , I can trace by placing the fabric over the design, OR I layer things up with the fabric on the bottom, Transdoodle Transfer paper in the middle, and the pattern on top. These sheets last a LONG time, can be used over and over and over again. Available in white, it has a heavier chalk load and last longer than Saral. Saral is a transfer paper available in art supply stores and online and is available in sheets like Transdoodle and in rolls. Sometimes you just want a long roll of white for a large design or motif. You can find Saral here at Dick Blick among other places.. I will note one caution: if like me you forget to test for removability, whenever you use ANYTHING yellow, TEST! It doesn’t like to let go of some fabrics! I stick to just white or blue.
Panasonic Non-Stick Titanium Coated Iron
I have had several of these over the years—one fell to the cement floor one time too many (I filed off the broken tip and kept using it tho!). The other I used so much I wore off (after multiple years) the finish on the sole plate! Oh how I LOVE LOVE LOVE this iron! I think iron manufacturers think non-stick means doesn’t stick to clean fabric. These you can melt fusible onto them directly and wipe it clean with a paper towel! No more iron cleaner fumes!
The key word appears to be Titanium–-other non-stick irons don’t work the same way! There are several models available at the moment on Amazon, and in various wattages…I’m going to order the 1800 as the one I have now is 1200. In 2020 I tested various other irons including one that is “titanium” but none worked nearly as well as the Panasonics have over the years. For the price of four or five tubes of iron cleaner, you get an iron you can wipe clean! Mo’ bettah! Put “Panasonic Titanium Non-stick Iron” into the Amazon search box for a current listing.
Running with Scissors bag and byAnnie’s patterns
Initially I made this as a “travel” case for teaching on the road. In March 2020. When the world screeched into a parallel universe with the arrival of the COVID pandemic. As I type, it has never been on the road. It has also never been put away. I LOVE this bag: it stays open on my worktable and is so easy to use! I enlarged the size about 1” in both directions so I could fit a 9×12” cutting mat inside the outside pockets (or corrugated plastic) so that I can stand it up without having to make and use the companion bag. This is not a fast project, but the instructions, as I have learned from other byAnnie patterns, are brilliant. Take it one step at a time, use the top-quality products from byAnnie (not affiliated, just a fan-girl), and you’ll LOVE it. https://www.byannie.com/running-with-scissors
Superior Threads
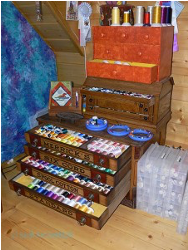
There are many brilliant threads out there now, that is one of the things that prompted me to write my book: so that folks could understand how to use them. Since I teach, I try to be fair, honest, and give all companies an equal chance. There are a number of companies that make threads I use, respect and like: Superior Threads, Aurifil, Madeira, Isacord and others. But Superior is far and away the best at striving to educate the public. I highly recommend the Education section of the Superior Threads website. As well, they make brilliant quality threads, stand behind their products, and have great customer service. When I switched from quilting with only cottons to using a wide range of threads (thanks to my Janome’s ability to do so without a grump), I decided to build my stash to “one of each please”–the thread equivalent of the BIG box of crayons! I did so 10 or 12 spools at a time, and having a wide range makes it so much easier for me to do my thread-coloring.
Textile Paint
You could spend years having fun with surface design, textile paints, drawing materials and dyes. My DVD just mentions the use of transparent Textile Paints.
There are many, Many, MANY types of textile paints including opaque, transparent, metallic and so on. You’ll find different ways to use them, too. All of the major brands work but have different properties. Some are creamier, more like sour cream that is well stirred, but others are more like a dense yogurt, almost spreadable Which to pick depends on your personal preferences and what you intend to do with the paint: direct paint, stencil, screen print. Yeah, I know. Helpful as mud LOL!
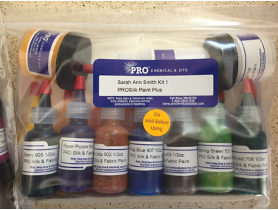
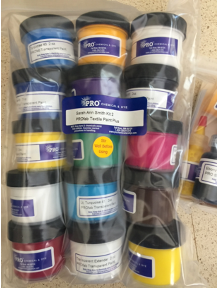
My favorites now and which I sell on my website are ProChemical & Dye’s ProFAB and ProSilk paints. The ProFAB are sour cream consistency and great for stamping, screen printing (my fave) and direct painting. The ProSilk can, despite their name, be used well on cotton. They are an ink-like consistency and you can almost use them in a watercolor-y way. My kits are now sold, so please check the trial packages at ProChemical and Dye, here. Click on the links there for ProFAB Textile paints, both transparent and opaque, and the ProSilk paint (ink-like consistency).
Val Webb, art teacher extraordinaire
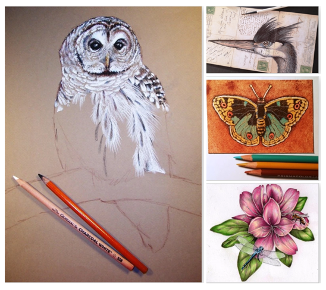
In late 2012 I took Val’s first online class. I have no idea how I learned about her, but I am so glad I did. I have learned SO MUCH from her. I have taken other online classes, but the most important thing in any representational art form is learning to see, and that I what she has taught me. My first workshop, I could tell something was maybe a bit amiss, but not what. Over various workshops over the years (several pictured at right, that’s Val’s art), I’ve grown to where I can study and compare, using tips and tricks and techniques. For example, I am not a fan of the waxiness of colored pencils, but learning the slow, repetitive nature of shading with them has taught me how to layer dyes and textile paints to create what I want in my artwork. If you’d like to see some of the blogposts I’ve done over the years about my work in her classes—the vulture is one of my favorites–click here. The skills of seeing and thinking translate directly for me. After a couple-year break for busy life, I am now signed up for my 8th class with her. So I encourage you to check out Val’s site and consider her classes. https://valwebb.wordpress.com She is on FB and IG as The Illustrated Garden.
Some years back, after a good teaching year, I finally indulged: not one but TWO VAST non-stick pressing sheets, which I ordered from art quilter Valerie Hearder, who lives in the Canadian Maritimes. Val says “I sell the wide teflon by the yard and can sell any length. Check out www.valeriehearder.com. I have 18” wide and I also have 37” by any length. Note that my prices are in Canadian $ which is a big saving for Americans. In the pre-COVID days I had no trouble ordering my two 36/7 x 72” sheets. One lives on my Big Board (a 22×60” ironing surface) and the other on my design wall. When I do Really Big quilts, I can pin both up on my design wall (see above!). Expensive, but if you do a ton of fusing and tend to work big, worth it.
Wool Felt Ironing Pad
When I was a kid, ironing boards came with a real wool felt pad under the cloth. Things ironed beautifully. Then things went to polyester and synthetic foam and, well, yuck. The quilting world recently rediscovered the joy of a nice wool press surface. As usual, if you stick the word quilt on the product, the price doubles, triples or more. So I did a little sleuthing. I knew of a felt manufacturer so I went to see if they had the wool pads. THEY DO. And they will sell to the public. It helps if you get a bunch of friends together and do a group order. Their ½” wool felt is 72” wide and is sold by the yard. Some friends from my local guild and I got together and did a group order for 2 yards. Rather than me try to cut the thick felt with a linoleum knife (and end up hospitalized), I paid the modest fee to have them cut the pads. One woman and I each wanted a 72” x 22” wide piece each. The rest we had cut into pieces 14 x 18”. Each yard cut that way yielded one large and three smaller pieces. You can have it cut into whatever size works. We ordered the F-7 Gray ½” thick felt. Shipping added to the cost, but I think the 14×18” pieces ran about $33 including cutting and shipping. 2021 prices for about the same size are a bit lower than two years previously, and are roughly $40, and for the large ones, my 22×72 cost me about $98, while the current prices for 20×60 are around $112 on Amazon. https://www.sutherlandfelt.com/felt/pressed-wool-felt/
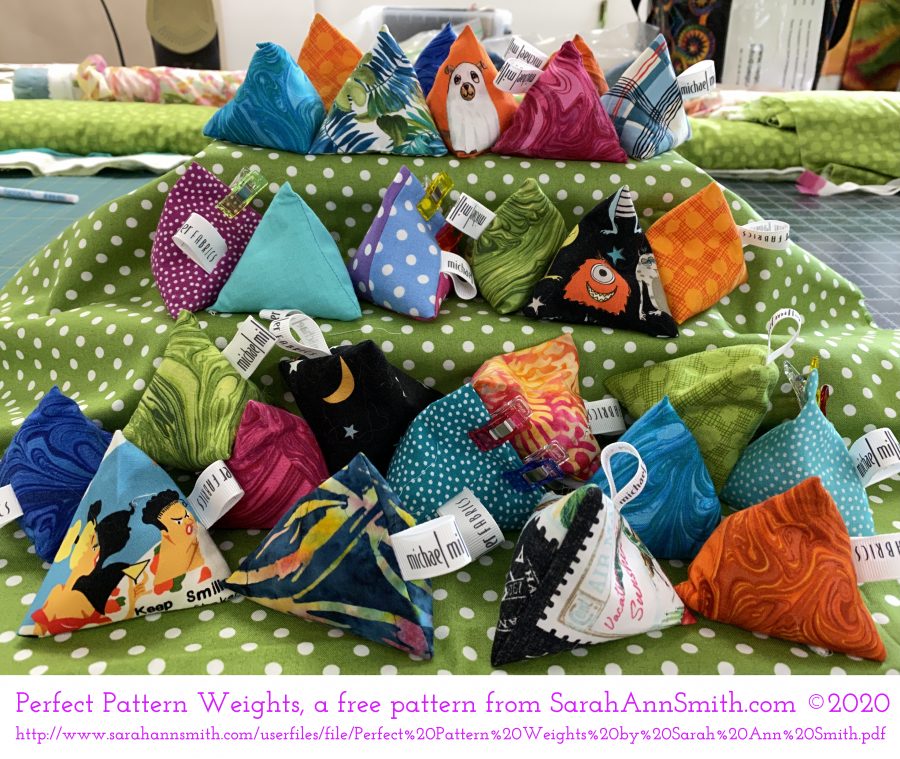
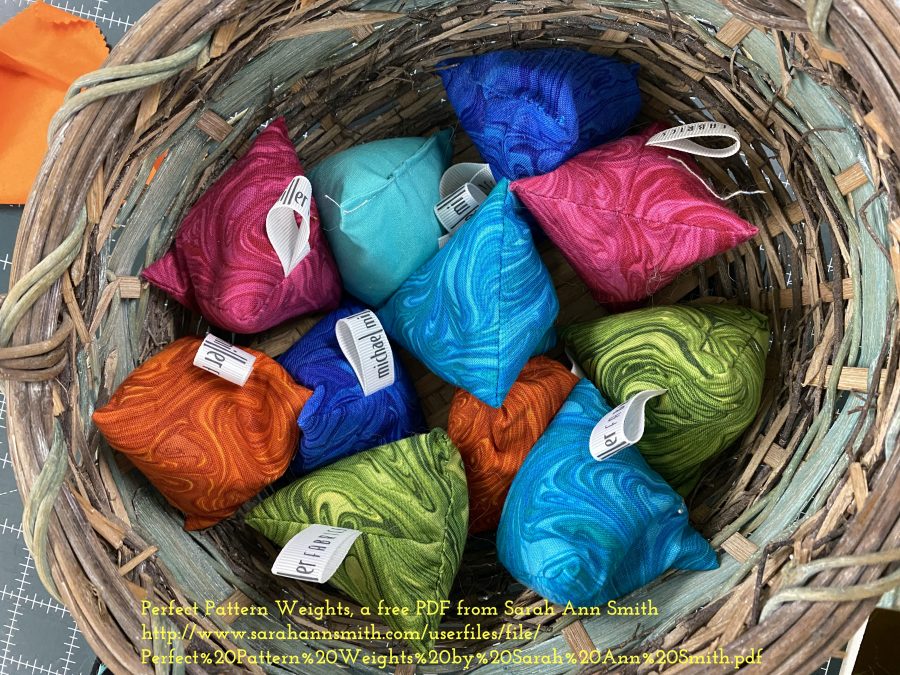
These just-perfect sized pattern weights, 3″ on a side, are not only just the thing for YOUR sewing room, but they make quick and easy gifts for anyone you know who sews!
Can you tell how much FUN I had? Lookit the doggie as a Halloween Ghost (top row) and the goofy Space Alien (center right) and those fantastic Garden Pindots (middle and lower rows)! See free PDF for pattern and Michael Miller Fabrics fabric details.
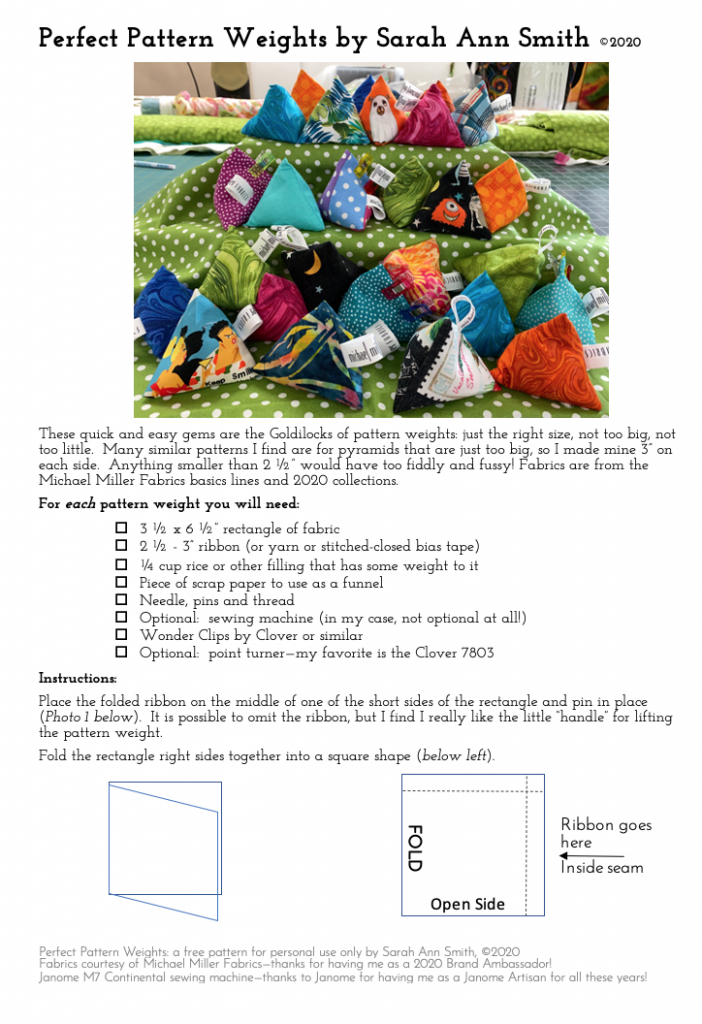
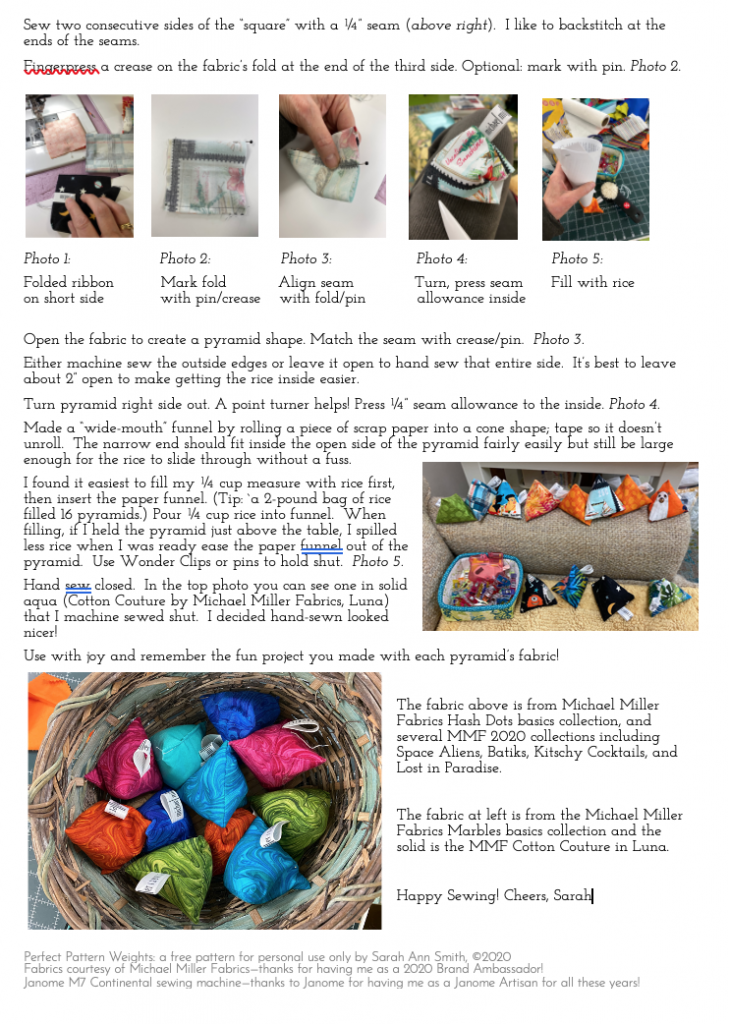
Early in my year as a Michael Miller Fabrics Brand Ambassador for 2020, I decided to use some Marbles (MMF Basic collection) for a much-wished-for set of pattern weights. Most patterns on the internet were way too big–at least 4″ on a side. I wanted mine smaller, to fit into smaller areas. As I made them I thought what fun it would be to remember this year by using fabrics from each collection and project that I made in more weights. It’s now December, and here’s what I have….FUN! Even better, Here is a FREE Printable PDF so you can make your own. The printable version duplicates what comes next:
And some new info: My cousin said the rice filled ones can be popped into the microwave (briefly!) and make nice handwarmer’s, and a friend said she uses a combination of fiberfill for soft outside and buckshot for the center to add the heft that you need for a pattern weight.
ENJOY and stay safe–here’s to hoping next year at this time we’ll be like to something approaching normalcy with COVID controlled, almost everyone vaccinated, and holidays celebrated with a LOT OF HUGS!
Now Registered participants ONLY can SEE it … CLEARLY!
If you were enrolled in the Virtual Quilt Festival’s second Machine Quilting Forum on Saturday, you know there were serious transmission issues with my presentation that made the video just yucky. TOTAL BUMMERS, but now TOTAL JOY! Thanks to the hard working folks in the Education Department (who should have been taking today off) you can SEE the video through December 12th. After that, like Cinderella’s pumpkin, it disappears. To access it, follow the following steps:
Registered participants ONLY can follow these instructions –
—Go to My Schedule (be sure to select the Saturday, Dec 5 schedule)
—Click on the class – 320 Machine Quilting Forum II
—A new page will open with the description of the class, recording link, faculty links, and attachments
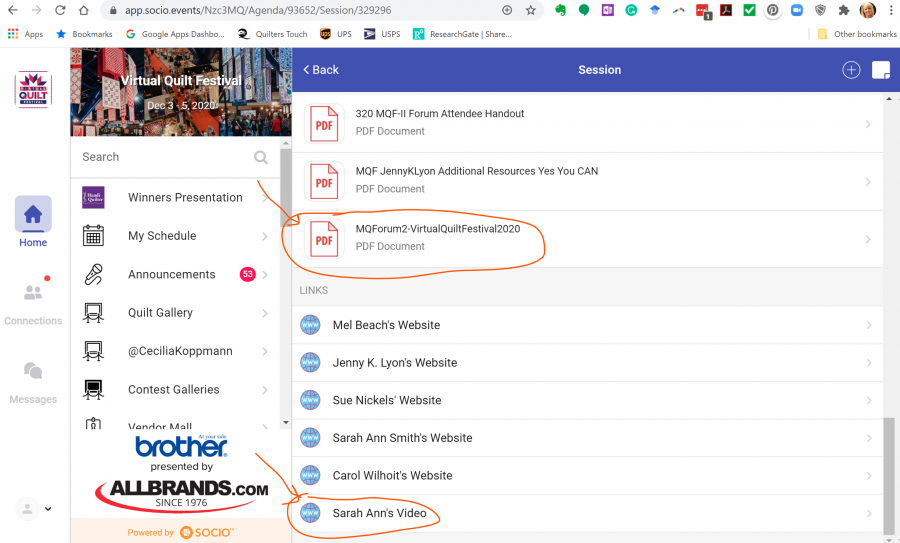
—Scroll down to the bottom of the page to find the PDF attachment and the link to “Sarah Ann’s Video” to watch the YouTube video
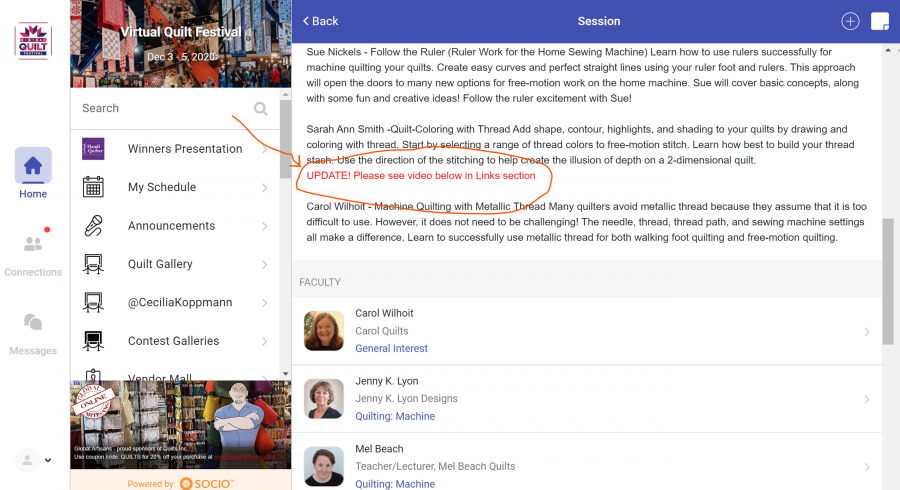
Here are some screen shots. They drew attention to the video by adding a text message in RED font in the class description.
Then this will open up on the next page. My friend Jenny K. Lyon prepared a PDF with links to her stuff, I prepared one for my stuff and the questions I received, and I was able to upload my presentation as an “Unlisted” video on my YouTube channel. The only way to access it is through your “My Schedule” portal. I promise, the video quality is VASTLY better!
Special thanks to Suzanne Hyland, head of the Education Department, who checked email on Sunday when she should have been taking a nap to recover from the frenetic pace she kept up for weeks to direct and pull off this debut event. MASSIVE THANKS to everyone at Quilts Inc. and, for me particularly, in the Education Department. I took three classes, attended three lectures, and would do it again–both present and attend–in a nano-second! Please let Quilts, Inc., the people who bring you International Quilt Festival Houston (and more) that you want MORE!
(1).png)
.png)
.png)



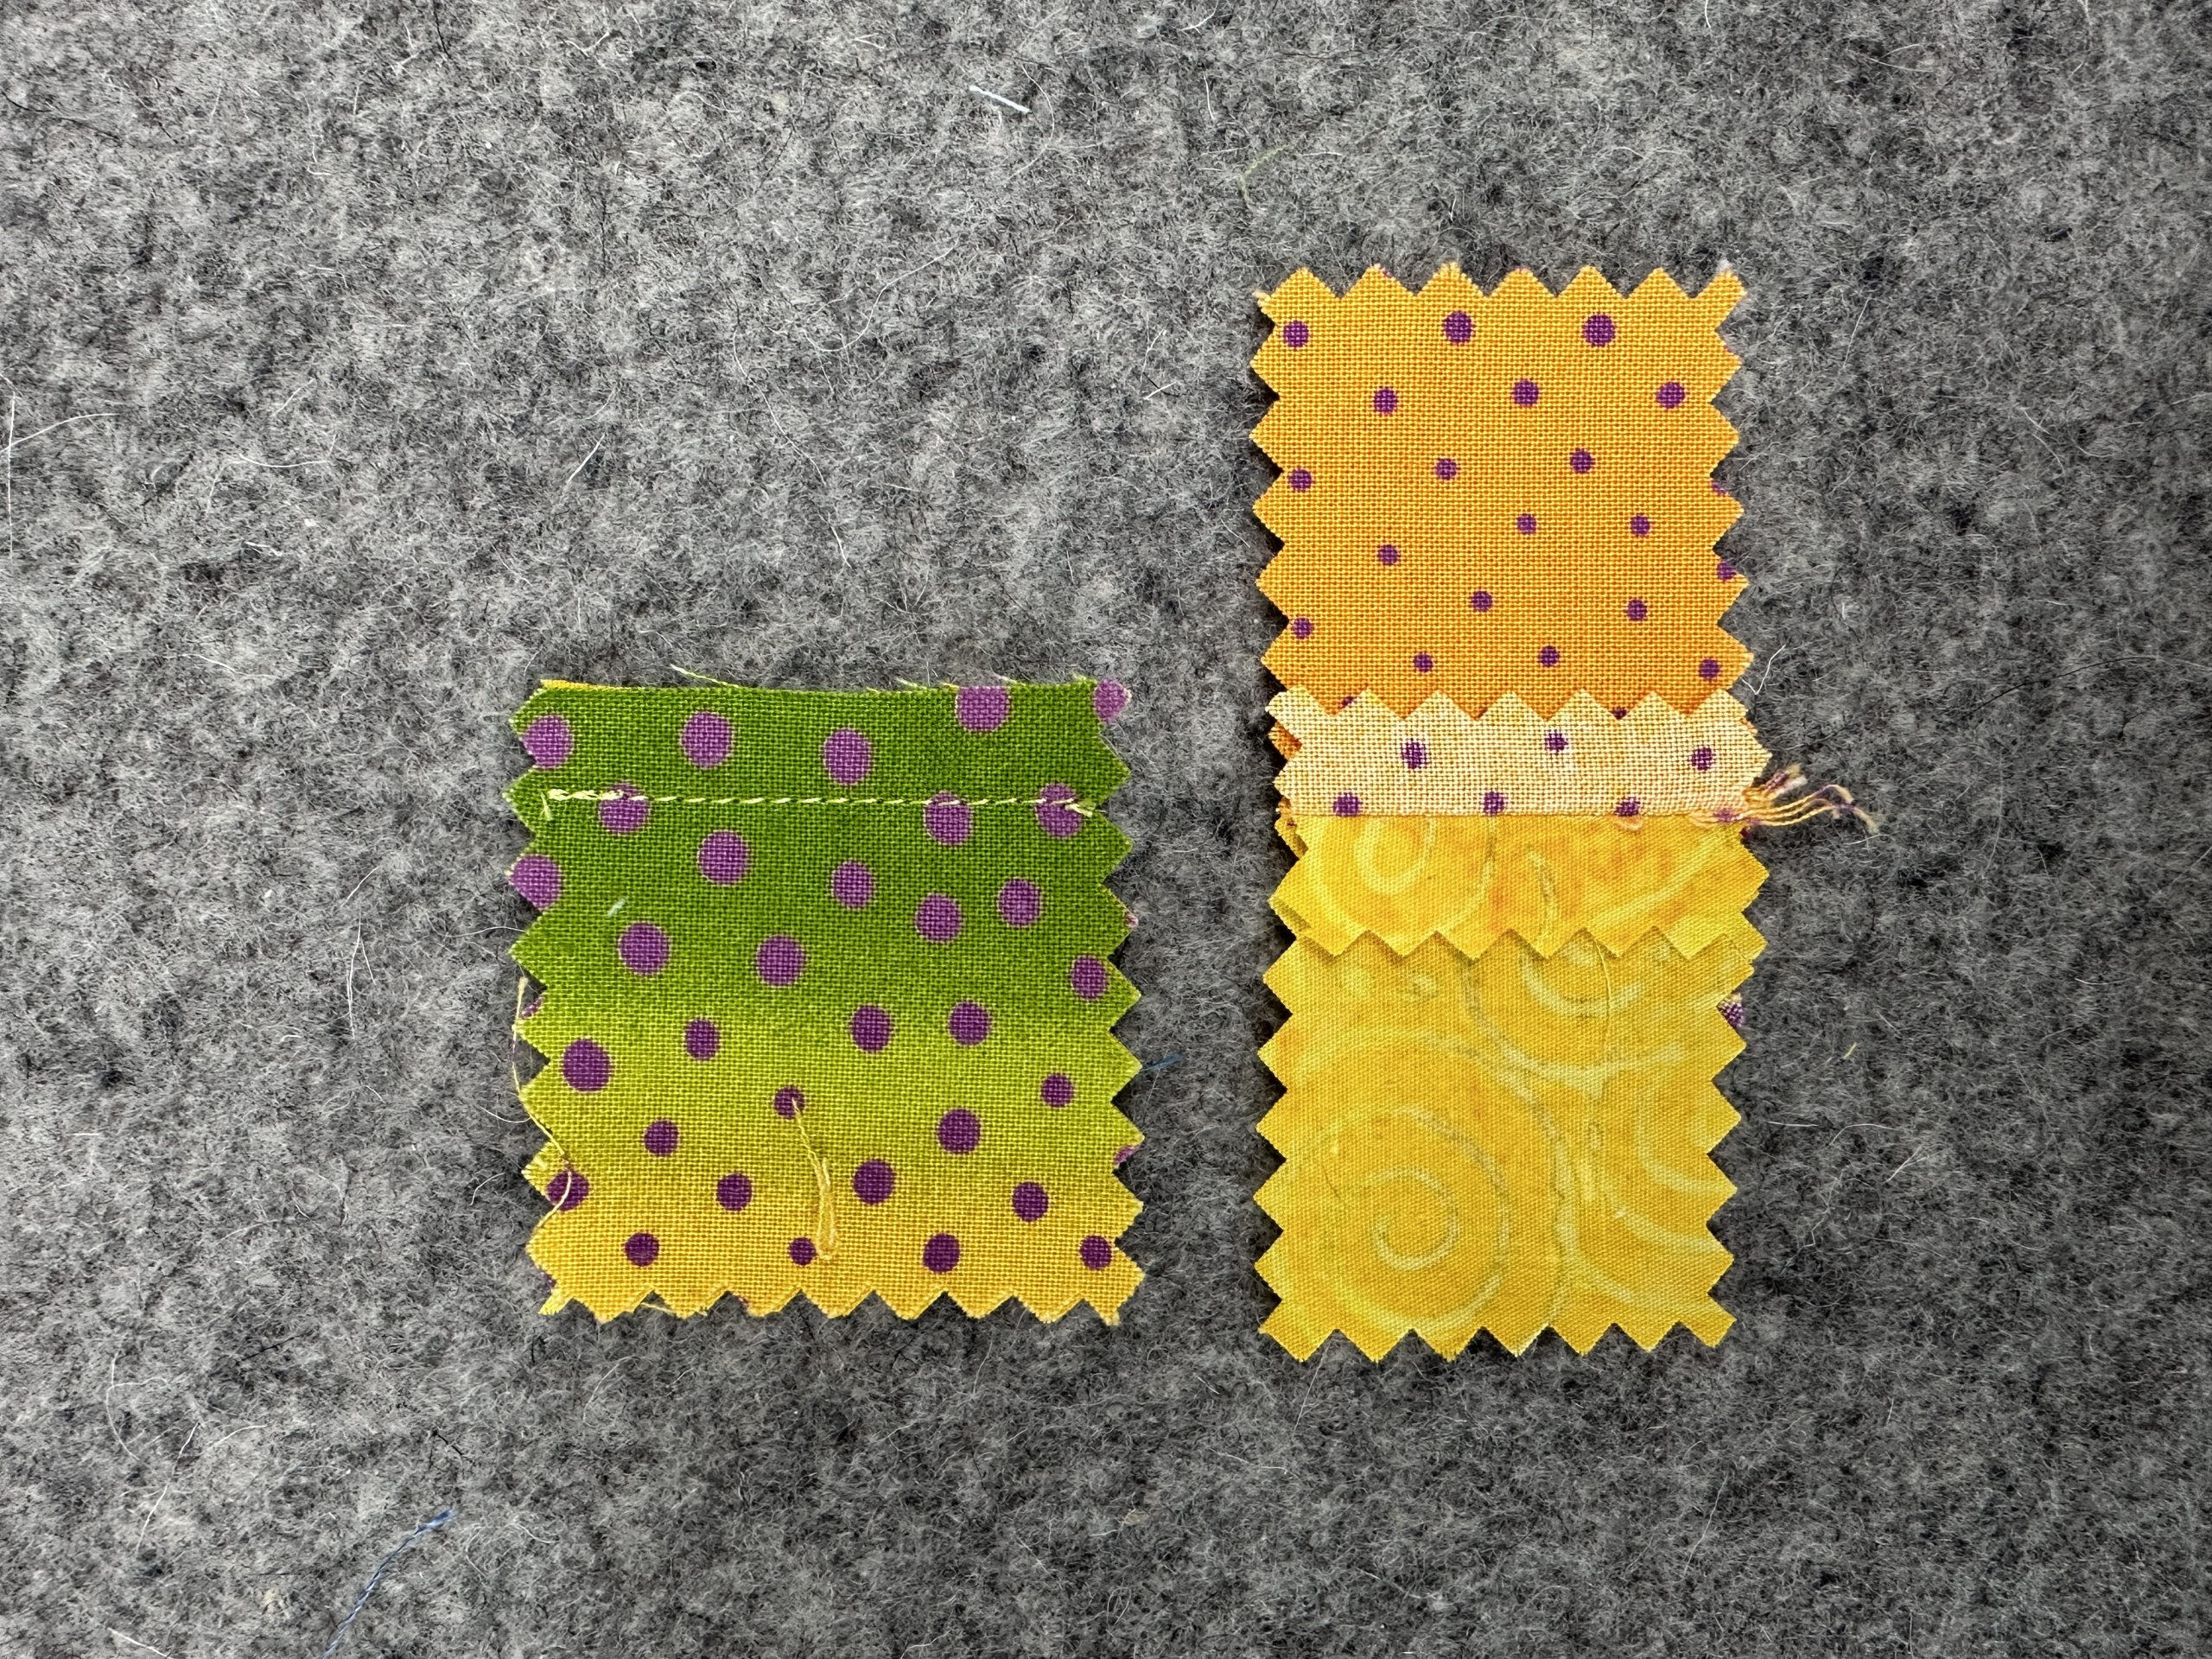 Left, seam as stitched, and pressed open. Bleah. It’s gonna ravel! Just don’t. See you next time!